Miata Clutch Master Slave and Line Replacement
My Miata wasn’t shifting as easily as before. Eventually, it surged at a stop light as though I had let off the clutch, but I hadn’t. This was an indicator something was off with my clutch hydraulics.
The first test on these cars is the slave cylinder, by the transmission, since they are apt to go bad. They will leak fluid when they fail – sometimes you have to pull back the boot to see it, and you’ll also see a very gradual decrease in fluid in the master. If you’re checking the level in the master, be sure to take the cap off – the brake fluid will stain the plastic so it appears full from the outside, but may not be.
In my case, I knew I had just recently put in a new slave
In retrospect, I should have just done the master at the same time as I did the slave. In this article, I also detailed replacing the hard pigtail on the clutch line. For whatever reason, Mazda has a hard line that does a couple of loop-de-loops and attaches to the transmission.
The loops make the clutch harder to bleed than it has to be. The bracket to the transmission means getting at a very awkward bolt to remove the engine. Fortunately, several aftermarket manufacturers make a braided steel clutch line replacement that goes straight from the cylinder to the upper hardline near the wiper fluid bottle, taking care of both issues at once. It is easier to bleed and makes engine removal easier later on.
I highly recommend doing the master cylinder, slave cylinder, and clutch line replacement all at once if any given component goes bad. Miata clutch, master, slave, and line replacement is pretty straightforward.
Replacement Parts
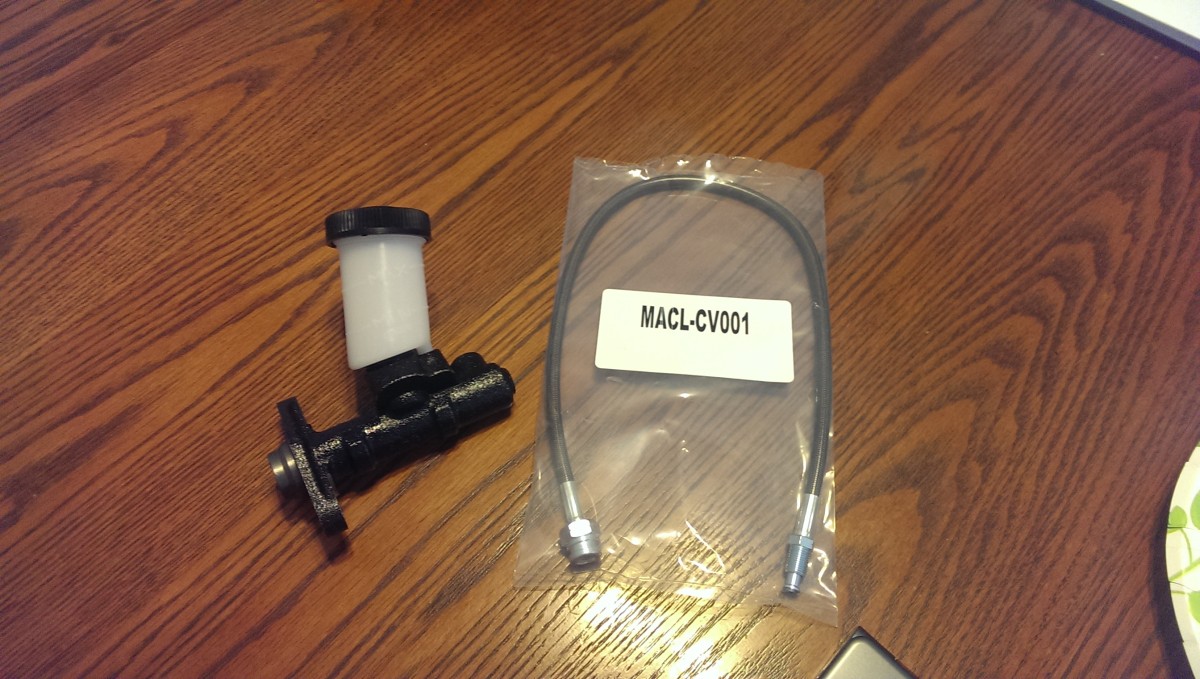
Exedy Master and Technafit Line
As I said, I already had a new slave cylinder, so I only bought the master and clutch line. The master


949Racing sells a $56 kit that includes master, clutch, and slave all together. I should have probably just done this in the first place. You have to watch shipping if you go that route, but this is a very reputable kit that has been recommended repeatedly on several forums.
Any of the above parts will work. The clutch also uses brake fluid, so definitely wear gloves and eye protection for this job and dispose of any excess properly. Brake fluid also eats paint, so don’t allow it to sit on any painted surfaces if it spills; wipe it up immediately.
Remove the slave
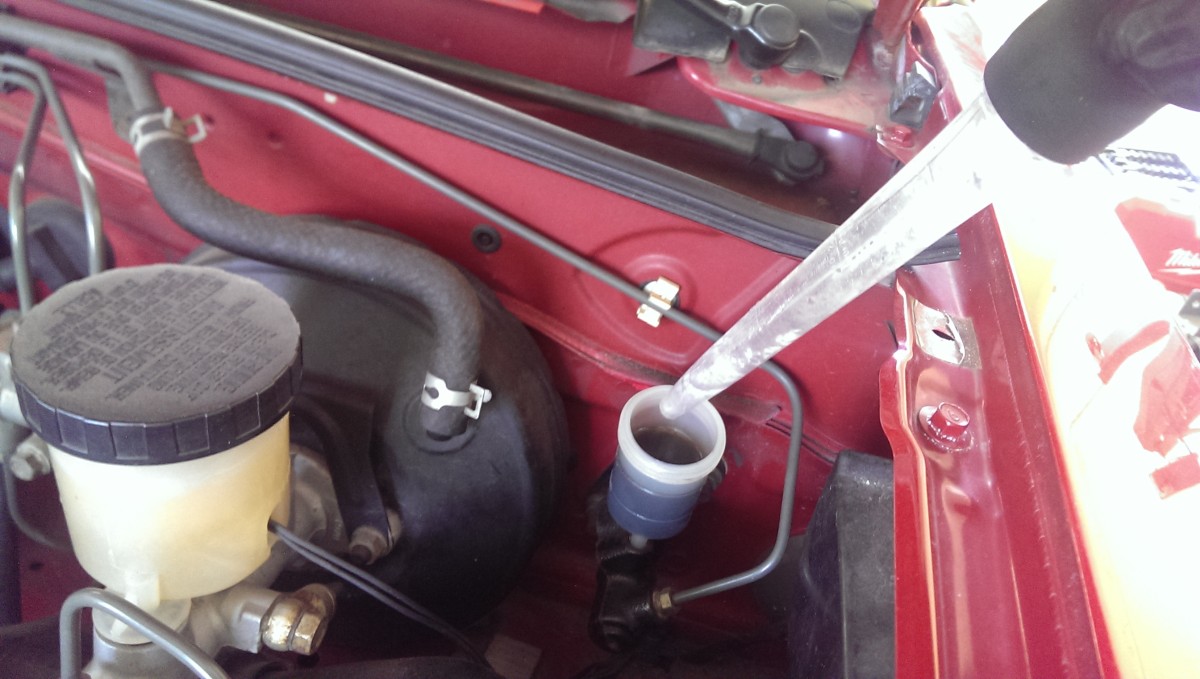
Drain the master as much as possible
The very first step is to get as much fluid out of the master cylinder as possible. Undo the cap and use a pump or turkey baster or shop vac or whatever’s handy to get as much fluid as you can. Again, this is brake fluid, so wear gloves and eye protection and be careful with it.
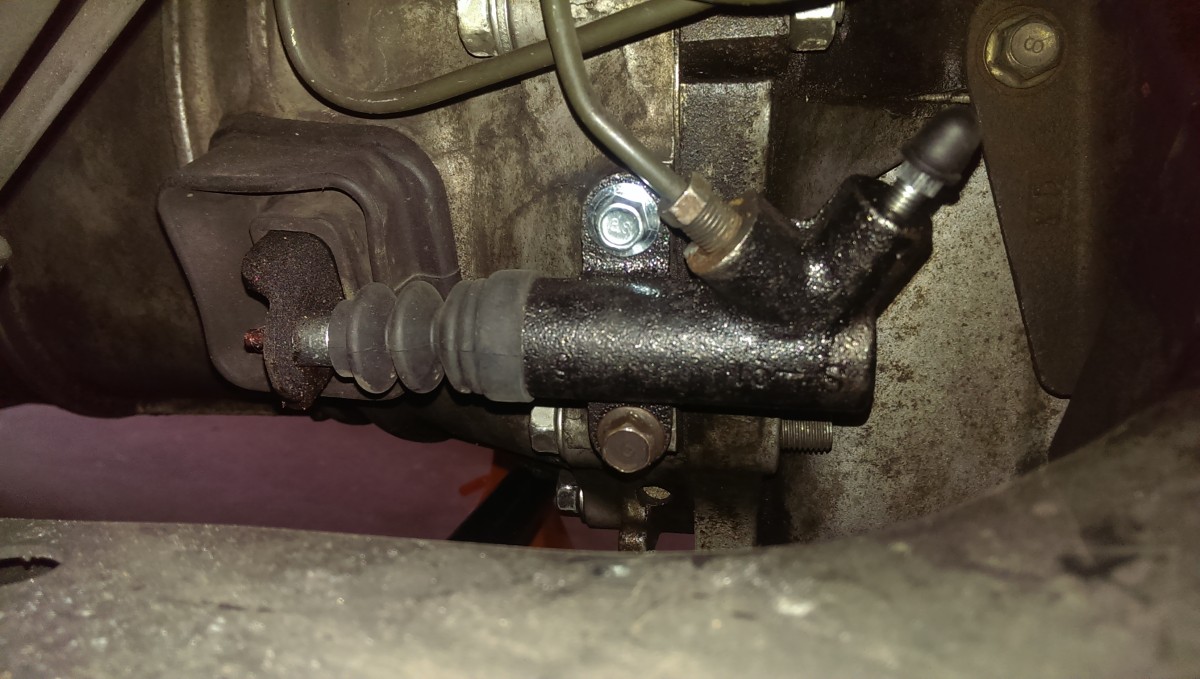
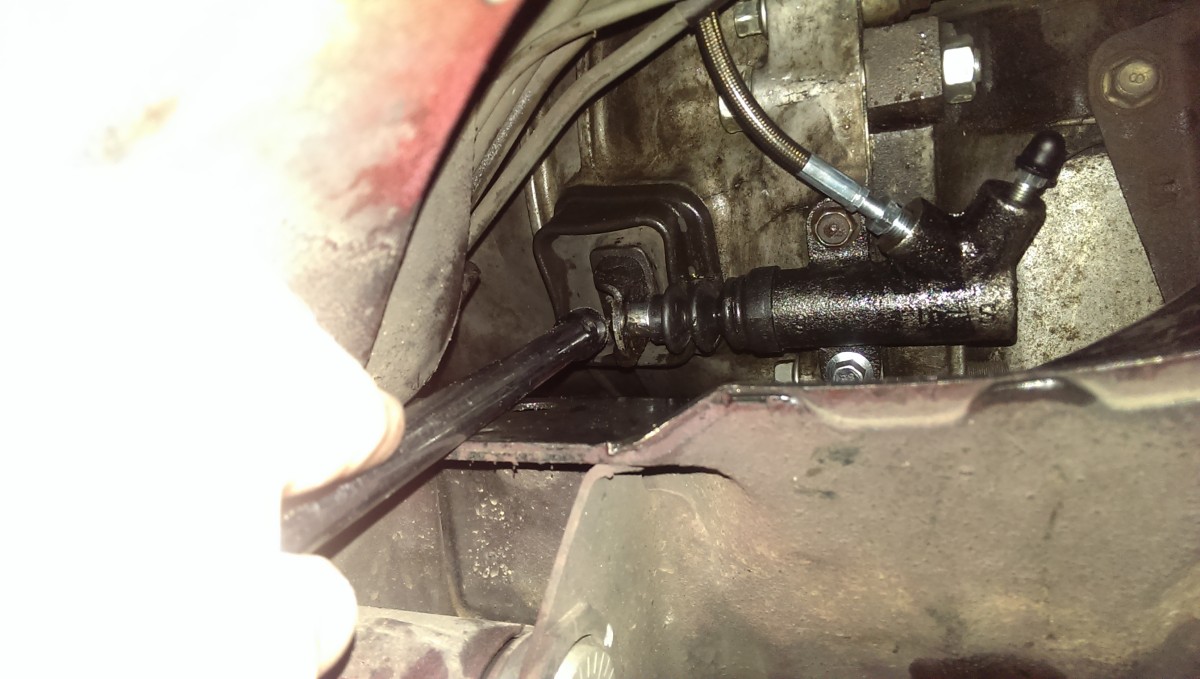
Slave cylinder
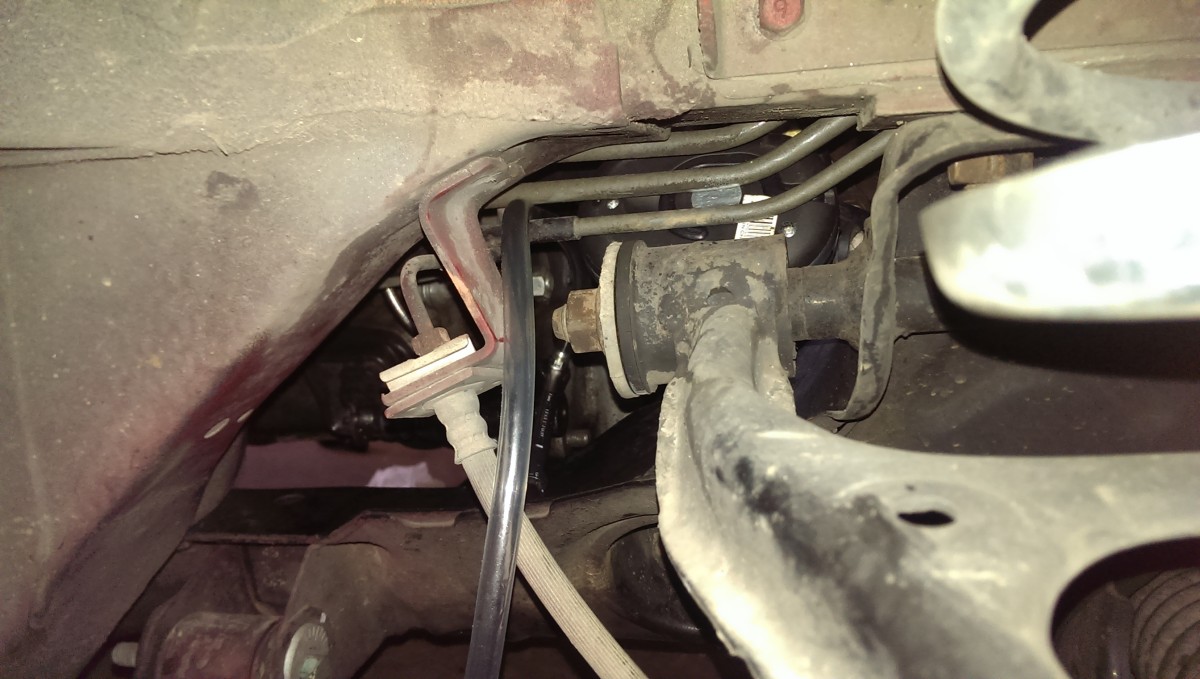
Now with the front end of the car on jack stands, remove the passenger front tire. If you look behind the right wheel area, you’ll see the slave cylinder as pictured.
The bleeder screw is under the rubber cap on the right. At this point, you can go ahead and try to get as much fluid out of it as possible. Use the same procedure documented in “Bleed the clutch” below, except don’t top off the master (of course) – you’re trying to get the fluid out of the lines altogether.

Loosen the line (above the bolts), then remove both bolts
Next, you can see where the clutch line is coming into the slave. It is the other bolt on top of the slave, opposite the bleeder screw. Go ahead and crack this open while the slave is still mounted. Don’t remove it, just get it to where it will turn – this is easier with the slave still bolted to the transmission.
Once that’s done, go ahead and remove both mounting bolts. I’m pointing these out in the picture.

Now you can fully undo the clutch line
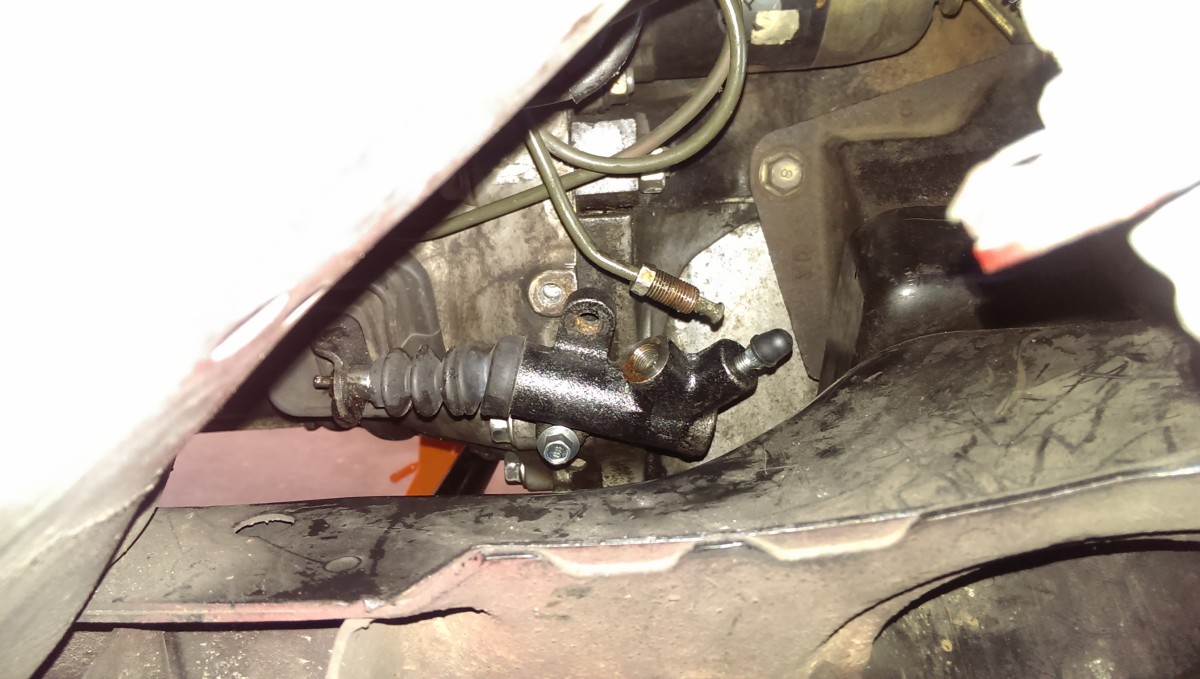
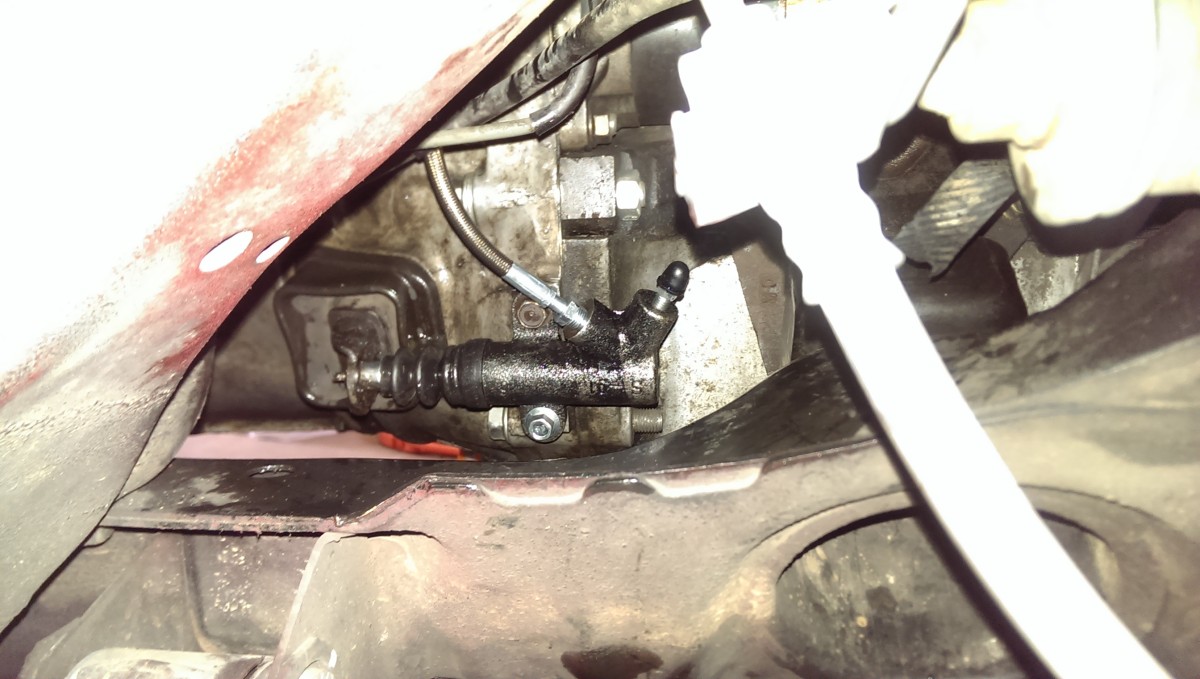
And now the slave cylinder is free
Once both bolts are out, you can go ahead and fully undo the clutch line and pull it free. Have a cup handy to catch any brake fluid that comes out, and wear gloves and eye protection. Note that one of my mounting bolts is still half-in: I’m not actually replacing the slave, so I didn’t bother to fully remove it.
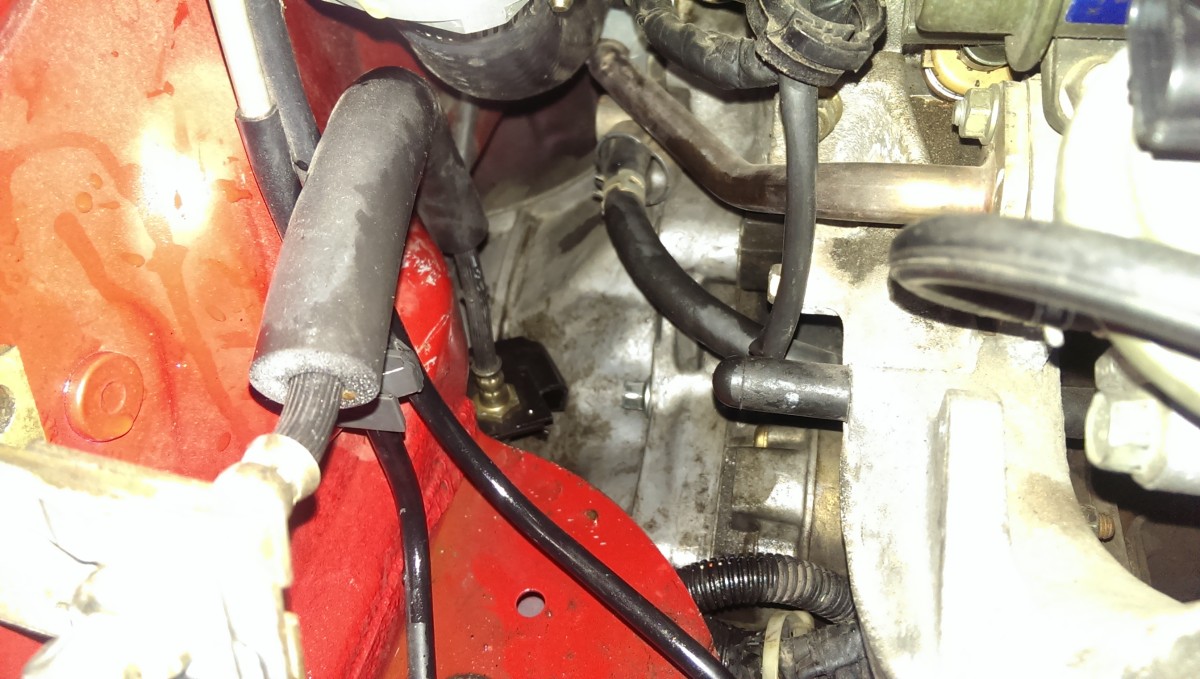
Removing the clutch line
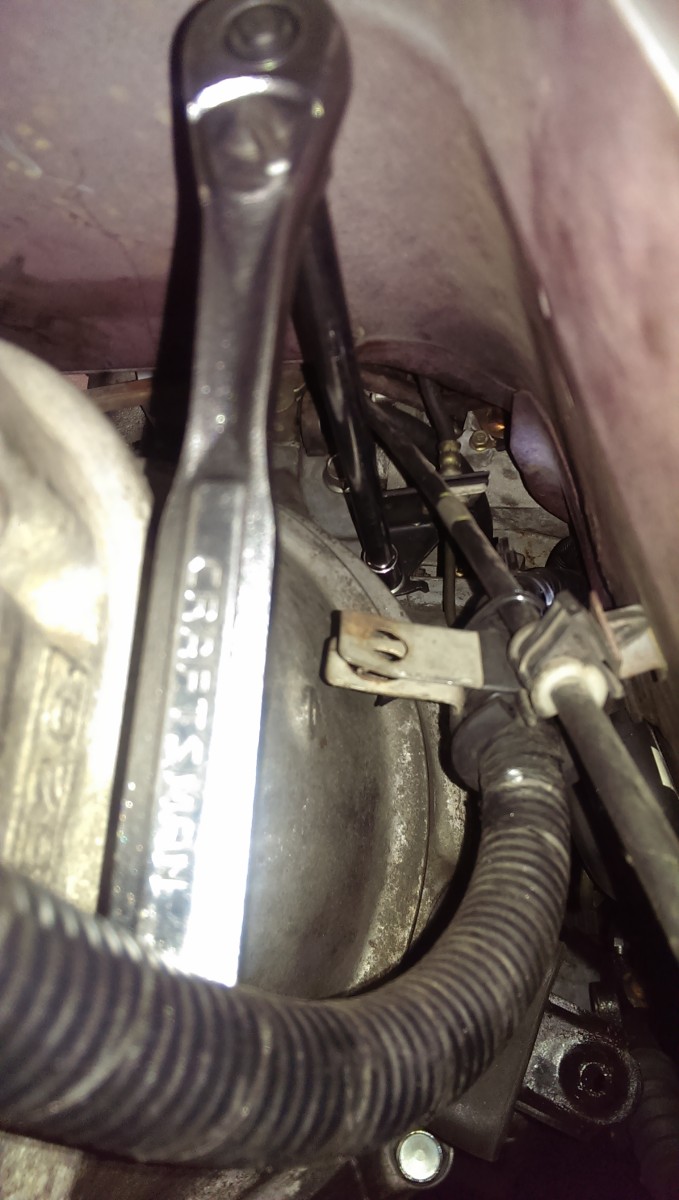
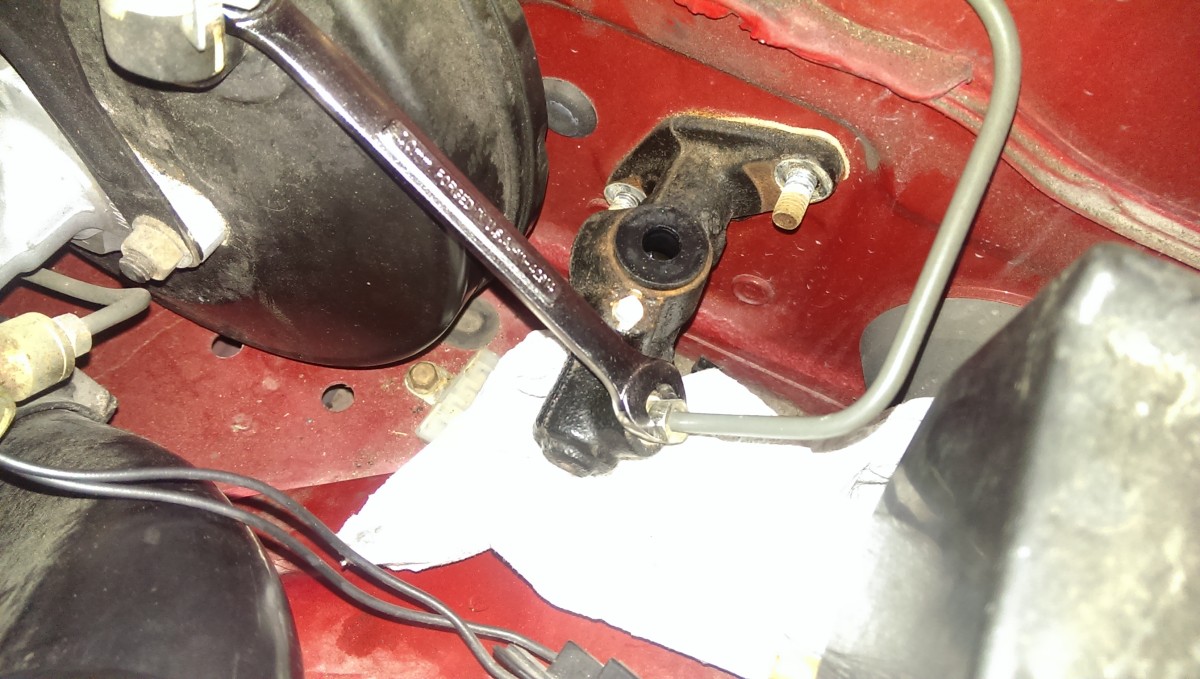
Really really annoying transmission bolt
This is the most irritating part of the whole job. Get this done, and it’s all downhill from there. The clutch line connections to the slave and the hard line are both easy to get to. What’s annoying is this transmission bracket bolt, which is actually one of the starter bolts if I recall correctly. Anyway, I tried to show where it is by taking a picture under the car with extensions on the bolt itself. I didn’t have enough leverage to actually break it loose this way.
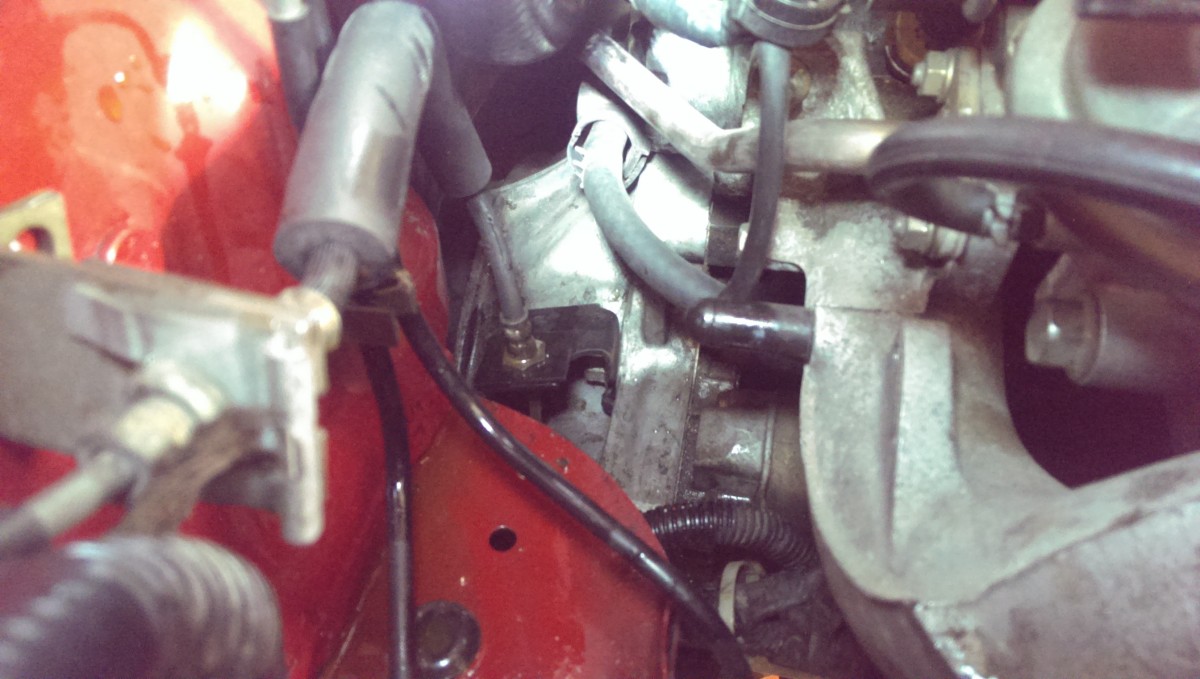
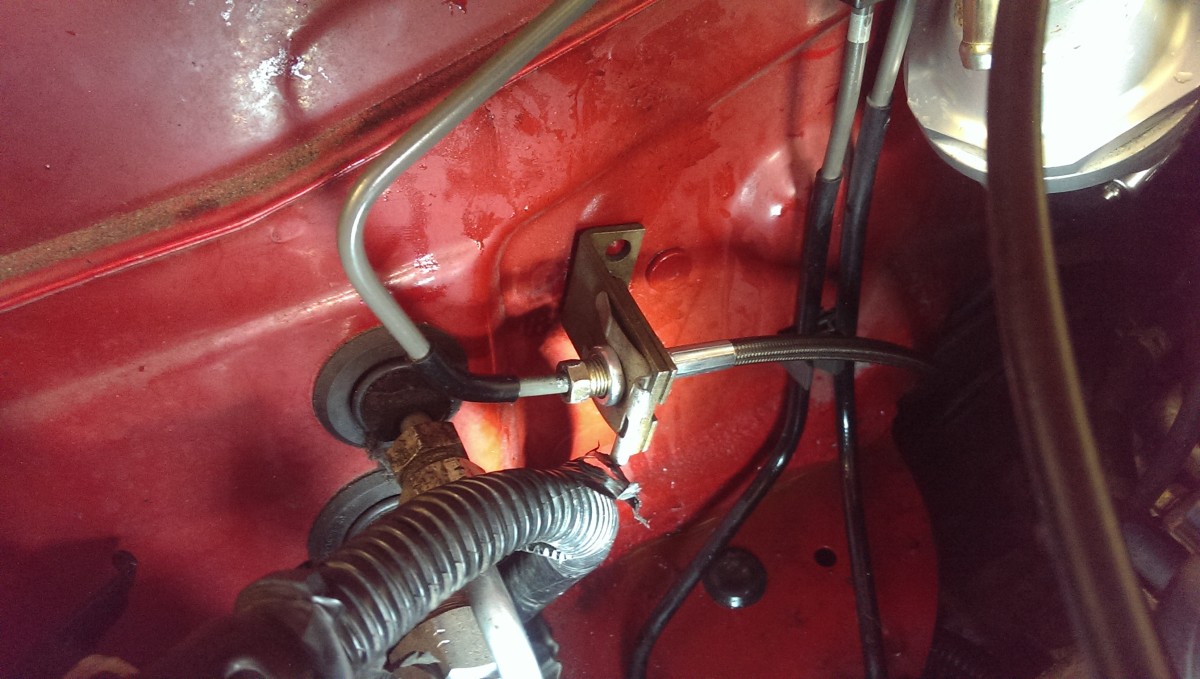
Top view of the bracket
Instead, I ended up unplugging some wiring (and detaching my coolant reroute hose, if you have done the reroute) to get at it from the top. You can see the black bracket fairly clearly in this picture; the clutch line runs straight to it.
Box wrench is the only way
The only way I could get it off was to put a 12mm box wrench on it as pictured and keep turning it over and over. I couldn’t get a socket wrench in there, and my ratcheting wrench was too wide.
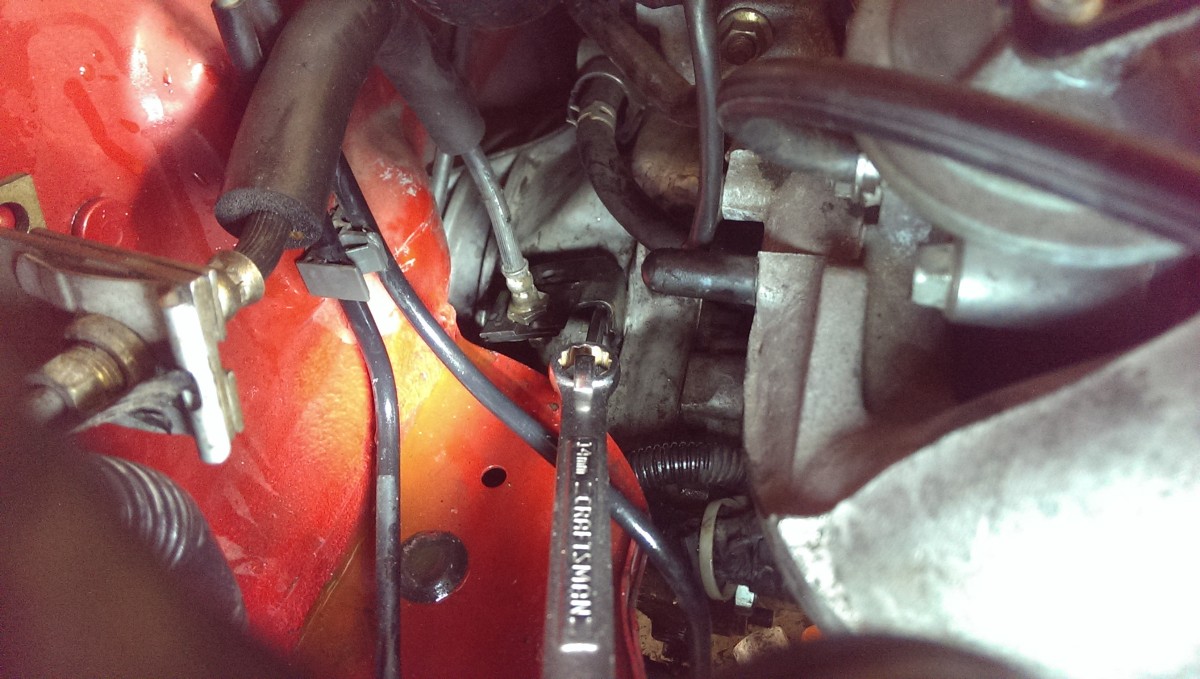
Had to double up on the wrenches to get enough leverage
I also had to double up on wrenches (slipping a second one over the 12mm) in order to provide enough leverage to break it loose the first time.
Be sure to put the bolt back in
Once removed, you can move the bracket aside and put the bolt back in. Fortunately, you can now fit a regular socket wrench with the bracket out of the way.
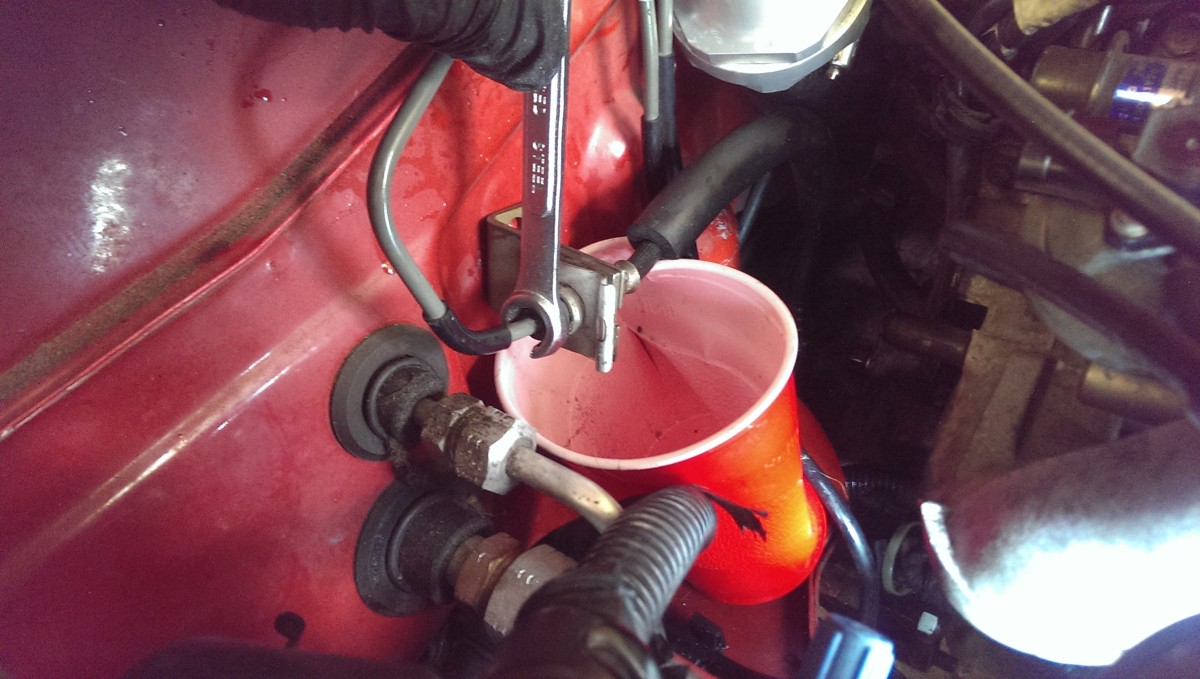
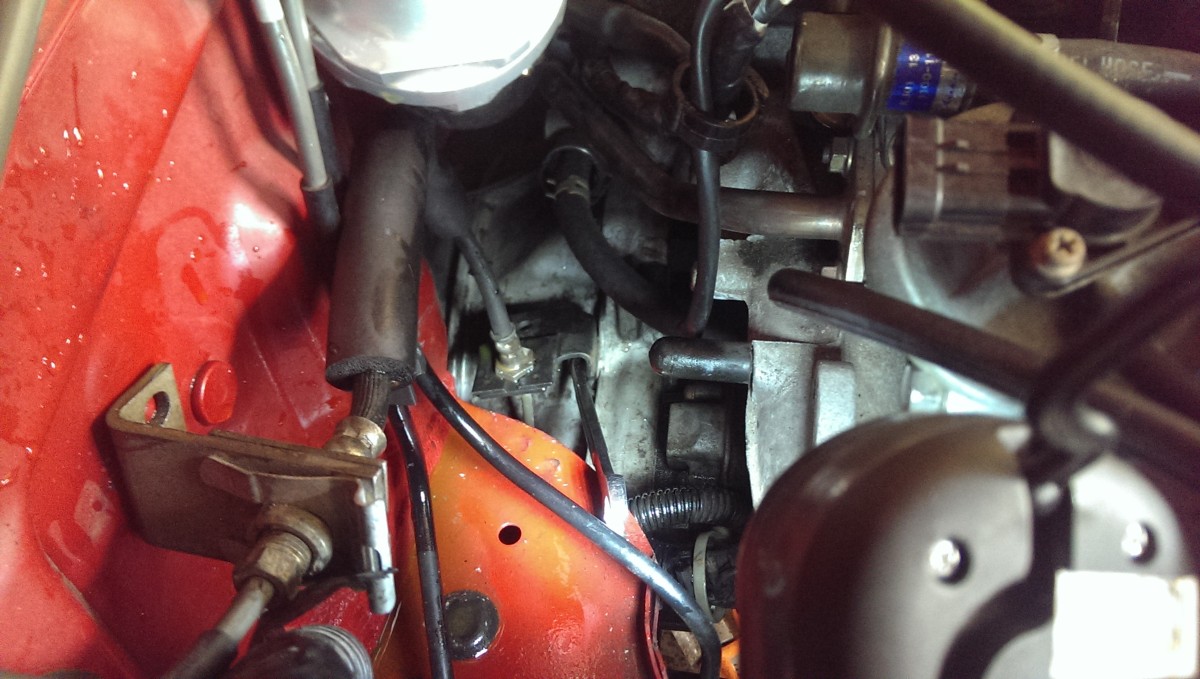
Loosen line
Now you can stick a cup under this clutch line junction and undo the connection. This is where the new line will attach to the stock hardline.

Unmount from firewall
Lastly, you can undo the nut holding the line we’re removing from the firewall.
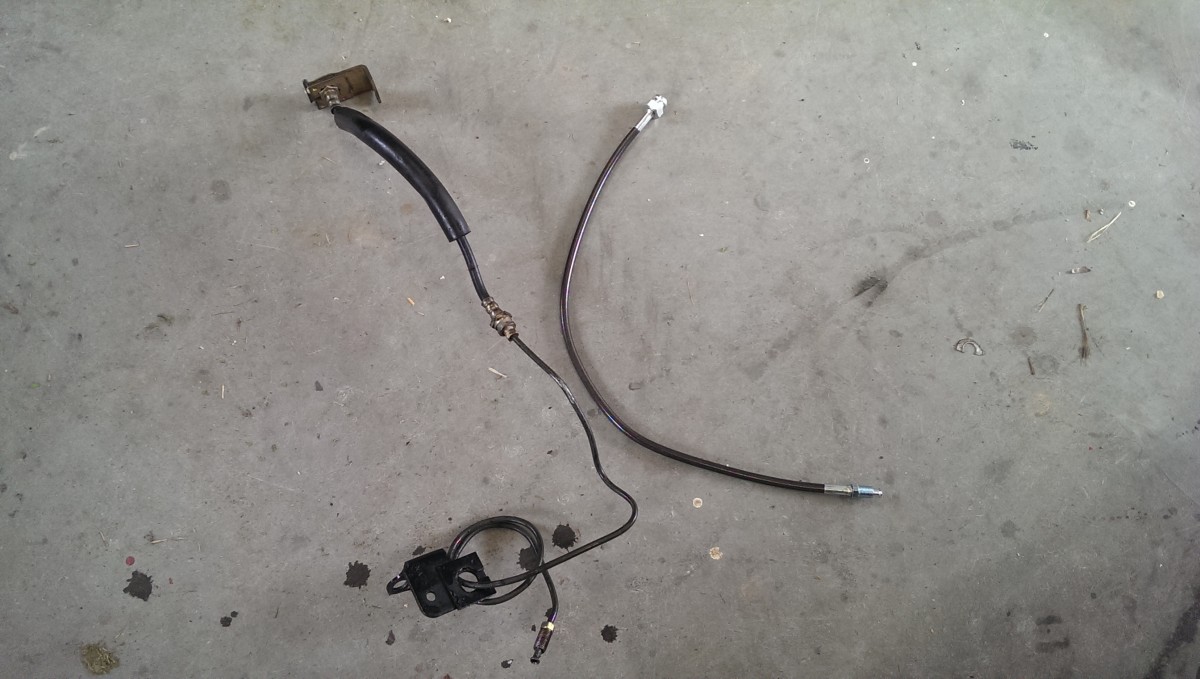
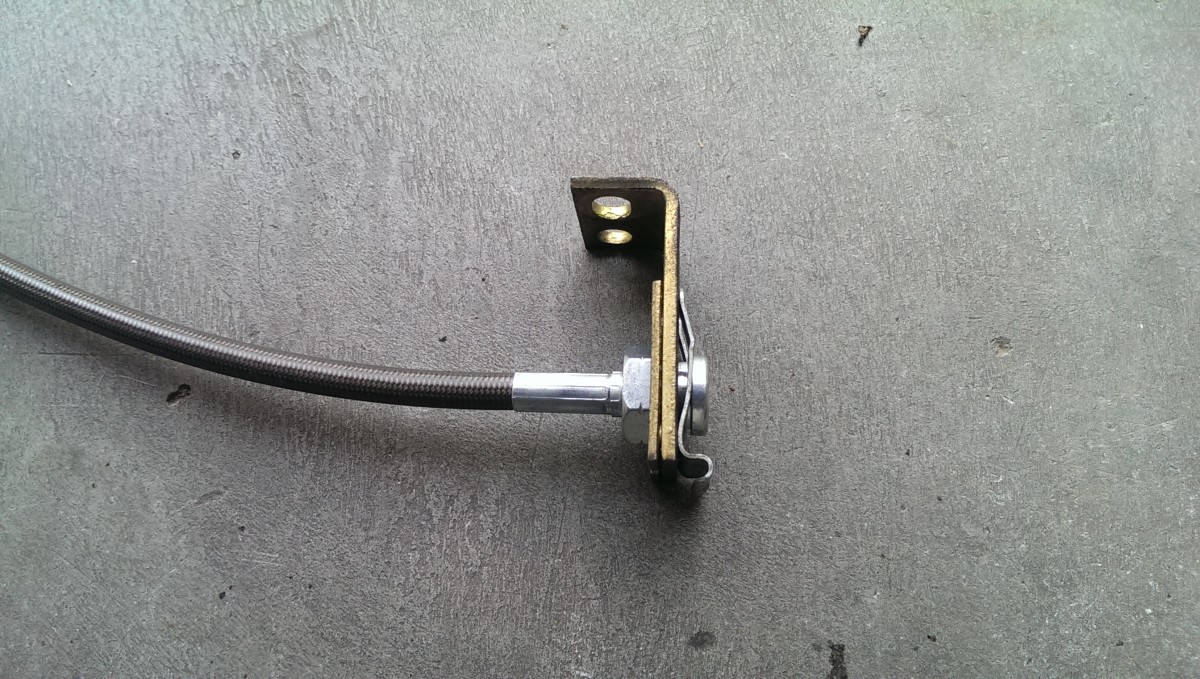
Old vs New
The hardest part is definitely over with. You can go ahead and yank the entire clutch line that we freed out, bracket and all. In the picture you can see the difference in length and complexity between the new line and the old.
Installing the new line

Move over the fitting
Compared to removing the old line, putting the new one in is a snap. You do have to move over this mounting bracket, but it’s fairly straightforward. The silver piece just slides off.
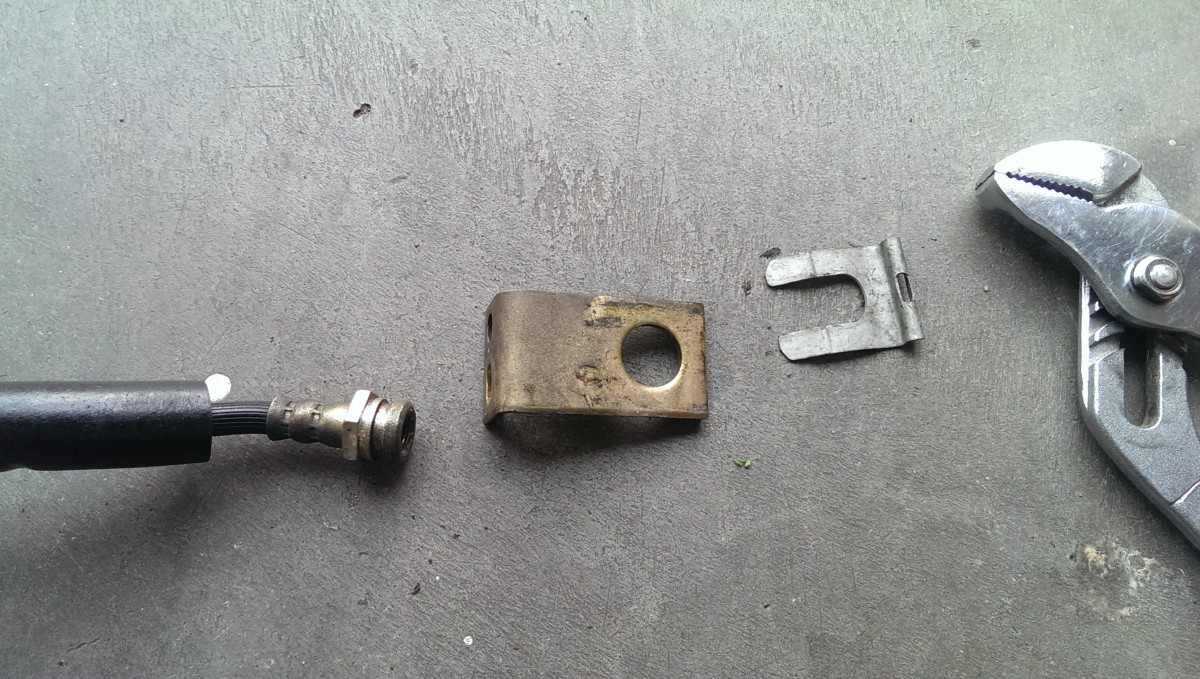
Mount in pieces
Once it’s out, the whole thing just sort of falls off. You can see the pieces laid out here.
Back together
You can go ahead and put this on the new fitting and use some pliers to put it back together.
Mounted to firewall and hardline again
Lastly, you can just drop the clutch line down where it belongs, re-mount the mounting bracket, and re-attach the hard line. All done. You should also reinstall anything you moved out of the way for this part of the job.
Reinstalling the slave
Add grease here
Before reinstalling a new slave, be sure to add any sort of grease to the point where the slave cylinder hits the clutch fork. I use wheel bearing / axle grease, but it doesn’t really matter what is used. I’m pointing to where to add the grease here. If you skip this step, you’ll hear a noise like crickets when it rubs; it doesn’t hurt anything, but it’s extremely annoying.
Done
With the grease on, simply slide the new slave into its spot, bolt in the mounting bolts, and attach the new clutch line. I had to slide under the car to route the line past the other wires and lines already there.
Removing the master
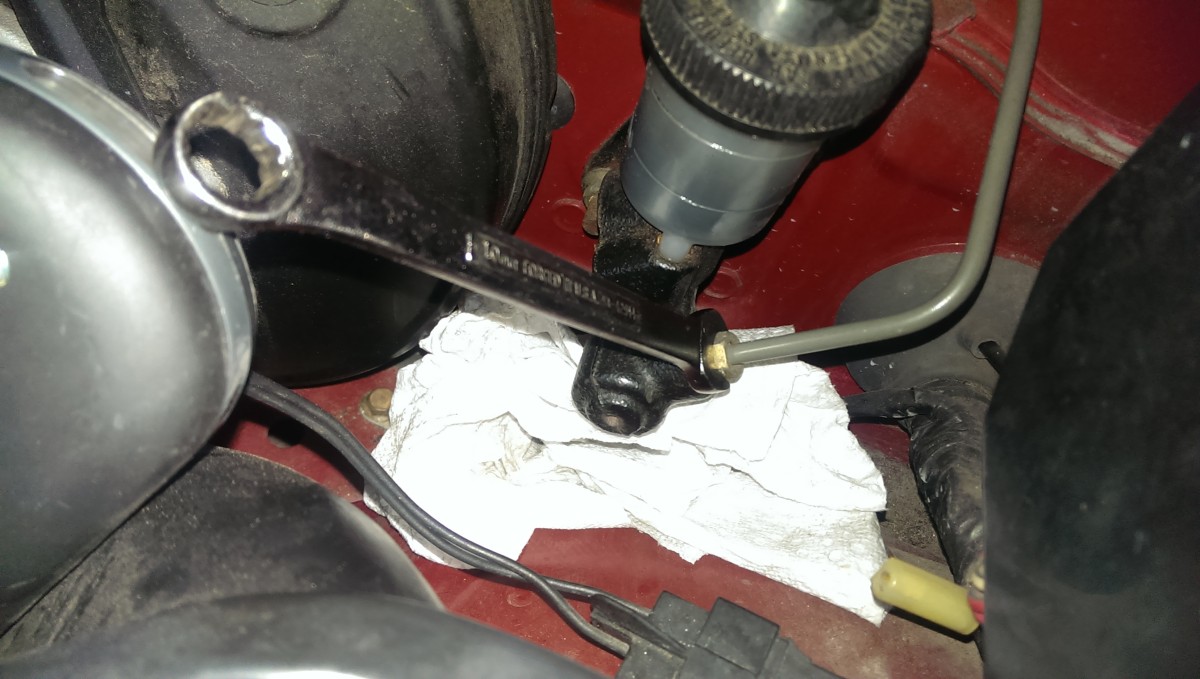
Crack the line open first
Compared to the clutch line, the master is very easy. First, crack the line open but don’t remove it yet. I put a wad of paper towels to catch drips from any remaining fluid. There shouldn’t be much left at this point.

One bolt
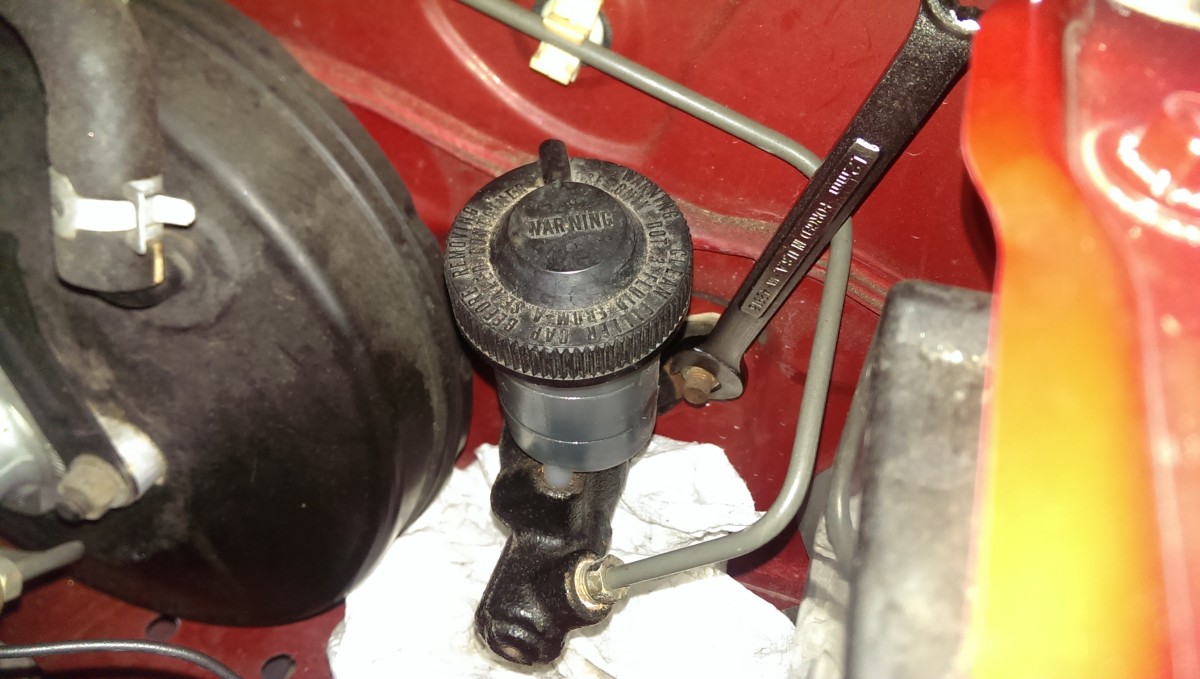
Two bolt
Then, you can undo the two mounting bolts holding the master to the firewall. If that all works out for you, that’s great, I’m glad for you.
Removing the master when it is being stubborn and you’re ready to be done with this stupid job
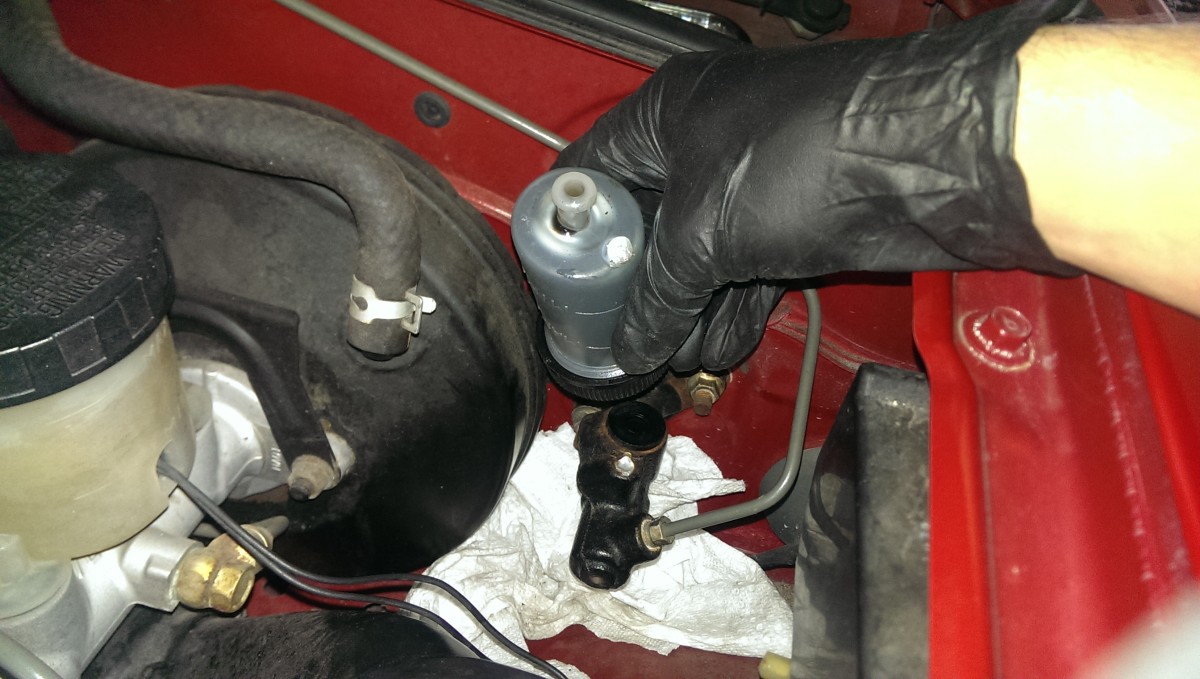
Gracefully remove the cylinder
So when the above doesn’t work, just hulk out and rip the plastic cylinder off of the master (while wearing eye protection and gloves!). It’s really surprisingly flimsy. Ripped right out.
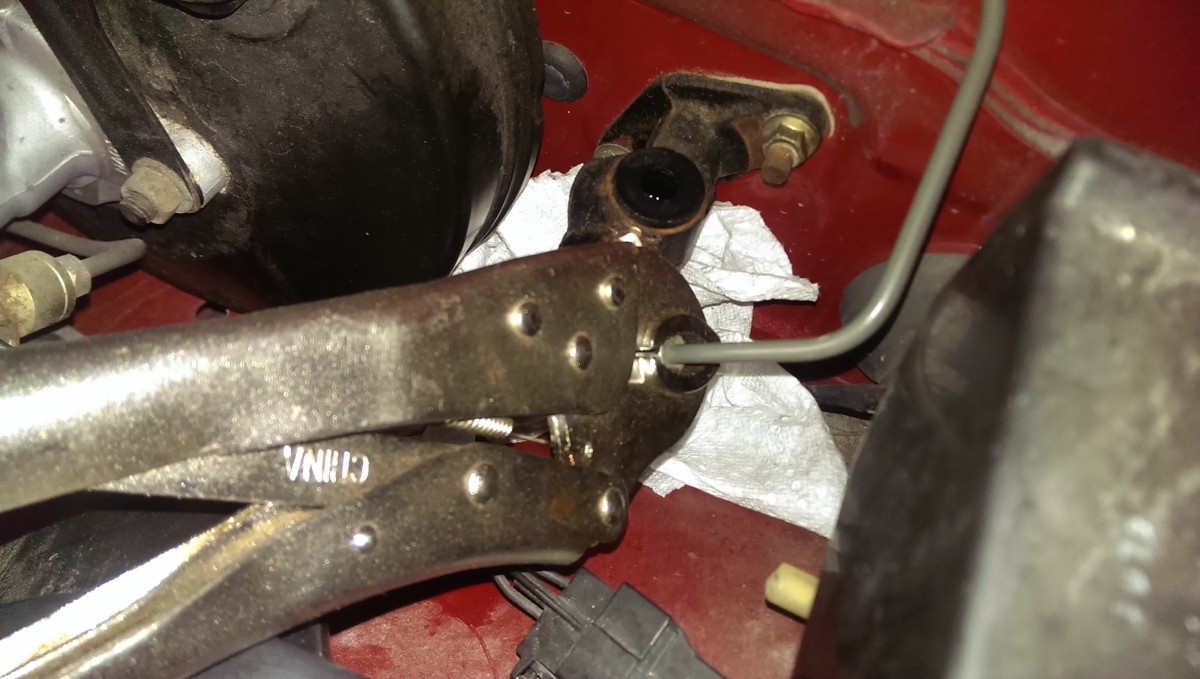
Plenty of room for vice grips
Now that you’ve done that, there’s plenty of room for vice grips to crack loose the clutch line that some idiot previous owner stripped and so you can’t get a wrench to fit on it properly.
Wrench after cracked open
With the bolt for the line loosened, you can use a wrench that should fit, but doesn’t quite, because the previous owner is an idiot. You also have way more access to the two mounting bolts, so you can more easily break those loose.
Reinstalling the master
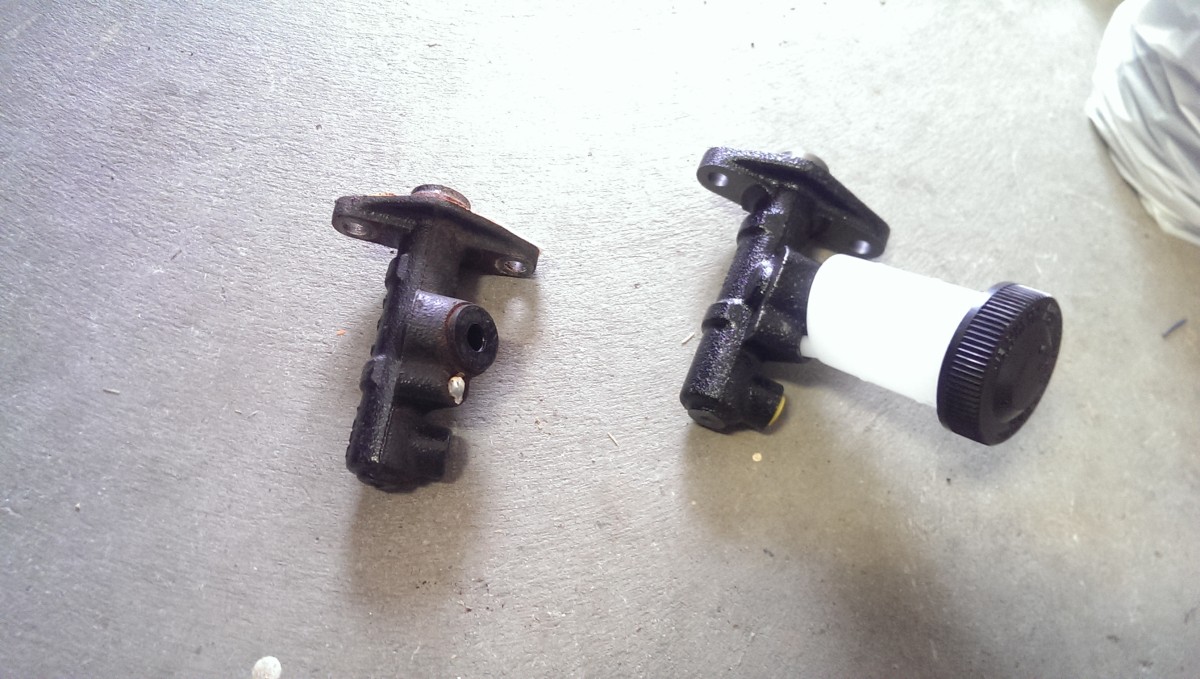
Old vs New
Here is the old master vs the freshly-painted new one.
Installation is reverse of removal
Some people will strongly recommend you bench bleed the new master before installing. Essentially, this involves putting the master in a vise, connecting some tubing from the output where the line goes back up to the cylinder, and using a screwdriver or similar to push the plunger in and out while topping it off with fluid. In essence, you’re bleeding it as though it’s in the car, except the fluid doesn’t travel nearly as far. I personally skipped this and didn’t encounter any issues, but your mileage may vary.
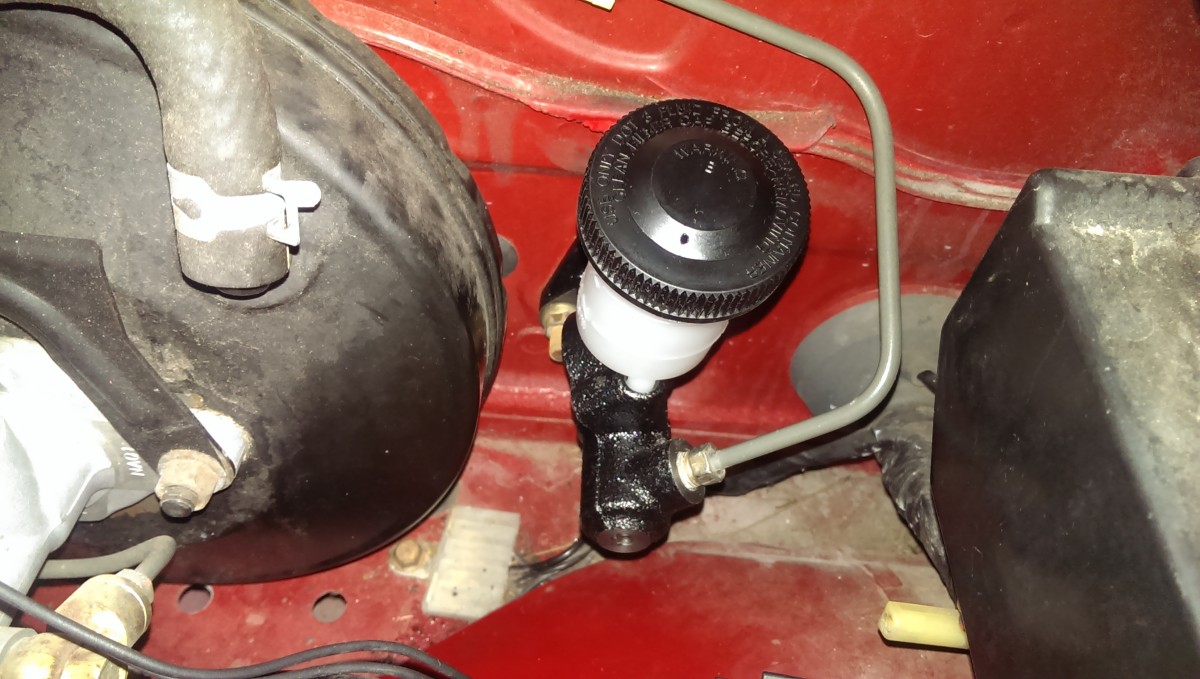
Reinstalling the master is very straightforward. Simply put it in place, add the two mounting bolts, and reattach the clutch line. Fortunately, the cylinder doesn’t get in the way as much for reinstallation, because you don’t have to turn it as hard to tighten it up as you do to break it loose.
Bleeding the clutch
Now that everything is back together, you need to add fluid and bleed the clutch. If you jumped here from the beginning of the article and are trying to remove fluid, follow the exact same procedure as below, but don’t keep adding fluid to the master.
Run a hose from the slave bleeder to an empty bottle
Threading through the brake lines helped hold it
The first step is to run a hose from the bleeder valve to an empty bottle or something similar. My hose is just generic tubing from home depot. I drilled a slightly undersized hole in the bottle’s lid and forced the tube through it. This holds it in place rather nicely.
You want to run the hose all the way to the bottom, and put a little brake fluid in the bottom of it. That helps keep air from being sucked back up while bleeding.

Bleeder valve ready with wrench and tube
When you attach the hose to the bleeder valve as pictured, be sure to put an 8mm box wrench under it. This lets you easily open and close it without pushing the hose off, and you get grip on the entire valve so you don’t strip it.
Go ahead and break the bleeder valve open now, and then close it lightly. You want to be able to easily open it during bleeding, rather than having to muscle it and knock the hose off.
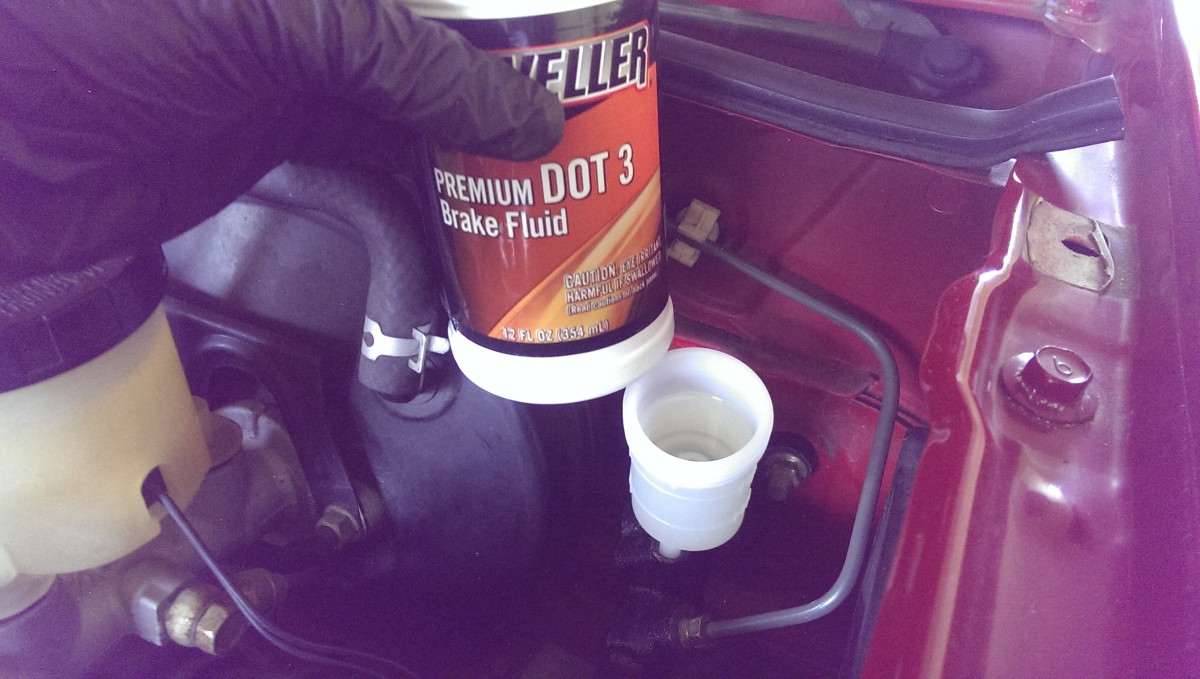
Top off the master with fresh brake fluid
Next, go ahead and top up the master with fresh brake fluid. I use dot4 for my brakes, but any generic cheapo $2 Walmart dot3 will do fine for clutch hydraulics. Keep the master open, as you’re going to keep topping it up.
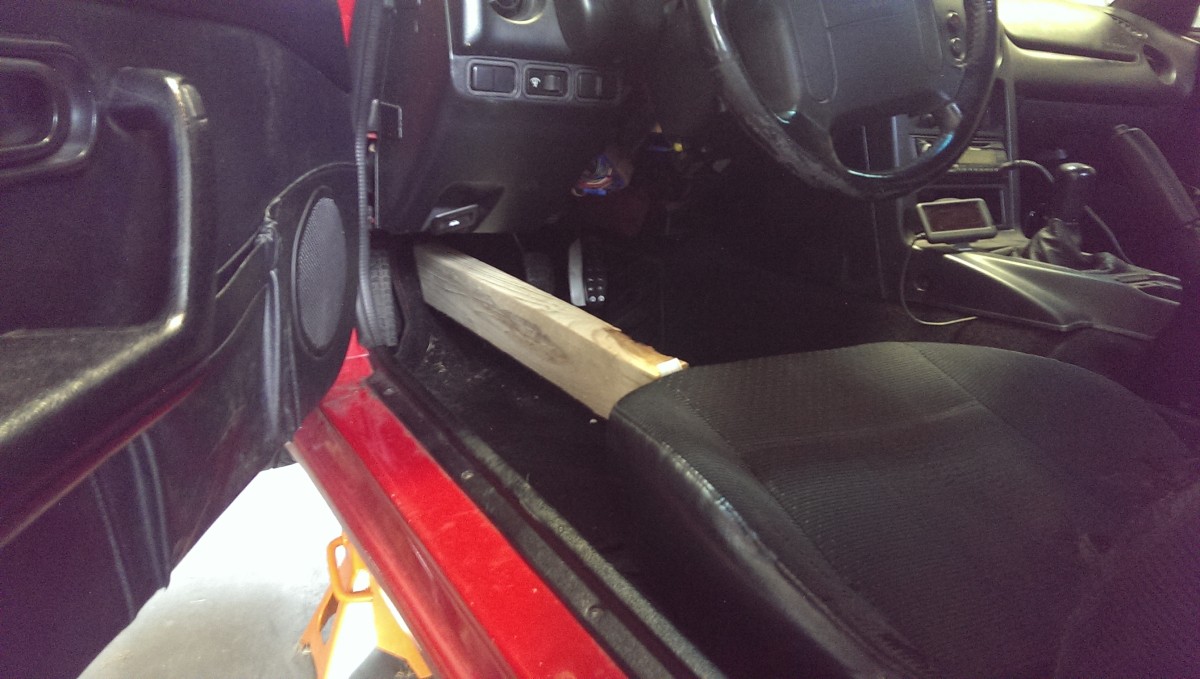
2×4 lets you bleed if you don’t have friends
Now you’re ready to begin bleeding the system. You can do this two ways, by yourself or with a friend. If you have a helper, it goes faster.
With a helper, have the helper sit in the driver’s seat. With the clutch line closed, have them push the clutch pedal and hold it down. Open the slave cylinder bleeder, air and fluid should rush out. Close the slave cylinder bleeder. Tell the helper to release the pedal. Repeat this over and over.
The alternative is to use a 2×4 wedged against the seat instead of a helper. I had to do this, this time. Wedge the pedal down, run around the car, open the bleeder, let fluid and air come out, and close it back up again. Then, run back to the driver’s seat, release the pedal, wedge it back down again. Rinse, repeat.
In either case, keep an eye on the master cylinder. You will have to keep adding fluid as it is pushed out into the lines. Once you have a few rounds where only clean fluid comes out without any bubbles, you’re done.
Others have also used gravity bleeding, where you let it slowly bleed. This has never worked for me. Another option is to use a power bleeder like a mityvac or similar, which work great if you want to spend the money.
Regardless of how you do it, once the system is bled, you can put the cap on the master, remove your bleed bottle setup, put the tire back on, put the car on the ground, etc. Once the car is level again, you can top the master cylinder up to the Max line, and you’re done.
You may need to readjust the clutch free play and travel after doing this job.