Heirloom DIY Crib: Part 1
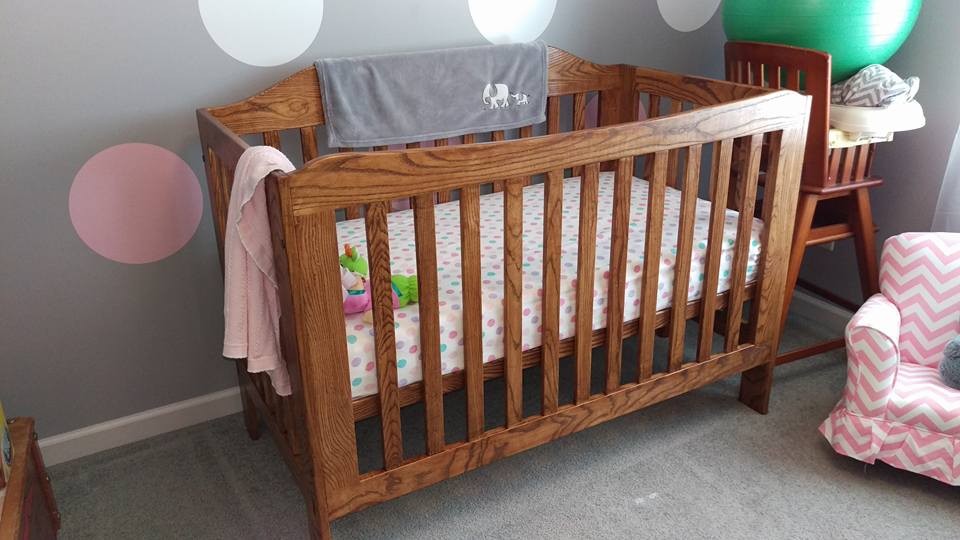
Spoiler alert: here’s what the finished crib looks like
With our first child on the way, I decided I wanted to make something nice in advance of her arrival. I settled on making a nice hardwood DIY crib. The goal was to have an heirloom-quality piece of furniture we could eventually hand down. Or, if I screw up, to make something we’ll no longer need shortly, so we can shelve my failure in the attic to be forgotten. =)
Disclaimer: I am documenting how I created a crib for my daughter. I provide no guarantees as to the safety of this crib design. It follows the federal crib specifications, and I believe it to be safe, but if you choose to make a similar design, you do so at your own risk.
This writeup was split into 3 parts due to its length. In the first part, I buy and mill some rough lumber (ash), and rough cut the structural members for the side panels and front and back panels. In the second part, I finish all four panels, including routing and installing dowels and threaded rods. In the third part, I finish the mattress support, and sand and stain.
Click here for part 2
Click here for part 3
Design
When designing a crib, the first thing to mention is the federal government specs. (Available Here) The government has specifications for dimensions on a crib that is going to be commercially sold. Of course, you could ignore these for a crib you make for your own use, but I figured if I follow the spec, my crib will be at least as good as one I’d get at the store.
There are a few things specified, although if you choose to make a crib, you should read the guidelines directly for yourself. First, the interior dimensions of the crib itself should be 28 ± 5/8 inches in width and 52 3/8 ± 5/8 in length. This is to accomodate a standard-sized crib mattress. I shot for dead-on 28″ and 52 3/8″, respectively, and came very close. Additionally, the mattress support to rail height must be at least 26″ at the lowest setting; mine is 28″. Finally, the slats for the crib sides must be no more than 2 3/8″ apart. I spaced most of these exactly 2 3/8″ apart, with one or two per side being closer together.
The specs gave me a general feel for the dimensions I was going for, so the next step was to determine how to fit it all together. Because this is something we will use for a few years and then store, it was important that it easily come apart. Therefore, I wanted to make the crib disassemble into 4 separate panels (each of the sides) and the bottom, so we could lay it all flat in the attic.
As far as joinery, making the panels themselves was clearly a great candidate for mortise and tenons. I chose to make a 7/8″ thick, 3-4″ square frame for each panel using mortise and tenon joinery. Then, I made the slats about 5/8″ thick, and made individual mortises to stick them into the frame. The only exception to using mortise and tenons was when I used half lap joints for the mattress support, which I’ll discuss during that build process.
The biggest conundrum I had was in joining the panels together. My first thought was to keep metal out of the build, and do some crazy through-tenon with a wedge hammered into it, or something. My biggest concern was that the pins or wedges or whatever would slip out over time, especially with a toddler jumping and shaking the crib sides. I did in fact end up using plain unglued through-tenons for the adjustable mattress support.
I finally came to the conclusion that we’ve already invented a great way to hold things firmly together that you can later undo, and it’s called a bolt. I ended up having two bolts per corner holding the 4 panels together. I also chose to add 4 unglued dowels per corner, both to help with alignment and do provide strength against racking.
Milling Lumber
I was initially planning to use maple, but even at $5 per board foot, it would run about $300 for the amount I needed for the project. Considering this is my first real piece of furniture built with all hardwood, and it is a piece of furniture a child is going to probably chew on (among other things), I decided to scale it back a bit. There is a warehouse in my city that resells rough lumber, and they had some $2 per board foot ash from Nashville that had nice grain.

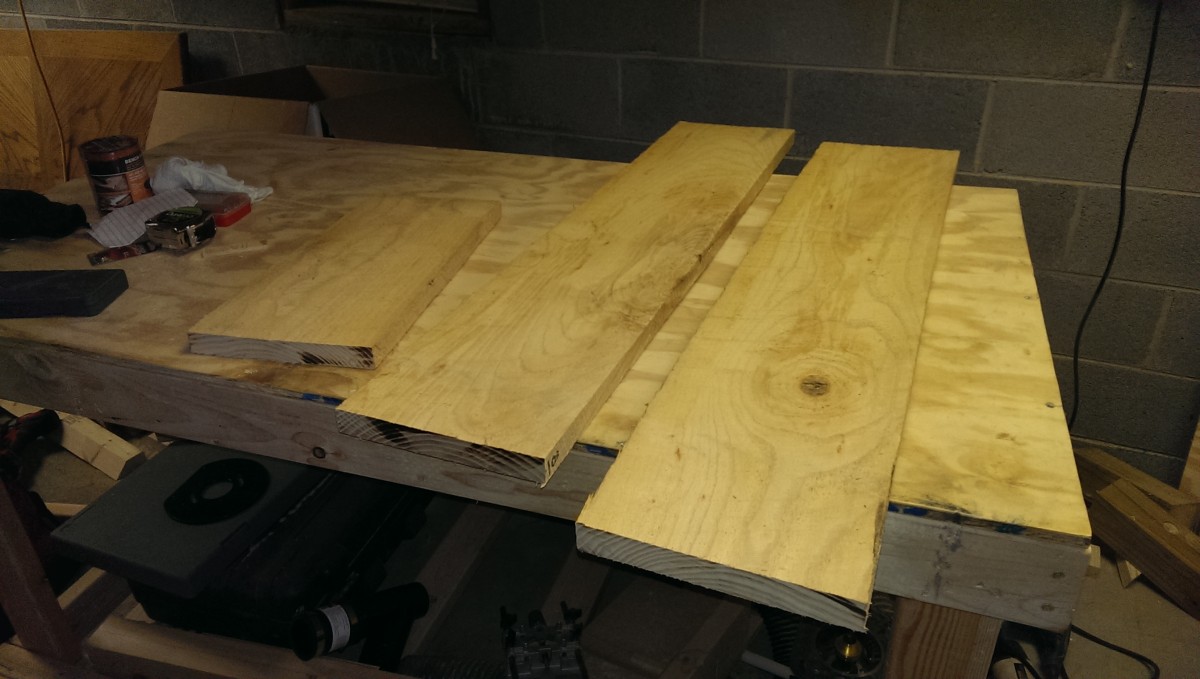
About 60 board feet of rough lumber
Ash is a very strong wood, it has a nice grain, and it takes a stain easily. It’s also cheap, primarily because it is very fast-growing, especially for a hardwood. Unfortunately, the emerald ash borer, a pest, is decimating forests of ash, but while the wood is still here it is good stuff. The above is the ash I bought, about 60 board feet.
Buying rough lumber is generally the cheapest. Boards are literally rough cut at a sawmill, kiln dried, and shipped out, without much surfacing done. You can instead buy S2S or S4S lumber. S2S is rough lumber that has been flattened on one face and one edge. S4S has had all 4 sides flattened and planed. Besides price, the other issue with buying pre-surfaced lumber is the humidity changes between where it was milled and where you’ll use it. Generally, you have to be very careful to pick out straight pieces of pre-surfaced lumber, otherwise you’ll have to mill them yourself anyway to get them flat. Unfortunately, milling lumber in a way that minimizes waste is itself an art that takes a bit of practice.
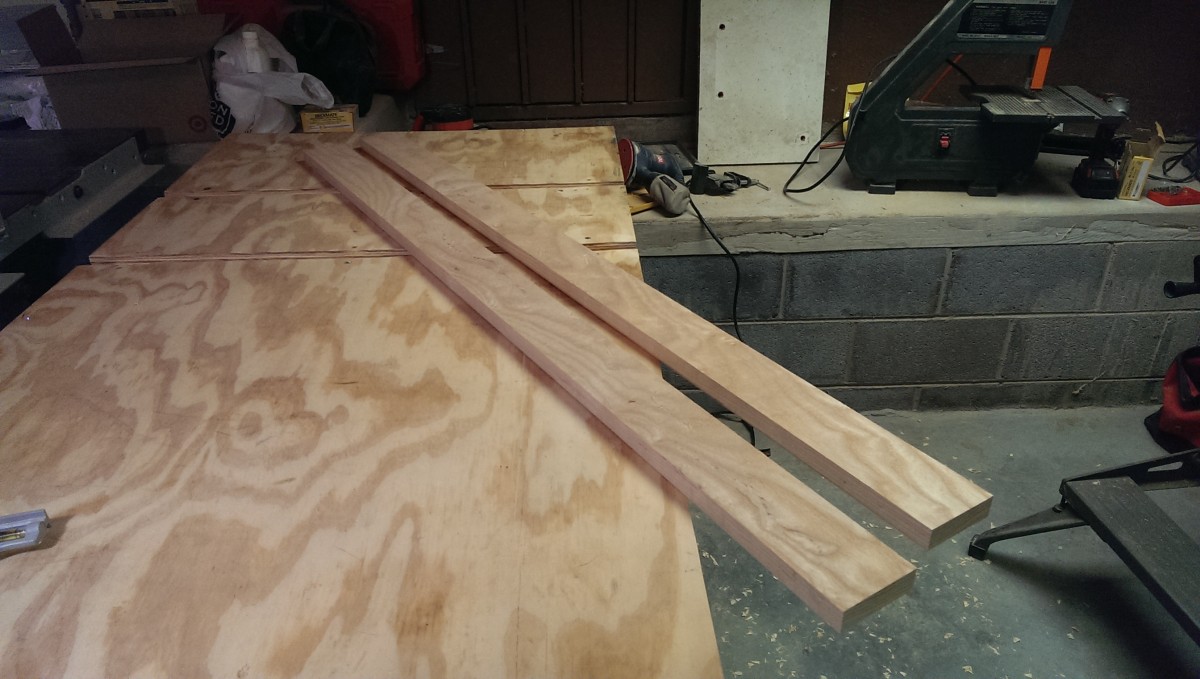
Rough cut the lumber to a little longer than required
The first step is to rough cut boards to the length you want. It’s difficult to joint or plane 8′ boards, so I don’t do this unless I really have to. I picked a board that was wide enough to make 4 pieces roughly 4″ wide and about 38″ long. I made sure that I had an extra inch or so in width, and a few extra inches in length, to account for any issues in finishing.
A brief note on milling lumber. The most common technique uses both a jointer and a planer. A jointer, pictured immediately below, is a machine that will make one face or edge of a board perfectly flat. A thicknesser, thickness planer, or planer is a separate machine that will make one side of a board match the other.
A common question is why you need both. The jointer can make any surface flat, but not necessarily parallel to the other surface. In other words, if you jointed both faces of a board, you would have two flat surfaces, but they wouldn’t necessarily be parallel – the board would likely be wedge-shaped. In contrast, if you simply planed both surfaces of a board with a bow it in, you’d get back a thinner board with a bow in it.
There are tricks to make sleds and things to use a planer for jointing, but considering how inexpensive used 6″ jointers are these days, I personally think it’s too much work. You can also make router sleds for jointing, although it’s much, much slower, but it works well for very large pieces of wood, such as big slabs. Lastly, you can use a hand plane to flatten surfaces; considering how fast and accurately the machines work, I personally don’t have much interest in this.
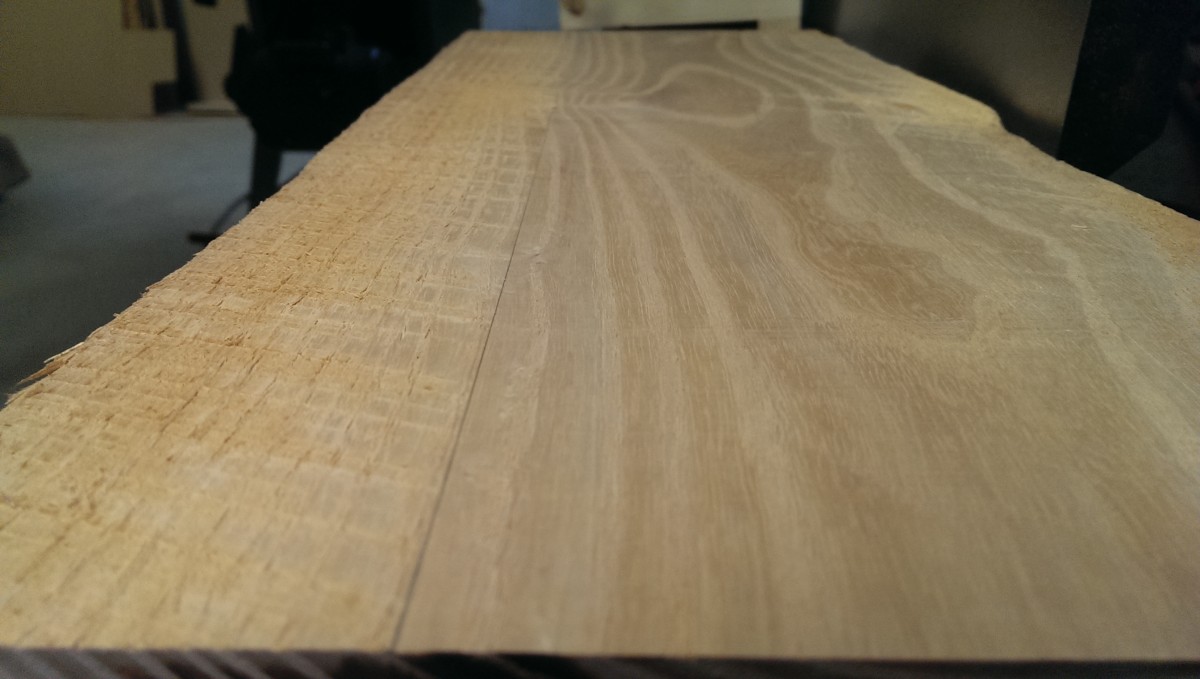
One side jointed

Run the board over in this orientation
The next step is to joint one face of each piece. My jointer is shown, although it’s a later shot – pretend there’s only one board on there, in that orientation, and one side is still rough. One issue is that I have a 6″ jointer and an 8″ piece of wood. A lot of people will make fancy, complicated jigs and sleds to deal with this. I agree with Matthias Wandel on this: http://woodgears.ca/jointer/wide_boards.html
There’s no real reason I can see to worry about this too much. Simply joint the board as normal to start. The face will beginning flattening on 6″ of the board, with a step, as pictured above. Then, flip the board around and joint the other half of the face, with the rough 2″. You will have a step in the other direction. Keep flipping the board around and jointing. Matthias has video of this technique.
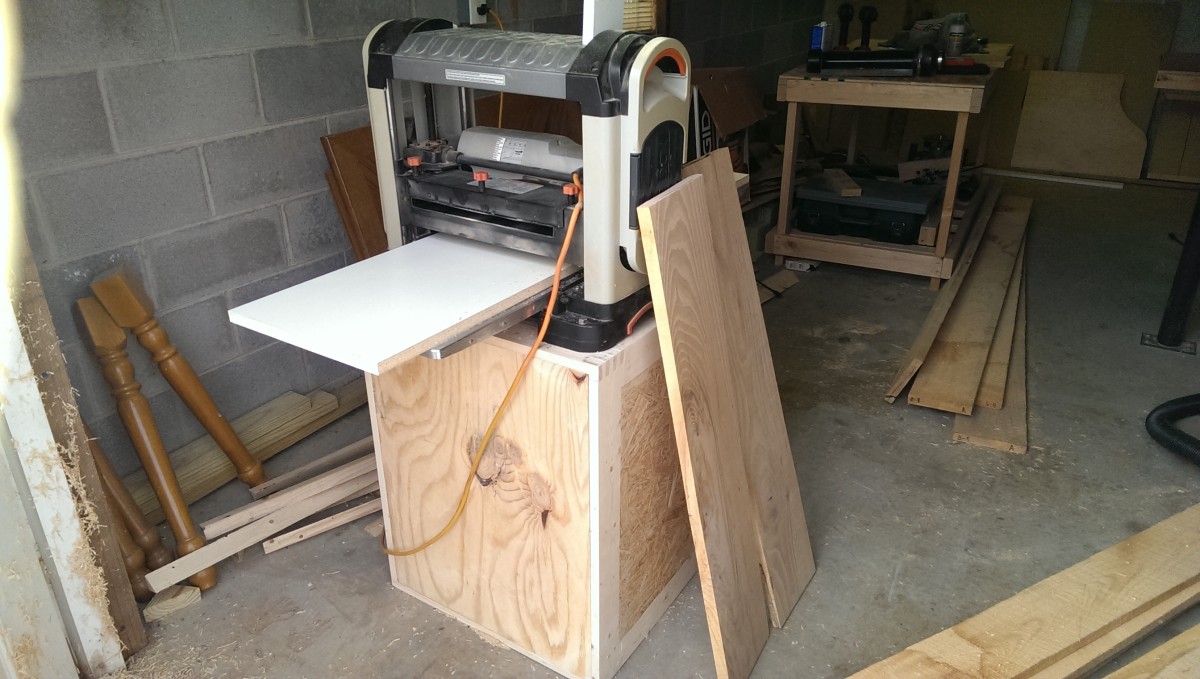
My lunchbox planer

Surfaced
At the end of it all, you end up with a board that is flat and has a shallow rabbet in it. This is no big deal. Simply put this flat, stepped side down and run it through the planer as normal, getting the other side flat. Once the other side is flat, flip it back over and plane off the rabbet. You now have a flat and square board.

Jointing an edge
Once you have the faces of the boards flat, smooth, and parallel from the jointer and planer, it’s time to clean up an edge. For this task, it’s back to the jointer. The above picture shows edge jointing. Simply run the board along on edge like this until you get a nice flat edge. I hold my board against a flat surface every couple of passes to check if it’s flat yet. It’s also possible to jig up a table saw to perform this operation.
The fence on a jointer can be adjusted for angle. I almost always joint at a 90 degree angle. I’ll note here though that while this angle isn’t critical for face jointing, it is very important for edge jointing. You should make sure your fence is square to the bed of the jointer before doing this operation.
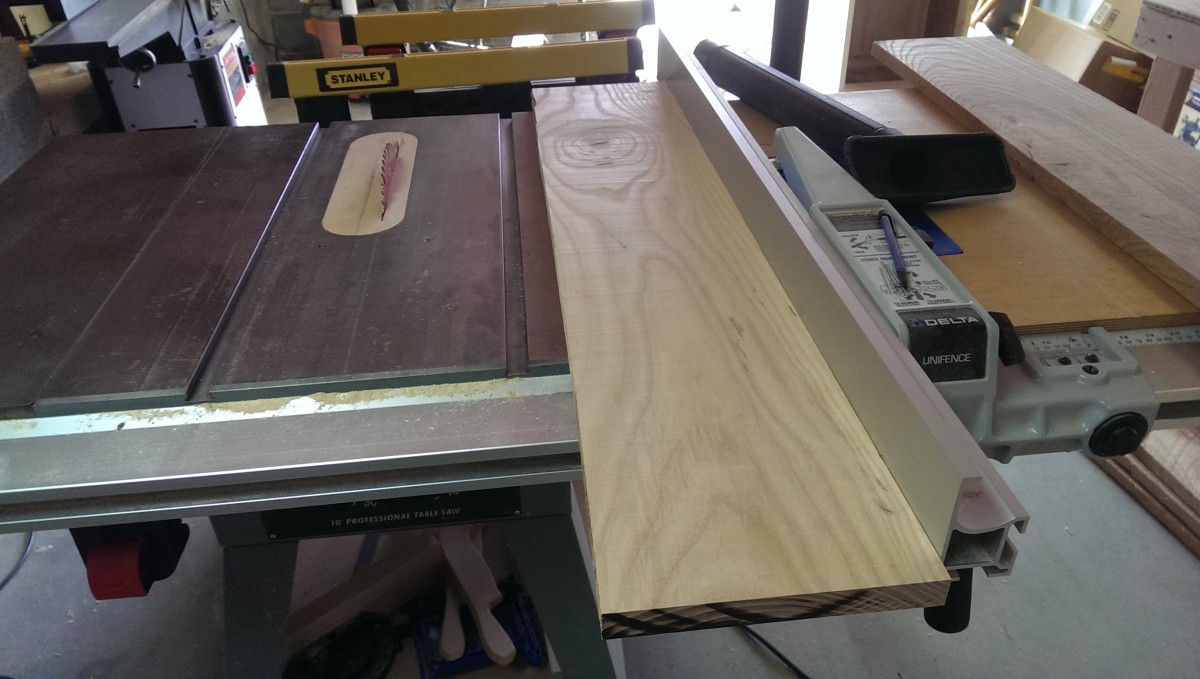
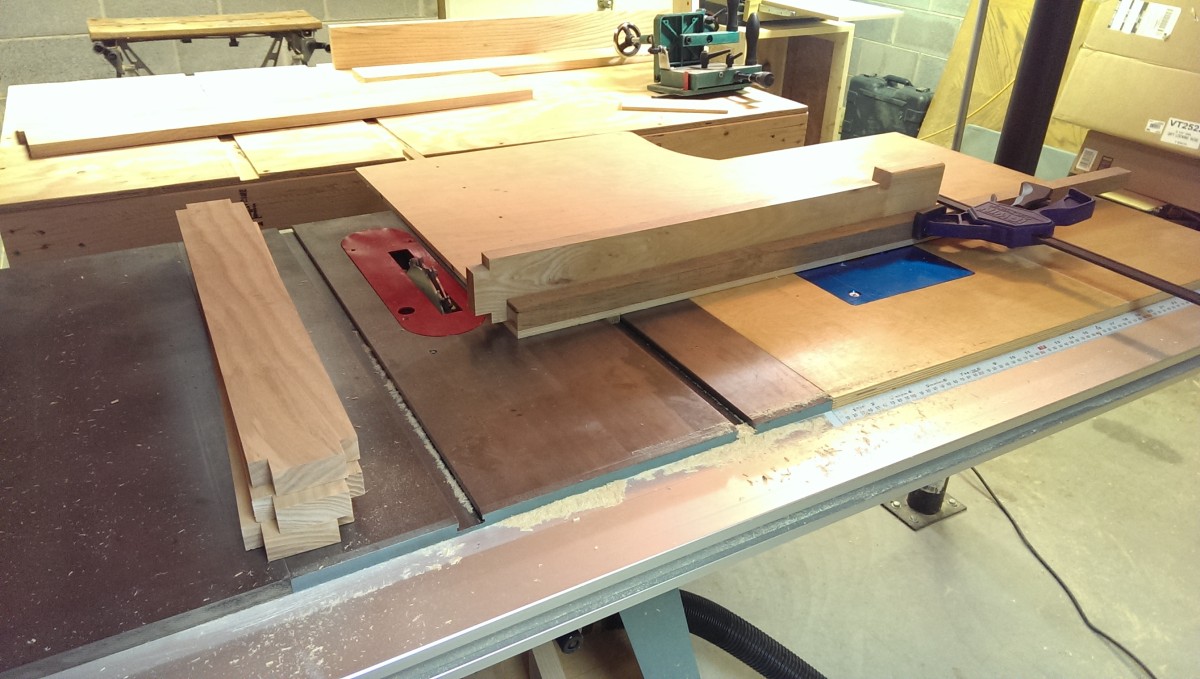
The flat edge can run against the fence of your table saw
Once you have both faces and an edge flat, you can move to the table saw. The edge you just jointed can go against the fence to rip the board down into the sections you need. This cut will also flatten the other edge parallel with the first.
Cutting the side panels
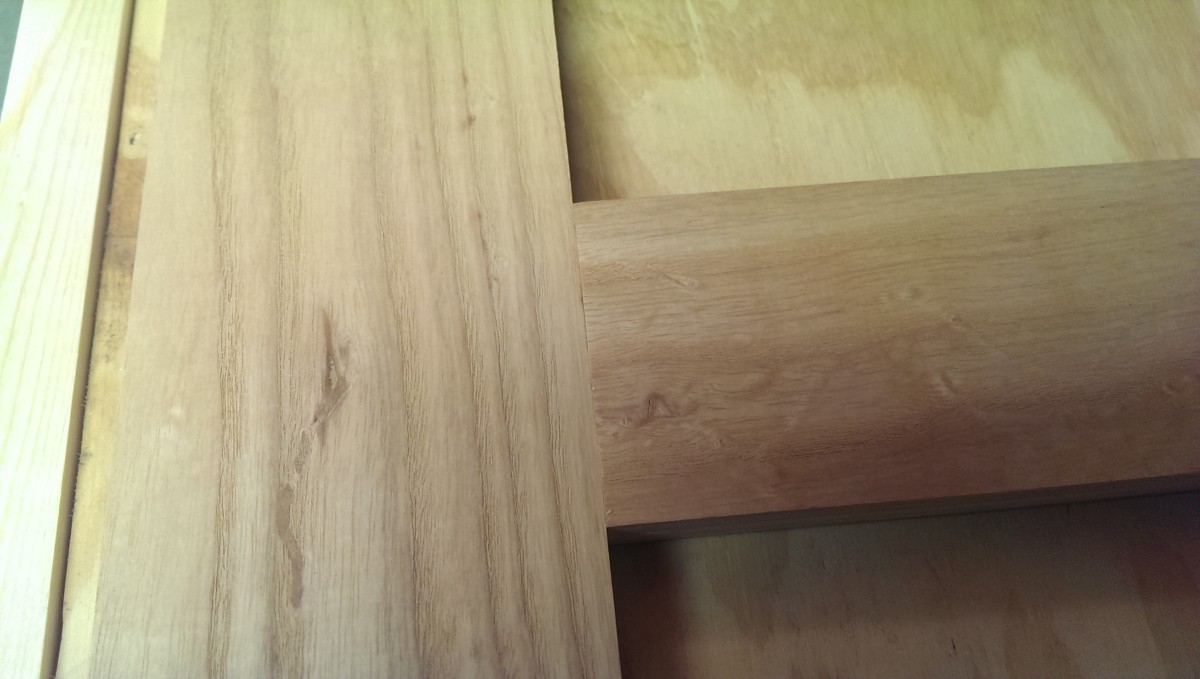
Vertical pieces for the side panels
Now that I have surfaced lumber, I’m ready to begin cutting the pieces for my side panels. The first step is to cut the 40″ pieces lengthwise to about 4″ wide. I think I ended up actually trimming down to 3.5″.
One thing to note is that for all of my rip cuts, I used a brand new Freud Diablo rip blade, with 24 teeth. I had been using a 40-tooth combination blade, but it is old and really needs a cleaning, and it was severely burning the wood. Ash apparently burns fairly easily if you aren’t careful.
Also, I’m not particularly recommending Freud Diablo blades; mine actually have a few thou of wobble that I’m not particularly happy about. WW2 blades they are not. The regular Freud blades are also much nicer. That said, they’re cheap, carbide tipped, and available off the shelf at the Home Depot 5 minutes from my house.

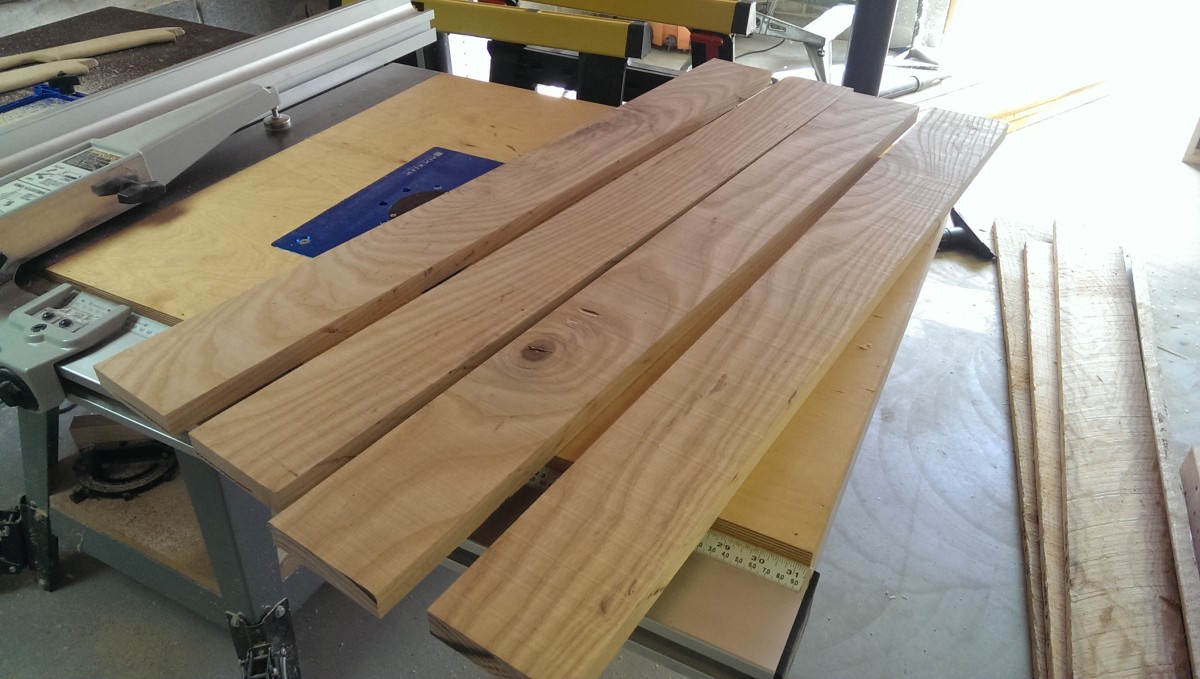
Side panel verticals and horizontals
I also cut shorter pieces to serve as horizontals for the crib. I needed 2 horizontal and 2 vertical pieces per side.
Starting to turn into a crib side
At this point, I had 8 pieces that will go together as shown. I did a final crosscut on these pieces to bring them to the right length with clean ends, using a 50 tooth Freud Diablo cross cut blade. With real hardwood, especially wood that is prone to burning, I’m finding it important to use the right blade for the cut.
On the vertical pieces, I cross cut a hair off of one side to make it square, and then crosscut the otherside to make each 37.5″ in length. As I said earlier, my wife is very petite, so I intentionally made a shorter crib.
The horizontal pieces were a little bit trickier, as they determine the width of the crib, which must match the mattress dimensions. The goal width is 28″.
So I needed: (horizontal length + 2 * verticalWidth) – 2*(thickness of front/back panels) = 28
I also knew I was going to use mortise and tenons to do most of the joints for these panels. This meant I had to add about 3/4″ or so on each end of each horizontal for a tenon. Anyway, you can solve the above for the horizontal length. In my case I needed them to be about 19.5″ long with 3/4″ tenons, meaning I cut them to about 21″.

Penciled in direction and side for reference
As I cut each piece that was going to oriented in a specific way, I was sure to write down a reminder on one face of each piece. In this case, the face I wrote on is the “left front outside”. This means this is a piece for the left side panel, that face faces towards the outside of the crib, and this is the front vertical piece (AKA right side of the side panel). The arrow points up in the direction it will be in when installed in the final crib.
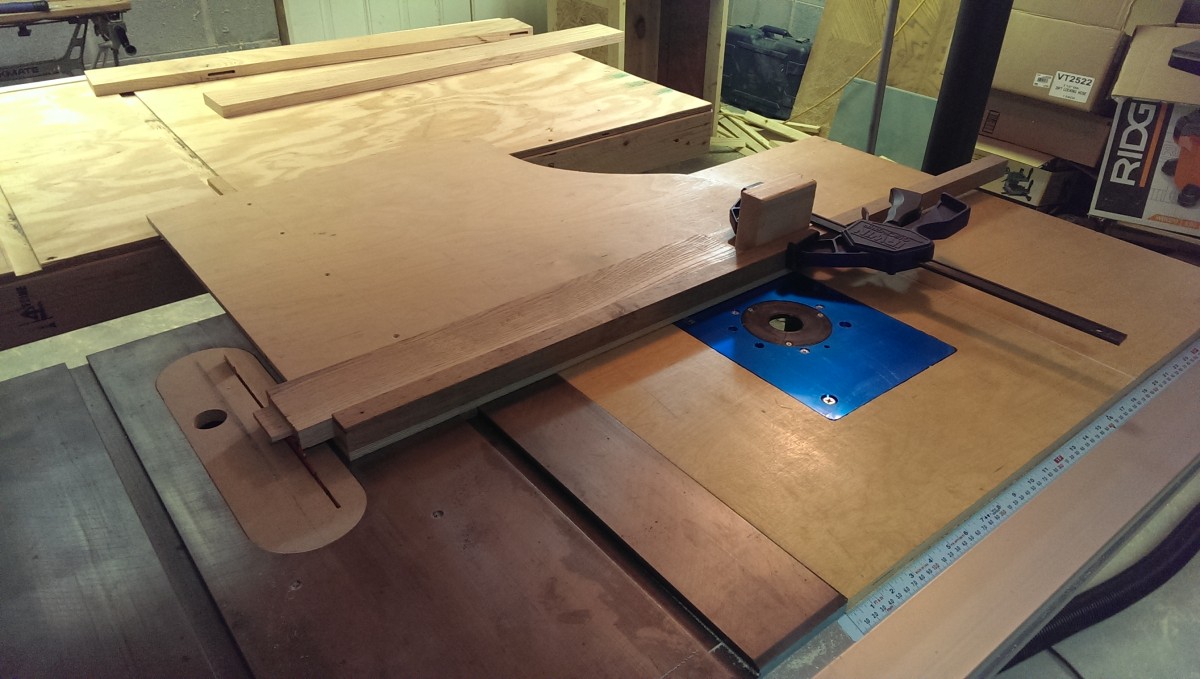
Mortising: Using router and straight edge guide
Setting up mortises
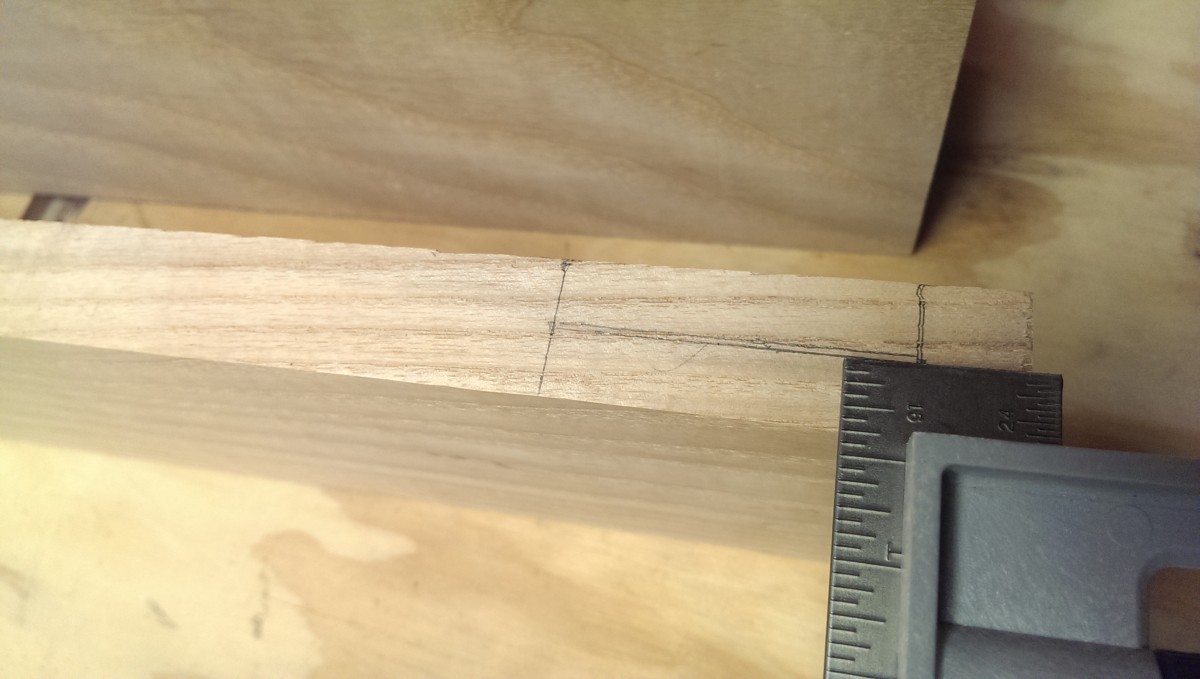
Marking the center
I am bound and determined to make Matthias Wandel’s pantorouter before I do another mortise-and-tenon heavy project, but I did this crib without a specialized tool. The next step was to mortise the verticals. Each vertical piece needed 2 mortises, one for each horizontal. For the upper two mortises, I marked where the horizontal piece ends, then marked the center line on the wood.
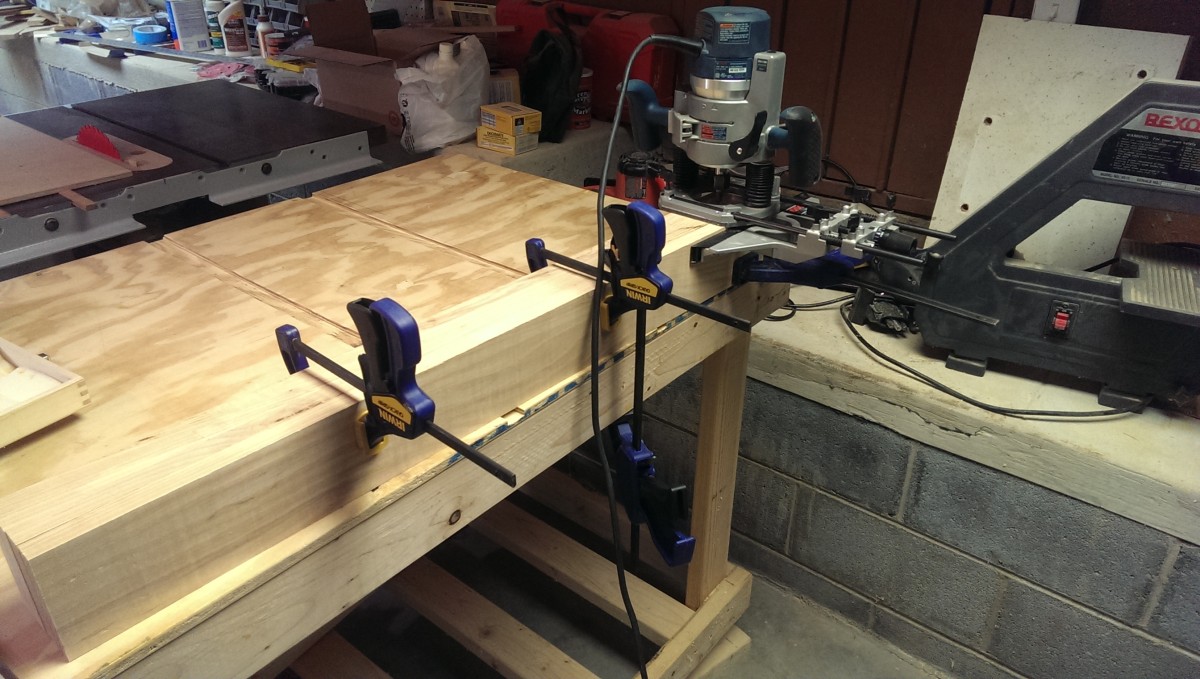
Ready to mortise with the pieces clamped together and to the bench, and the edge guide set
For these mortises, I just eyeballed using the edge guide. I clamped all of the pieces together, marked with where I wanted to make the mortises and the center lines.
View of the line
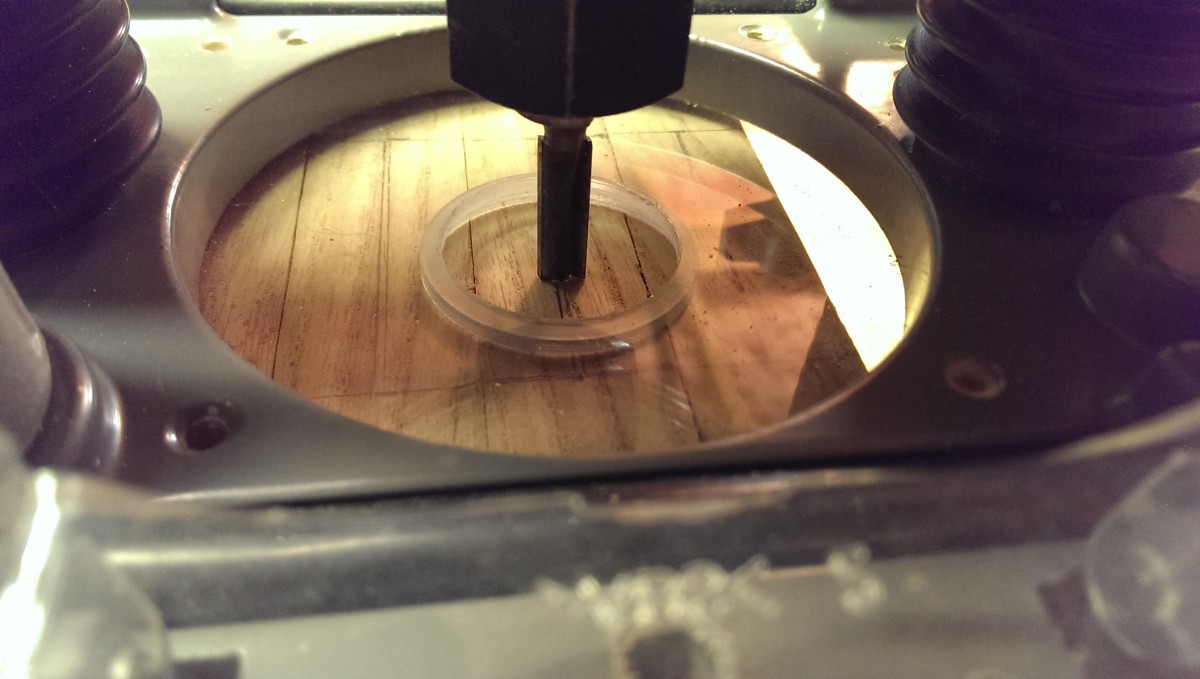
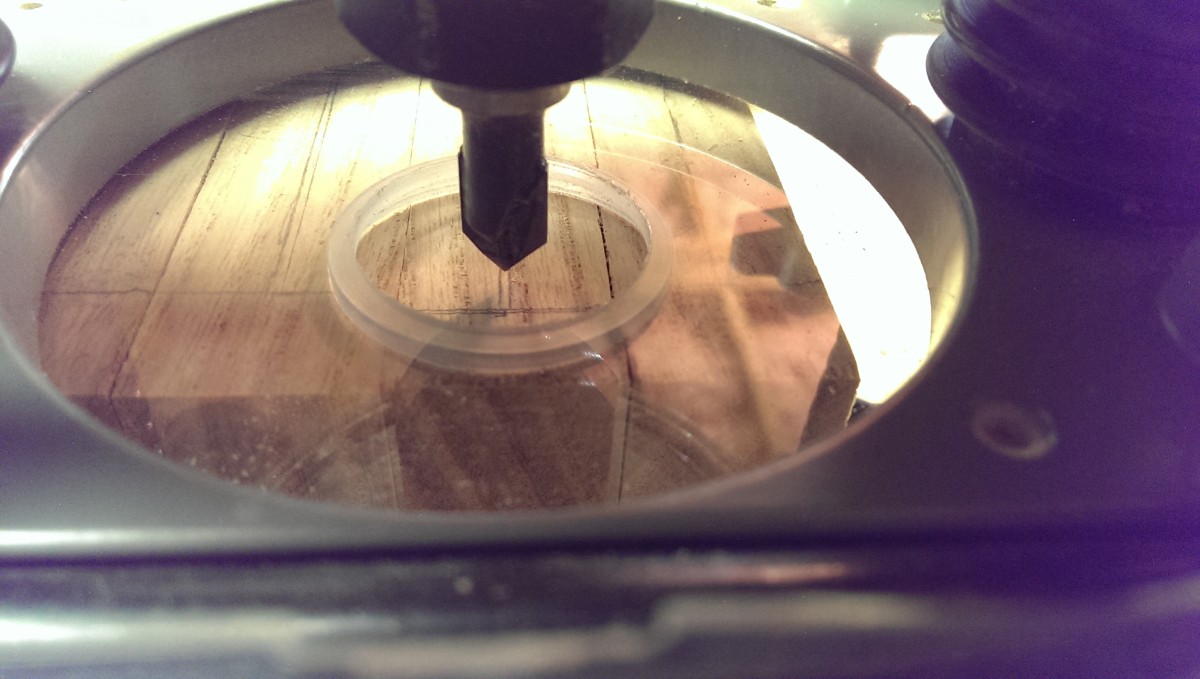
Setting 0 position
I set up the edge guide by using a v-bit; it has a more easily visible center than the 1/4″ straight bit I used to make the mortises.
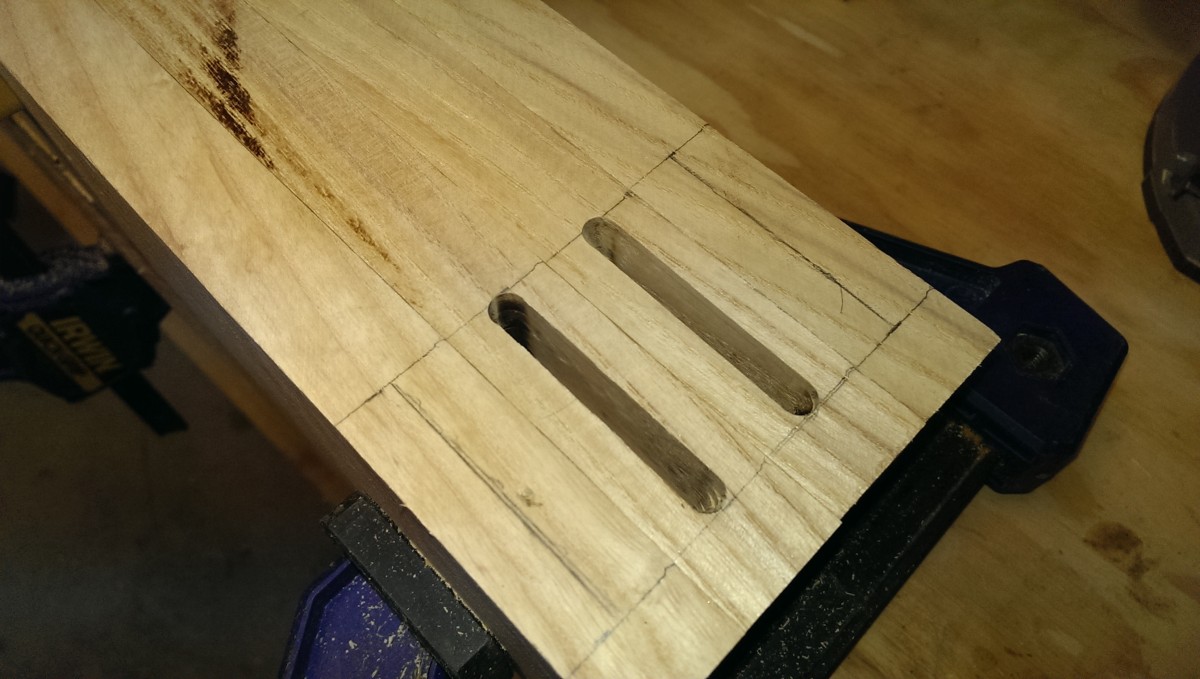
First two mortises cut
Then it was a matter of just cutting the mortises in incremental cuts, going deeper each time. I was able to flip the entire clamped block of wood around to reach 4 mortises (two on each end) with one edge guide setting. This isn’t the most accurate way to do this, but since I was going to match each mortise to a tenon individually anyway, it was OK.
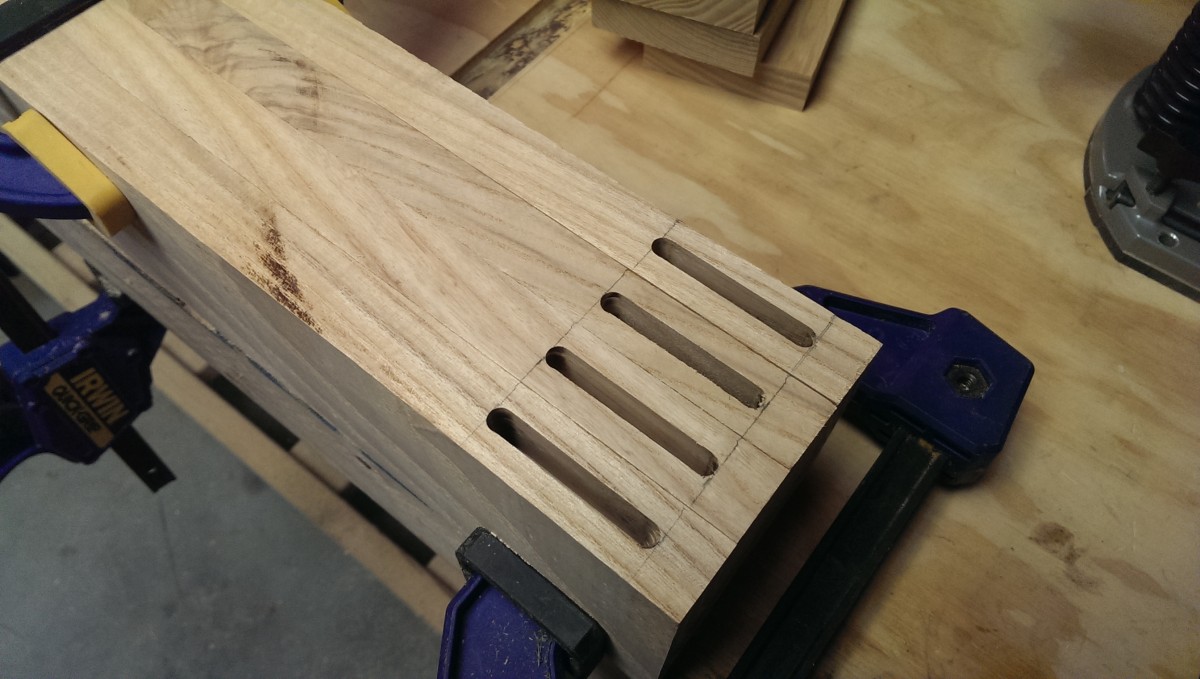
Mortises done
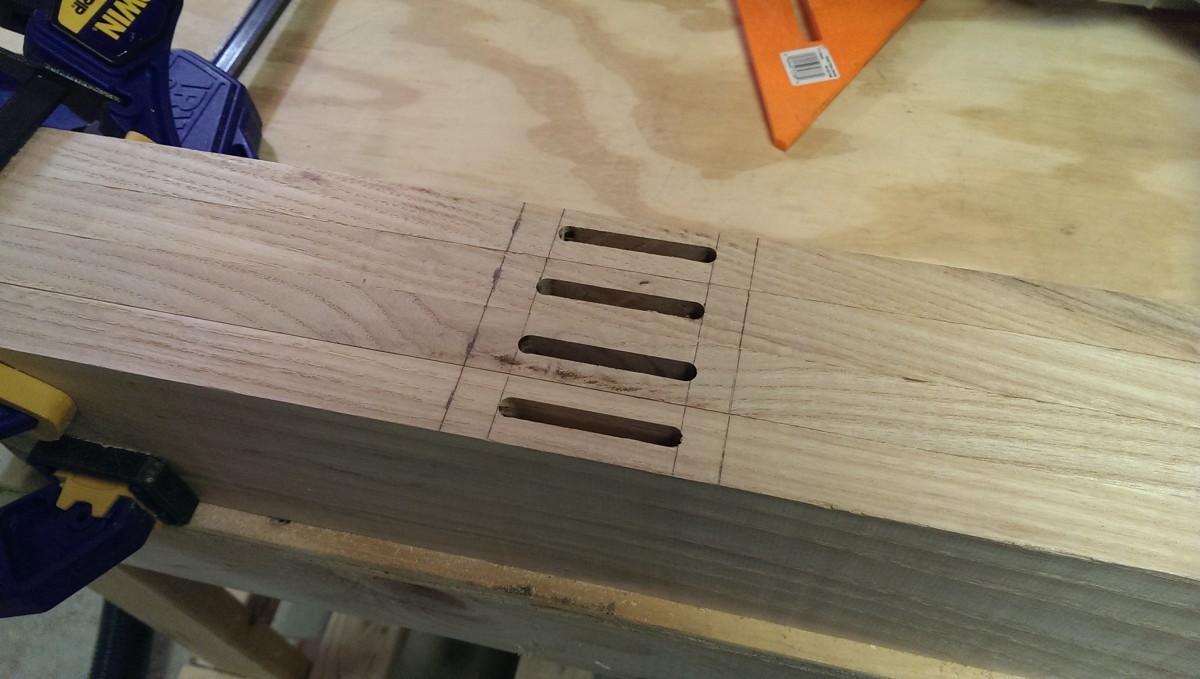
The other end
And with that, I had the mortises done. You can see some significant burning: I think I accidentally used the wrong blade cutting that piece, rather than my new rip blade. Fortunately, the burn mark came right out with a card scraper.
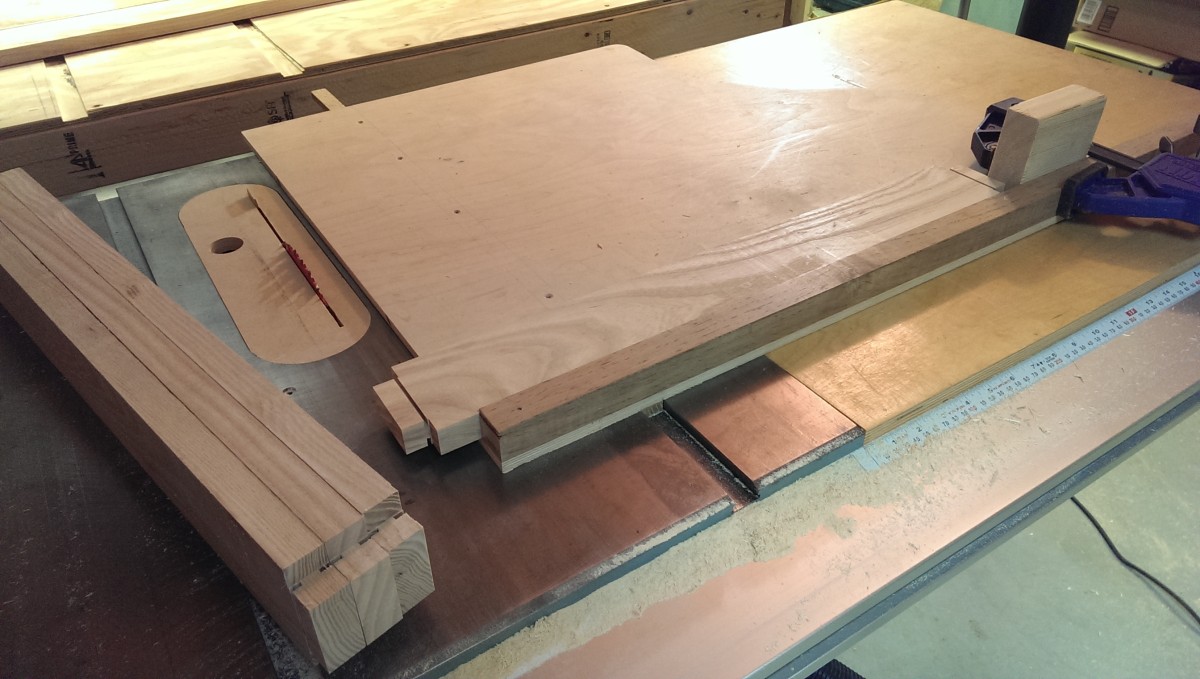
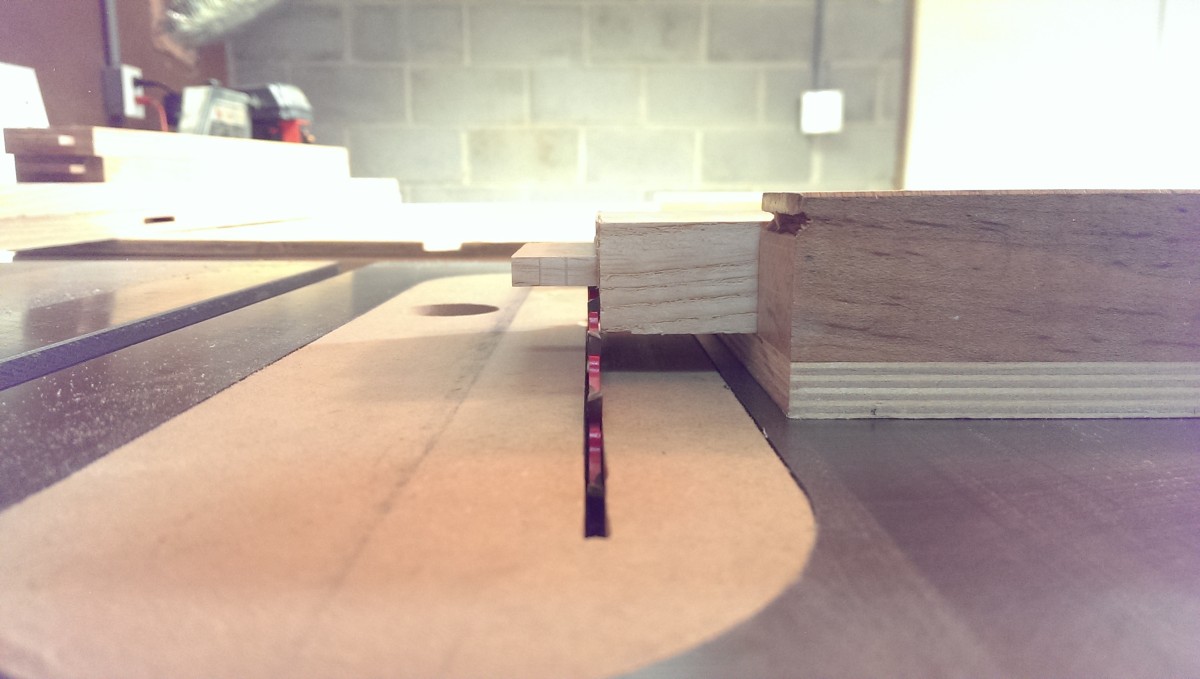
Cutting tenons: tenoning jig
i cut the shoulders with a dado blade
The next step is to make integral tenons on the horizontal members. In this case, I used my tenoning jig. Further along, I switched to using the dado stack, which I greatly prefer. I first cut the edge shoulders with a dado blade, using a stop block on my table saw sled to ensure a consistent depth.
Cutting slots for shoulders
Then, since my stop blocks were already set up, I went ahead and used a regular crosscut blade to make the face shoulders, ensuring a consistent height. I’ll note here that doing it this way, I do ensure that the shoulders will be consistent all the way around, but I’ll probably have some grooving where the cheek meets the shoulder if I cut too deep here, or some cleanup to do with a chisel if I cut too shallow.

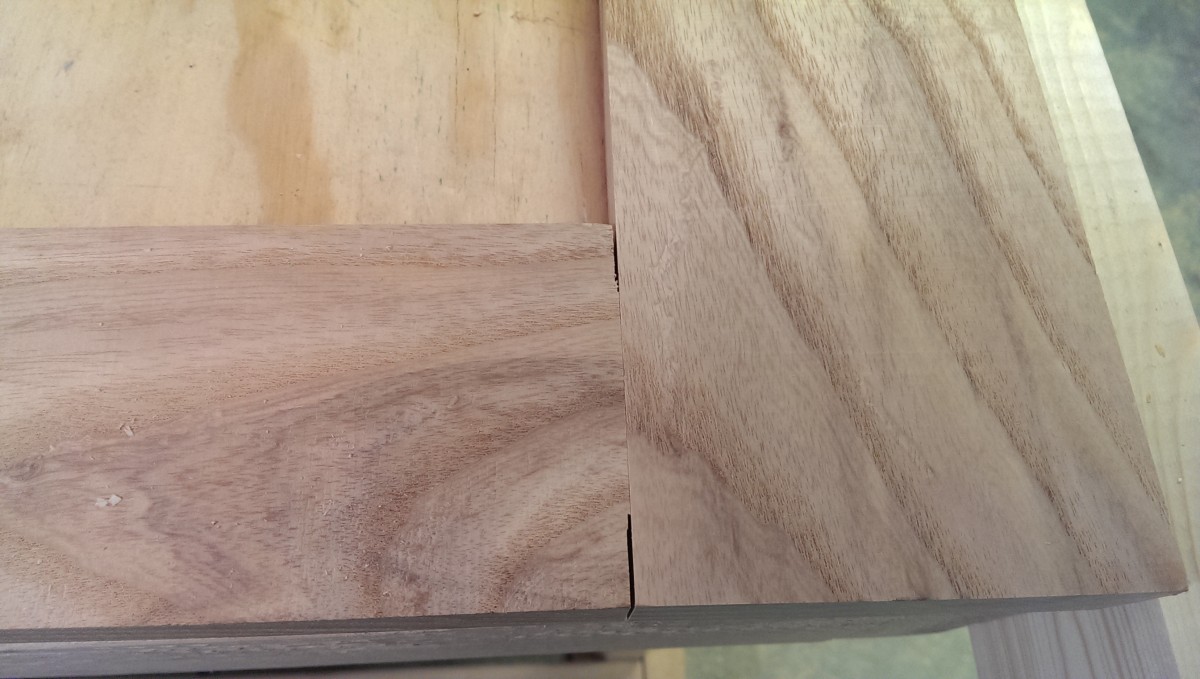
The tenon roughed out against the mortise
Now that I have the tenon roughed out, it was time to use the tenoning jig.
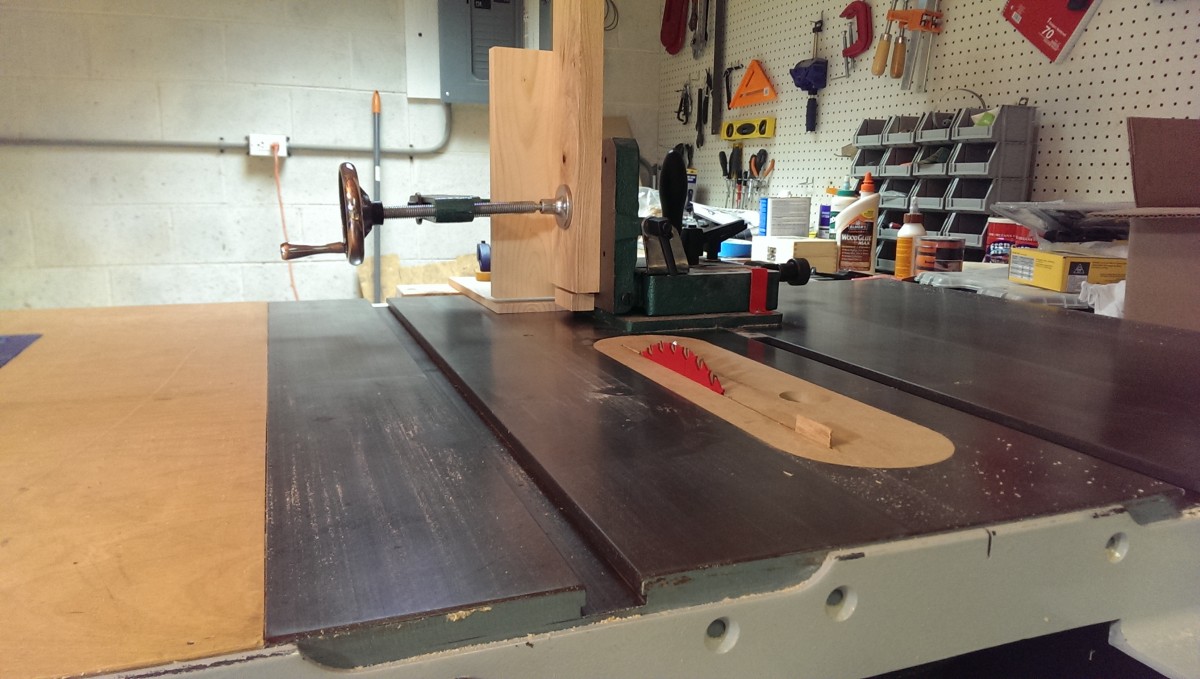
Cheap delta clone, nothing special
I went ahead and used my Grizzly tenoning jig, which is just a cheaper clone of the Delta unit. I ended up matching the tenons to the mortises individually. This is why my pencil markings indicating which piece went where was important: since my mortise and tenon technique was so inconsistent, I had to be sure I kept them all matched or they would be off. Again, next time I’ll be sure to build a pantorouter first!
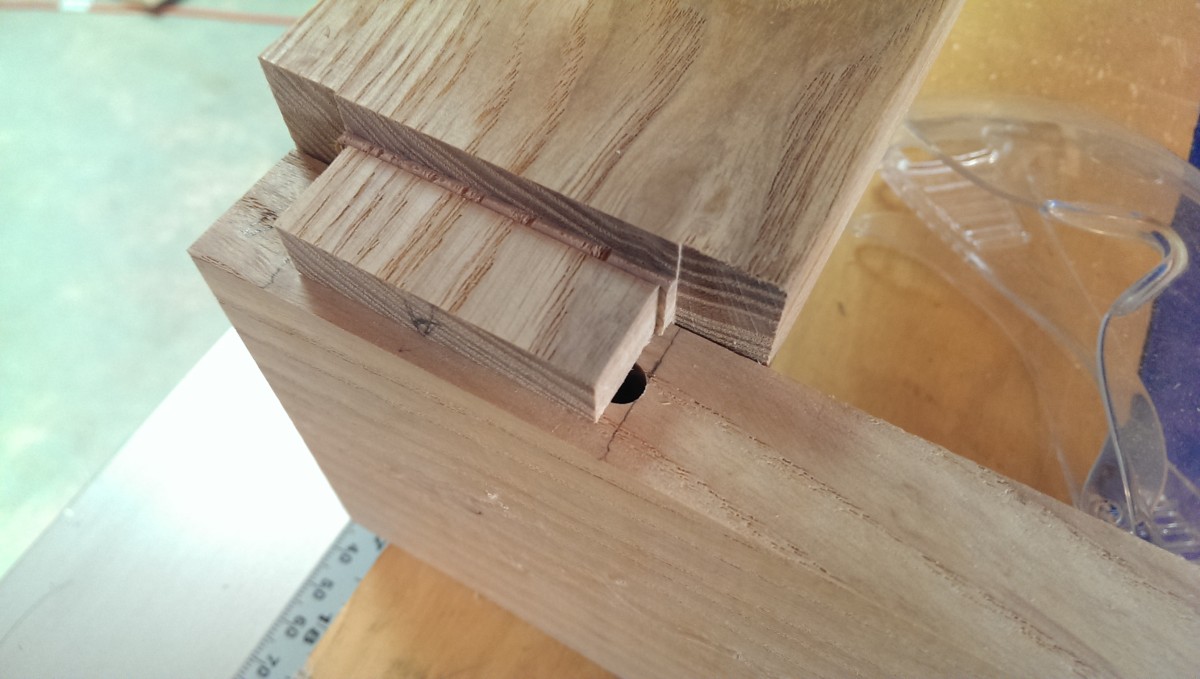
Nearly there – you can see the cheek has some extra material that will need to be cleaned up
The process for using a jig like this is iterative. You make a cut, check it, and repeat. One issue with slotted mortises like these is that they’re round, while the tenon will come out square. There are a variety of ways to handle this, including rounding over the tenons or squaring the mortises with a chisel. I went for neither approach and simply made slightly shorter square tenons. The strength of a mortise and tenon joint comes from all of the glue on the faces, so this is plenty strong.
In the future, this is reason number 485 that I’d like a pantorouter.

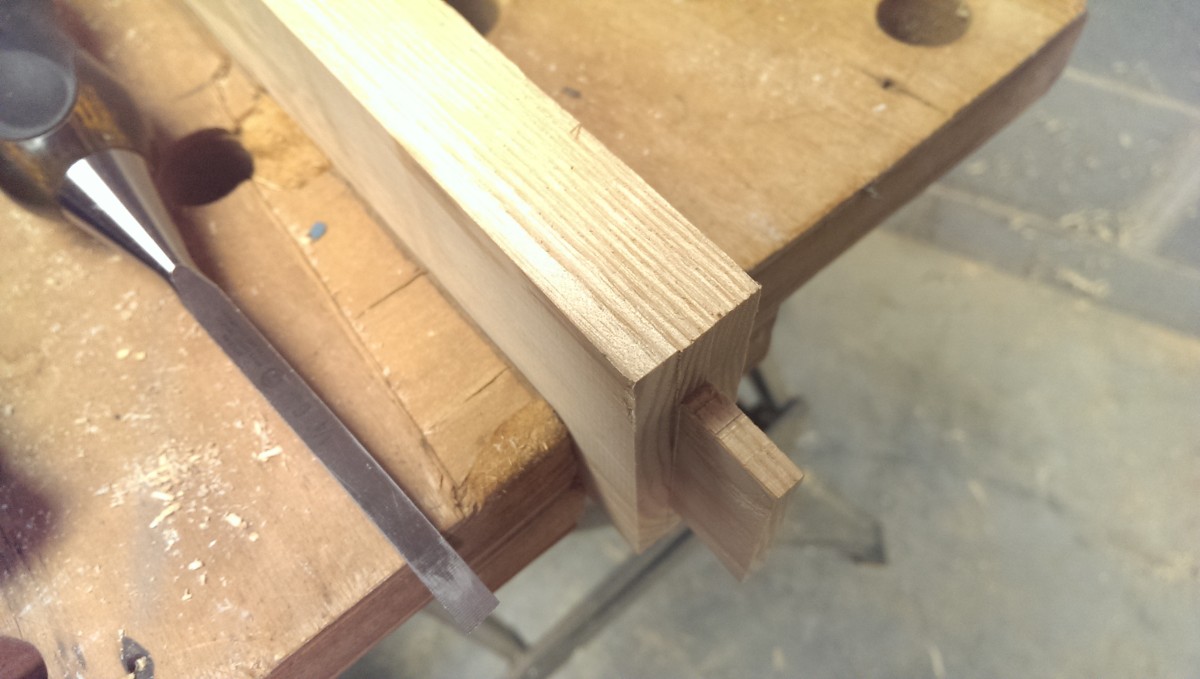
Cleaned up and finished
Finally, I end up with a finished tenon.
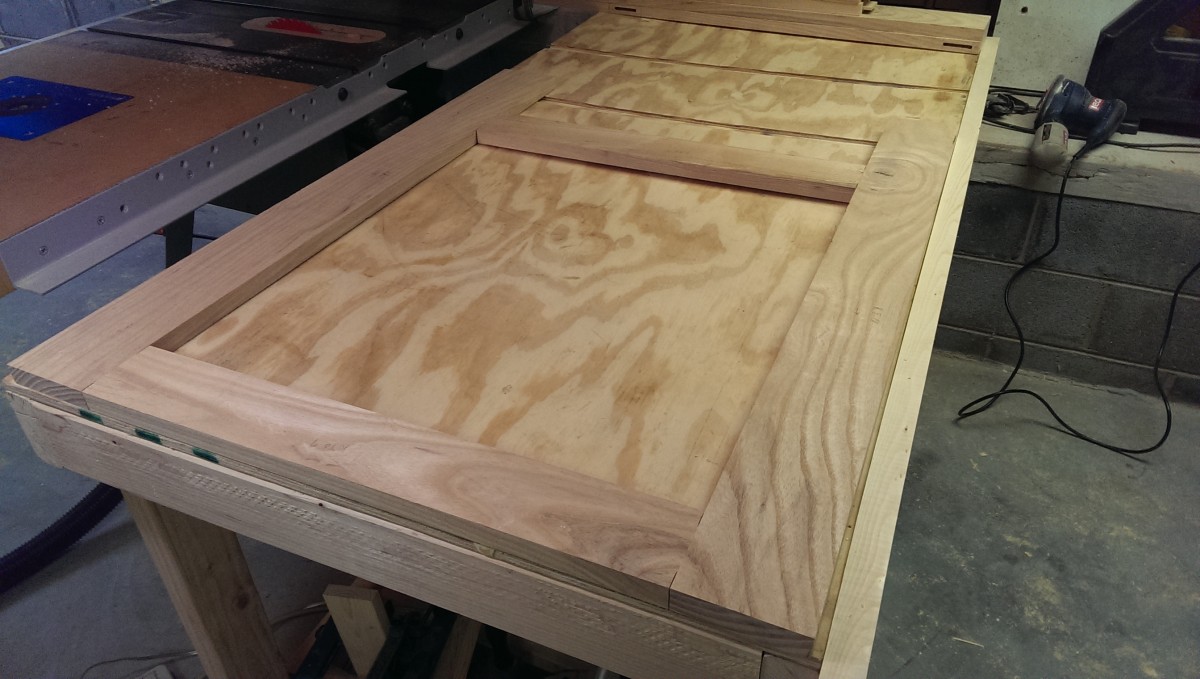
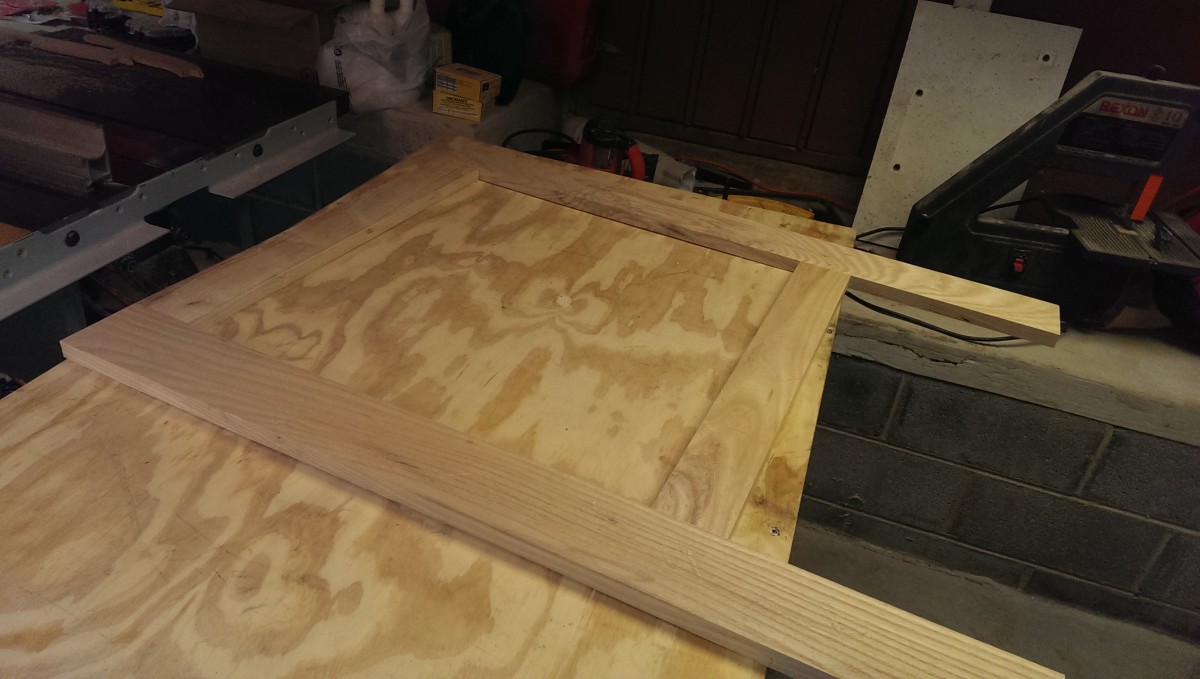
Side panels connected together
Slight gaps
Unfortunately, as you can see, as a result of fixing up my tenons, some inconsistency snuck in resulting in ugly gaps in the shoulders.
Re-smoothing shoulders
Stop block setup
The chisel was the quickest way to fix it
No more gaps
I ended up going back with the table saw and cleaning up the shoulders using a stop block. Then, a little bit of work with a chisel cleaned up the remaining inconsistency on the edge. I think this was a result of switching blades when I cut earlier – even the same 10″ blades aren’t exactly the same.
The end result came out OK. After trying the tenoning jig and the edge guide, I ended up switching over to using a dado stack for the tenons and a template for the mortises, which gave me much faster and more consistent results. I’ll detail that later on.
A large part of this could be my novice technique with the tenoning jig, but I’m just not that big of a fan after trying to use it. I do think it will be nice to have on hand for splined miters and other cuts on vertical pieces of wood, however, so I’m still glad I have it.
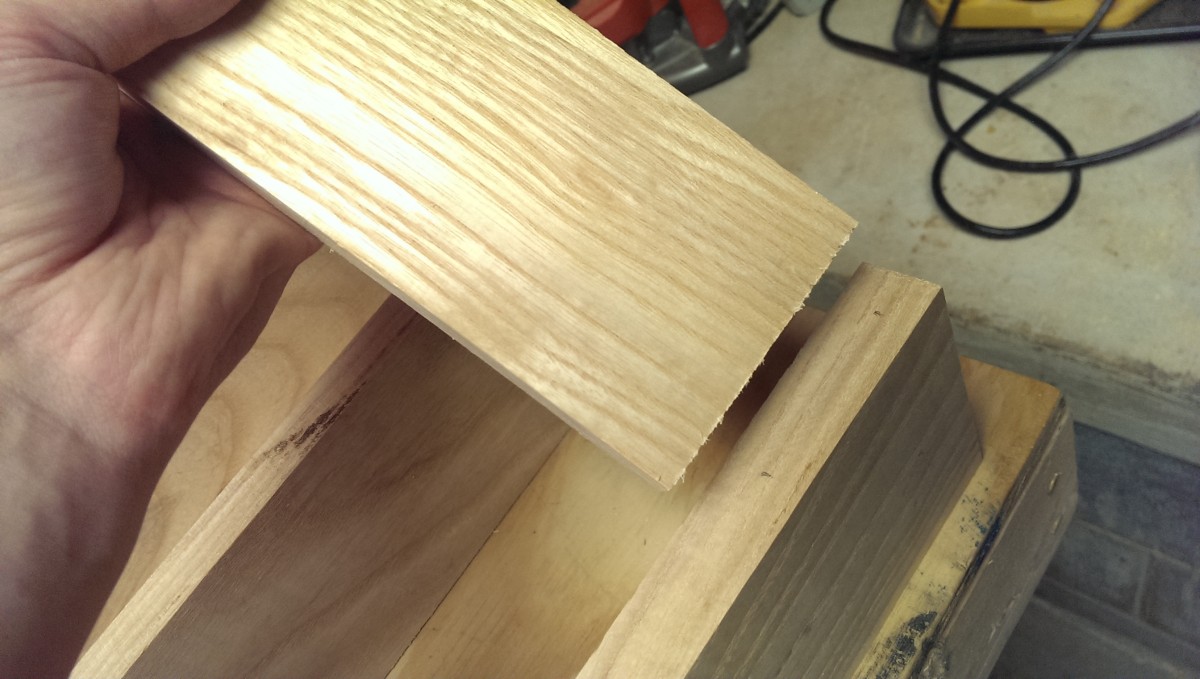
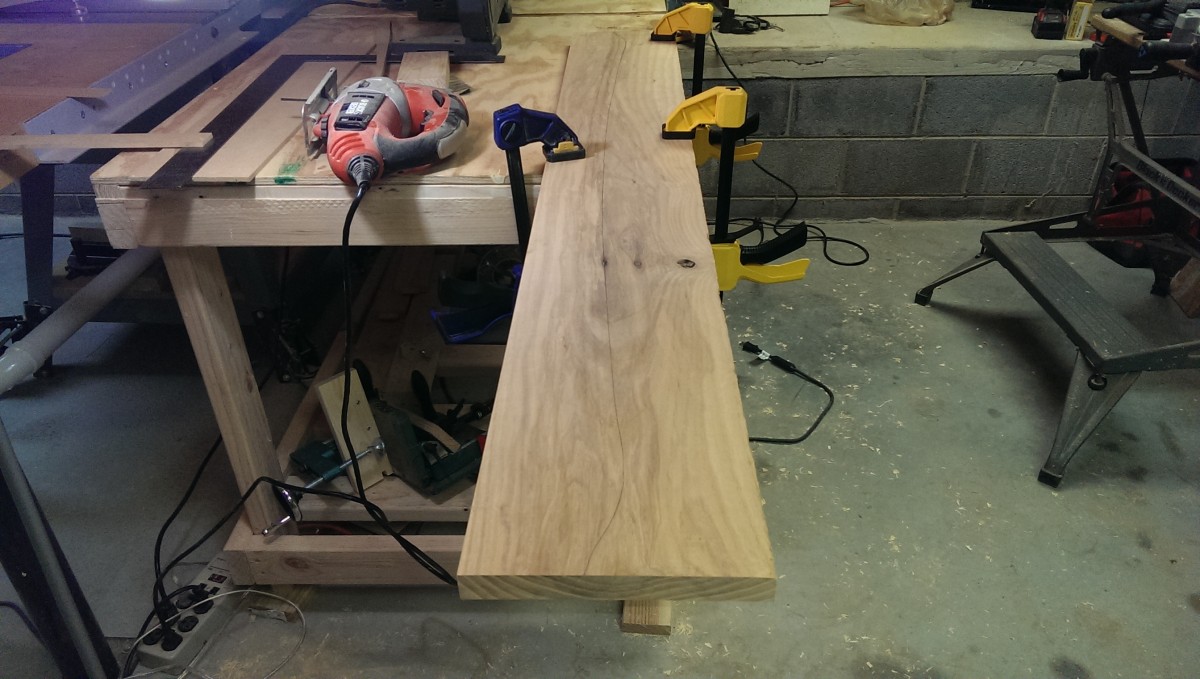
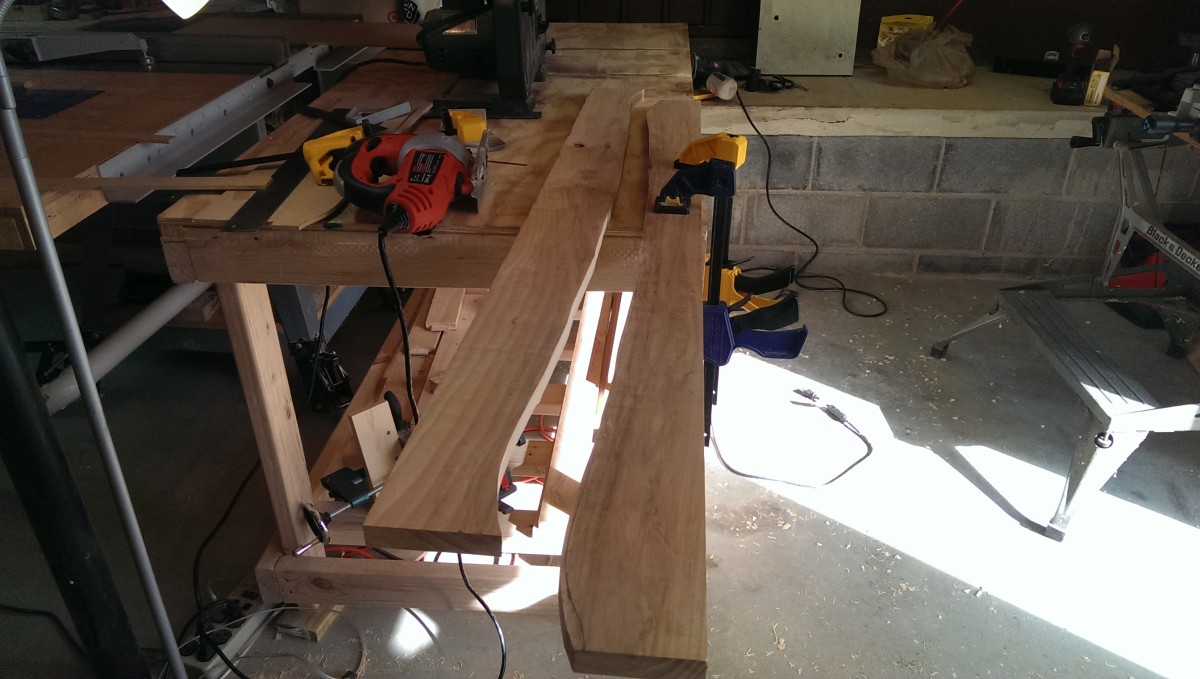
Roughing out the front and back panel top pieces
The bottom pieces are 3″ wide, like the side panel horizontal members
Thick pieces for top of crib
So the front and back panels were roughed out approximately the same way, except that they’re 52 3/8″ long instead of 29-30″. One big difference, however, was that I wanted to add some curves to the top of the panels. The crib is mostly mission style, but I liked the idea of having a bit of shape to it to make it more interesting. The bottom two pieces, pictured, are simply 3″ wide like the other horizontals on the crib. The top pieces, however, I left full-width so that I could cut the desired shapes out, and then reuse the scrap later for other purposes.
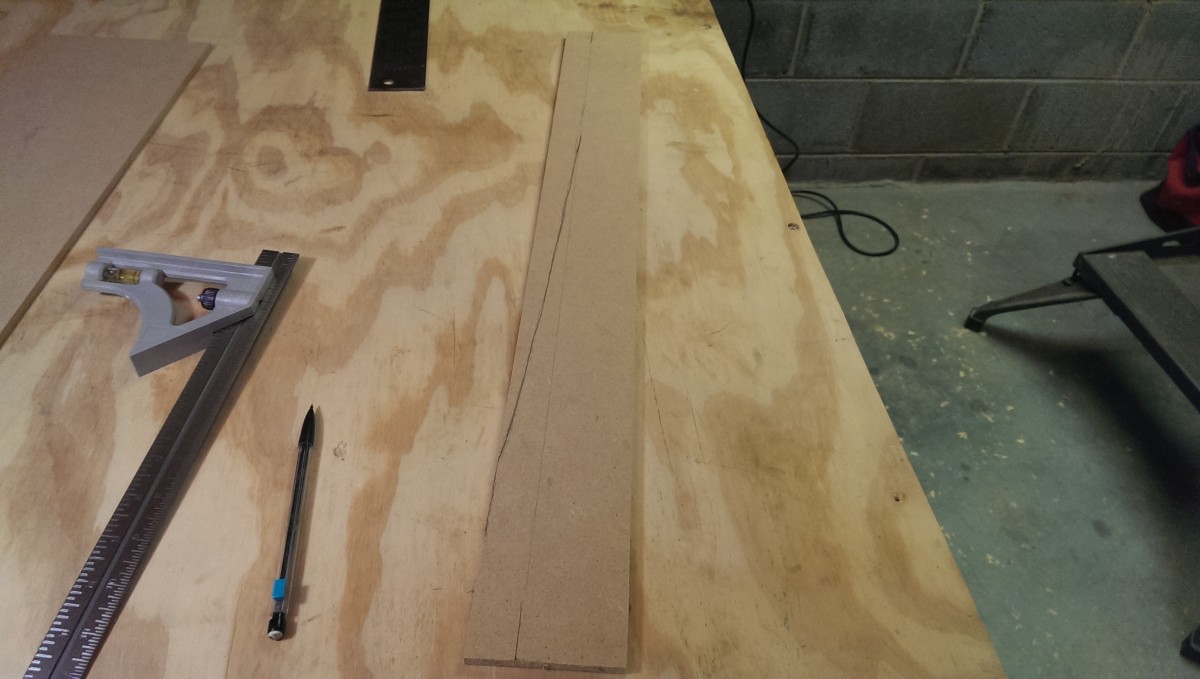
Drawing shape for front piece
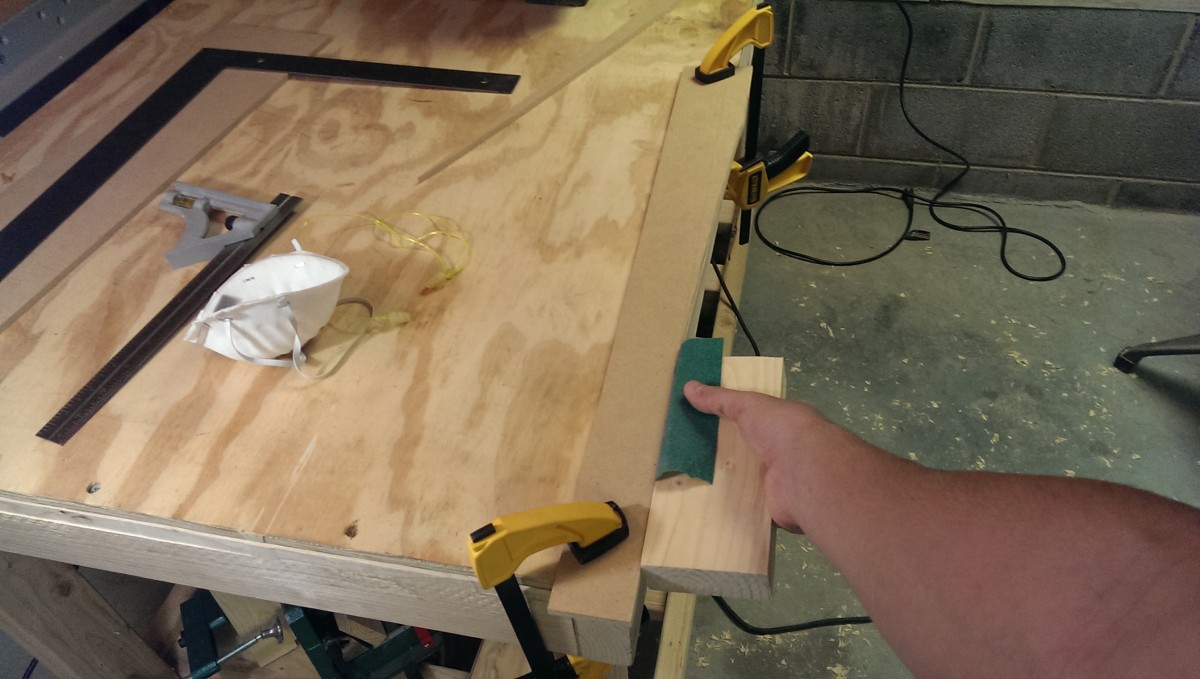
Smoothing out curve with sandpaper
For both pieces, I decided to make templates out of scrap 1/4″ MDF. The idea is to make a template for half of the curve, and flip it over for the other half, to make sure both sides stay symmetrical. I simply roughed out a shape I thought looked nice, and cut it on the band saw. Then, I used some sandpaper to smooth out the curves a little further.

Transferring the curve to the work
Once I had that done, I could transfer it to the work. To keep it lined up, I ended up making the template shorter than my desired height, with a 1″ strip of MDF aligned with the bottom of the wood. I actually did this by accident, because I cut the MDF template a little too thin and didn’t want to make a whole new template, but it worked really well. So much so that I did the second piece this way on purpose.
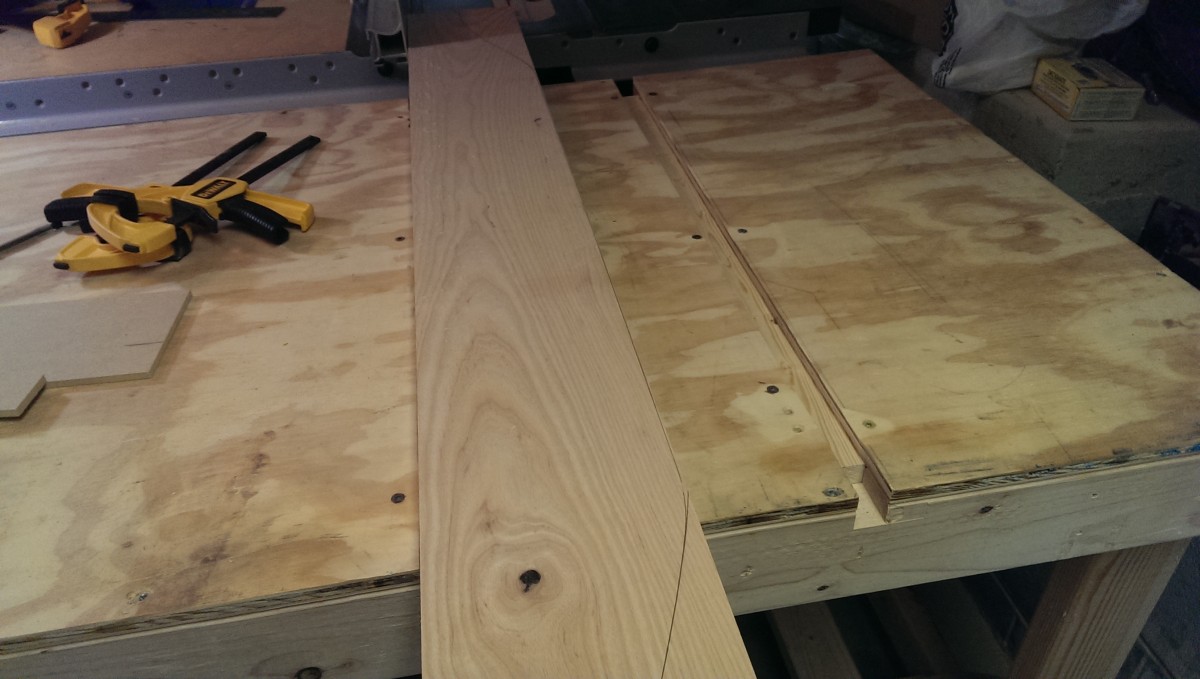
Rough cutting the board
Done with the cut
The next step is to rough cut the curve. I intentionally stayed outside of the line. If I had a good bandsaw, I could have probably gotten closer. My little 10″ bandsaw generated enough smoke to set off my fire alarm, so I had to use a jigsaw. This was much less controllable, so I had to stay further outside the line and waste more wood.
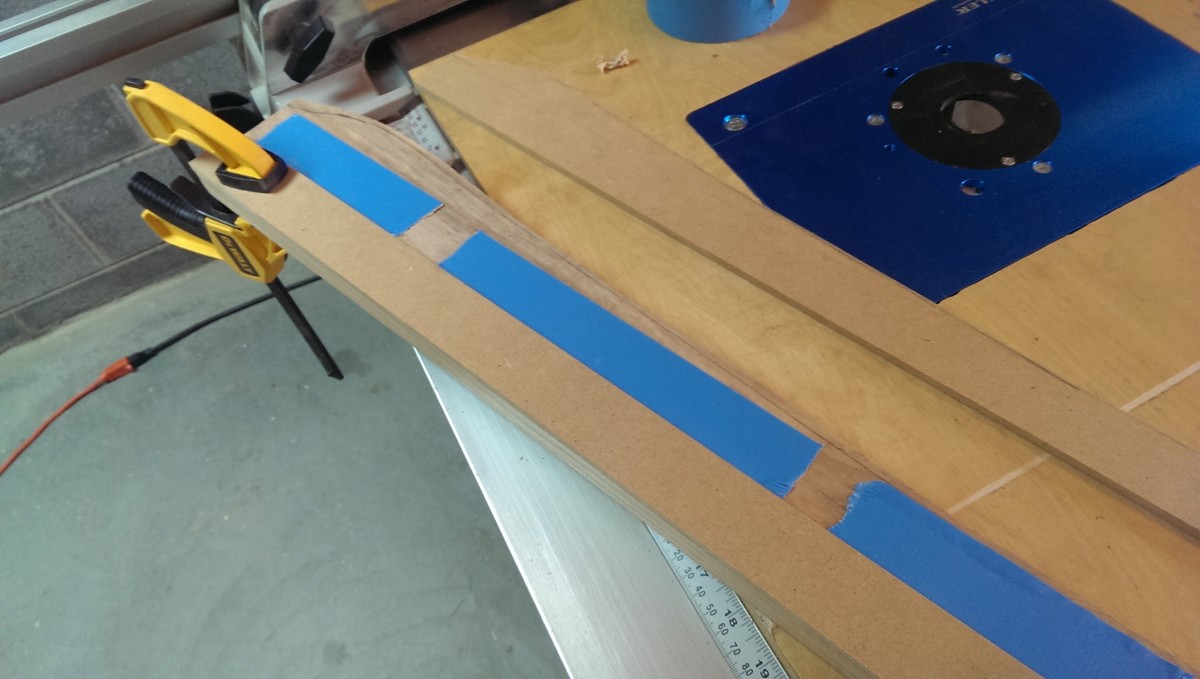
Carpet tape held the template temporarily
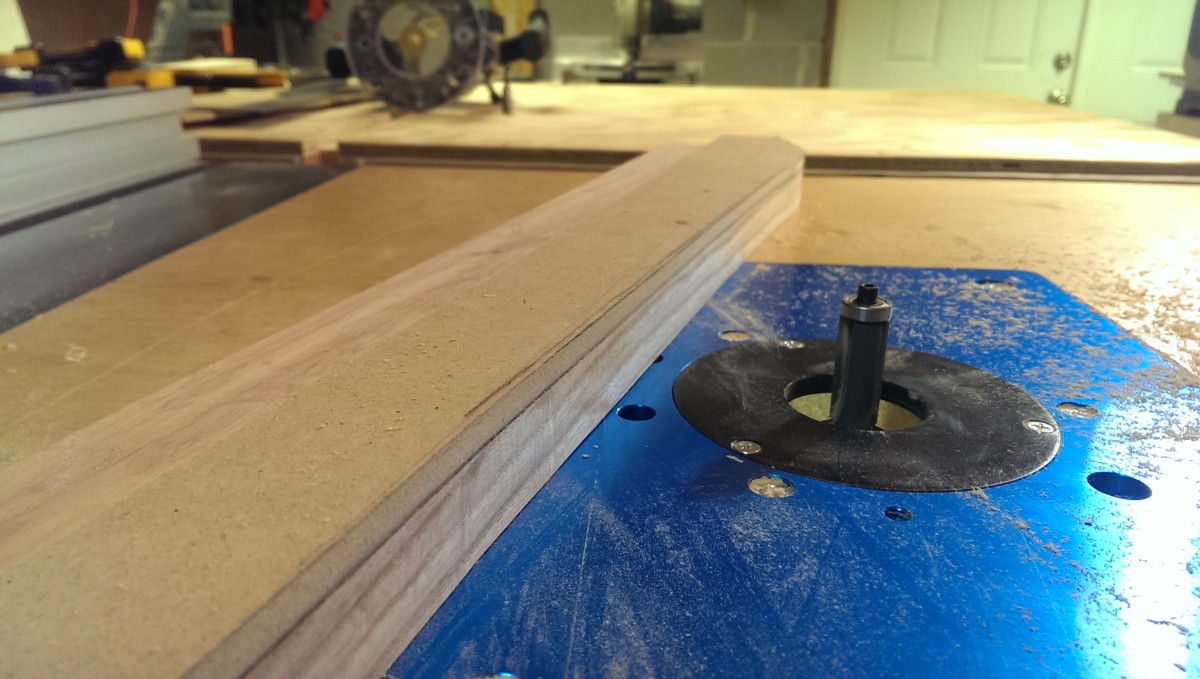
The router bit should be raised so the bearing rides against the template
I then used carpet tape AKA double-stick tape to tape the templates to the work piece. I left the lower piece clamped on to provide a consistent straight edge guide. I recommend making the curved template a little longer than halfway if you do this, so that the very middle gets consistently cut.

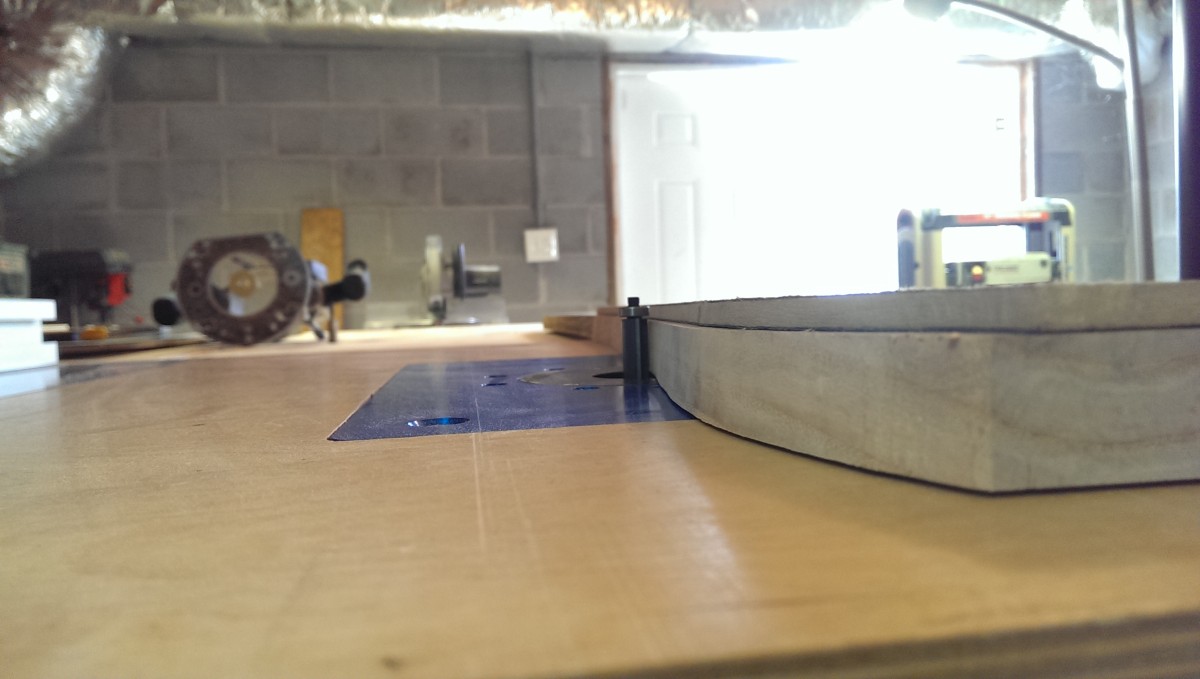
I took multiple passes, cutting more off each time
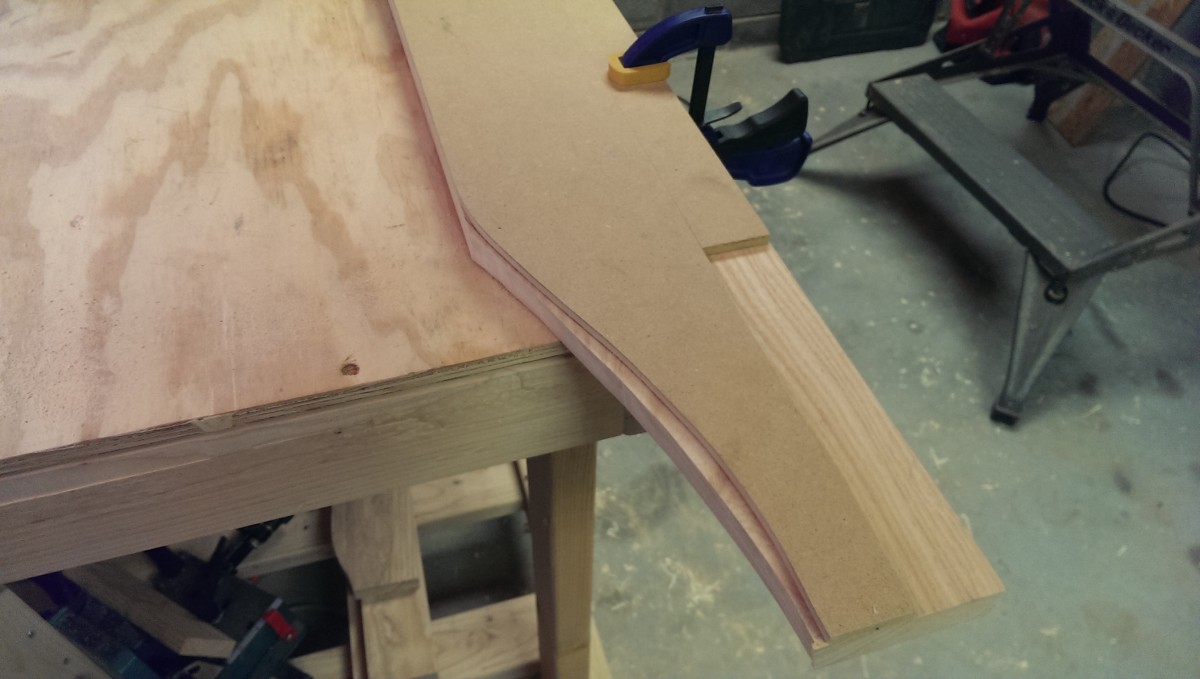
Final edge is pretty clean
The actual routing should be done in a couple of passes, depending on how the rough work piece was cut. Where I was able to use my bandsaw and get closer, I could generally do it in one pass, since I was about 1/8″ from my line. However, the jigsaw had a lot more waste to cut away, and so I ended up taking shallow passes so as not to burn the wood or overwhelm the router.

The front is finished for now
Following this technique, I got a really nice, symmetrical curve cut.
The upper piece for the back followed a similar procedure
The top was flat, while really only the sides were curved
I followed the same technique for the upper part of the back. In that case, I made a much taller piece, so I had a lot less to cut. I ended up using the table saw to cut the piece to the marked line, and then using the template for only the cutouts on the sides.
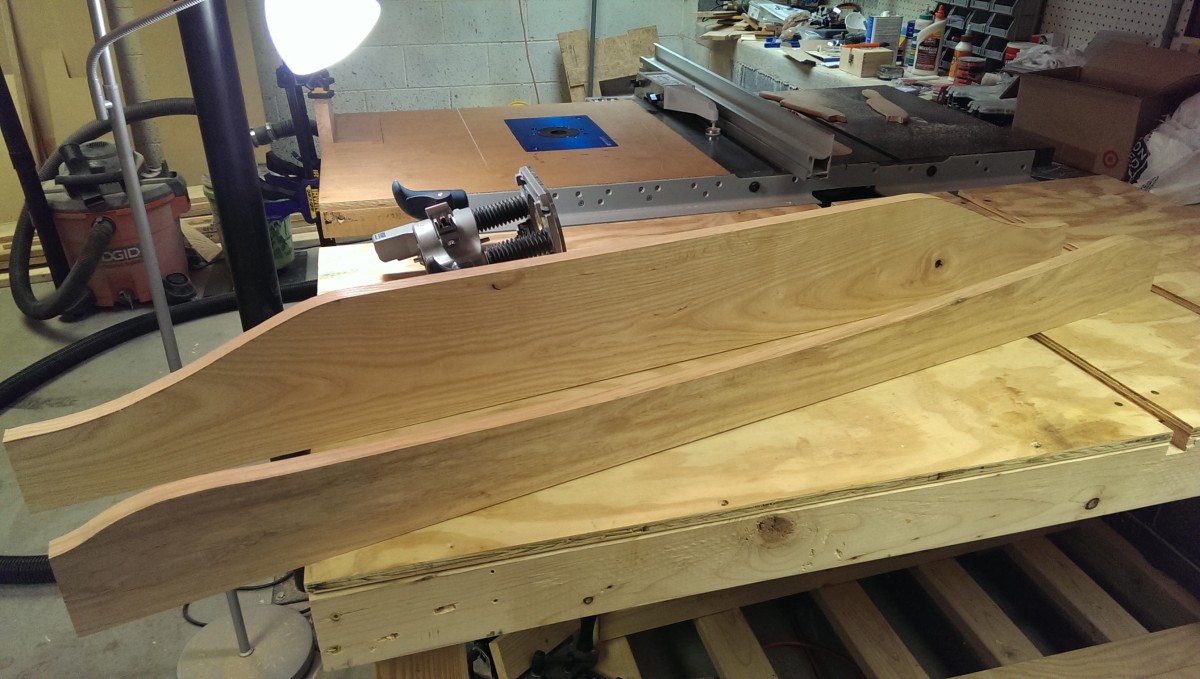
Curves all cut
These pieces still have some sanding and roundovers to go before they’re fully complete, but roughed out like this is enough to work with.
That’s it for part 1. Be sure to check out parts 2 and 3 to see how it ends up.
[…] the legs, which appear to be maple or some other hardwood, for use in a side table in the nursery to match the crib I had made. I had some scrap ash from the crib project to use for a table top and aprons, as well. Making a […]
[…] one adds the curve. There was enough wood, by supplementing some ash from the lumber used for my daughter’s crib, to make a third board for my […]
[…] thin, so I ended up laminating two pieces together. I chose to use some scrap ash that I had from building my daughter’s crib for the body of the reindeer, and some scrap purpleheart from making cutting boards for the […]
[…] Click here for part 1 Click here for part 2 […]