Heirloom DIY Crib: Part 3
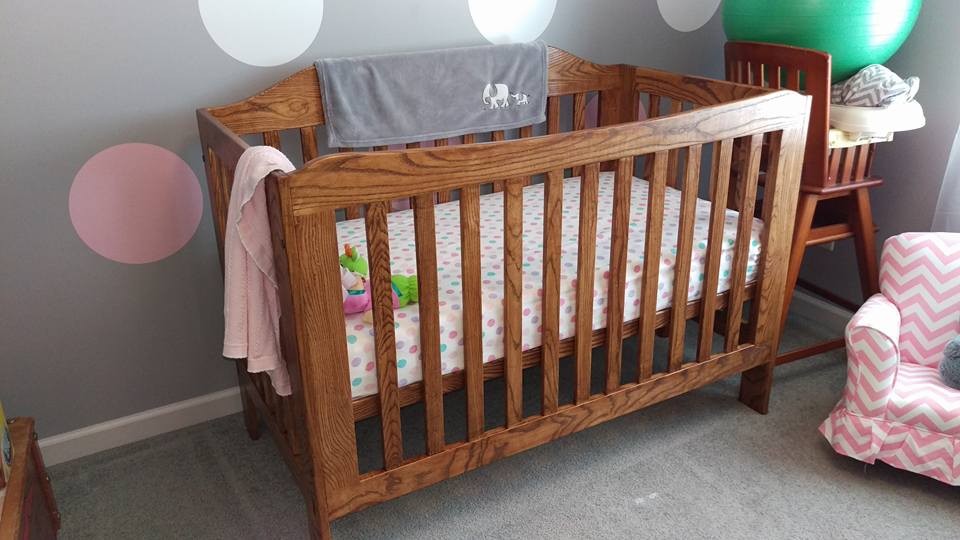
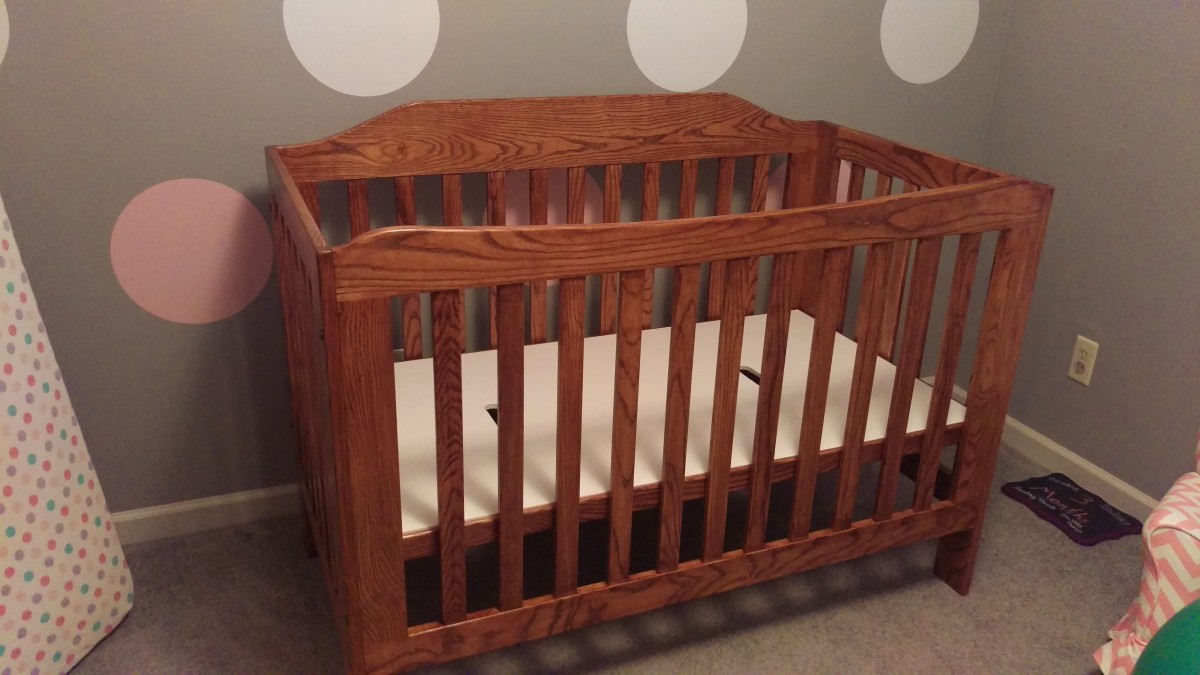
Spoiler alert: here’s what the finished crib looks like
This is a continuation of my series of articles about building a crib for my daughter. In the first part, I bought and milled some rough lumber (ash), and rough cut the structural members for the side panels and front and back panels. In the second part, I finished all four panels, including routing and installing dowels and threaded rods. Now, I’ll finish the mattress support, sand, and stain.
Click here for part 1
Click here for part 2
Creating a mattress support frame
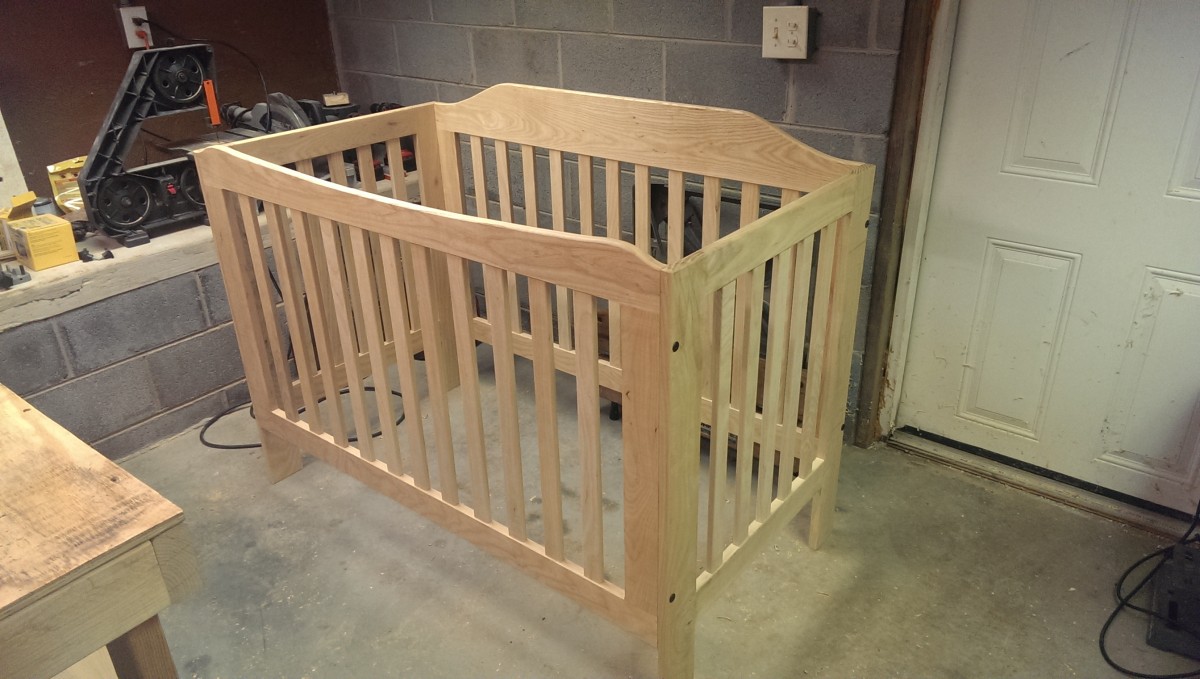
End of part 2 status
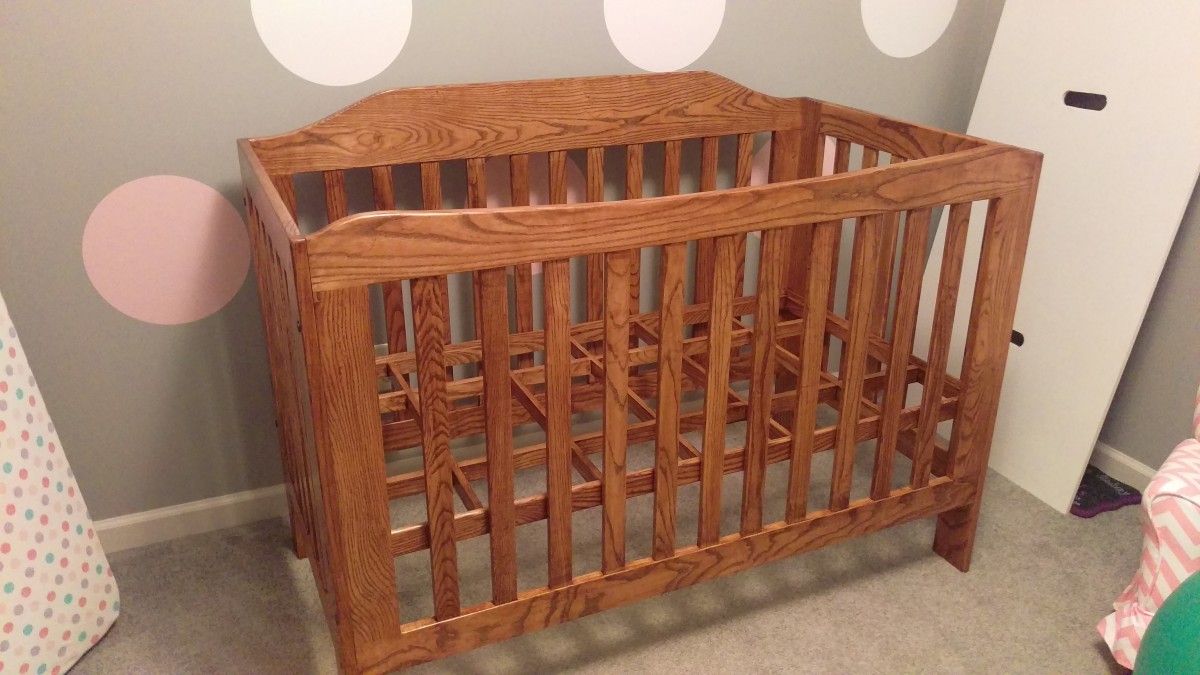
At the end of part 2, the crib is very nearly complete, aside from a gaping hole in the bottom where the mattress support needs to be. This next step will remedy that.

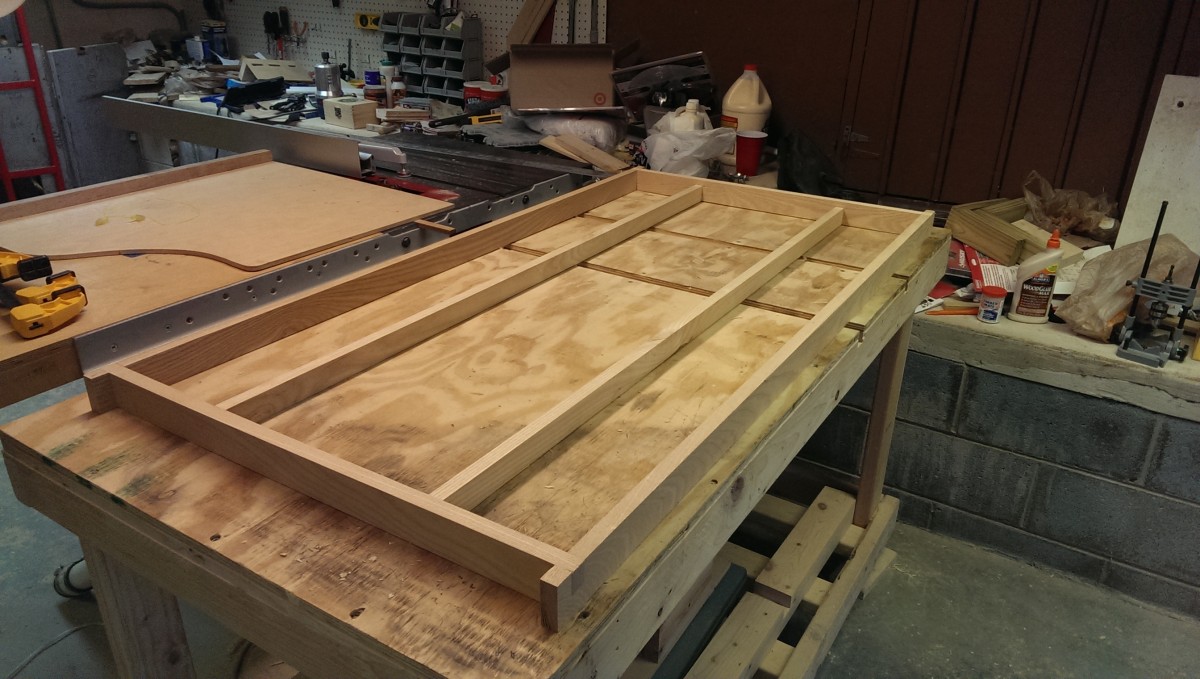
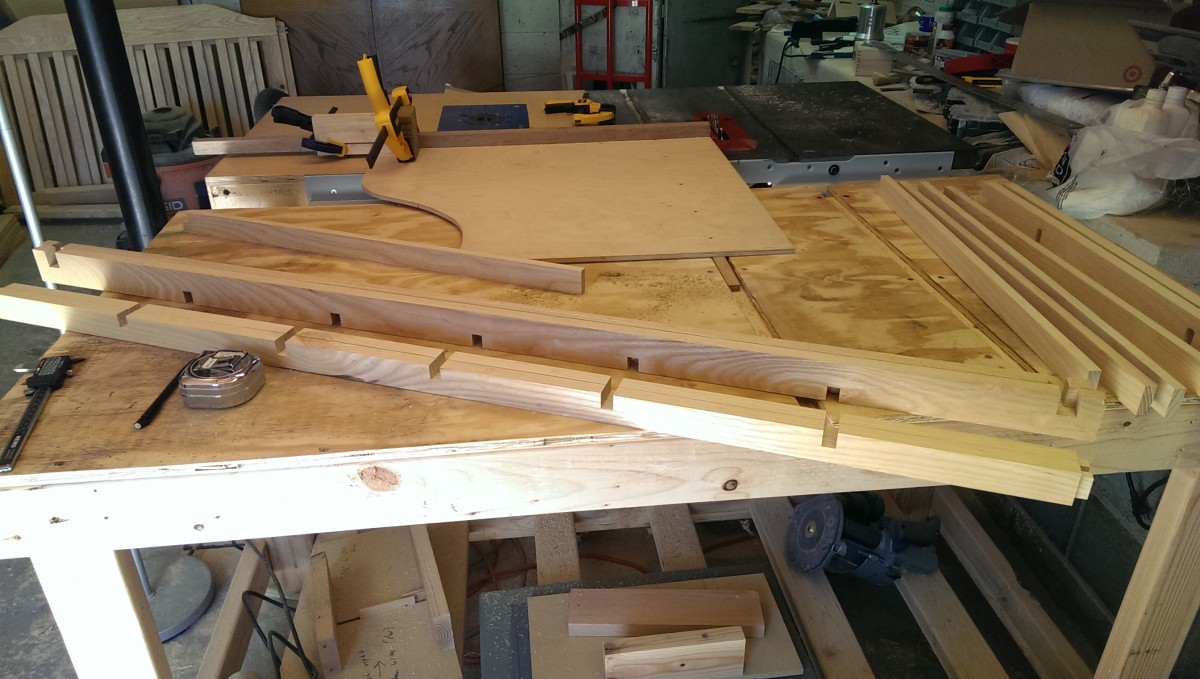
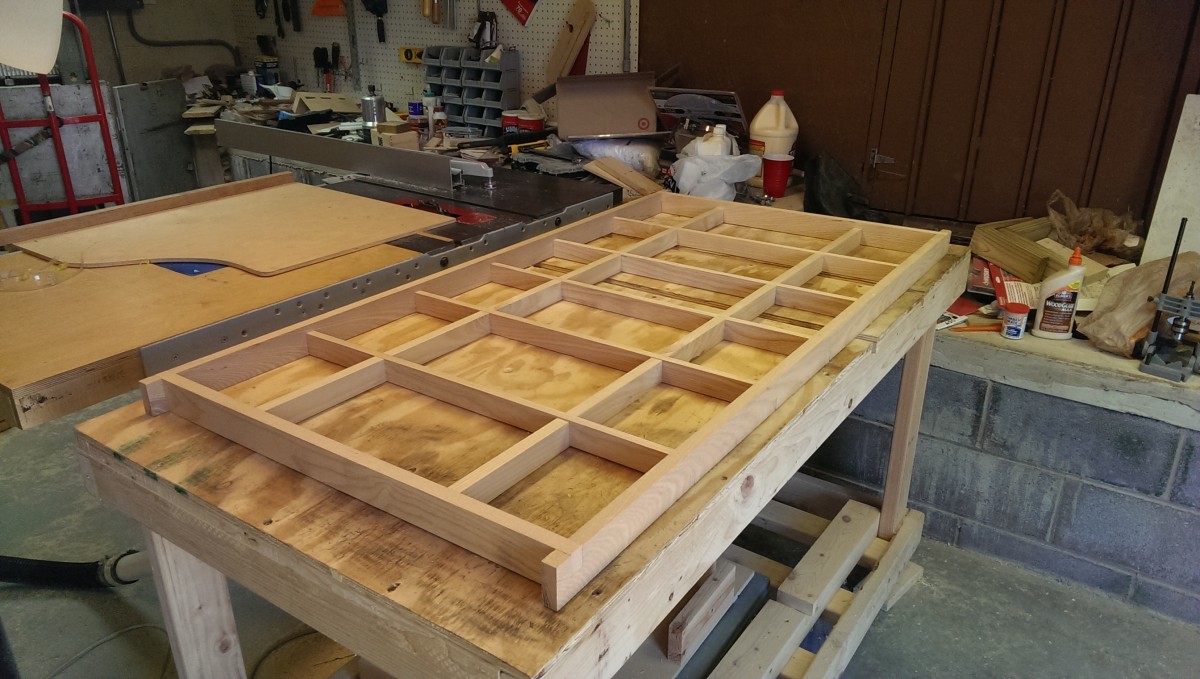
Roughly what it will look like
I cut up some lumber roughly in the shape I was going for, with the dimensions all a little bit extra long. This is the rough idea. Essentially, it will be a lattice of members on their sides as pictured, with primarily half lap joints connecting them all together. The inside pieces are 1/2″ shorter than the outer frame. The outer frame will have a 1/2″ rabbet cut in it. In this way, a 1/2″ piece of plywood or MDF can sit inside the support, providing a solid surface braced by these supports.
I also ended up deciding to have the long sides of the mattress support act as through tenons through the side panels. You’ll see what I mean in another couple of steps. The idea is to have them stick through the side panels, so that the side panel itself is supporting the mattress support’s weight, while still being easy to remove. By making two sets of mortises, I can easily make the mattress support height adjustable.
Gratuitous caliper and dado stack use later
I used my calipers to set my dado stack exactly as wide as necessary for the half lap joint, using shims as needed. The end result was half lap joints such that the mattress support will fit just inside of the crib, with the ends of the long sides being exactly as long as the crib for use as through-tenons later.
The outer frame correctly oriented
Here you can see the outer frame as it will be oriented when complete. The short sides rest on the long sides, which will rest in the side panels. Thus, I’m not relying on just glue strength to hold it together, although it would probably be perfectly fine with the half lap joint flipped.
Mattress support inner long pieces

Mortise locations
In the spirit of overkill, I also decided to make somewhat shallow mortises in the long inner pieces rather than do half lap joints. This seemed like a good idea at the time, so that the long pieces also rested on top of the ends, although I’m sure the glue in a good half lap joint would hold at least as well, if not better, in retrospect. On the plus side, it does help make the glue-up slightly less awkward.
I’ll state here that mortises made this shallow compromise strength. Also, mortises oriented in this direction also compromise strength, because there is less crossgrain-crossgrain glue surface. On the plus side, I only do this in 4 places, and the rest is all very strong half-lap joints.
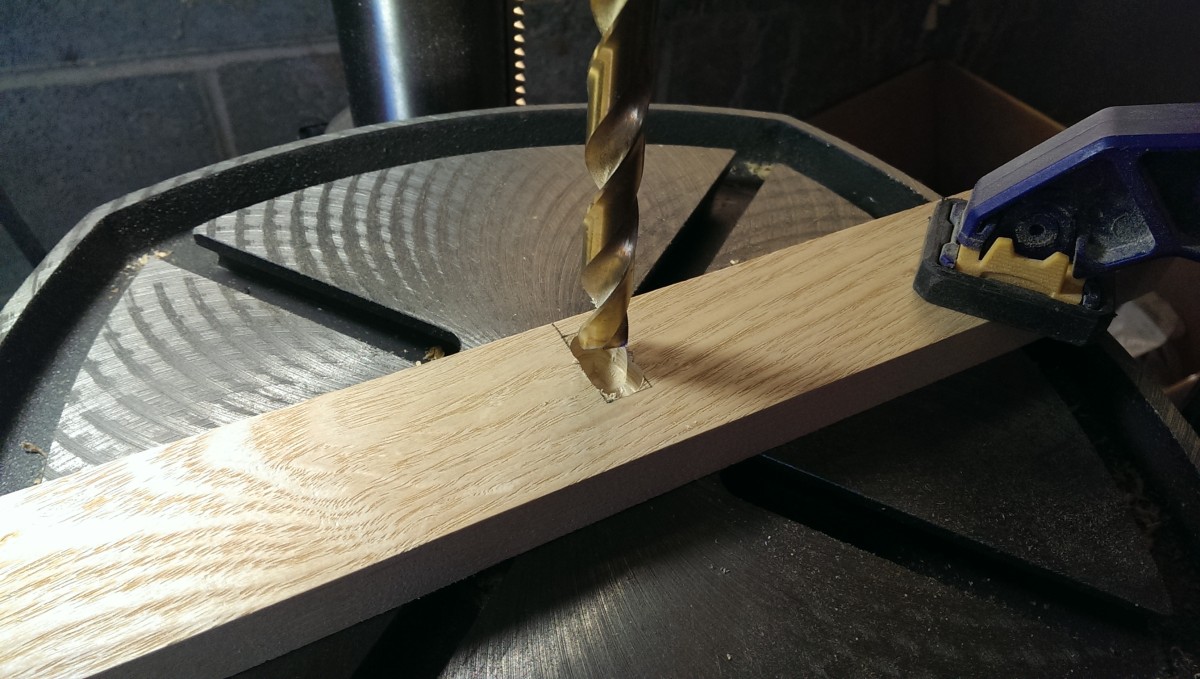
Roughing out the mortises
I roughed out the mortises on the drill press. I kind of did this, I’ll admit, in part because I wanted to try this technique. I discovered I don’t like it very much at all.
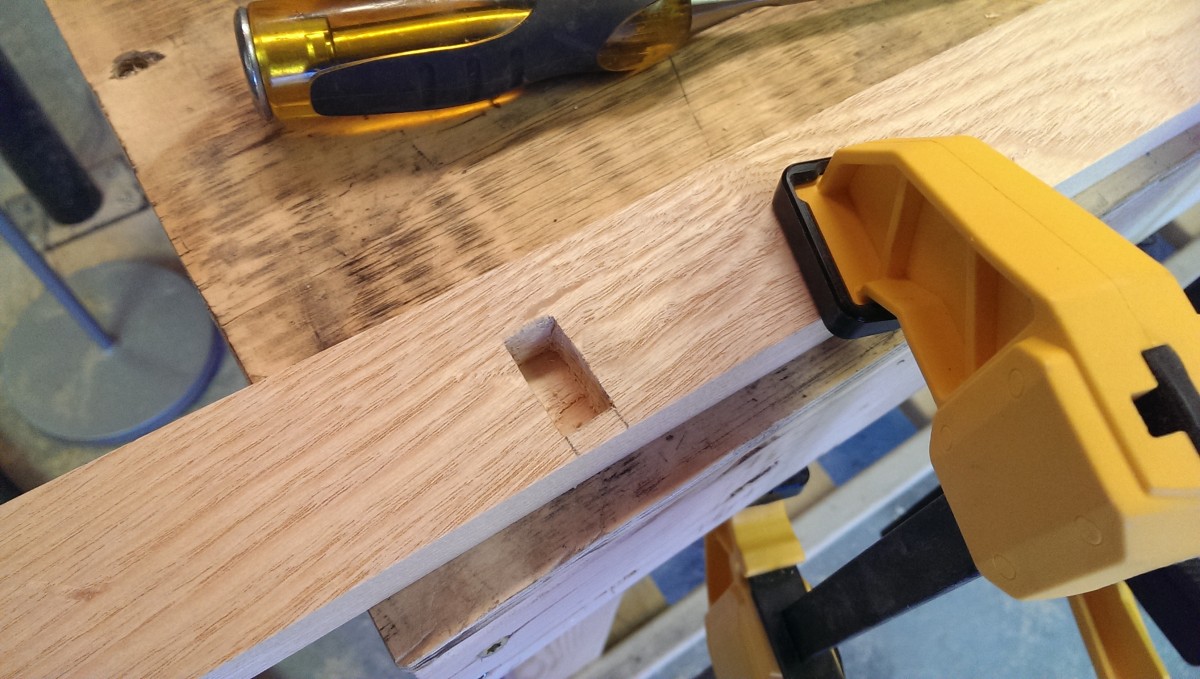
Cleanup with a chisel
The hole needed to be cleaned up with a chisel. I only have one chisel, a 1/4″, so the result isn’t that great. On the plus side, in contrast to making a slotted mortise with the router as I did earlier, this one has square sides to match a square tenon.
The inner long pieces are done
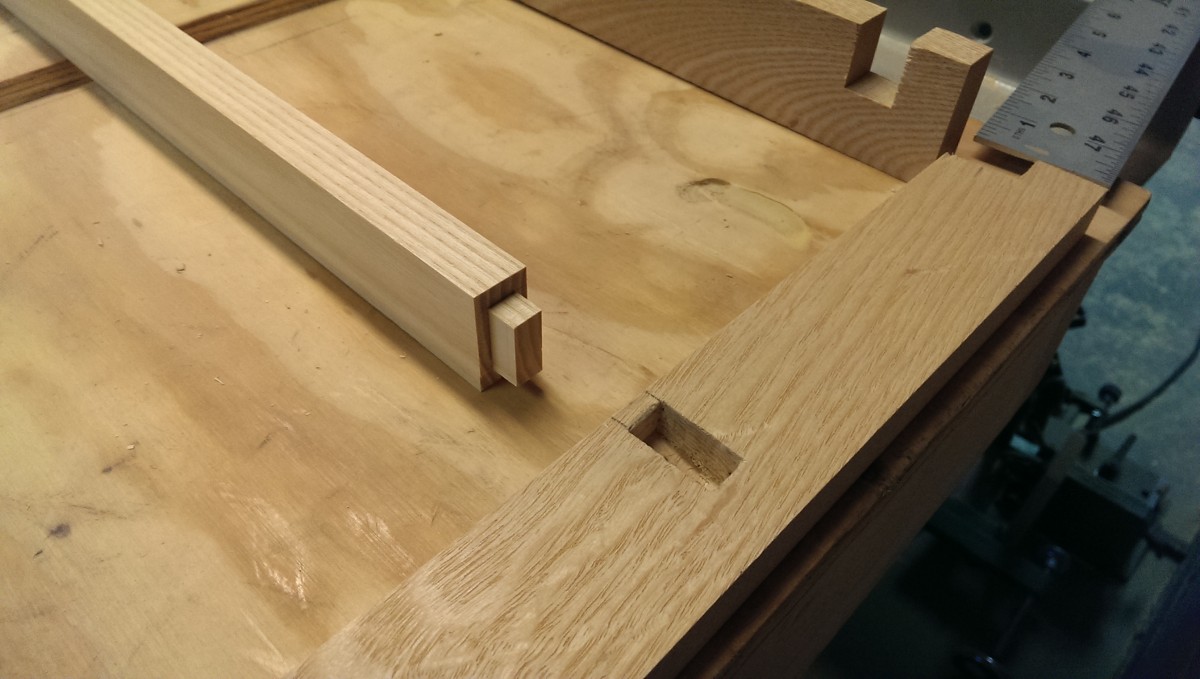
Mortise and tenon
And with a little work on the table saw, using the same dado procedure as earlier, The long pieces are dadoed in. Nothing is glued up yet, of course.
As I stated, these aren’t the strongest mortise and tenons by a long shot. However, they’re used minimally and supported by half lap joints everywhere else. Also, this entire crib is probably overkill, since the occupant will be less than 20 pounds at most.
Cutting the remaining half lap joints
Half lap with dado stack
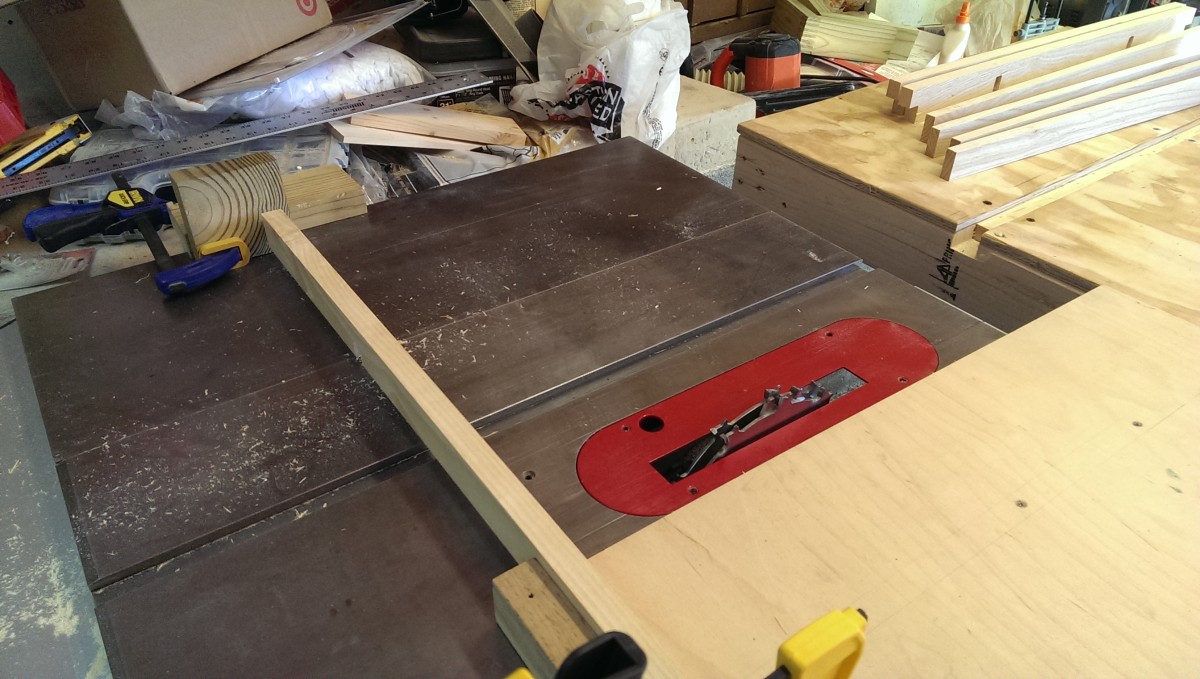
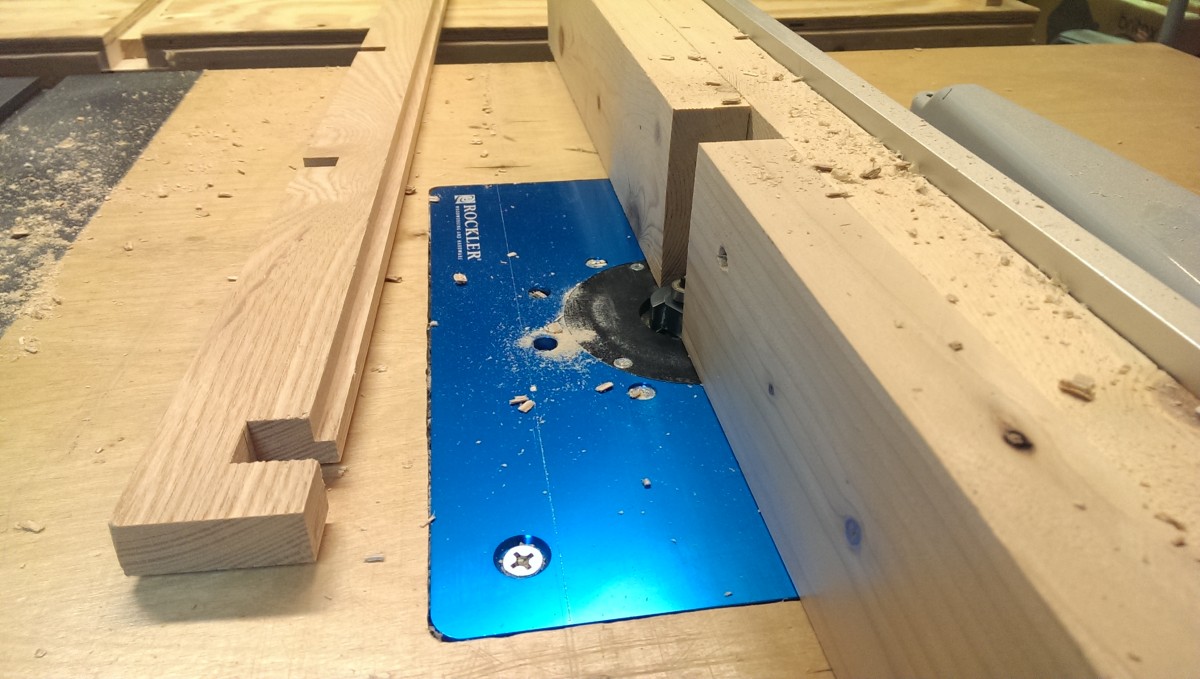
Half lap joint on the outside piece with a stop block extension
The rest of the half lap joints are equally easy. I set up the dado stack to cut as narrow as the inner pieces. I used stop blocks to move inward from the outside. I cut the leftmost dado first, then flipped the work piece around to cut the rightmost. Then, I could adjust the fence or stop blocks once, and repeat. Finally, I cut the center, making 5 cuts in total. This ensure that even if my measurements weren’t accurate, if I cut all of the pieces this way, they would be consistent.
One remaining issue was that the outer two pieces are longer than the inner two. To solve that, I had a double stopblock setup. I cut a block of wood exactly as thick as the difference between the two lengths of pieces. When cutting one of the shorter pieces, I rested it against the stop block plus this extra piece, as in the first picture. To cut the longer outer pieces, I just referenced off of the stop block without including this piece. This seemed to work pretty well.
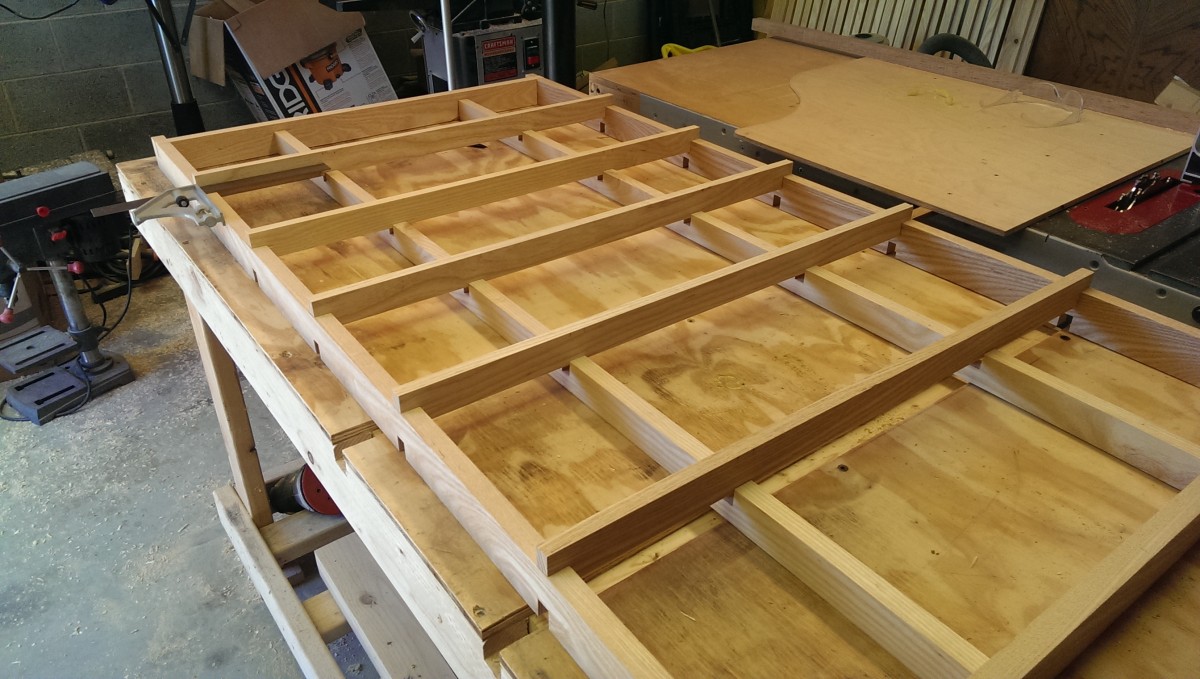
The lengthwise half lap joints are done
That wrapped up cutting the half lap joints on the longer members. Next up is doing so on the shorter cross pieces.
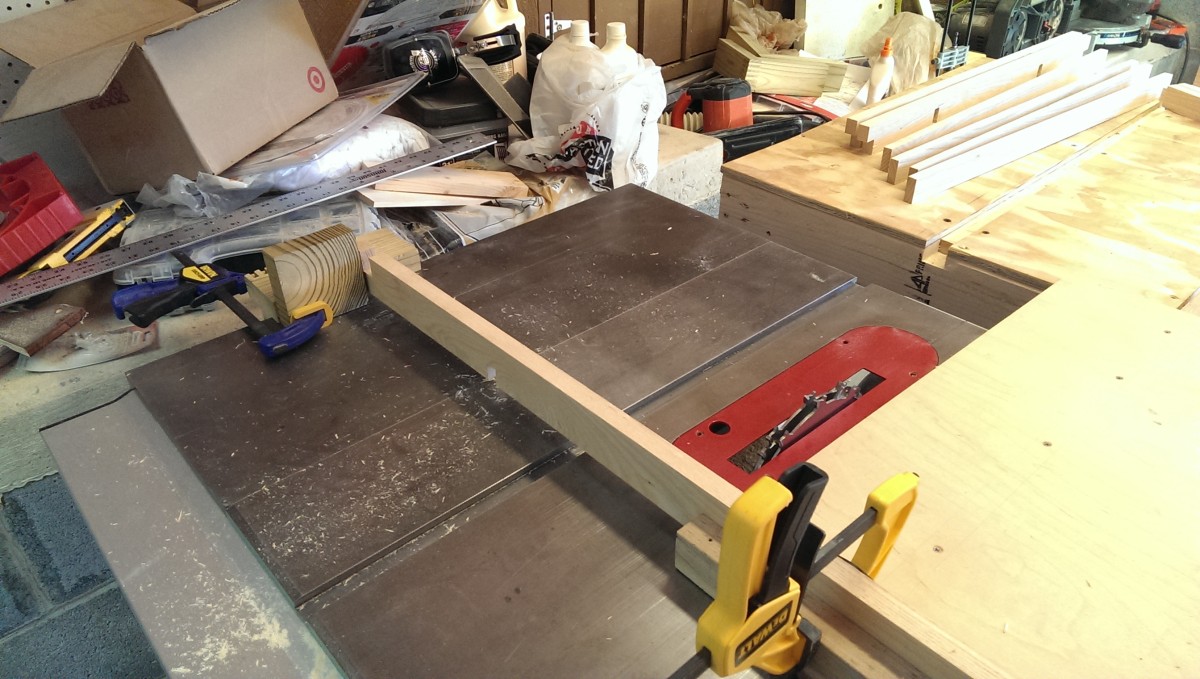
Wider dado cuts on the outsides
I first cut the outer half laps, using the wider dado stack I had installed earlier again.
Using the same procedure, finished up
Then, using the same procedure, I finished this part of it up. You’ll notice a few of them aren’t seating all of the way. I went back later and sanded the joints a little bit wider or deeper as necessary to get good fits all around.
Rabbeting the outer frame
These pieces are really easy to rabbet
Rabbeting the outer frame is easier to do now than when the mattress support is glued together, because the top of these pieces provides a really narrow surface to try to rest a router on. I simply put a rabbeting bit in the router table and did it that way. The long side pieces are very easy to do, since the rabbet can simply extend up to the half lap joint. It’s worth noting that this is a lot of hardwood to chew out in one pass. I did these rabbets in a couple of passes to not put too much stress on my router.

The narrower pieces must stop near the end
The narrower pieces have to stop near the end, so that they mate properly once assembled. I’ll come back with a chisel once it’s assembled and finish cleaning these up.

Oooops, I screwed this one up
I did screw up in one case. The work piece got away from me, and the router took a good chunk where i watned it to stop. To fix this, I extended the rabbet all the way to the end of the work piece, to get a square surface for the repair. Later on, I describe the rest of the fix once it is all glued up.
Glue up

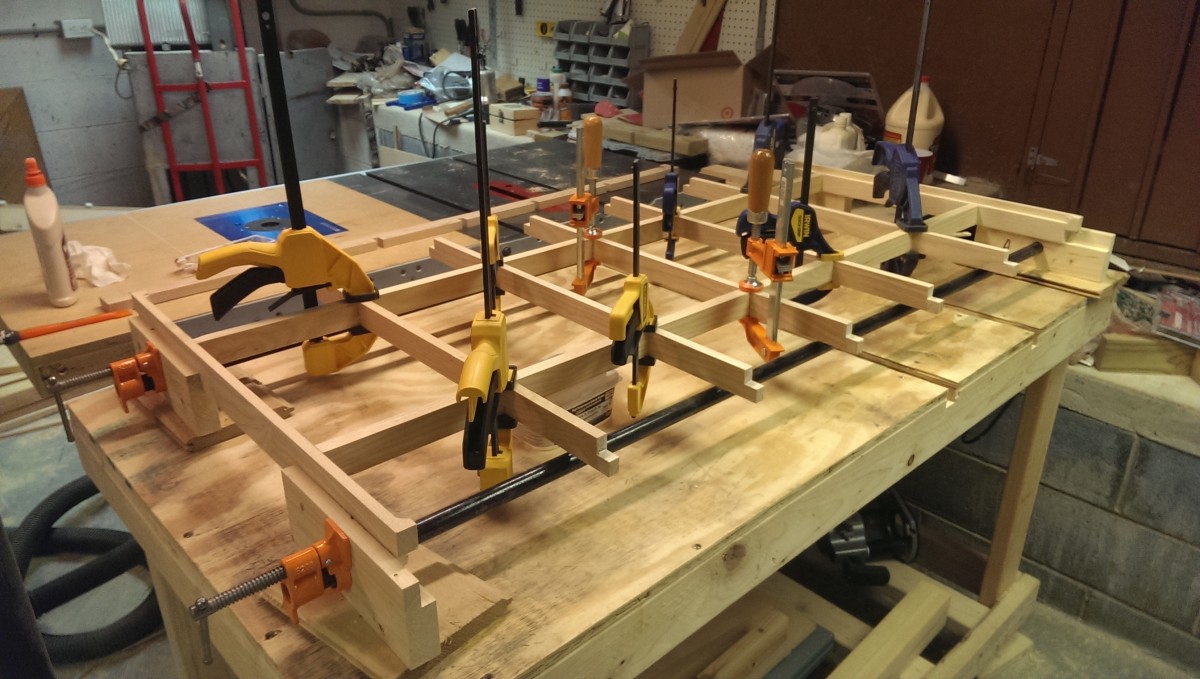
The inner frame was glued and clamped first
The glue up for this is kind of tricky. I started by gluing and clamping the inner frame as pictured.
The whole thing on cauls between the pipe clamps
I then took the whole glued inner frame, still clamped, and loaded it onto cauls on top of my pipe clamps. I put it between the two outer pieces of the frame during this step. Tenons paid off in this step, by making it easier to move the pieces without risking the inner frame falling out from the two outer ends.
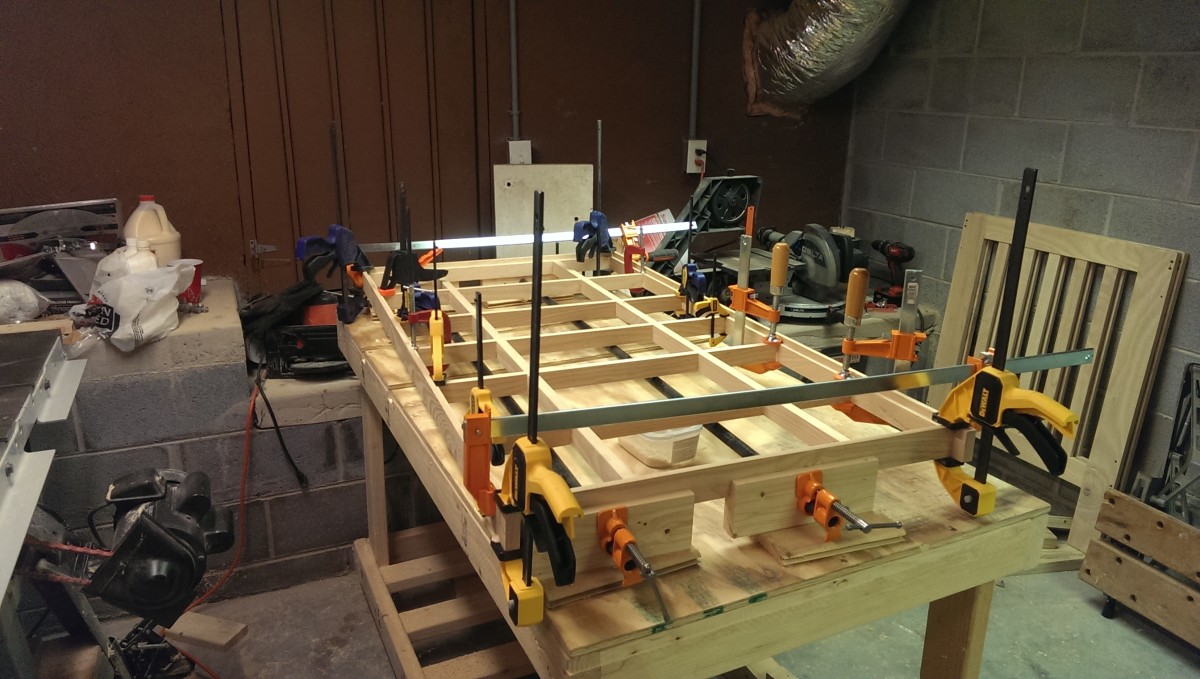
The outer sides went on last
The final step was gluing and installing the outer sides. This was a matter of carefully sliding them onto the ends of the rest of the support. Once done, I used large bar clamps to hold them together. The pipe clamps put pressure one way, and these bar clamps the other. It would have been nice to have a few more bar clamps, but I only had two. I also used regular quick-grip clamps at the critical corners to keep everything level. I literally used every clamp I own to do this.
Repairing my rabbet goof up
Oooops, I screwed this one up
I cut a block of wood to repair it
As I said above, I goofed up one of the rabbets, as shown in the first picture. As I said, before I glued everything up, I simply extended the rabbet all the way to the end. Once glued up, this left me with the second picture. I have a mostly flat surface, with one little gouge out of it. I was able to cut a small block of scrap to glue in here.

Glued in place
The piece glued in, although the grain orientation is wrong – oops. I used a chisel to get this mostly flush. I didn’t sweat the details or the slight tear-out too badly, though, because I knew I was going to come back and roundover and sand this entire piece.
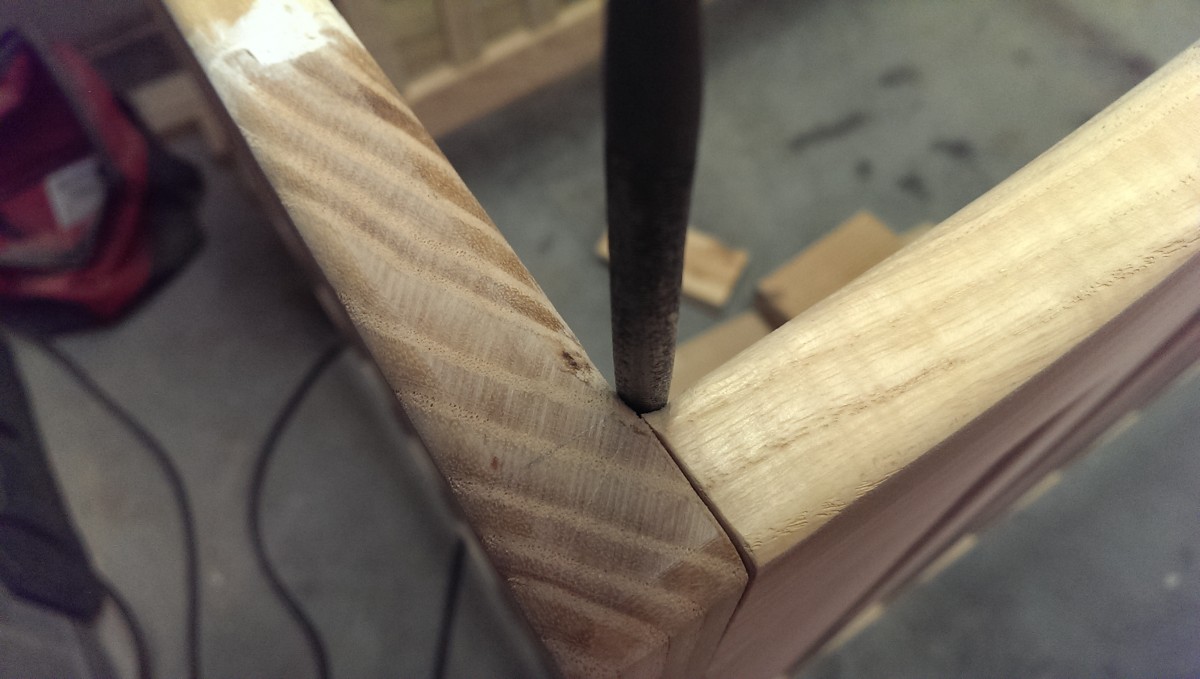
Chiseling the rabbets
Chisel
As I stated earlier, I left some extra material on the end of part of the corners. With the glue all dry, I came back with a chisel to chisel these square.

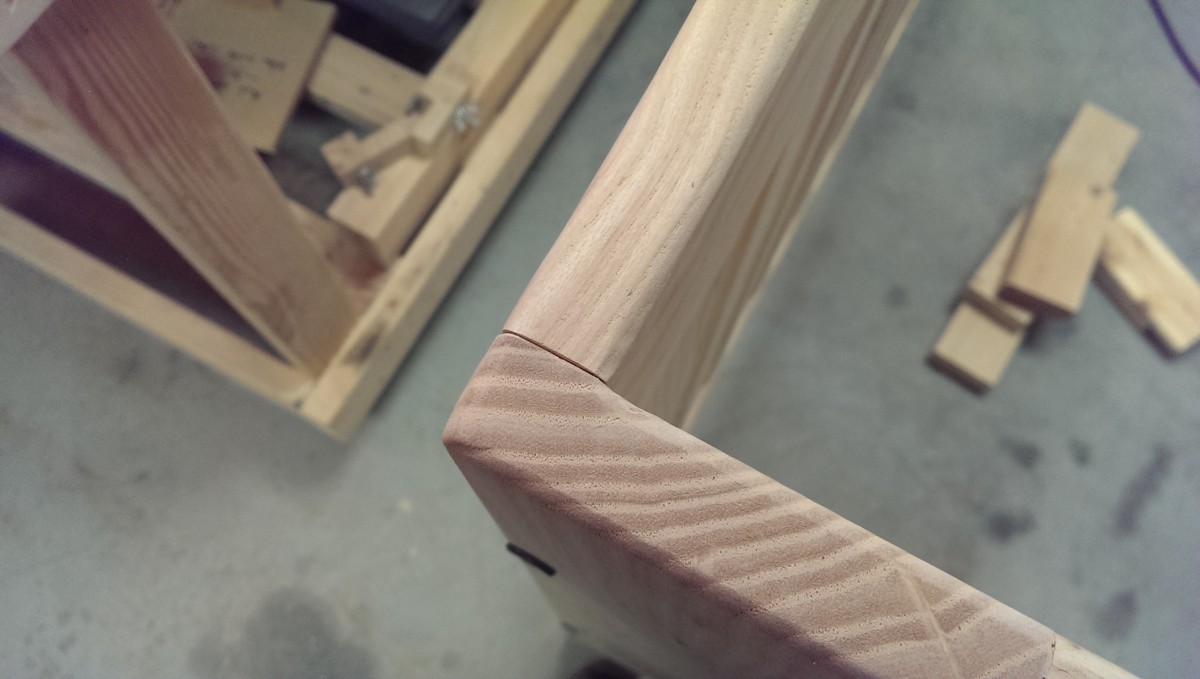
Squared
I’m obviously no hand tool pro, but I was able to get this square enough not to be noticeable.
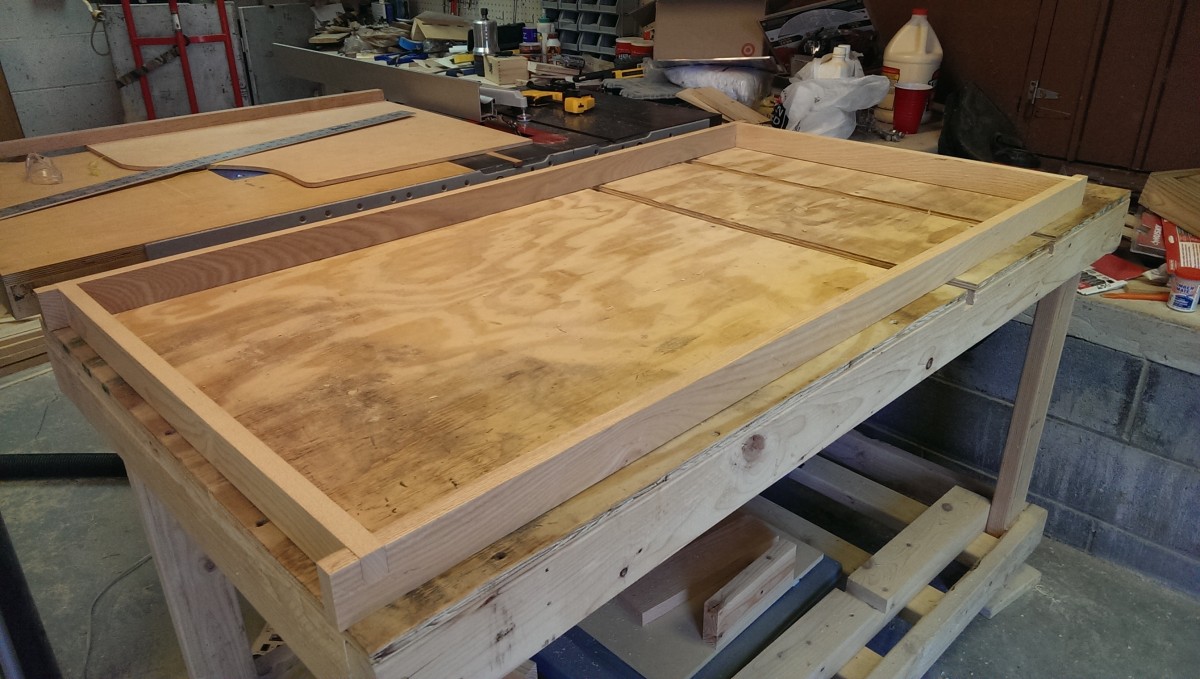
MDF Panel in the mattress support

Freshly cut panel
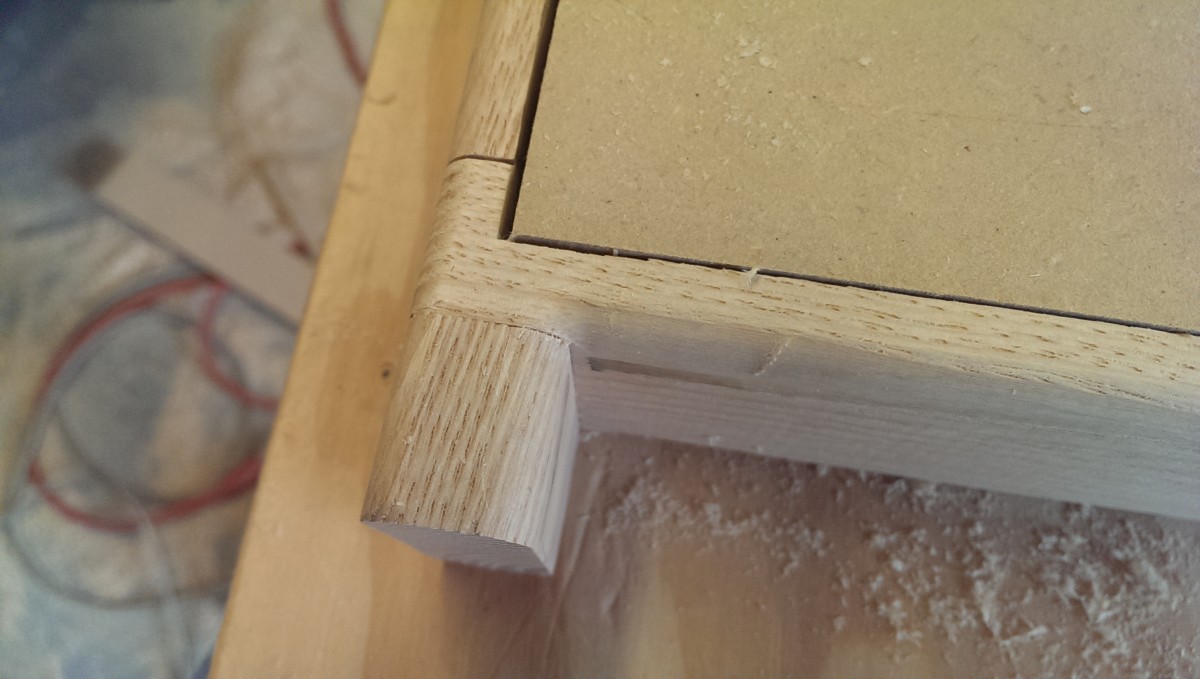
I used a piece of 1/2″ MDF to sit inside the rabbet. What you’re looking at is basically the completed mattress support, minus the remaining router work. As you can see, my rabbets aren’t perfectly straight and square, but they’re close enough, considering the entire surface will be hidden by the crib mattress.
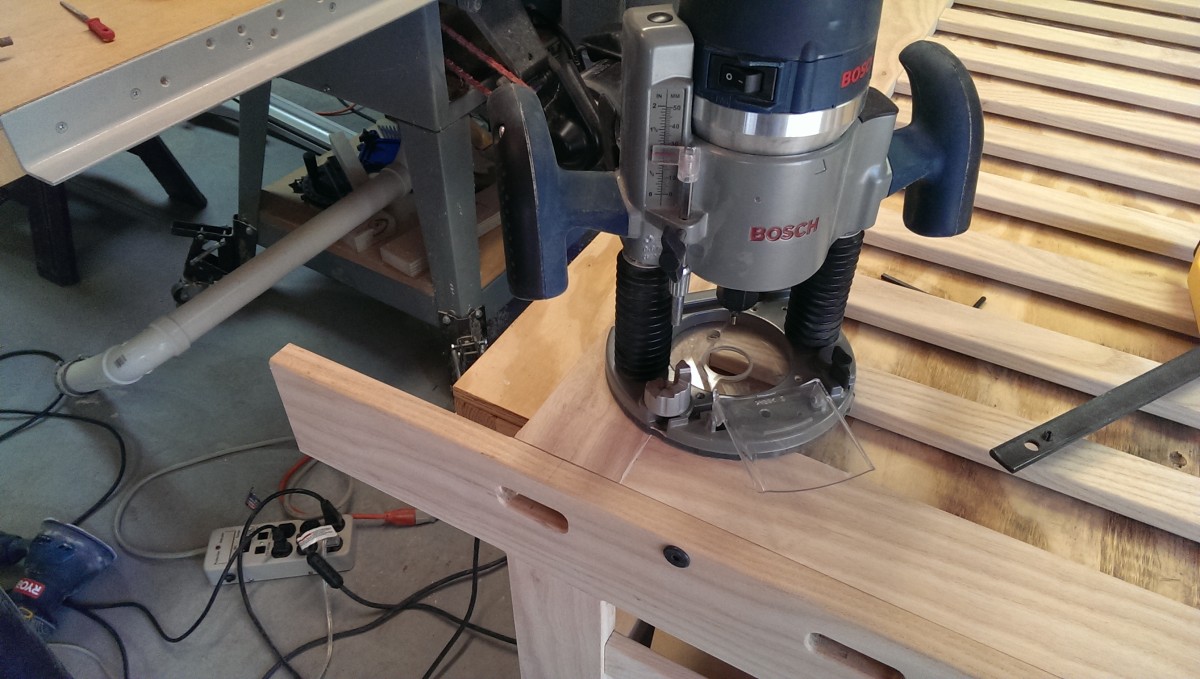
Routing the mattress support
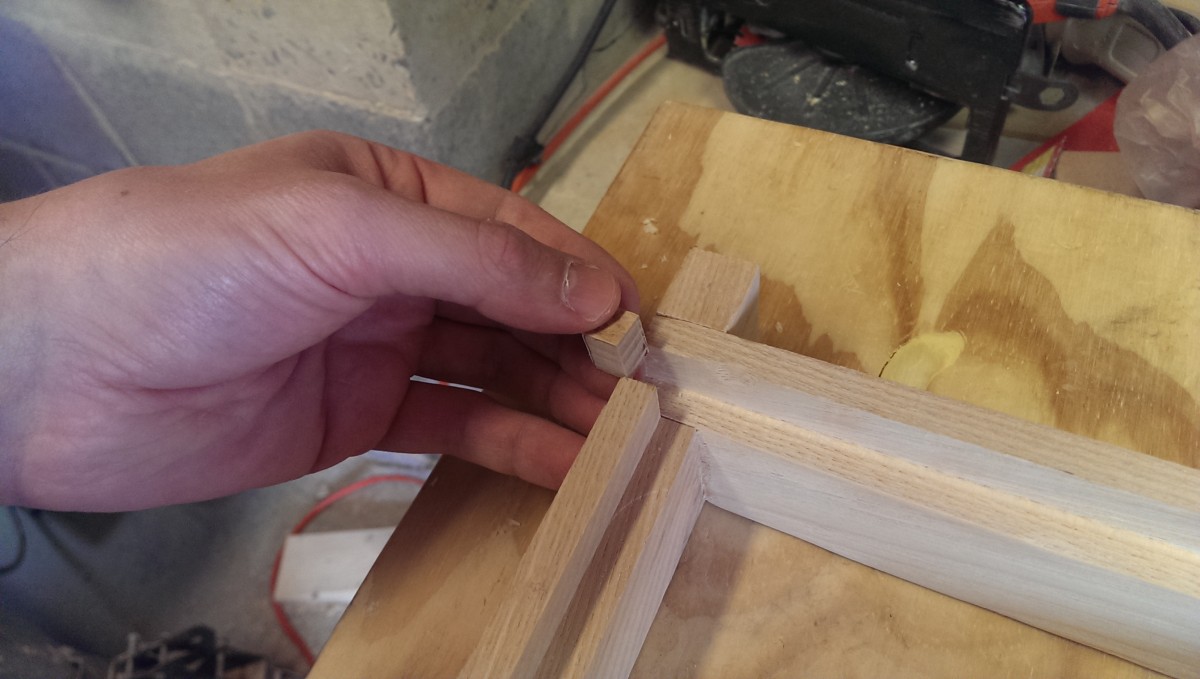
The major areas can be routed with a regular guide bearing roundover bit
As I said, the mattress support ends will be through-tenons into the side panels. Since these tenons will be visible, I decided to round them over to match the rounded mortises that will be in the side panel. I intended to use a 1/2″ bit to cut the mortises in the side panels, so a 1/4″ roundover on the tenons would match perfectly. I used a regular bearing guided 1/4″ roundover bit to do the majority of this work. I did this with the mattress support panel installed to have extra support.

Inside corners weren’t quite right
Brass bearing roundover bit
The inside corners were left not quite right, because the bearing is too big to fit inside. This is you could use hand tools. Instead, I used a brass pilot bearing bit, which is able to sneak right into the corner and do a perfect roundover. The only caveat with these bits is that they will burn the wood pretty easily, so you need to keep the bit moving.
The brass bearing rounded this over nicely
As you can see, that bit makes short work of the inside corners. I still have to sand the mattress support, so I’m not too worried about minor inconsistencies between the bits like the one pictured.
At this point, the mattress support is finished, aside from sanding, staining, etc. I decided to not glue the panel to the support, both because it’s easier to set the crib up that way and in case I ever want to make a new panel from nicer wood than MDF.
Making through-mortises in the side panels

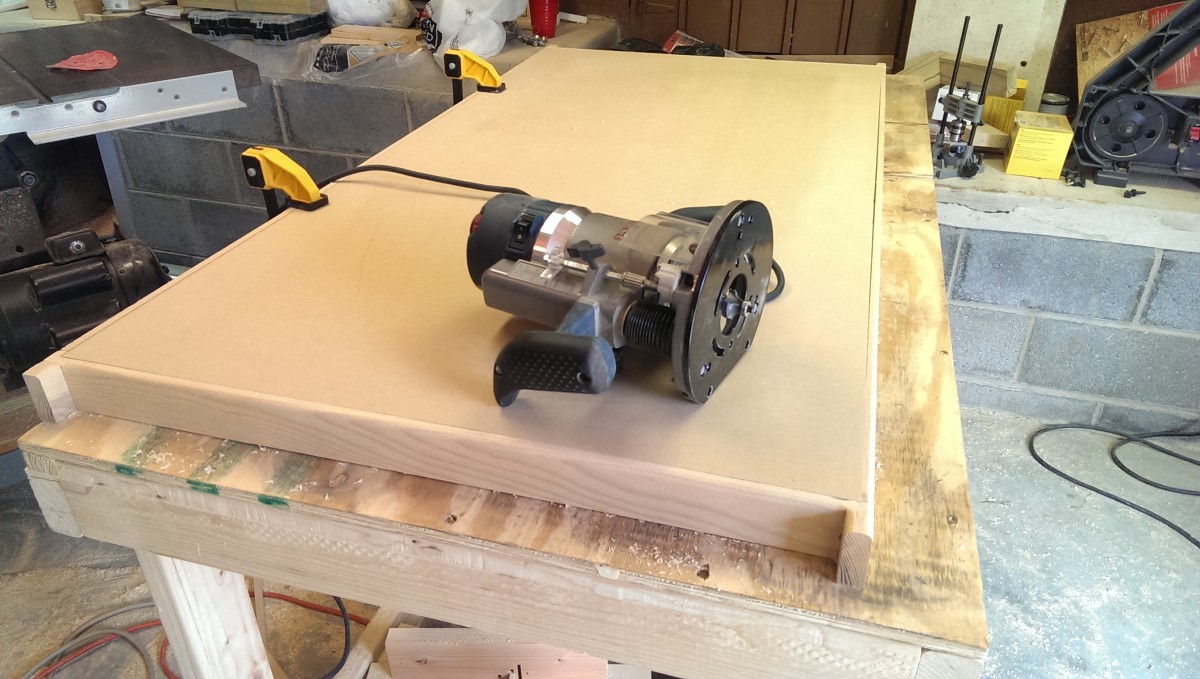
Side panel mortise template, this time from scrap cedar
As discussed, the mattress support fits into the side panels via through mortises. After deliberation, trial, and error, I went back to the tried and true template bushing system. I made a template for a mortise that would match the mattress support tenons using a 3/4″ bushing and a 1/2″ straight router bit.
The template idea is exactly the same as the one I did for the slats, just with the dimensions adjusted to center the mattress support instead.

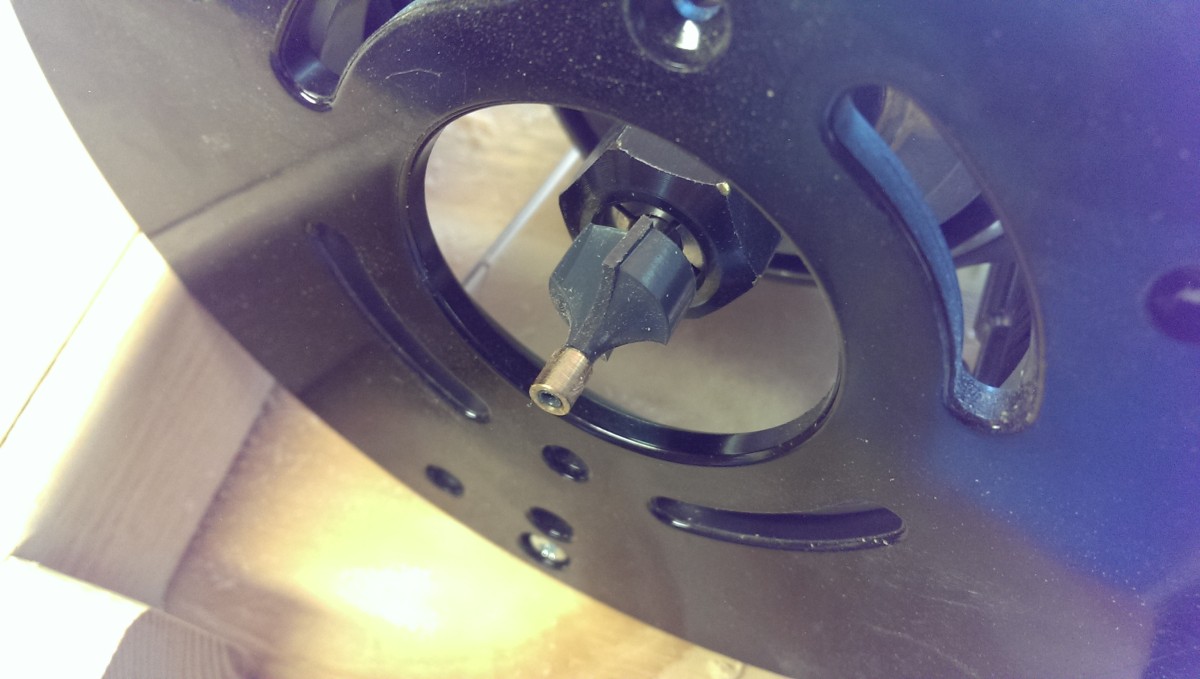
Extended length 1/2″ bit
The 1/2″ bit I had ended up not being long enough. I went to a 2″ long bit to be long enough to reach through the template and the 7/8″ ash. A 1-1/2″ bit may have worked, but I figured I would just go straight for a really long bit while I was shopping.
First set done
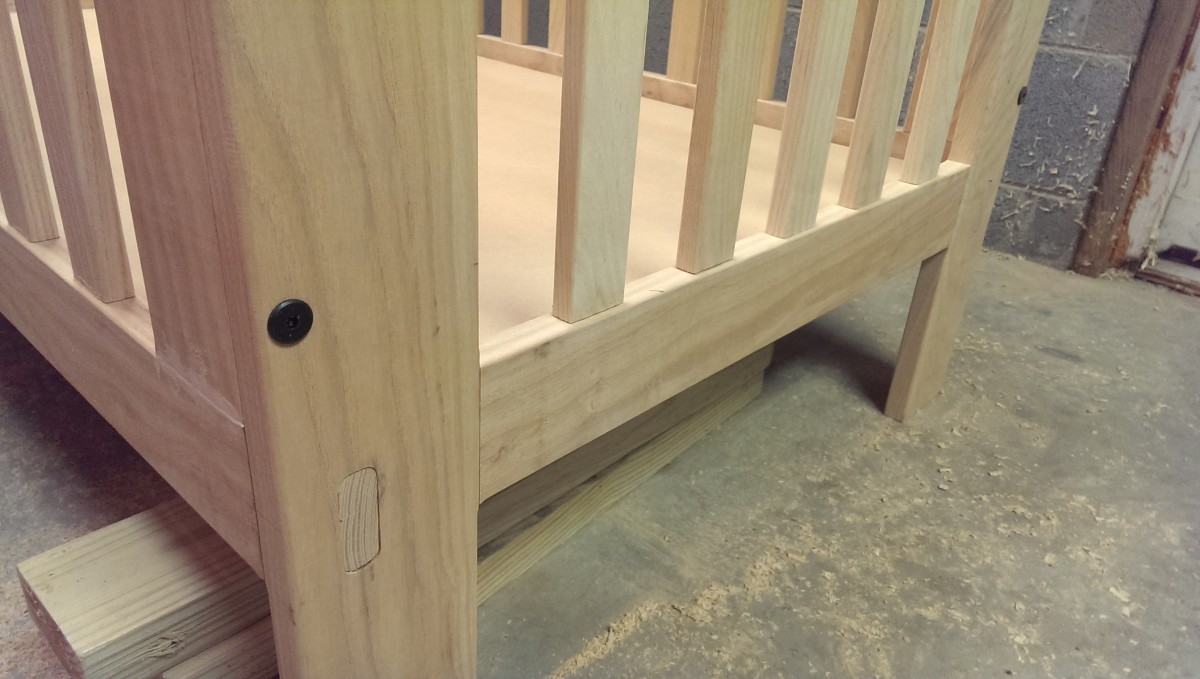
I did a test run once the first set was complete. These are located so that the mattress support bottom is even with the bottom of the horizontals on the crib, making it 28″ from the lowest point of the crib rails.
Some rounded files were handy to clean up the mortise and loosen it a bit
Some files were handy to clean up the mortises and even ease them a bit.

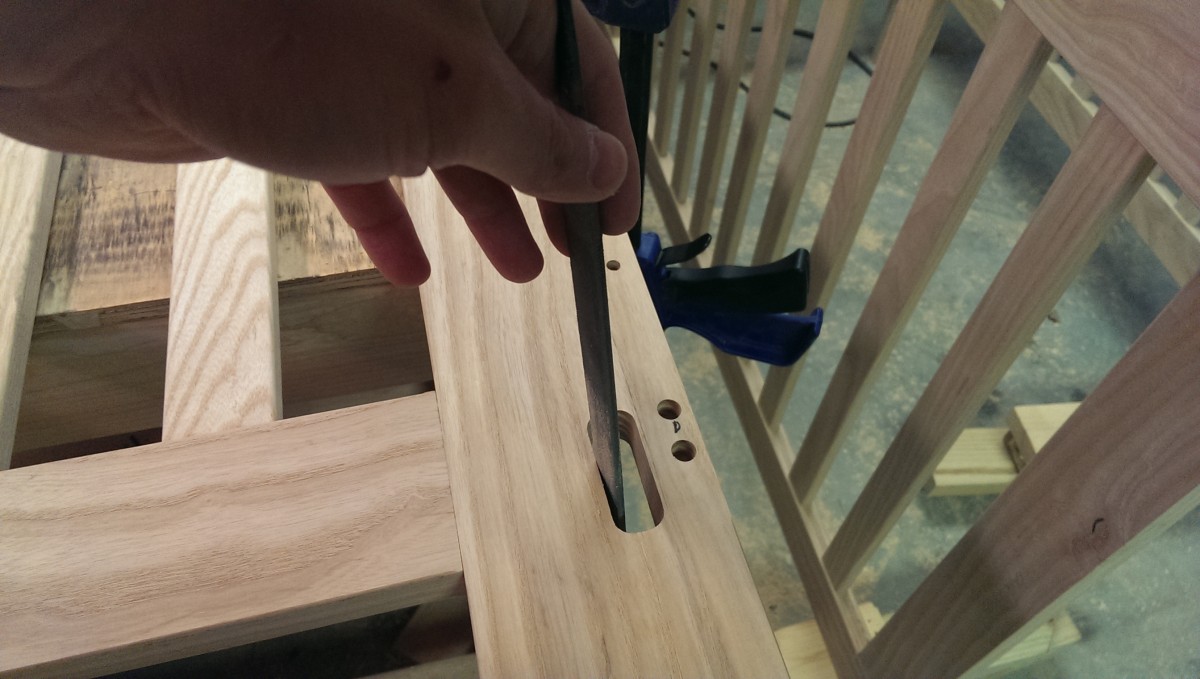
Marking holes
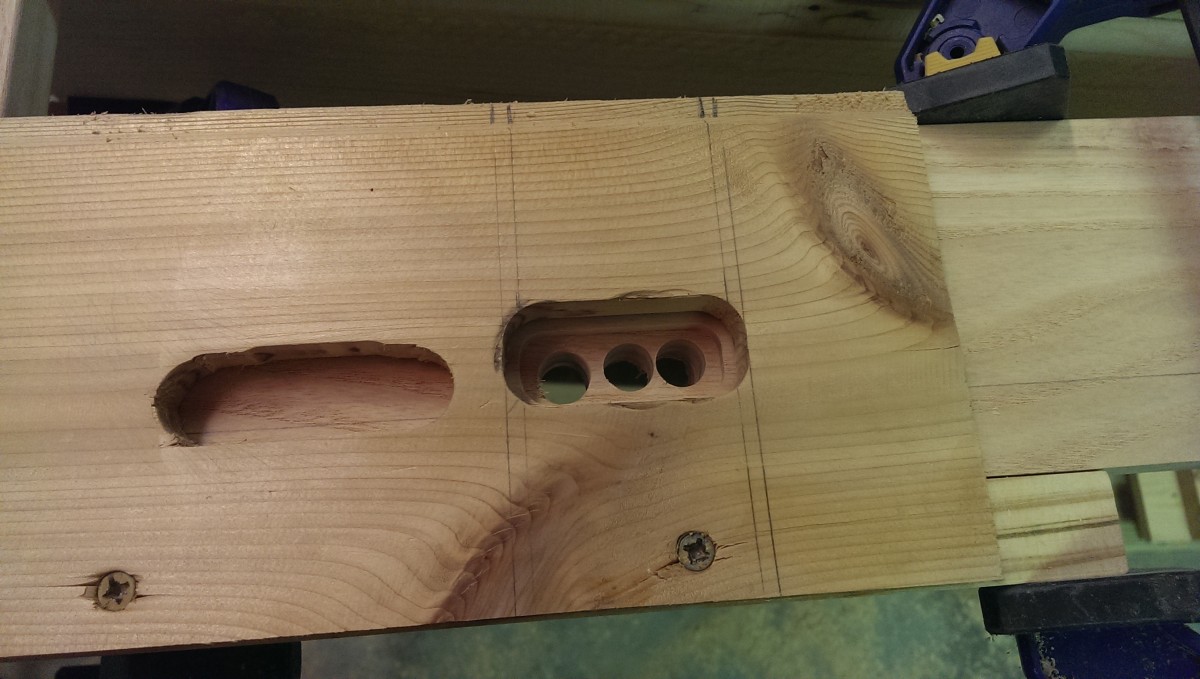
Drilled through on the drill press
One technique I began using for mortises this large was to hog out some of the material using 1/2″ drill bits. I marked the locations with the template on using a hand-held drill bit, then took the piece to the drill press to drill a straight hole. This gave me a place to start with the router, without having it jump all over when it made contact. Additionally, it gave the dust somewhere to fall, which help keep the bit clear of debris.

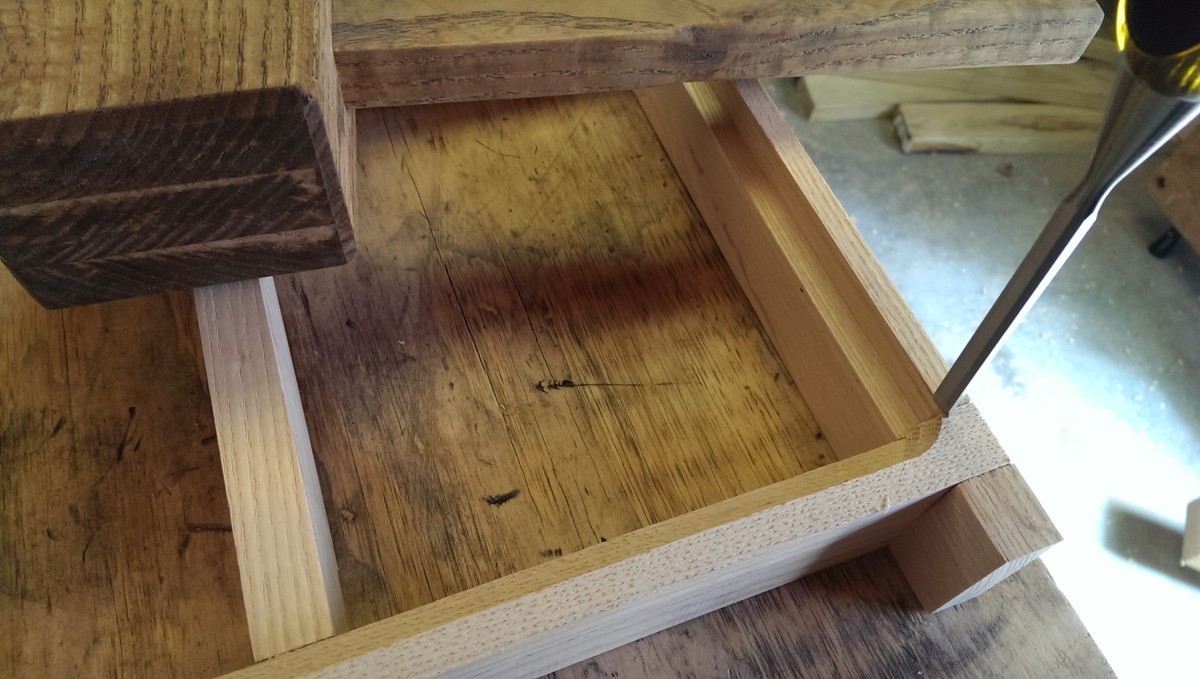
Testing the upper set of holes
Since I knew my template was good, and that the general idea works from my earlier tests, I tested the second set of holes simply by sliding each panel onto the mattress support, instead of bolting the entire crib together. I made this set of holes 8″ higher than the last set. I probably could have gone a bit higher than that, in retrospect.
Putting hand holds in the mattress support panel

Making holes
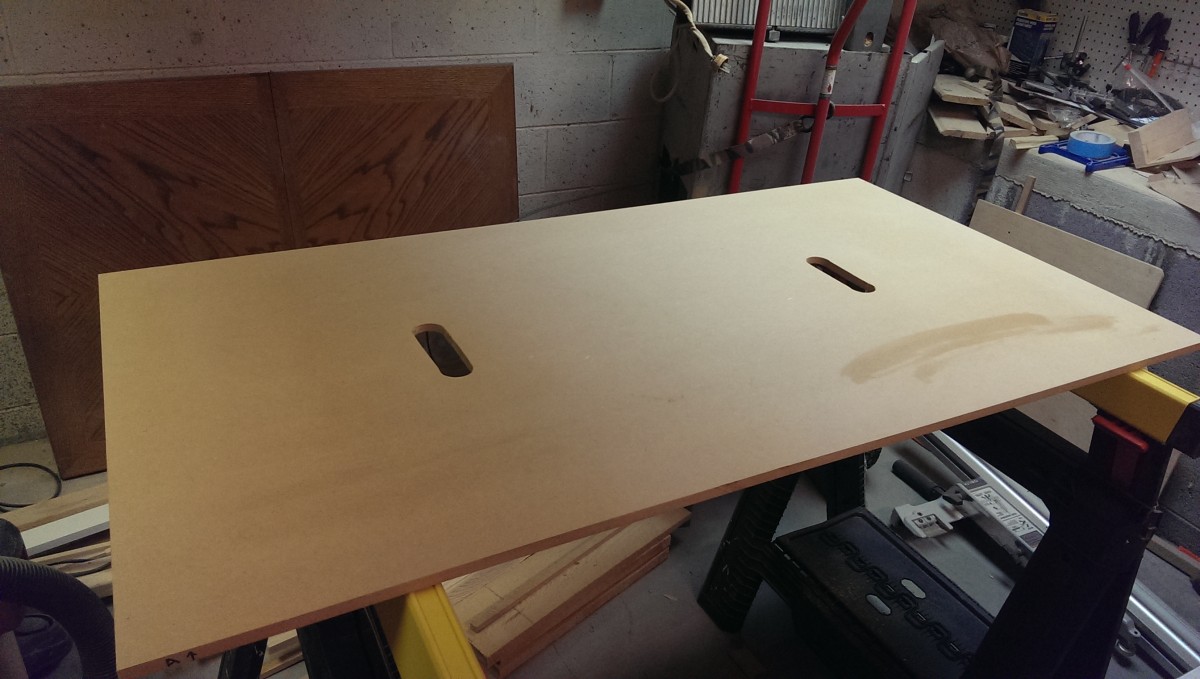
Jigsaw to connect holes
Getting the mattress support panel installed with the crib put together turned out to be fine, but getting it out again was a pain. I ended up making these long slots in it, so that I had something to reach through and grab. I simply drilled a hole in either end with a large forstner bit, and then used a jigsaw to connect them. It’s not the cleanest cut I’ve ever made, but it won’t show through in the final product, so I didn’t worry about it. I was ready to be done with this project!
Final repairs and routing
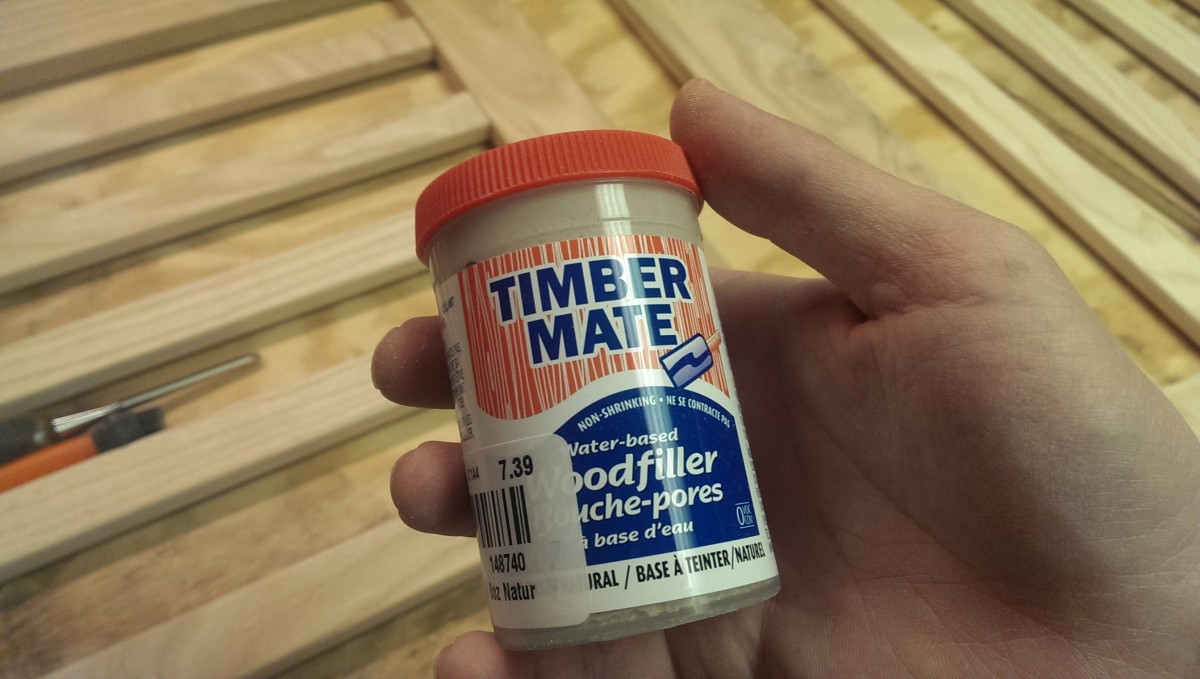
This stuff is awesome
At this point, the crib is basically complete. I’m on to fixing up any issues I see. To fix gouges, gaps, and other cosmetic issues, I used Timbermate’s natural color wood filler. This stuff will seal up gaps and is supposed to stain really well.

Timbermate in gaps

After sanding
I ended up spreading on the Timbermate on visible gaps in the wood and letting it dry overnight. Then, when in the process of sanding the surfaces in prep for stain, I was able to take off the extra filler, resulting in only the gaps being filled. I was concerned regarding the stark contrast of the color of the Timbermate at this point, but it ended up working out great after stain.
In keeping with the directions on the General Finishes gel stain I bought, I sanded the wood to 100 grit, and then finished at 150 grit.
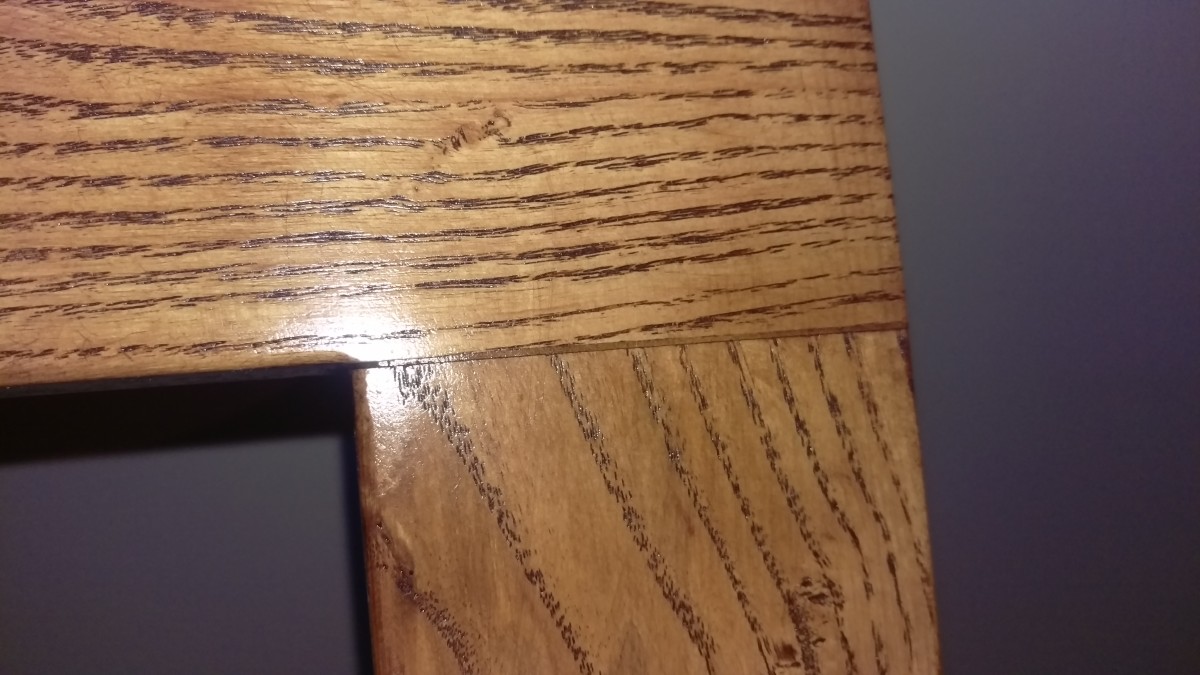
Flashing forward: just to show how the Timbermate stains
I’m getting ahead of myself here, but here is a picture of how the Timbermate takes a stain. As you can see, what was once white now blends in rather nicely with the rest of the wood. I had been assuming I would need a blend pencil: I’m very happy with Timbermate. Ideally, of course, you won’t have gaps to begin with, but we all make mistakes.
Routing the inside corners
I used an 1/8″ pilot bearing to get the inside corners I intentionally had skipped earlier.

A dremel bit could go where the router couldn’t

Starting to get the corner rounded
Finished up with a rounded file
I’m satisfied with the result
The only places the brass bearing bits didn’t work were the 4 inside corners where the panels came together. To address this, I bolted the whole crib back together and used the narrowest dremel drum I had on the slowest setting I could. I went back and did final cleanup with a file. After the file and a bit of sanding, it’s a pretty nice smooth curve.

All sanded and ready for stain
Once I did all of that and had the surfaces sanded to 150 grit, I was ready to stain. I wiped the entire crib down with mineral spirits to get the dust off, and aired out my shop thoroughly. I actually left the doors open for a few hours with a fan running.
While the shop was airing out, I took the crib up to the nursery for a test run with the mattress. Success!
Staining and Wrap-up
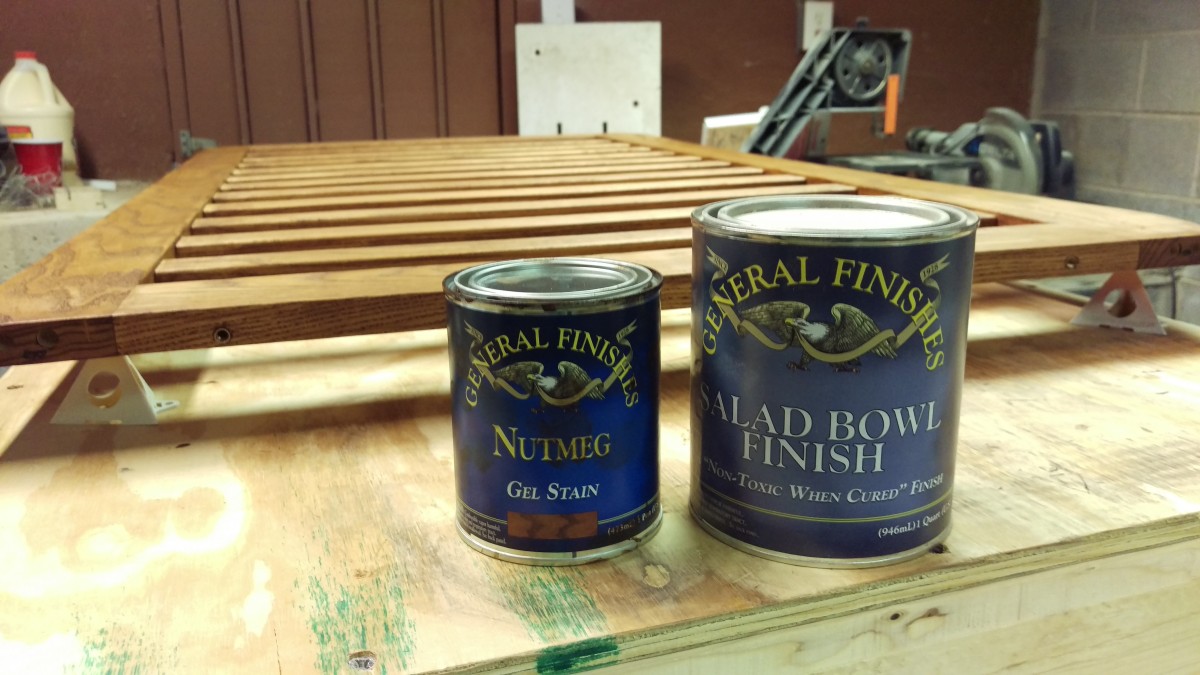
Gel stain and salad bowl finish
I ended up using a gel stain from general finishes that matched other furniture in the nursery. I also used General Finishes’ salad bowl finish, since I was told it would be safe if the baby were to chew on it. I’ve since discovered just about any finish left to cure long enough becomes food safe, but in this instance I don’t mind having used this.
The gel stain was nice for a novice like me, especially on a complicated piece to stain like this, because it kept the color even. As it was, if I did it again, I would strongly consider staining before assembly or using a spray gun. Getting into the corners and between the slats was a big pain. I’m glossing over the rest of this step, because it’s boring.
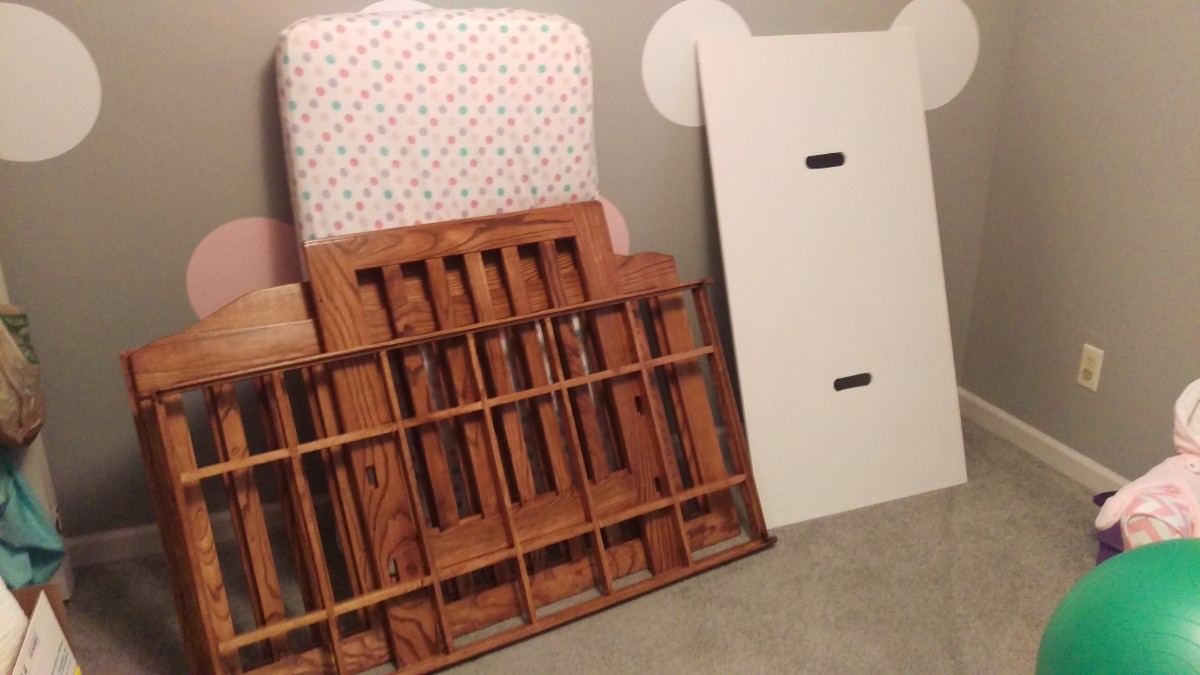
Crib disassembled
Once the stain and finish dried, here is the crib disassembled into pieces. I also chose to paint the MDF white to protect it. I read that you can stain MDF: I tried it, and it came out terrible. I don’t recommend it.
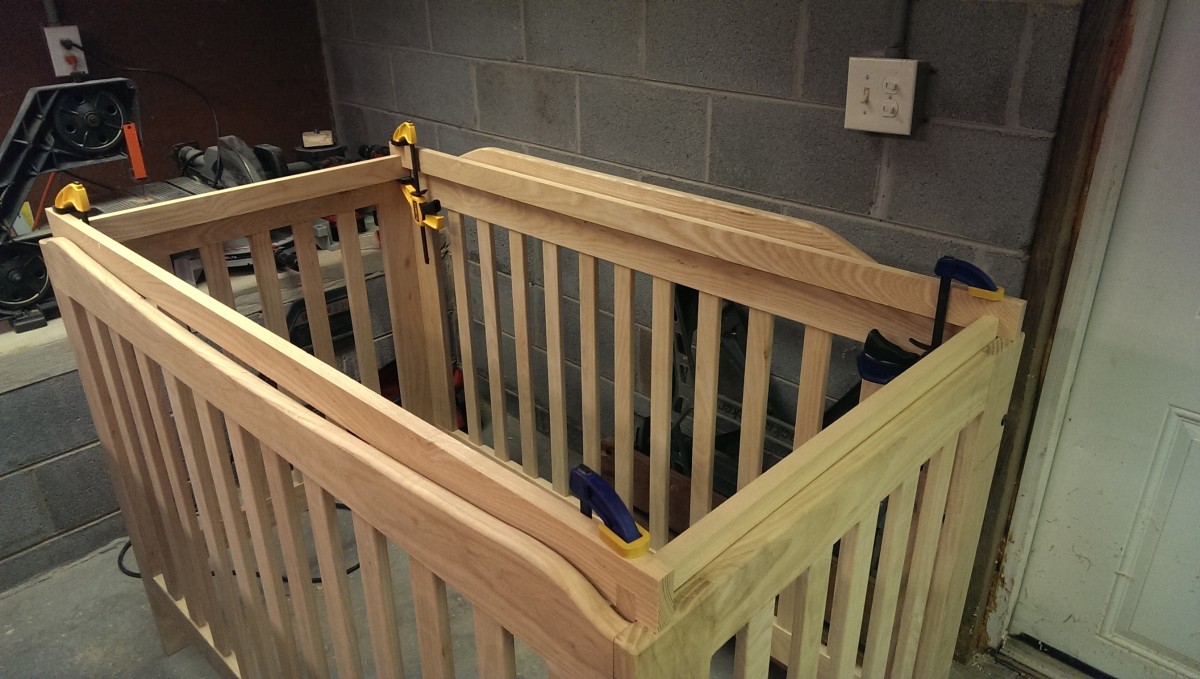
Assembled
With support
Here you can see the final design. I bolt it together first, then drop the MDF in.
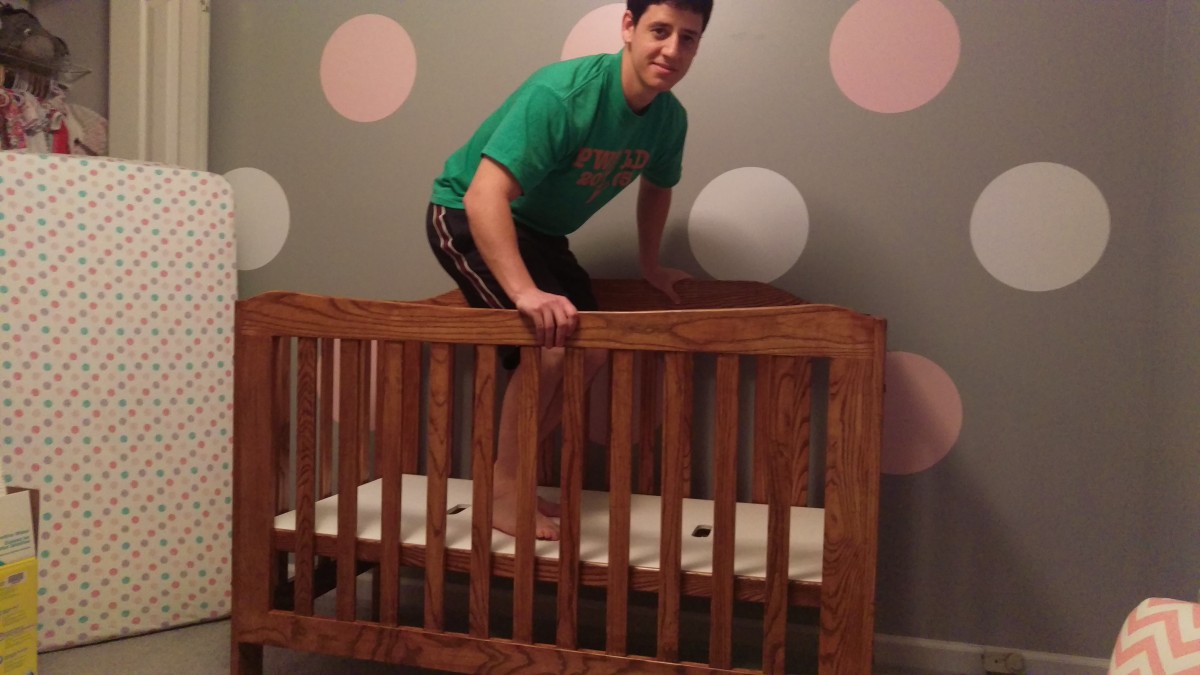
Strength test
The design ended up being plenty strong. If it can hold my weight, I’m sure the 12 pound baby will be just fine. My weight is resting on the well-braced support, which hooks directly into the sides, which sits on the ground. The bolts holding the front and back panel on do a good job squeezing the mattress support in place and keeping everything solid.

Finished
Spoiler alert: here’s what the finished crib looks like
And here it is, ready for the baby after curing.
Google
Usually posts some extremely intriguing stuff like this. If youre new to this site.
true wireless earphones
[…]Every after inside a while we opt for blogs that we read. Listed beneath would be the latest web-sites that we opt for […]
mulvadi kona coffee beans
[…]just beneath, are several totally not connected web sites to ours, having said that, they may be surely really worth going over[…]