Fix a Pinhole Leak With a Sharkbite
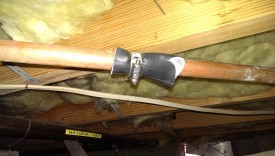
I had a pinhole leak show up in one of my copper supply lines in the crawl space. This was a concern, because the lines run right underneath my floor joists and insulation. Picturing fixing things the old-school way, with a torch and solder, I was imagining my house would soon be on fire and burn down if I tried to attempt this one myself. I ended up fixing the pinhole leak with a Sharkbite.
Temporarily Patching a Pinhole Leak
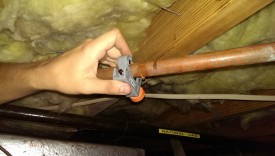
In the mean time, I did not want to be spraying water all over my crawlspace, running up my bill. A handy tip is that you can patch any leaks of this nature with a hose clamp and any sort of rubber or other waterproof material. I had some old tire tubes from a bike that I cut a few pieces out of. Turn the water off, wrap the pipe in rubber, and clamp down the hose clamp. It won’t hold forever, but it’ll keep things dry (and your water operational) until you can get to a real fix.
Deciding to use Sharkbites
Calls to various plumbers yielded no results; they basically didn’t want to bother showing up for such a small problem. I was talking about the issue to a buddy of mine, when he asked (bewildered) why I hadn’t just used a Sharkbite fitting.
I had no idea what Sharkbites were. Turns out, they’re a product introduced relatively recently that makes connecting or repairing pipe of all types a snap. They are a little on the expensive side – $10 or $15 per fitting – but they’re still a heck of a lot cheaper than a plumber, and they’re permanent.
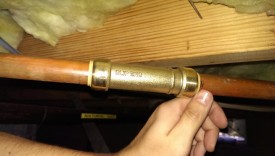
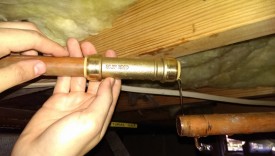
Basically a Sharkbite is a press-on fitting available at most home stores. You cut the pipe, slide the Sharkbite on one half, and then slide it back over the other. The Sharkbite has compression fittings inside of it that seal to the pipe. I don’t believe they can be reused because of this, however.
The Sharkbite can be used for a leak like this two ways: if the damaged section of pipe is short enough, the damaged section can be removed and replaced with the Sharkbite itself, which is 5″ long, or thereabouts. If a longer section is required, you can cut a new length of pipe and use a sharkbite on either end to hook it into the original.
Sharkbites can also be used for new construction. There are Sharkbites to convert from copper to PVC to PEX and back again. If you want to tee off of your copper piping to attach a PEX line, Sharkbite has you covered with a fitting for that purpose. They’re a very flexible way to avoid the hassle of traditional methods of connecting pipes.
Performing the Repair
Step one is to turn off the water, and then remove the temporary plug I had been using. The hose clamp was kept for later use, while the section of tire tube was discarded.
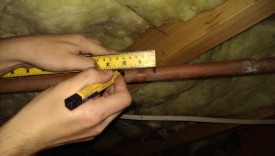
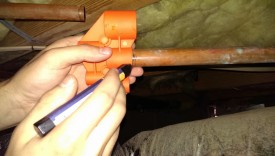
In my case, I was going to remove a 2″ section of pipe and replace it with the Sharkbite. The first step is to grab a marker and mark where to cut.
Then, cut the pipe where you marked. I used a cheap store-brand pipe cutter from the home store. If you’re just an occasional DIYer, this is all you really need. A powered pipe cutter will of course be faster, but also more than is necessary for the occasional job.
Then, you can cut the other side at the mark, removing the section. The ends of the pipe are now ready to be deburred.
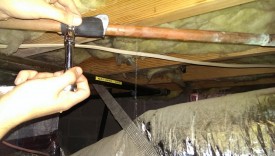
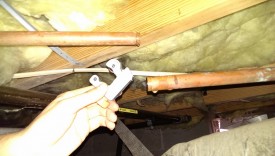
When you cut a copper pipe, the ends will have some burrs on them that will leak if you immediately push on a compression fitting. They need to be cleaned up with a deburring tool. I got this $10 Sharkbite version that deburrs and also gives the correct depth to push on the fitting.
The Sharkbite tool doubles as a seal depth gauge, which is most of why I bought it. You can slide it onto the fitting and mark the end. This tells you how far over to slide the fitting on the final install.
With the pipe marked and deburred, this is almost done. The fitting will have “slip end” marked on one side. This side gets slid first – it is designed to slide over further than necessary, so you have room to line up the pipe.
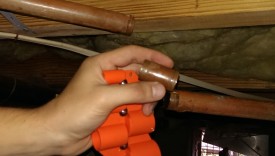
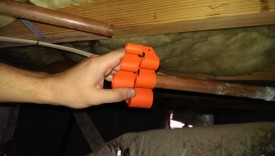
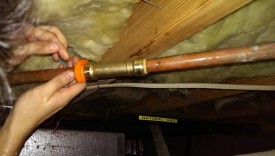
Once the fitting is far enough left to line the pipe up, you can begin sliding the fitting back to the right, making the connection. The orange thing came with the Sharkbite – it’s intended to let you apply even pressure to the fitting. I don’t know how much good it really did, but I used it anyway.
Just keep sliding until the right side hits the mark you made earlier with the seal depth tool, and that’s a wrap. The orange pusher tool can be removed and saved for disconnecting the fitting in the future. The result should seal for a very long time.
In my case, my pinhole leak was likely a symptom of an old copper pipe beginning to get thin. As a result, it may be that I see further leaks going forward. Thanks to the Sharkbite, if this ever happens I will simply get a new section of PVC or PEX and replace as much pipe as necessary.

