Replacing Original Aim Solo Battery
A friend of mine decided to quit going to track days, and he offered me his original AIM Solo for very cheap. I was fairly happy using my phone and sub-$50 DIY 10hz Bluetooth GPS Receiver, but at this price, it made sense to take the plunge. However, the Aim Solo battery needed to be replaced.
For some reason Aim doesn’t consider the original Solo battery to be user-replaceable. (This has been addressed on the Aim Solo 2.) Fortunately, the fix cost me less than 8 bucks.
The replacement battery should be lithium, 3.7V, and use a 3-pin JST-PH connector. The original is 1600mAh, but going higher capacity shouldn’t hurt. The only other trick is ensuring it is small enough to fit in the case. I ended up going with this 1800mAh Battery intended for a baby monitor. I also used some carpet tape to secure it inside the Aim Solo.
Disassembly
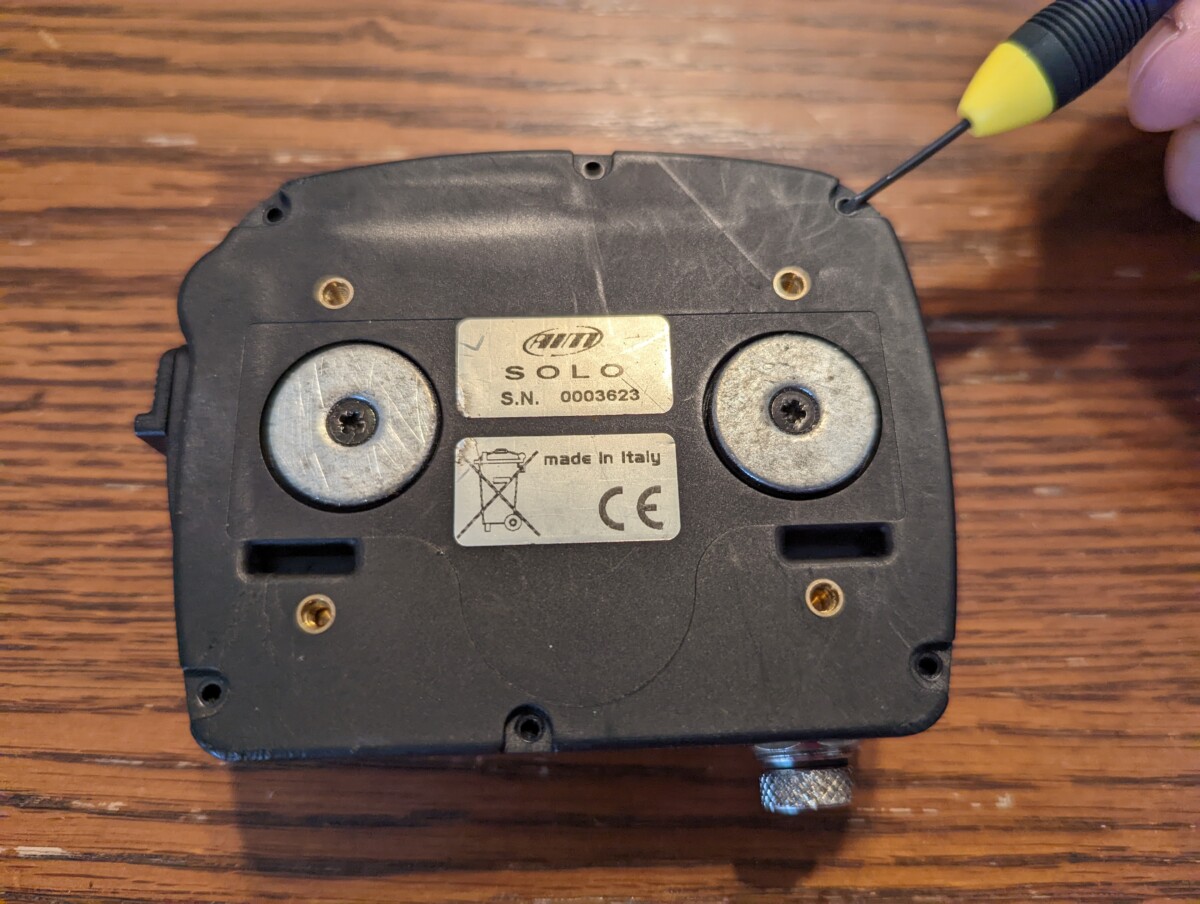
The Aim Solo has several small screws to remove
Despite being supposedly not user-serviceable, the Aim Solo has 6 small screws on the back.
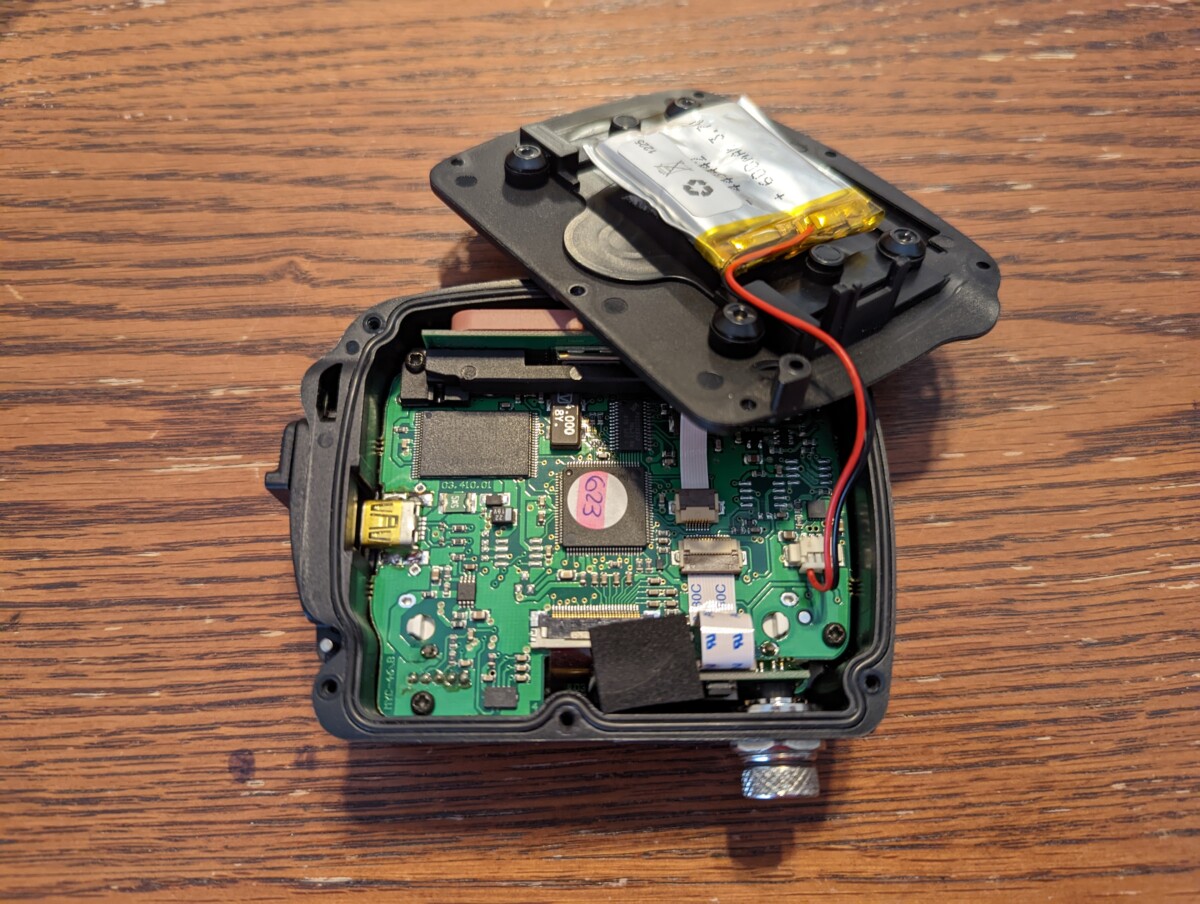
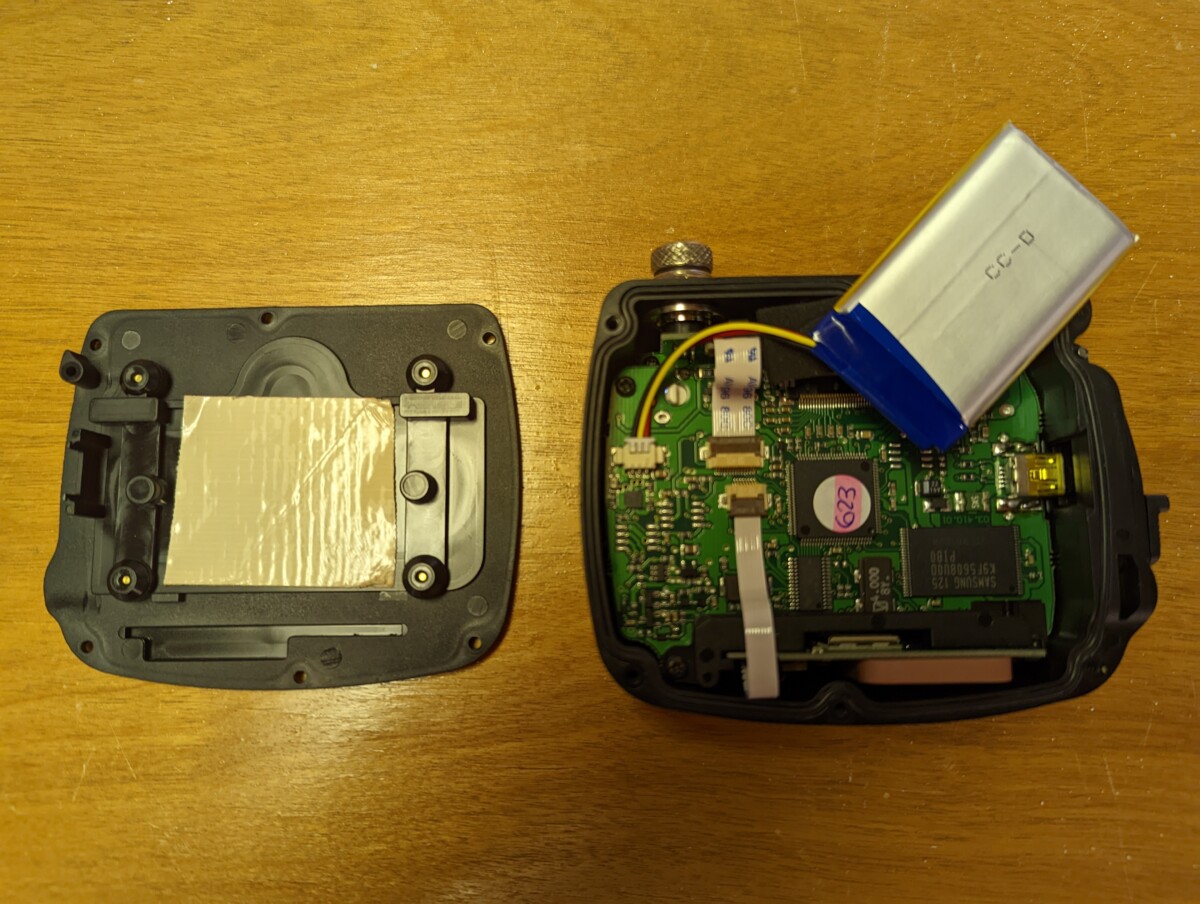
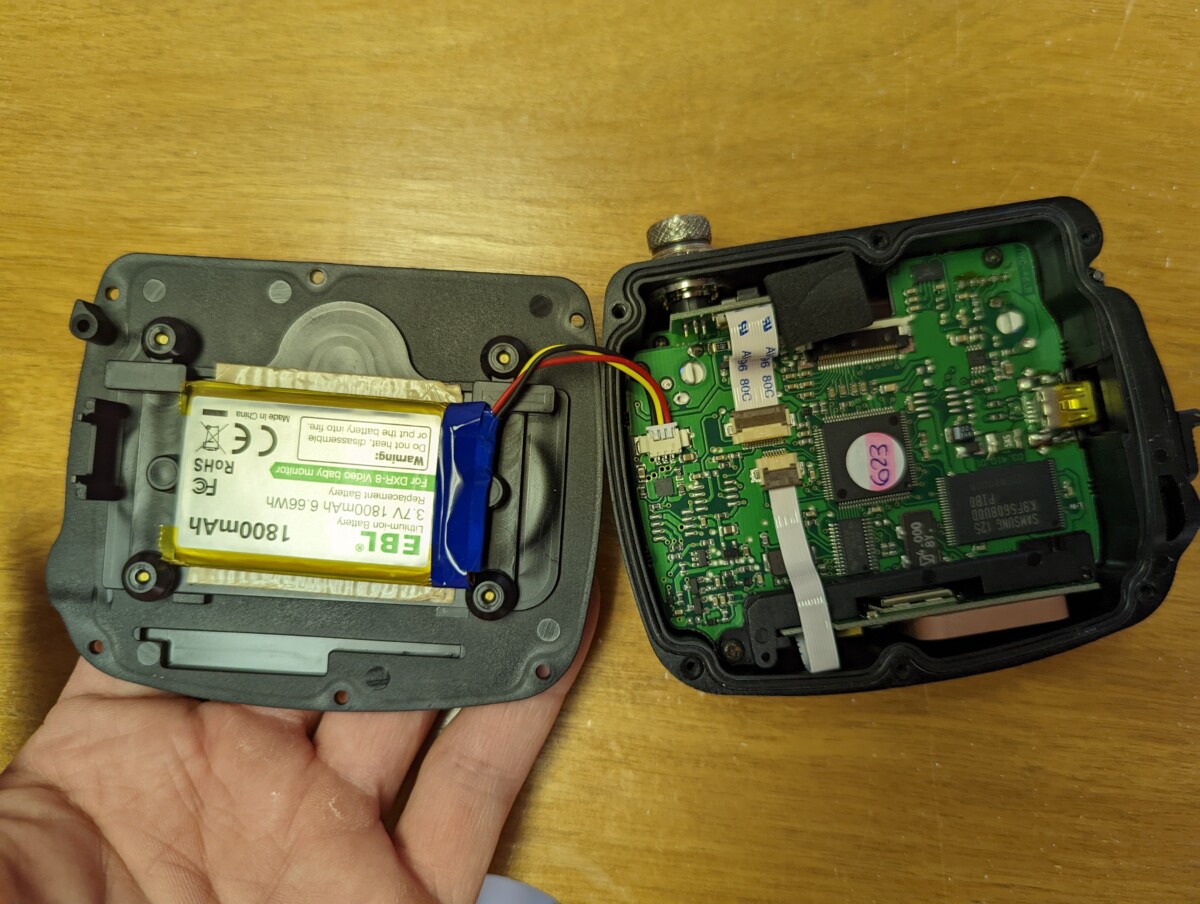
Back removed from the Aim Solo
With the screws removed, the back should come off. Note that the battery is taped to the back panel, so you need to unplug it before it can be fully removed.
Battery Comparison
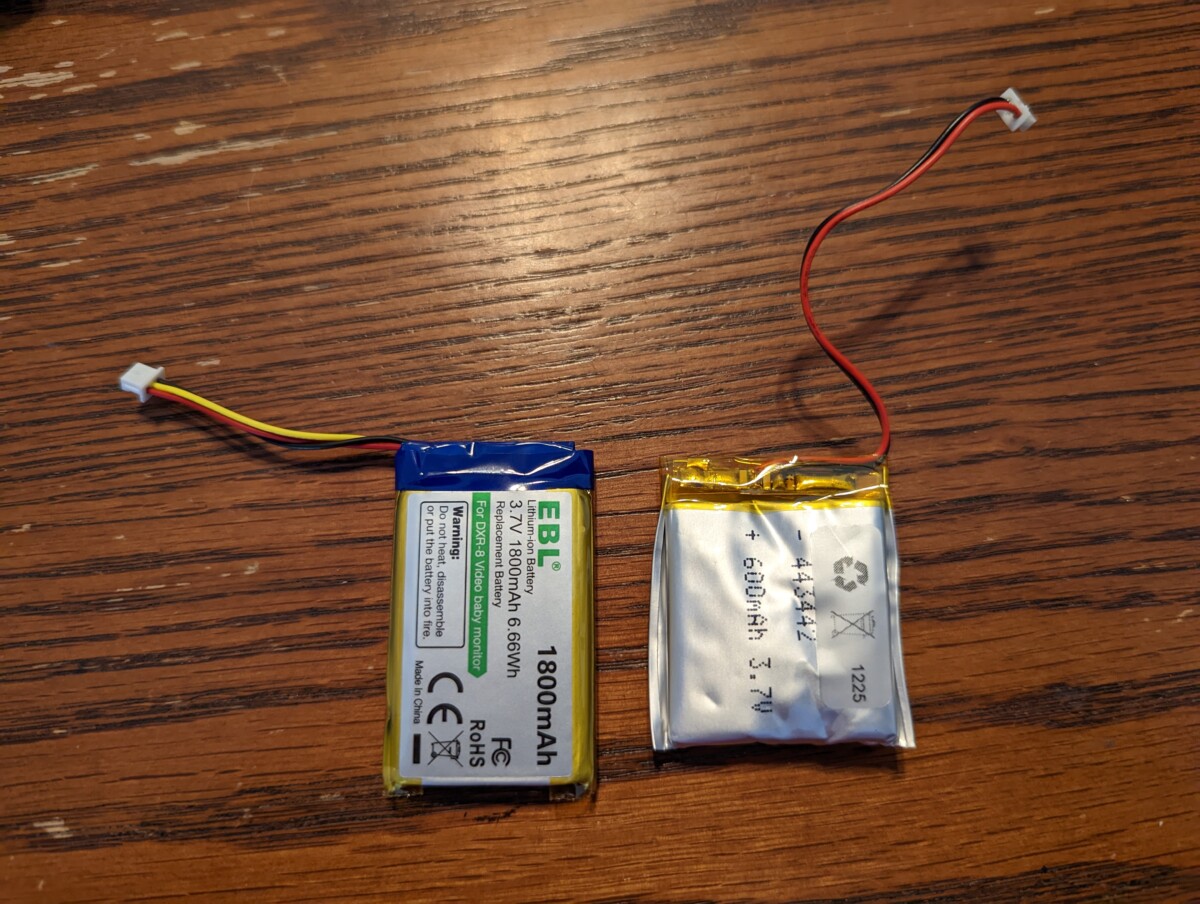
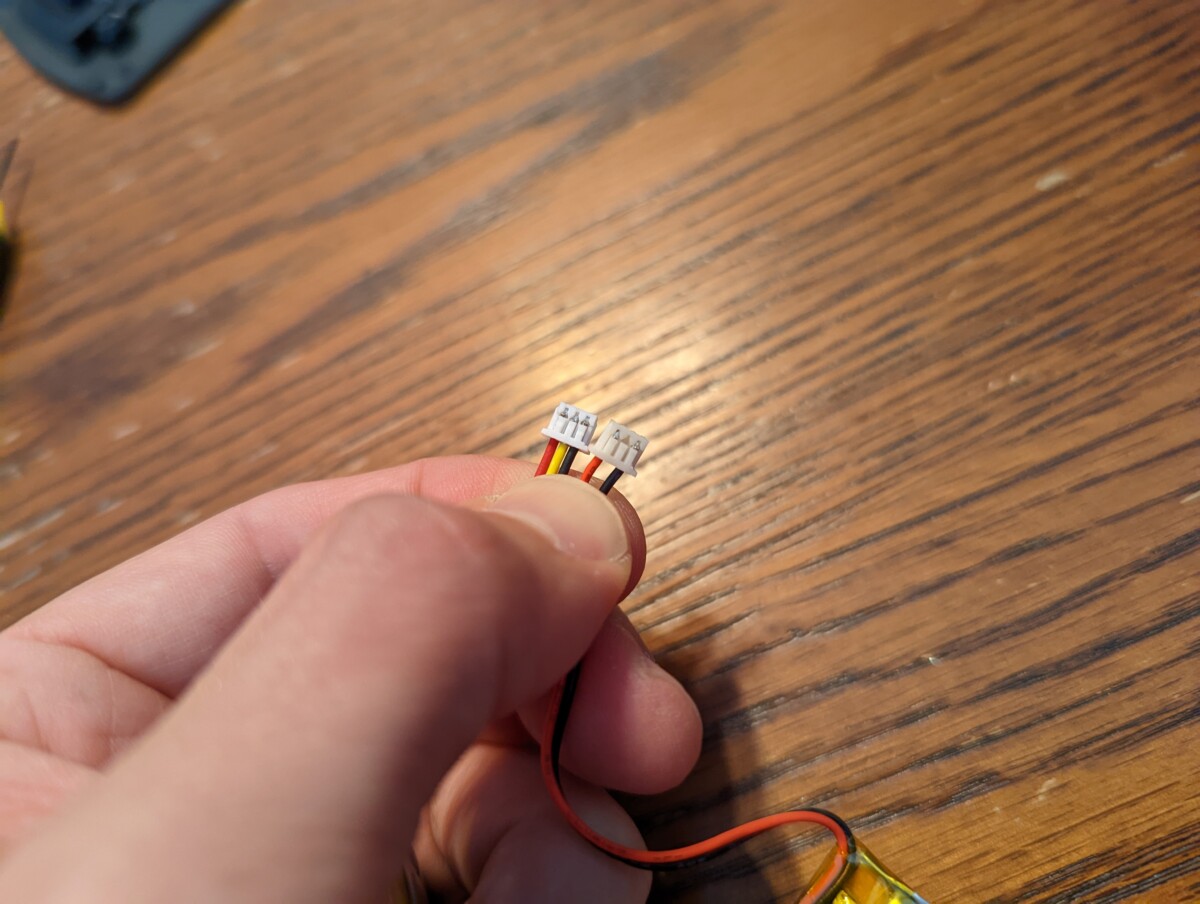
I don’t think this was the original battery

Same connector, but note the red and black wires are switched
Here is the new battery (left) vs the battery I removed from the Aim Solo (right). Obviously, I don’t believe this was the original battery. It has no balance wire (yellow wire) and is only 600mAh. I’m not sure the balance wire is truly necessary, but given that the board has a 3-pin socket, I would lean towards ensuring the replacement battery also has all 3 wires.
Regardless of what replacement battery you go with, you do need to make sure the pinout is correct. As you can see, the new battery has the red (positive) and black (ground) wires reversed from the old one. We’ll have to re-pin it.
Repinning the New Battery
Note: Be careful not to touch the red (positive) and black (negative) wires together. Shorting the battery like this can damage it very quickly.
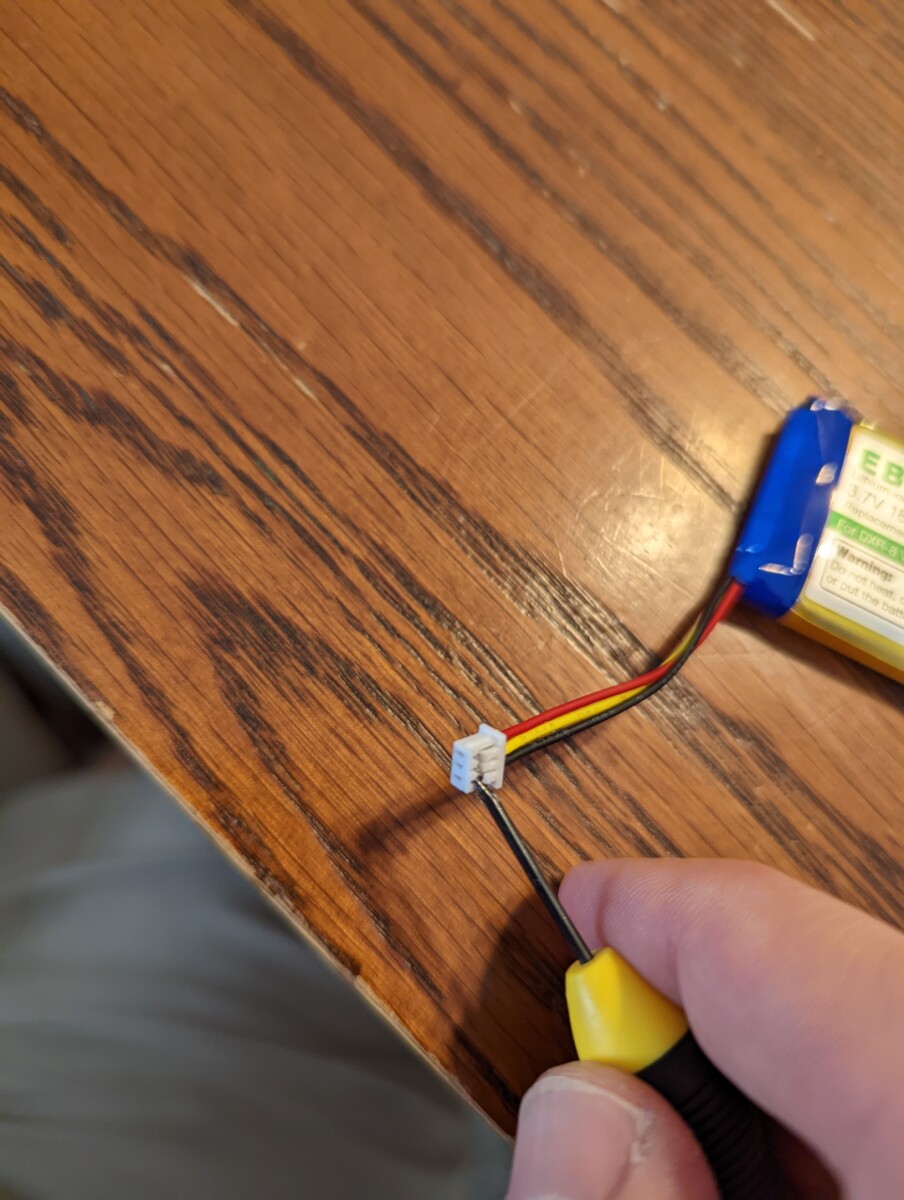
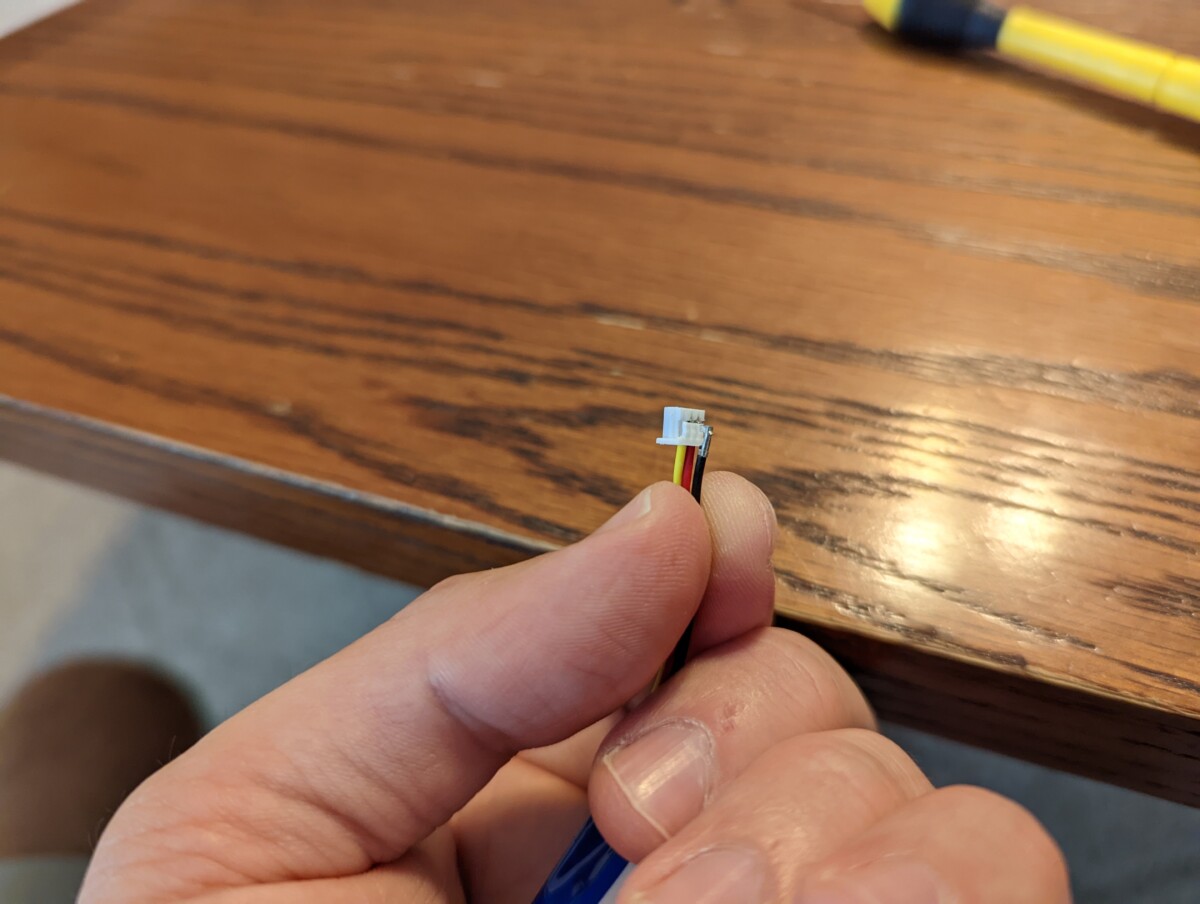
I used a small screwdriver to depress each pin’s tab
The JST connector has these small tabs holding the pins in. I used a small screwdriver as shown to depress it. While still pressing the tab, I gently but firmly pulled on the wire. When the tab is pressed properly, the wire pulls right out.
Here’s what a removed pin looks like
Here’s what the pin looks like when it’s removed. If you damage these, it is possible to replace them with an JST-PH connector kit and a decent crimp tool for such small connectors.
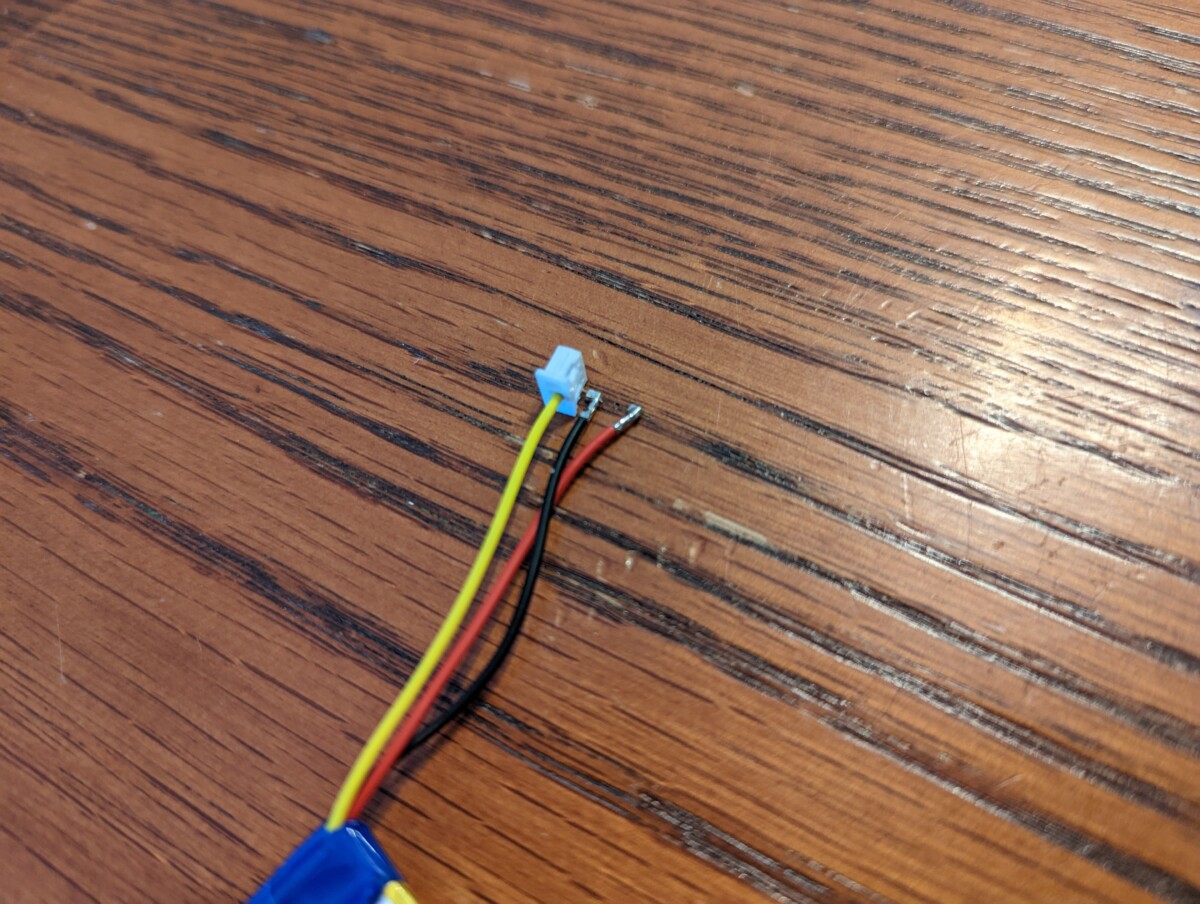
Both wires have been removed
Wires are now correctly oriented
Once both pins are removed, you can go ahead and reinsert them. They should simply slide in and lock in place. The second picture shows that they now match the old battery.
Quick Test

Successfully turned on
At this point, I went ahead and did a quick test before wiring everything together. With the new battery plugged in, the Aim Solo should start up as shown. If it doesn’t, you can also try charging it briefly. Once I knew it worked, I moved on to reassembling the unit.
Securing the Battery
Carpet tape, tape of champions
Battery secured to the back cover
The old battery was secured to the back cover by some flexible adhesive. I had some extra carpet tape laying around and used a piece of that to hold the new one in place. I think this should work just as well as anything, but I’m no expert.
Conclusion

It seems to work like new
And that’s it, the Aim Solo now works good as new. An Aim Solo 2 would certainly be nicer, but it’s hard to beat getting the original so cheap. And if you have an Aim Solo that you like with a dead or nearly-dead battery, it’s hard to beat about 8 bucks for a new Aim Solo battery.
My battery is on order!
Do you think that the polarity of the wires is important ?
If yess what about tte yellow one?
Thanks
Tam
Hi, sorry for the delayed response. Yes, you absolutely must have the wires in the correct order.
I would like to replace my Solo 2 Battery. Do you by any chance which battery I need? I can’t seem to find any info on it without removing the battery first.
That is the original battery. I just opened mine. Exactly the same. I’ve owned mine since new, so it had never been replaced. Two wires only and 699mAh. 3.7V. 443442 printed on it