F-150 Transfer Case, Front and Rear Differential Fluid Replacement
On my 2011 F-150, Ford officially recommends replacing the transfer case and front and rear differential fluid at 150,000 miles. However, if you’re towing or in offroad environments frequently, you should change it earlier. Based on no actual data, I chose to change mine at about 100,000 miles. I don’t see a downside to getting fresh oil in all three of these systems, and it’s an easy job.
Tools / Consumables Required
- A basic wrench set
- Rear differential fluid: 2.75 quarts / 2.6 liters of 75w140 lubricant
- Ford Friction Modifier
* (If limited slip rear differential – see note below)
- Front differential fluid (If 4wd): 1.75 quarts / 1.8L of 80W90 lubricant – I used
Valvoline 75W90with no issues
- Transfer case (If 4wd): 1.6 quarts / 1.5L of Motorcraft XL-12
transfer case fluid
- Fluid transfer pump
- Brake cleaner
- RTV – I prefer Permatex Ultra Black
- An oil drain pan
- Plastic Scraper
– I really like these things, they let you scrape metal mating surfaces without any risk of scratches


* If you have a limited slip rear differential, you may want to add Ford’s Friction Modifier

Rear Differential
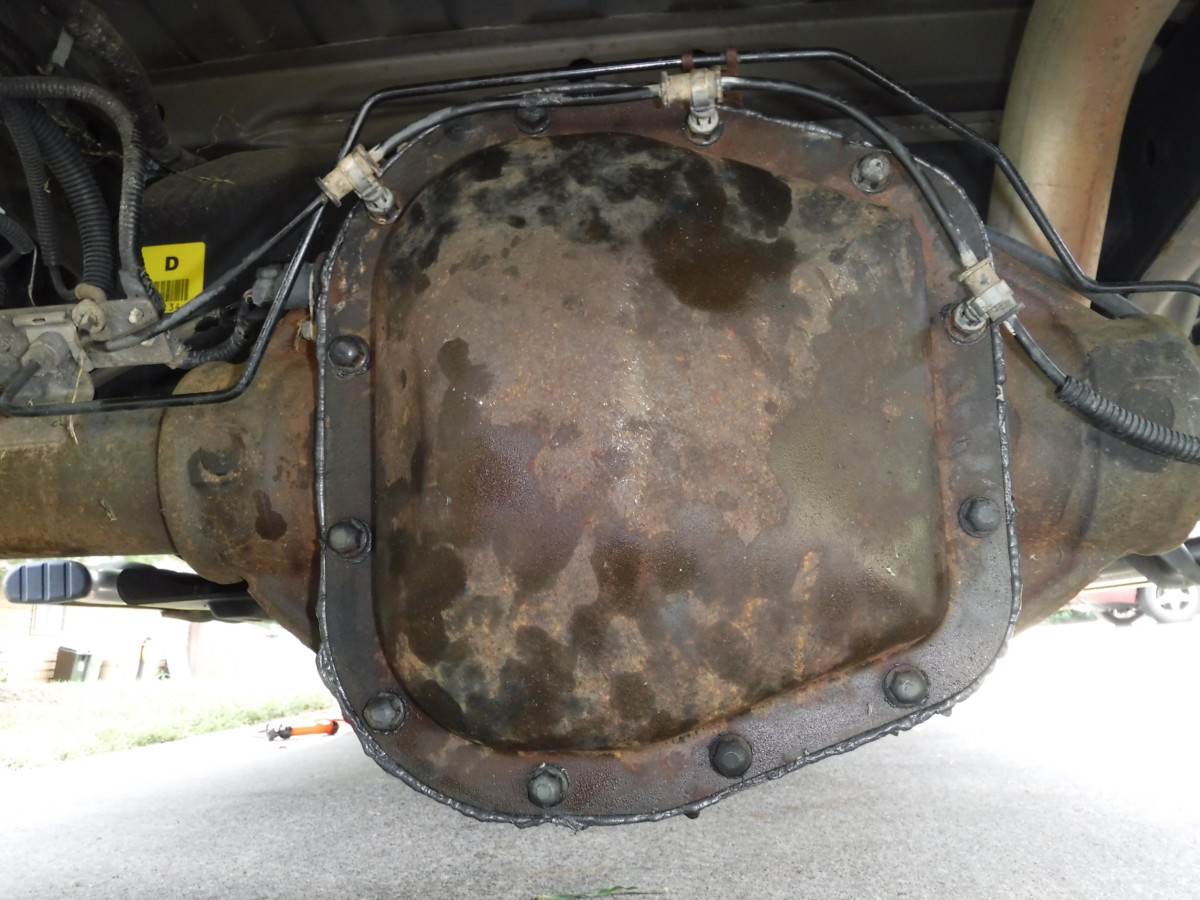
The rear differential
Ford, in a move that will forever anger and baffle me, does not like to put drain plugs in their rear differentials. The F-150 is no different. As a a result, you have to remove the cover to drain, and then it can be refilled through the fill plug.
Another note: this procedure is easier with the spare tire removed. I didn’t document that step, but it gives more room to work around the rear axle.
Removing the Fill Plug – Rear Differential
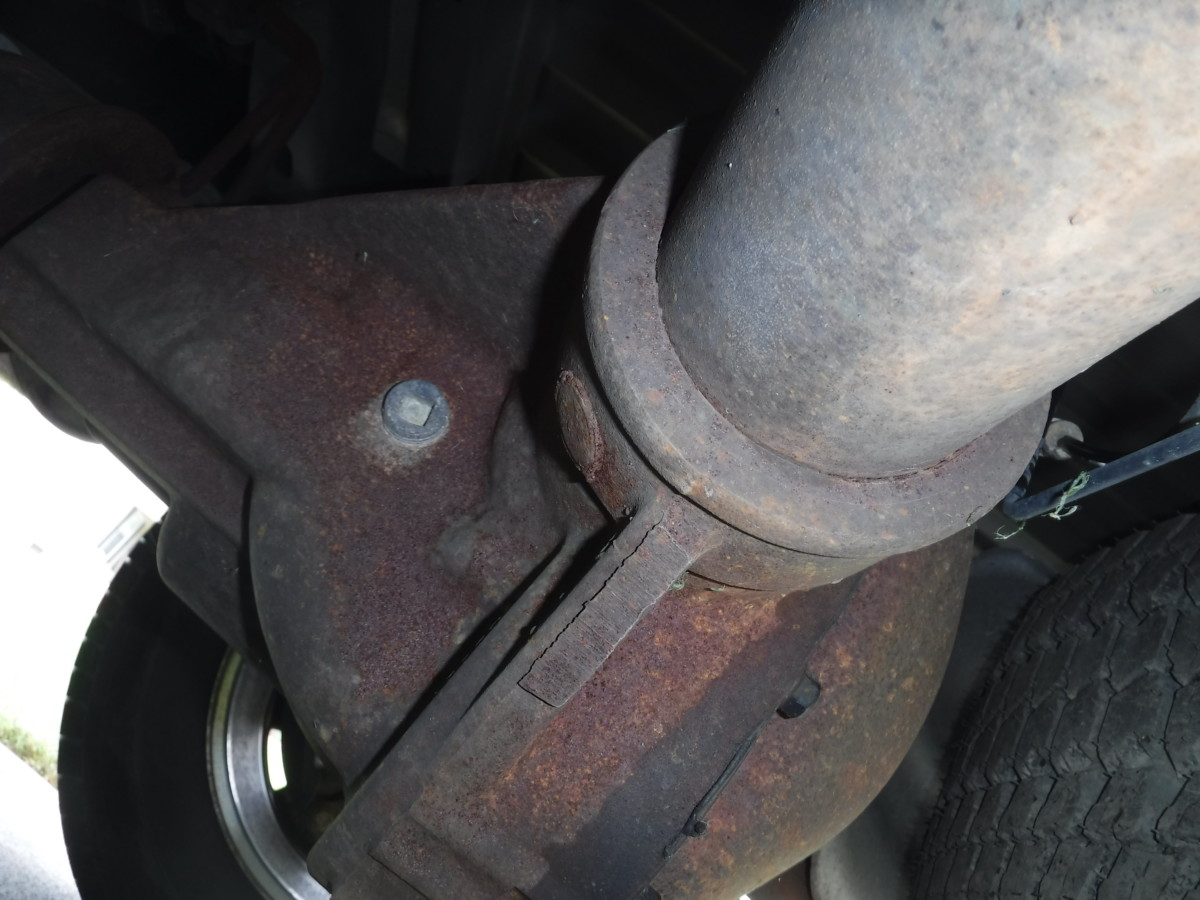
Fill plug on top of rear differential
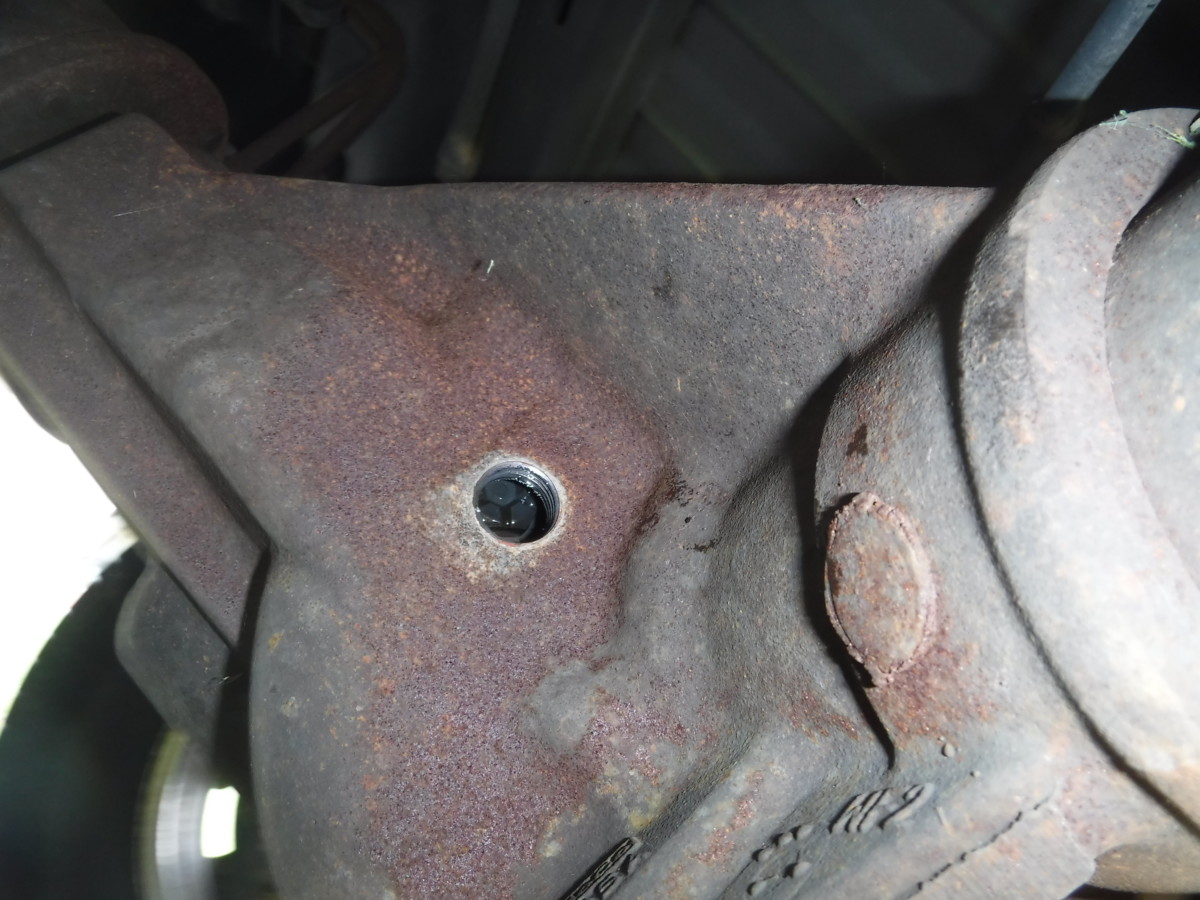
Removed fill plug
Make sure you can remove the fill plug before doing anything else. This is true for any fluid change on any part on any car. If you can’t get the fill plug out, the vehicle is still driveable. If you drain first, you could find yourself in trouble when you realize the fill plug is rust welded in place.
The F-150 rear differential fill plug is on top of the differential on the driver’s side above the axle shaft toward the front of the truck, as pictured. You don’t use a socket for this plug; instead, simply put a 3/8″ socket wrench directly on the bolt. A regular 3″ 3/8″ extension can be helpful.
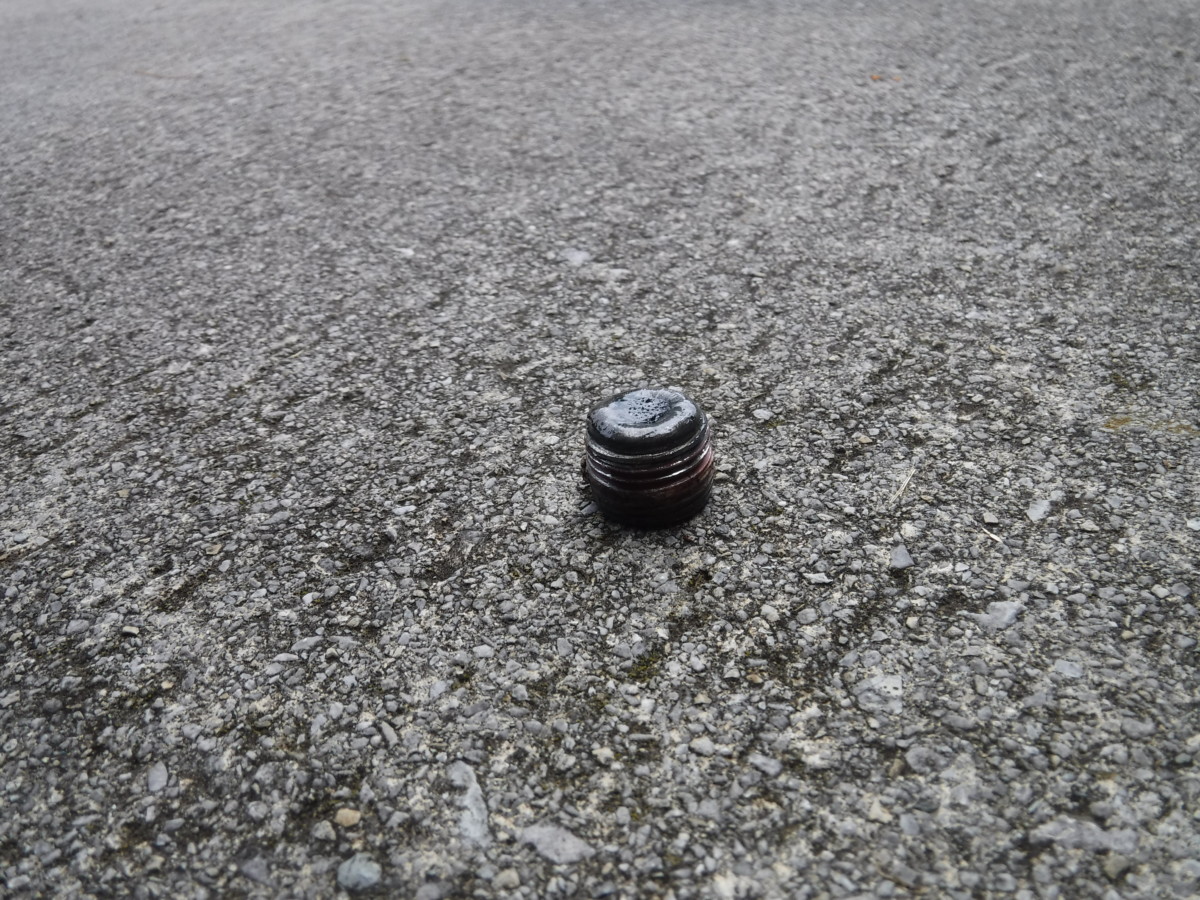
Dirty plug still to be cleaned
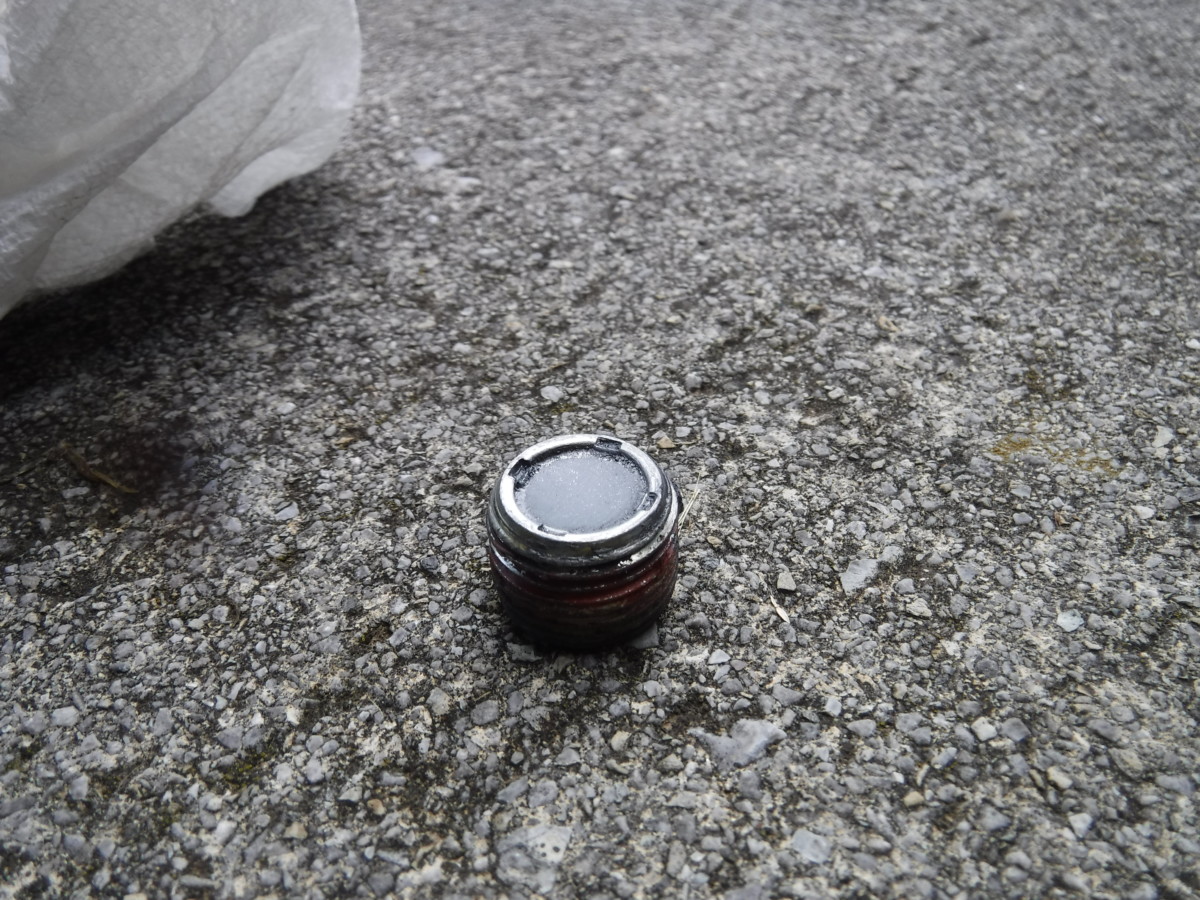
Gunk wiped off of plug
The fill plug is intentionally magnetic, to help trap small shavings and metal particles as the differential wears over time. Be sure to clean the gunk off. I just wipe it with a cloth and maybe a little bit of brake cleaner.
Remove the Line Around the Cover
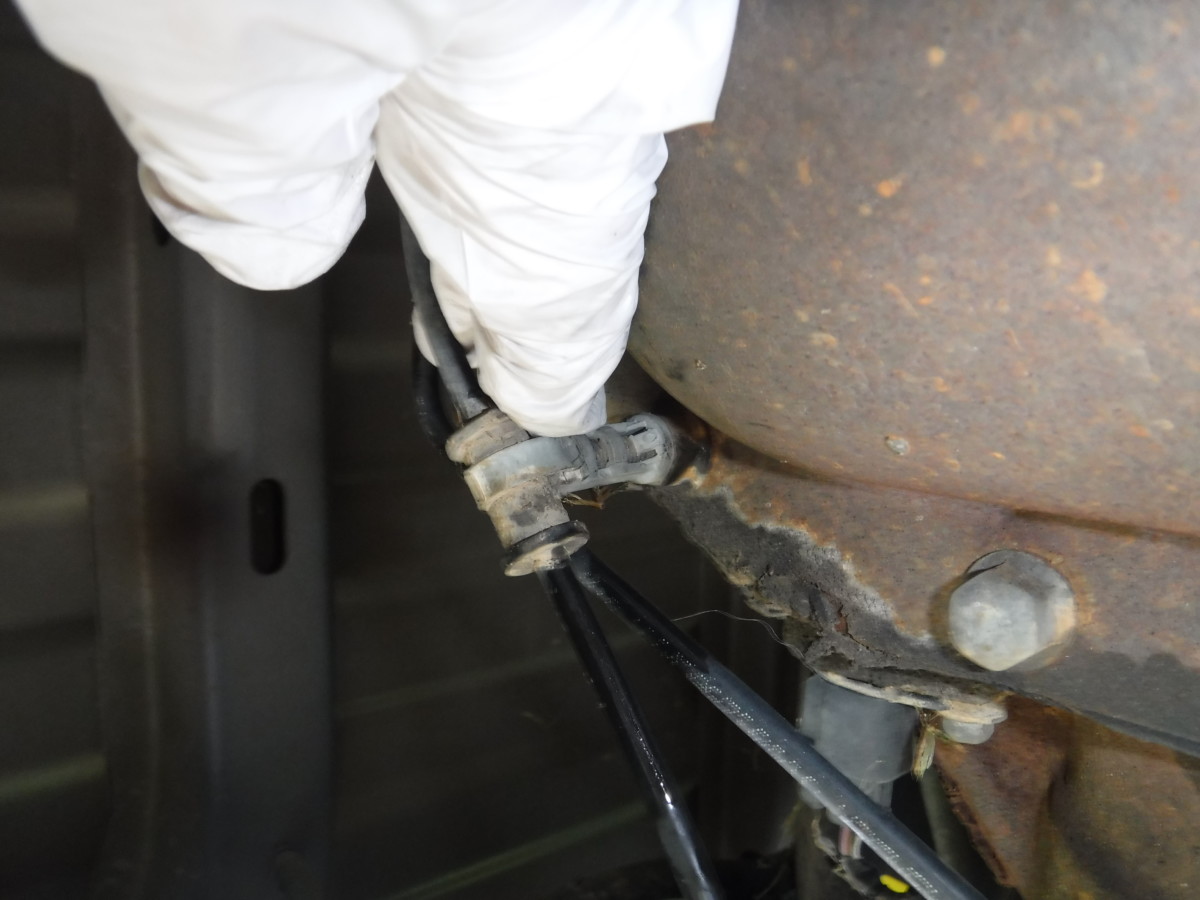
Example
Pulls right off
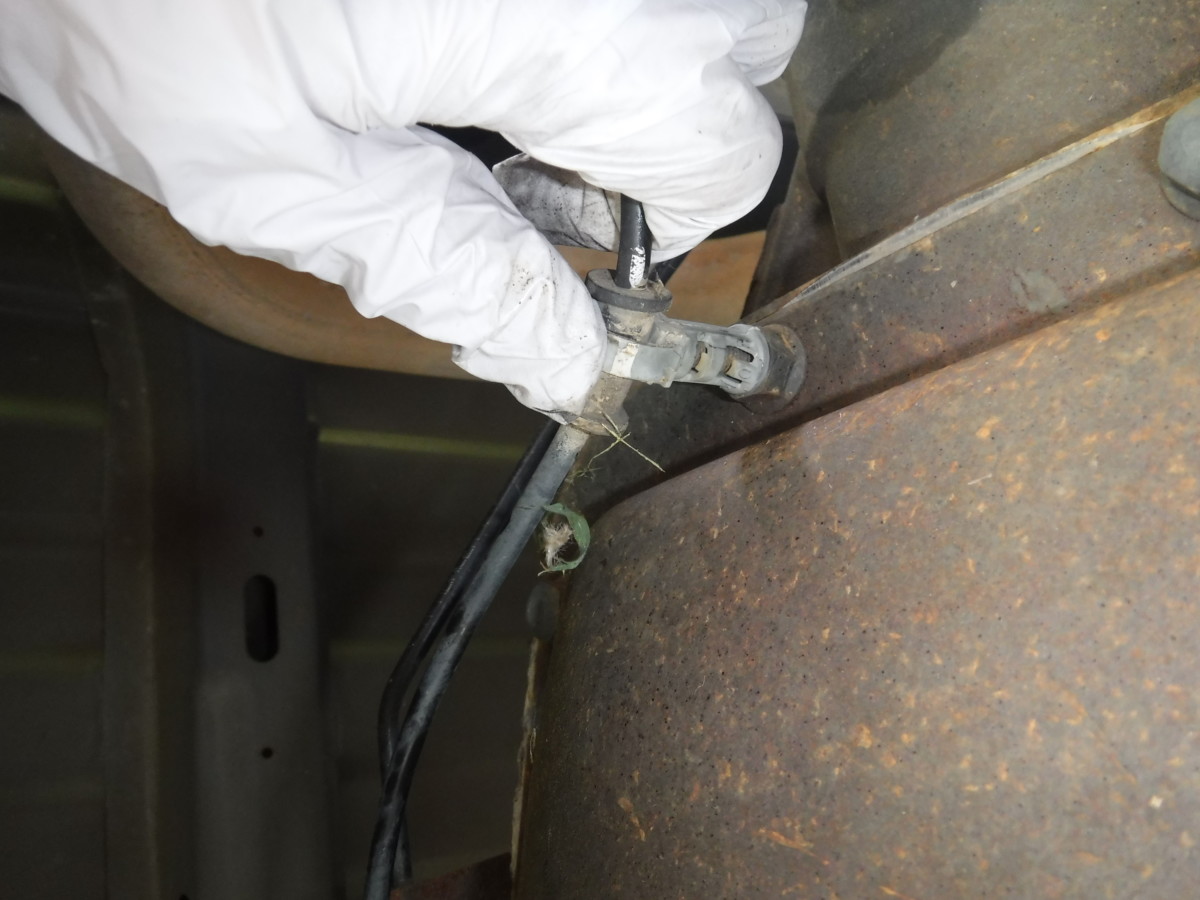
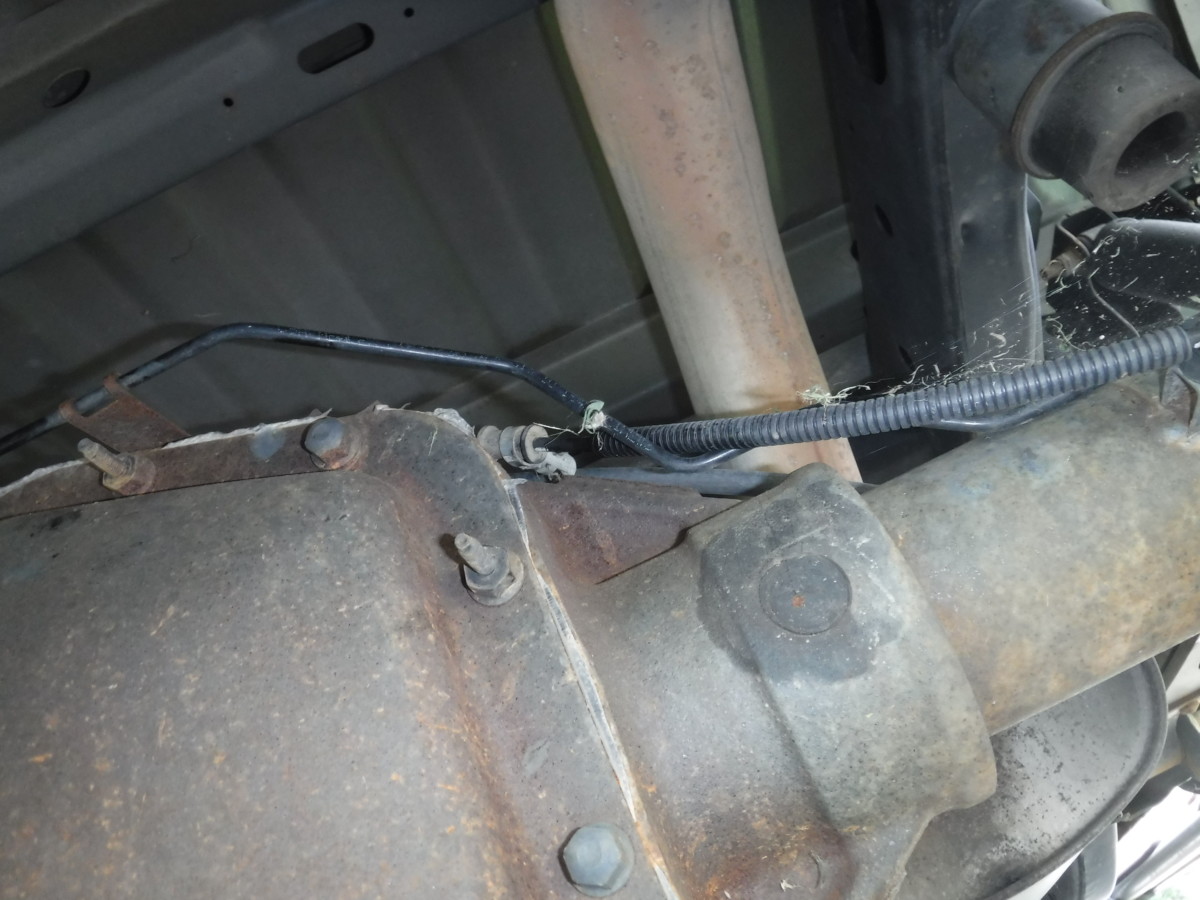
I’m not sure what this line is for – ABS maybe? – but you need to detach it from the rear differential cover. These plastic plugs pull right off of the cover bolts. There are three in total.
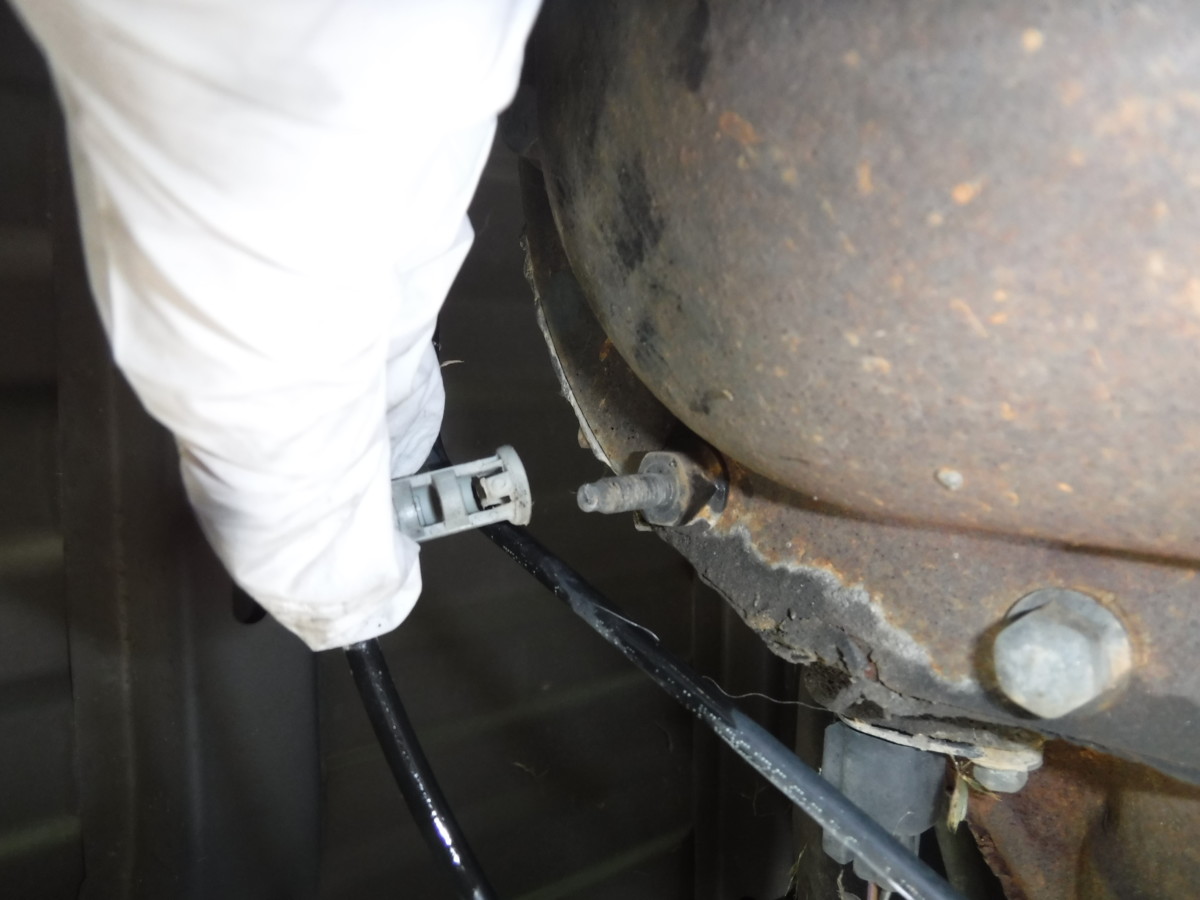
Second one
Third one
Here are the other two.

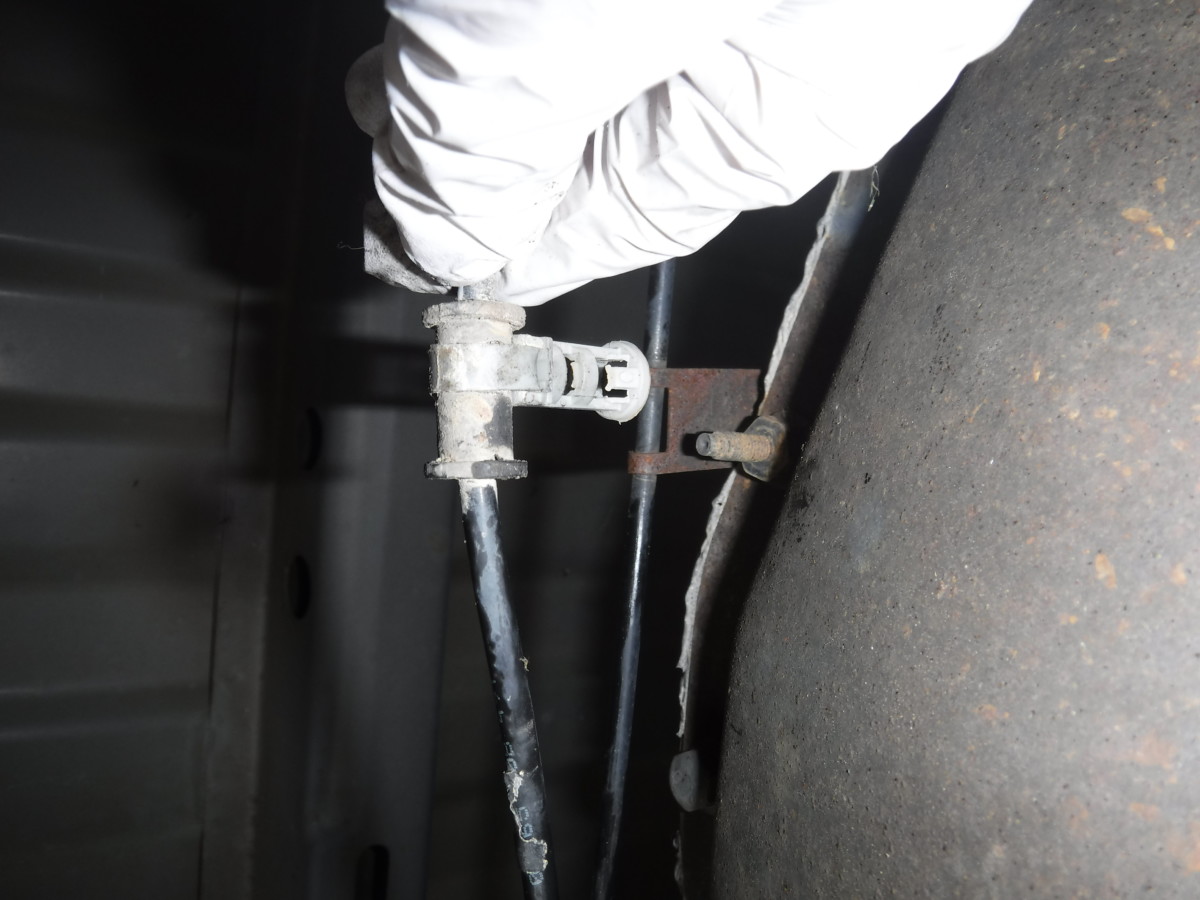
Cable now loose
It tucks easily above the differential
Once they’re out, you can tuck the line above the differential as shown.
Draining the Rear Differential
Get your drain pan and start cracking all of the bolts loose
As stated, Ford didn’t put a drain plug on these differentials, so you have to remove the cover. (Sigh.)
Slide your drain pan under the rear differential. With that in place, crack each of the 12 cover bolts loose, but don’t remove them yet. The socket in the picture is on one of the bolts.

Tappy tap tap

Fluid pouring out
Once they’re all loose, you can start removing them. At some point, fluid will likely come pouring out. If all twelve bolts are removed and it still isn’t loose, you can give a firm whack on the top of the housing with a deadblow hammer. The force is often enough to loosen the cover.
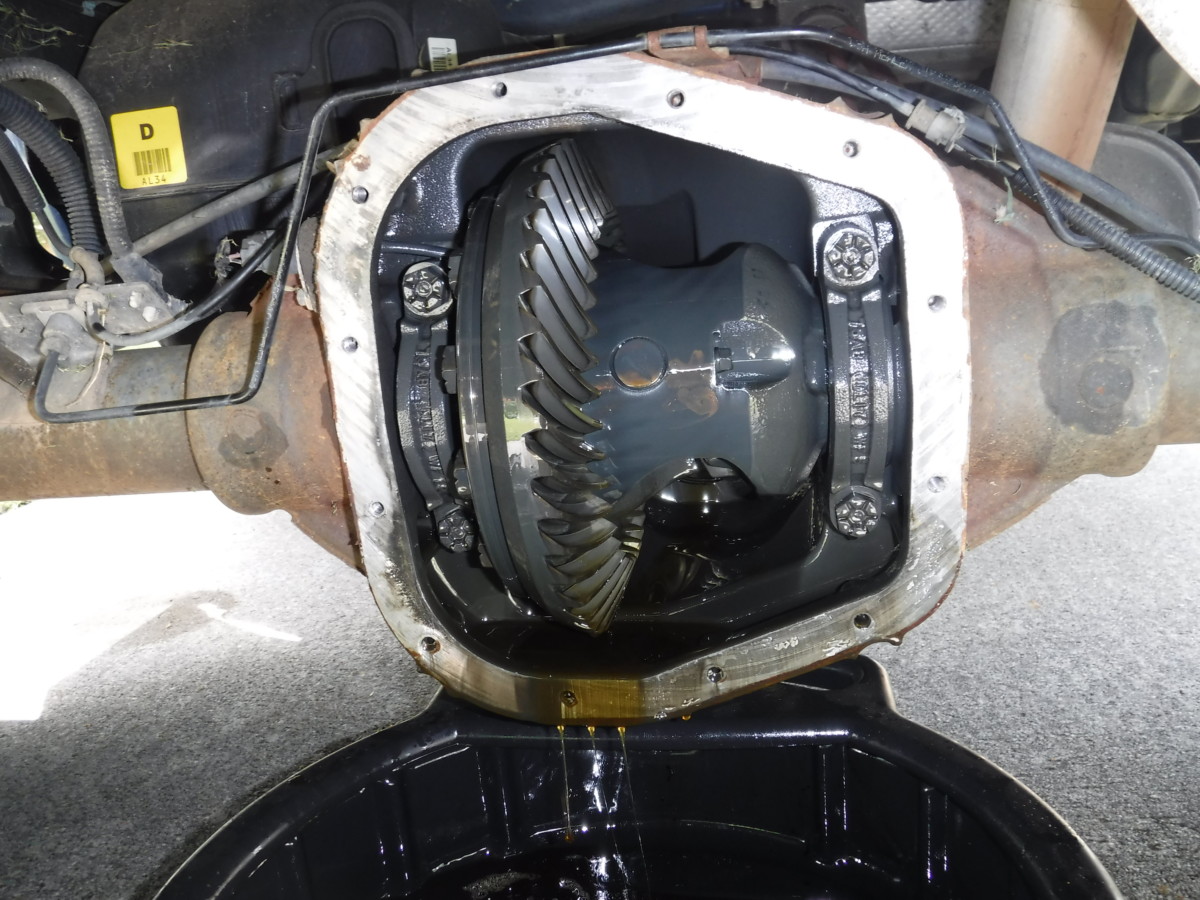
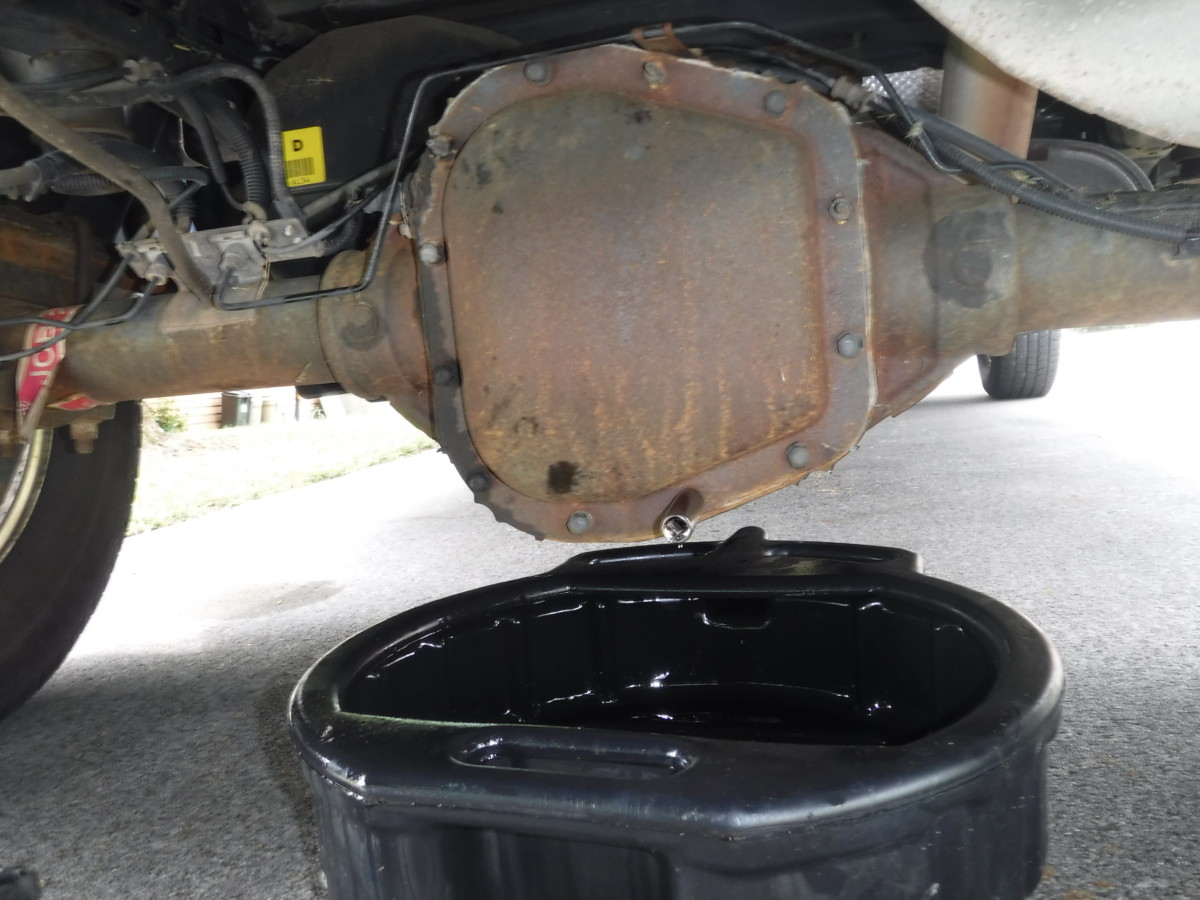
Letting it finish draining
Once the flow slows down, pry off the cover completely and let the rest of it finish draining.
Cleaning the Mating Surfaces

Brake clean and a plastic scraper are your friend
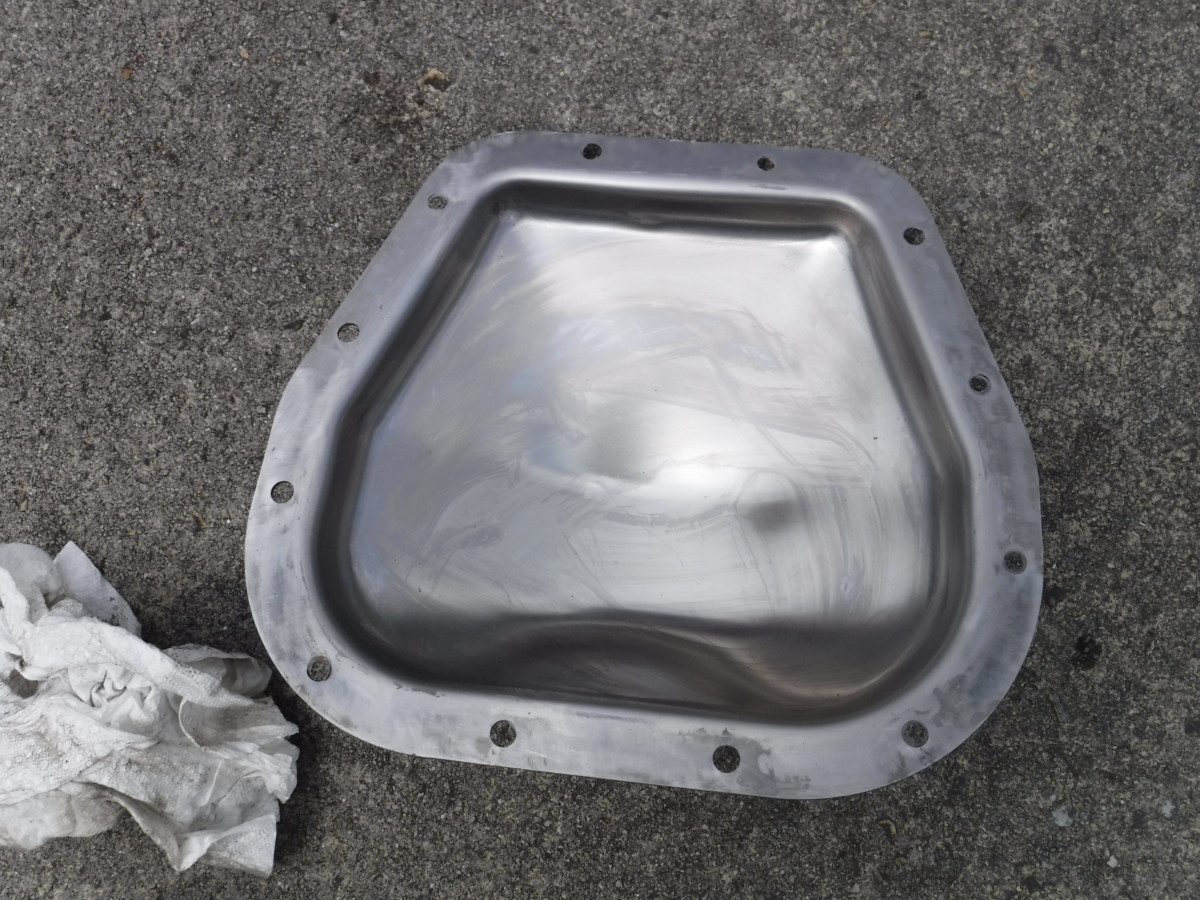
After cleaning
The mating surface of the cover needs to be clean enough for the new RTV to bond to it and seal properly. I find a plastic scraper


Mating surface now clean
Use the same approach on the mating surface of the differential housing. Note that it’s not absolutely spotless, but all of the old RTV is gone. Any remaining imperfections are taken up by the new RTV. As you scrape out the old RTV, try to keep it from going into the differential housing. You don’t want to add chunks of garbage to your differential.
Putting the Cover Back

RTV applied to cover
Now the cover goes back on. Put a solid bead of RTV around the clean rim. I really like Permatex Ultra Black
The rear differential
Once the RTV is applied, carefully place the cover straight back on. Try not to shift it around too much, as that can smear the RTV. While holding the cover in place with one hand, use your other to thread the bolts back in by hand.
Torque them incrementally in a round robin pattern. The cover bolts torque to 33 lb-ft. I like to torque them all to 10, 20, and then 33 to ensure it’s evenly tightened. By round robin, I mean similar to lug nuts. Torque the bottom-most bolt, then the top, then the left, then the right, then the bottom left, top right, etc, moving as far across the cover as you can each time. This helps ensure the cover seats flush and avoids leaks.
Refill the Rear Differential
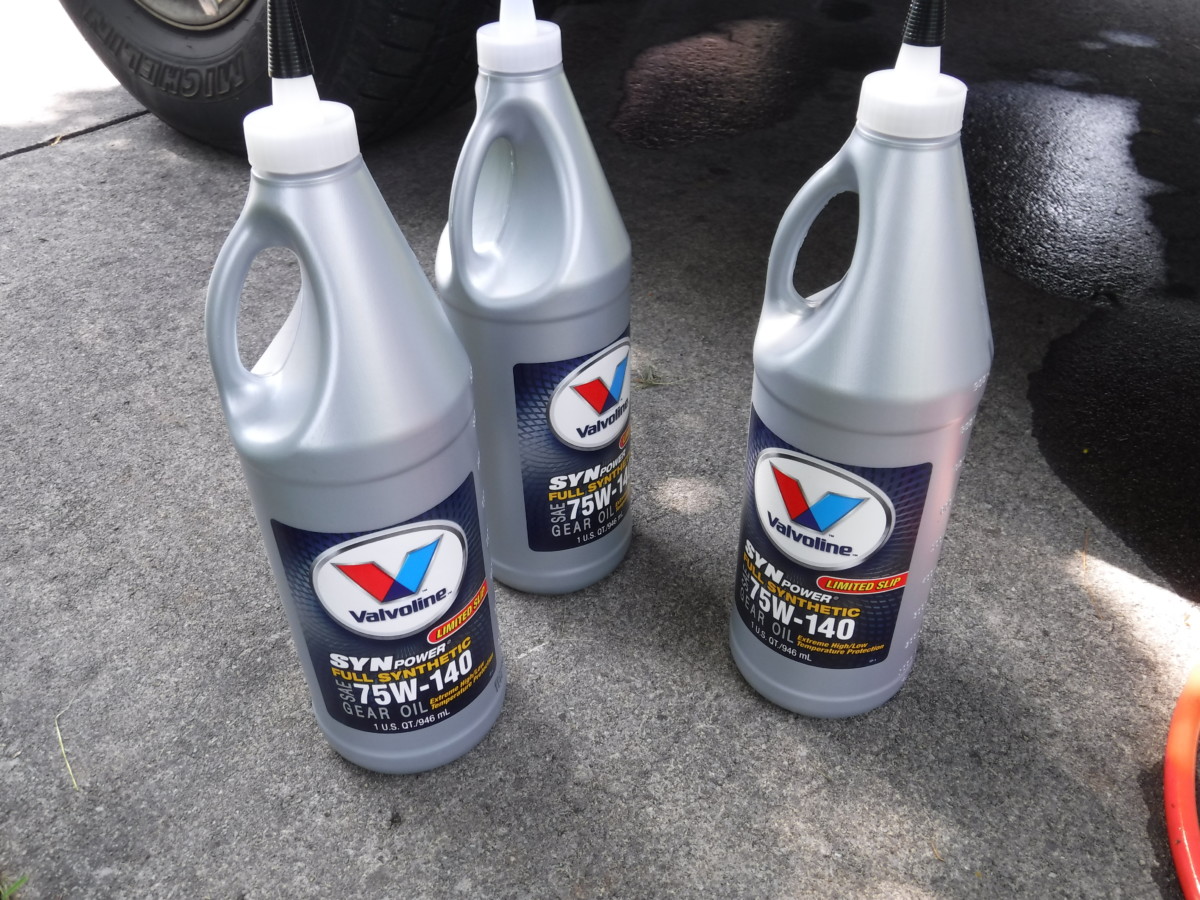
Rear diff fluid (75W140)
You want to give the RTV some time to dry – at least 15 minutes, but more is better. I went on to the front differential and transfer case and refilled the rear afterwards. Once dry, though, get out your three bottles of 75W140.
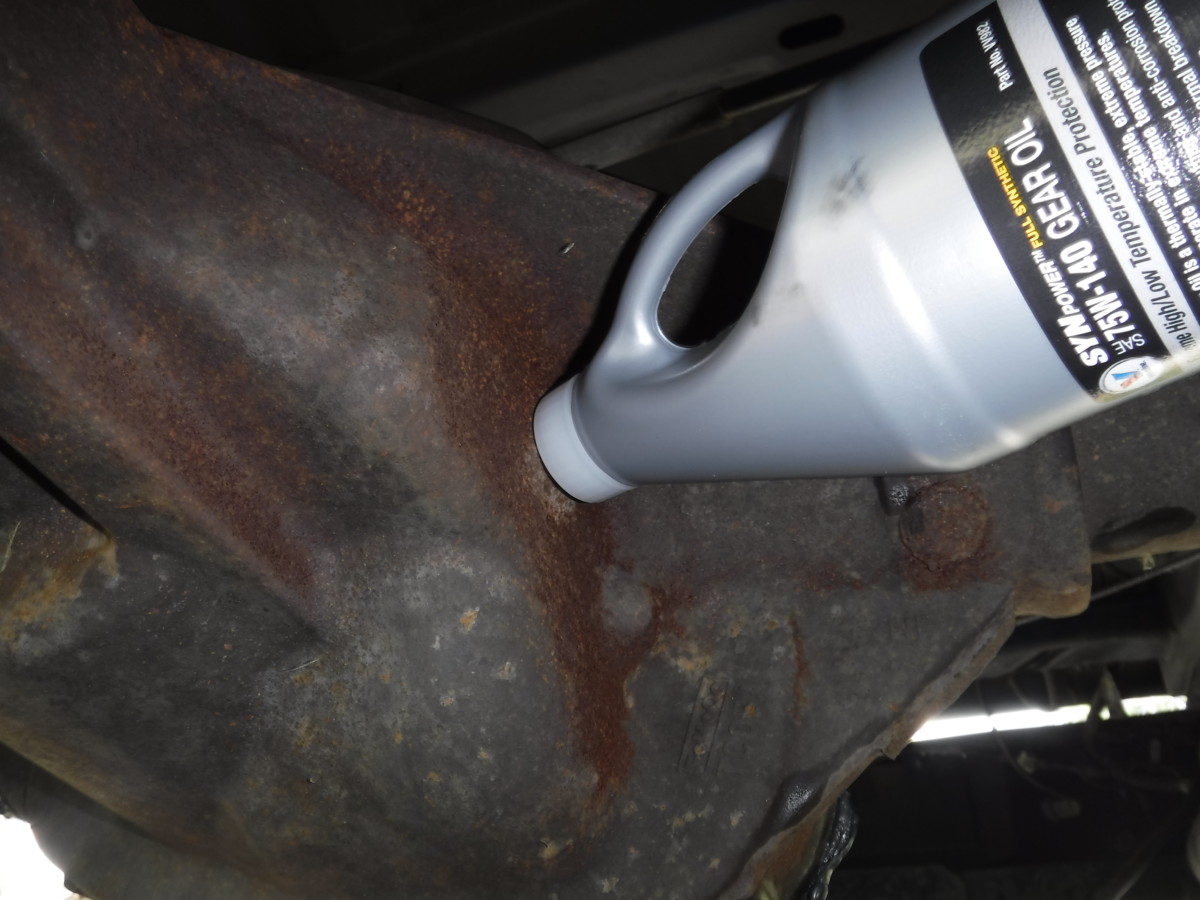
Pour in the fill hole until it starts dripping out
There is enough room above the rear differential to simply pour the fluid in as shown. If you are adding friction modifier for your limited slip differential, don’t forget to add all 4 ounces. Either way, fill with 75W140 until fluid starts dripping out of the fill hole. Once that happens, put the drain plug back in and tighten it down. Job done.
Removing the Front Differential Fill Plug
Front differential fill plug location

Close up of front diff fill plug
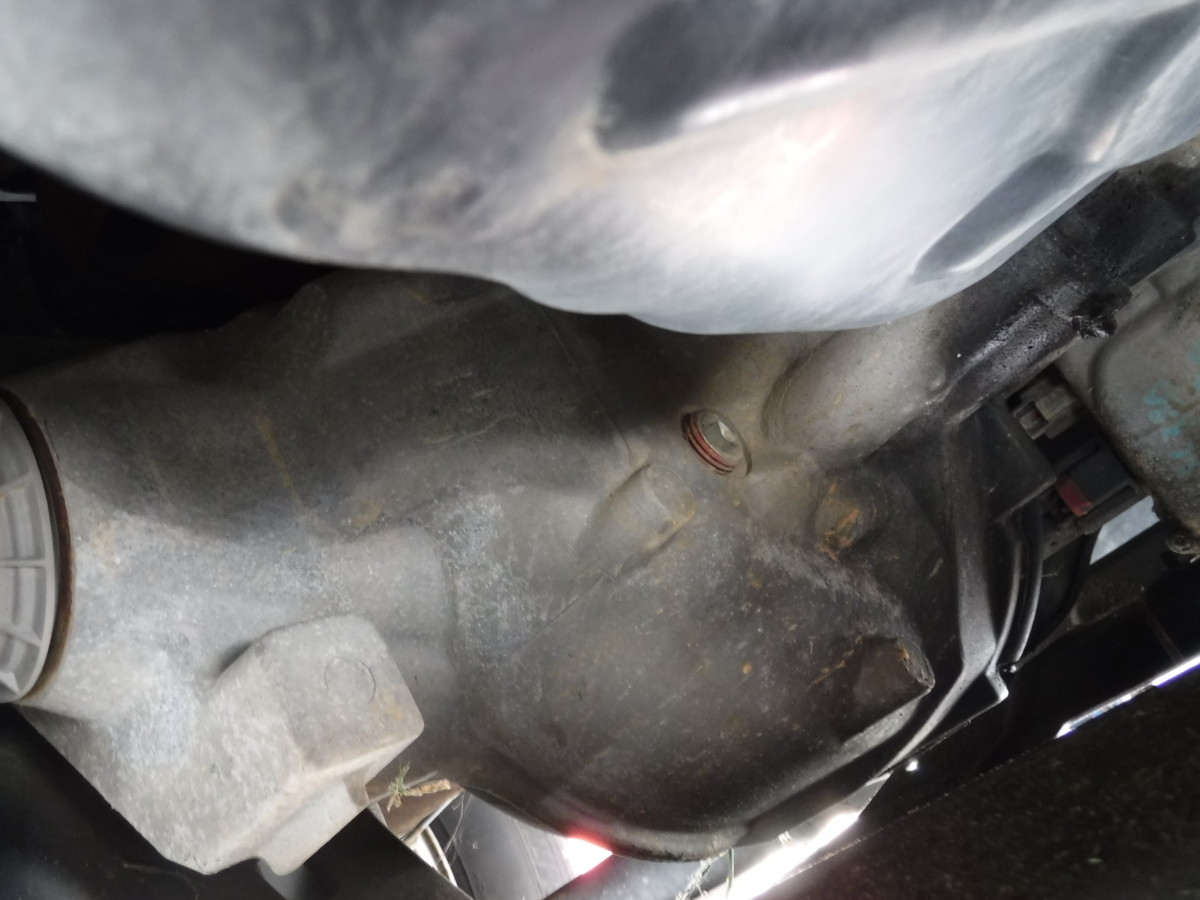
No wrench on the fill plug bolt
If you have 4wd, you may as well change the front differential fluid when you do the rear. Like the rear differential, start by removing the fill plug. It has a similar 3/8″ square drive bolt. Stick a wrench on and remove it.
Draining and Refilling the Front Differential
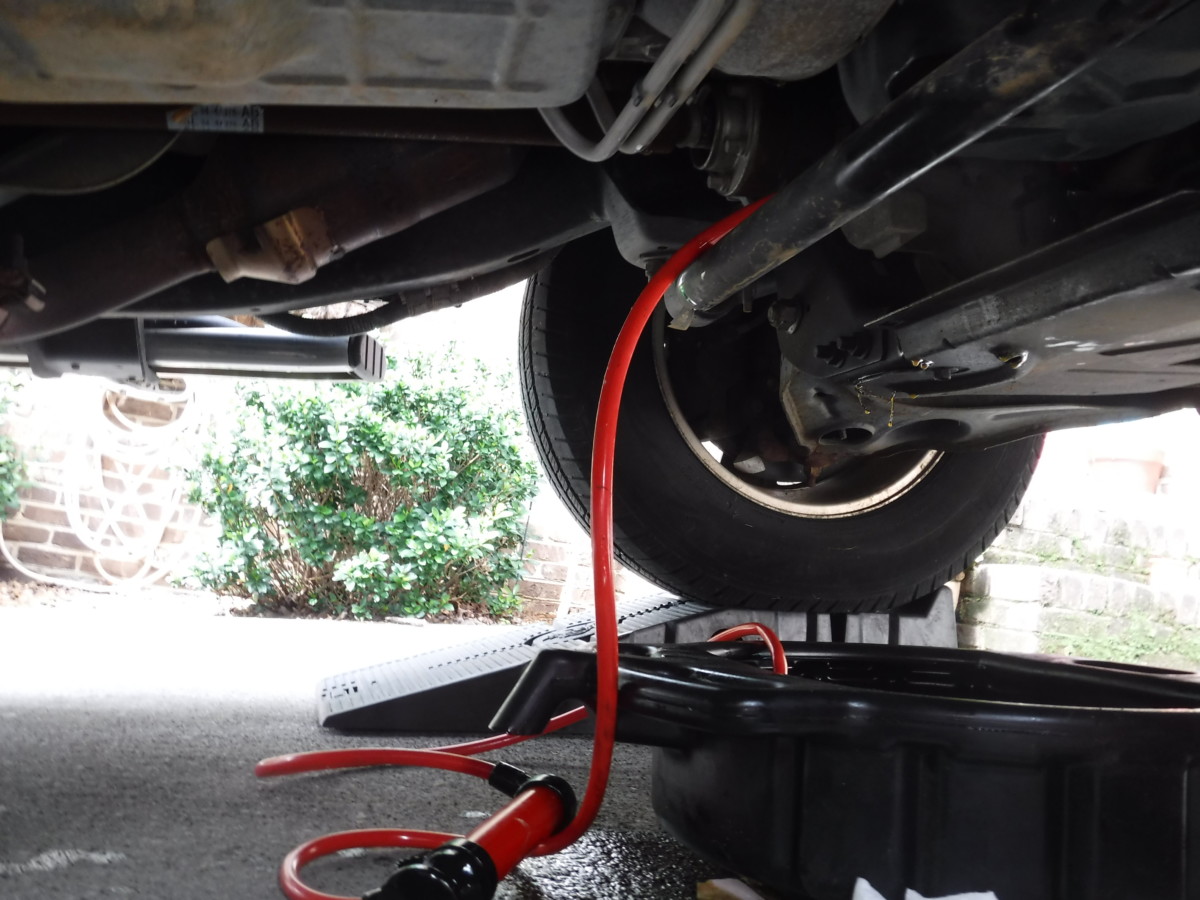
Far away shot of the transfer pump
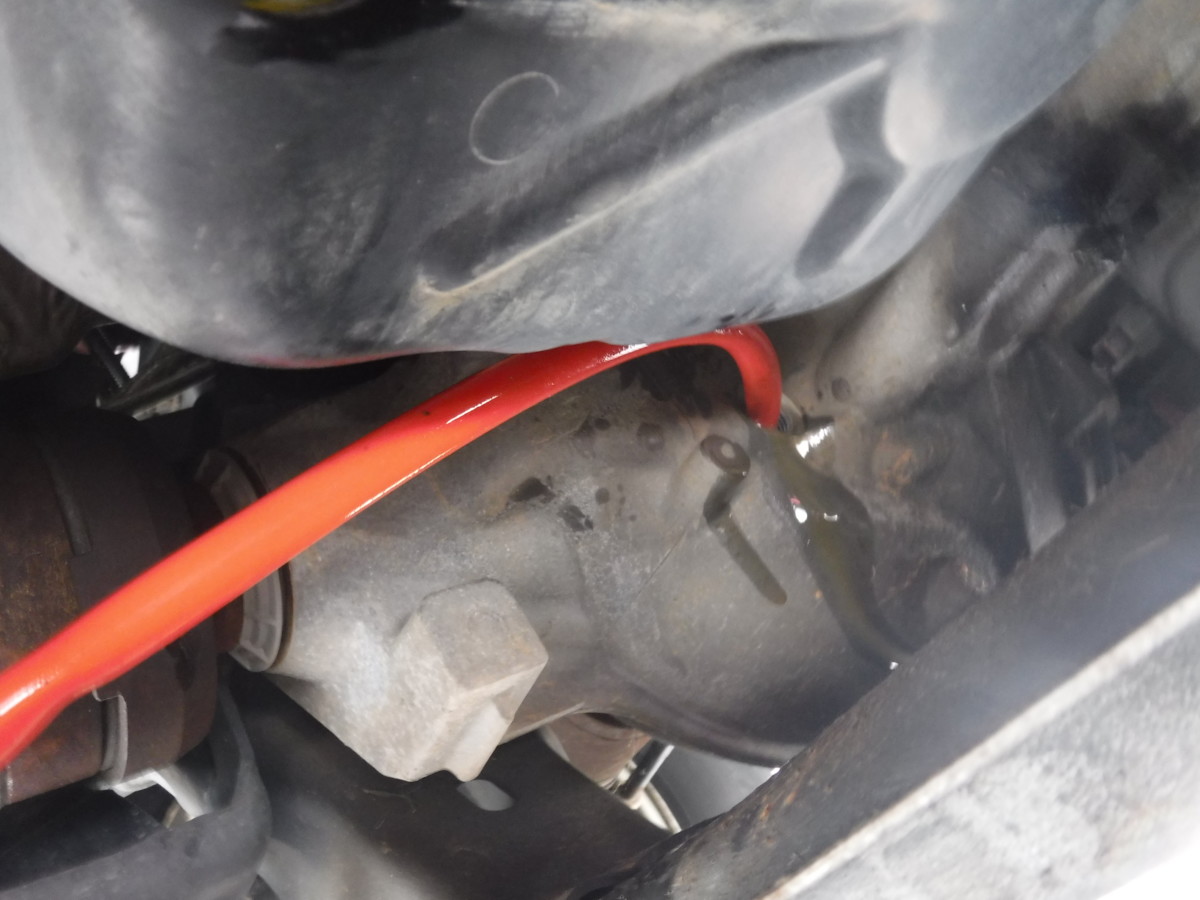
Fill plug with transfer pump tube
The Ford factory manual procedure involves dismantling the front differential to drain it. I didn’t do this because it’s a huge pain and generally speaking, the front differential gets used much less often than the rear, so it doesn’t get nearly as dirty. The compromise, which is much easier and still gets mostly fresh fluid in the differential, is to use the transfer pump
Once you get everything you can out, you can reverse the tubes. Siphon fluid out of your bottles of 75W90 until it drips out of the fill hole. And with that, you’re done.
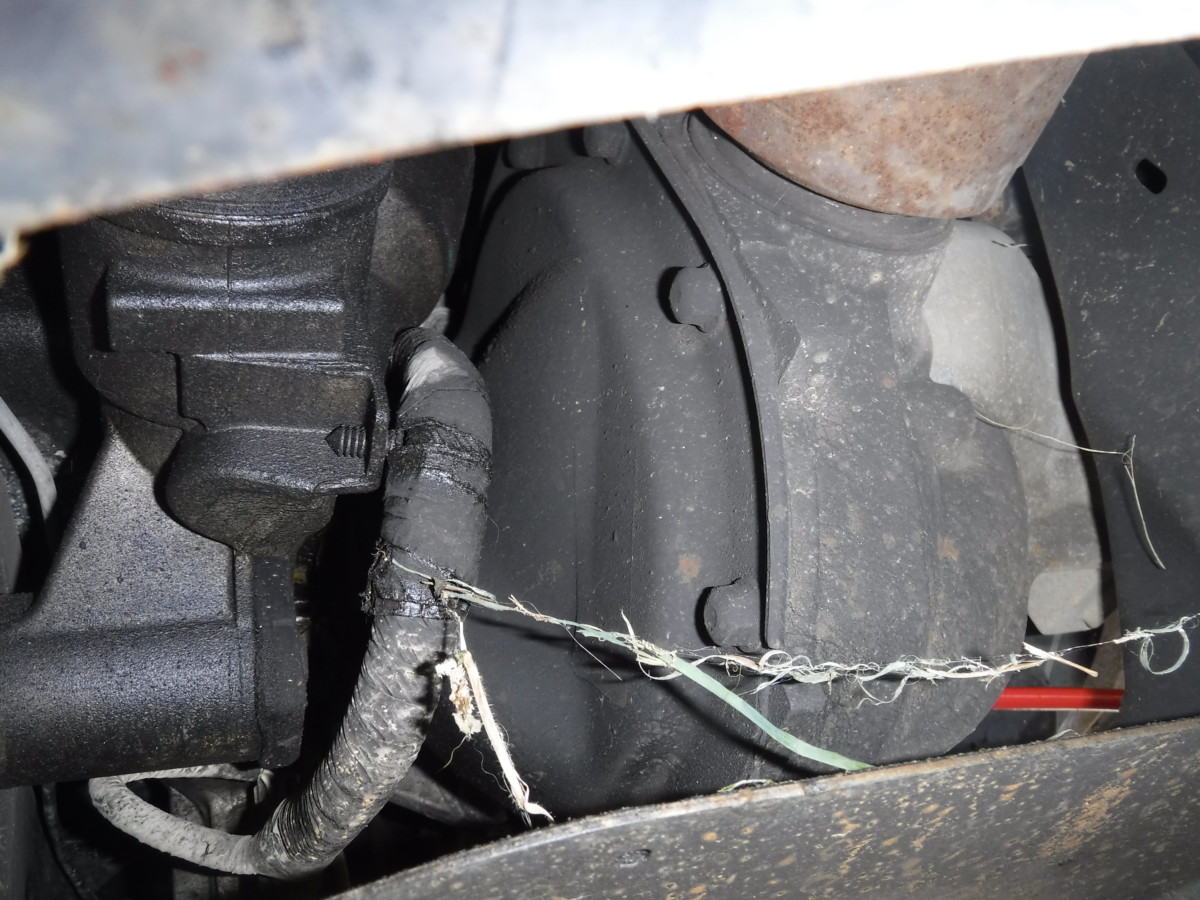
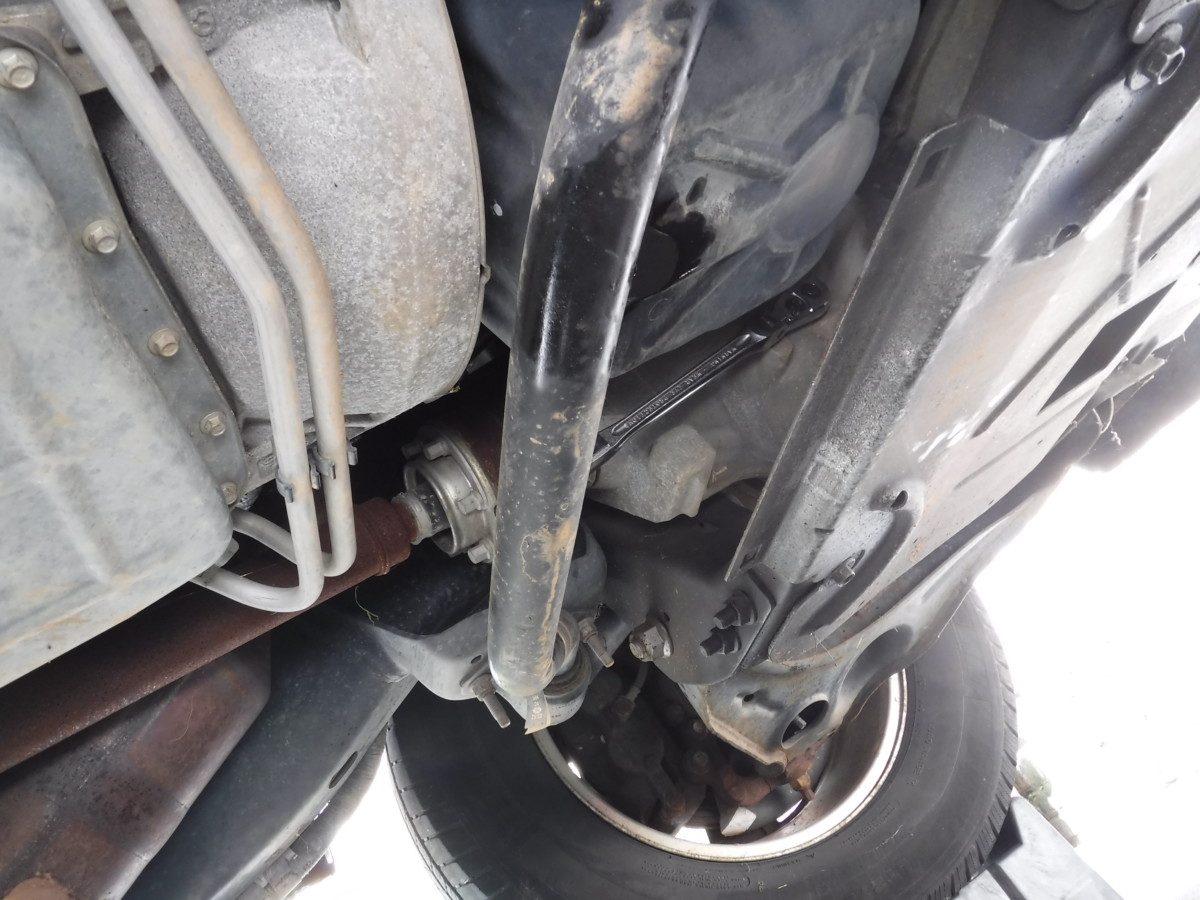
The front diff cover, if you choose to try to remove it
Just to elaborate on the earlier point. The factory-approved method requires removing the cover in this picture. Note how it is generally inaccessible. As stated, if you would like to try to remove this, the resulting procedure is similar to the one for the rear differential described earlier, but good luck getting to it, particularly when trying to reseal.
Transfer Case Skid Plate Removal
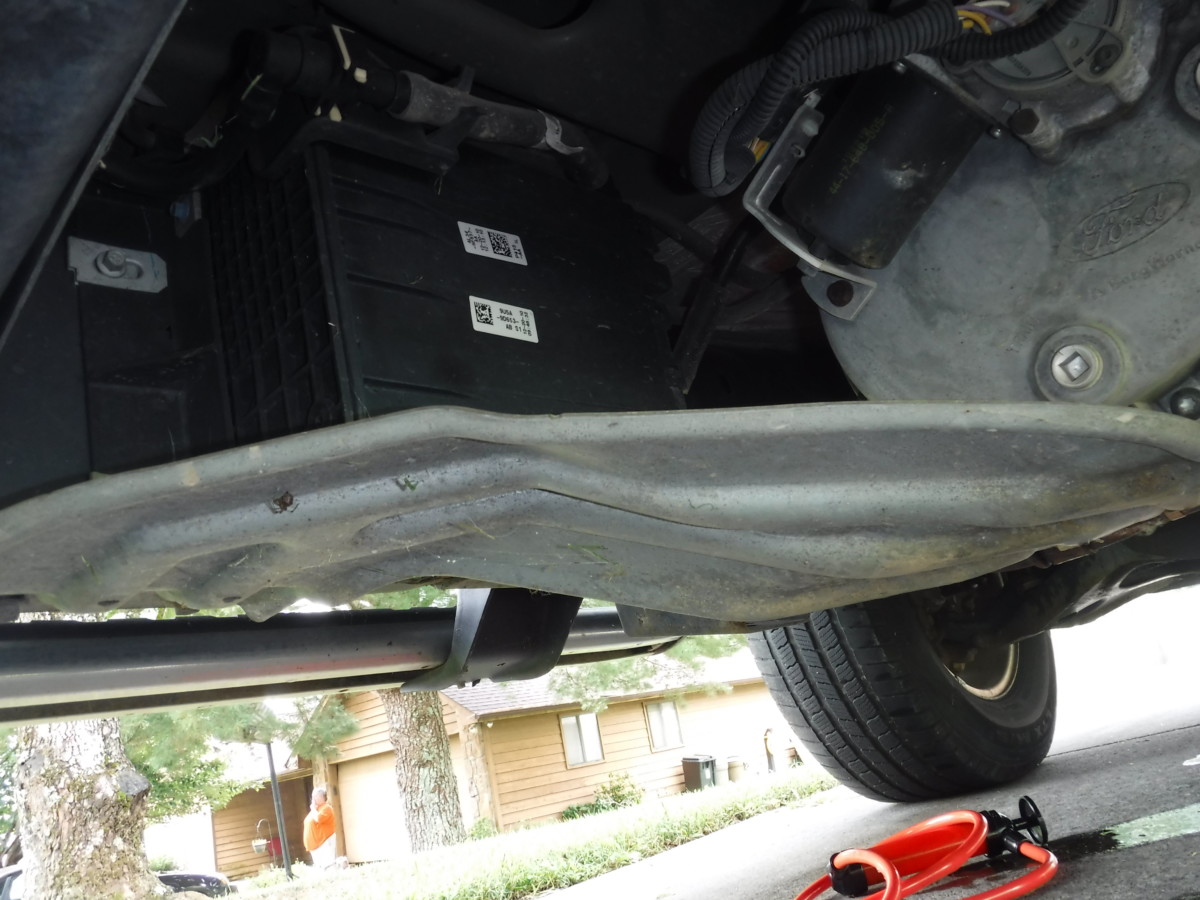
Skid plate for the transfer case
The transfer case has this skid plate just underneath it. Pulling this off makes it much easier to access the drain and fill plugs.
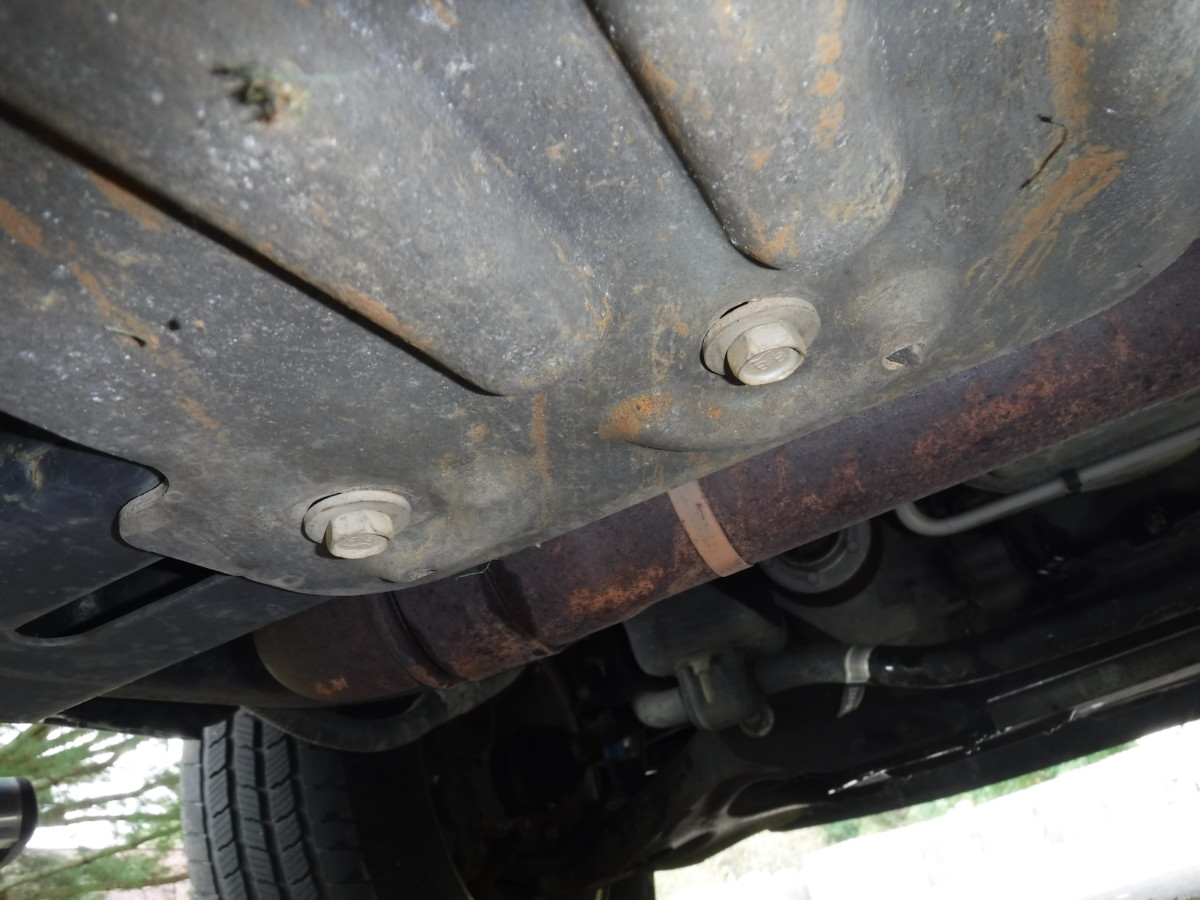
First and second bolts
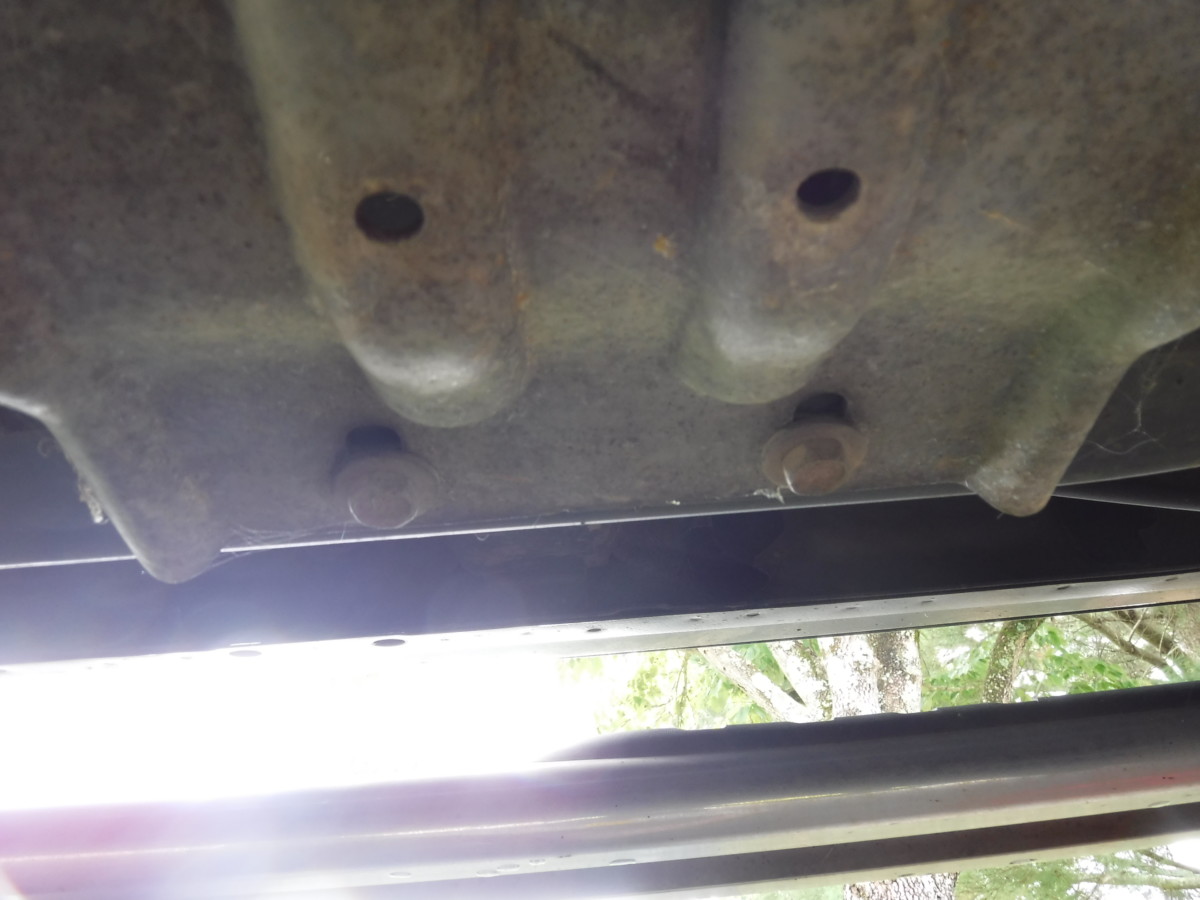
Third and fourth bolts
Only four bolts hold it on. I busted these off with a portable impact wrench in no time.
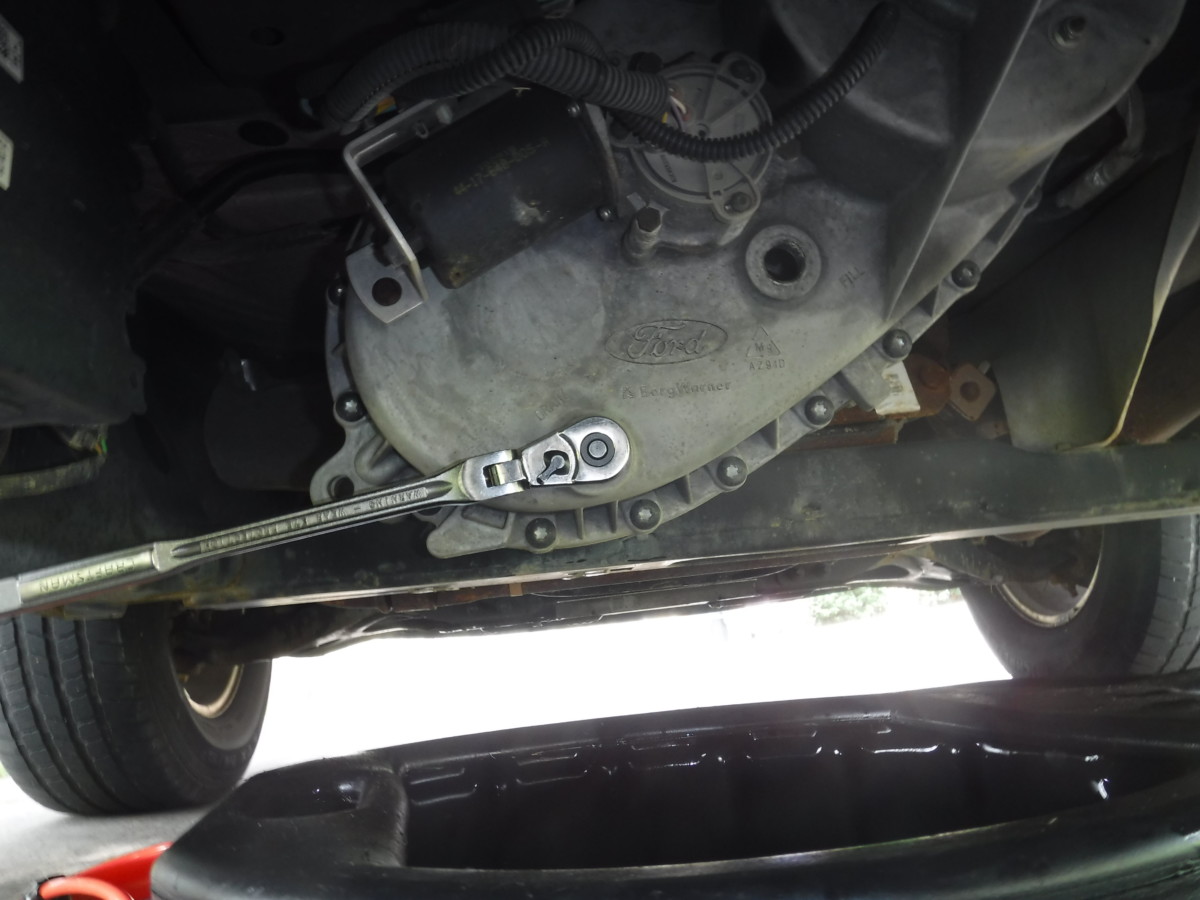
Removing the Transfer Case Fill Plug
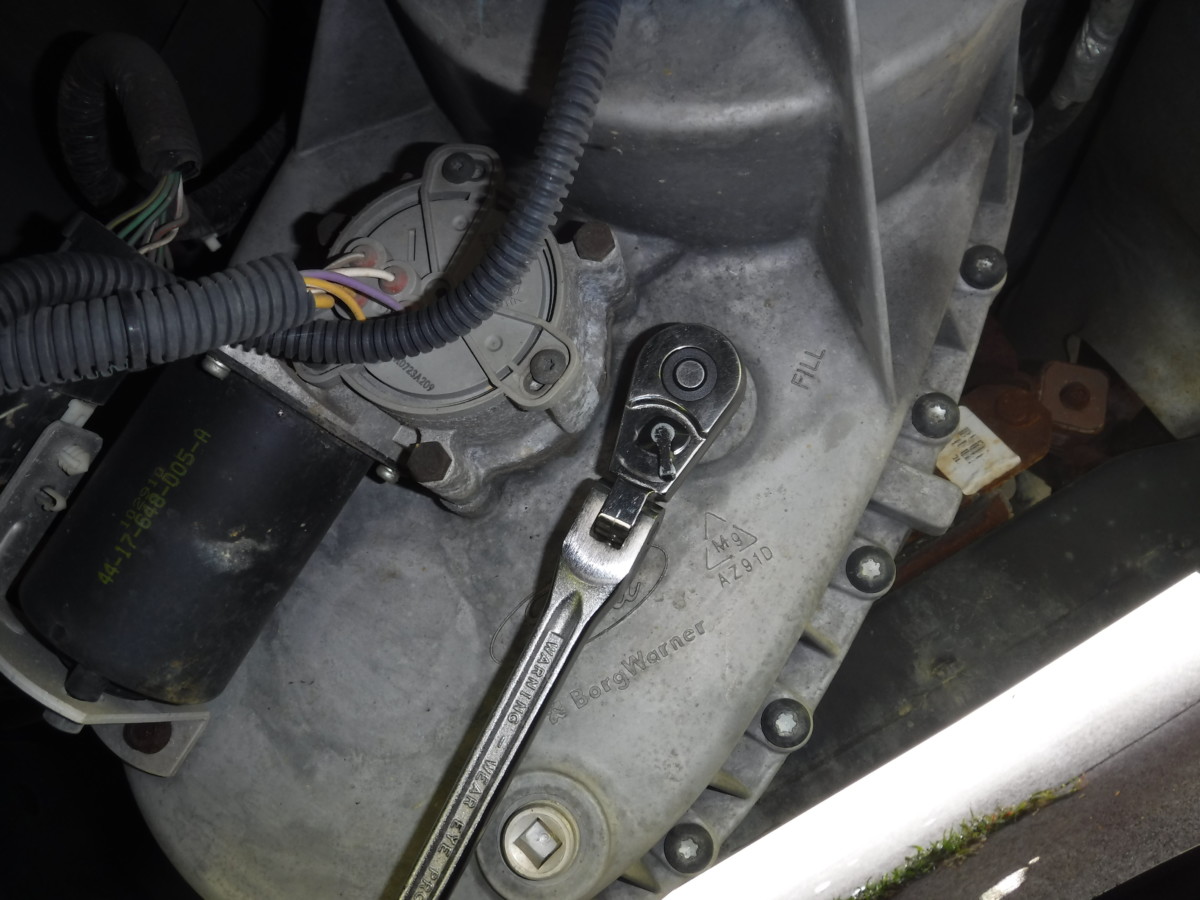
Fill plug for transfer case
This is the third section like this, so it shouldn’t be new information at this point. The transfer case has a 3/8″ square drive bolt for the fill plug. Use a wrench and take it off before doing anything else.
Draining the Transfer Case
Draining the transfer case
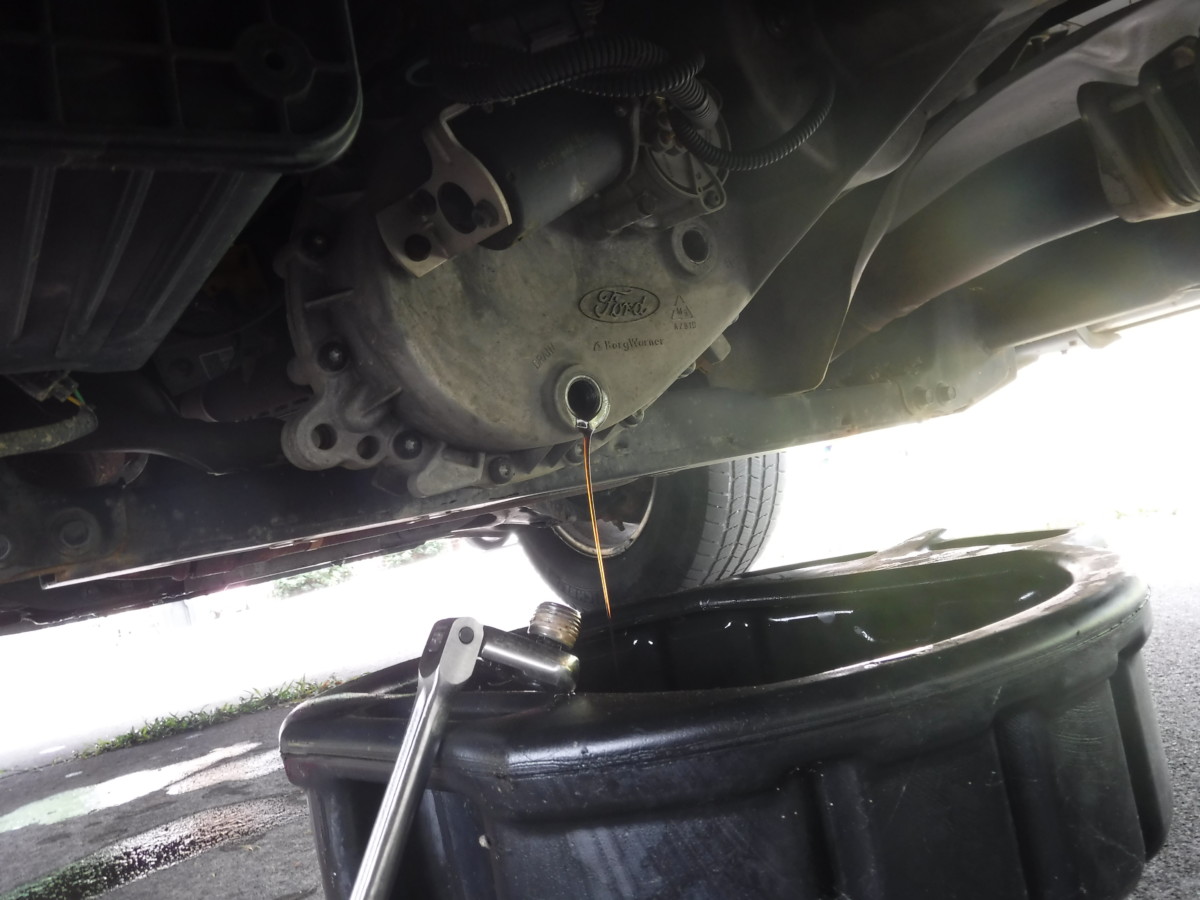
Hurray for drain plugs
In a rare move, Ford actually put a drain plug on this thing. Position your drain pan under the transfer case and remove the drain plug. I wish they did this with the differentials, as it’s much easier.
Refill the Transfer Case
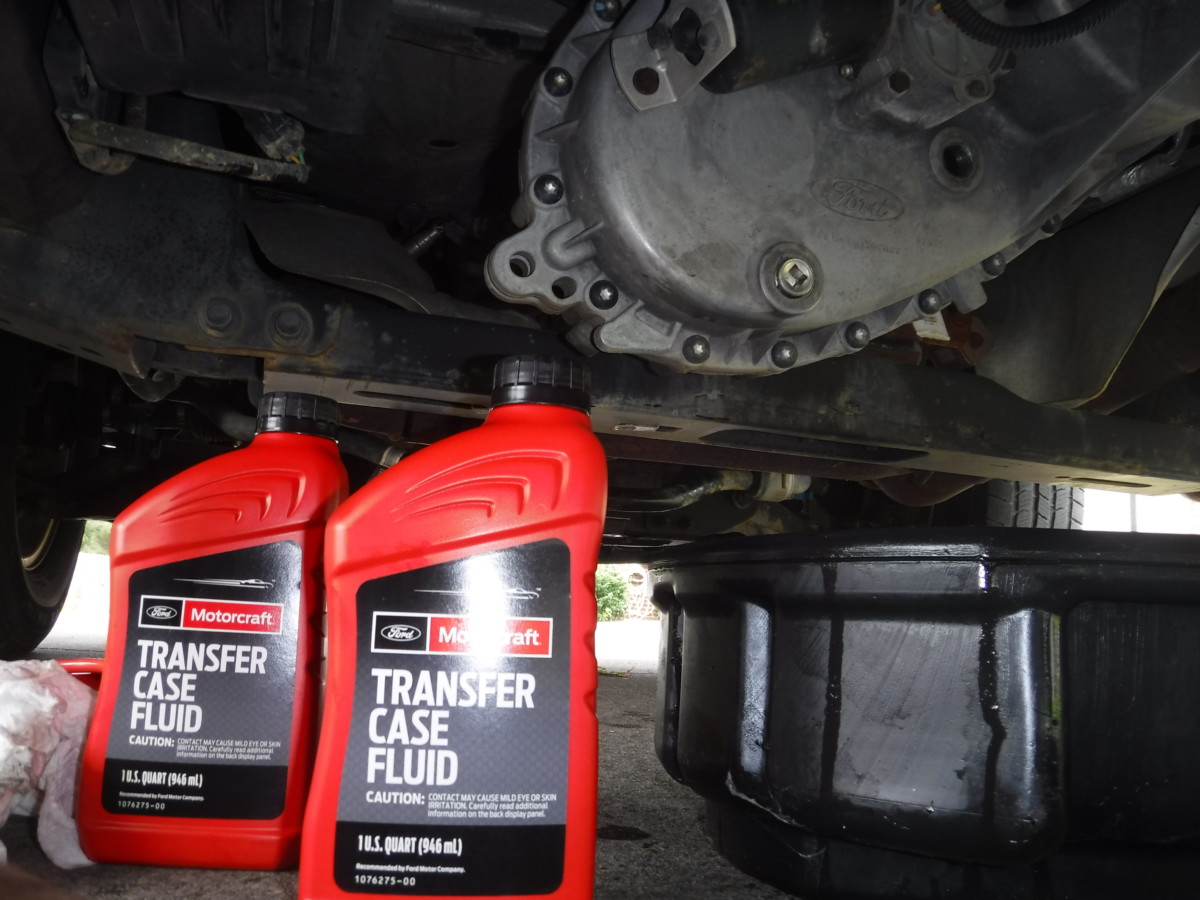
Ford Transfer Case Fluid
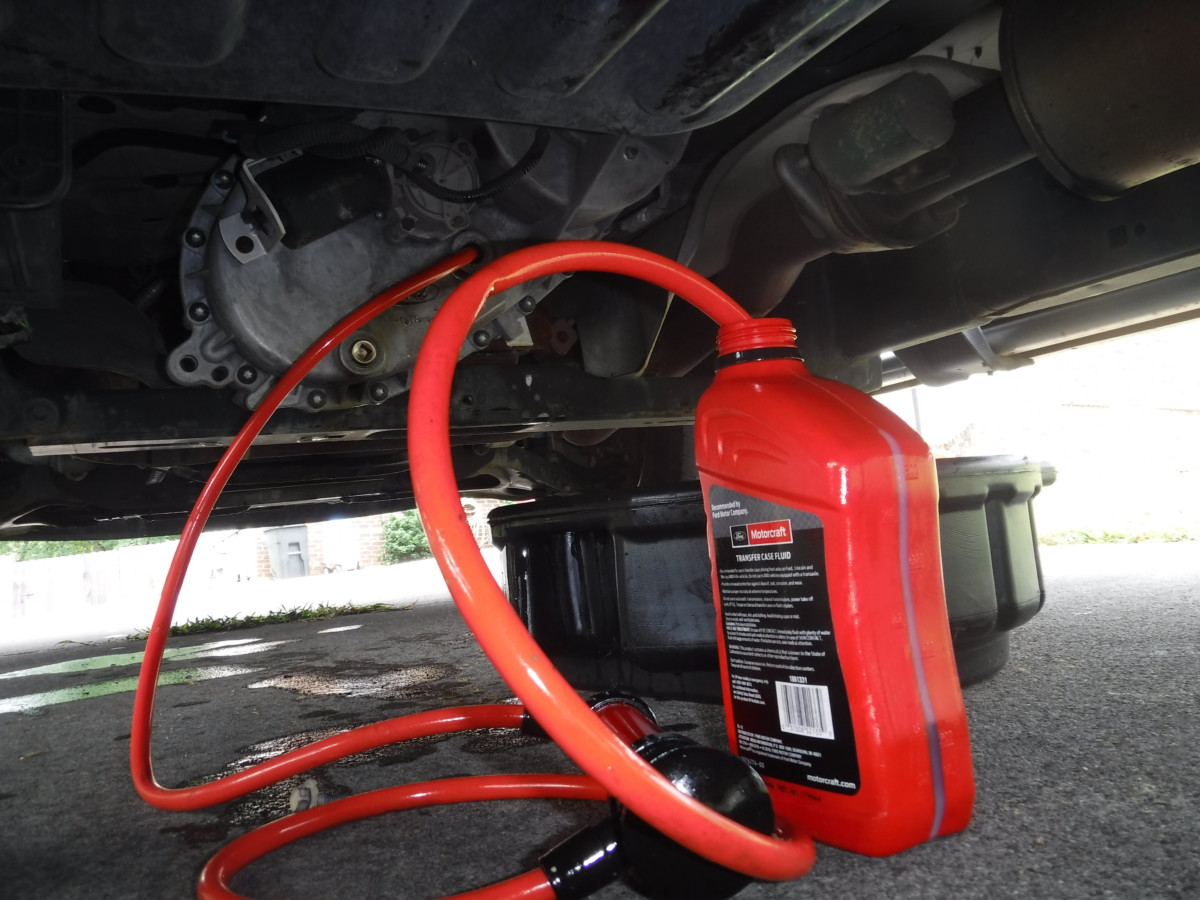
Using the fluid transfer pump to refill
Once the fluid is drained, put the drain plug back in and tighten it down. That is so much easier than the differentials, it hurts. You can use the fluid transfer pump to fill the transfer case with Motorcraft transfer case fluid
Wrap-up
Other than a general frustration over a lack of drain plugs on these differentials, this is still an easy job you can do at home. The differential in any car is going to pick up metal shavings in the fluid over time, and this is especially true for trucks that see a lot of towing or offroad use. Putting fresh oil in the differentials and transfer case periodically is pretty easy, doesn’t cost much, and will help extend the life of the vehicle.
Truck differental transfer case assembly
Just curious, as I don’t know… Why can’t you do the same procedure you did on the front diff to the back? (Drain with pump thru the fill plug)
You certainly can, but doing a “full” drain gets more contaminants and old oil out.
A full drain would be better on the front, too, but it’s physically difficult to do and the front diff gets less use than the rear, so using a pump is an OK compromise there.
What is the Torque Specs for the Transfer Case?
Isn’t there an actual gasket that needs to be used on the rear diff as well as the RTV? My truck 2011 is at 95,000 miles – I don’t tow or haul much, but wondering if I should change the diff fluid after 10 years?
Not a bad idea, and no, there is no gasket.
Thank you, awesome, simple, consice!
Can you add 75W-140 to front and rear differentials? Rear additive is required friction modifier.
2020 f150 5.0 4X4 on front and rear differential Valvoline 75W-140 same on rear and front?