Fixing a Squeaky Bathroom Fan
Our bathroom fans are probably original to the house, meaning they’re 20 or 30 years old. One of them suddenly started making serious noises: it sounded like a bird was dying in the attic. I figured it was time to fix it. Fortunately, fixing a squeaky bathroom fan is a pretty easy process. For reference, here’s what the fan sounded like before the fix:
When you do this job, you can either re-lubricate the fan or buy a replacement unit. I chose to lubricate this one for now. The issue with doing that is that it likely won’t be a long-term fix: six months, a year, or however long afterwards, the fan will probably start squeaking again. When this one starts to make noise a second time, I plan to buy a $15 Broan replacement from Lowe’s: it turns out this unit is common enough that replacement extraction fans, just for that part, are still made.
Opening up the fan housing
The very first thing to do is to cut the breaker to the bathroom. You do not want the power on while disassembling the fan. If turning off a circuit breaker makes you uncomfortable, you may want to rethink doing this project.
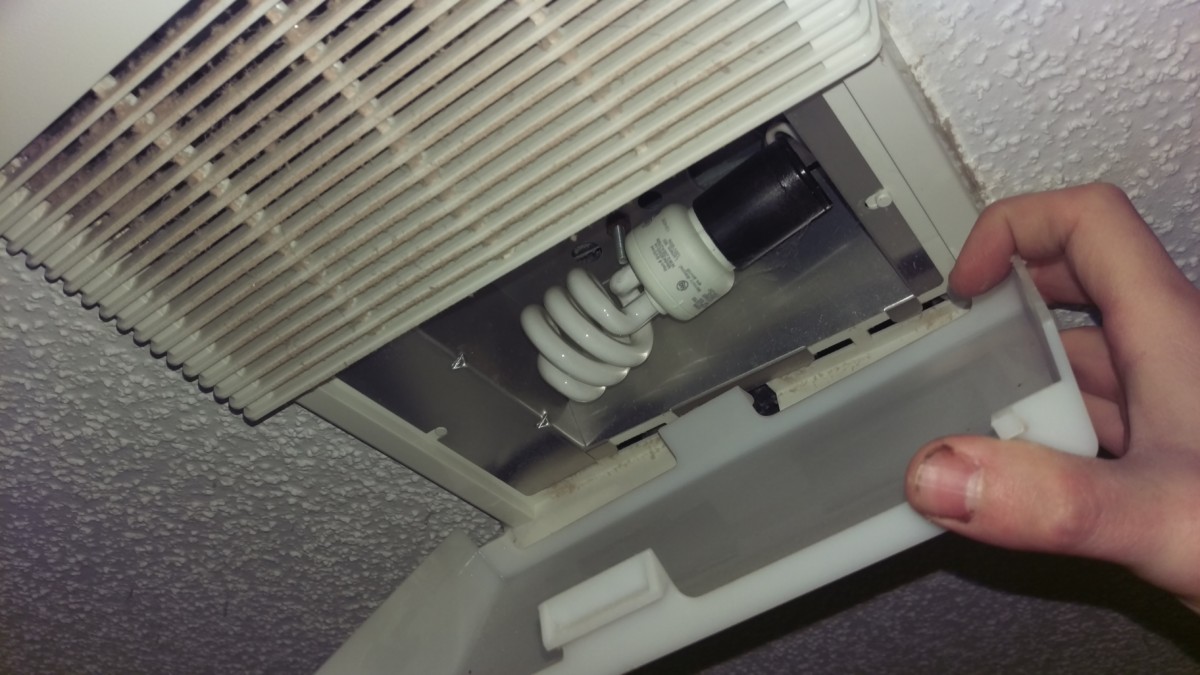
First, the bulb cover is opened and the lightbulb removed
First, open up the light cover and unscrew the bulb. The light cover usually has little pry tabs holding it in that need to be pushed in with a flat head screwdriver to remove. This will expose the mounting nuts for the fan unit.
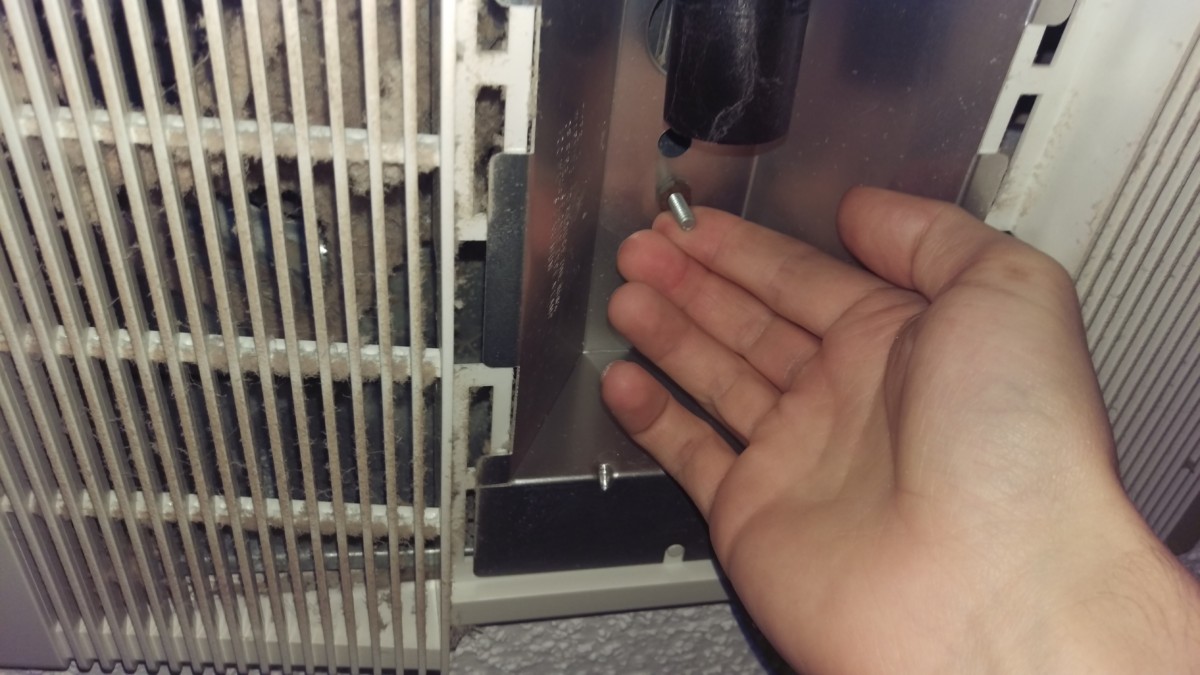
These nuts screwed onto studs hold the fan cover on
With the bulb out, you can see these nuts screwed onto studs holding the fan cover on. Remove these two nuts, and the whole cover drops right off.

The cover removed

Far shot, the cover is still hanging by the light bulb
With the cover removed, you can see the fans. In my case, I have an extraction fan that squeaks (left) and a second blower that heats the bathroom (right). I will be fixing the fan on the left. I still have the cover dangling by the lightbulb socket. This probably isn’t the best idea, but the cover is very light. I remove it in a subsequent step.
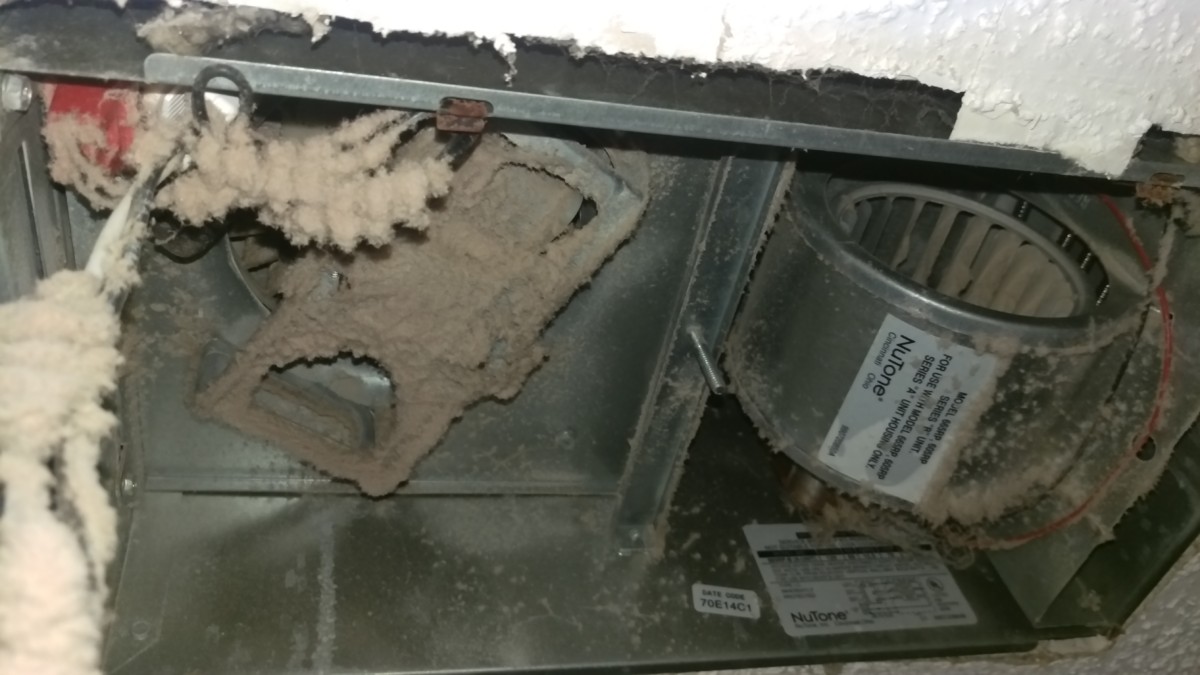
Tons of dust to vacuum out

After vacuuming, much cleaner
As I said, my fan had been here for quite awhile, so there was a ton of accumulated dust. I simply used the hose extension on my vacuum and vacuumed that all out. Having the fan’s shaft lubrication get contaminated with dirt and grime and wear away is why the fan squeaks in the first place. Having all this crud in it won’t help matters, and it’s also simply gross. Might as well quickly clean it while you’ve got it opened up.
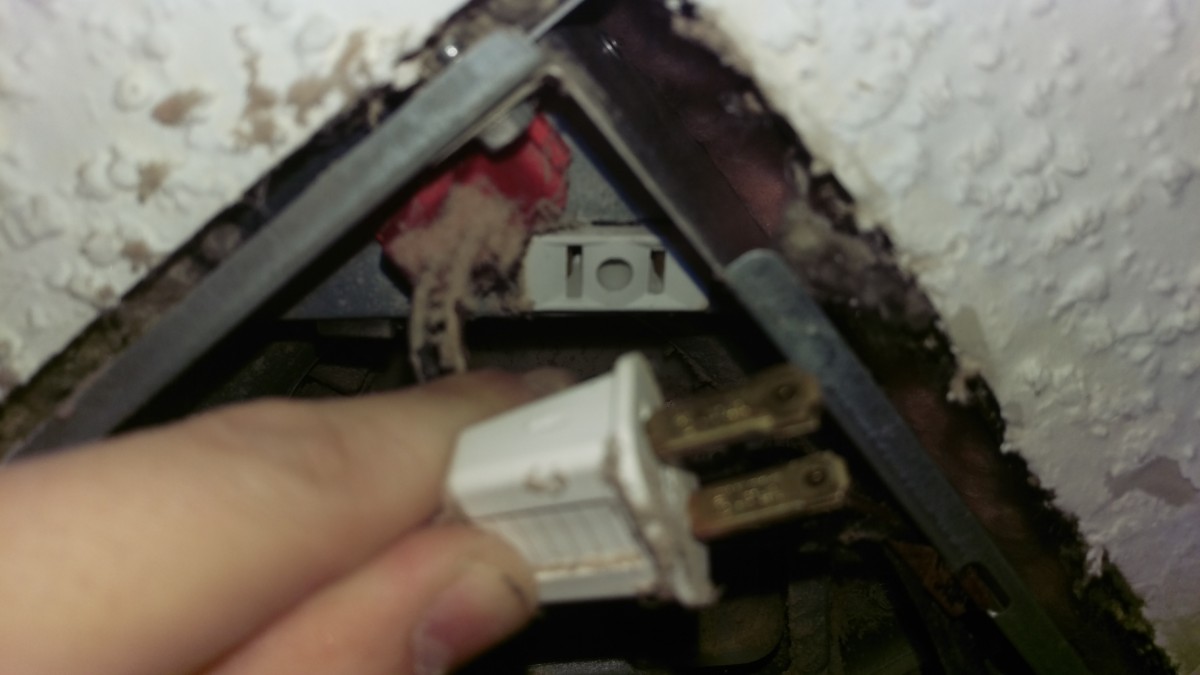
Unplugging the light releases the cover

Unplug the fan for safety and removal
The way this unit works is that both fans and the light socket are plugged using standard 110V ungrounded connections into what is essentially a built-in power strip. This makes it very easy to unplug things to work on them. Above, I unplug both the light bulb socket and the extraction fan. This lets me set the light bulb socket and fan cover on the ground out of the way. It also lets me work on the fan without danger of it accidentally coming on.
I also ended up removing the red plug, used for the heater blower, to get that and the wire out of the way to remove the extraction fan. I don’t have a picture of this step, but it’s pretty straightforward.
Removing the fan

Screw 1
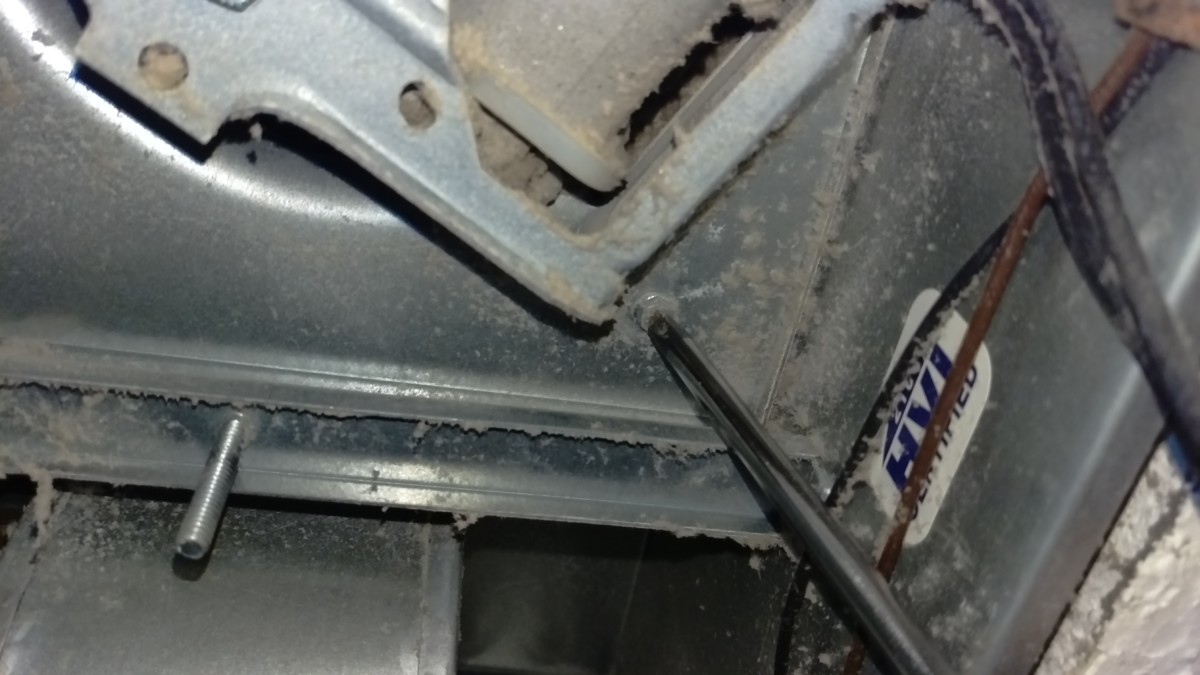
Screw 2
Screw 3
The extraction fan can come out of the housing without actually dropping the entire housing. Simply remove the three screws pictured, and the extraction fan itself can be removed.
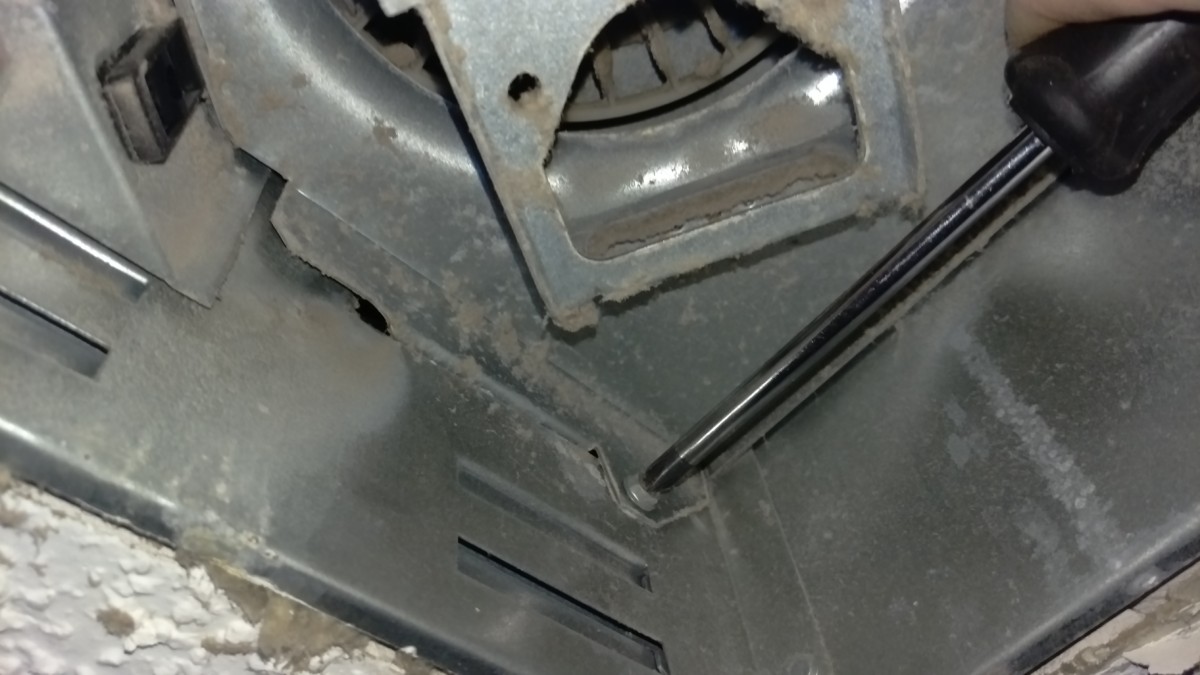
Slide it to the right first
And then it can be angled down and removed
With the screws out, it can be pushed to the right, towards the heater blower, and then angled down and brought out.
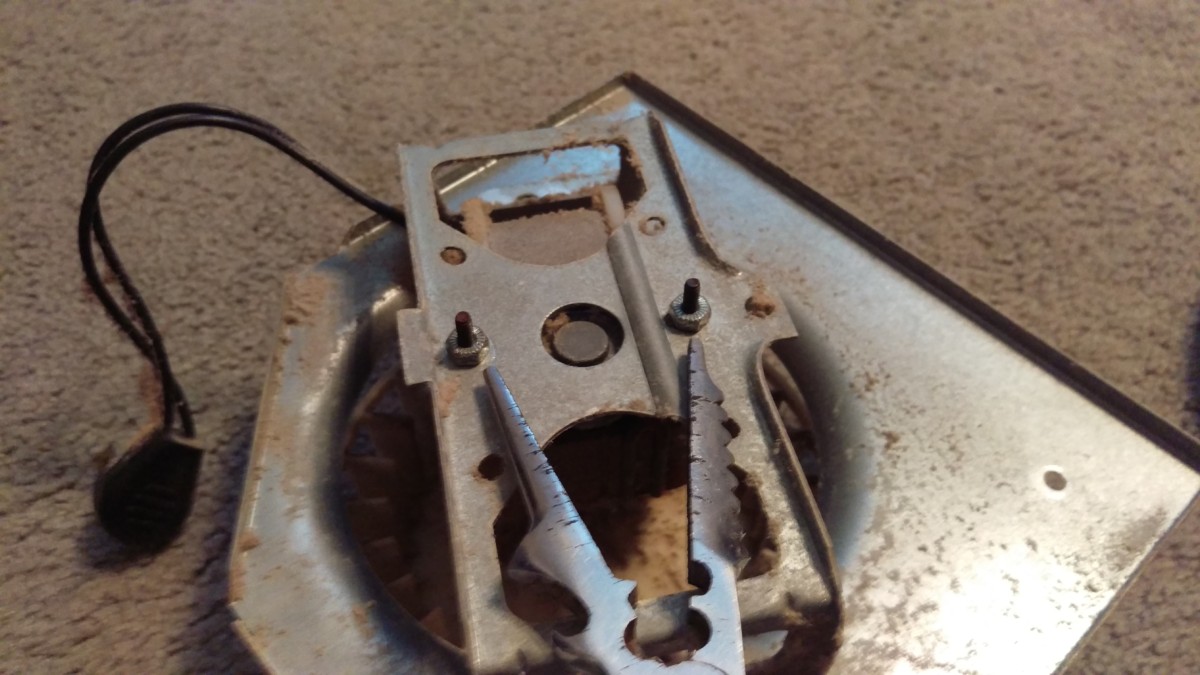
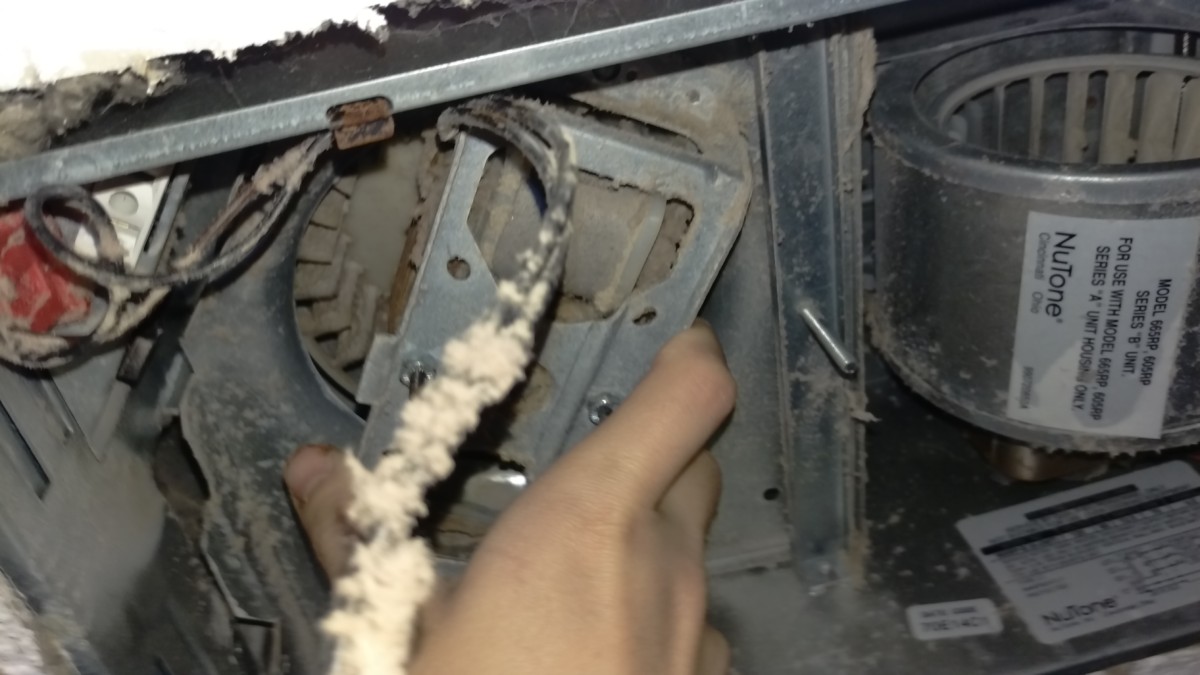
Removing motor and blower from housing
With this removed, you can now remove the actual motor and blower fan from the housing to work on it. This is done simply by removing the two nuts pictured, and lifting it out. At this point, you’re now ready to either repair or replace the fan.
Repairing the extraction fan
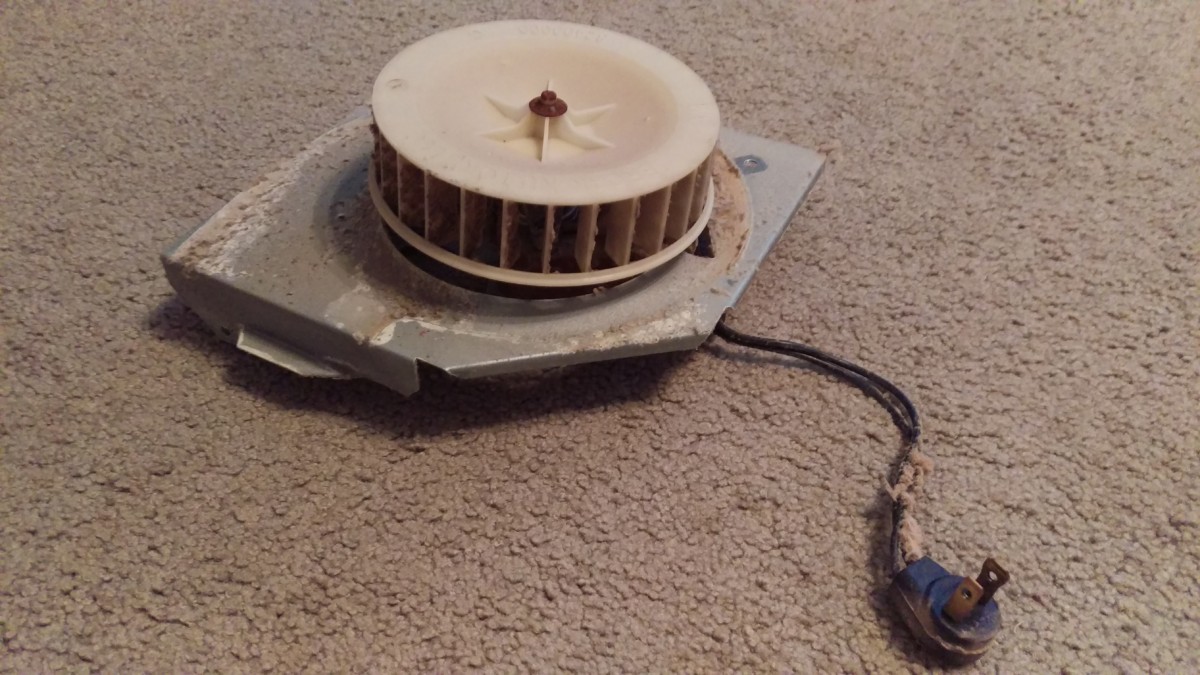
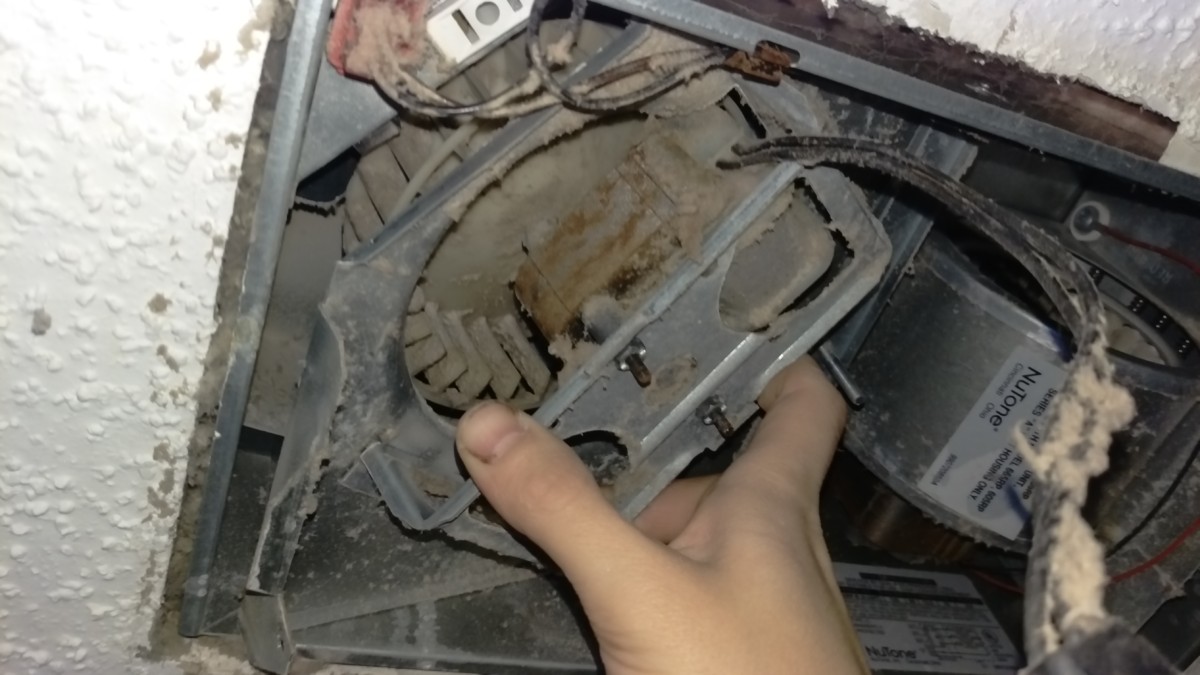
This is the culprit
At this point, you now have the offending fan removed and ready to fix or replace. As you can see, this fan is old and quite dirty. However, some lubricant on the impeller shaft will quiet it down again for awhile. That said, I still plan to eventually get a $15 Broan replacement unit for a longer-term fix.
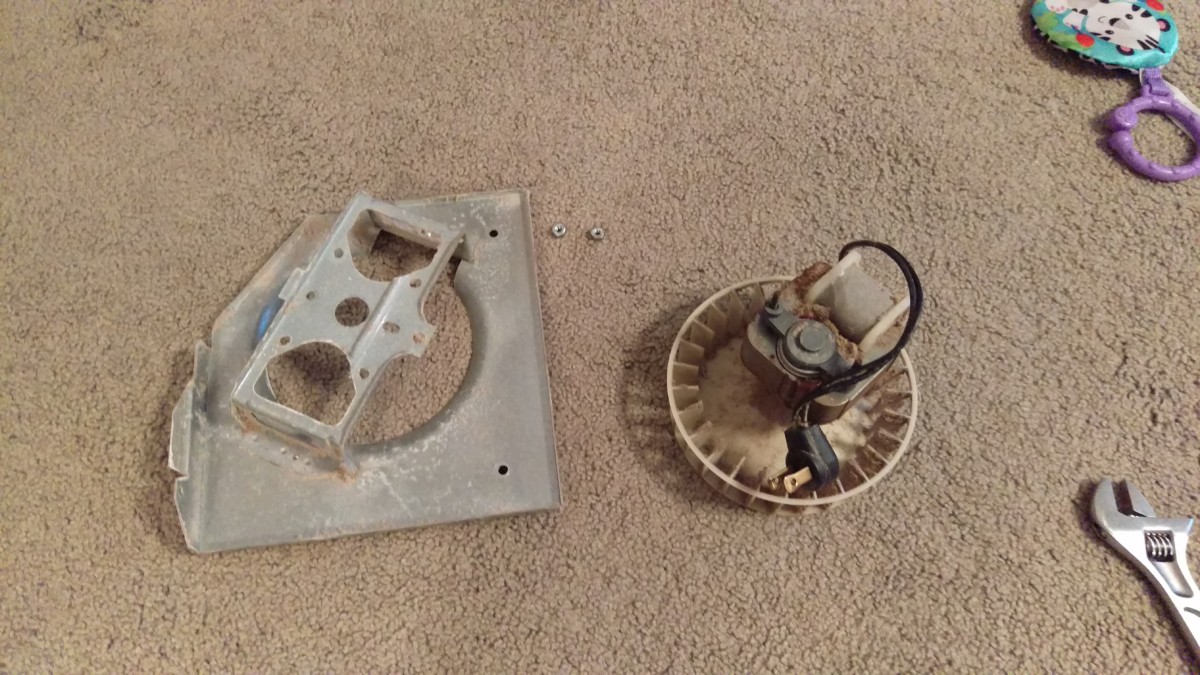
Remove 2 nuts and pull fan from bracket
To get at the actual fan, you need to remove it from the bracket. The fan motor has two studs on it. Remove the nuts, and the fan and motor pull right out as shown.
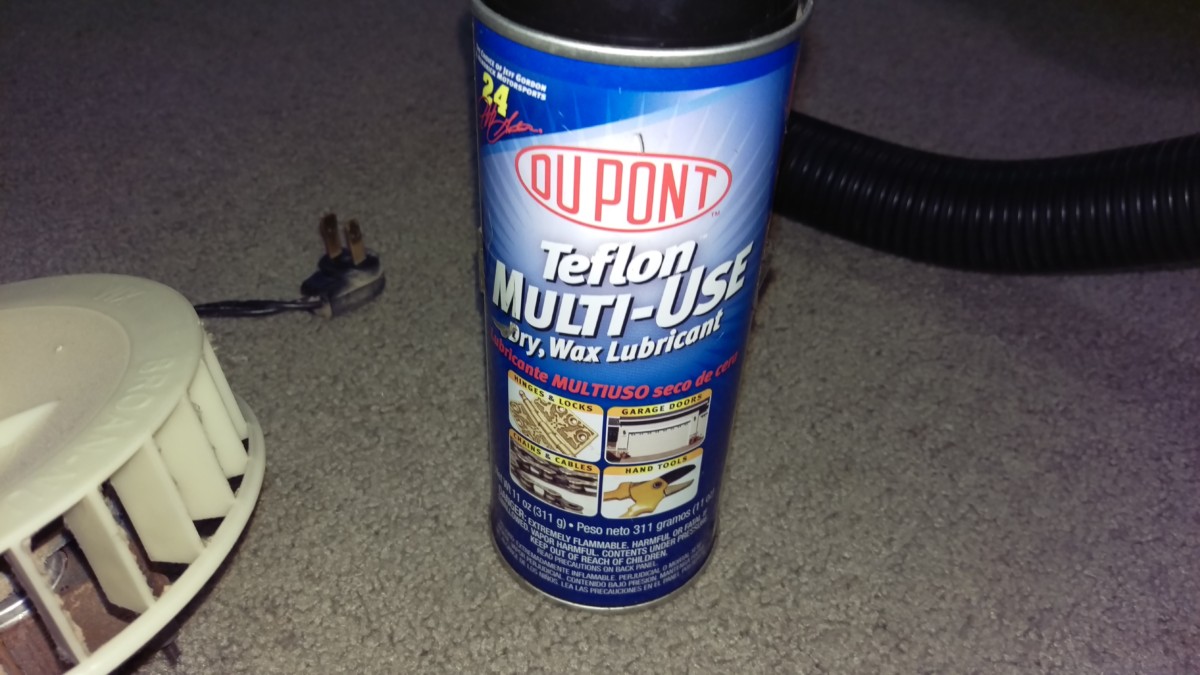
Dry teflon lubricant will resist grime
You can use a lot of different lubricants or grease for this. I went with dry teflon lubricant: I had bought this a long time ago to grease the uniball upper control arm ball joints on a truck I had. This stuff goes on liquid, but the liquid evaporates and a dry lube is left behind. The key advantage to it is that it does a great job resisting grime. My hope was that this would prevent the fan from making noise again for a long time.

This is hard to get a picture of, but here’s where you add lubricant
This is nearly impossible to get a picture of, but I added a liberal amount of lubricant to the shaft the fan blades spin on. I’m adding lubricant where the red tube from the lubricant can is pointing. I sprayed all around, trying to really get the lubricant in, turning the fan as I did so.
After lubricating, you put everything back together in reverse order from how it was disassembled. When I first fired the fan up, it was squeaking, but it quickly quieted down as the lubricant worked its way in. That said, it periodically still makes noise. As I said, I am still planning to eventually simply replace with the $15 Broan unit. You can see the results in this video:
Replacing the extraction fan (Updated 7/10/2016)
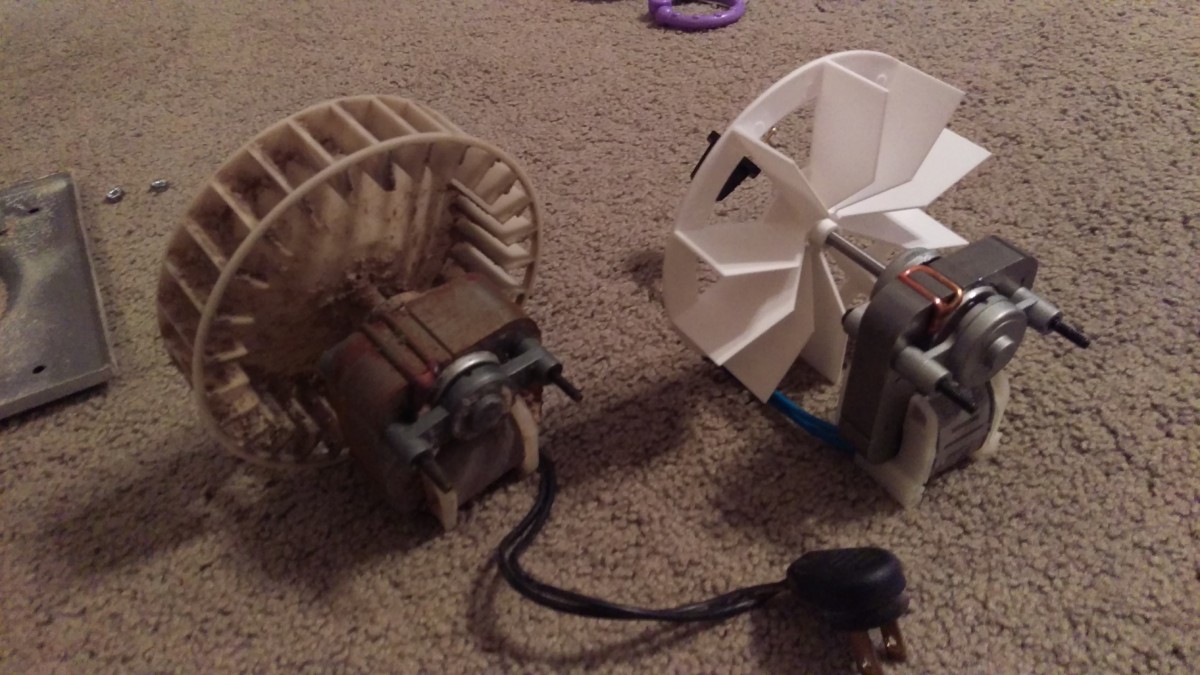
Old vs new unit
Replacing the extraction fan follows the same steps as repairing, above, except instead of lubricating the motor shaft once you remove it, you simply chuck the motor and fan in the trash and go buy a new one. Lowes has them in stock, and Amazon
I first tried the cheap method of lubricating the fan. As I said above, this will work for awhile, but not indefinitely. The motor shaft is apparently supposed to be sealed and presumably once contaminating, adding more grease is always going to be a short-term fix. Bathroom fans live in a really humid environment. The Broan unit above had increased to $17 by the time I bought one at Lowe’s, but it did the trick beautifully. It’s a bit quieter than my old one and pulls less air thanks to the impeller, but since we mainly turn it on for its “noise cancelling” properties, that’s OK.
There’s no telling how long the new motor will last. I’m guessing it’s a cheaper part than what was originally there, so only time will tell.
Conclusion
Fixing one of these old bathroom fans is no big deal. The job probably takes a half hour or an hour, and only requires basic hand tools. After having the grease wear out, though, I went ahead and replaced the motor and blower with an off-the-shelf part. I’m glad I did this, as the fix looks like it should last much longer. It also saved me from having to spend $85+ on an all-new bathroom fan unit.
Thank you for your wonderful information, check_out one of the most reputed
Inline Fans and Blowers Manufacturer Chennai
tanx for this article