How to Build a 6′ Privacy Fence
Overview

Fence
One of the reasons we bought a house last August was to provide a backyard for our dogs. To that end, we wanted a 6′ privacy fence around the yard so we could let the dogs run around outside without having to monitor them the whole time. Wood privacy fences are expensive; we did ours nearly as cheaply as humanly possible. Going into this thing, we figured out a budget.
Fence builders will quote prices in linear feet of fence, based on the type. To budget, you need to start with the type of fence you want. This can be a wooden or vinyl privacy, picket, wrought-iron, chain-link, and probably several other options I have never heard of. We wanted a privacy fence so that our dogs wouldn’t bark at passersby. Wood privacy fences can be built from cedar or pressure-treated pine, most commonly. Pine is a lot cheaper and actually more durable with the pressure-treated coating, but cedar is less prone to warping and looks nicer. This is a starter home for us, so we went with pine.
Once you know what you want, you need to know how long the fence needs to be to get an estimated cost. I actually just found my home on Google Maps and used the distance measure tool. Since then, Google has changed Maps to no longer support this. You can still find it if you use their classic maps or try Free Map Tools. I simply drew lines on my property where I wanted my fence, and looked at the result in feet. We were looking at a fence slightly under 500 feet. It is worth noting at this point that if you aren’t totally sure where your property boundaries are, you need to get a survey. Also, we don’t live in an area that has such things, but you may need a permit to build a fence.
A couple of nearby fence builders gave us estimates of around $13-$17 per foot. I should add that we’re in a small Tennessee city, so labor prices here are probably lower than elsewhere. Still, that was going to be around $7000 or $8000. I did the math on materials, and figured I would most likely come in around $3600 building it myself, not including gates. To get this number, I simply divided the total fence length by 8, and that is the approximate number of 4×4 pressure-treated posts required, each one being about $8, plus one bag of concrete per post, about $5 each. Then I added the rails, 3 8′ pressure-treated 2x4s per span between the 4x4s, about $2.50 per 2×4. And lastly, the pickets themselves were the most expensive part; pre-cut dog-eared pressure-treated pickets are about $1.50 each; simply take the total span of fence in inches (so 500′ * 12 inches/foot = 6000 inches) divided by 5.5, the width of a picket. For my fence, I needed around 70 4x4s, 70 bags of concrete, 210 2x4s, and 1100 pickets.
Note that these are all over-estimates, so make sure you save your receipts. It is also worth noting that although we had a truck and trailer, our Home Depot will deliver materials for a flat rate of $59 – I definitely recommend looking into this particularly for the concrete, since we ended up getting thousands of pounds of 4×4 and concrete delivered to start. You’ll also need some incidentals like deck screws and gate hardware, but the above is good for a rough estimate. We also used 6×6 posts for our gates, because they are 12′ wide.
Once you know what your numbers are, you can decide whether to put it in yourself. I can honestly say at this point that putting up a fence is a ton of work, so this is worth fairly careful consideration. In the end, we ended up paying for the builder to do a couple of the things that were really a pain and saving a total of about $2500.
Tools Required
- Cordless drill or impact driver
- Hammer
- Level
- Table saw
to cut pickets lengthwise
- Circular saw
to cut rails / stringers (Optional)
- Clamps that open at least 6-8″ wide
- Framing nailer and either an air compressor or butane cartridges (Home Depot rents butane nailers)
- Pickup truck or trailer are nice for returning warped or split pickets and picking up materials


Posts
We ended up paying the local builder $12/post to do the posts. This made sense to us, because this part is a lot of work and really requires the use of an auger for any significantly large fence. You can rent an auger and do this yourself, just be aware that if you catch a rock or bind it up, it’s very easy to get injured. Also be sure to call the hotline to get your power and water lines marked before doing any digging. The other option is to dig with a post-hole digger by hand, but that wasn’t happening for us for 70 holes.
The key to doing this yourself, based on watching the guys who did it, is as follows. Get some string and stakes, and run strings where you want your fence. Along this line, set your posts a maximum of 8′ apart, erring on the side of 7.5′ or so. You mix up a batch of concrete, dig an approximately 2′ hole in the ground, pour the concrete in, and stick the post in the ground. At this point, before the concrete sets, use a level to get the post as straight up and down as possible. You should brace it at this level position with some small stakes. Once the concrete sets, fill in the rest of the hole with dirt.
You will likely have some leftover posts and cement bags, which you can return. This step isn’t hard to describe, but it is a ton of work depending on how much fence you need. After reading up on posts, I read that pressure-treated 4x4s with cement end up being the sturdiest and longest-lasting. Cedar works well for pickets and rails but rots faster when in direct ground contact.
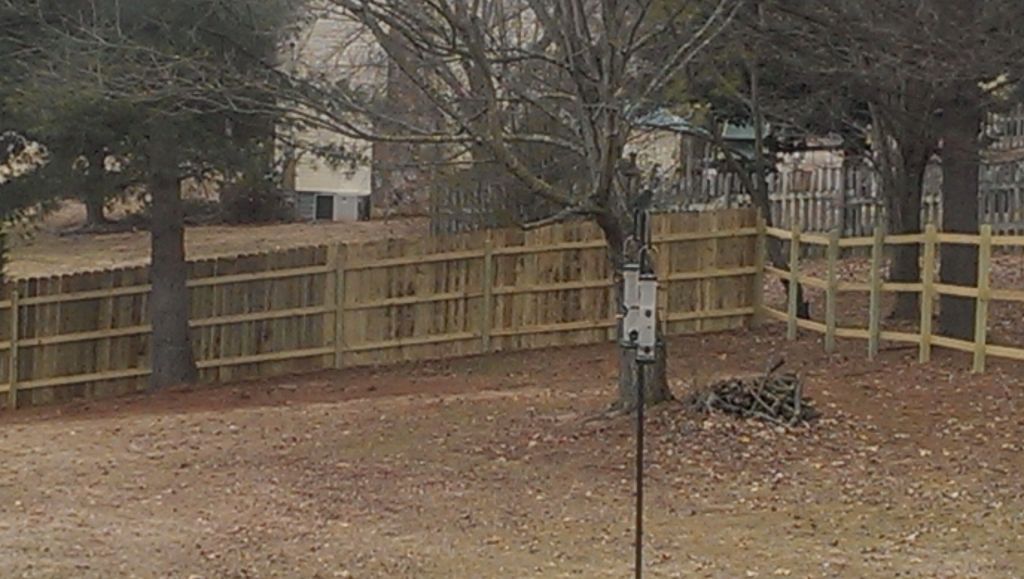
Once the posts are up and the concrete has set, you need to cut them to the same height. I grabbed a 2×4, marked it at 66″, and used it as a reference to mark a line on each post. Then, I took my circular saw with a large extension cord, and zipped off the top of each post. It is possible to try for a more aesthetic arrangement, but we simply cut each post to 66″ from the ground, and the result came out nicely, rising and falling with the slope of the ground.
Rails / Stringers
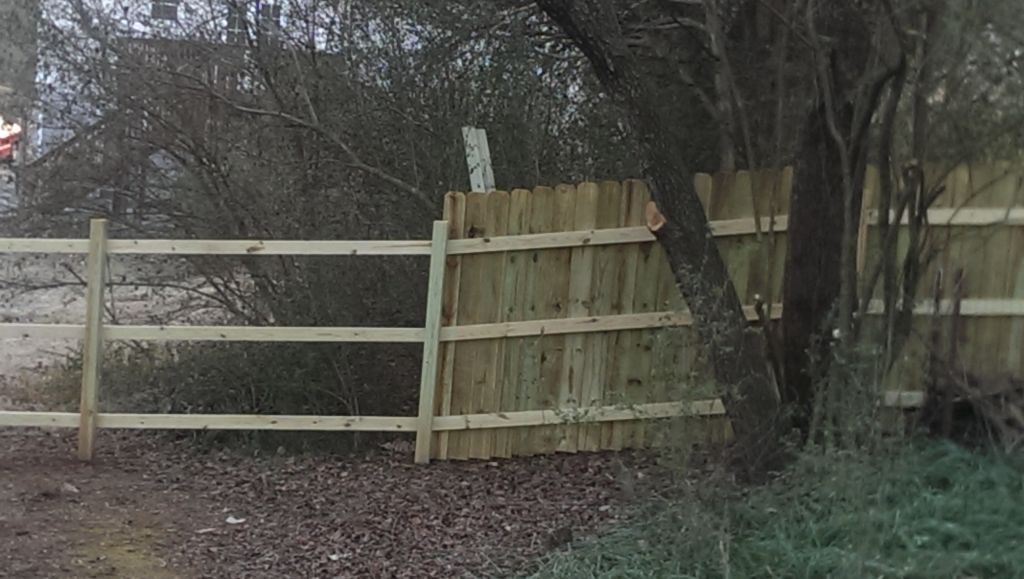
The 3 things across are the rails, if that was not obvious. There’s no picture of the installation.
Next, you need to put up rails or stringers or whatever you choose to call them. Simply put, you need 3 2x4s between each of your posts, except gates. We did the gates last. The rails are attached to the posts with 2.5″ deck screws. If you don’t have a cordless impact driver or screw-driving drill, buy one for this task, definitely.
I used a similar trick to finding heights on posts for this. I grabbed a couple of spare 2x4s, and cut them to the length I needed on the rails.
In my case, I think I went with 10″, 30″, and 60″ or thereabouts. Basically for a 6′ fence, you want a post near the top, bottom, and middle to hold up the fence and keep the pickets straight. For a shorter fence, two rails could suffice.
In any case, to start, use the guides to make marks at 10, 30, and 60 inches on the first post. Clamp one of the guides, say the 60″, to the second post. Hold the 2×4 to the mark on the first post, lined up where you want it, and rest it on the guide on the second post, an assistant helps here. Allow the 2×4 to go too far past the second post, you’ll see why in a minute. Use your impact driver to put 2 2.5″ deck screws through the 2×4 into each post. On the second post, be sure to keep the screws on the left half of the post.
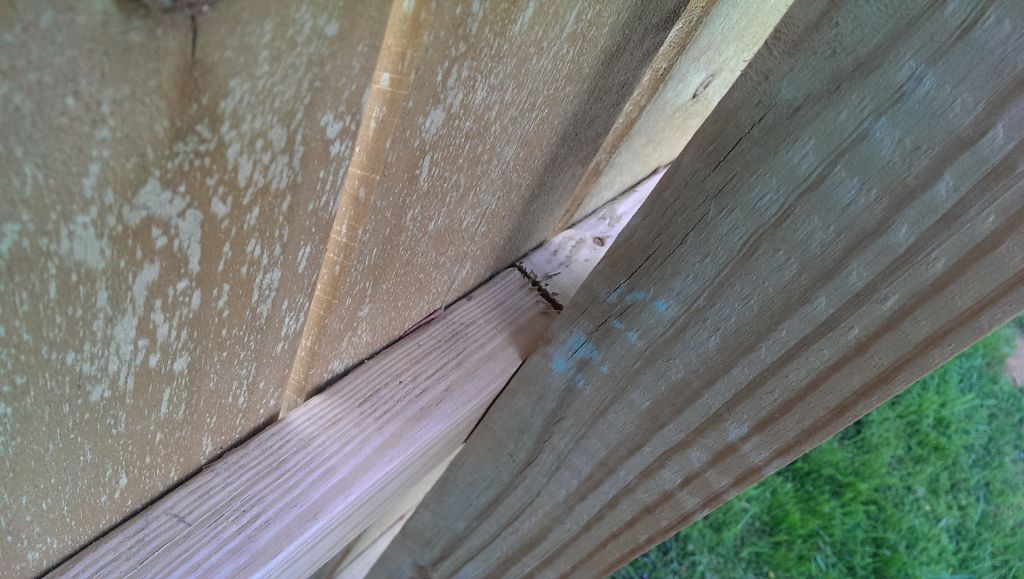
Two rails meeting at a post, saying hi
After you drive in the screws, you should be looking at a piece of 2×4 that looks correct by the first post, is screwed into the second post, and goes too far past the second post. At this point, I grabbed my circular saw, and zipped it off about halfway across the second post. Set it for a slightly deeper than 1.5″ cutting depth, which is the true width of a 2×4. You can discard the scrap piece you cut off. Repeat this procedure for the other two rails in this section.
Then, to do the next set of rails, simply repeat the procedure. Move the guide to the third post. Then, on what was the second post, simply hold the 2×4 up to mate with the last one you did. The end result is that you can run all of your rails and have them look fairly nice without having to waste time premeasuring the posts. The only problem was that the cuts didn’t look as clean as they could have and scarred the posts a little bit. In my opinion, since that side is between the pickets and the posts, I can’t see it so I didn’t worry about it. In case it helps, pictured is one of the joints between the rails to make it clear what you are going for.
Pickets – The Hardest Part
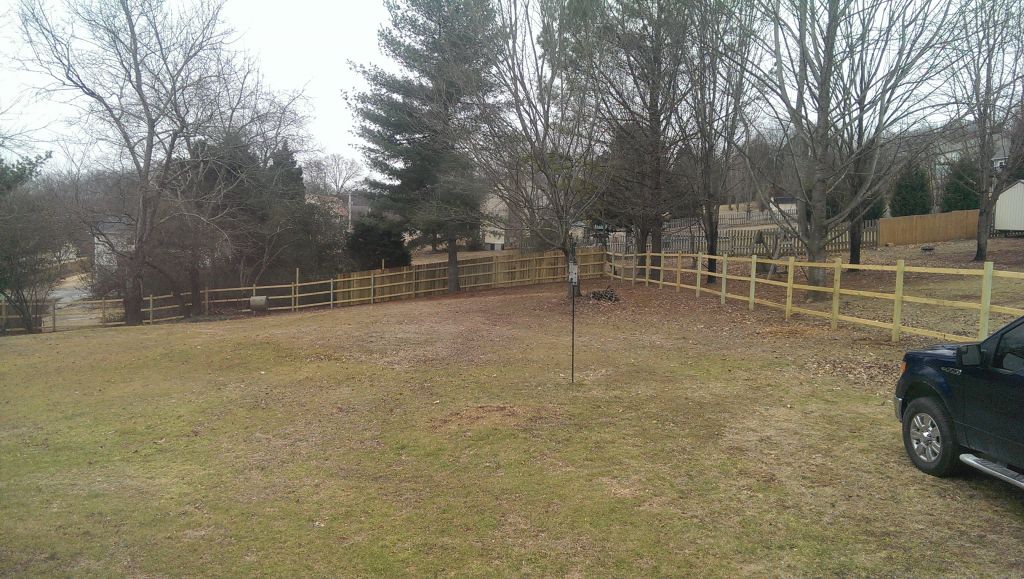
You can barely see the procedure in the yonder distance, look at the yonder pretty hard
This is the worst part of the entire project. It is the slowest and most difficult. You will get a workout, on the plus side. This is probably the easiest part of the fence to explain, on the other plus side. To do this part, rent, borrow, or buy a framing nailer. There is simply no other way to do it. You do not want to pound nails in by hand, and for any decent sized fence, screws will be very expensive. Ring shank nails are pretty strong and go in very fast.
Having a compressor and a nail gun you don’t have to pay rental fees on is the best, because you’ll be at this awhile depending on how long your fence is. If you have no air compressor access, Home Depot in our area rents both butane and air-powered nailers for about $30/day. The butane nailer uses a rechargeable battery to spark the butane from a cartridge to drive the nail in, sort of like a literal gun. It is loud, but extremely portable, and we only would have needed about 4 cartridges to do our entire fence, at $10 apiece. We did that for one day to get going and then borrowed a nailer and compressor from my father-in-law, which was great because we didn’t have to buy or change out cartridges or recharge batteries, but it did require driving the compressor around the backyard.
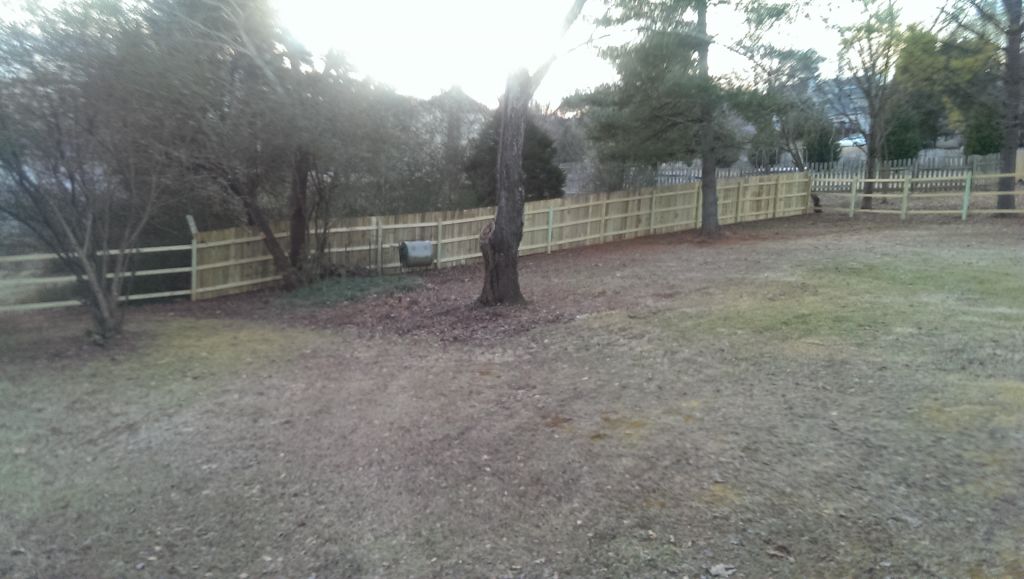
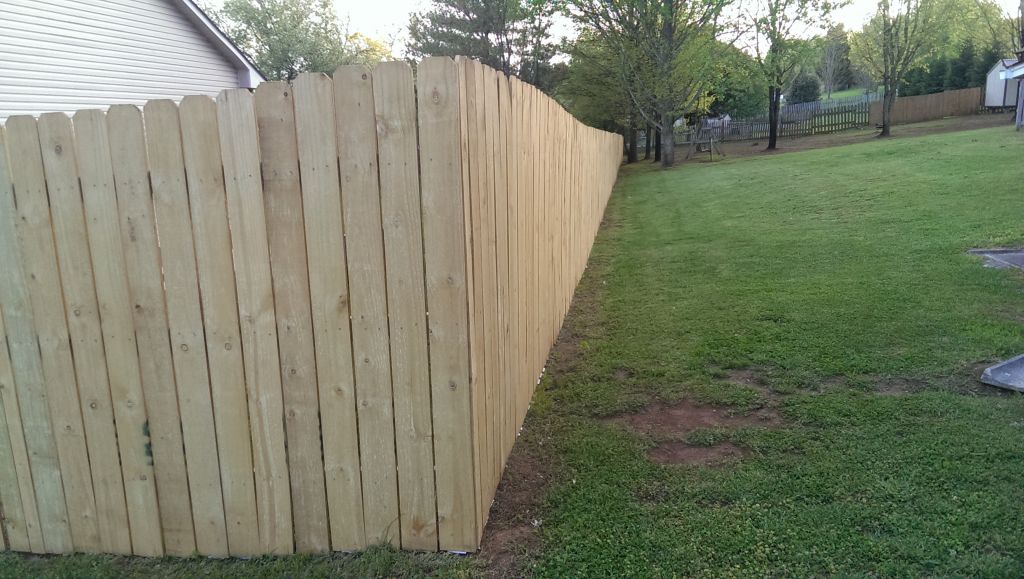
Finished the back, nearly
I used two spare 2×4’s, marked at 6′, to help place the pickets. What I did was clamp them to the posts 2-3 sections apart, depending on the slope of the ground, and run a string very tight between them. That gave me an indicator of where 6′ was. The distance depends on the slope of the ground because when you only want to span a section with a constant slope. In other words, the ground should be steadily flat, rising, or falling between your two markers, rather than having a hill or valley, to ensure your pickets come out straight. The goal here is to have the top of the pickets right at the string, where the string is at a height such that you have about a 1″ gap between the picket and the ground. If the pickets sit on the ground, they will rot, and the fence won’t hold up over time.
Going up
I used a couple of clamps to hold the picket tightly to the rail where I wanted it and drove six nails, two per rail. Rinse and repeat. Every couple of pickets, I used the level to make sure my pickets were straight vertically. For sloped sections, the pickets stay straight at a constant distance from the ground, as pictured. The pickets should be spaced about 1/8″ apart, so there is room for them to expand and contract without busting off of the fence.
As you move along the fence, obviously you simply move the reference 2×4’s down and readjust. Once you reach the end of a side, you will have a gap that is less than the width of a picket. I simply measured the distance and used a small table saw to cut a picket lengthwise, making a smaller picket.
If you buy in bulk, you’re invariably going to get some pickets that are cracked or too badly warped to use. Home Depot, at least, takes these back and exchanges them, so plan on having some sort of method to transport these.
The Gates
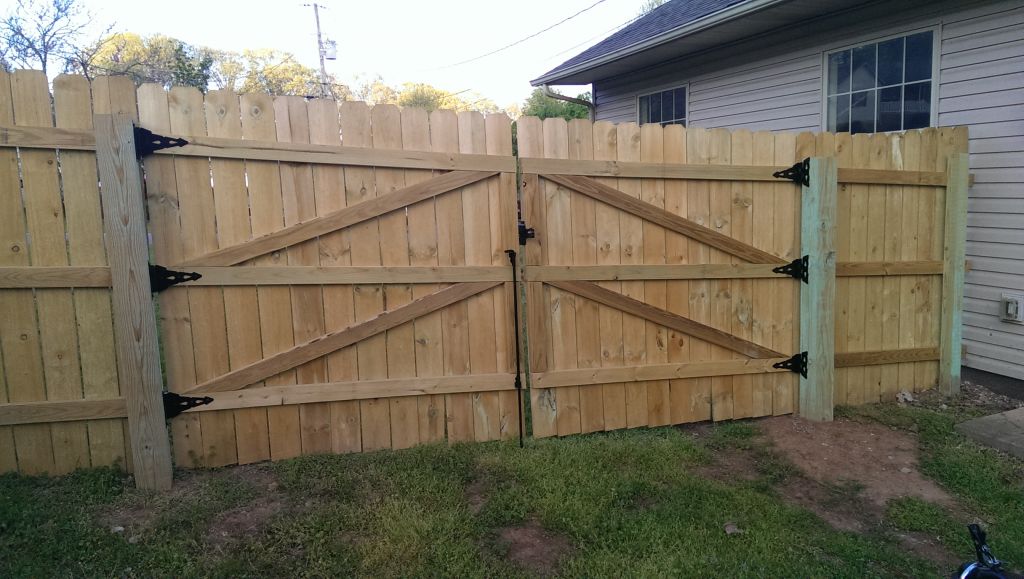
Can’t claim credit for this
As mentioned, we wanted two 12′ gates to accomodate a vehicle. The builders recommended 10′, but we’re glad we went with 12. There is plenty of room to back the trailer up through the gates on one side and pull our truck through on the other. I think had the gates been any smaller, it would have made it very difficult. Because we had such large gates, we used 6×6 instead of 4×4 for posts on either side.
We ended up paying about $400 per gate, including wood and hardware, to have the builders do them. I looked at doing it myself, but it was a very large span on some land that slopes fairly steeply from one gate post to the other, so it was about as tricky as gates get. Now that we’ve seen them do it, I would feel confident doing it myself next time. As it was, the gate hardware and wood alone were about $200-$300, so I think it was worth it.
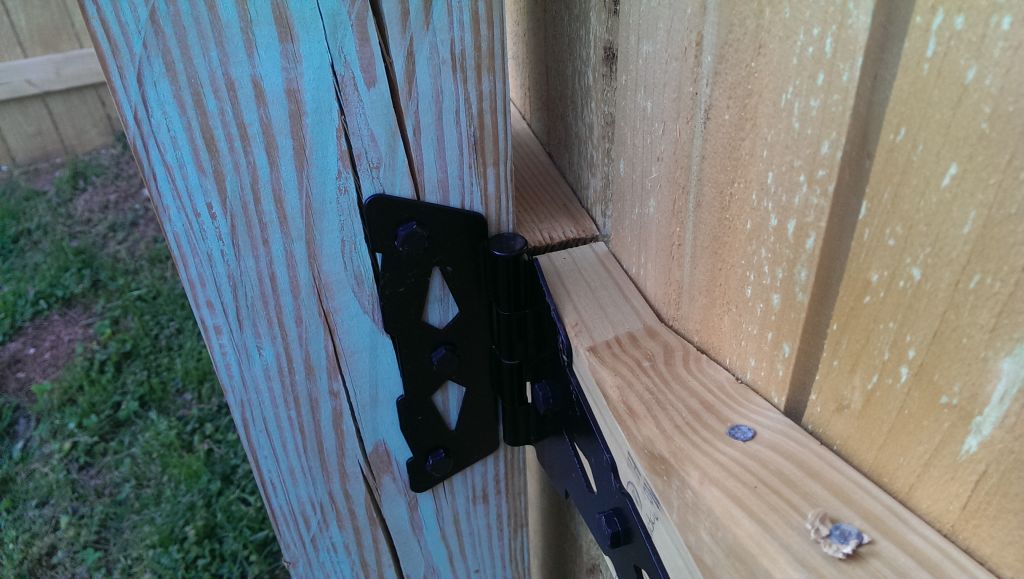
Closeup of hinge mount with the gate closed
As mentioned before, for gates in the 10′ to 12′ vicinity, it is wise to use 6x6s instead of 4x4s for the posts. The builders had a clever system to build the gates. First, they set up the rails. They temporarily screwed 12′ or 16′ 2×4’s in across the entire span, straight into the posts, going with the ground’s slope. With the rails in the correct place, they were able to install the hinges and cross-braces. Lastly, they used a reciprocating saw to cut the rails in the middle and at the posts, so the end result is framing for the gate that swings properly against the slope of the ground.
One thing I wasn’t wild about was that they used nails to connect all the gate framing together. I went back with my impact driver, and sunk a few deck screws into some critical framing locations to reinforce their nails. Additionally, they did not use any sort of
gate turnbuckle
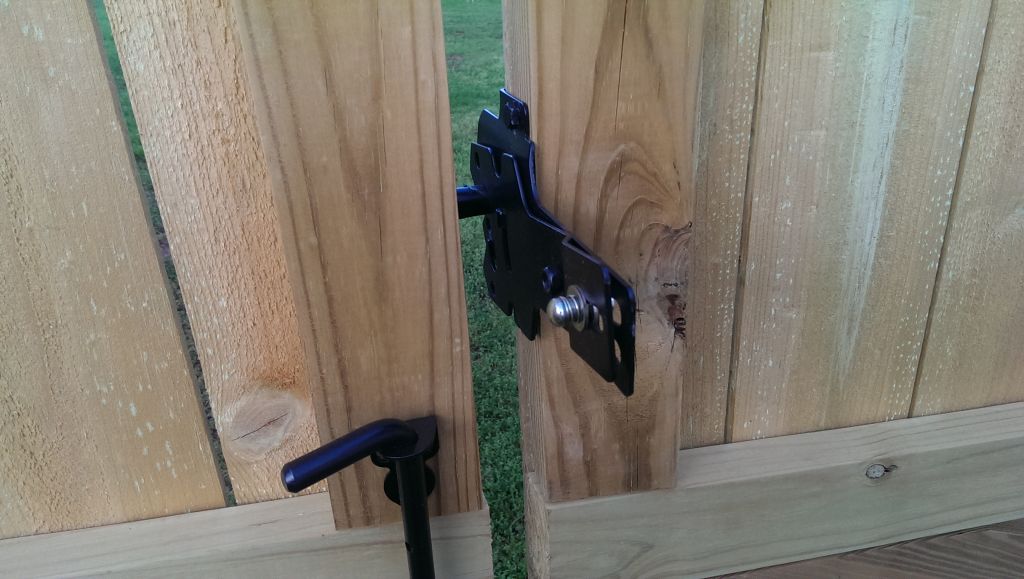
Opens from both sides
To complete it, they simply had to nail in the pickets and add some hardware. They also picked the latch for us, using this style I hadn’t seen before, but really like. It is trivial to open the gate from either side, without the hinge being overly complicated. They also did the cane bolt.
The cane bolt is the long rod that holds one side of the gate closed, pictured on the left down from the latch. Installation of one of these is really easy; you just screw it into the gate. The only trick is that if you’re using it on grass, as in the picture, you need to sink a piece of PVC tube or something into the ground so it holds properly. If you’re installing the gate over concrete, you should use a masonry bit to drill a hole for it to sit in.
Wrapping Up And Lessons Learned
Finished
That pretty much sums it up. Building a fence is not complicated, but it is certainly labor-intensive. We’re satisfied with our results. We did have some lessons learned, though.
One way to make the process faster is to use pre-built panels. We considered this option, but it really only works if you have a perfectly flat ground to work on; you can’t slope the pickets with the ground nicely like you can if you built it using the method described in this article. In my opinion, the pre-built panels will rarely come out looking nice, except for the absolute flattest yards.
I do wish I had been a little bit pickier with the pickets. There were some that were slightly warped, and I simply nailed them up anyway. I didn’t want to keep going back to the store. As you can see from the finished picture on the right, we’ve got several pickets that are noticeably warped after they had a chance to dry out, which keeps the fence from looking as nice as it could. I could have dried the wood out before doing this, but I didn’t have anywhere indoors to place this much wood. The real solution would be to go to a nicer grade of wood, but that would have dramatically increased the cost of the fence, so I just left it alone.
Lastly, I rushed in one or two areas when getting the height and level of the pickets correct. It’s something most people don’t notice unless I point it out, but if I did it all over, I would try to be a little more careful in this regard.
[…] 2×6 the owner had left in the shop, plus some scrap 2×4 and leftover deck screws from the fence project. My initial plan was just to sort of brace the framing with cinderblocks and not even screw it, […]
Im sure you can build it too guys. Just look for WoodPrix page
I am sure that you will find good way to make it on WoodPrix Webpage.