Building a Cinderblock Retaining Wall
How to Mortar and Stucco a Cinderblock Retaining Wall
… Lovely.
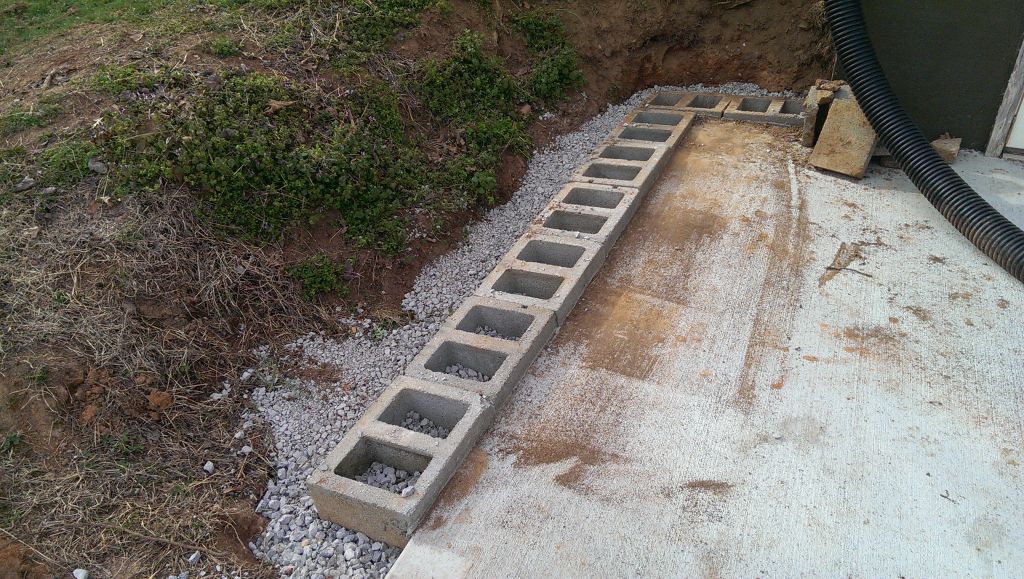
Our house had an incompletely and crudely done “retaining wall” when we moved in. The other side has a decent enough wall that was properly mortared and stuccoed, but this side just had some blocks sort of stacked up lackadaisically. We wanted to flatten and put a small fence around the area near it for a garden, so we needed to make this wall actually do its job and look presentable.
Unfortunately, when we got the driveway extension poured, they used the bottom row of blocks as framing. We didn’t think anything of it, but now they’re fairly well cemented down. A chisel could get them out, but I’d be concerned about damaging the driveway. On the plus side, the bottom 2/3″ of the cinderblocks are braced by the driveway, so at least its somewhat sturdy.
Given this and the fact that all we wanted was a 3′ or so wall, we decided to simply use the existing blocks, plus a couple of new ones, and build up the wall with mortar using these blocks as a foundation. If we were starting over, it would be better to ensure such a wall is done on a good, level concrete footing. We didn’t really have a choice here, but this wall won’t be doing a whole lot structurally or be very tall, so it isn’t a big concern.
Leveling the Unlevel
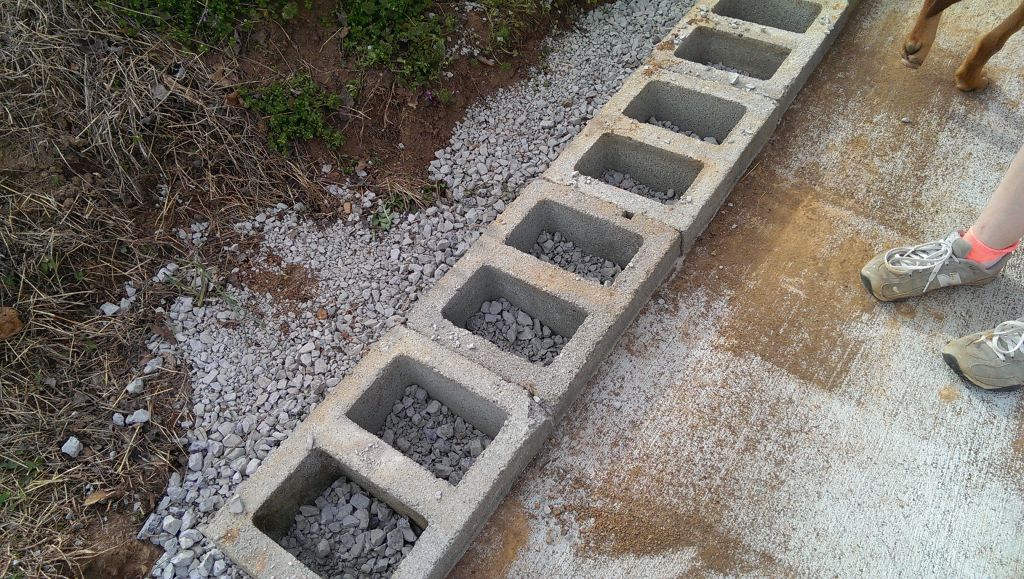
Ended up filling them almost completely with gravel after this picture
I needed to get this goofy basis for the wall into something approaching level and sturdy without ripping the blocks out. What I went with is unconventional, and I can’t say I recommend it, but it appears to have worked. We filled the cinderblocks most of the way up with some gravel for drainage and weight. It cost us about $8 for a half a ton at a rock store down the road. Yes, there is such a place.
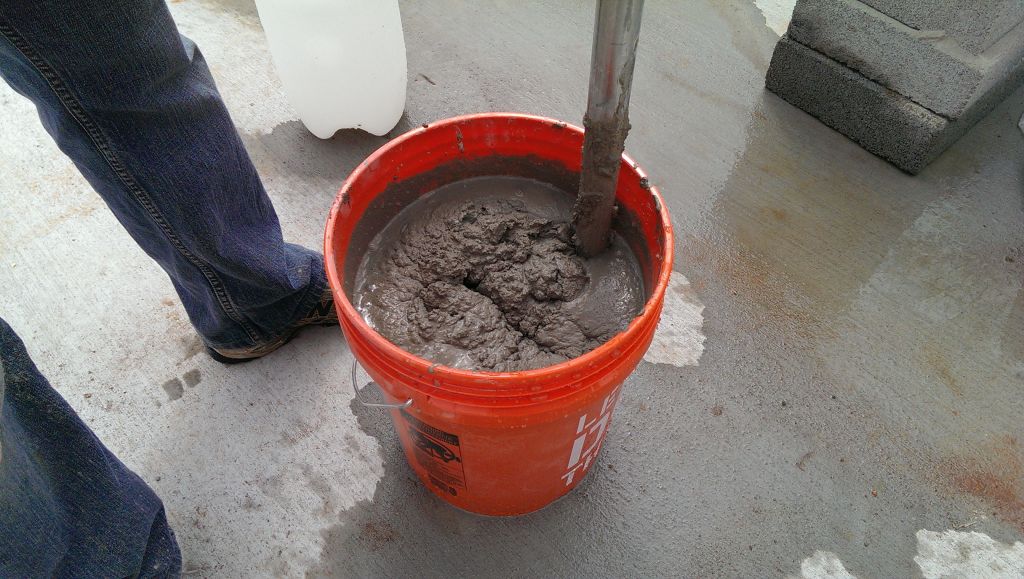
Then, we grabbed some bags of Sakrete mortar and a cheapo “Homer” bucket from Home Depot. We used the bucket for this job and then threw it away – amazingly, somebody came and picked it up before the garbage men. Apparently they want a $1.50 bucket half-full of drying mortar.
This was my first time dealing with mortar. There is a difference between mortar, concrete, and cement, for those who don’t know. Cement is the binder that is in both mortar and concrete. Concrete has larger stone with cement, while mortar has sand. Concrete is for large structural pours, while mortar is for gluing things together, more or less.
It didn’t do it, it’s been framed. ZING.
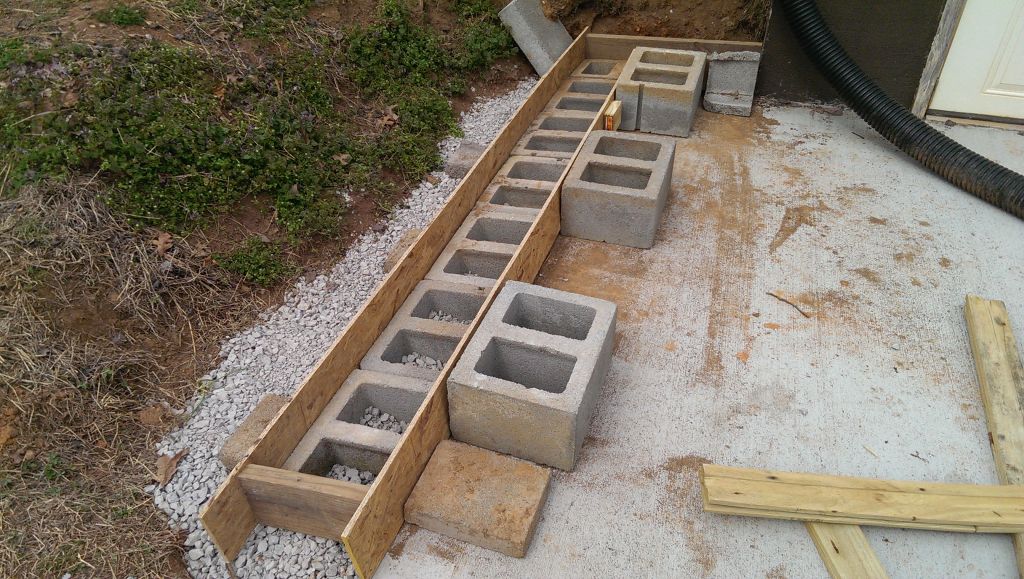
So I went ahead and did the concrete thing with the mortar, because I’m peace like that. My plan was to cover the top of all of the blocks with mortar, getting down into the gaps between them, and pile on the mortar in the low spots to level the whole thing out. I figured between this, the support from the driveway in front, and all of the gravel we were dumping in back, the wall probably won’t go anywhere.
To frame, I just used some scrap OSB and 2×6 the owner had left in the shop, plus some scrap 2×4 and leftover deck screws from the fence project. My initial plan was just to sort of brace the framing with cinderblocks and not even screw it, but this was a horrible plan. It didn’t hold tight to the blocks at all, so that was a really dumb plan. I still used some blocks for extra support.
Mortar all up in my bucket
Then it was time to mix the concrete. I had to play with the consistency a little bit. The directions on the bag were a good start. I ended up adding a little more water than it said, to make it a little more malleable. You can use just about anything metal to stir it; as long as you wash it off after you’re done, it won’t remain dirty. I used this random stake and an old shovel.
You definitely want some kind of gloves. I use the disposable rip-resistant nitrile gloves they sell in 100-packs at the store. They’re fairly tough and you can throw them away: awesome for painting, car work, or things like this. Eye protection is also a good idea; it’s very easy to get drops of mortar splashing around.
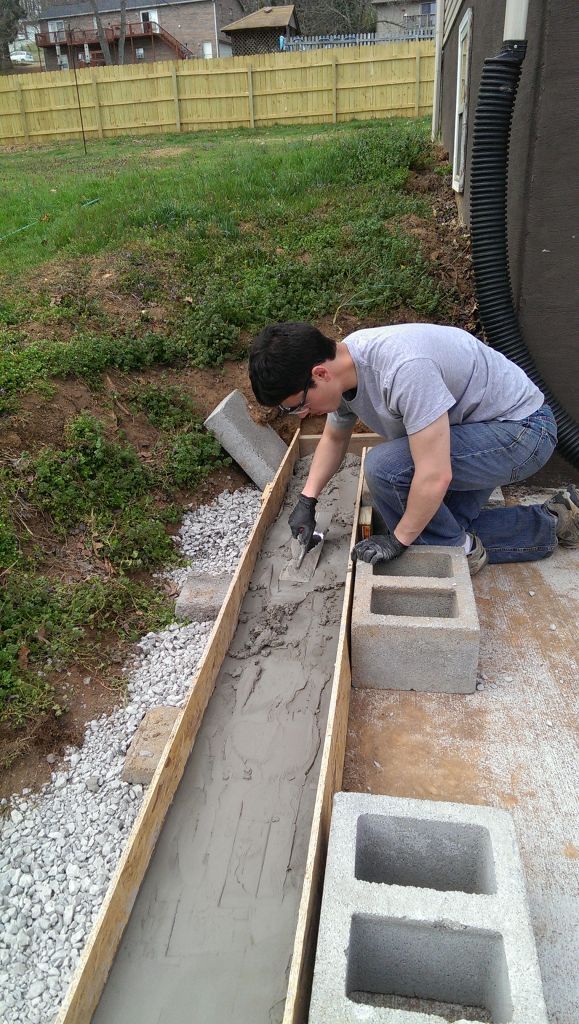
Laying it down
I just used a shovel and started scooping the mortar on top of the bottom row of blocks, getting it between 1/2″ and 2″ thick depending on how unlevel the surface was. I used a $12 trowel from Home Depot to smooth out the surface of the mortar. Later on, I used an old float level to make sure it was fairly the whole way across.
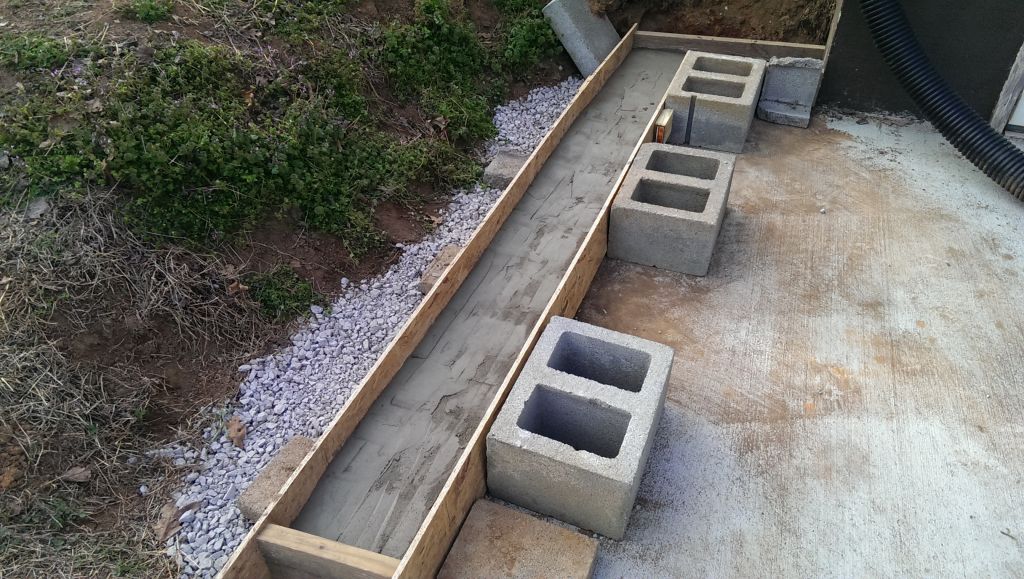
All level and good to go
At this point, I was all finished up, so my dogs had to walk across it to let me keep practicing my trowel skills. I smoothed it out again, even more confident in my abilities, and let it dry for a few days. I’m not sure whether it really needed to dry for as long as it did, but I didn’t have a chance to get back to this project.
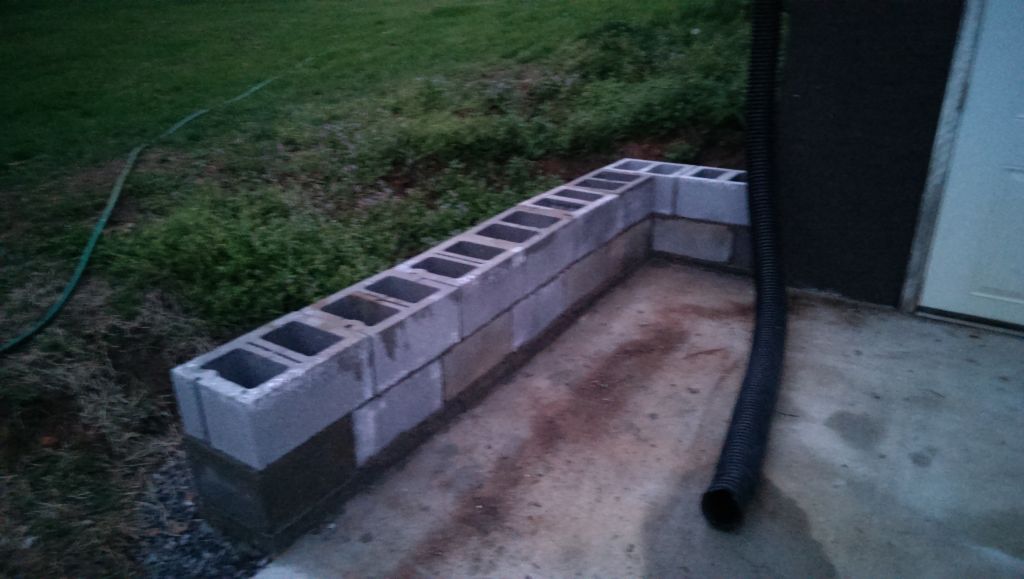
Building the Rest

Voila! (Which is literally”look there!” in French)
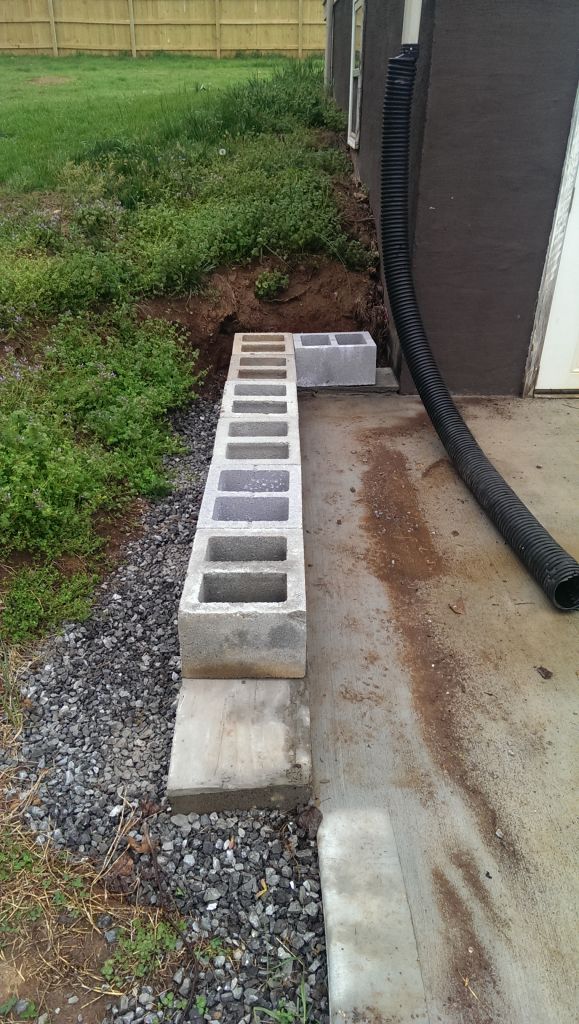
After letting it cure for awhile, I got ready to finish building the wall up. I pulled the framing off, and things were looking pretty good. The bottom row was now solid enough to work from, and although not entirely level, it was much better than at the start of the project.
Laid out, with my mind on my money and my money on my mind
The next step was to test fit the next row of blocks. Unfortunately, the gaps in the first row made for some odd fitment issues that would need to be corrected through the rest of the build.
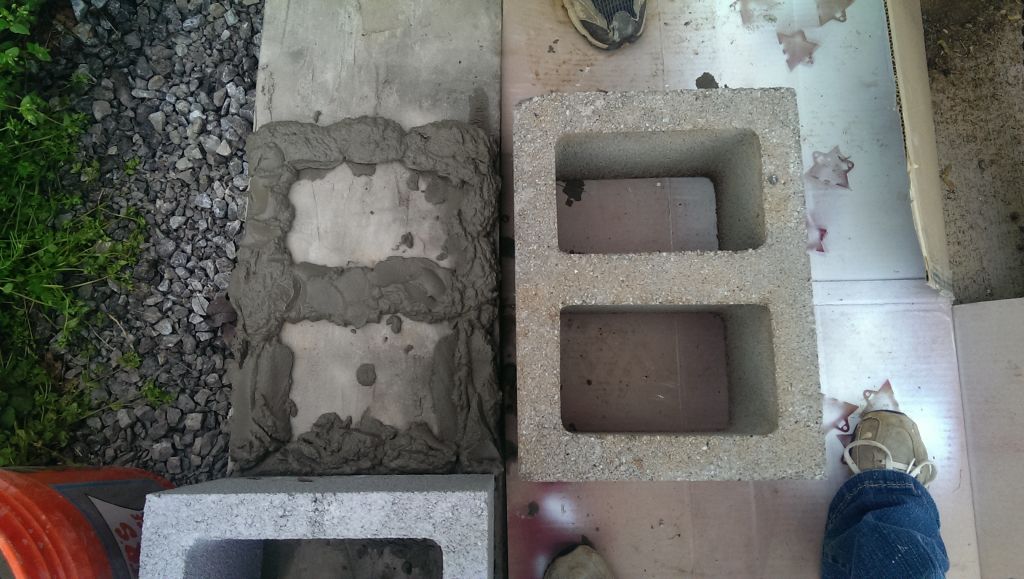
The goal with these walls is to stagger the blocks so that you have a wall rather than several columns of cinderblock apt to fall over at any minute. Typically you can just buy half blocks at the store, to use on the ends of every other row. Unfortunately for this project, the previous owner decided to use extra deep blocks, which nobody sells half blocks of. Also, after I laid out where the blocks need to be as pictured, it was clear that I needed something more like a 1/4 and 3/4 block.

Diamond cutting blade
Enter the circular saw diamond blade. I got this one on Amazon for $8.
You could use a masonry chisel instead, but this method is far faster and easier. Also, the end result is a very clean cut.
PB 1

PB2
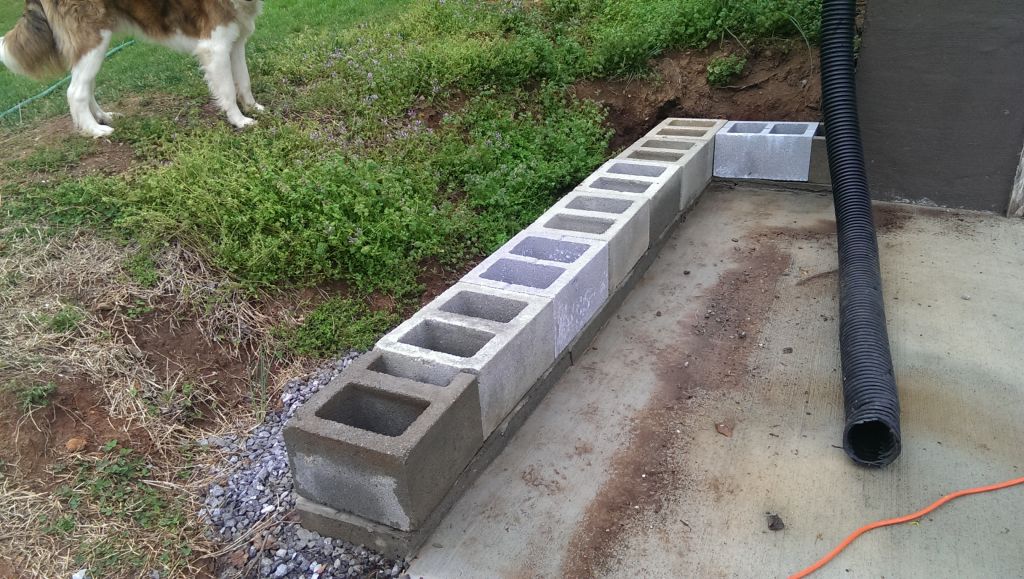
I used the masonry blade to divide up a cinderblock into the fragments I needed. The end result came out pretty well. One downside to my approach, as you’ll see later on, is that the vertical seams between rows aren’t as staggered as they really should be, but this wall is so short that I don’t imagine it’s a problem. I might be concerned for a taller wall or one that really did structural support.
Gooping down the mortar

Butter
Once I had my next row all set, I mixed up some mortar as before and started setting the block up. First, I laid down a good layer of mortar where the block needed to go. Then, I buttered the end of the block. Finally, I sat it in its place and used a small hammer to tap it down and against the block its joining. This way, each block is mortared to its neighbor as well as the one underneath it.
MONTAGE
Hit the easy button, because this was easy
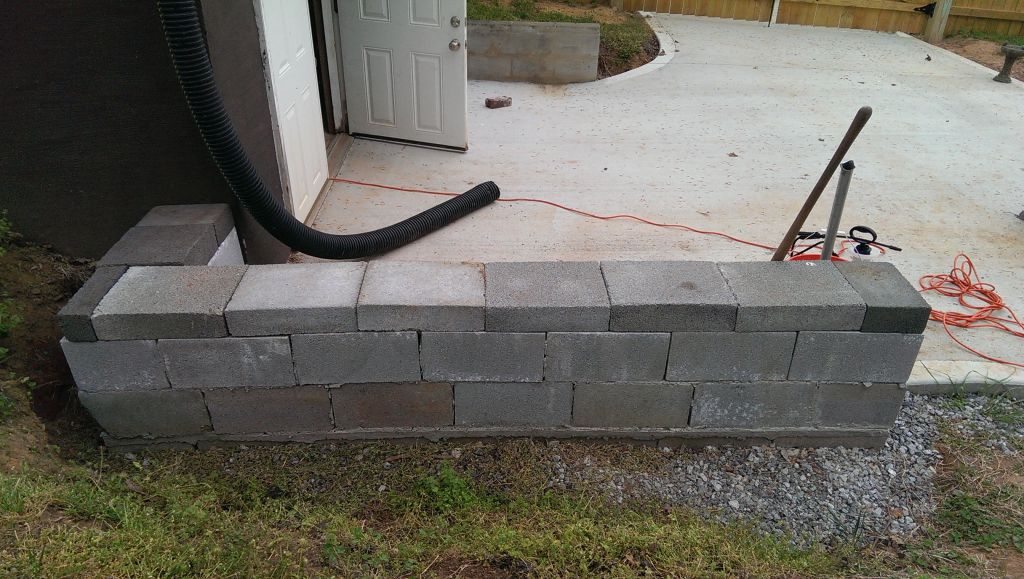
So skipping ahead a little bit, I got all of that done and came to the caps. These are the half-height blocks without holes that sit on the top. The procedure was basically the same: I cut one in half and used the halves to offset the seams vs the row below it. I also used the same trick as on the first row, doing like 1/4 and 3/4 of a cap to make the rest of it mate up. After the caps were cemented down, I let the wall cure for a little bit, and then came back to cover the whole thing in mortar to finish up.
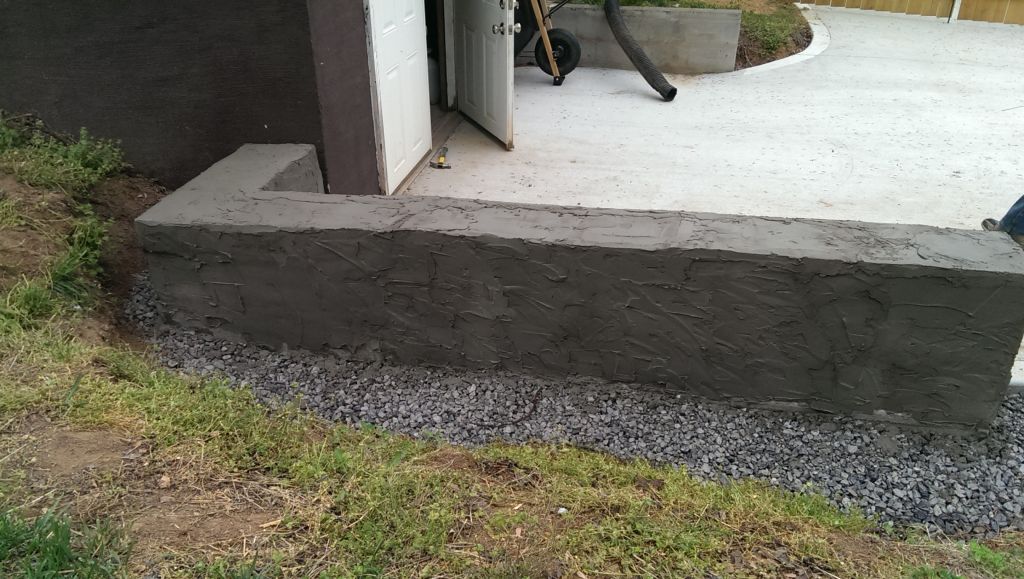
Stucco Time
I actually have video this time! Go me. Anyway, I wanted to stucco the whole thing with some mortar, because I had a mixture of old and new blocks of different colors, I wanted to help reinforce the wall, and there is another wall across the driveway that was done this way. This allows them to match.
Stuccoing is pretty simple. In addition to the rectangular trowel I had earlier, I also got a small tuck-pointing trowel. I used the smaller trowel to slap mortar onto the bigger trowel, and spread. I found that holding the bigger trowel against the block allowed me to drop the least amount of mortar.
On the gravel side, dropped mortar didn’t matter, but I put down cardboard on my driveway. I would recommend this, as you’re definitely going to spill mortar. Also, I found adding a little bit of extra water to the mix made the mortar stick to the wall better. It’s one of those things that you just experiment with and see what works. The mixture in the video is actually a little too soupy, I believe I added a little bit more mortar to it afterwards.

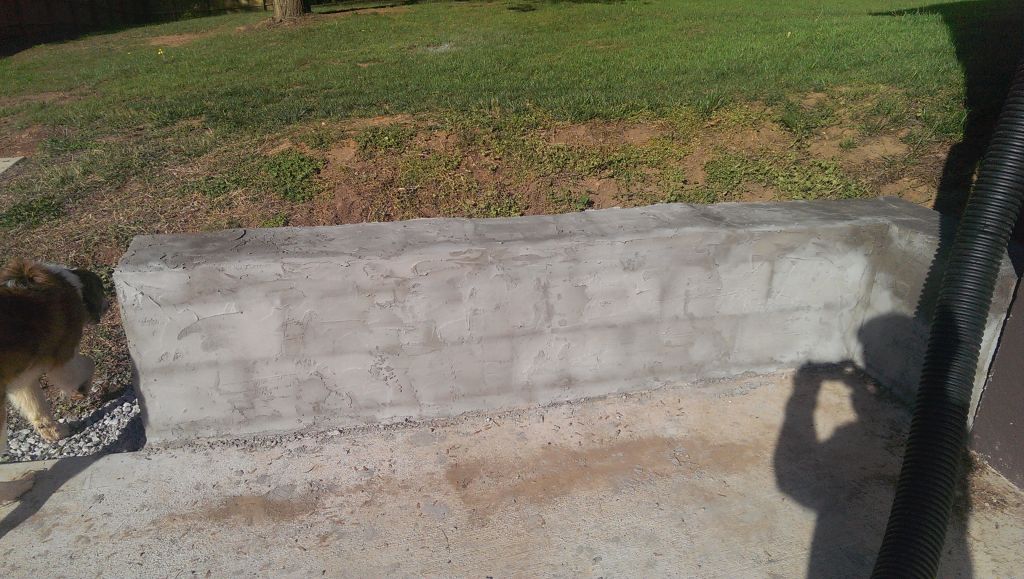
All done
I wish it stayed this color
And with that, this project is about wrapped up.
Wrap-Up
Overall, this turned out pretty well. I would definitely do this myself over hiring somebody, were I to need it again. The total cost was around $60-$70 including tools I didn’t have, and it was a pretty quick project. I do almost wish the wall had stayed that darker grey, but oh well.

Nearly dry
The marks between the bricks dried away eventually
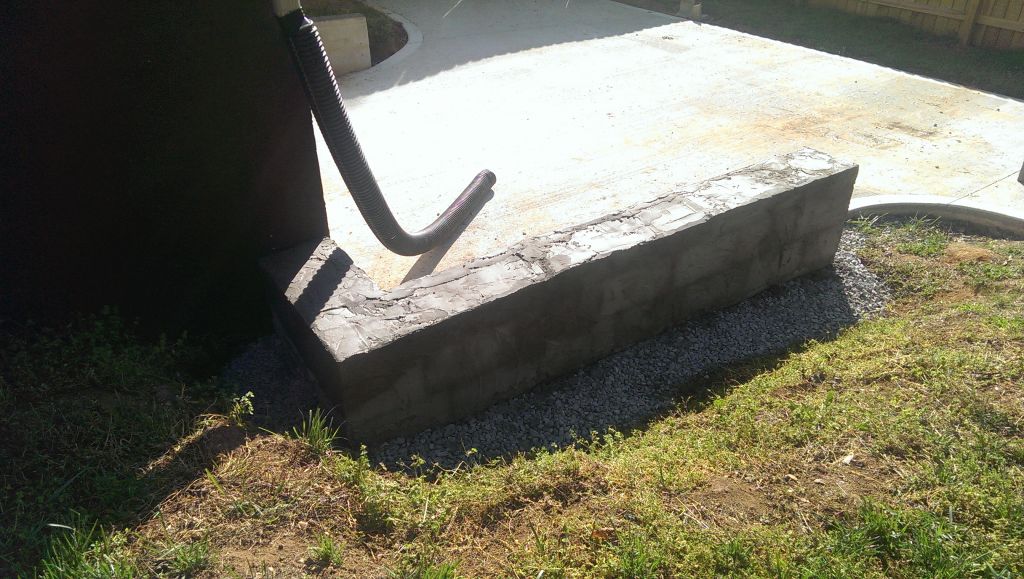
Yup, it’s a wall