Outer Tie Rod End Replacement
My wife’s 08 Scion Tc had started intermittently pulling when on the highway. The fact that it wasn’t consistent implied that it wasn’t simply an alignment issue. Sure enough, the passenger side outer tie rod end was loose and had some play. You can test this by simply getting under the car and shaking the tie rod. While these instructions are on a Scion, outer tie rod replacement was identical on my Miata and most other cars.
Tie rods connect your steering rack to your wheels, one on each side of the vehicle. The rod itself doesn’t generally go bad, but there is an inner and outer end on each side, each with a joint covered with a rubber dust boot. Either of these joints is apt to going bad over time. The scion is about six years old with about 120,000 miles, and this is the first tie rod end it needed.
Tools Required

Don’t leave home without it, or you won’t be fixing any tie rods
All you need is a basic set of wrenches. On the Scion, I simply needed a 17mm socket wrench for the castle nut and a 19mm box wrench for the jam nut.
Also, I definitely recommend renting the tool pictured on the left from AutoZone. I tried to pry and pound the tie rod end out, but I was afraid of damaging something. This tool simply clamped on and let me use a wrench; it was incredibly painless with no chance of collateral damage.
You will need an alignment after this job.
Tie Rod Description

Tie rod
The picture shows the outer tie rod end to be replaced. It connects in two places. On the right, the tie rod end has a threaded rod that goes up through the wheel assembly and is secured to it with the castle nut pictured. The cotter pin keeps the castle nut from being able to back out.
On the left, the tie rod end actually has a threaded hole in it; it screws onto the tie rod, the silver bar on the far left. It can be screwed in and out as part of adjusting the vehicle’s toe alignment. The silver nut on the left is used to tighten the end to hold the setting after it is set properly.
Procedure
The first task is to lift the front of your car with a floor jack and put it on jack stands, with wheel chocks on the back wheels. You can look at your owner’s manual for information on this procedure. Then, remove the wheel on the side that you intend to work on. Truthfully, if this part isn’t already old hat for you, you might want some help with this.
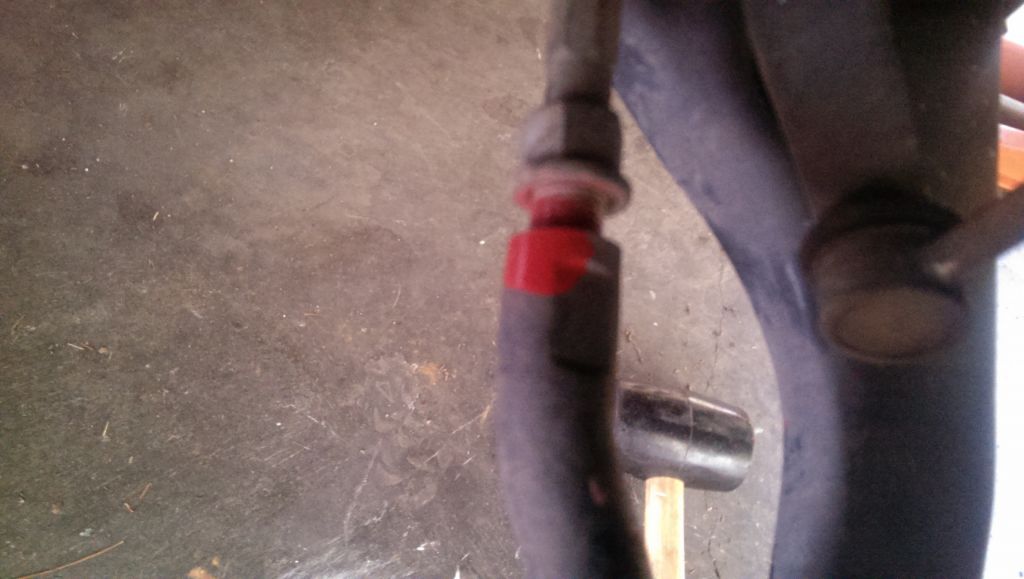
Nut loosened and painted
Loosen the silver nut holding the tie rod end secured to the tie rod. Mark the tie rod threads so you know approximately where the old tie rod end was set. You will still need an alignment, but this will let you set the alignment approximately correct, enough to get it to a shop. In the picture, I just used a can of red spray paint I had in the garage.
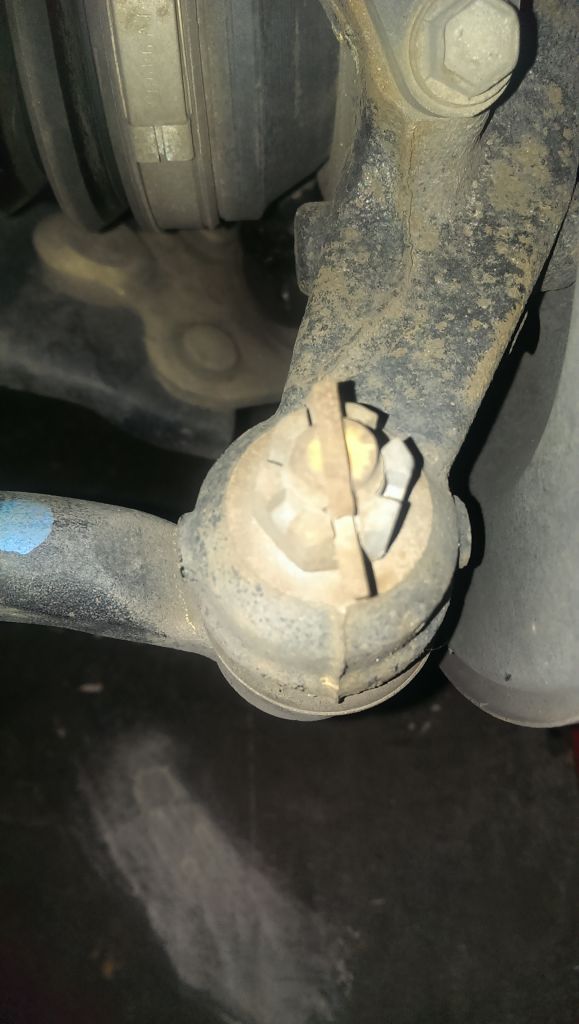
Castle nut and cotter pin
While this dries a little bit, remove the other side. First, use some pliers to bend the cotter pin straight and pull it out. Grab your wrench, 17mm in the case of the Scion, and remove the castle nut. The replacement outer tie rod end I bought included a new nut and cotter pin, so I discarded these.
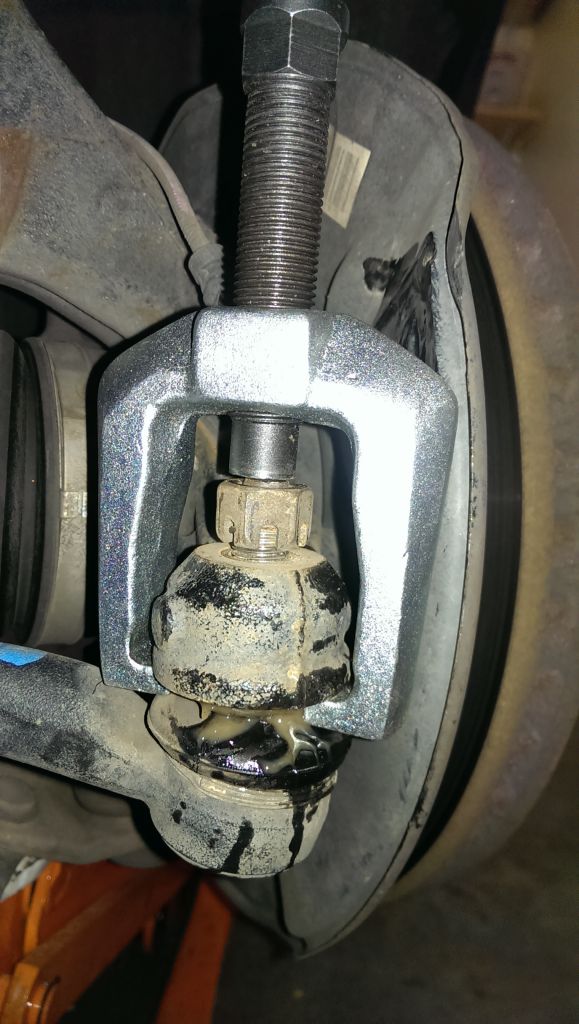
Hook up and pull out
As I stated above, I tried to use a hammer to do this part, but this tool was so much easier. You simply hook it up like in the picture, with the prongs hooked under the wheel assembly and the bolt on the pin, and crank til it pops out. Very painless. I’ll note that at this point I had been hammering at it with that castle nut on to provide more surface area; I had to remove it to actually do this and didn’t take another picture.
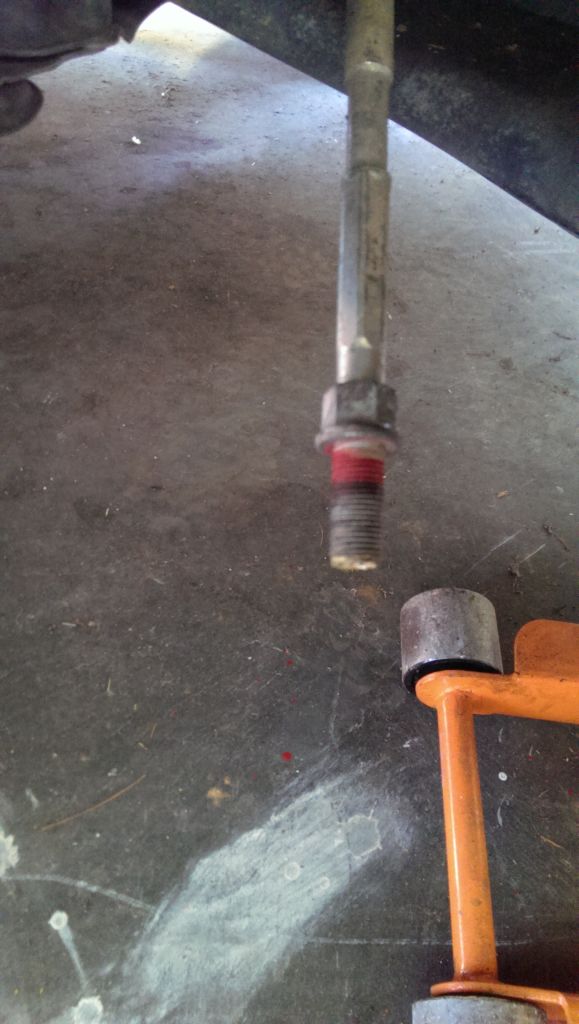
Tie rod end removed
Once the end is free of the wheel hub, you can unscrew the entire outer tie rod end from the tie rod. The tie rod itself will just hang there, all lonely. You can see the paint in the picture, though. Hopefully this makes the reason for marking it clear. When I put the new one on, I just spun it until it touched red.
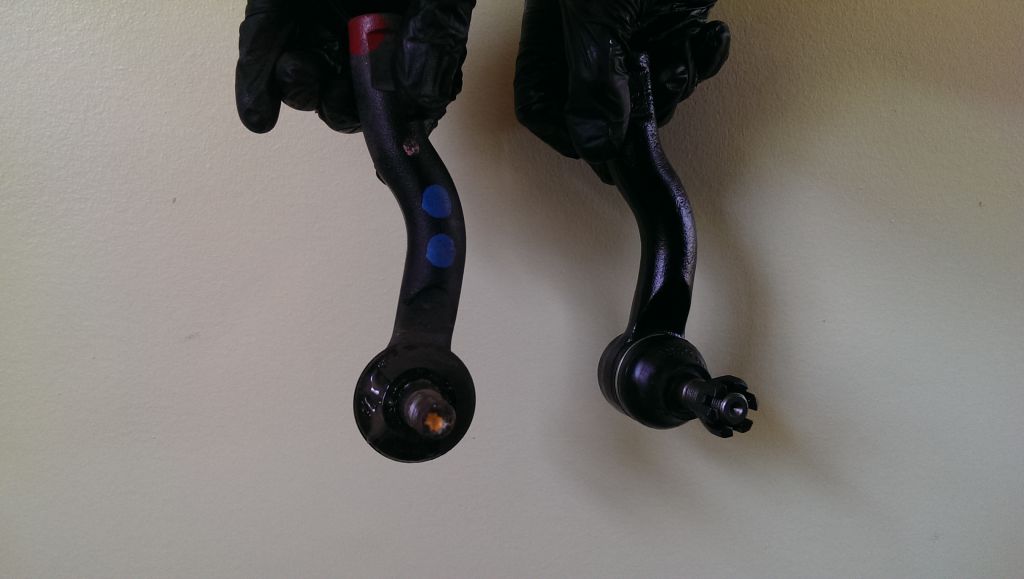
Side-by-side
And that’s about it. You can see old vs new. The old one you can move very easily with one hand, it was pretty loose. The new one is nice and tight. The problem with the steering was completely solved, and we were able to do this for about thirty bucks instead of the $180 the mechanic wanted.
[…] some maintenance on my wife's 08 Tc, and I figured the community might get some use out of them. How to replace an outer tie rod end How to do a coolant flush on a Scion Tc How to replace a Scion Tc lower ball joint […]