Building a Bluebird Birdhouse with Rabbets, Dadoes, Dovetails
Bluebird Birdhouse Overview
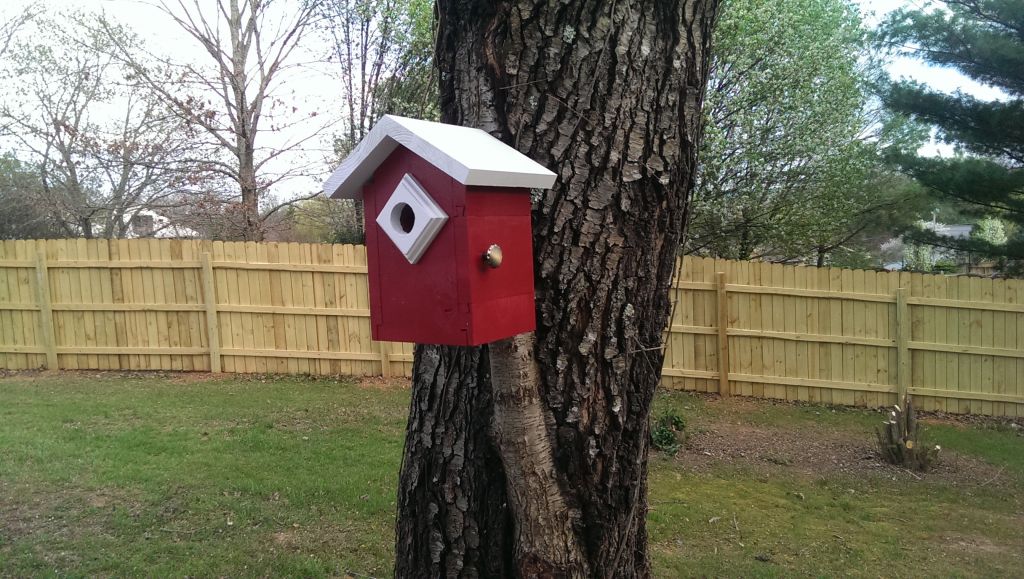
Done! We’re gonna Tarantino this!
My wife wanted a bluebird birdhouse, and I wanted to practice some different joints with my new table saw, router, and router table. This ended up being a great project to try out some rabbets and dadoes, as well as some sliding dovetails. Truthfully, it is massive overkill for a birdhouse, but it was fun. The design I came up with only requires one 6″x6’x1″ board.
I also used it as an opportunity to try out the cheap whitewood I had seen at Home Depot. I realize a big box store is not the place to go for fine wood, and I had seen mixed reviews on “whitewood” in particular, but this stuff was around a dollar a foot. It is apparently generic low-grade utility wood, but it’s S4S (surfaced on four sides) and I don’t yet have a jointer or planer, so I wanted to see how it was on a project like this, where wood choice doesn’t really matter. I can’t say that I will use it again – it was very difficult to find a straight piece, and it tore out and chipped extremely easily.
Design
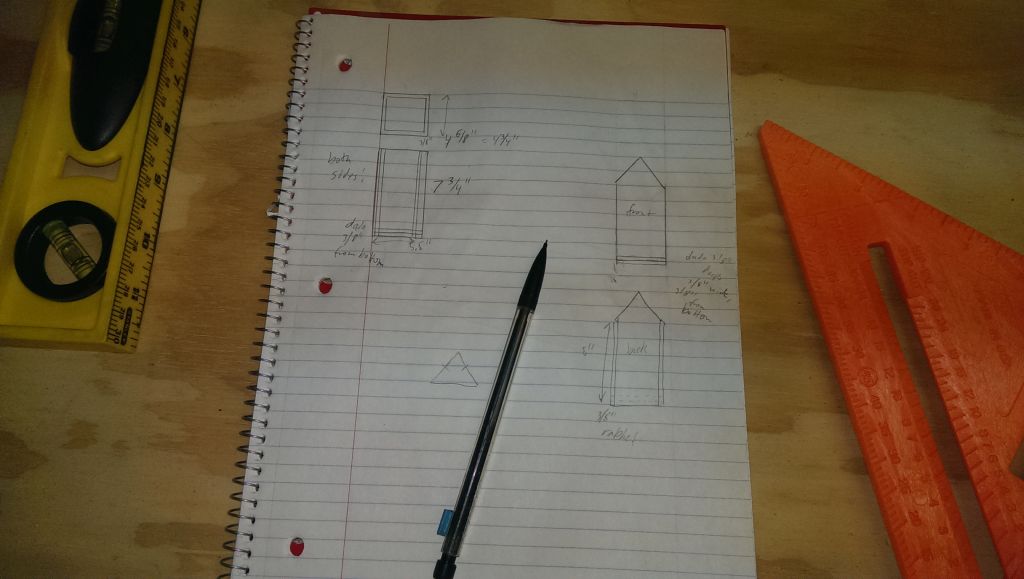
Design drawing
The plan I came up with holds together without screws, nails, or glue, like a puzzle. I still used glue on the joints for reinforcement and longevity. I used some plans online purely to get an idea of appropriate dimensions.
The idea I came up with was to use rabbets and dadoes to hold the entire house together, aside from the roof. The bottom side of the bottom piece has a rabbet running around it on all 4 sides. The bottom of both sides, the front, and the back have dadoes in them so that the bottom slots into them. The fronts also have rabbets cut on their front faces, which fit into vertical dadoes on the sides. I was going to use fancier joints like sliding dovetails to hold the roof on, but I started running out of material and got lazy, so the roof is just glued.
Walls and Floor
Crosscutting safely
I began by cutting out the floor and sides. I don’t recall the exact dimensions, but my goal was to make the birdhouse as large as possible with the caveat that the wood was 5.5″ wide.
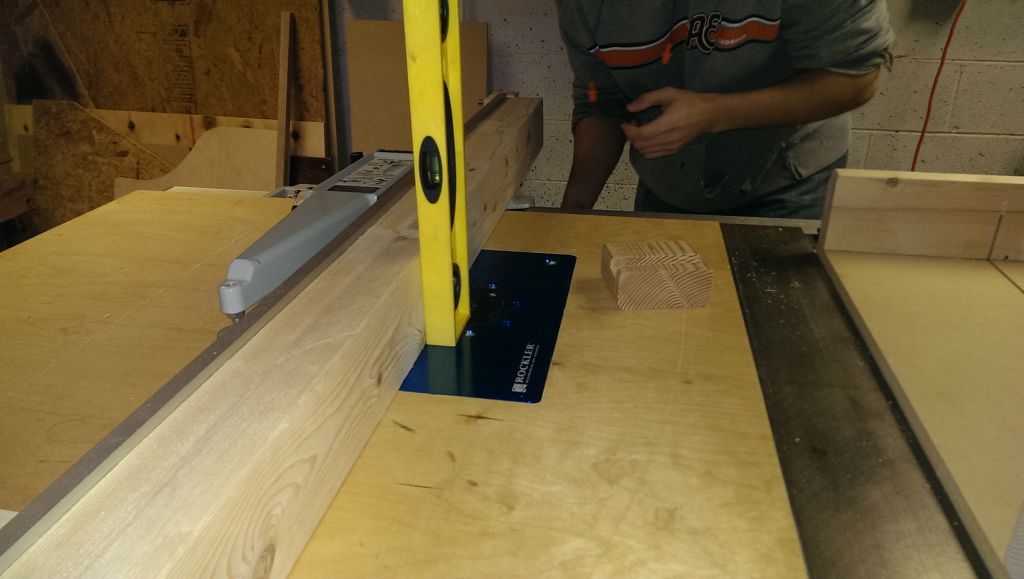
Legendary accuracy in that level’s ruler
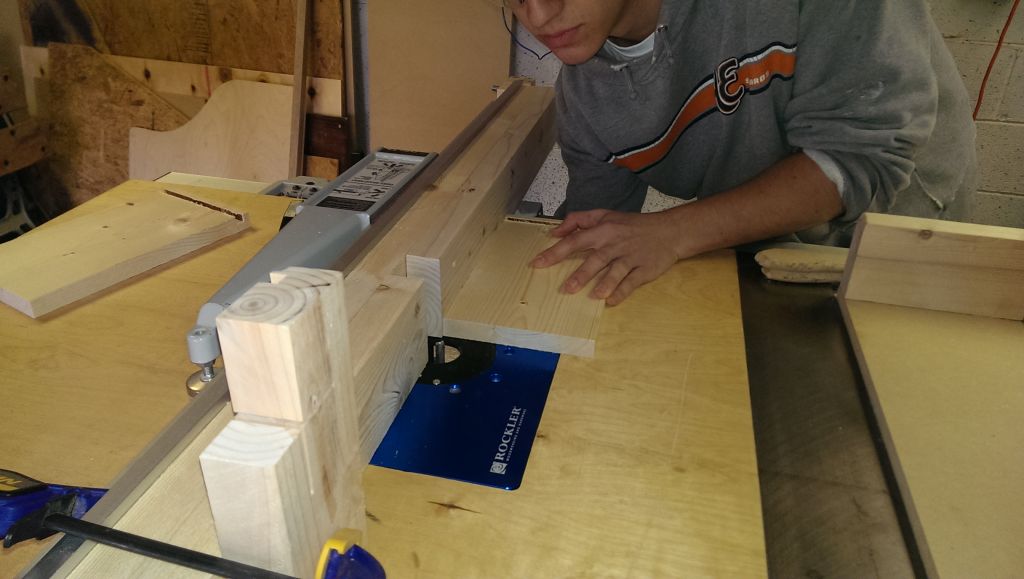
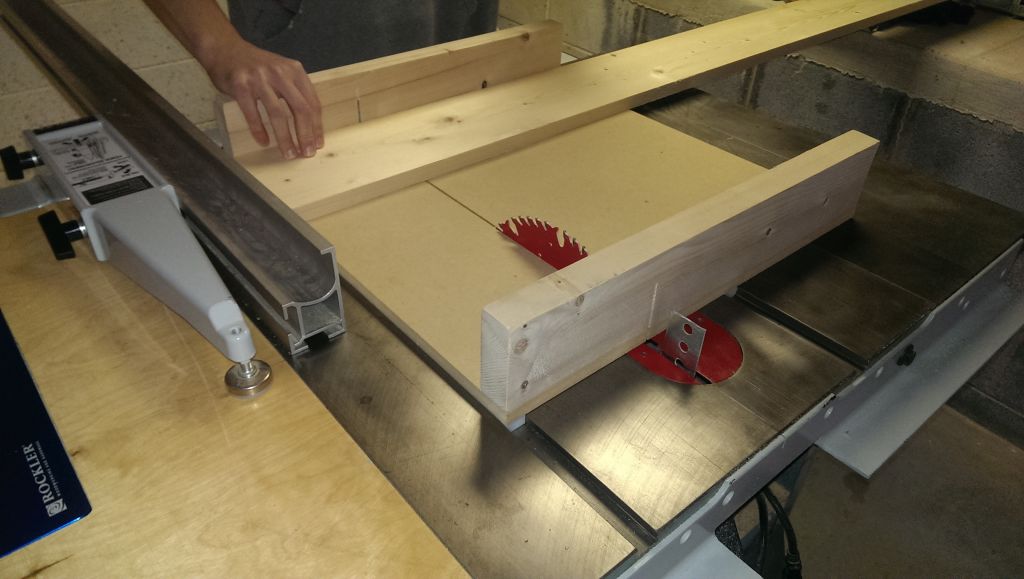
Cutting rabbets
I had 3/4″ thick wood, which is the same as 6/8″. I used my 3/8″ straight router bit in the table to cut the rabbets and dados. The rabbets were 3/8″ deep and wide, exactly on the edge of the board. The dadoes were 3/8″ in from the edge of the board, 3/8″ deep, and 3/8″ wide.
The left-hand picture above is me setting it up to also cut 3/8″ deep. I ended up doing a stopped rabbet for the front and back, where I ended up clamping some scrap to the end of the fence so I knew where to cut. This prevented an ugly hole where it met up with the side. I really need to make some good push blocks and get some miter slots set up to use featherboards for my router table – the table saw push sticks don’t hold the wood down very well.

One side dadoed up
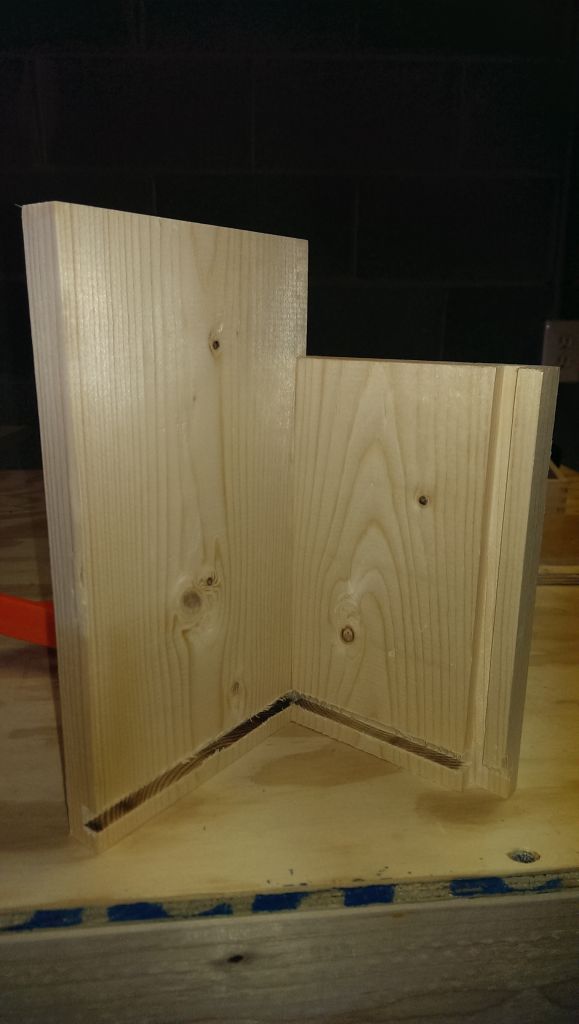
Front and side fitting together
The left-hand picture above is one of the sides, having done the dadoes on it. You can see how it fits into the front panel on the right. The front is the taller one – note that I cut it long enough to make some angled miter cuts to put the roof on later.
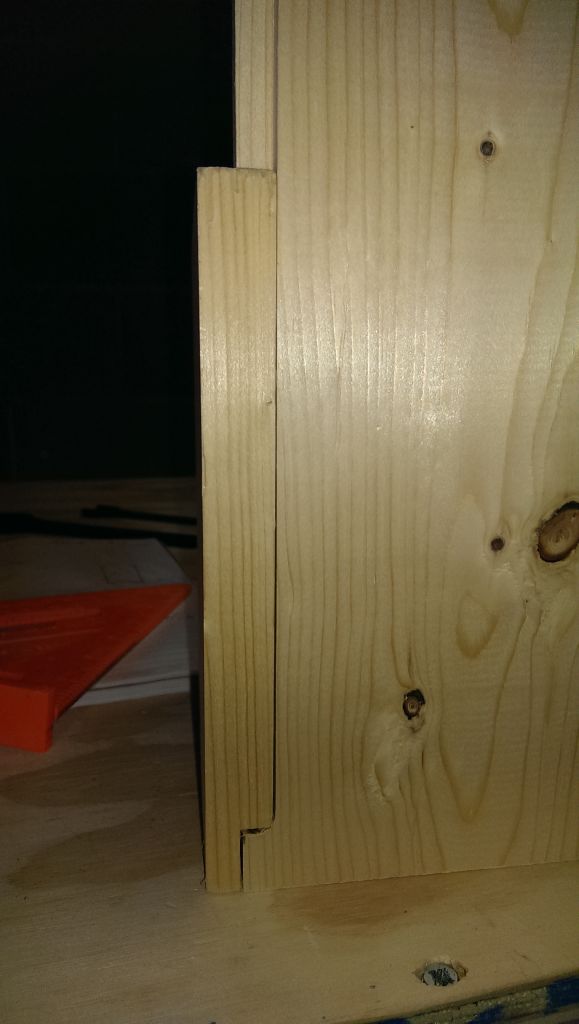
Gapless-ish
This picture shows how the seam between the front and side has nearly no gap. You can see here why I did the stopped rabbet on the front, otherwise there would be a square hole in the seam at the bottom. One thing I should have done, that would have made the joint even tighter, was use a chisel on that stopped rabbet to make it square. However, I didn’t have a chisel, so I just went with it.
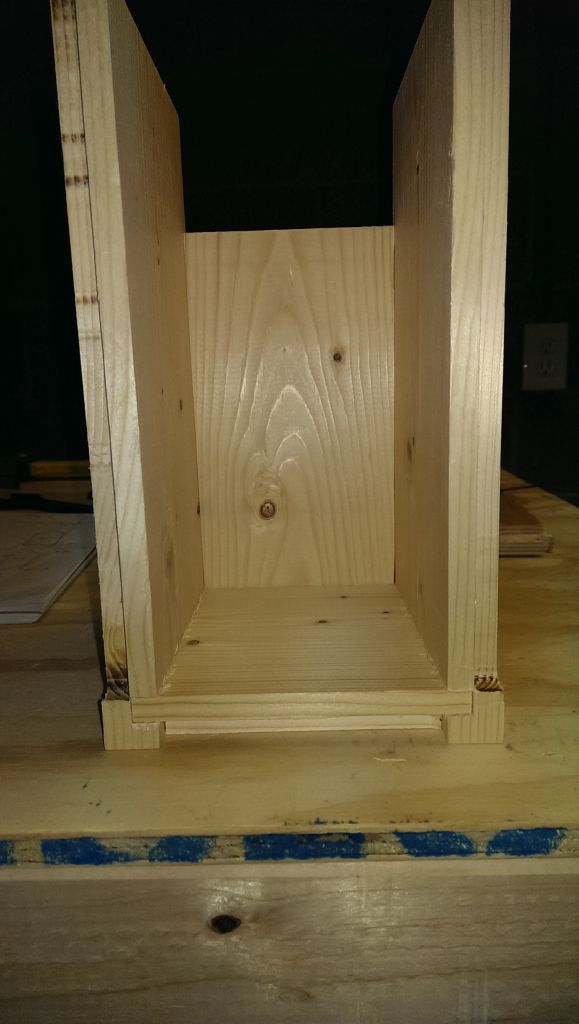
All but the final side
You can see how the bottom fits in now. This is a shot from the right side of the house. The floor, front, back, and left side are all fitted together. The main trick left now is to get the access panel done in the right side of the house before fitting it up.
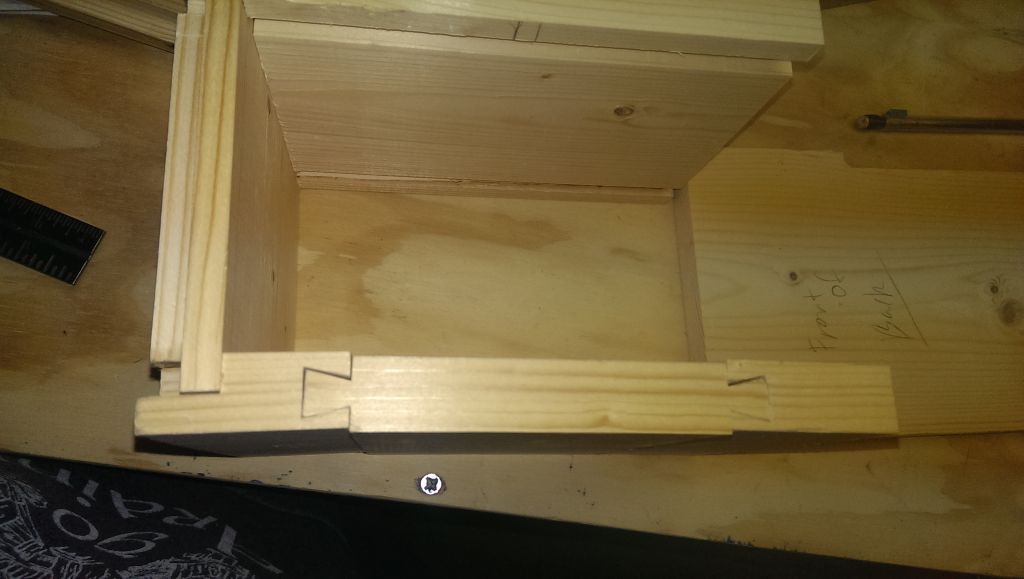
Sliding dovetails
Here’s a shot of what that sliding panel side looks like. I cut this side longer than the other, did the sliding dovetails, dadoed the bottom like normal, and then trimmed the top to make it the same height as the other side. The front and back also had to have their rabbets turned into actual cutouts where the sliding dovetail is, to keep them out of the way.
Roof and Glue-Up

Allllmost….
At this point, the floor and walls were done. Before gluing it up, I took the front and back panels to my cheapo miter saw, and made them accept an a-frame roof. There is intentionally a gap where the roof hits the side panels, in order to allow for some ventilation. In this shot, you can also see the sliding dovetail panel in action.
After doing this, I cut a couple of pieces for the roof and used my table saw to make them meet up. The intention was to do a fancy joint to join the two halves of the wood, but I got lazy at this point and just used glue. I also put some regular non-toxic silicon caulk on the inside seam of the roof after I was completely done, to ensure it stayed fairly water-tight.
Puzzle time
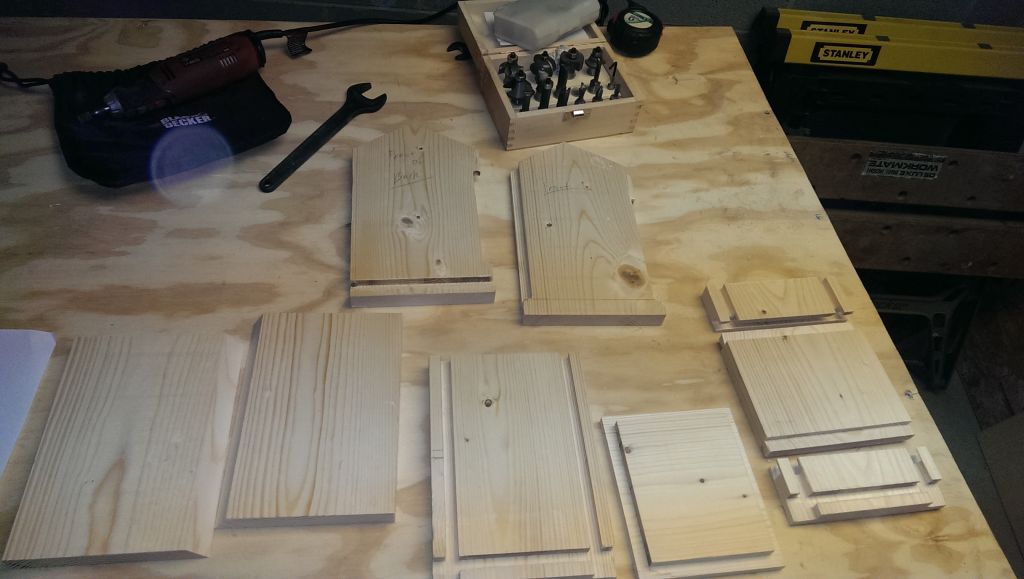
Here are all of the pieces, laid out. The bottom left two are the roof panels. The top two are the front and back. The bottom middle two are the left side and the floor. The three pieces. to the right are the sliding dovetail right side.
With this all together, I went ahead and did the glue-up of everything except for the roof. My wife wanted to paint the house red and the roof and accent trim white.
Trim and Paint
Once the glue dried, I needed to make a small piece of trim to put on the entrance hole. This extra depth near the entrance helps keep predators out, apparently. It seems like mostly decoration to me, but it looks nice.

Trim piece
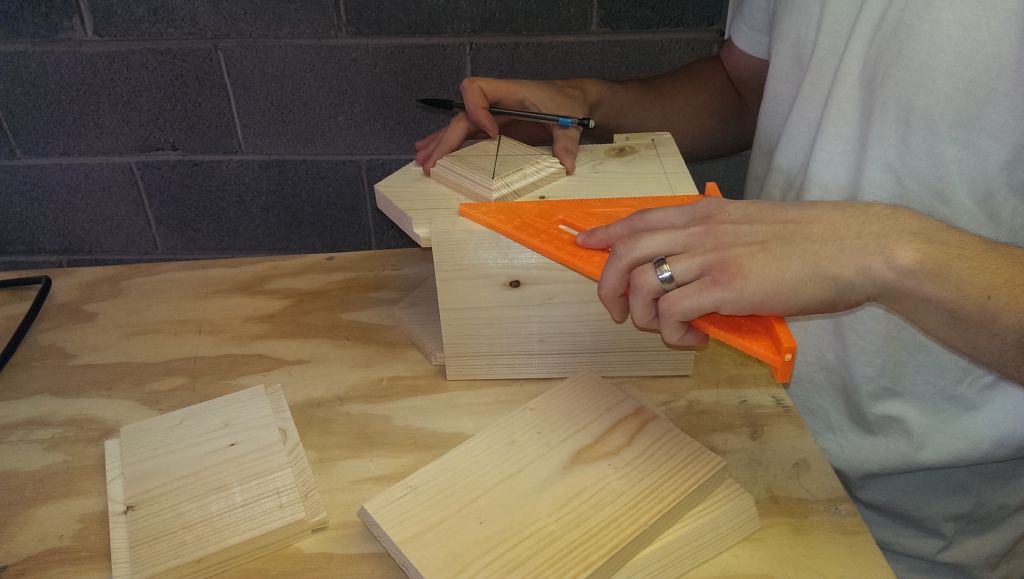
Centering hole on the house
I simply cut a small 3″x3″ piece of wood, and ran it over the roman ogee bit I had on my router. This gave a nice fancy profile to the piece. I found the center of it for the entrance hole by making two straight diagonal lines and then used the piece itself to figure out where to make the hole on the house.
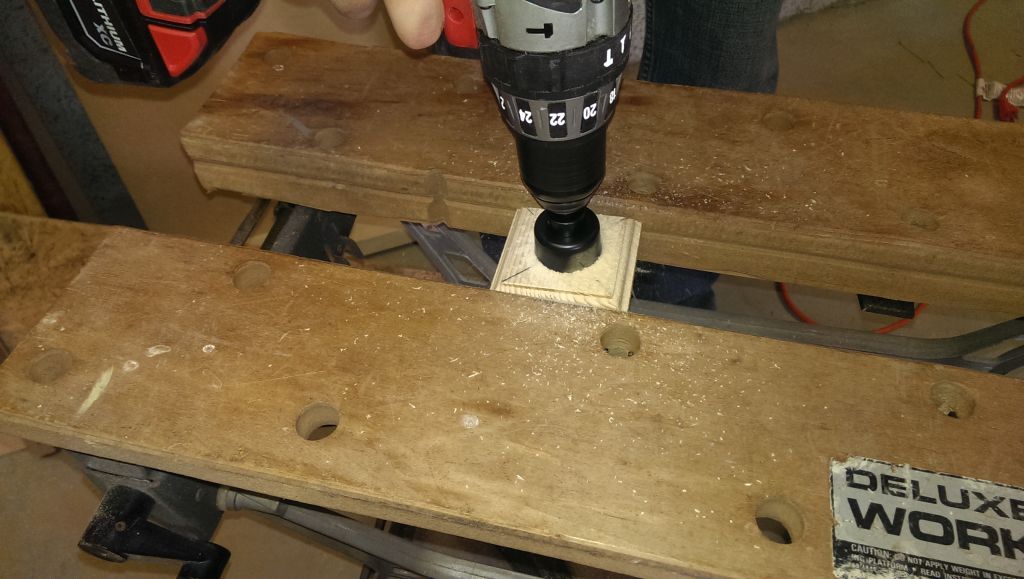
B&D to the rescue again
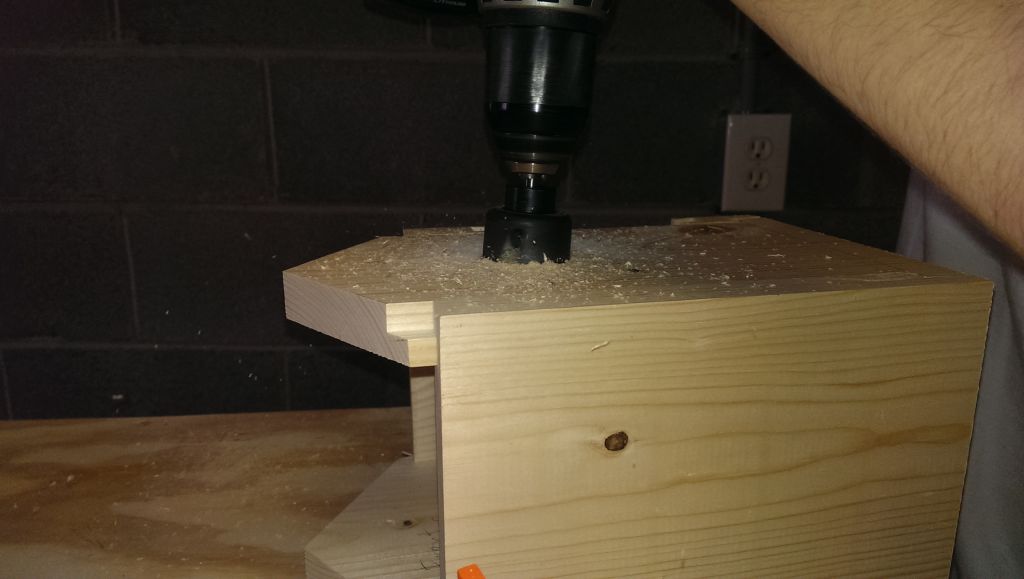
I gave that house a hole; houses love holes
I used a 1-1/2″ hole saw drill bit I grabbed from home depot. It already has a pilot bit in the center. To do the small trim piece, I used my late grandpa’s old Black and Decker Workmate
Wrap-Up of the Bluebird Birdhouse
Mount up
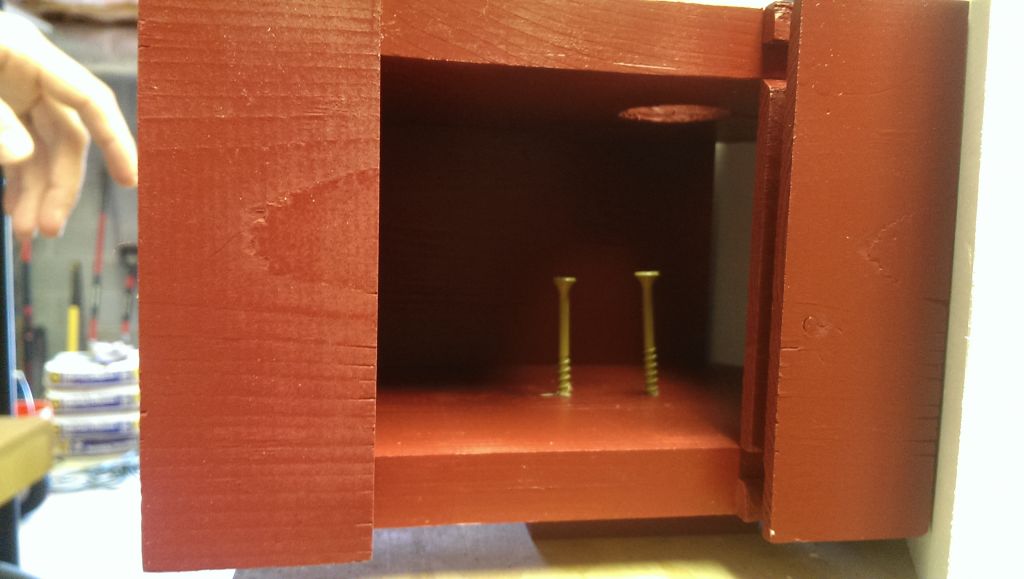
At this point, my wife painted everything, I glued the roof and trim on, and we were ready to mount it. We have an old tree in the backyard that wasn’t looking so hot anyway; I went ahead and used a couple of deck screws to mount the birdhouse. I have a little Dewalt right-angle adapter
After this was all done, we had a bluebird birdhouse. So far no birds, but we’ll see what happens.

Access panel

Ready for move-in