Adding a Table Saw Router Table Extension
Router Table Extension Overview
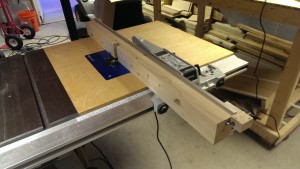
I got a table saw. Recently, I have also added a Bosch 1617EVSPK. It consistently scored the best reviews, is routinely on sale for $200, and includes both a fixed base and a plunge base. The first thought I had with that wood extension wing the table saw came with was that it would make a great router table.
For those not in the know, routers are really just giant oversized dremel tools. They come with a variety of specialized bits and can be used to make things like stopped dadoes, rabbets, and other cuts in wood. They’re slower than a table saw or a band saw, but they can cut to different depths unlike a band saw, and you can stop a cut partway through, unlike a table saw. Their most unique feature is that they can be used to do nice edging and trim, using various bits. Rounded over edges are made with roundover bits, and those scroll-like edges you see on other pieces can be done with a roman ogee bit. They’re really required to make a standard wood piece decorative and to make the more complicated types of wood joining.
Having them upside-down in a router table enables you to use a fence for straight cutting and to more easily trim small pieces. Instead of buying a router table, I chose to make one out of my existing table saw. A table saw router table extension gets you a great adjustable fence for free and saves room in your shop.
Adding the Insert Plate
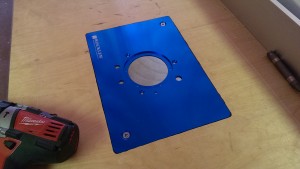
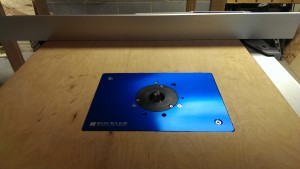
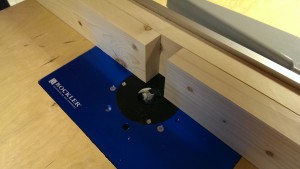
You can just drill holes in the table for the router, but an actual insert plate came recommended. It makes it easier to lift the router out of the table, and provides a cleaner-looking installation. I ended up getting an aluminum plate from Rockler based on reviews, and I’m happy with it so far.
I elected not to buy Rockler’s insert template or bit. Considering how it came out, I’m not sure that was a wise move. The basic goal is to cut out a rabbet (or a lip, if you aren’t familiar with the term) with a cutout in the middle, so that the insert plate has something to rest on.
If I did this again, I would NOT use OSB. This was dumb. Dumb, dumb, dumb. Know who’s dumb? This guy. I got a nice Whiteside pattern bit. Pattern bits are regular straight bits with a bearing at the bottom near the router. If you have a template on top of a piece of wood to route, the bearing will spin against the wood and prevent the cutting edge from going past your template.
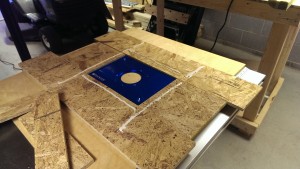
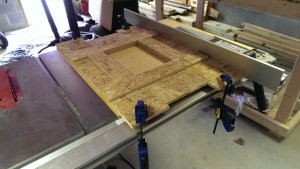
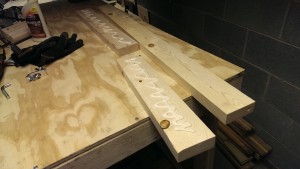
I cut a few piece of OSB that I had laying around as pictured, and arranged them as pictured. I slapped down some glue, and put down another few pieces to achieve the picture on the left. The goal is simply to make some wood that roughly approximates the outline of the router. I used the fence to keep everything straight.
Now, I had a 1″ tall bit with a bearing above it and a 1/4″ thick insert plate. My goal was to route a slightly-deeper-than 1/4″ edge within that rectangle cutout there. You want it deeper than the depth of the plate so that you can install leveling screws and make it perfectly level with the table. I made the template 1″ high, so that I could lower my 1″ bit enough for the bearing to contact the template. I should just take a picture of this.
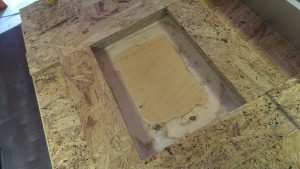
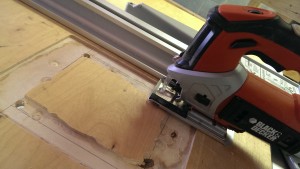
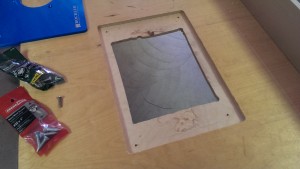
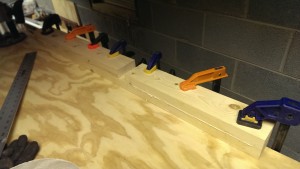
Anyway, I let the glue dry, clamped it to the table top, and ran the router around the edges of the rectangle. This got me my ledge on which the insert could rest. The next step was to drill a couple of pilot holes, and then a jigsaw, and get the middle cut out. I used the router afterwards to clean up the edges.
I initially tried to use the table saw fence as a guide for the jigsaw, but it ended up working better to simply freehand it. These cuts won’t be visible with the plate installed anyway, so I wasn’t too worried. At this point I had test fitted the plate and gotten everything set up. I also drilled some holes in the corners for leveling screws.
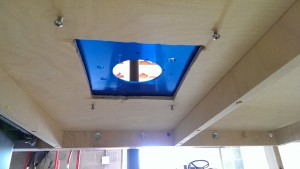
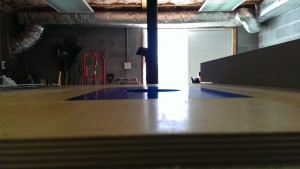
Then, I simply took a drill and installed some small bolts up through the bottom. I also went ahead and installed some larger screws down through the top to lock it down. Unfortunately, because I used OSB as a template, some of the edges were a little shaky, so I didn’t think the insert installed solidly enough to not use some lockdown screws. This kinda aggravates me, but I can always try again to rectify it later. It works great for now.
Fence
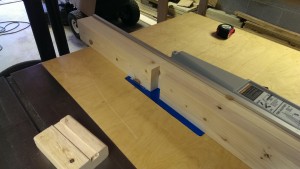
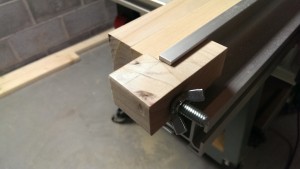
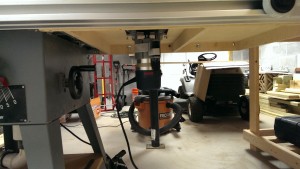
A major reason that I chose to use my table saw as a basis for my router table is that I get an adjustable, perfectly straight fence for free. However, router fences do have one difference from table saws: they need to have a gap in the middle so that you can place the fence over the router. This also provides a great place to put on dust collection. My goal was simply to make a wooden fence to clamp on to the Unifence, and it turned out pretty well.
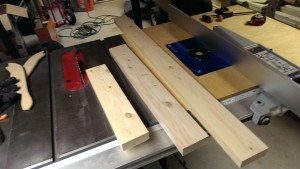
I cut a 2×4 into 3 sections. One large span is as long as my fence. The other two fit between the end of the fence and the middle cutout I want them to straddle. I ended up shaving every face of each 2×4 straight using my table saw. Most people will probably recommend against what is effectively resawing a 2×4 on a table saw, so I won’t recommend or show pictures of this operation. If I had a bandsaw or a jointer, I’d use it. As it was, I used pushsticks and featherboards, so it was as safe as I could get it.
I wood glued and clamped the two pieces to the long board as best I could. It is important to try to get it as straight as you can at this stage. After the glue dried, I did the not-recommended table saw operation one more time, except with the entire unit glued-up. The purpose of this was to ensure that the parts of the fence before and after the gap are perfectly flat to each other. It is important that your workpiece smoothly passes from one to the other as you run pieces past the router. It ended up coming out pretty well.
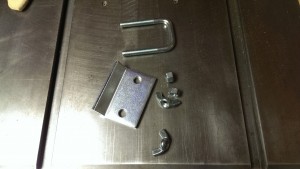
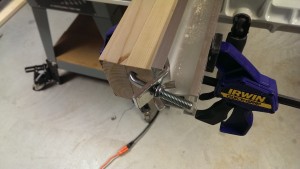
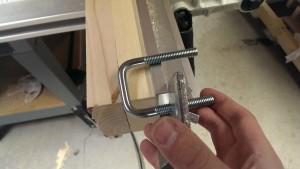
The final question thing to do, then, was to affix the router fence to the real fence. I couldn’t just use a regular clamp or it could get in the way of the workpiece I’m running across. They sell fence clamps for about $10 apiece, but I’m a cheap guy, so I ended up doing a u-bolt trick that I saw on lumberjocks.com. Basically, I went to home depot and bought a square ubolt and two matching wing nuts. The idea behind a fence clamp is that you drill a hole into your sacrificial fence, and then place this cane-shaped object in the hole and screw it tight.
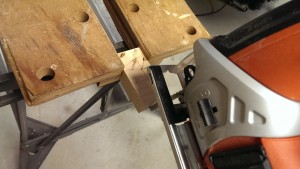
When cut in half, these u-bolts make a pretty good makeshift fence clamp. I cut the u-bolt in half using my Black and Decker RTX dremel tool with a metal cutoff wheel. This is my favorite way to cut small pieces of metal; it’s fairly quick and more precise than an angle grinder. I’m way too impatient for hacksaws. I did notice that the speed control can get clogged with metal shavings and go full speed. If this happens to you, it’s fairly easy to fix.
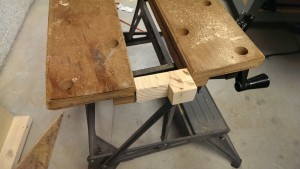
The initial plan was to also cut the plate it came with in half, and use that as pictured as a backing piece. This sort of worked, but I had to tighten it more than I liked, and it just didn’t work very well. I went ahead and cut up a couple of small bits of scrap 2×4 instead, using a drill and a jigsaw, and that worked out much better.
I ended up using a Black and Decker Workmate I inherited from my late grandfather to cut the piece. It worked fantastic. B&D has made these little sawhorse/workbench/vise clamp things for the last 50 years, and they’re really handy to have around. I use this thing more often than I would have thought, and it folds up for storage too. I’m not sure the effort for the clamps was worth the money I saved, but I like to make stuff.
Finishing Up
So that pretty much took care of everything. The final fence works great, and I’m pretty happy with how the project came out overall. I still need to add dust collection, but I can do that at a later date.

[…] birdhouse, and I wanted to practice some different joints with my new table saw, router, and router table. This ended up being a great project to try out some rabbets and dadoes, as well as some sliding […]
[…] wanted to do something simple with my new router and router table extension for my table saw, as a gift. A nice oak picture frame seemed like a good project. This can be done easily in an […]
[…] had just gotten my Bosch router and added a router table extension to my table saw, so I wanted to do a small project that was router-heavy to play with […]
[…] I was making a router table extension for my table saw, I was using my Black and Decker RTX to cut u-bolts in half for DIY fence clamps. The RTX is a […]
[…] Adding a Table Saw Router Table Extension […]