Compression Testing a Mazda Miata
A compression test is a good way to get an indication of internal engine health. It is performed by turning the engine over without fuel while a pressure gauge is attached to one of the engine cylinders. After each cylinder is tested, you can compare the results between cylinders and as an absolute number. It’s also a pretty cheap test – a compression tester costs less than twenty bucks.
In this case, I was compression testing the used engine I had just put in my Mazda Miata. The compression tests results were 180 190 190 180 psi for the four cylinders. The field manual for your engine should say what the specifications are for a compression test. In the case of my miata, I was looking for 128psi minimum, 182 standard, 28 psi max variance. On an old 90’s miata engine, anything north of 160psi is acceptable across all cylinders.
More important than the absolute compression numbers, though, is the variance between cylinders. The raw numbers will change depending on how long you crank the engine, how good your gauge seals, how accurate your gauge is, etc. The test conditions are relatively similar across the cylinders, though, so you should look at the difference.
In my case, They only varied by 10psi or about 5%, which is pretty good. On a previous engine I had, I got 170/155/180/152, which is bad news. If I had seen say 160/160/160/160, even though some cylinders had lower compression numbers, it would actually be a better result thanks to the uniformity. Of course, there’s a limit to this: a motor reading 75/75/75/72 is still shot, even if the numbers are close together.
Test Overview
The general idea behind this test is that you disable fuel and spark, put the gauge in a cylinder’s spark plug hole, and then crank the engine over with the starter for a certain number of seconds. You cannot do this test if you can’t get a starter hooked up to the engine – there is no other way to crank the engine fast enough to build compression.
If you want to test engine compression without a working starter, you need to investigate performing a leakdown test instead, which requires an air compressor

Get a Compression Tester
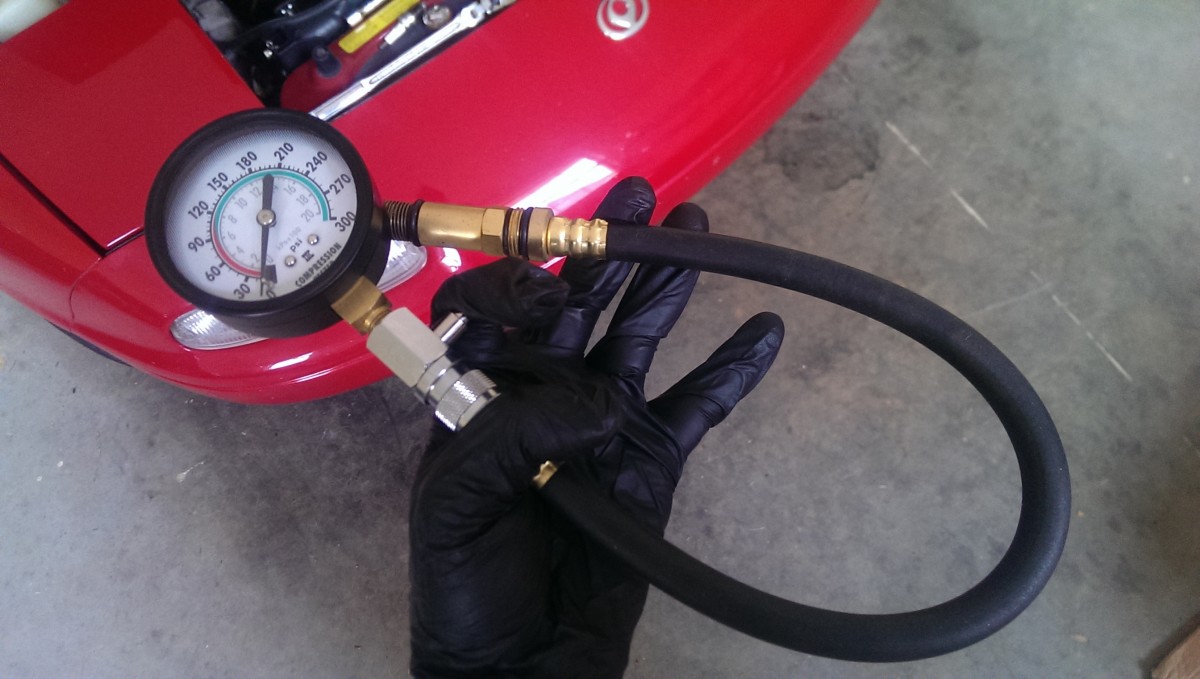
My compression tester
The first step is to get a compression test gauge
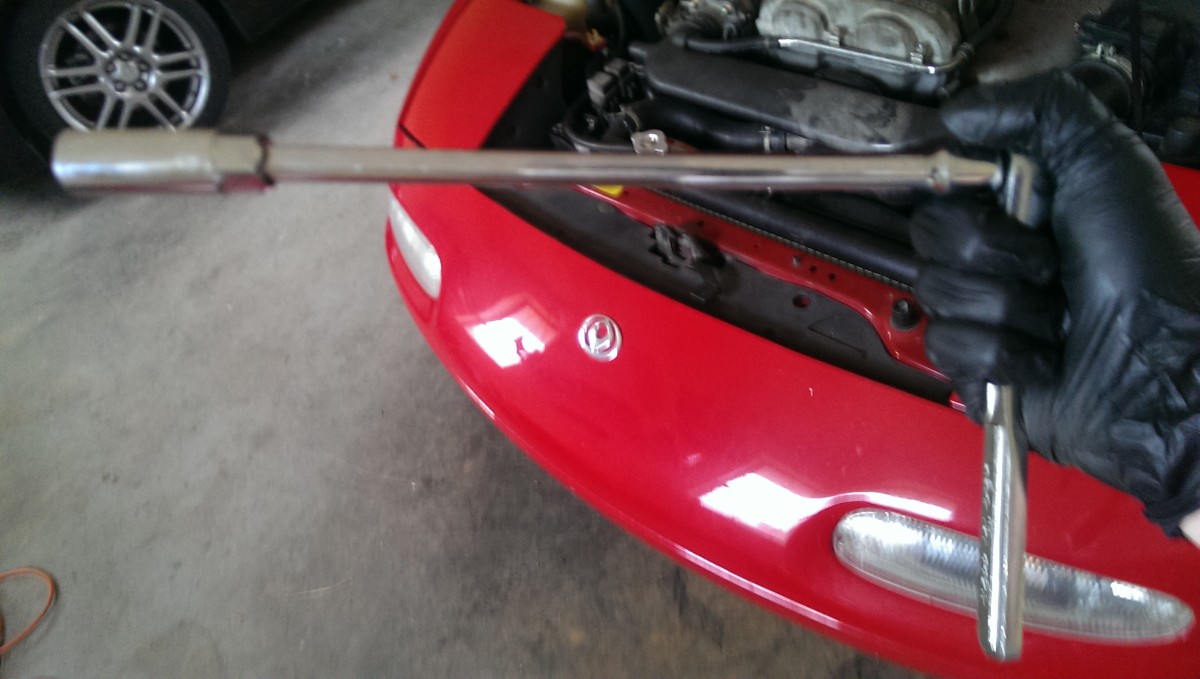
Miata requires a long extension
You also need a fairly long extension and an appropriate spark plug socket, which is 5/16″ for the miata. And of course, you’ll need a torque wrench to properly tighten the spark plugs after the test is complete.
Cutting Fuel
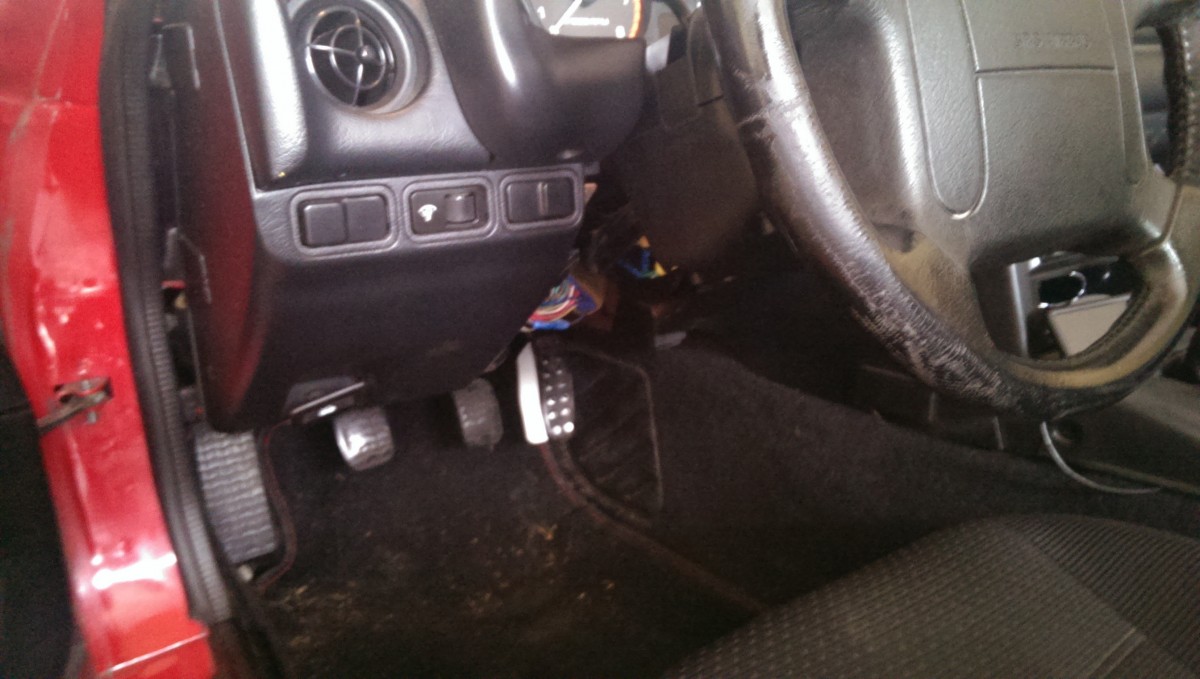
Under the footwell here
Above the clutch and brake pedal assemblies
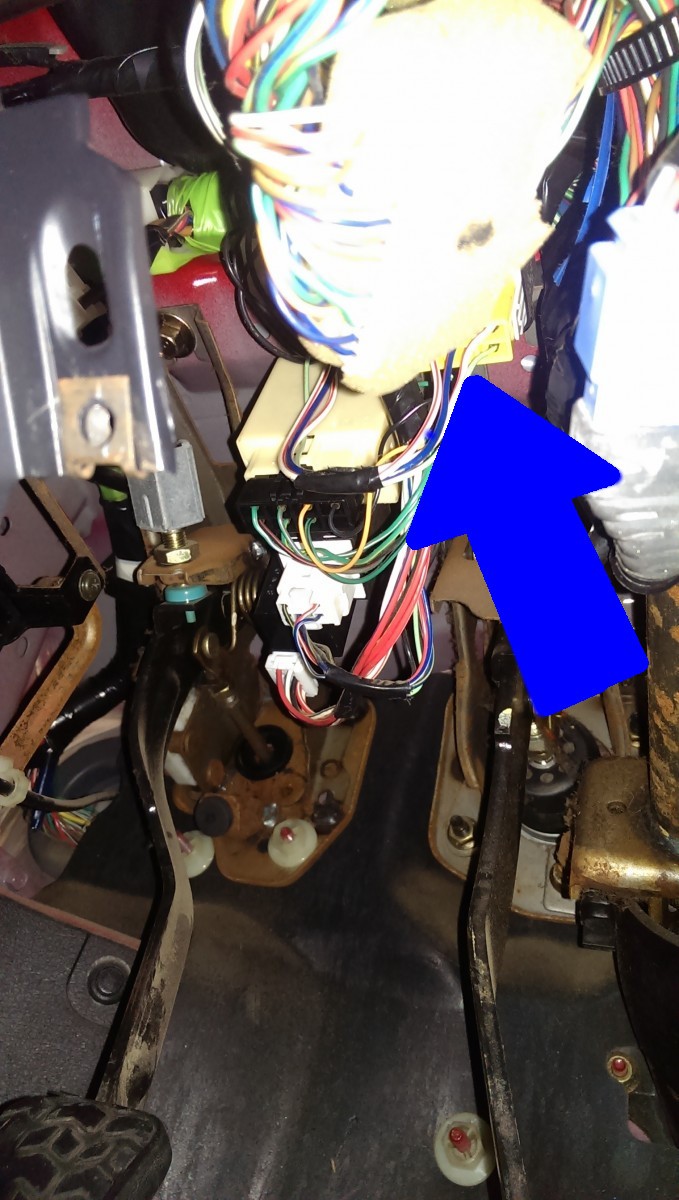
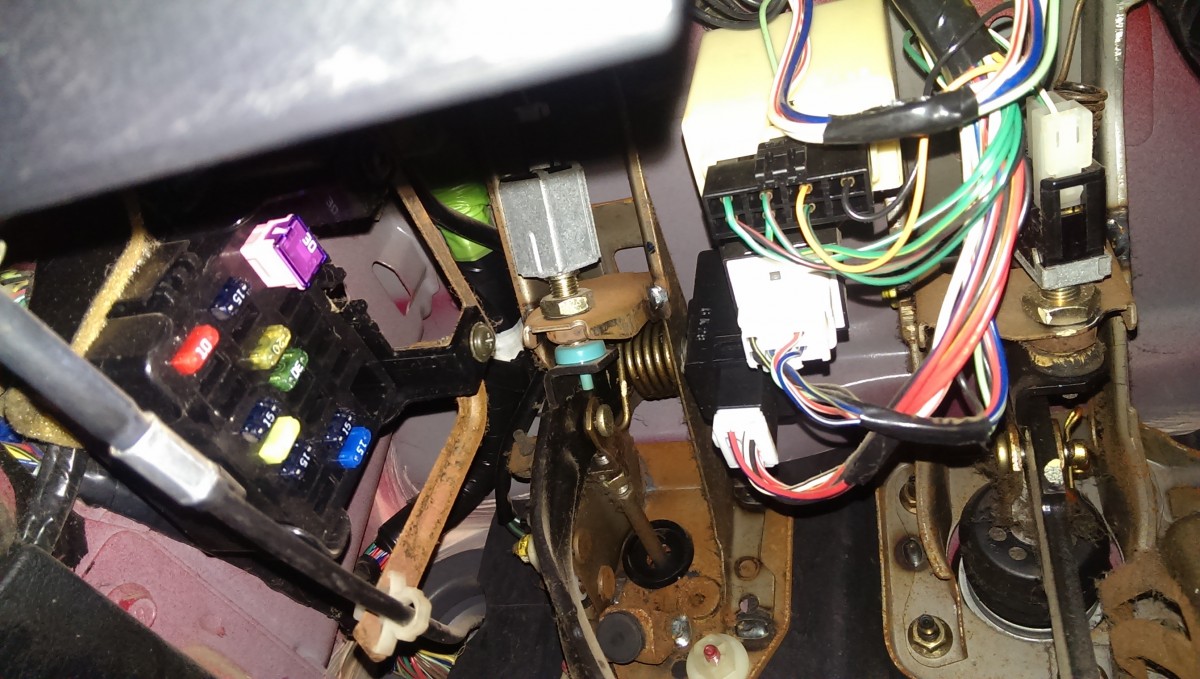
Yellow plug at the top disables the fuel pump
When doing the test, the first step is to disable the fuel pump and ensure the fuel lines are clear. You do not want fuel getting dumped in the cylinders during the test. In a miata, you first start the engine. Then, with it idling, (and the parking brake ON!), you can reach up under the dash in the driver’s side footwell.
There is a bright yellow plug directly above the brake and clutch pedals, pictured above. It is barely visible behind the wire bundle, but it’s easy to spot if you can see the obnoxiously gigantic blue arrow pointing at it.
If you unplug it, the fuel pump will turn off, and the engine will run through the fuel it has and die. Your engine now has no or very little fuel left in it, and you can leave the fuel pump unplugged to go to the next step.
Disable the Coil Pack
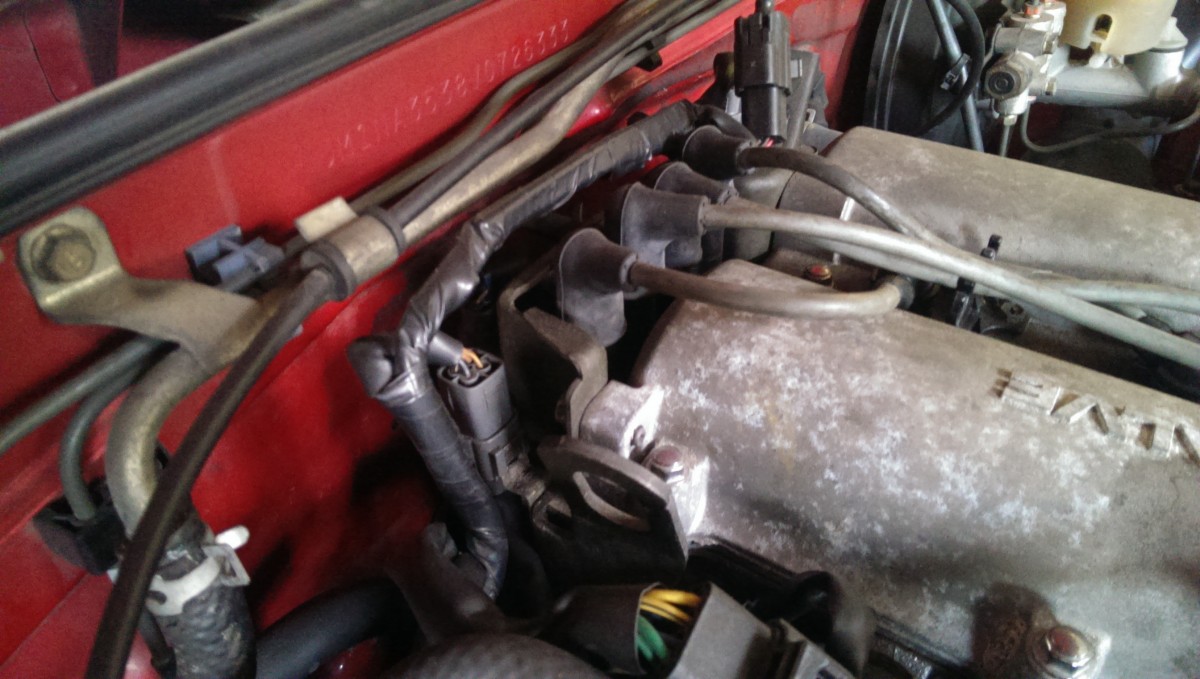
The coil pack is at the back of the engine, the spark plug wires connect to it
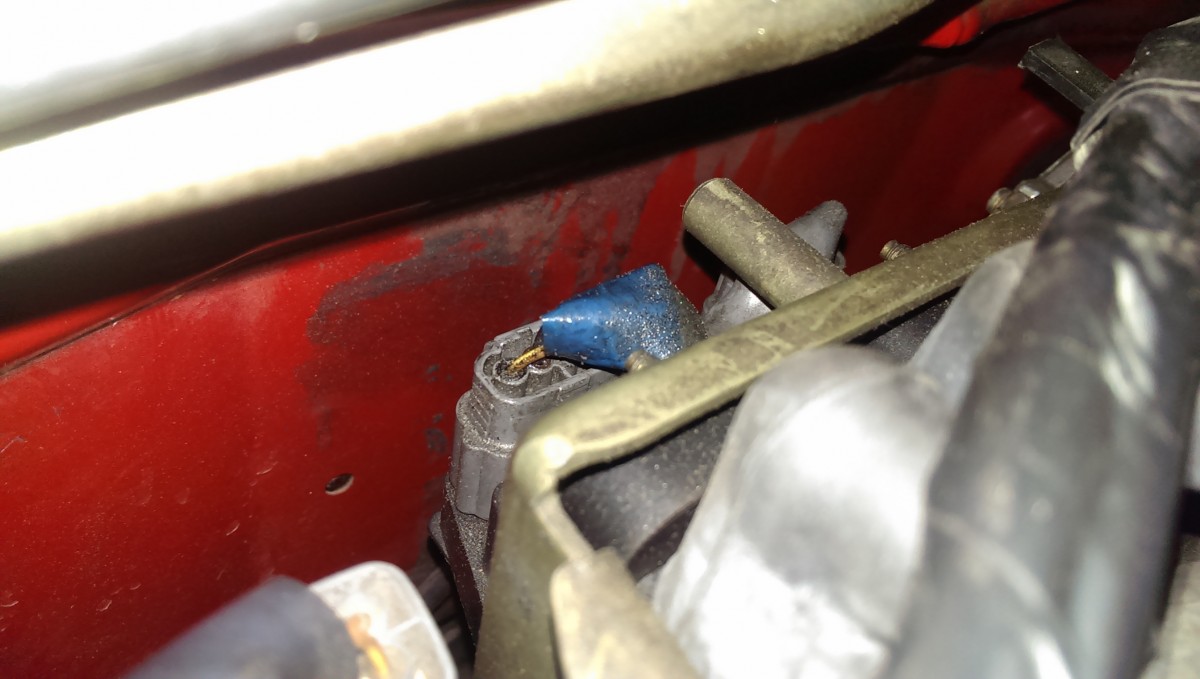
The two grey plugs pictured need to be unplugged
The next step is to disable the coil pack to prevent the spark plugs from firing. If you skip this step in a miata, you can damage your coil pack, and they cost a couple hundred bucks to replace. You need to unplug the engine harness from the coil pack. The spark plug wires connect the coil pack to the engine, shown in the picture.
One connector may have a blue piece of tape on it as pictured; that is to differentiate sides. If they aren’t marked, be sure to mark them somehow before pulling them out – one wire controls two cylinders, and the other provides signal for the other two. You don’t want to switch them inadvertently. With the wires unplugged, you can move on to the next step.
Hook Up the Gauge
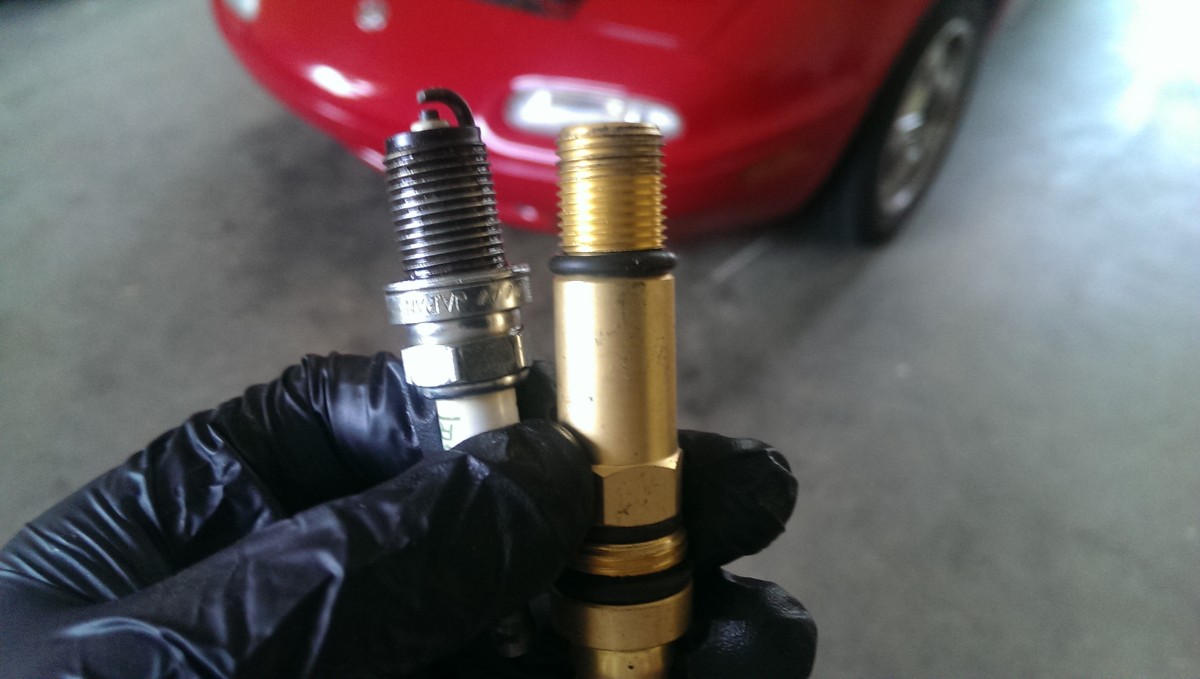
Spark plug vs gauge’s hose fitting
Now comes the easy part. Pull one of the plug wires (I start with #4 on the miata and work towards #1) and use the spark plug socket to loosen and remove the spark plug. Most sockets will have a rubber o-ring or a magnet to grab the spark plug. If not, you can always just use one of the plug wires to hook onto the plug and pull it out after it is loose.
When you pull the first one, you can check it against the end of the compression gauge to verify that you have the right adapter on the end of it. Make sure the adapter is on as tight as you can; I put loctite between the adapter and the main hose and let it sit prior to doing the test. You do not want the adapter to come off of the hose when you’re trying to remove the tester.
If this happens and you’ve got a little adapter stuck threaded down in your plug well, you’re going to have a bad time. If you’re lucky, your adapter has a hex end like this one, so you can use a socket to undo it. If not, try building up pressure in the cylinder (instructions below) before you unthread it. Internet wisdom says this may help the adapter come out. You may have to remove the valve cover and get friendly with needle nose pliers or a screwdriver.
With the tester set, go ahead and put the hose down the plug well and thread it in. Get it hand tight (by twisting the hose), but you don’t have to go crazy on it, the o-ring should do the work sealing it. If you can’t get a seal, you can put some motor oil on the o-ring to help. As noted above, do not overtighten.
Crank the Engine
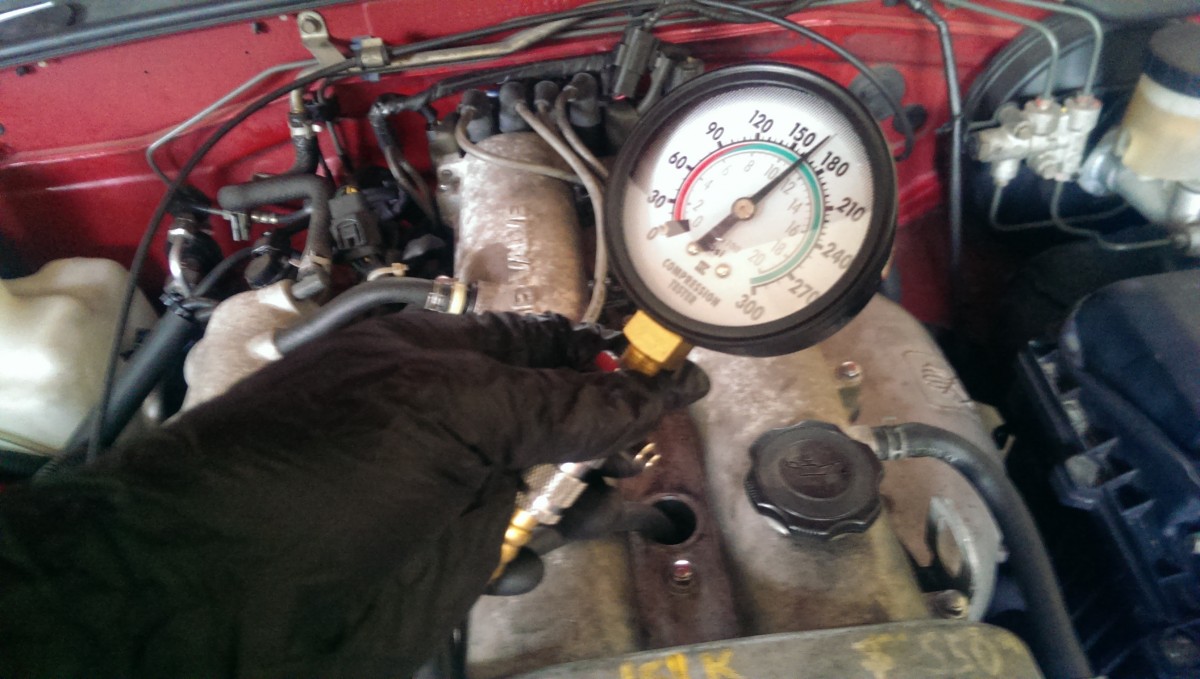
This shot is from my last engine’s compression test
Now, go ahead and crank the engine for about 5 seconds, or whatever duration you prefer. Longer will build more pressure, to a point. The main thing is to crank it the same amount for each cylinder you’re testing. After you crank it for five seconds (or have a helper do it), you can check the gauge, and get your reading. The compression gauge will have a button on it to release pressure to bring the reading back to 0.
Also be sure to keep an eye on your battery level. If it drops too low, you’ll see decreasing readings because the starter isn’t cranking as hard. I didn’t have a problem, but if this is an issue you could use a battery charger between rounds of testing or individual tests.
When you’re finished with a cylinder, follow the appropriate procedure to reinstall the spark plug: first, use the socket without the wrench to hand-tighten the spark plug. You do this by hand first to make sure you do not cross-thread the plugs, which will cause you to have a very bad day. Once you know the spark plug is threaded in straight, attach a torque wrench to the socket and torque the plug to the appropriate setting. In a miata, it is 11-17 ft-lb.
Wrap-Up
And that’s it, you’re done compression testing a mazda miata, or whatever your car is. If your numbers come back high and close to each other, you shouldn’t have compression problems. If you notice too much variance between cylinders or overall pressure is too low, you can repeat with a “wet” test. This means you put a teaspoon of oil in the plug hole before testing that cylinder. If the compression goes up significantly, you probably have burnt rings. Otherwise, you need to check your valves or headgasket.
If you fail a compression test, you may also want to follow up with a leakdown test. As alluded to earlier, a leakdown test requires more expensive equipment (particularly the air compressor if you don’t already own one), but it can help you pinpoint the source of a leak. Basically, a leakdown test is the opposite of a compression test – instead of allowing the engine to build compression in a cylinder, you simply force compressed air into the cylinder and see where and how much of it leaks out.
This kind of testing, coupled with having an experienced ear listen to your engine run, is a great diagnostic. It’s a fairly easy test to do on a used car before purchase. It’s also a really good idea to do this when verifying an engine is in good enough shape for adding forced induction.
[…] Compression Testing a Mazda Miata – Did It Myself – Guide to compression testing a Mazda Miata, … A compression test is a good way to get an indication of internal engine health. […]
Great post! I suggest you run each cylinder three times, test A, test B and Test C, while you have the gauge inserted in the plug hole. This accounts for disparity in crank times and is worth the extra seconds while the fuel is off and the coils are unplugged.
Mazda Workshop manual Page 120 no need to disable the fuel pump the ECU detects it is not running and you have the accelerator WOT it wont pump fuel. Its called de choking. Its there to help clear out a flooded engine.