Replacing the Wiper Hoses in a Miata
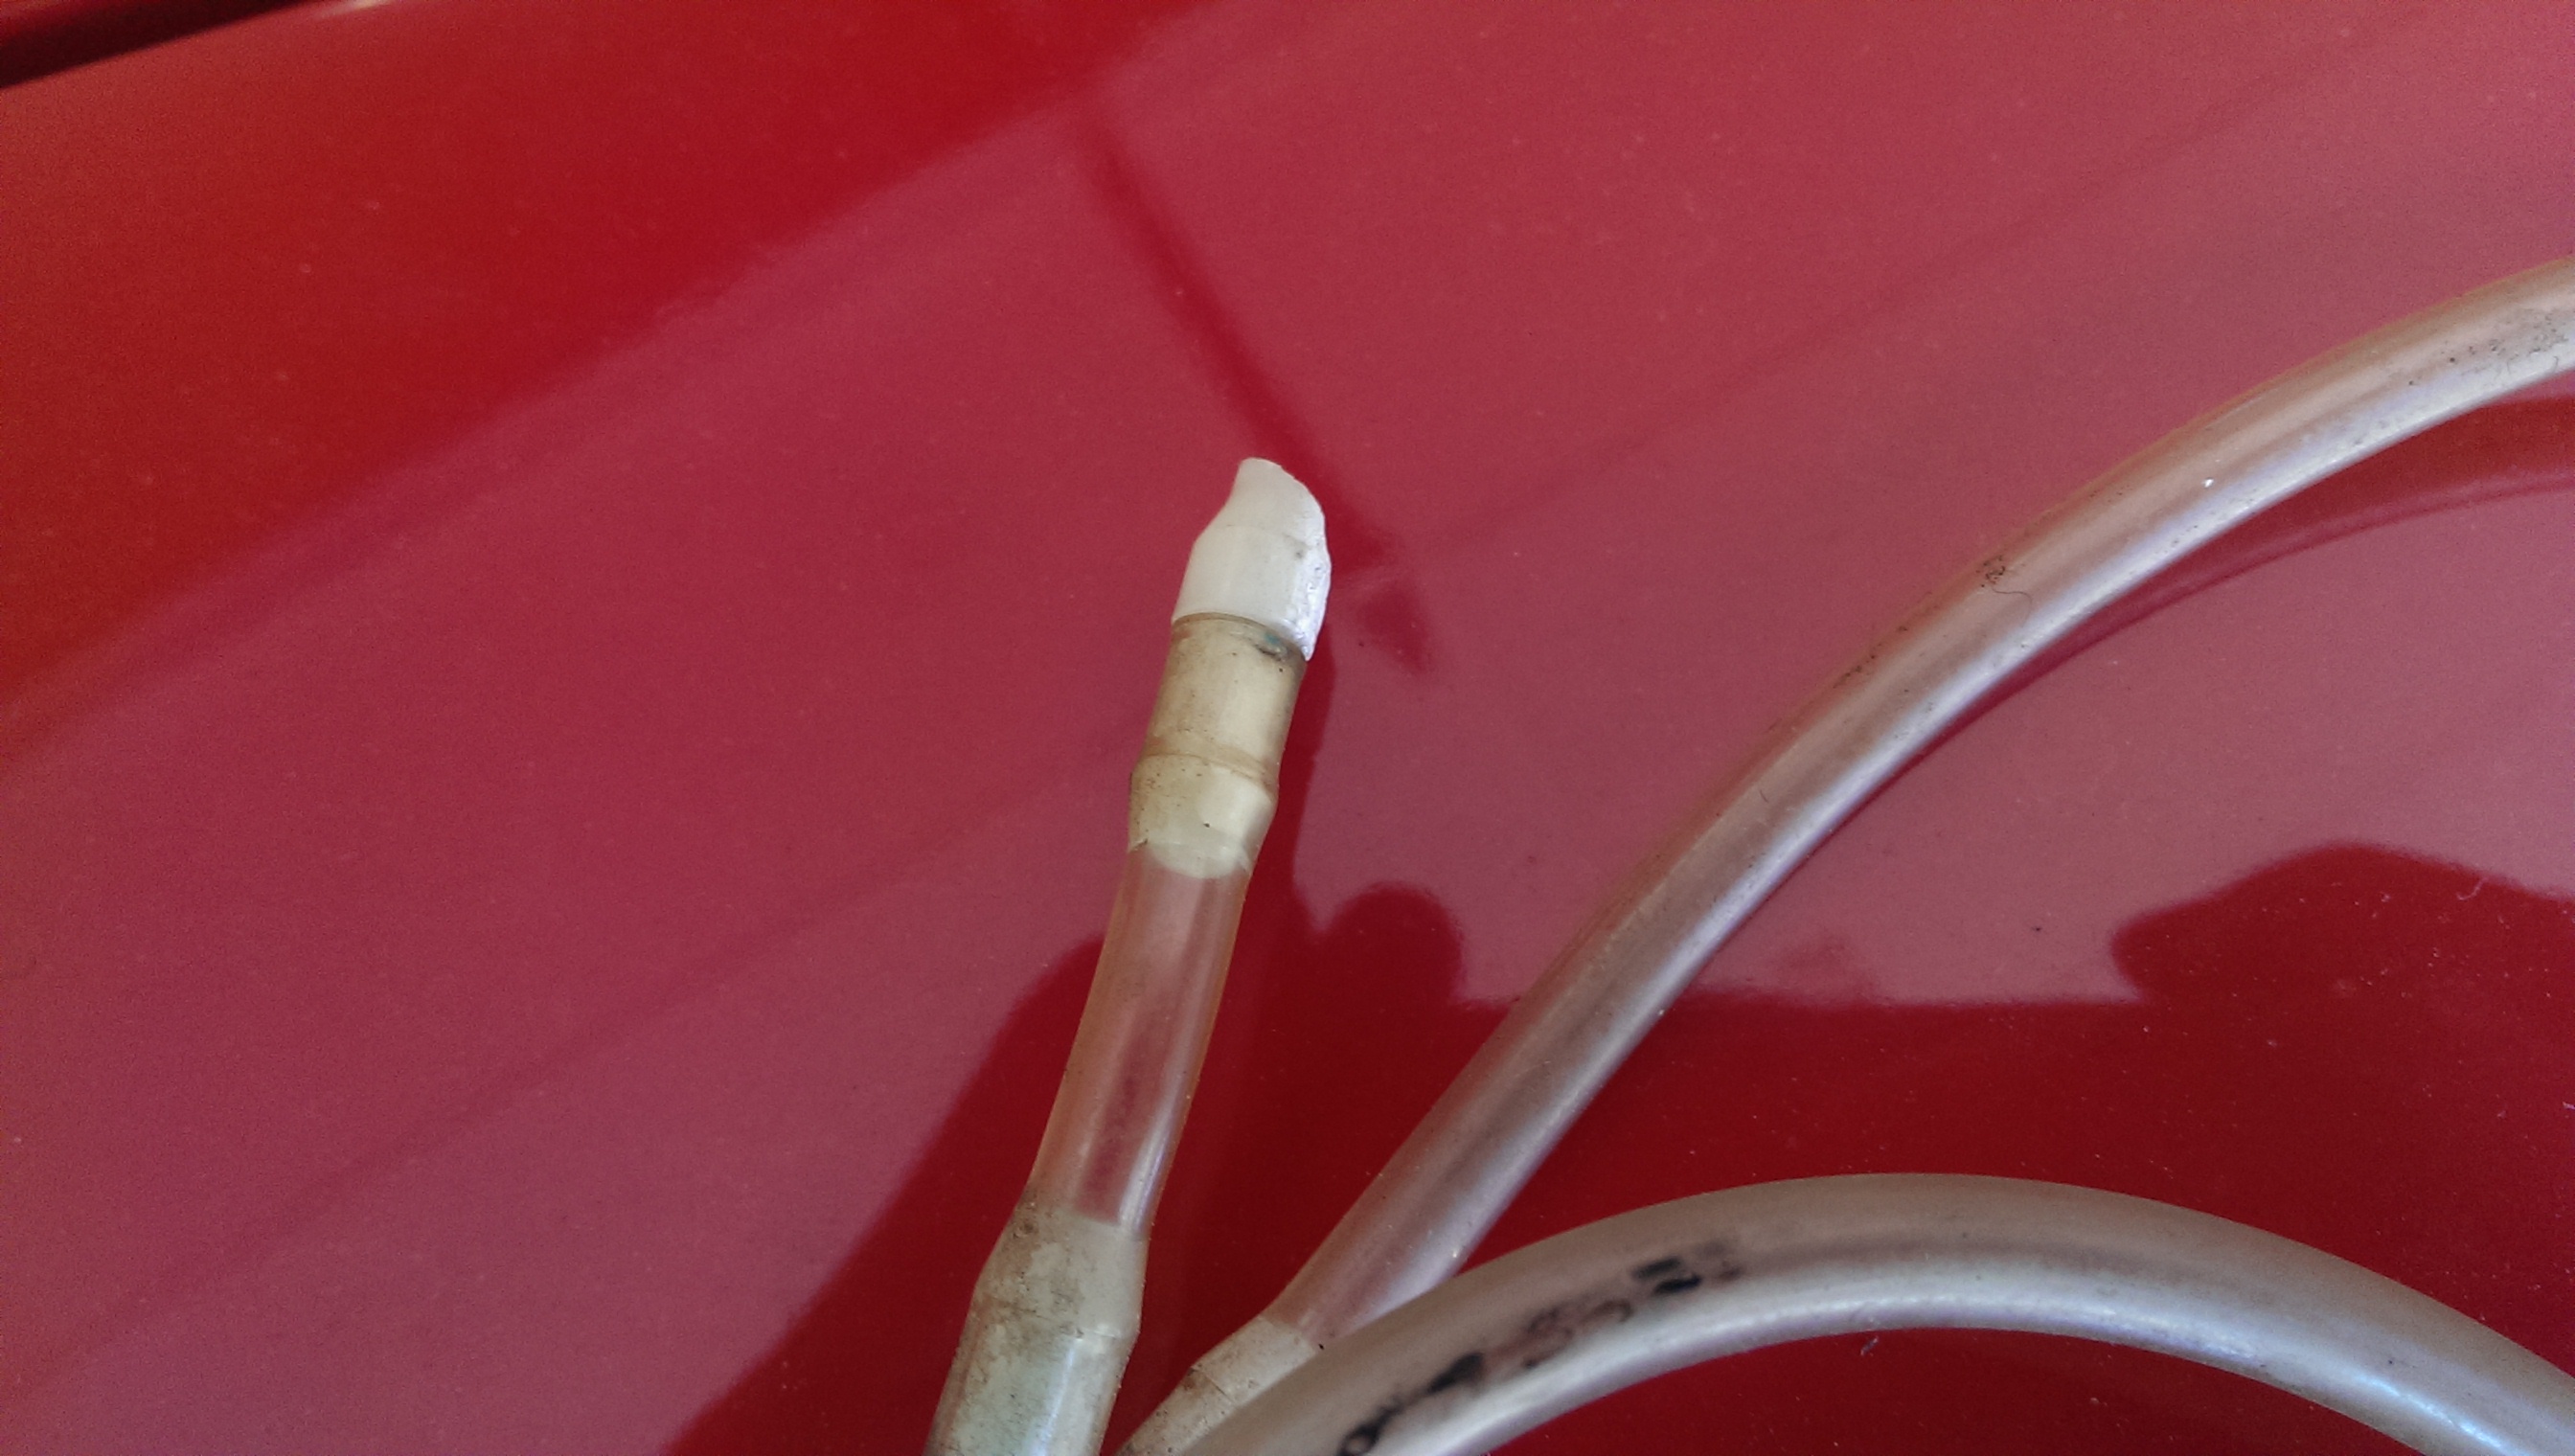
Cracked spray valve
When I took the hood off of the car while replacing my engine, one of the check valves for the windshield wiper spray nozzles broke in half. It was the original plastic and rubber, and I think it just got old and sunbaked over the last seventeen years. Replacing it is pretty easy, but the annoying part is finding the part numbers required, so I did a quick how-to.
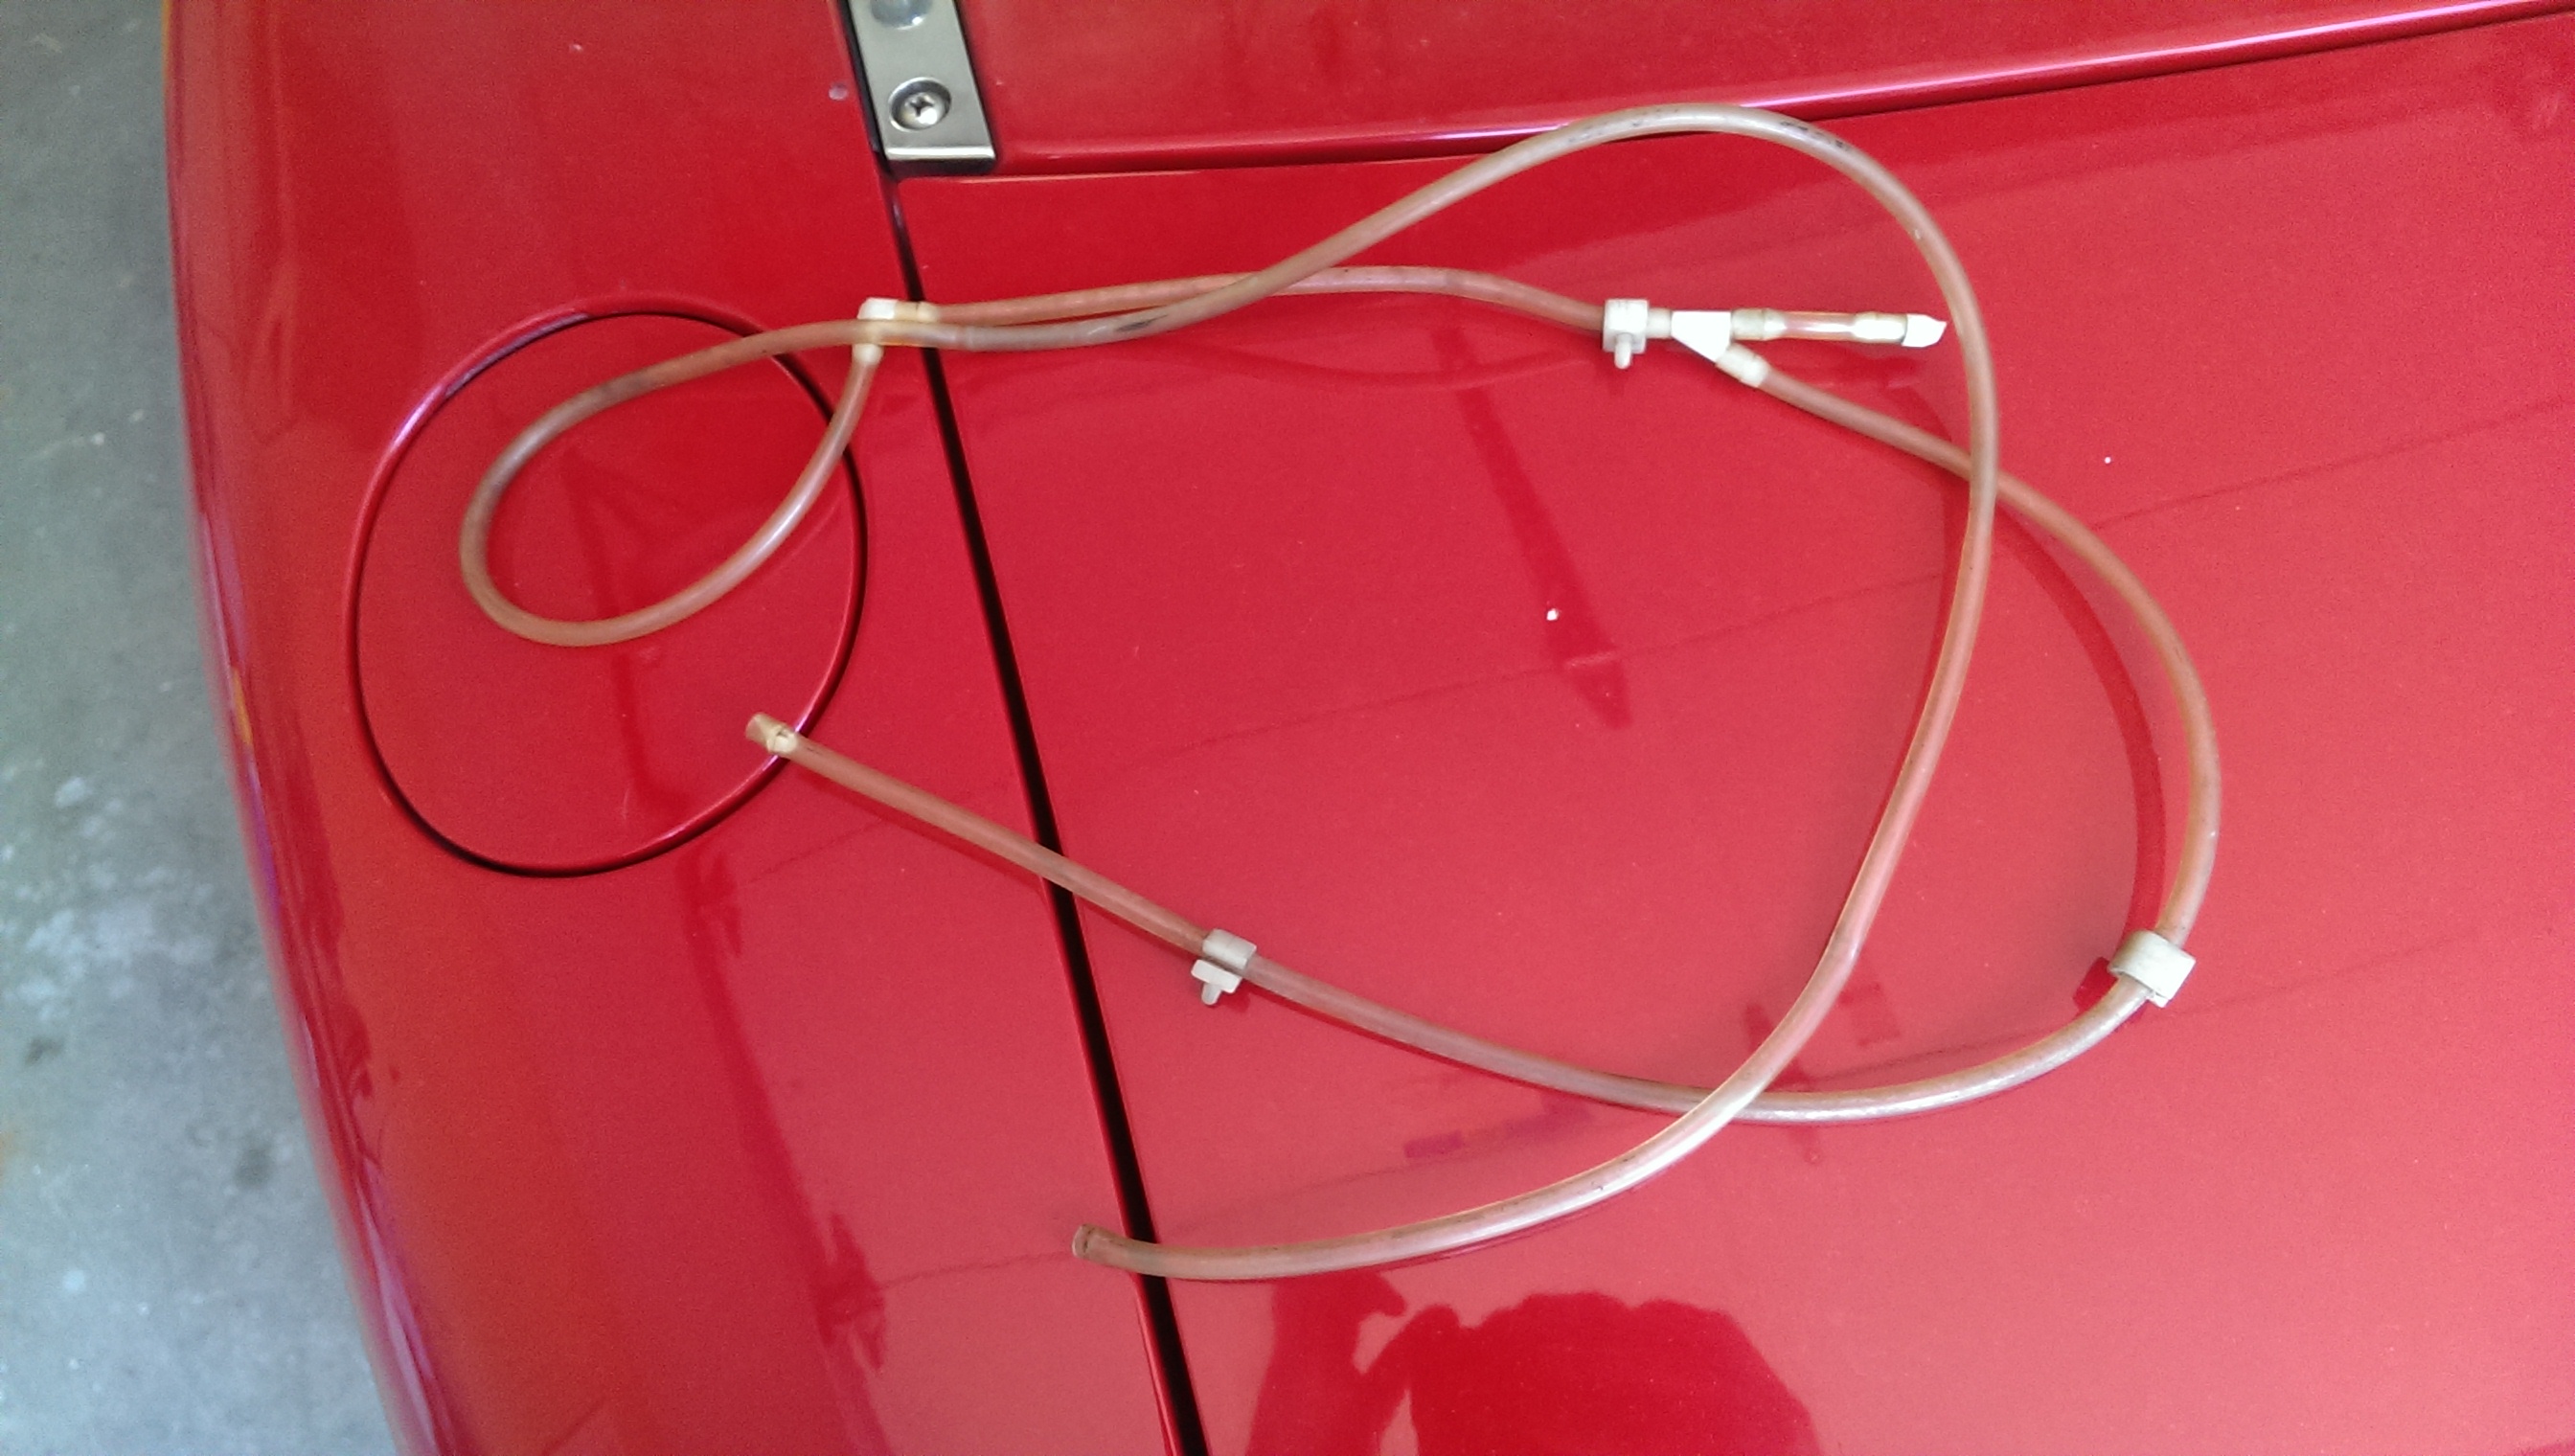
Old wiper hoses
I figured while I needed to grab new check valves, I might as well replace all of the hoses too. The old hoses, shown here, were pretty old and in poor condition. As usual, I did this on the cheap, so I got as little as possible to get the job done.
Parts to Get
- Two Check Valves (Mazda Dealer, http://parts.arlingtonmazda.com, etc)
- 8′ of Aquarium Tubing (Walmart, Fish Store, can use vacuum line from Autozone probably)
- Vacuum Tee or Aquarium Tubing Tee (Walmart, Fish Store, Autozone)

The parts required
The only real parts for this job are a bit of tubing and some valves. The tubing is easy – some aquarium tubing from the fish department of Walmart works fine. You could substitute vacuum line or really any rubber hose of the same length. It’s not rocket science or under a lot of pressure, it’s just some water spraying.
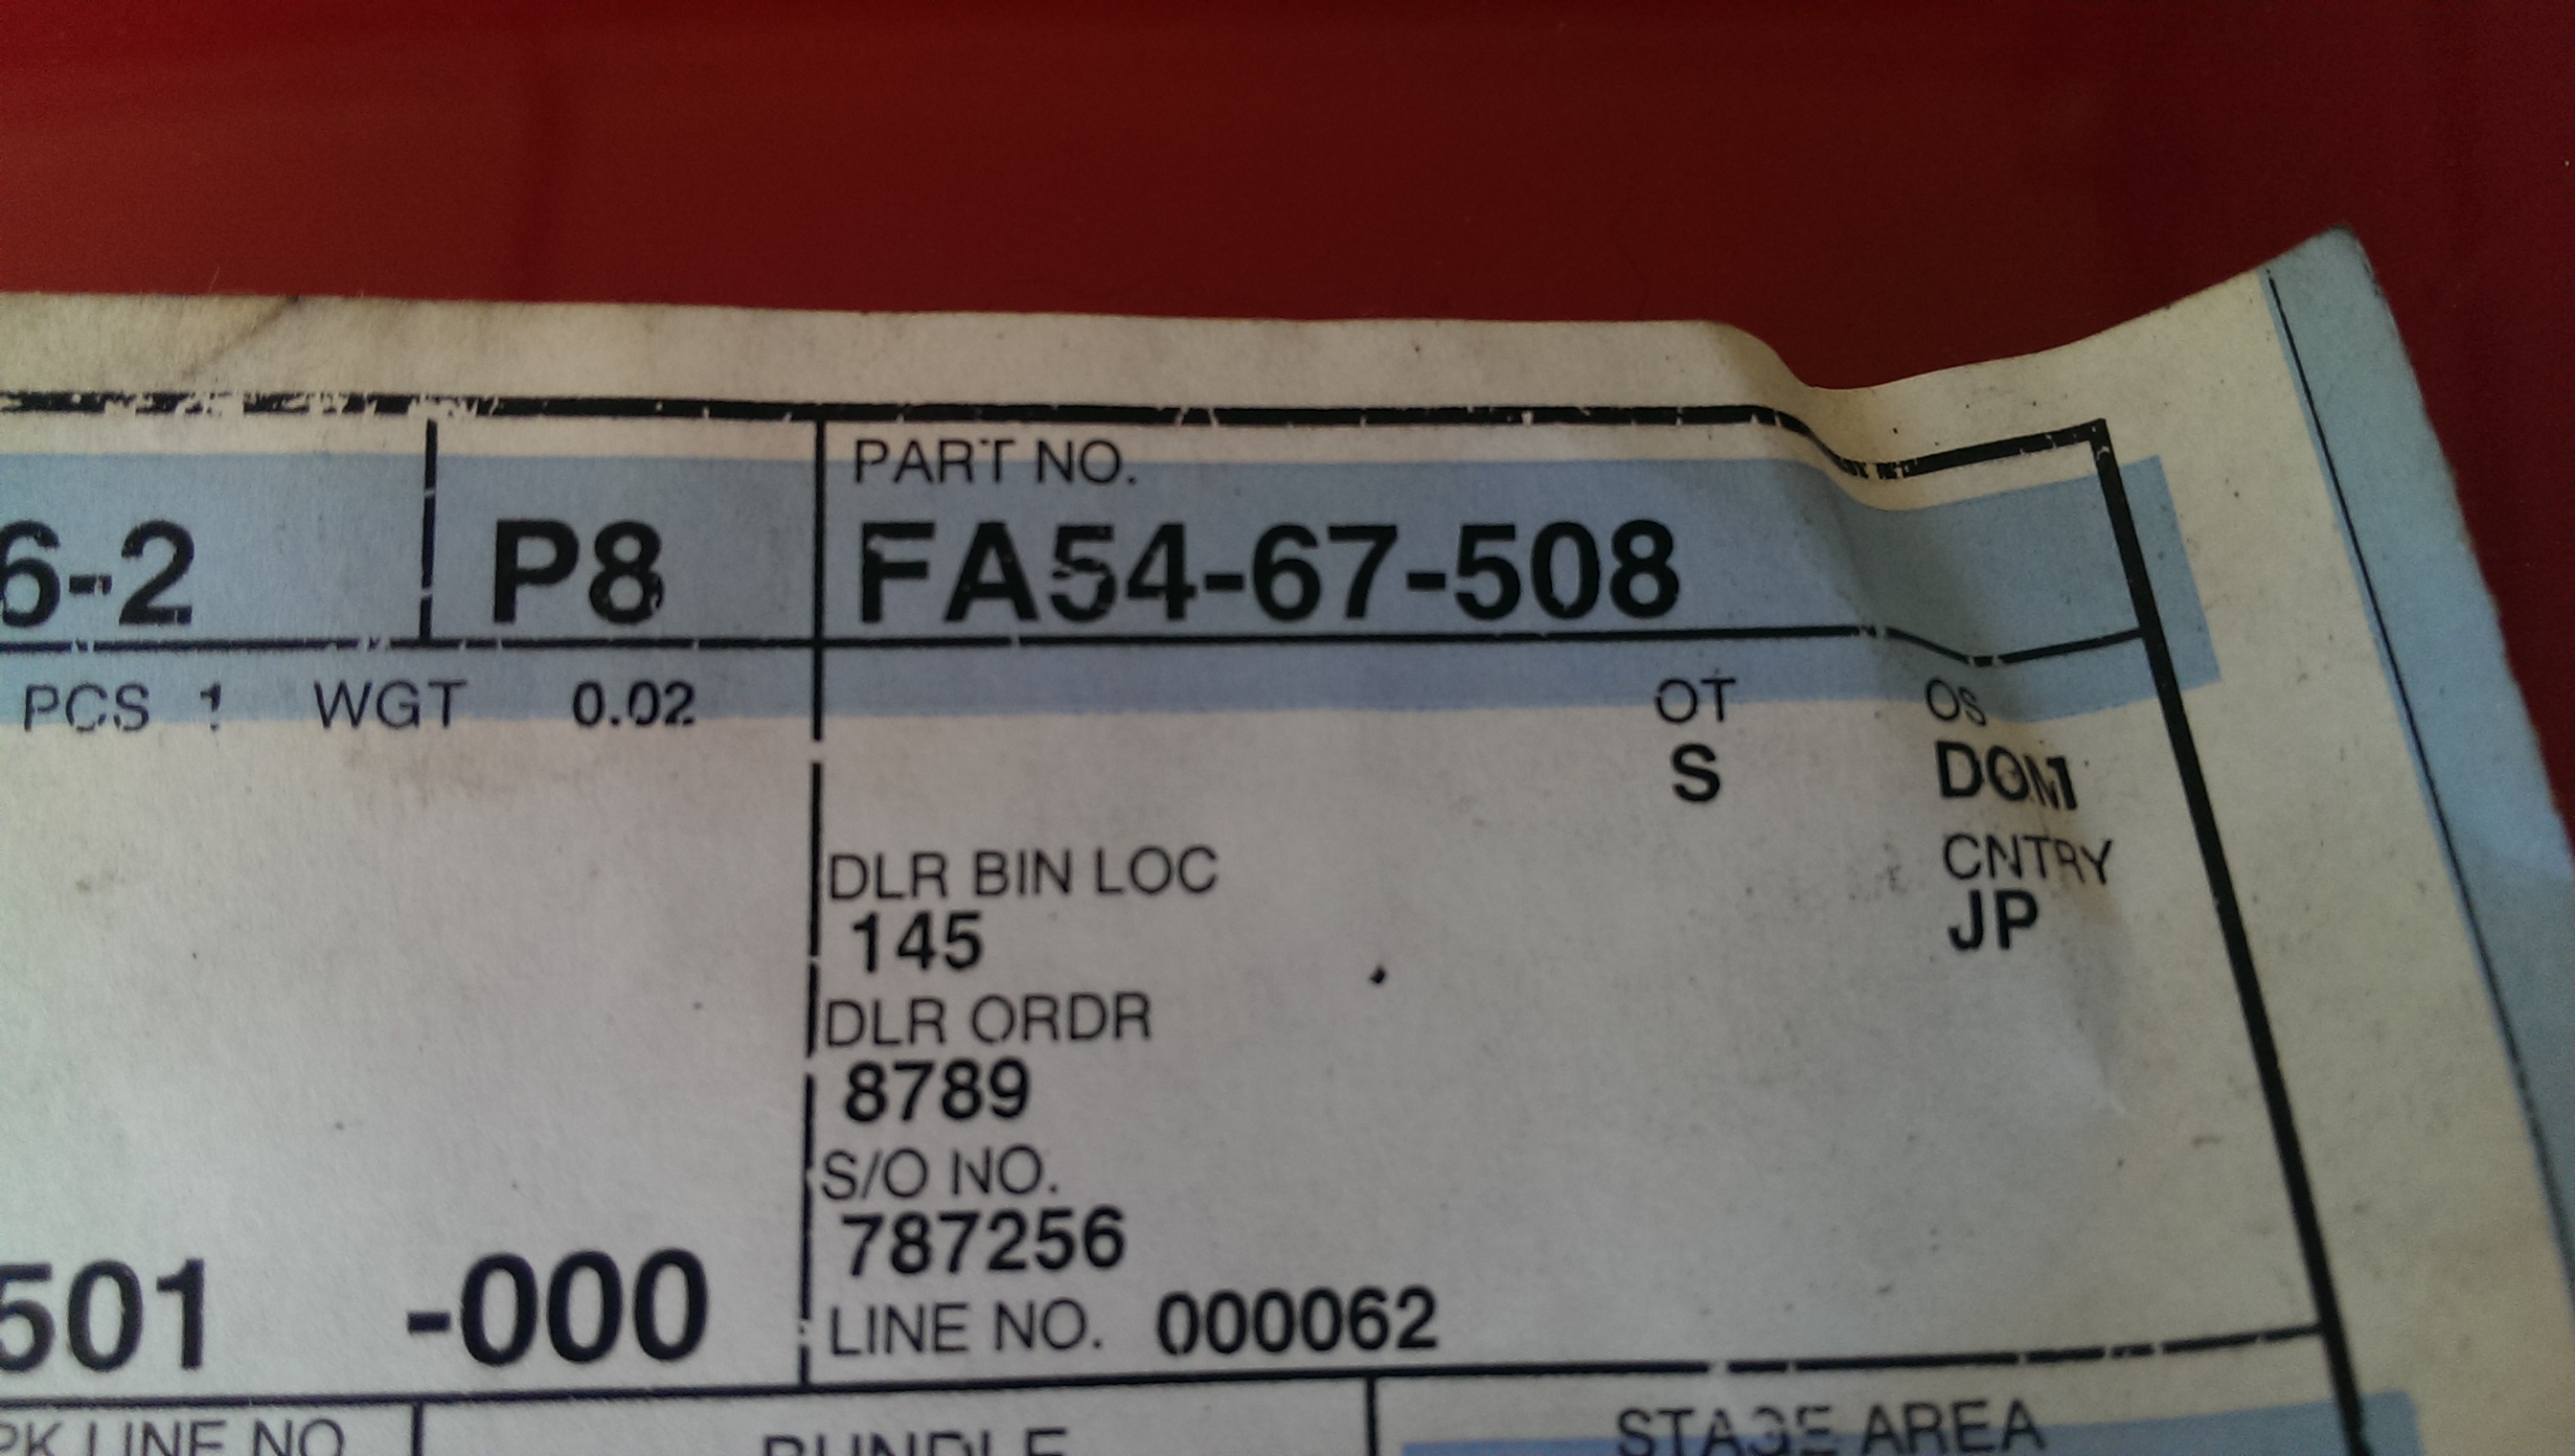
Check valve part number
The only thing unique to the miata is that it uses a check valve on each spray nozzle. The check valve has a little spring in it at each nozzle that only allows flow if the water is of a certain pressure. This prevents the water from dribbling on the hood. As such, you could really skip the part. If you want these, you need two of them. The part number is shown above, Mazda Part Number FA54-67-508.
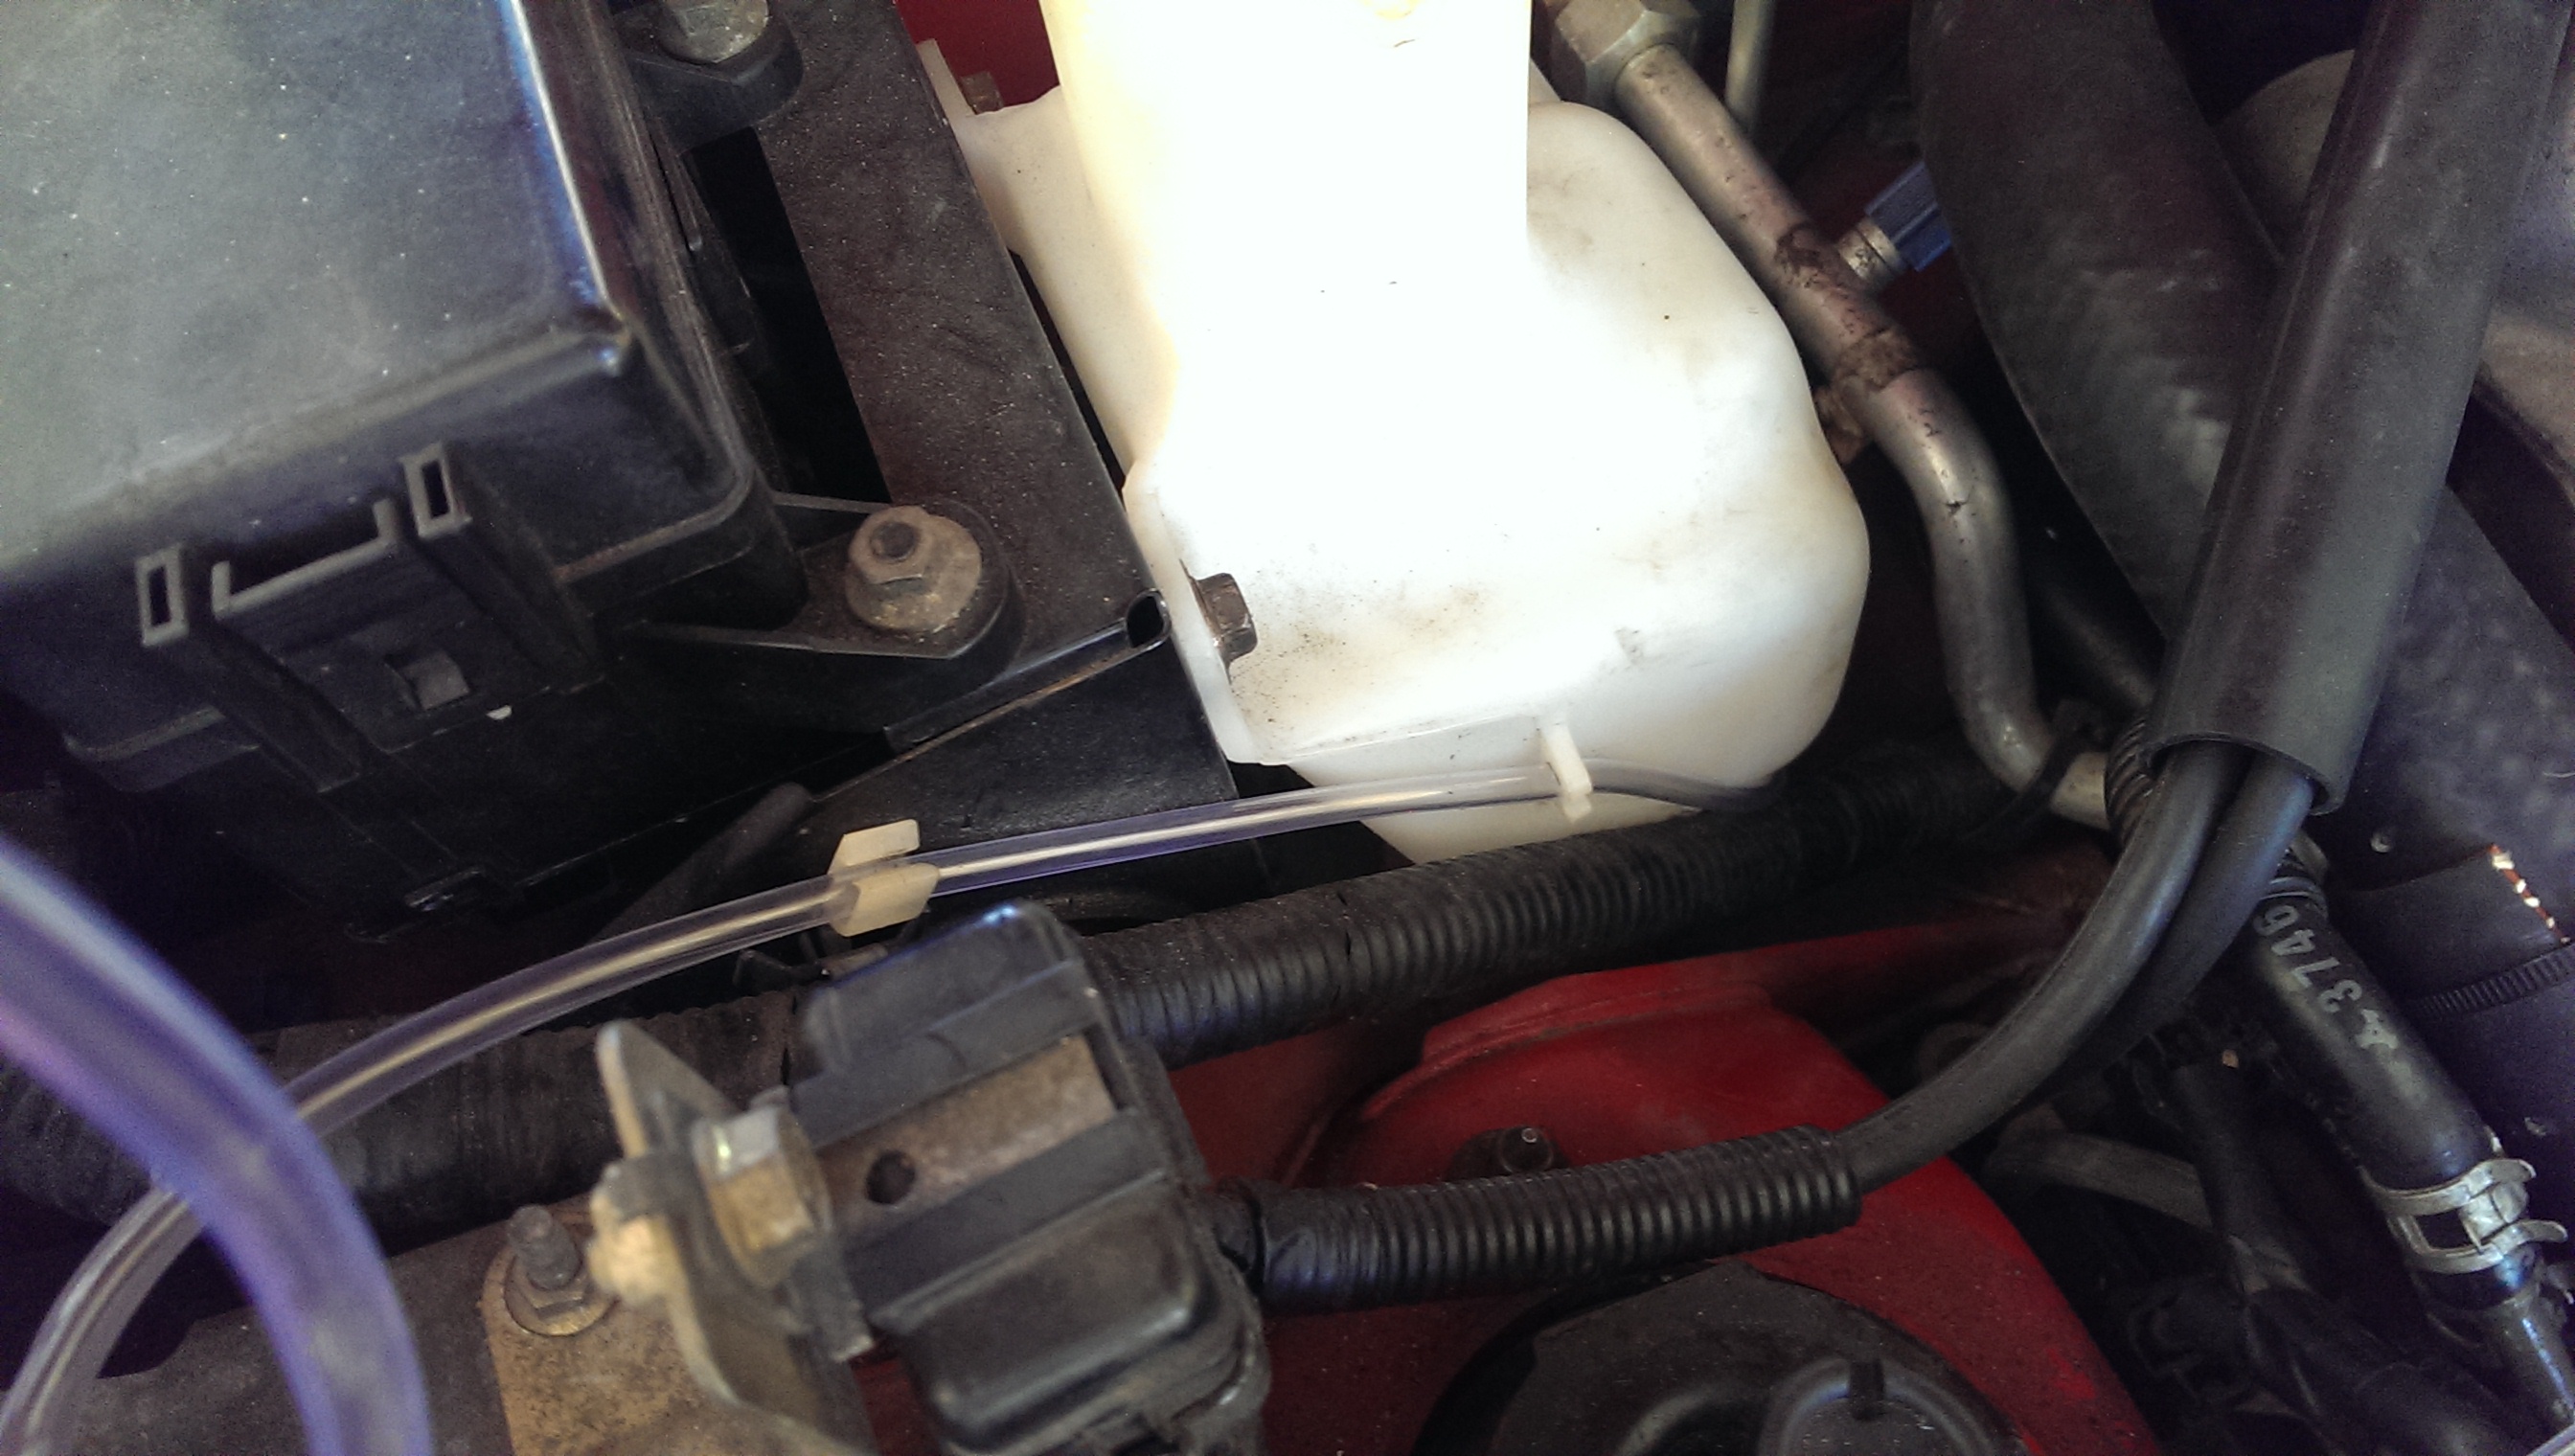
Remove and Reinstall the Washer Tank
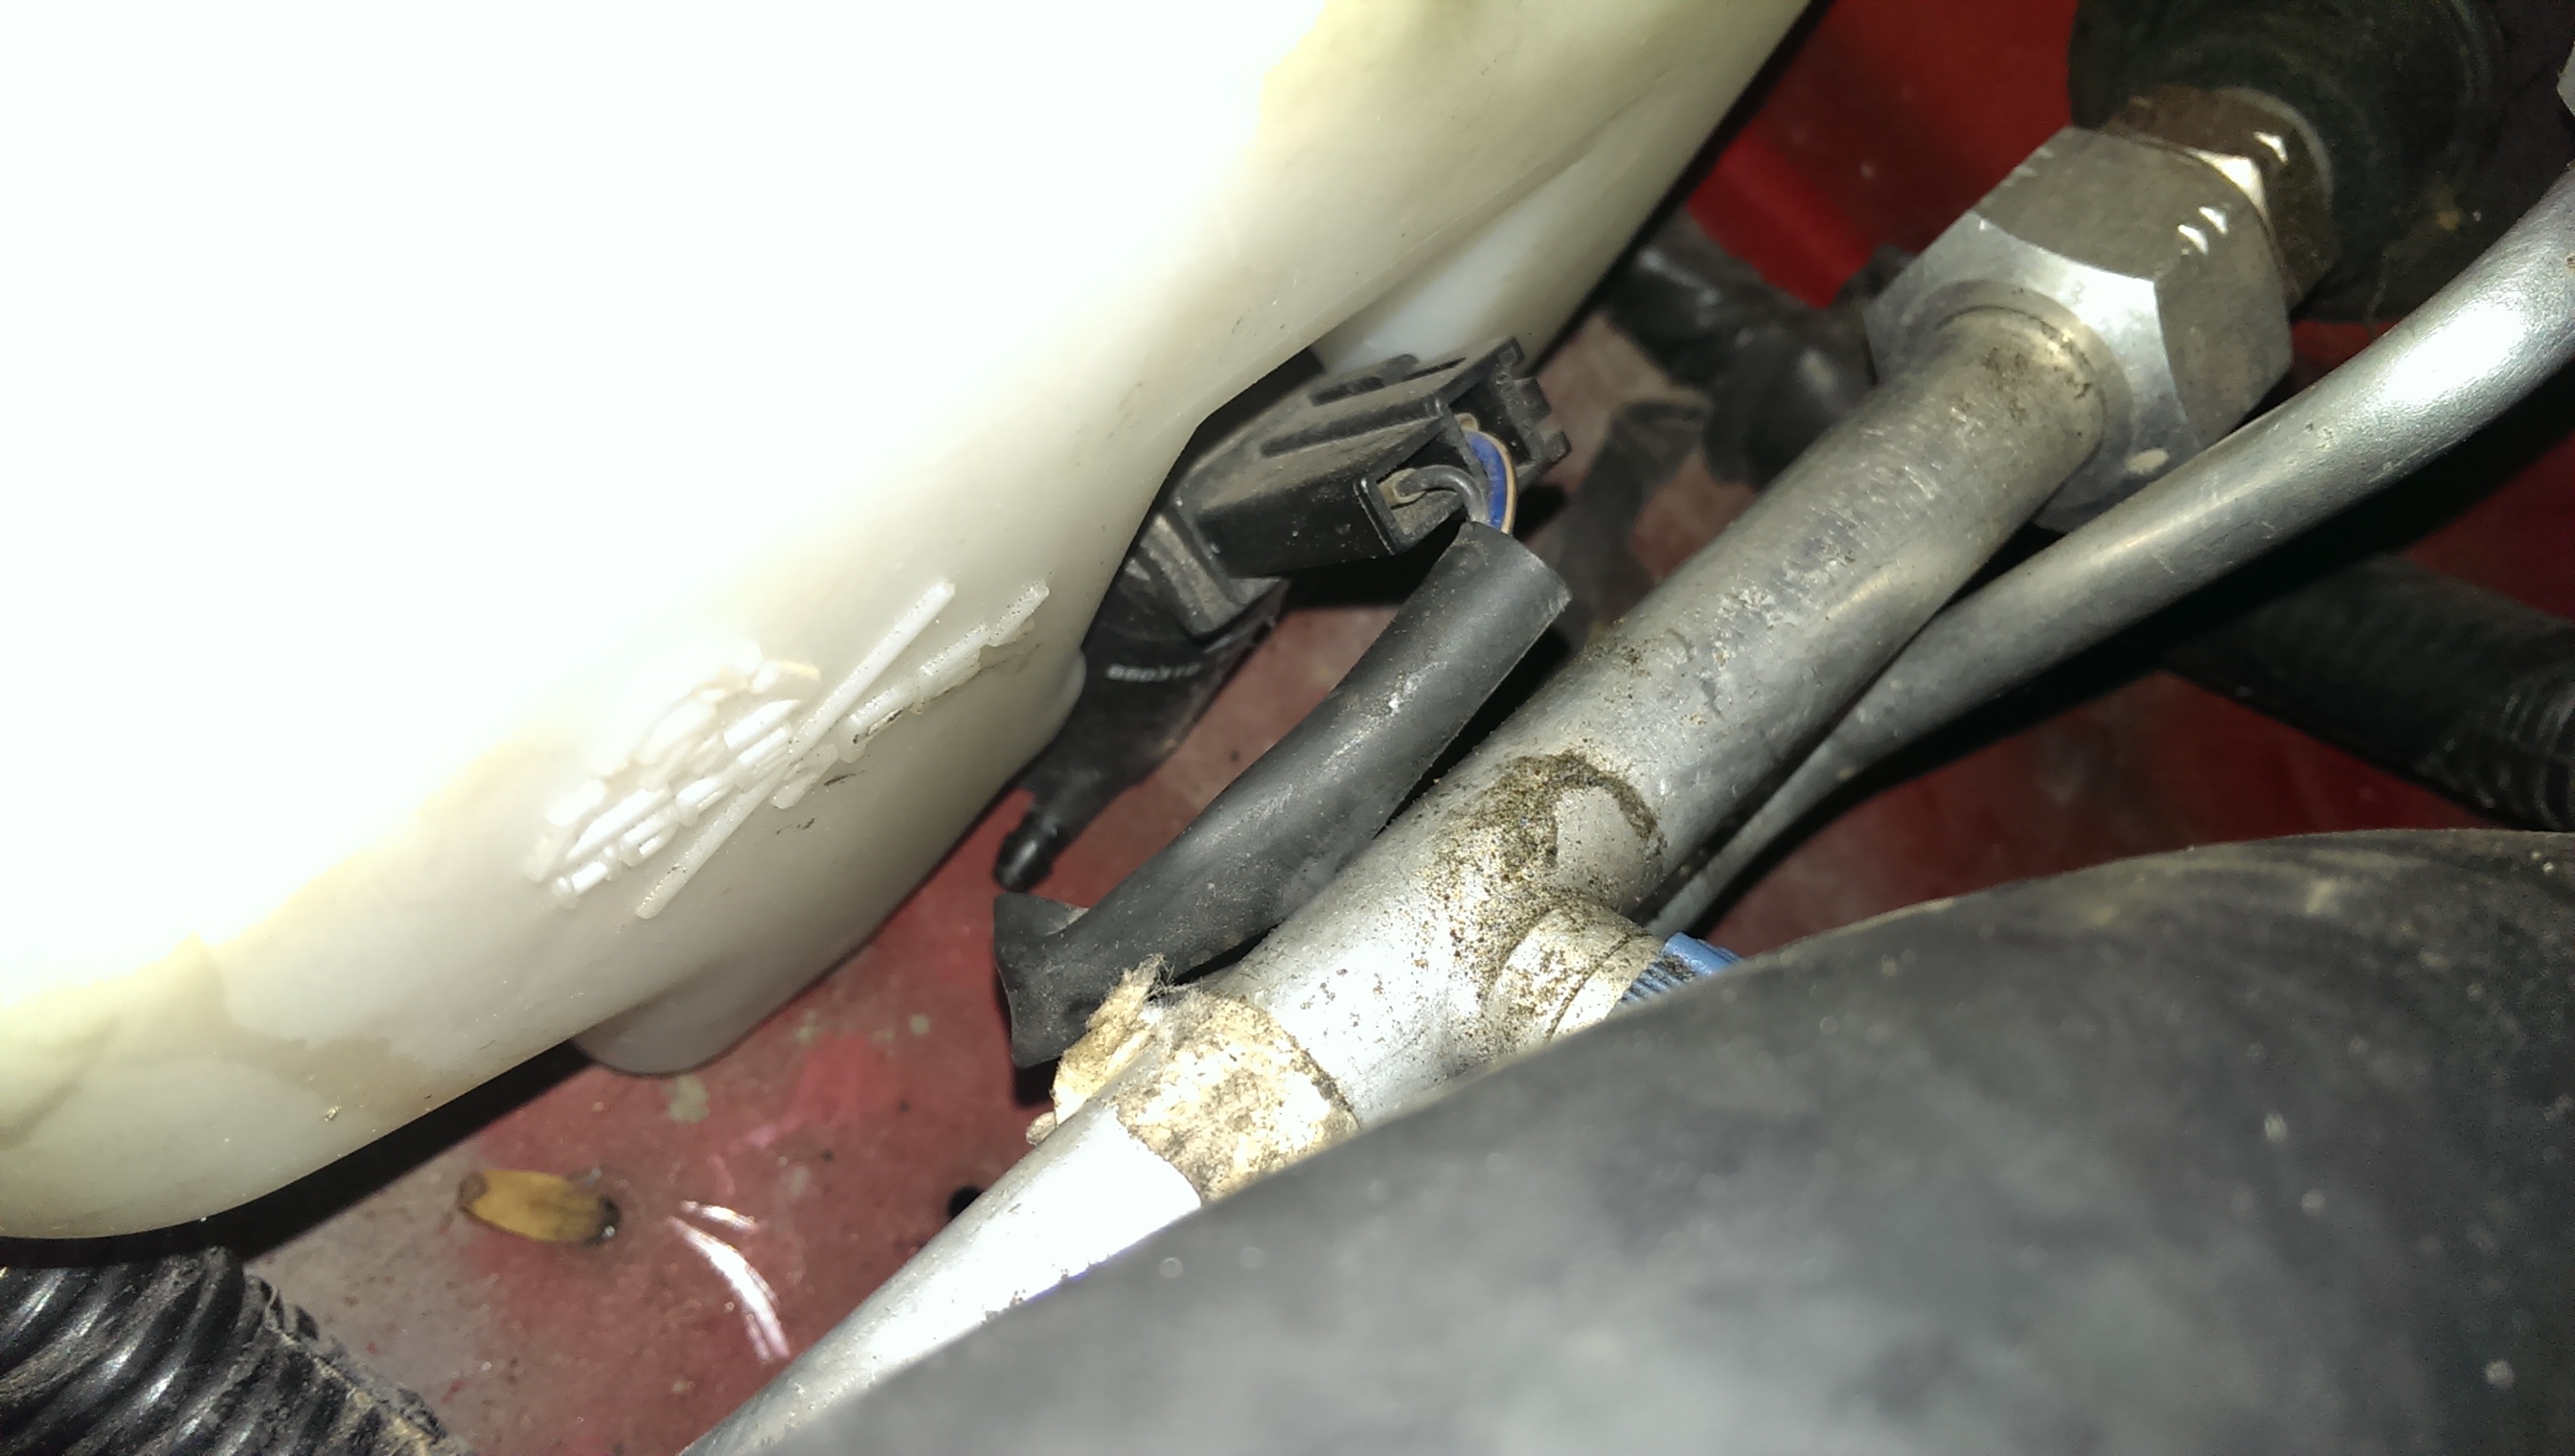
Water pump that hose needs to hook to

These two bolts allow the washer tank to come out
You need to hook the hose to a small pump at the bottom of the washer tank. It’s much easier to remove the washer tank to get this done. The washer tank only has two bolts holding it on. Simply unbolt them and it pulls out.

Washer tank hose connection
With the tank out, it is much easier to fit the hose onto the pump. You can just hook the end of the 8′ on here, and route it, and cut it later as necessary. I’ll also note here that a dab of silicone grease, like what is used for plumbing, makes it easier to get the tubing on; it’s a pretty snug fit.
Routing the hose along the tank
You can then reinstall the tank, routing the hose through the clips on the outside of it.
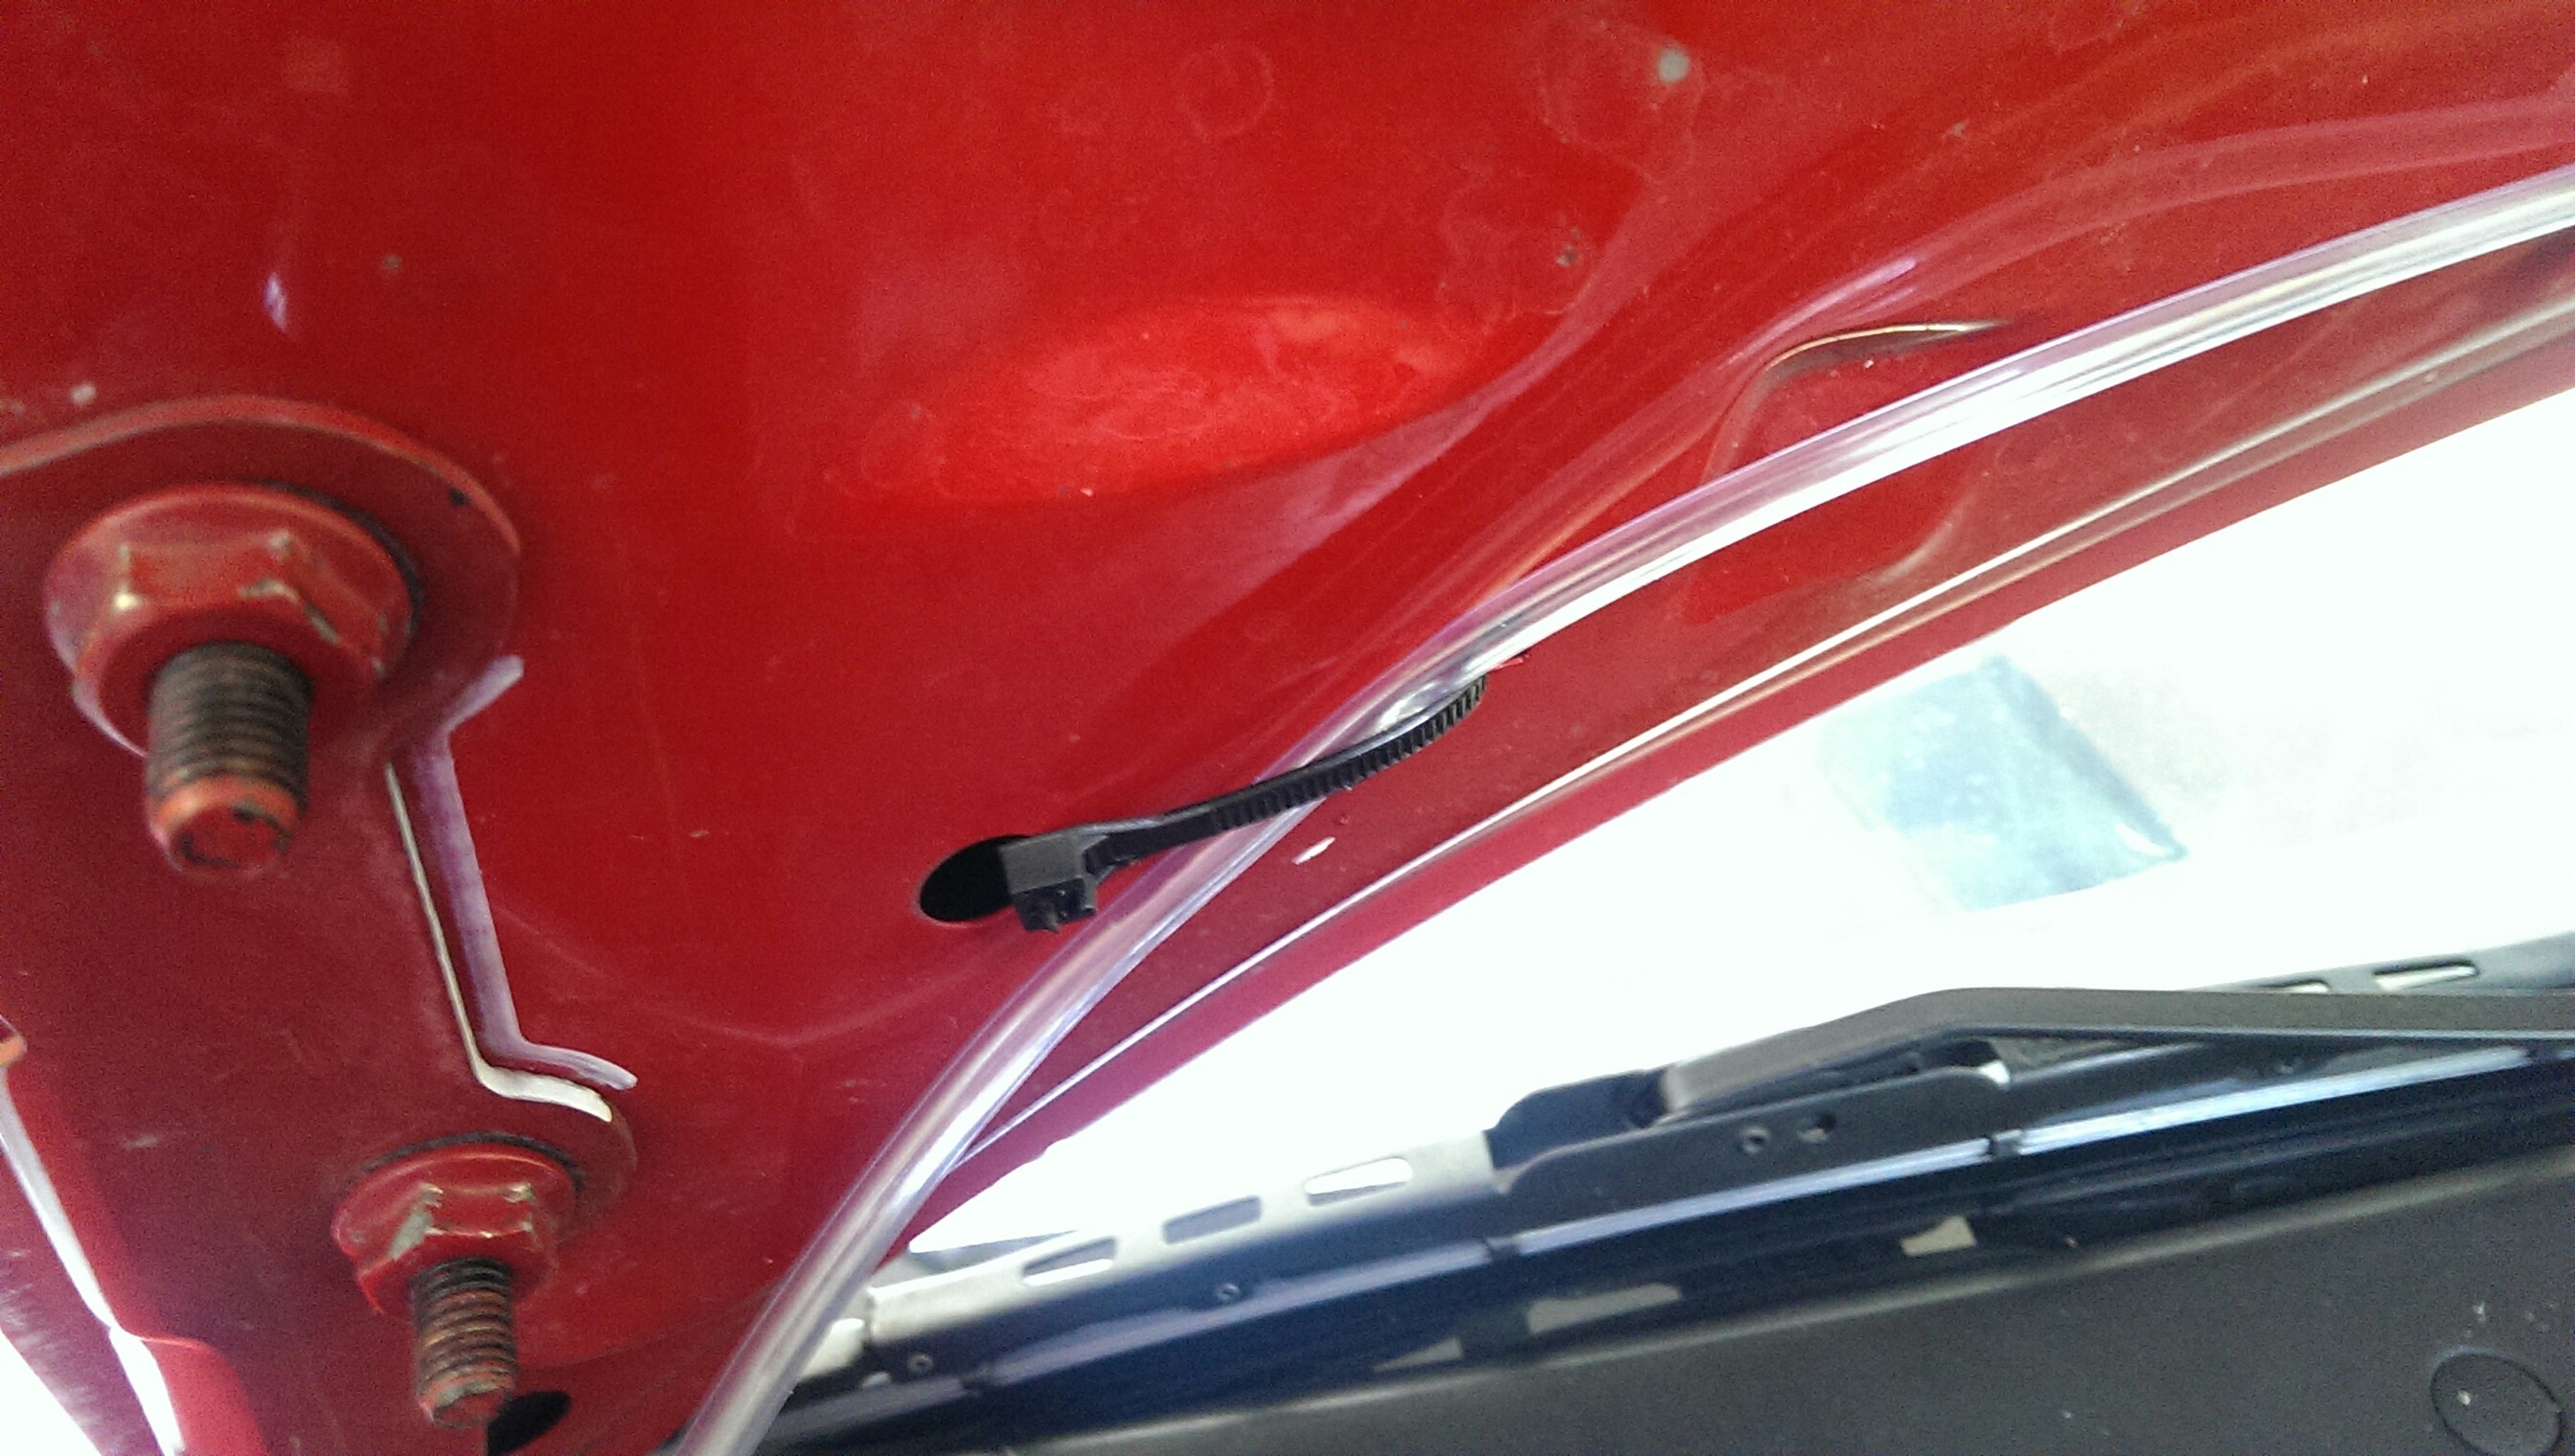
Hose Through Firewall

Hose can go through the firewall here in this grommet
There is a grommet through the firewall just behind the fuse box for the hose to route. It fishes through and then locks into the plastic clip. If the clip is missing, you could just use a ziptie to hold it.
Hook to Nozzles
Ziptied the end
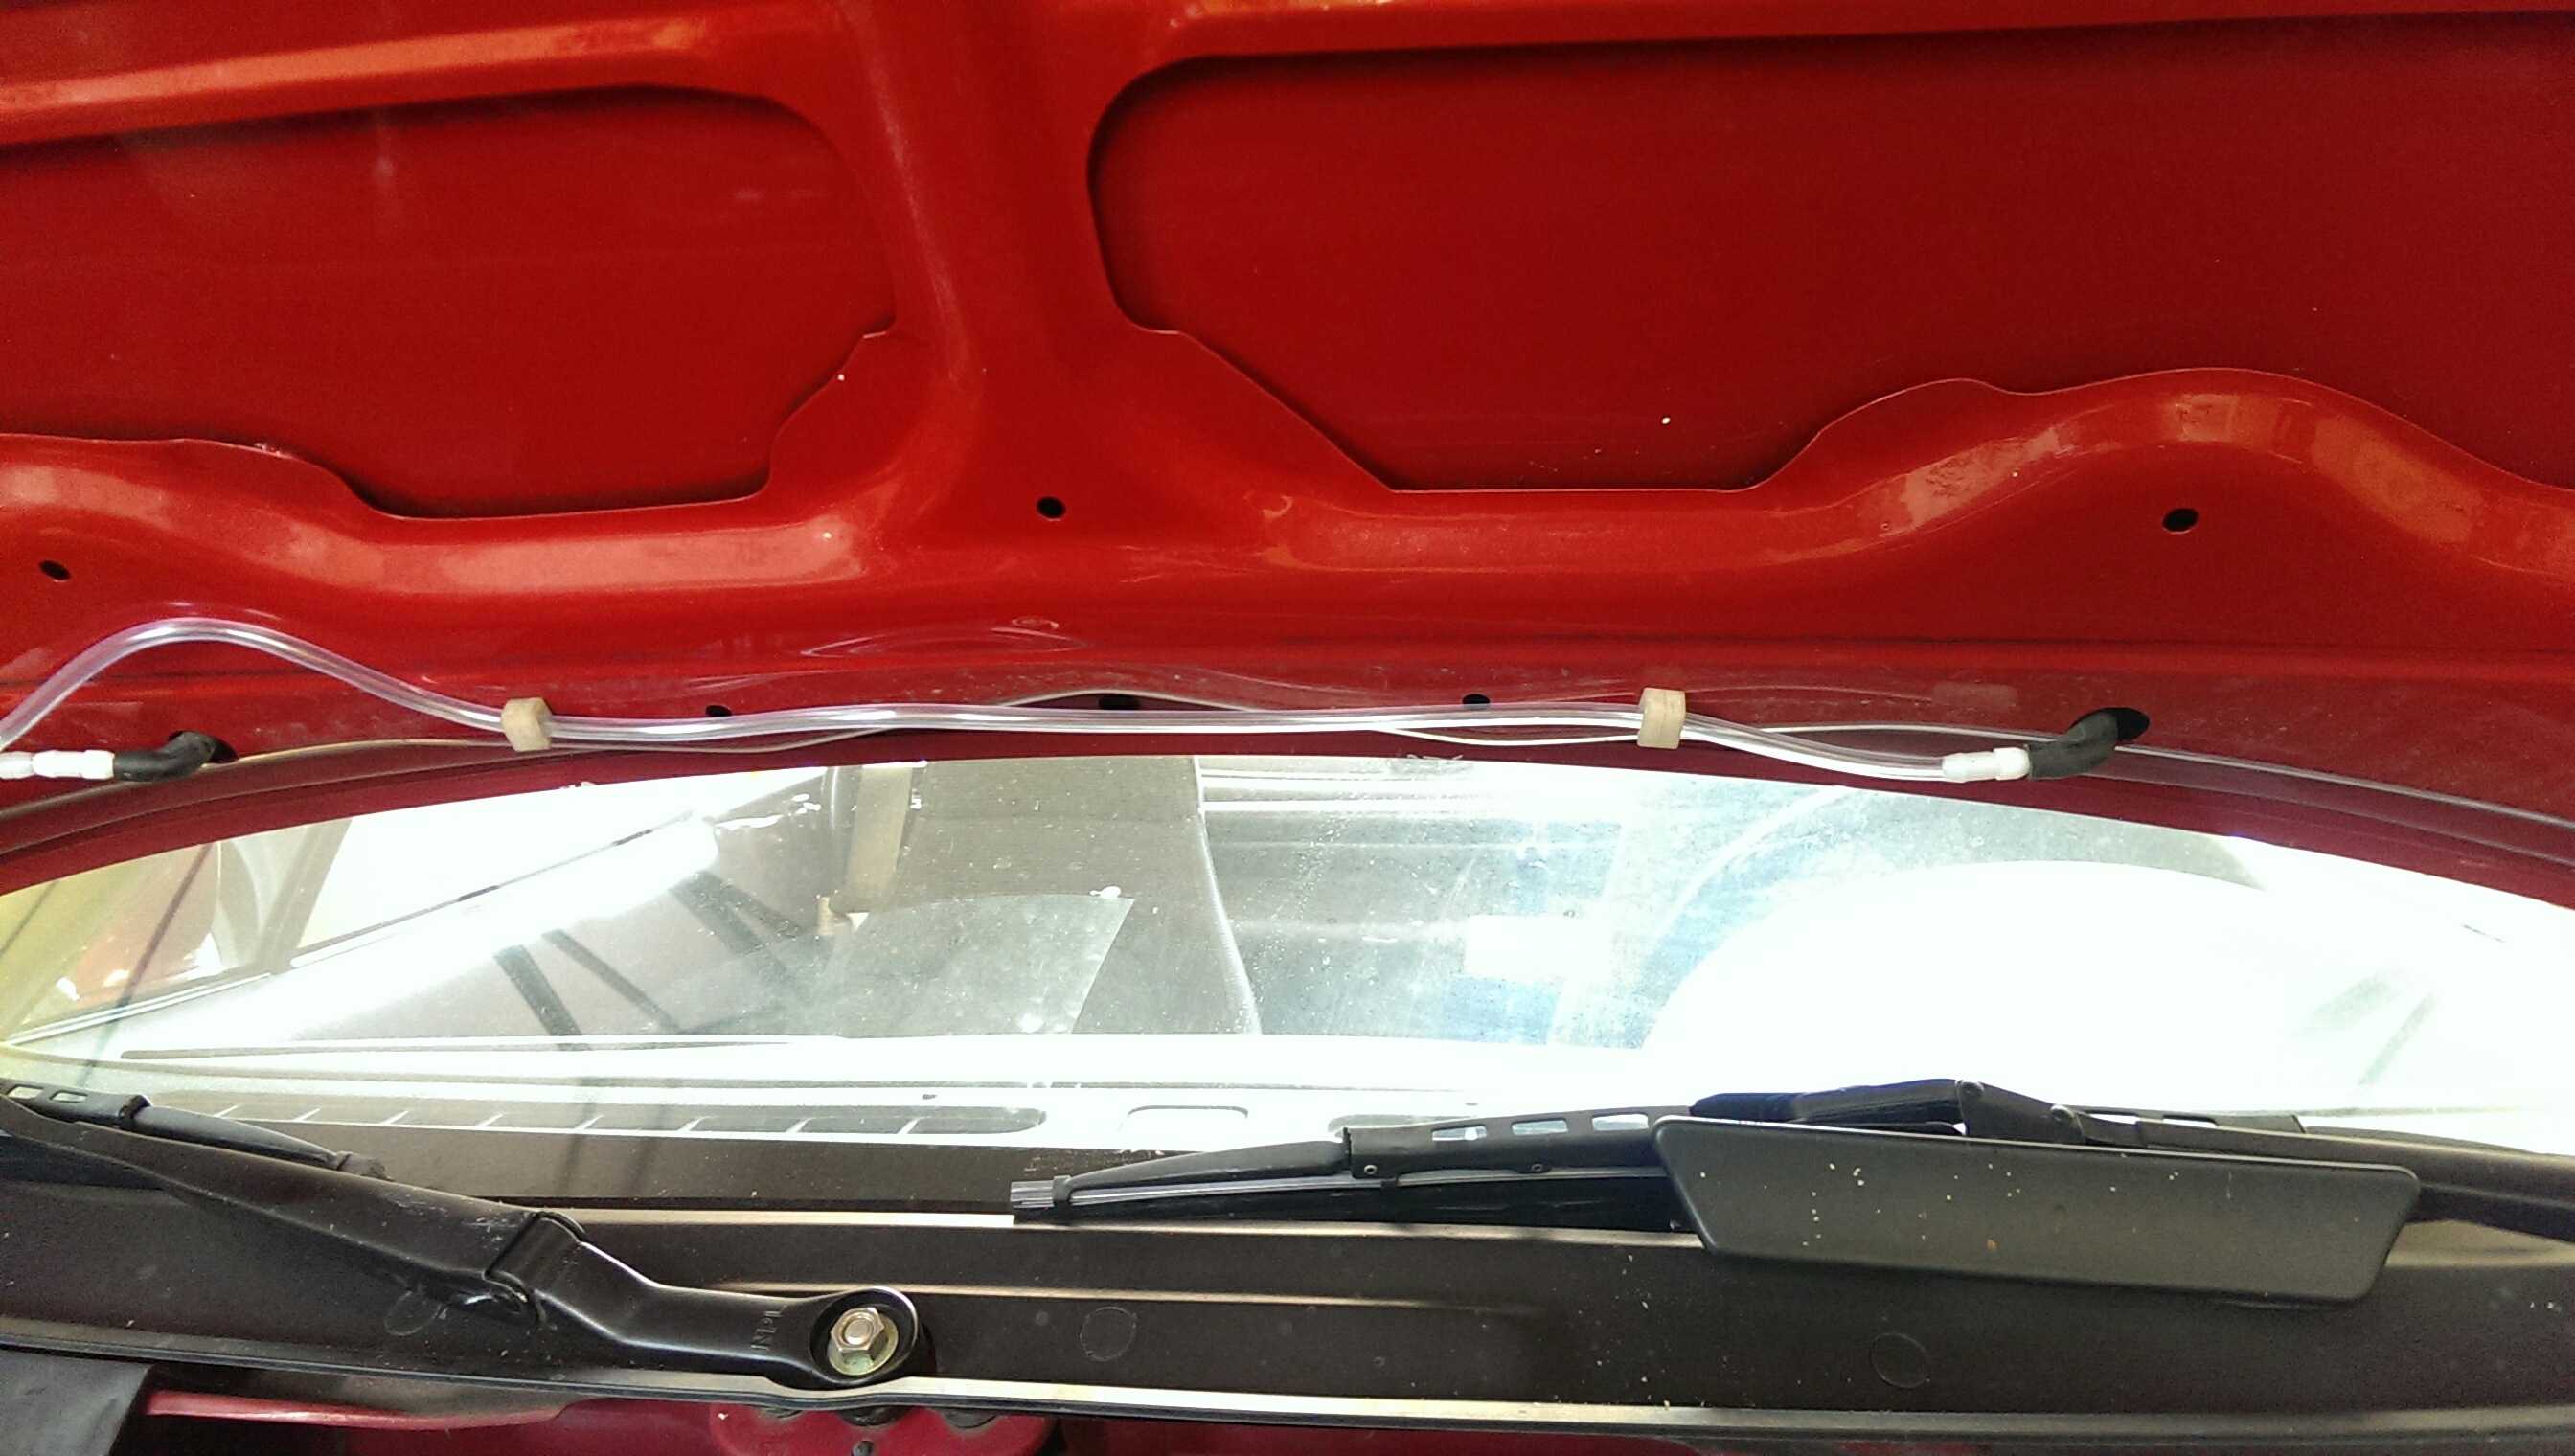
I routed the hose up under the hood. It had been several months since I removed the hose, so I honestly forgot how it was supposed to route. I ended up just using a ziptie here to hold it against the hood, allowing a little slack for it to open and close.
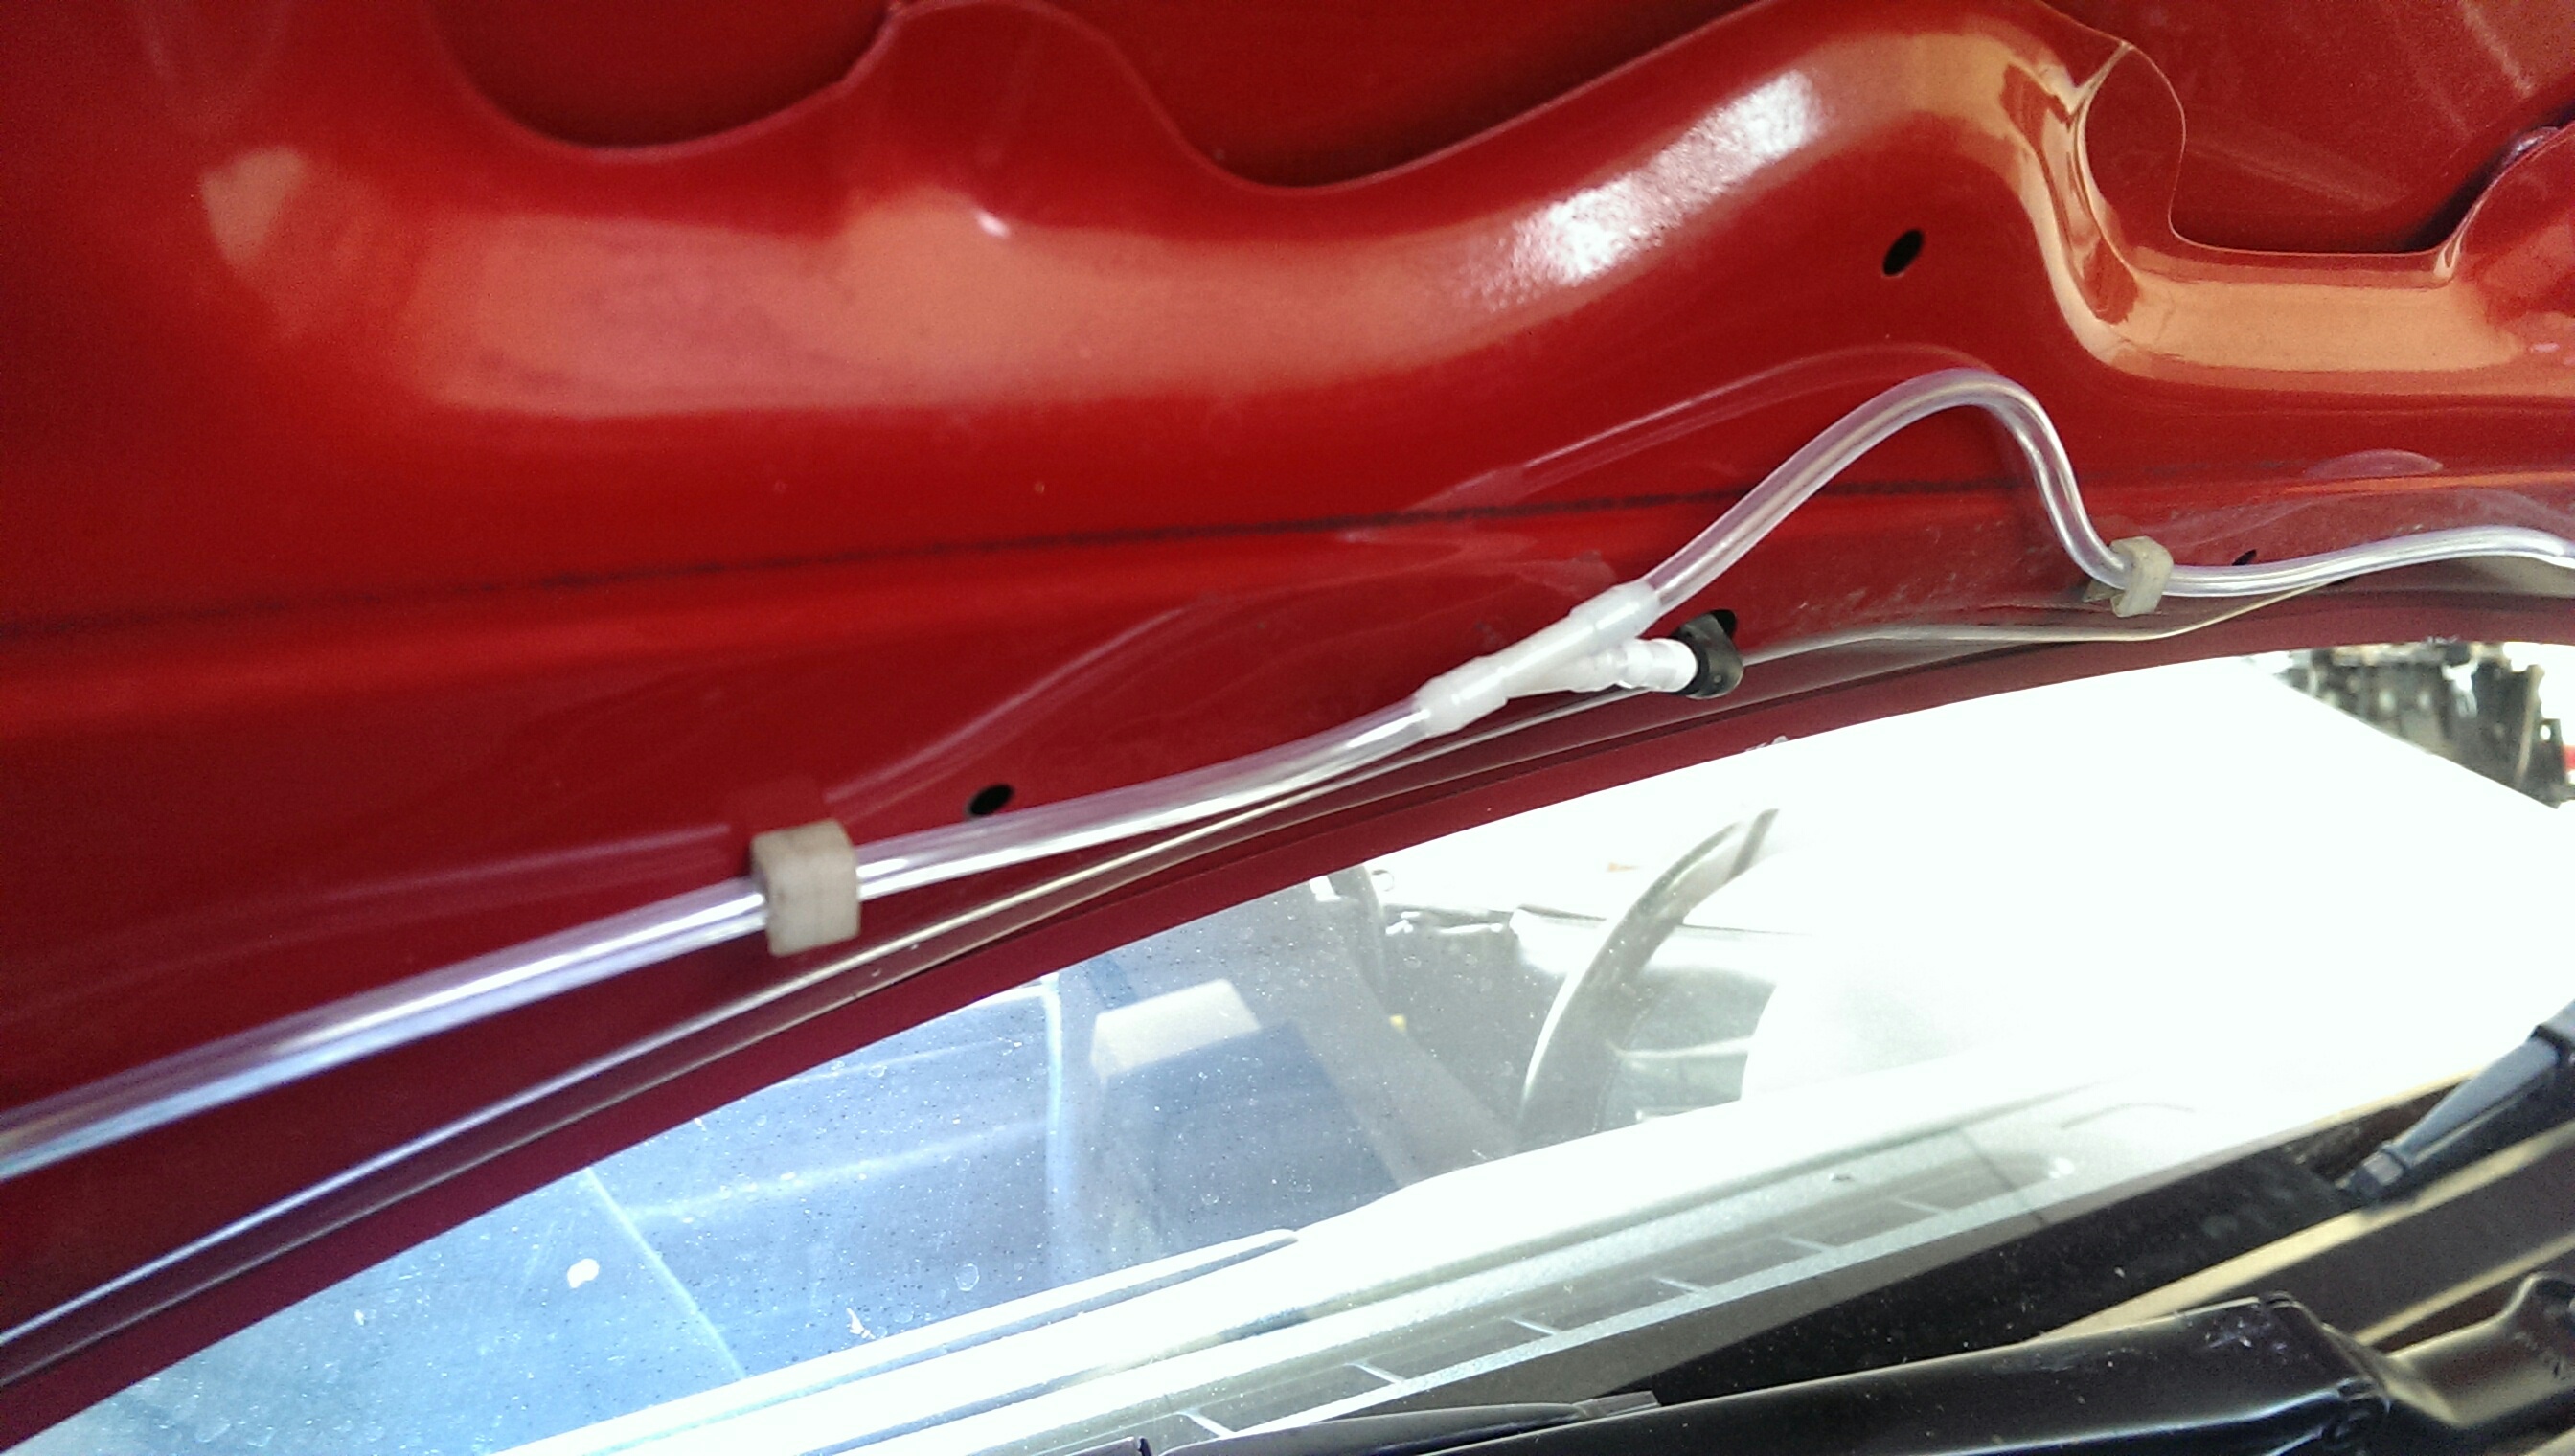
Through clip and into y connection
I ended up reusing the Y connection I had instead of my aquarium tee, but the principle is the same. Just before the passenger side nozzle, you can cut the hose and attach the tee. Use a small piece of hose to reach the passenger nozzle, and then a longer piece for the driver’s side.

Extend to driver’s side from tee
You can reuse the plastic clips to hold the hose as it goes across to the driver’s side.
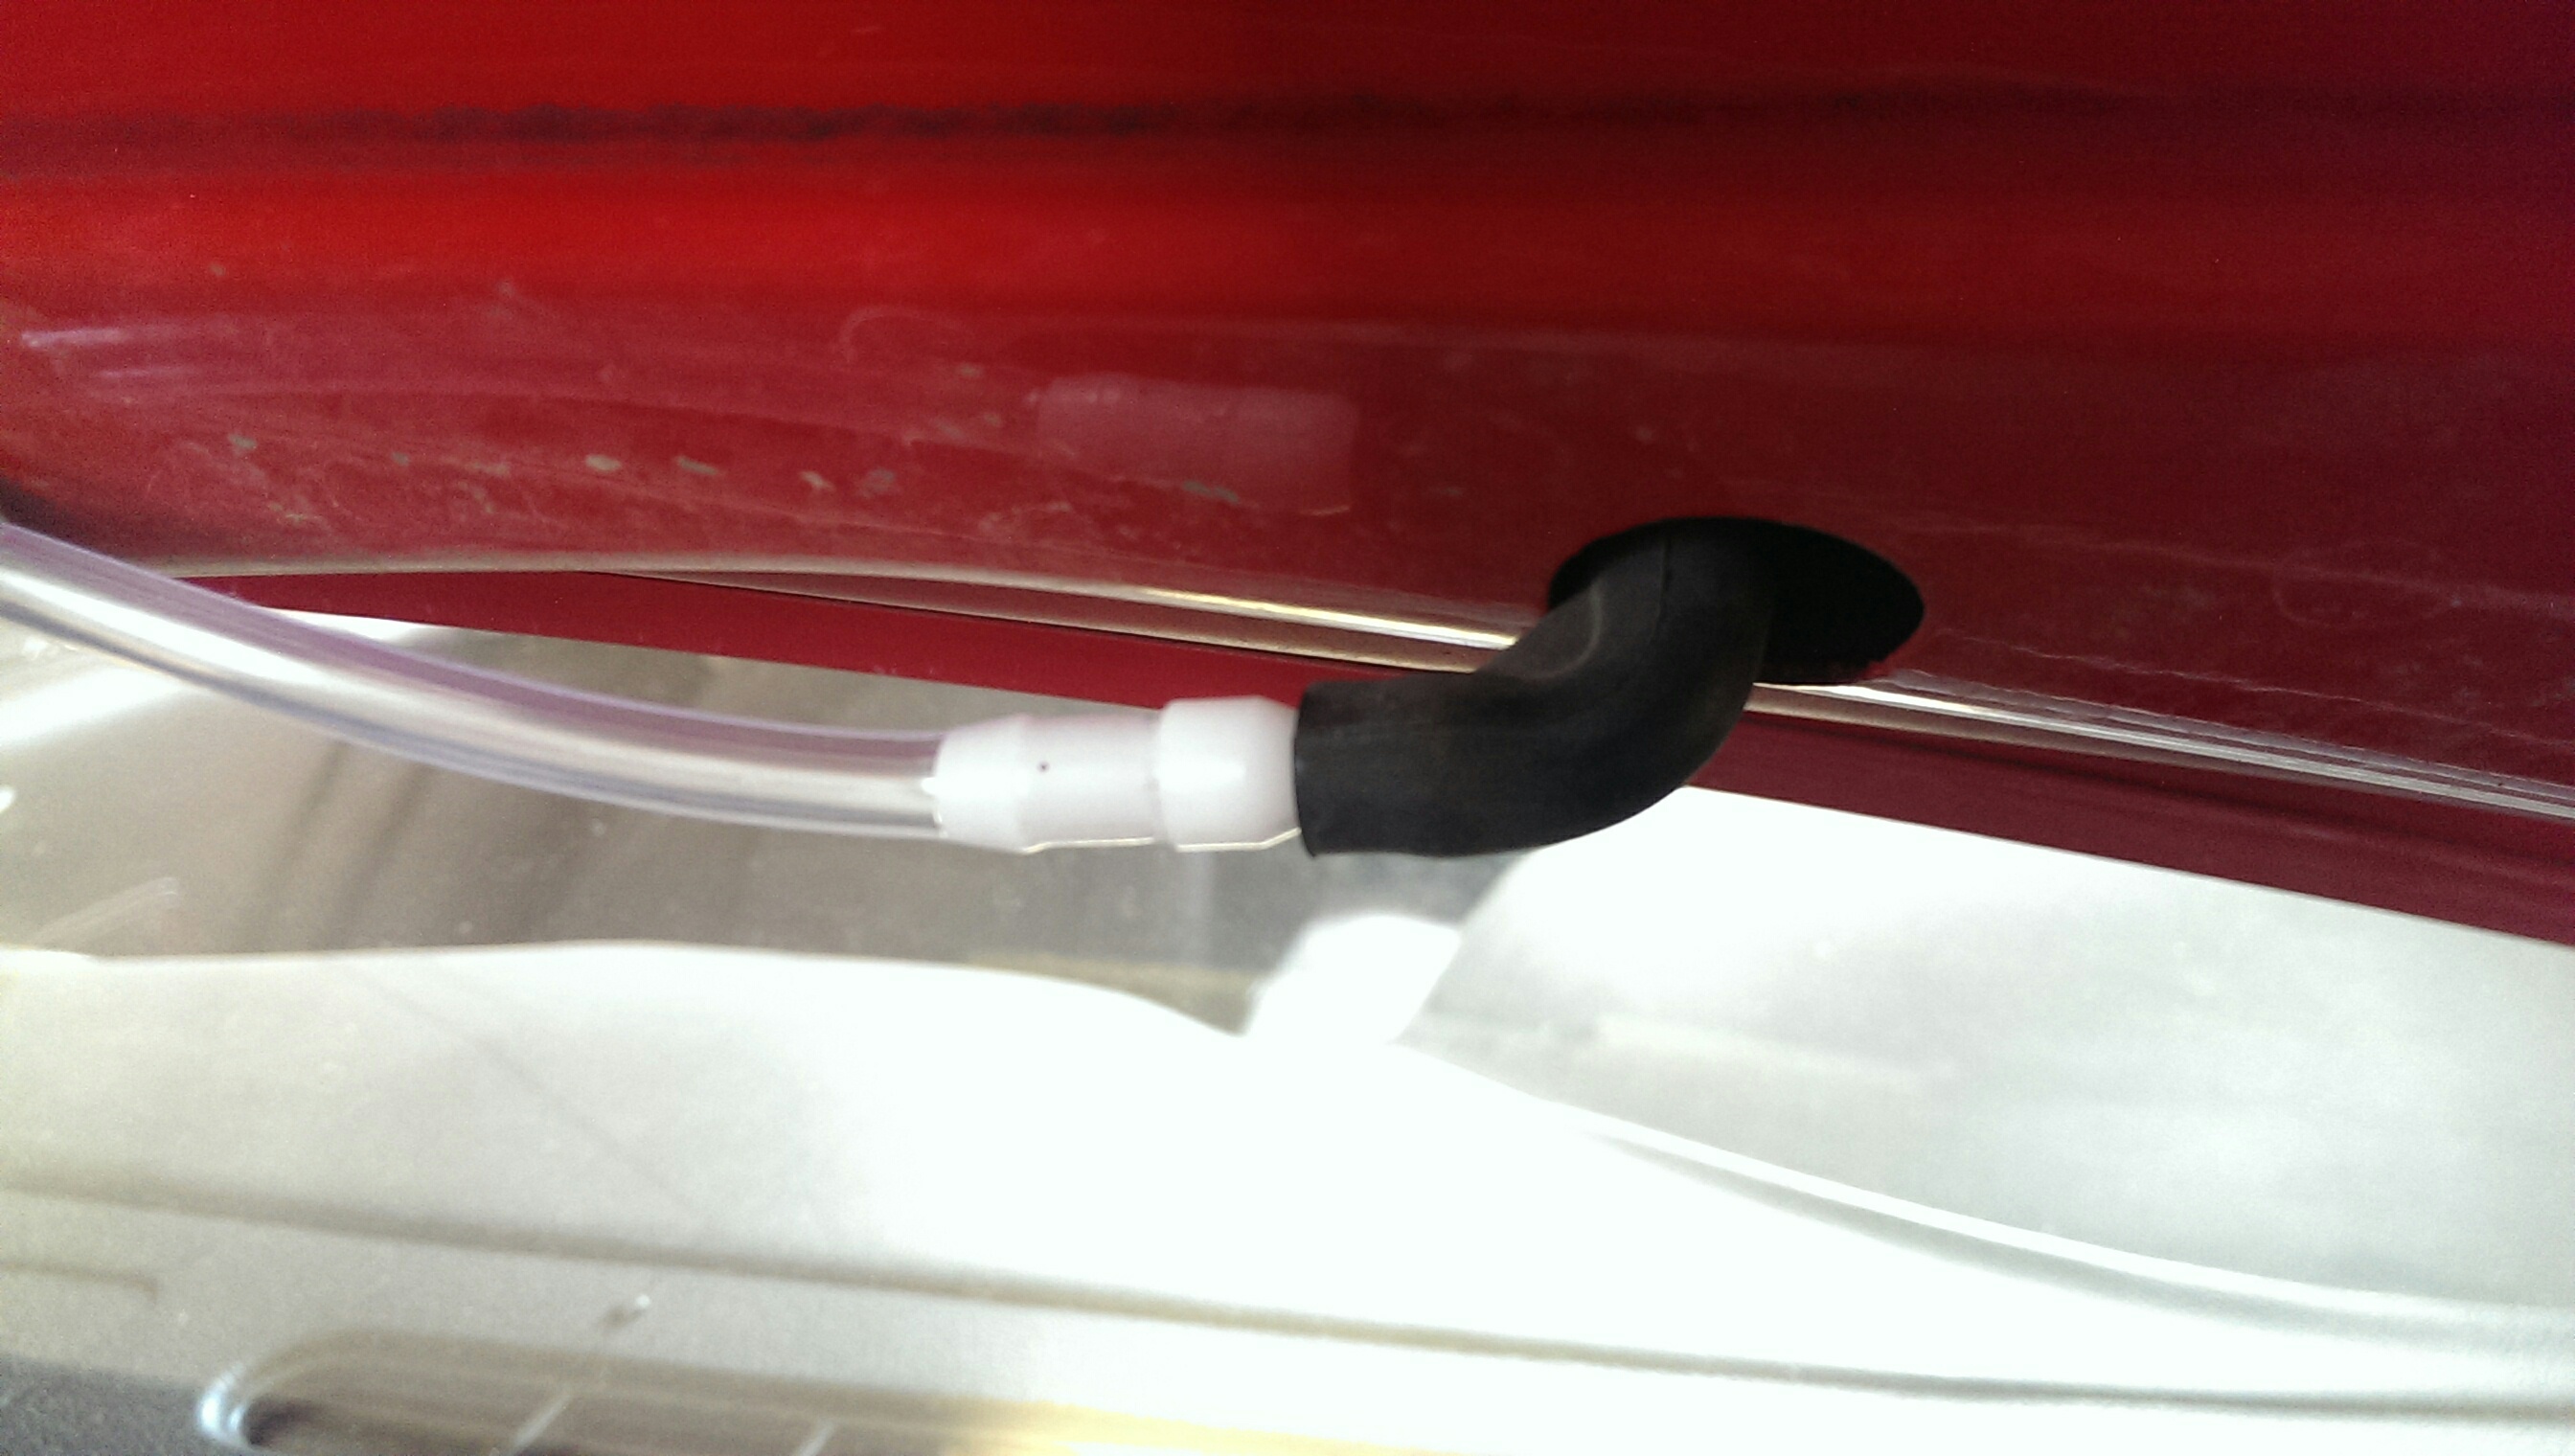
Make sure the check valve isn’t backwards
The check valve is directional. You can check the old hoses for reference, but the thin side goes towards the hose, and the thicker side towards the nozzle. If you get it backwards, you’ll know because the washer won’t spray properly.
Finished
And that’s it. You’ve got new washer lines.