Building a DIY Dust Separator (Thien Cyclone)
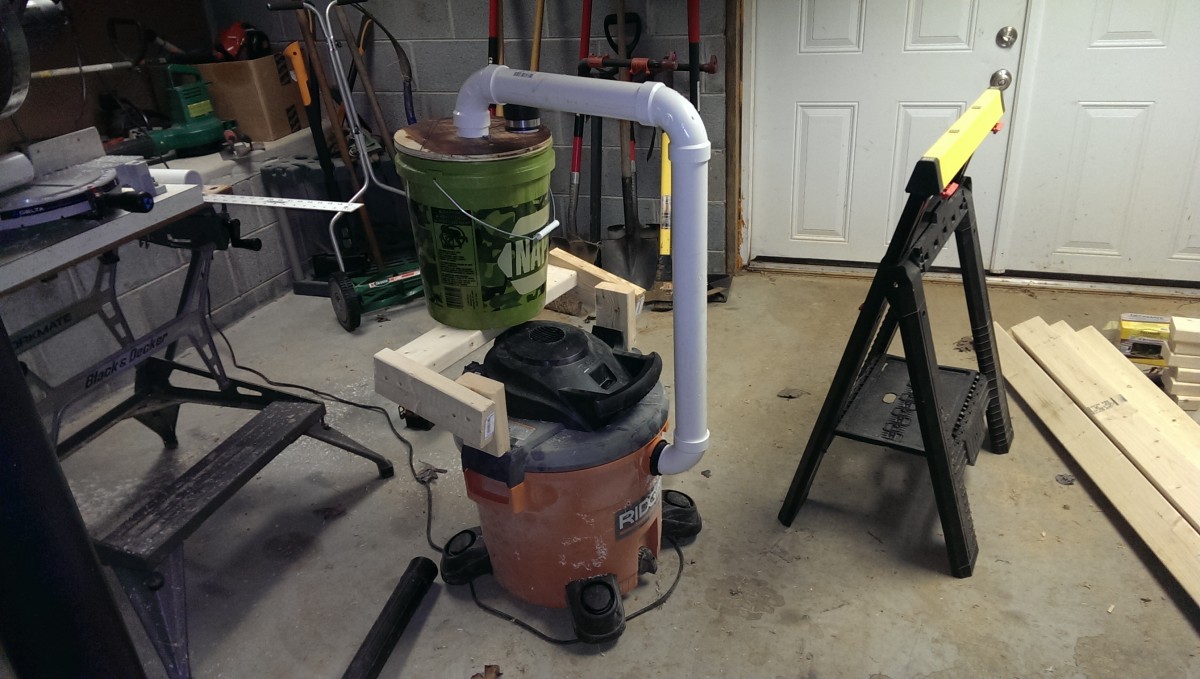
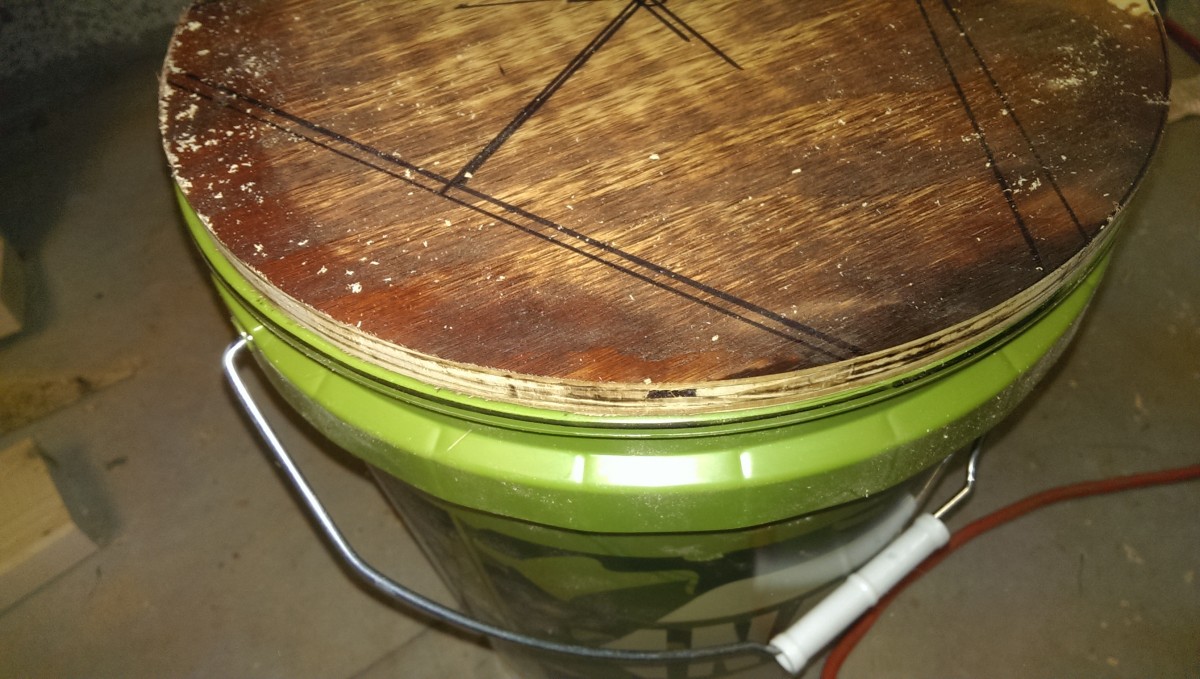
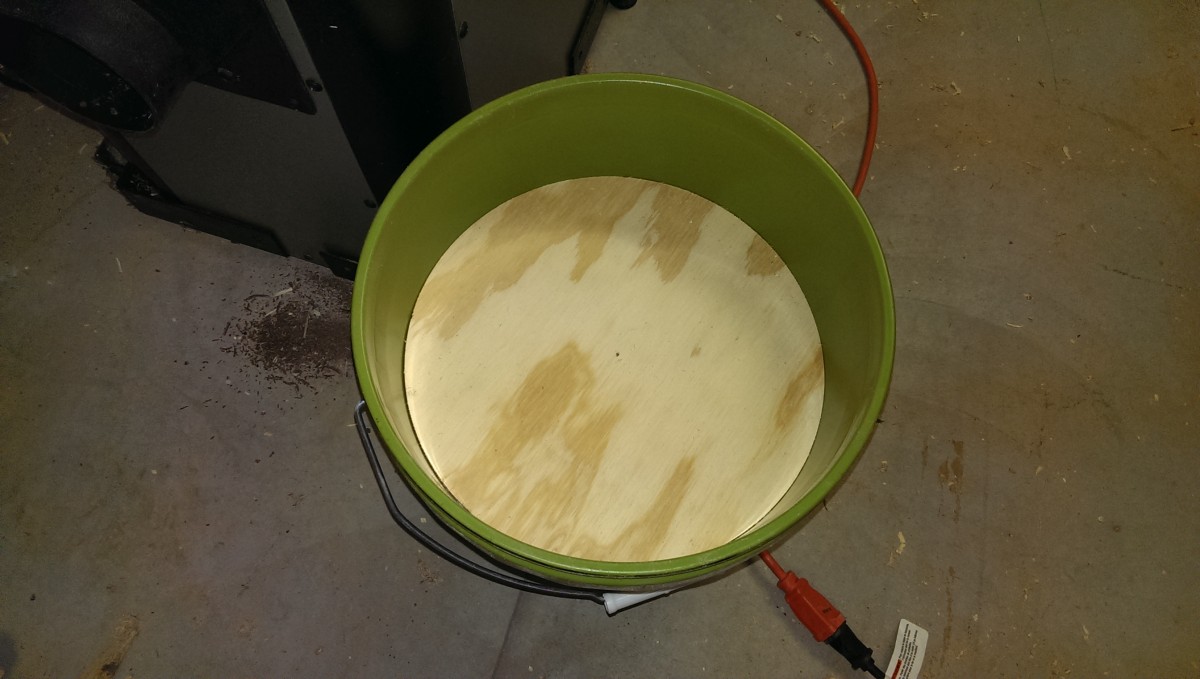
Completed dust separator mounted to shop vac
If you use a shop vac for dust collection, you probably realize that if you just run it bagless, you eventually spit fine particulates out the back. If you have an enclosed shop, this isn’t particularly great for your health. You can put a finer filter or a filter bag from the home store on your shop vac, and these work great at catching this dust.
Then, you have a second problem: the course dust plugs up these finer filters and fills the bags really quickly. This is where a dust separator comes in. The idea is to have a chamber that is in-line between your tool and the dust extraction you’re using. The chamber is intentionally shaped to circulate the incoming dust in a cyclone, allowing the heavy sawdust and other chunks to fall into a bucket. This is similar to how bagless vacuum cleaners work.
If you put together something like this, you can catch a lot of the big stuff before it ever hits your shop vac filter. It will fall to the bottom of a bucket, which you can easily pour in the trash, and save your filter for the really fine stuff.
There are products like the Dust Deputy that you can purchase to do this job. However, as of this writing, they’re $50 + parts

I was able to make a similar separator using only scrap plywood, some dirt cheap PVC and elbows, and a $2 bucket. Total cost was probably in the neighborhood of $20. So far it’s been working great.
Figuring Out How to Connect Everything
Getting inner diameter
Getting outer diameter
Getting hose measurement
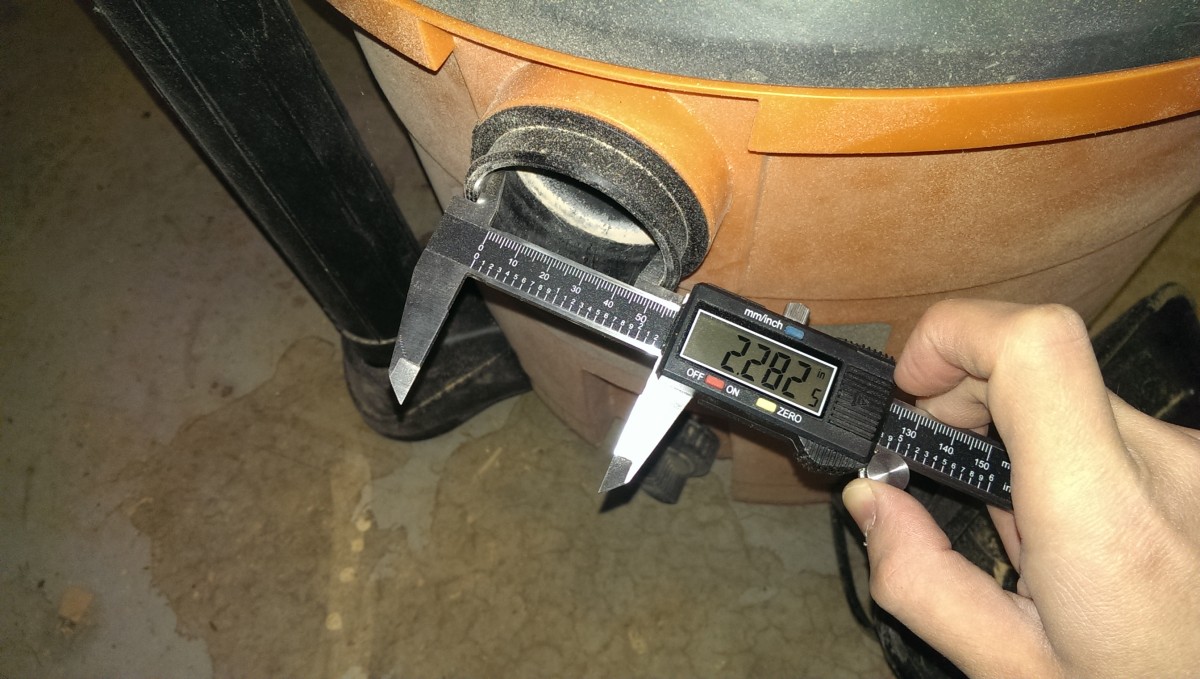
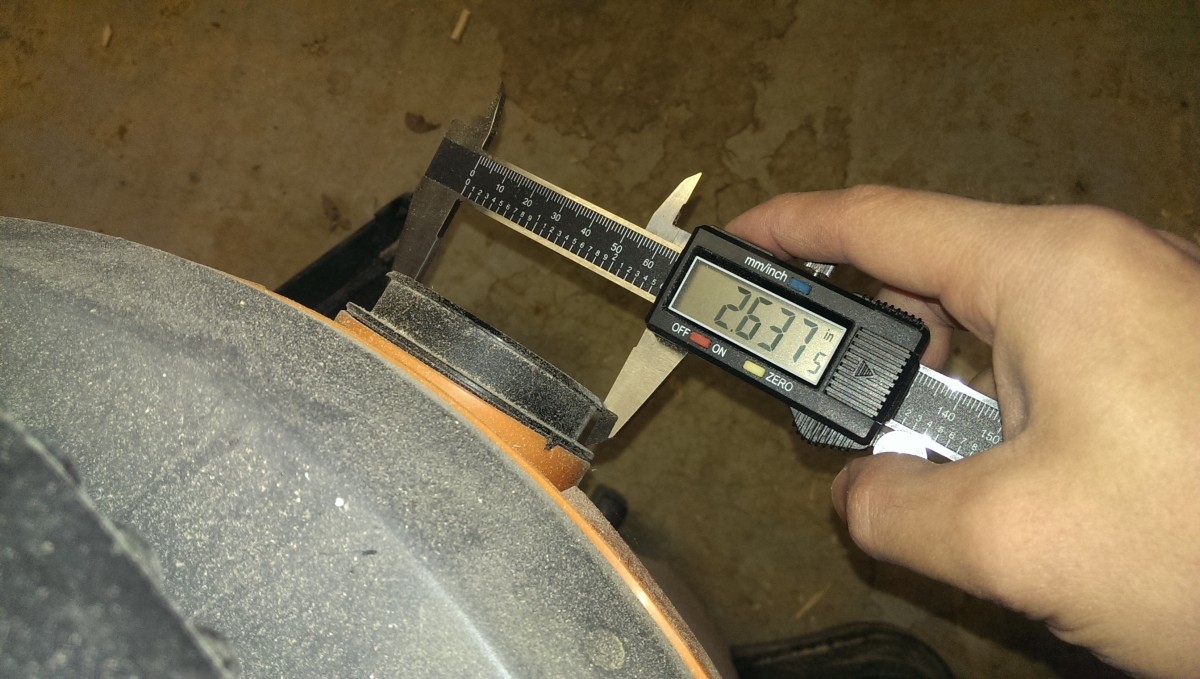
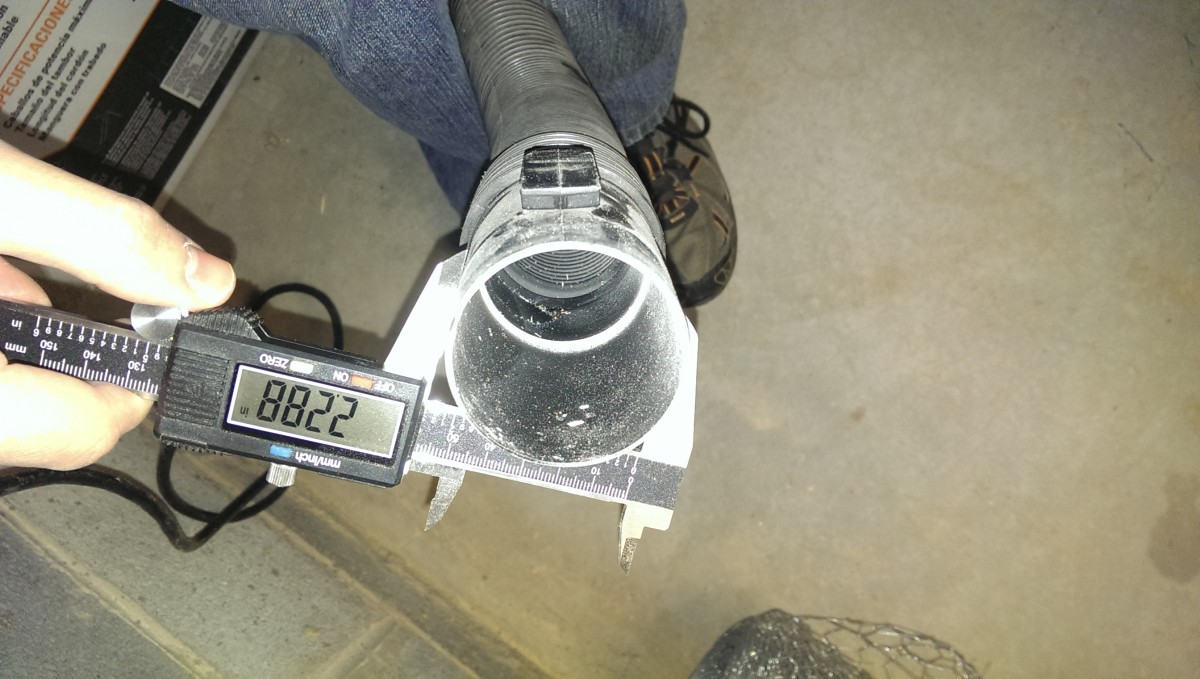
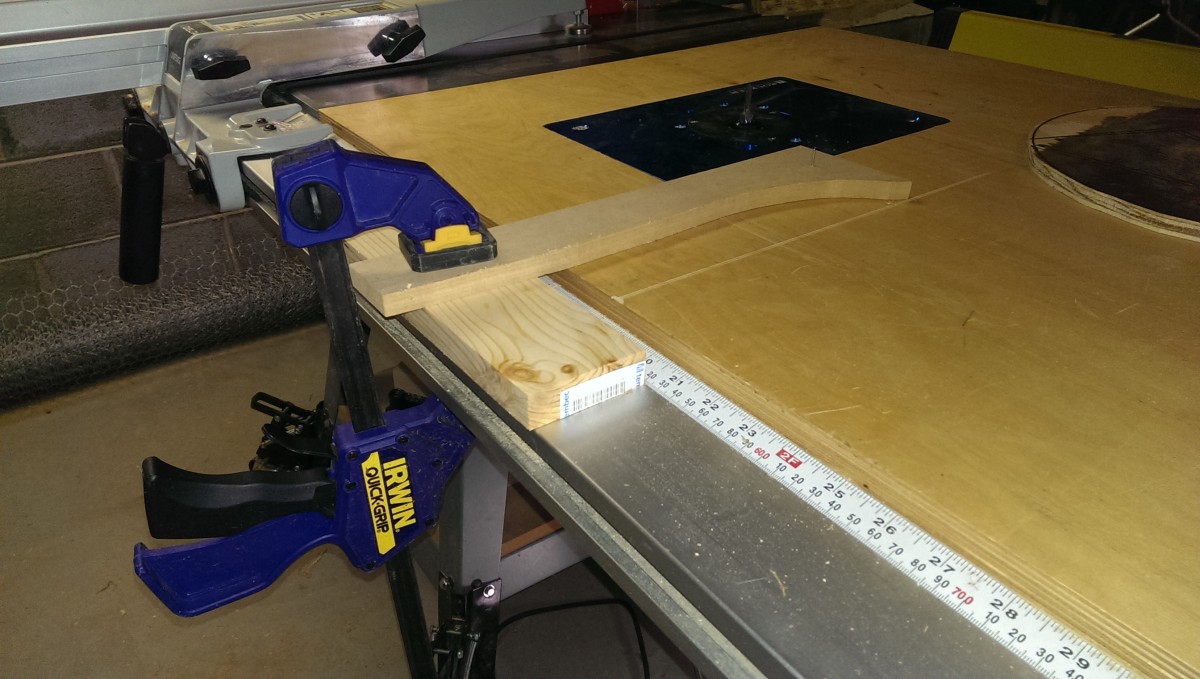
I planned to have the separator sit on top of my shop vac, so I can roll them both around. I’m also too cheap to buy proper shop vac hoses, etc, so I wanted to improvise with as much cheap PVC pipe as possible.
I got out my handy dandy digital caliper and simply measured the shop vac opening and hoses. The only keys are that I could find some PVC to hook into the shop vac opening, and that I could find a fitting the hose could connect to on the separator. I ended up going with a length of 2″ straight PVC, four 90-degree 2″ elbows, and a flexible 2″ coupling. Bringing the caliper to the store, though, made it easy to figure out the fittings that would work.
Cutting Circles for the Lid
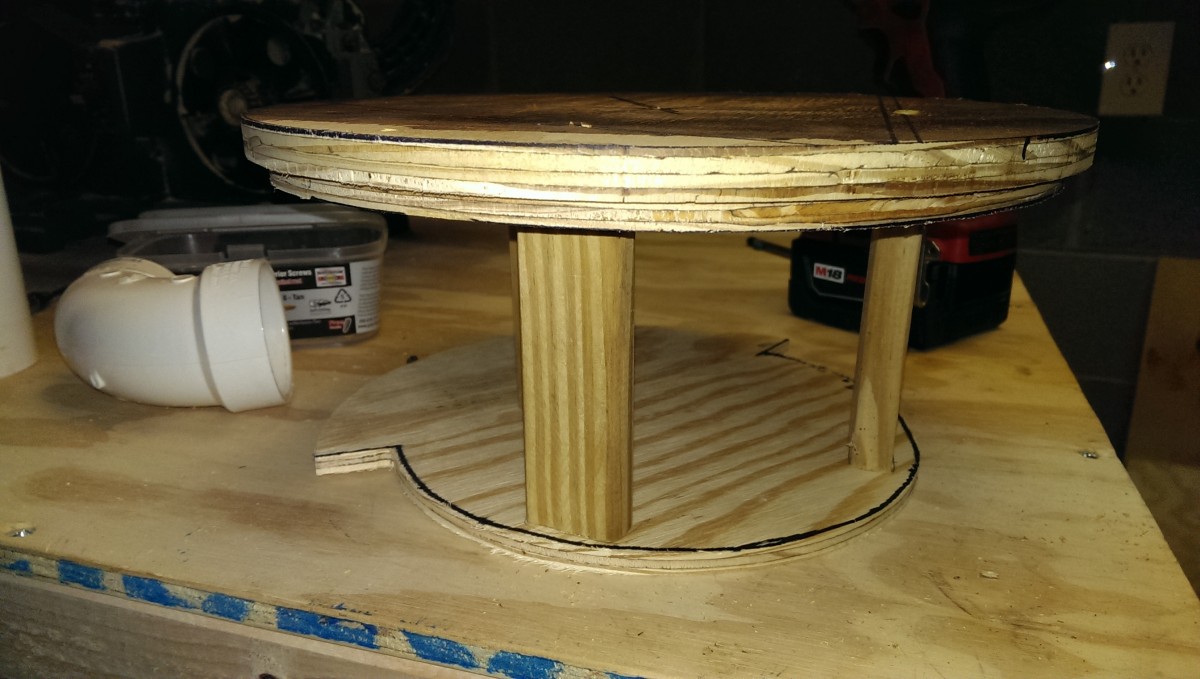
Thien cyclone mostly complete
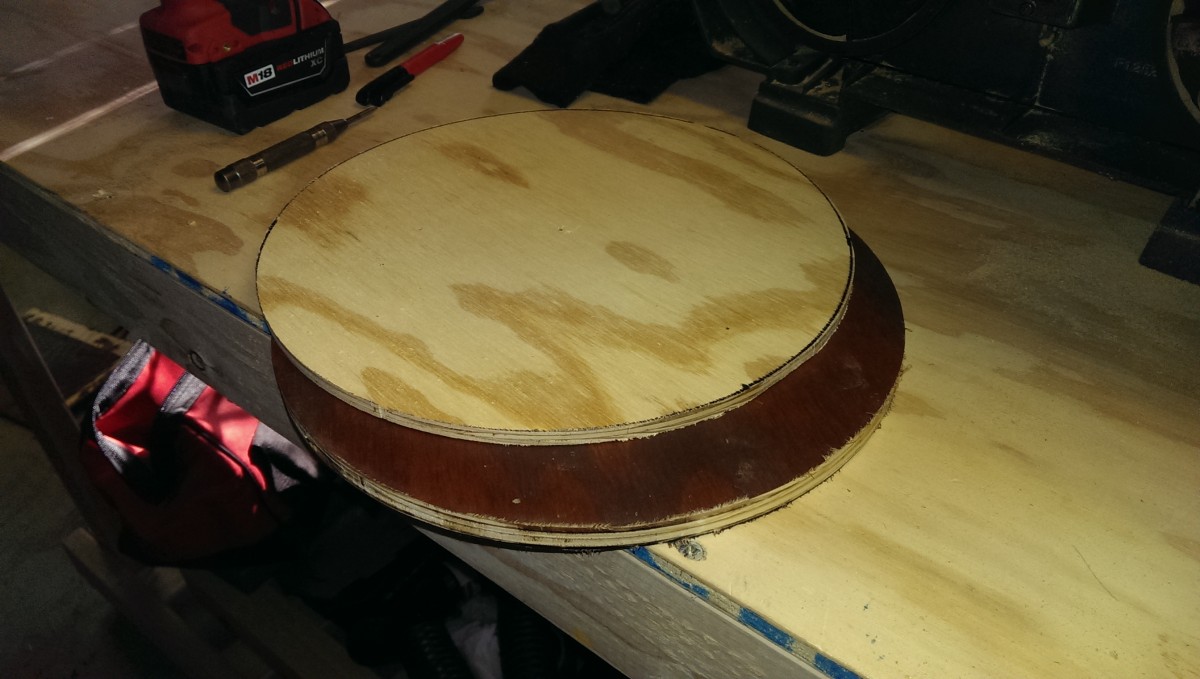
The cyclone itself will require three wood circles; I used some scrap plywood. The first should be as wide as the bucket, to hold the whole thing on top of the bucket. The second should be just as big as the inside diameter of the bucket, to glue under the first. The last should be a bit smaller still, to fit down in the bucket and form the bottom of the cyclone.
Cutting the Top Lid
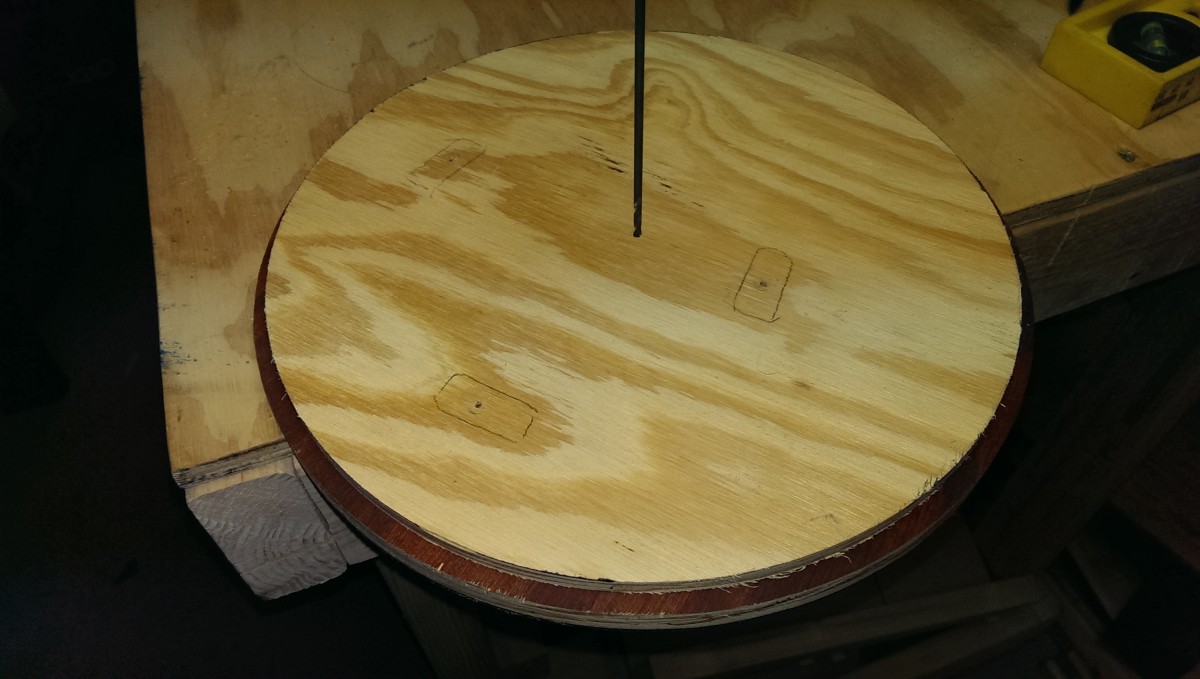
Getting outline of bucket
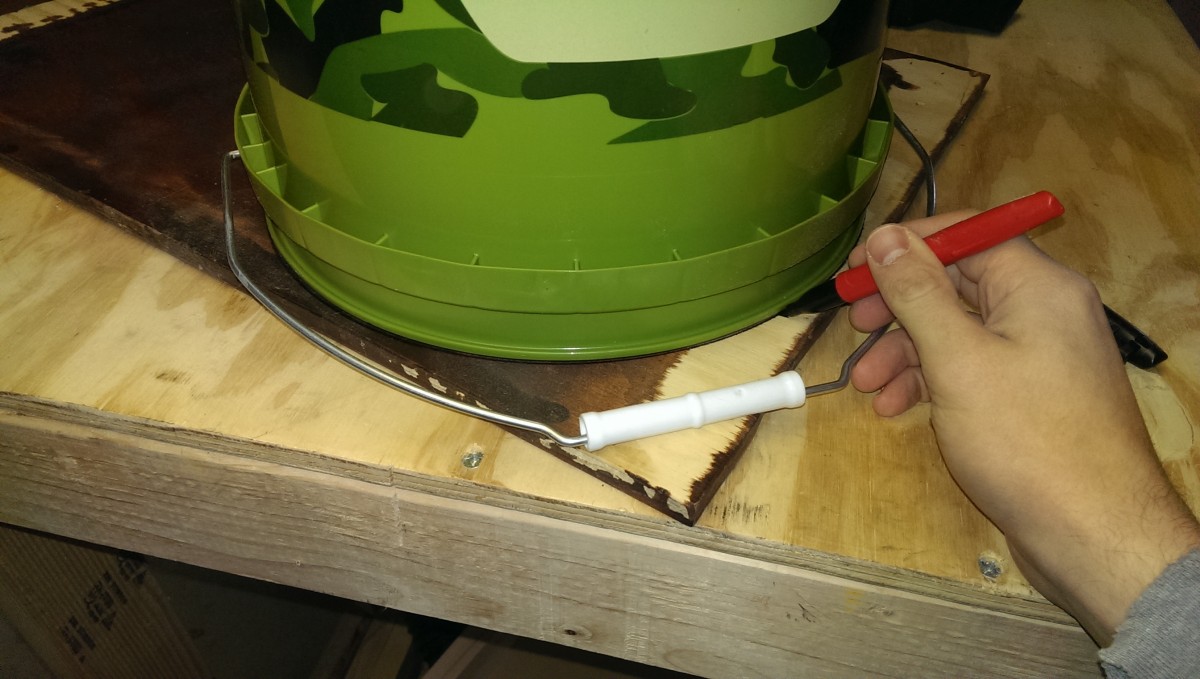
So, the first step is to size and cut the topmost circle. You can really use any bucket or trash can you want for this project. I used a 5-gallon bucket I got for free from Napa when I bought some oil. Step 1 here is to simply put the bucket on the plywood, and trace it.
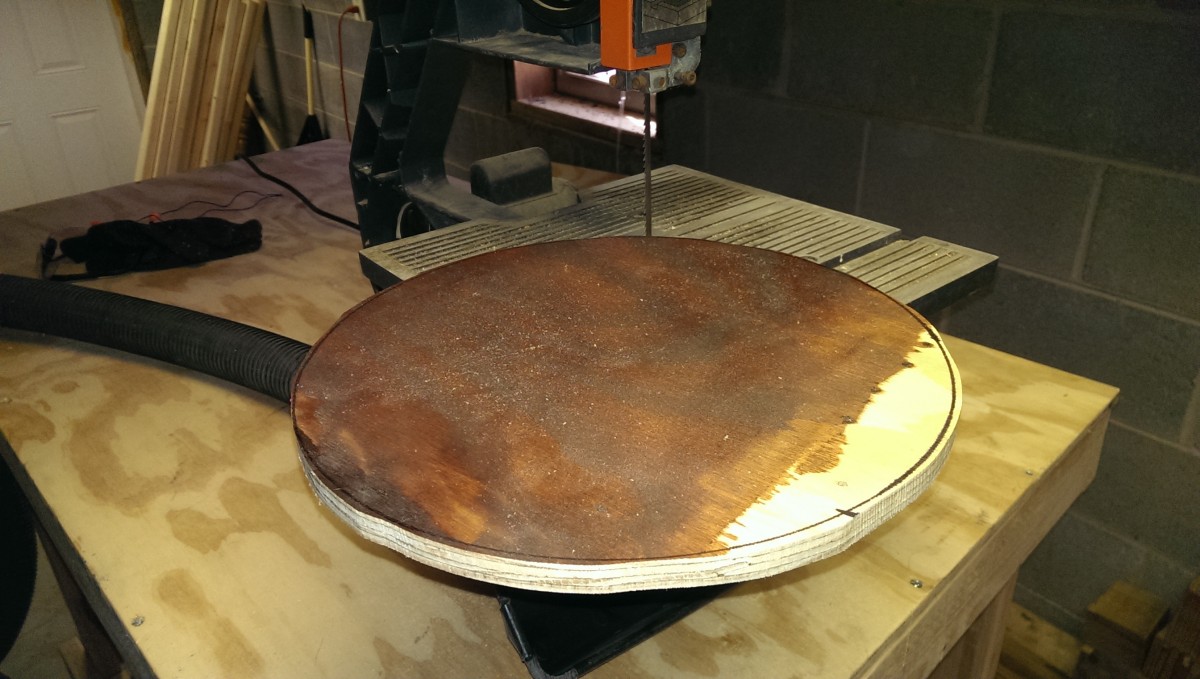
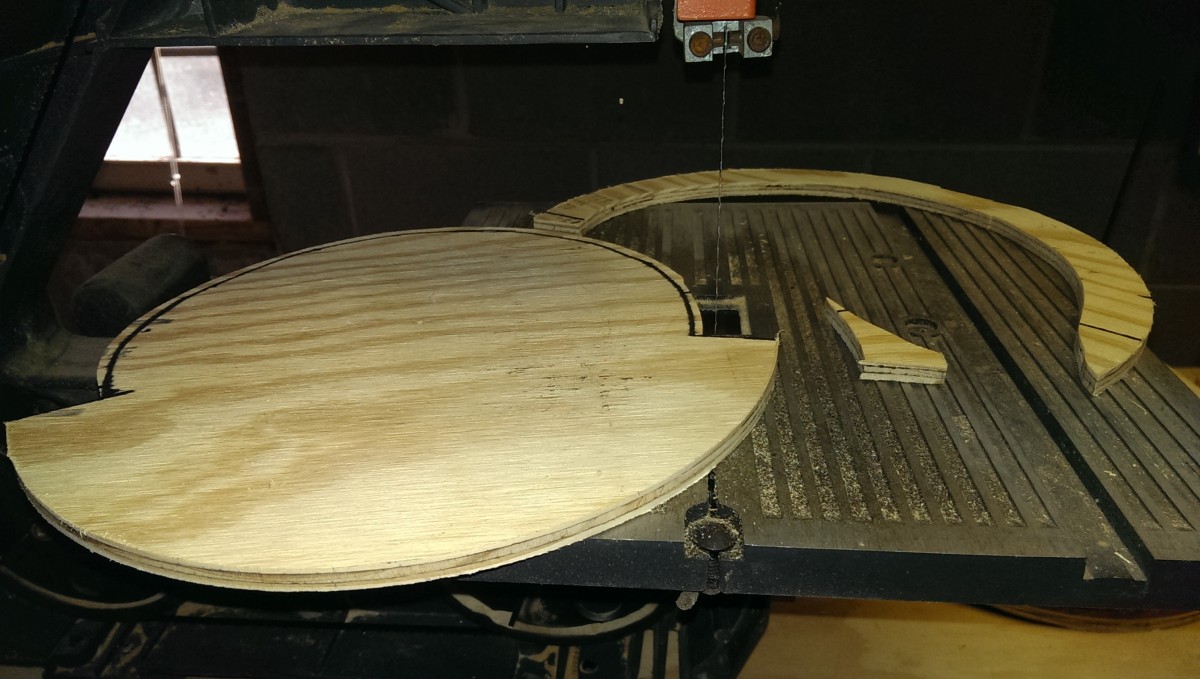
Rough cutting the top circle on a bandsaw
You then rough cut the circle. Accuracy isn’t critical here as long as you stay outside the line – I finish the circle on a router table. The goal here is to simply remove the majority of the wood around the circle. If no bandsaw is available, a jigsaw could do the same task.
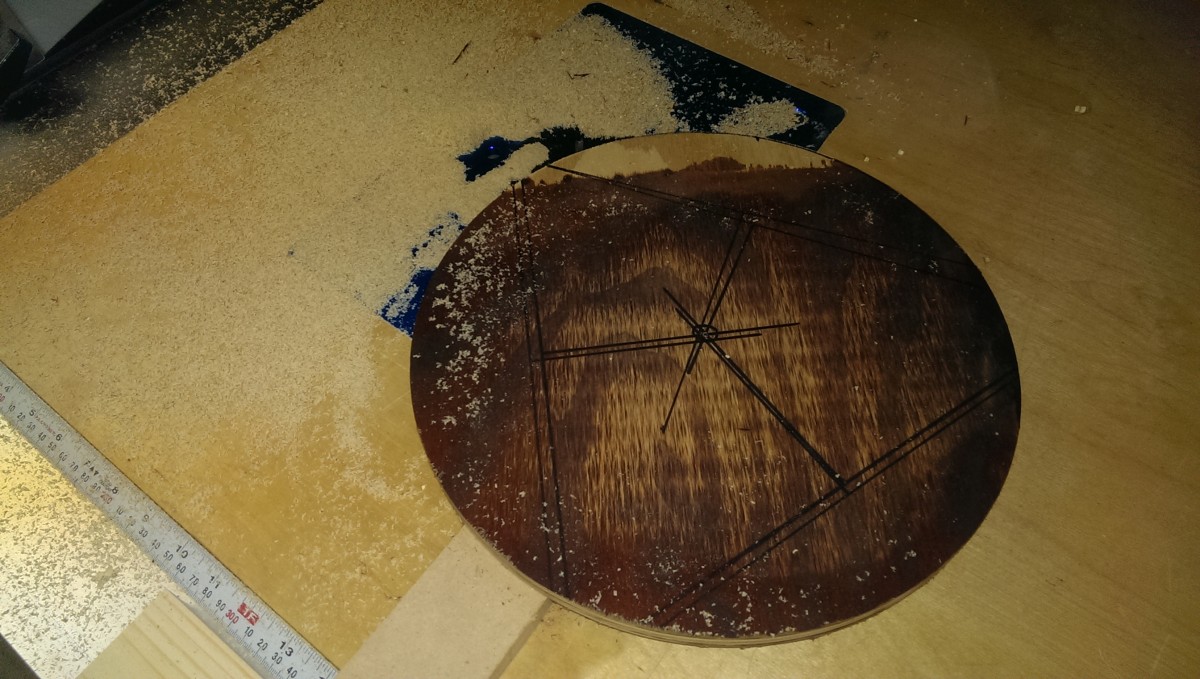
Drawing lines across circle to find center
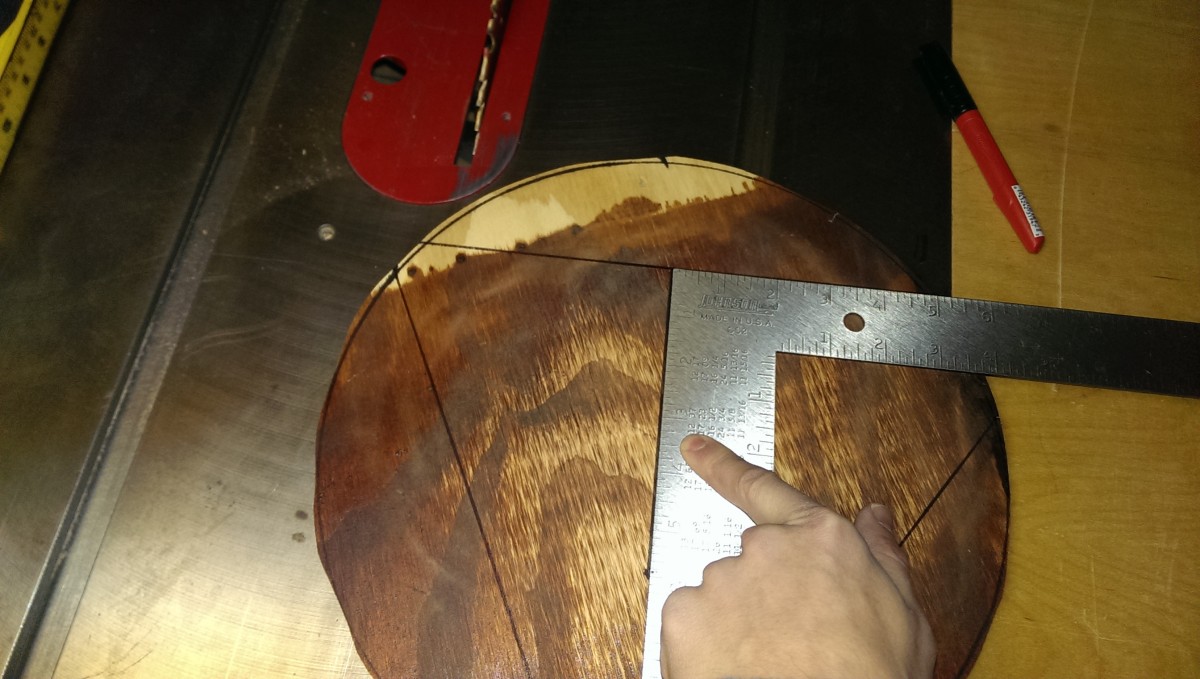
Draw perpendicular lines at exact center of edge lines with a square
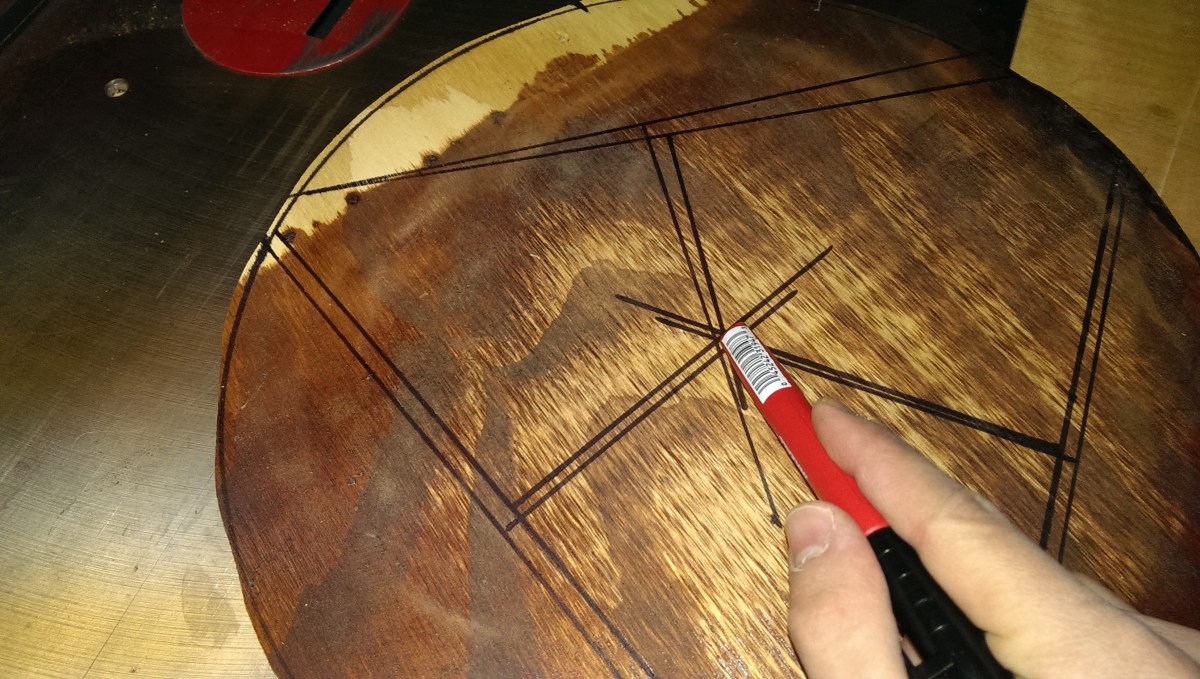
The center is at the intersection
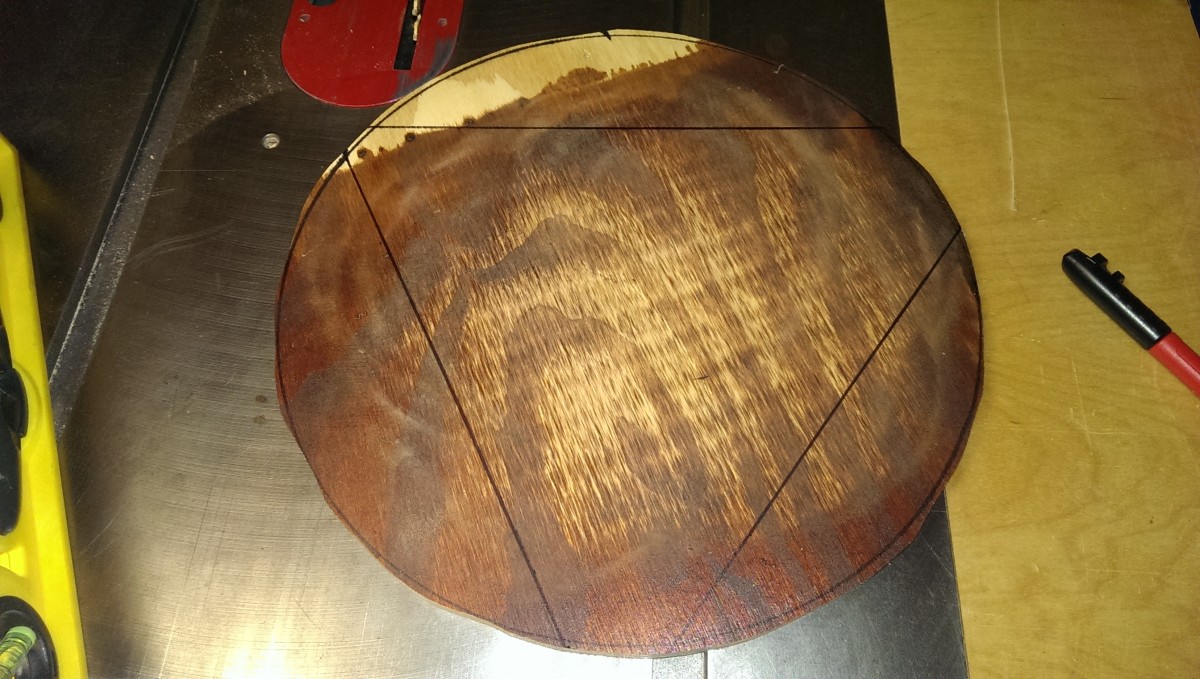
The next step is to find the center of the circle, to drill a hole in it. You’ll have a small amount of room for error on this, since the router circle jig will make a perfect circle regardless of where the hole is, as long as there’s sufficient material around it. Still, it’s easy enough to find the center.
To find the center of a circle, the trick is to simply draw 3 straight lines from edge to edge of the circle. These lines should be an even number of inches, though – the last picture has two sets of lines because I just randomly drew them, and then had to try to bisect lines that are 9 3/16″ across, etc. Anyway, if you draw 3 edge-edge lines, and then draw 3 lines perpendicular at the exact center of each of those edge to edge lines, the 3 perpendicular lines will meet at the exact center of the circle. (SCIENCE!)
Circle jig clamped to table
Another view of the circle jig
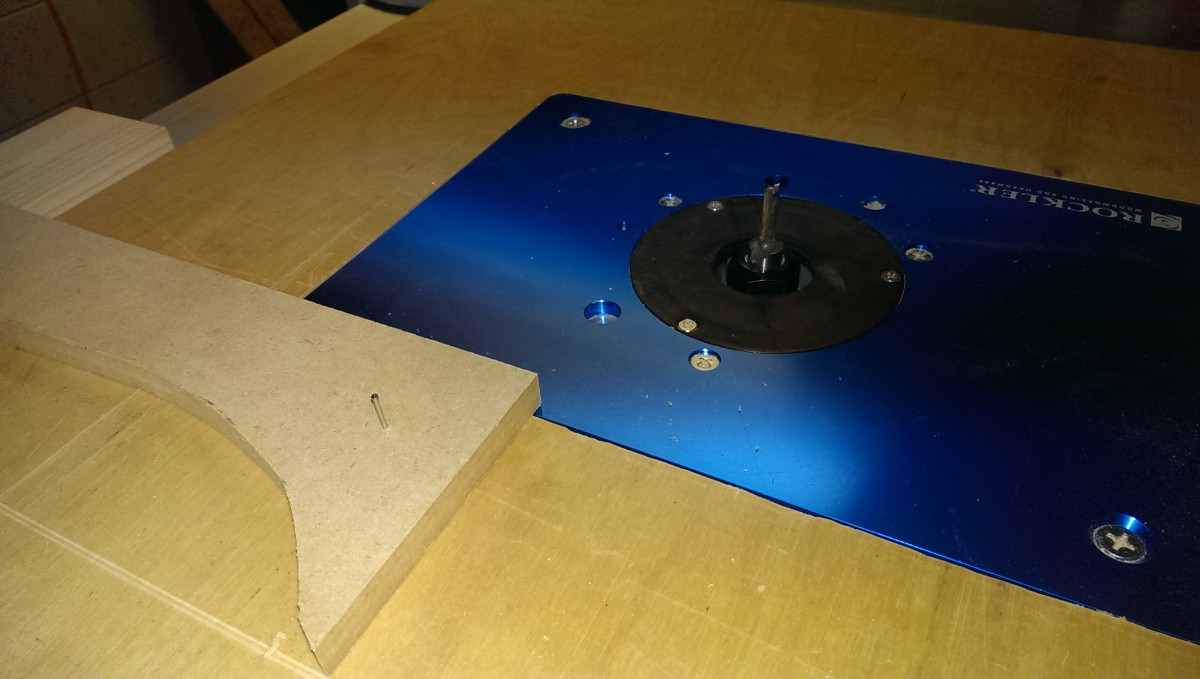
At this point, you need to make a circle jig if you don’t have one. They’re expensive, so I did this instead. I simply grabbed a piece of scrap and put a small nail in it. I drilled a hole the same diameter as the nail into the center of the circle I marked earlier.

Using the circle jig
Sawdust afterwards
Lid should sit right on the bucket
At this point, it was a simple matter of putting the circle’s hole on the nail, and then clamping the whole thing down where it just barely met the router. Turn the router on (WITHOUT the wood touching it yet – turn it to a shallower place to start). You can at this point spin the wood, feeding it into the router. When you make it all the way around, you can turn the router off, adjust the jig to cut deeper, and keep going until you’ve got your circle.
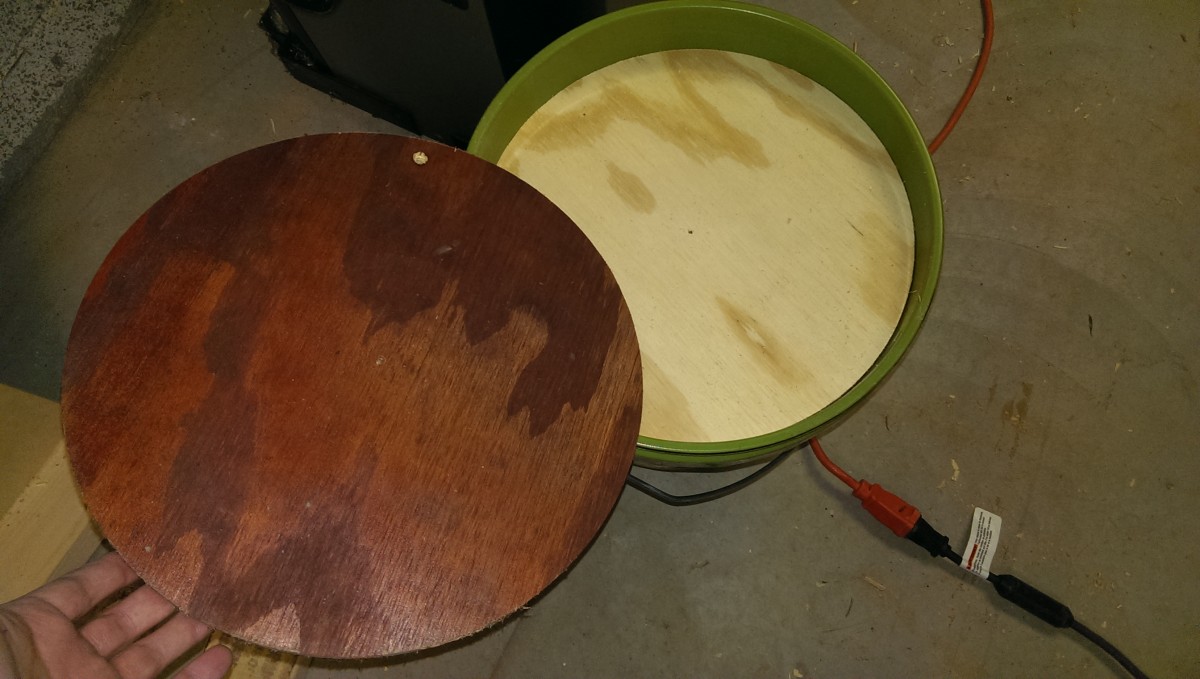
Once this is done, you should be able to test-fit the piece. It should fit right on top of the bucket as pictured.
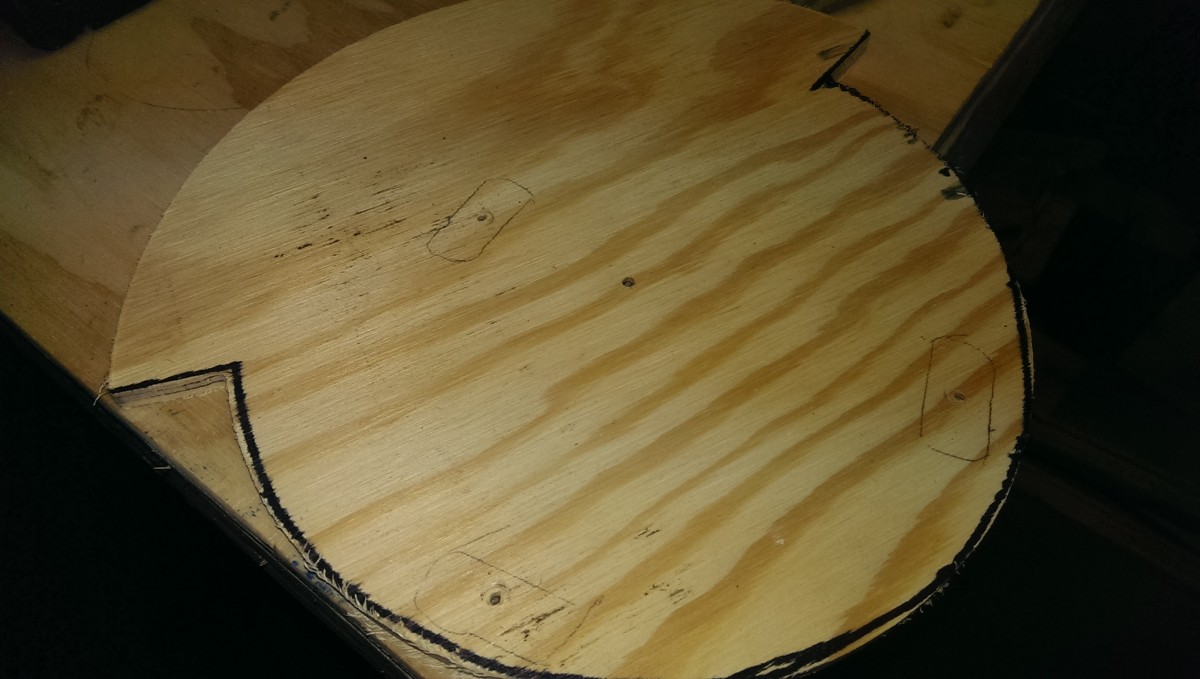
Cutting the Inner Lid

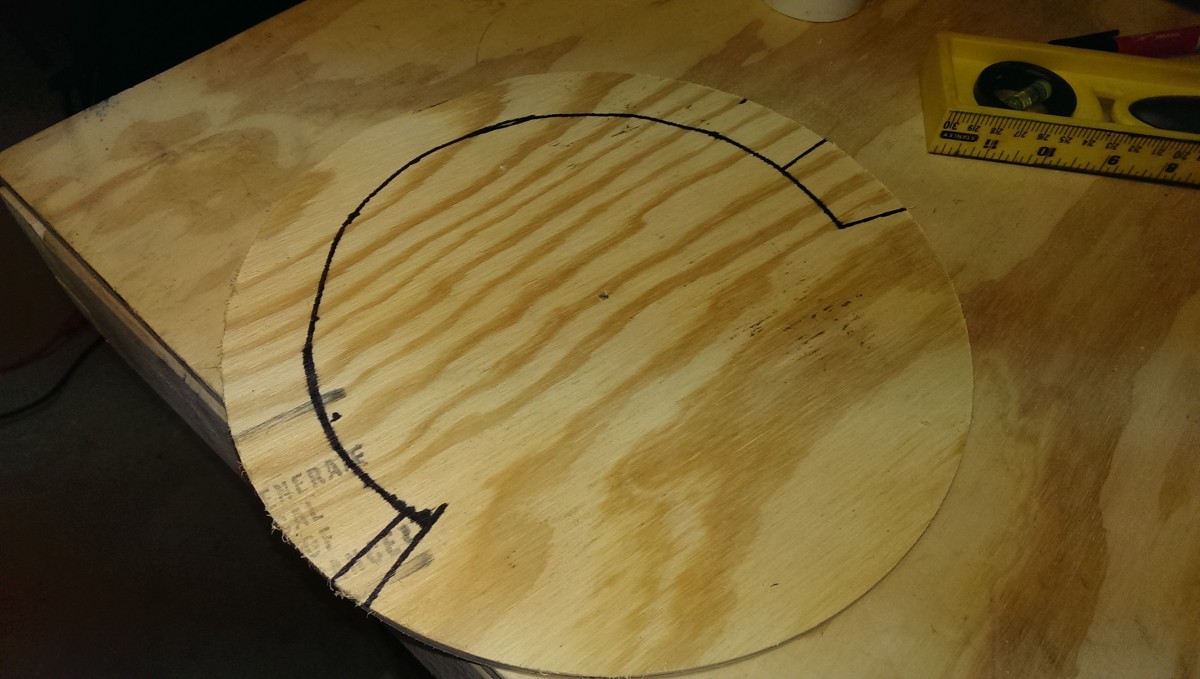
Traced top lid to start it cut out identical to bottom
Top vs bottom lid after completion
Perfect fit
Now we need a circle to glue to the top lid that fits just inside the bucket. This helps stabilize and hold everything in place. The procedure is largely the same: I traced the top lid on some plywood, rough cut it with a bandsaw, and used the router circle jig.
At some point, you’ll have a circle the same size as the top lid. I simply kept making the circle smaller past this point, and test-fitting it against the bucket. Once it fit right inside the top of the bucket snug but not tight, mission accomplished.
Cutting the Bottom with Baffle

Cutting the bottom piece starts the same as before
It should drop lower in the bucket than the last circle
As Phil Thien says in his design, the baffle is a critical piece of the separator. This allows dust whipping around the inside of the separator to drop into the bucket and not get picked back up. I started by making a slightly smaller circle than the last one. This needs to be able to drop about 4-6 inches down into the bucket. The procedure is identical to the last one.

I should really buy a compass
This is loosely a semicircle
Part B here is to cut the baffle, which is basically a semicircular cutout that goes around approximately 2/3 of the circle. Obviously just use a compass if you have one, but I do not, so I just drew a bunch of dots 1″ from the edge and guessed at a semi-circle. The good news is that accuracy is not at all critical here: like before, I used the circle jig to finish this up and make it perfectly circular.
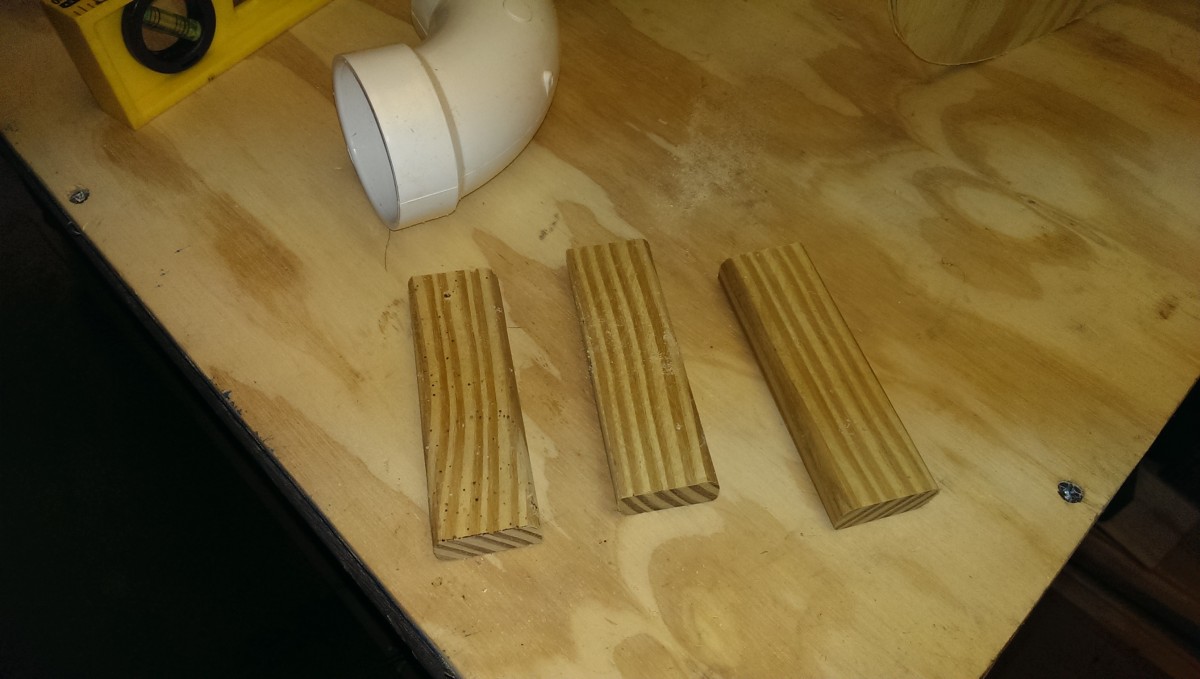
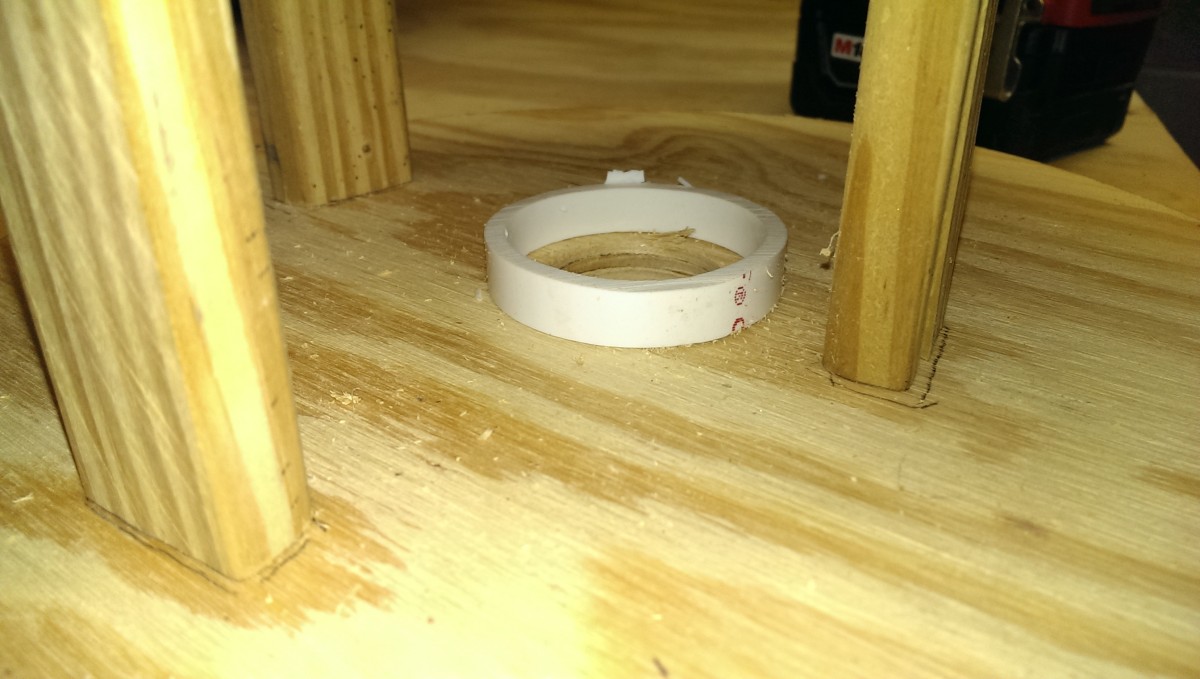
Cut 3 support pieces
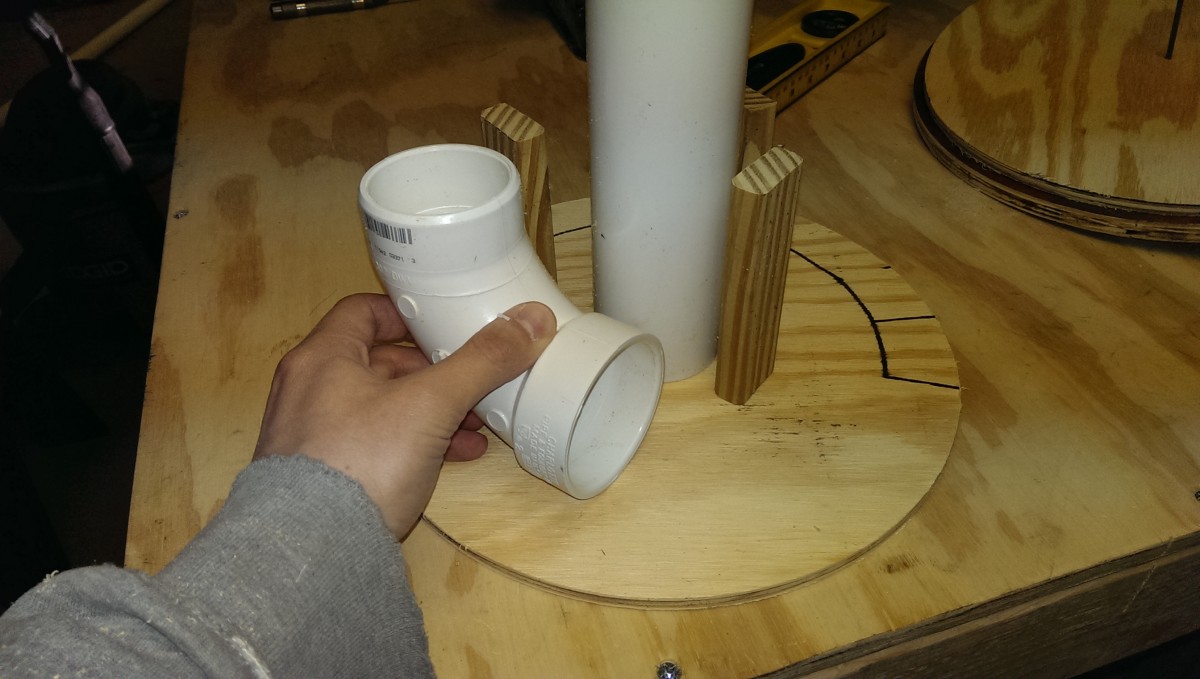
Check how the pieces will fit before cutting
Next, I cut 3 scrap pieces of 1×2 (size isn’t important) to the same length to use as supports between the bottom baffle and the top lid. The goal was to eyeball how everything would fit prior to cutting the baffle, in case I needed to make changes. I also had the 2″ PVC elbow I was using to test fitment, along with some 2″ straight pipe that would later be cut to size. Thien’s design showed the elbow sort of pointing in the area with no cutout, so I went ahead and did something similar, mostly just eyeballing.
Rough cut the baffle with a bandsaw or jigsaw

Baffle after finishing on router table
At this point, the procedure is the same as before. I simply used the circle jig on the router table to incrementally cut the baffle until it was a nice, perfect circle. As you can see, my improvised semicircle as drawn was not quite a semicircle, but it didn’t matter – it was really there as a bandsaw guide, and the circle jig took care of the rest.
Installing the Supports to the Baffle
After marking out the support locations and drilling pilot holes in the center
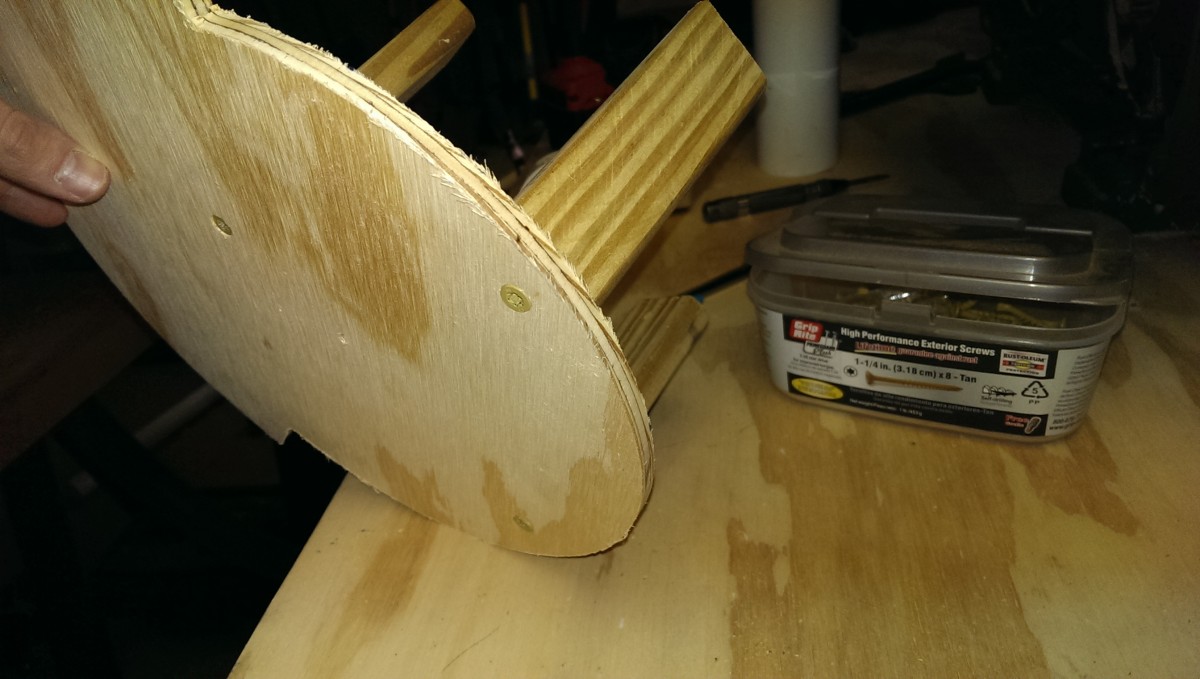
Glue and screw the supports to the bottom baffle
The next step is to get the supports attached to the bottom baffle. Based on the positioning done earlier, I had marked out where the supports were supposed to go. I drilled pilot holes through roughly the center of the markings and into the supports themselves. Then, I just glued and screwed them in place.
Gluing the Top Lid
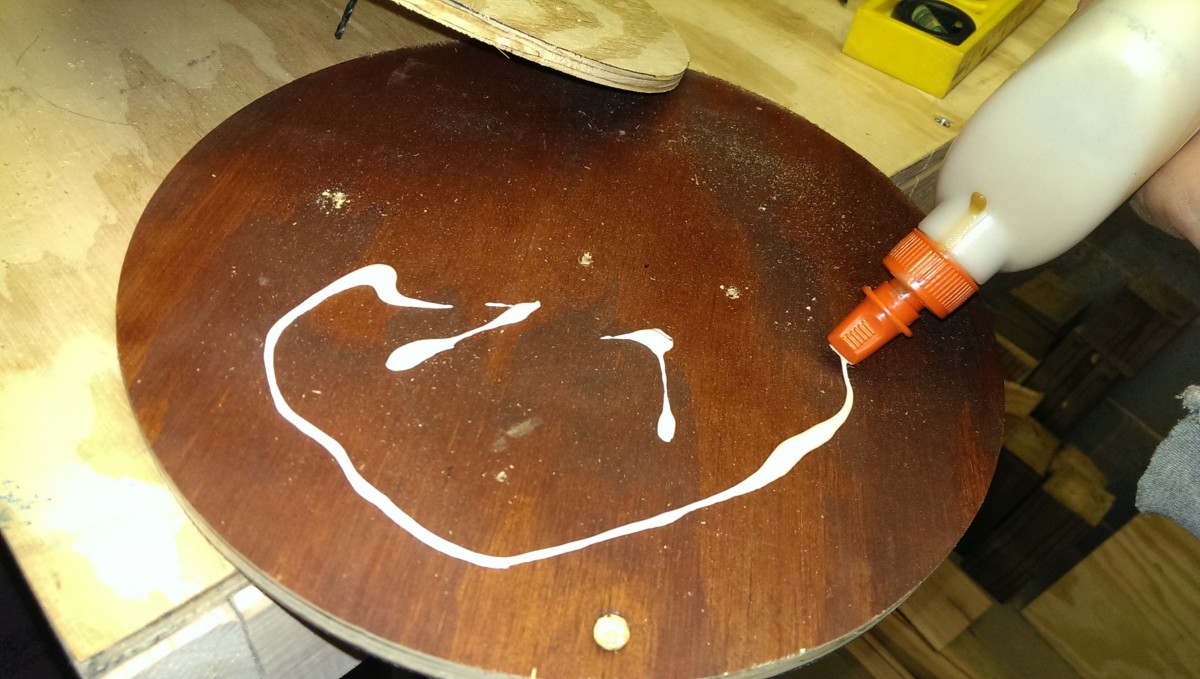
Applying glue to top pieces
A long bit or similar can hold all of the pieces exactly straight
The top lid first needs to be glued into one piece, exactly straight. This is easy to accomplish by slightly enlarging the nail hole used for the circle jig earlier, and putting a drill bit or similar through both pieces. I then allowed this to dry before going on to the next step.
Connecting the Top Lid to the Baffle
Attaching the top lid to the baffle
Connecting the top lid to the baffle now becomes a simple matter of using the long drill bit from earlier through the center of all 3 pieces to make sure everything is straight. Then, simply apply glue to all 3 supports, drill pilot holes, and screw the top lid into the supports.
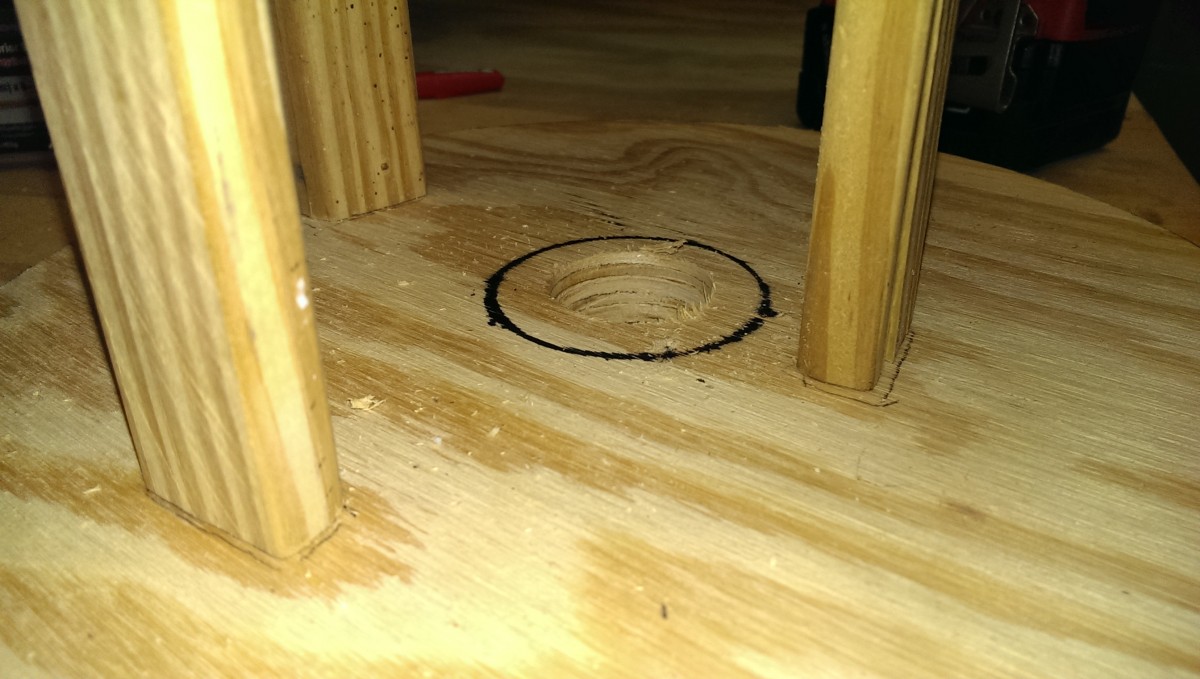
Creating Holes for Vacuum Hoses

Using the hole saw bit for the initial holes
Now you can use a hole saw bit to make two holes for the inlet and outlet ports. The ideal solution here would be to simply get a hole saw bit as big as the PVC you intend to put through the opening. This is what you should absolutely do. What you’ll do instead if you’re as cheap as I am, is use the one bit you happen to have in the shop, and then enlarge the hole on the router. Do not do this, it was stupid.
Tracing the outside of the PVC
Outline of PVC, ready for router table
As you can see, after using my too-small hole bit, I traced a small section of PVC. I was able to take this to the router table and enlarge the whole freehand. Unless you’re really good at routing, again, do not do this. It turned out OK, but I would have gotten a much nicer hole if I had simply bought a bigger bit.
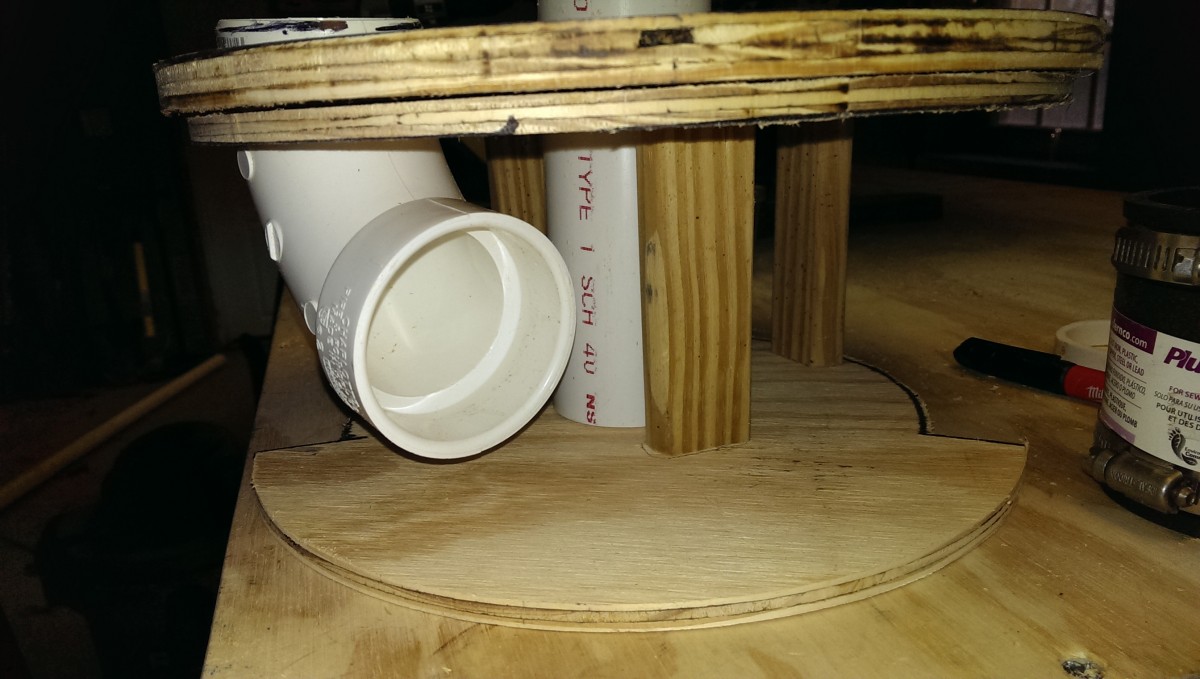
Thien cyclone mostly complete

Top view after adding screw to hold straight pipe
Do that twice, though, and you’re mostly done. I was able to fit a 90 elbow + 2″ flexible coupler and a piece of straight pipe on. I put a screw in the straight pipe to hold it a couple of inches away from the baffle. I also put a screw through the elbow piece to hold it at a constant angle and keep it from moving around.
At this point, you’ve got a basic cylone separator together. You could sit this in your bucket, hook up the pipes, and call it good. As I stated, though, I wanted to have it sit on top of the shop vac so I could roll it all around as one unit. That meant…
Attaching to the Shop Vac

These supports fit snug in the shop vac handles
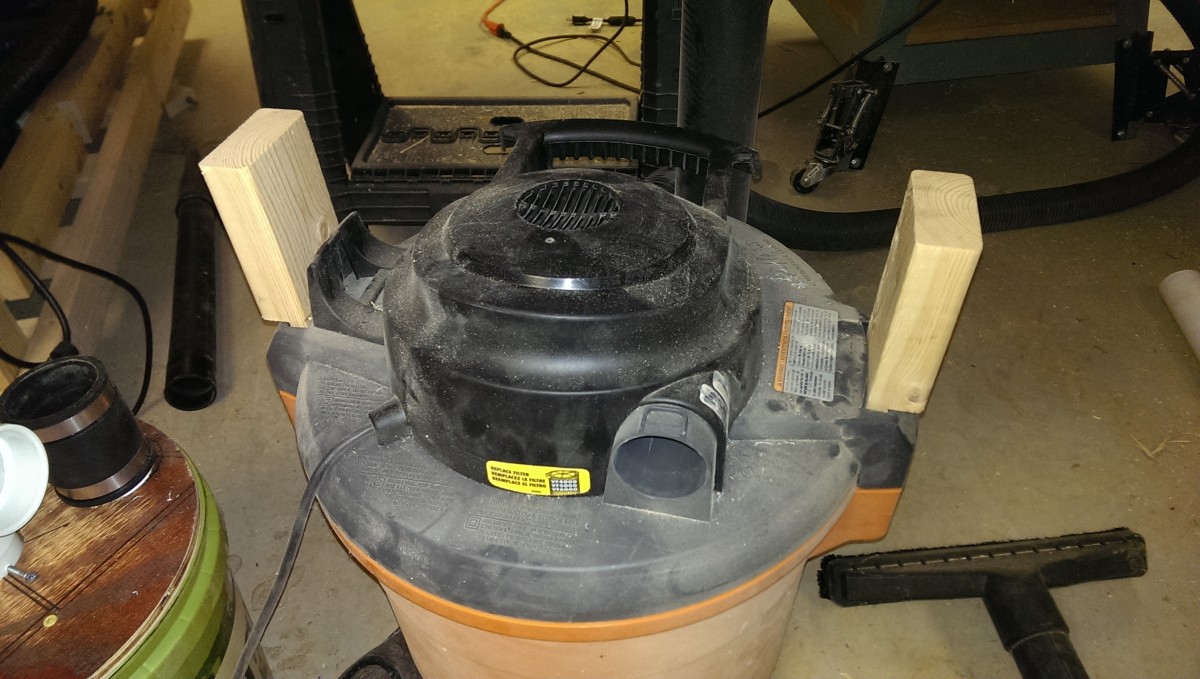
Supports done
I wanted to have it be removable as well, of course. I ended up discovering that putting a huge rabbet on some scrap 2×4 let me just slip the wood into the holes near the shop vac handles. With one of these on each side, I could just screw some more 2×4 to it, and have myself a handy removable base for the separator.
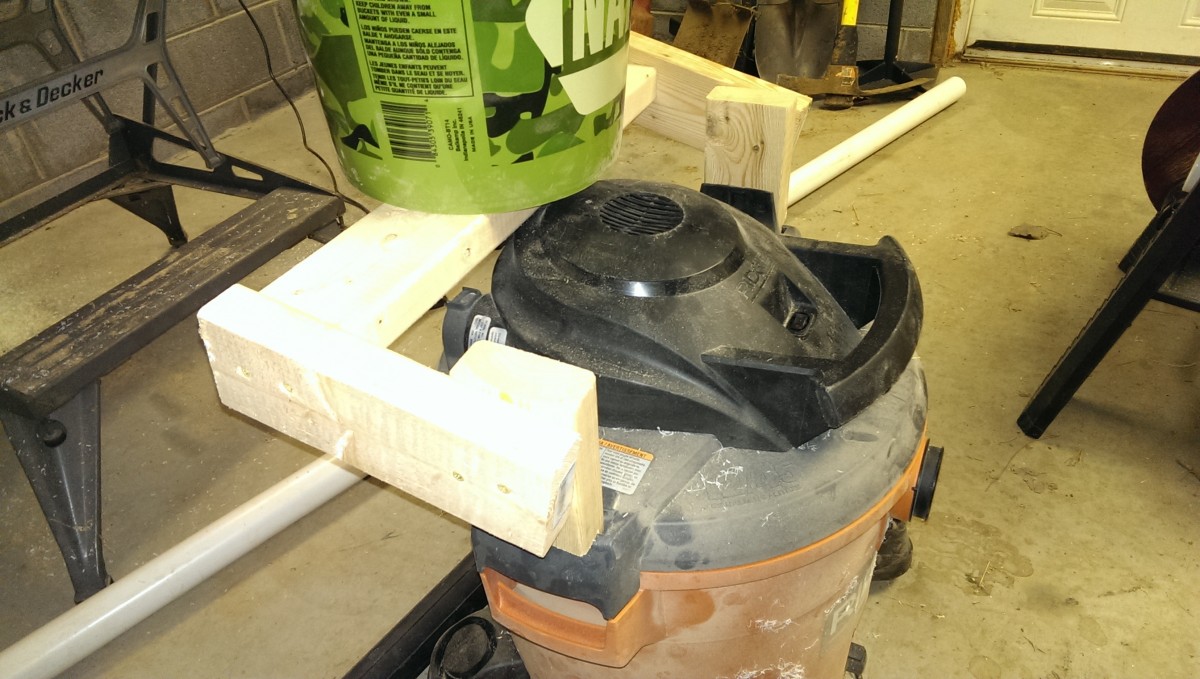
Support shot #1
Support shot #2
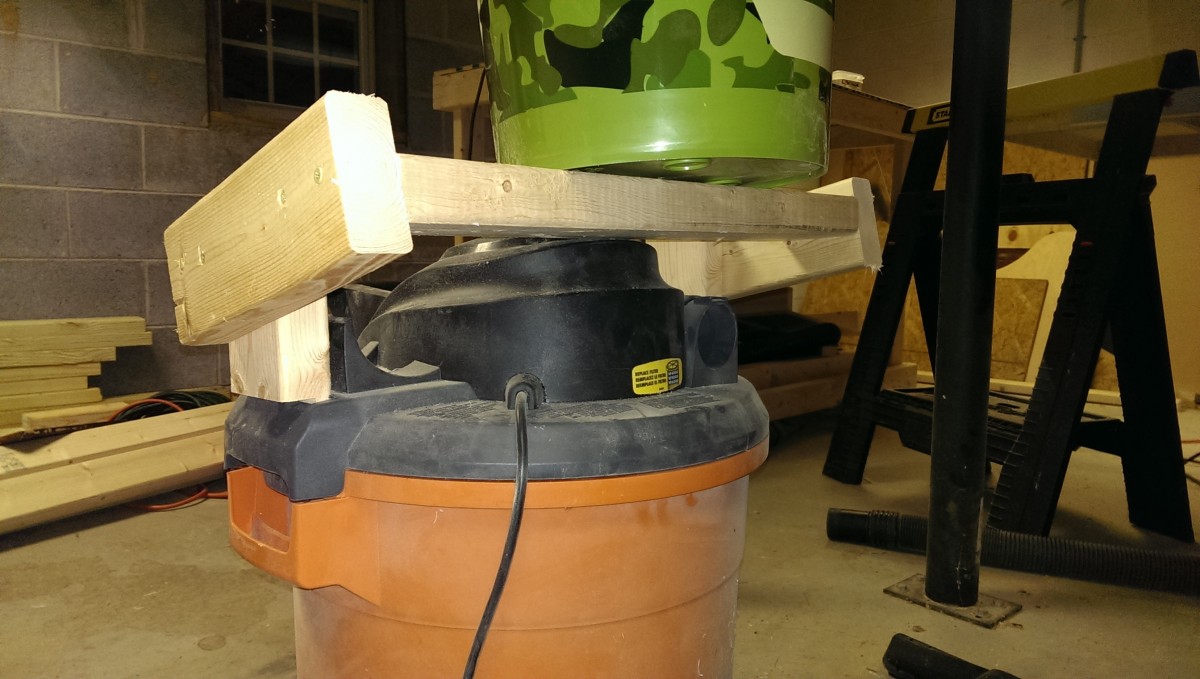
I ended up just screwing another couple of 2x4s to these supports, and then putting one screw through the bottom of the bucket into the support. When I want to remove the bucket to empty it, this support structure comes with it, but so far it has worked pretty well. It also took two seconds to throw together. It’s worth noting that I intentionally built it so that the bucket is set back to where it is supported by the shop vac, but doesn’t cover the fan.
Connecting It Up

One end of the elbow had to be trimmed a bit
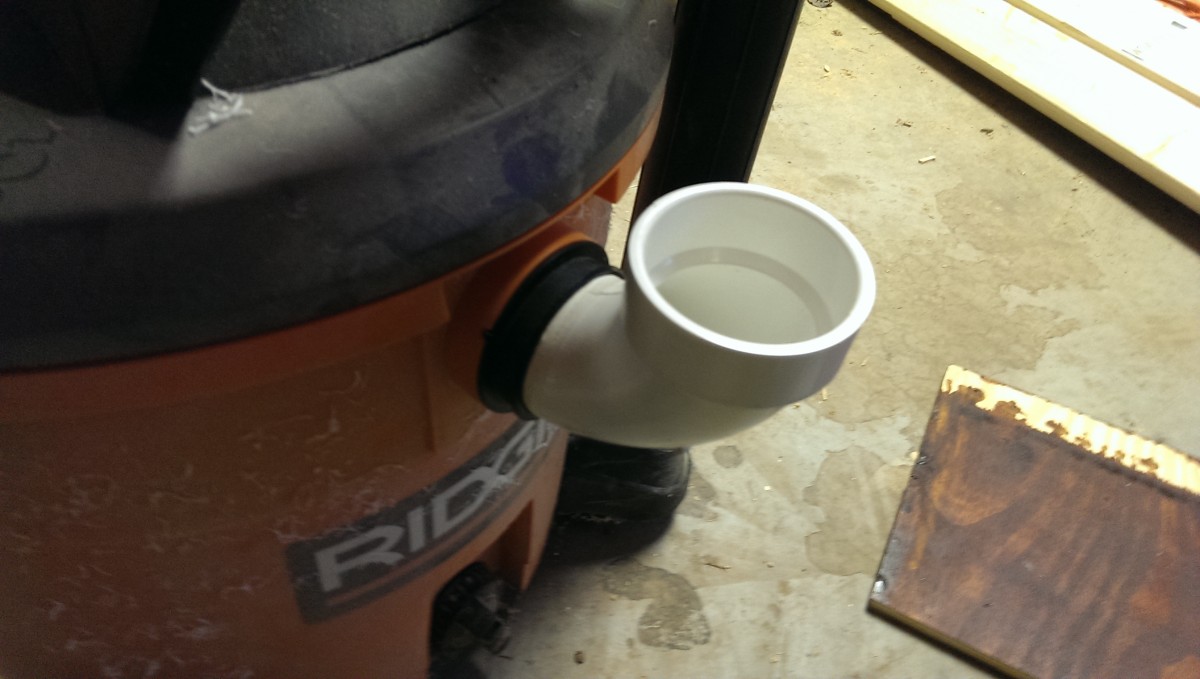
Elbow in shop vac
Now it was time to plumb it. I ended up having to shave down one of the elbows just slightly to get it to fit into the shop vac. This was quick to do with a router bit in the table, but a sander might have worked too. Alternatively, I could have looked for a better fitting to use, but I didn’t. Oh well.
Finish
Completed dust separator mounted to shop vac
The rest was a simple matter of cutting and connecting some PVC, which should be easy peasy if you ever had legos. The center hole in the separator connects to the shop vac, the elbow outer hole connects to the hose. When I take the shop vac out, i just pull the pipe out of the separator and turn it to the side, then lift the bucket. I could probably find a better system, but it works well enough so far.
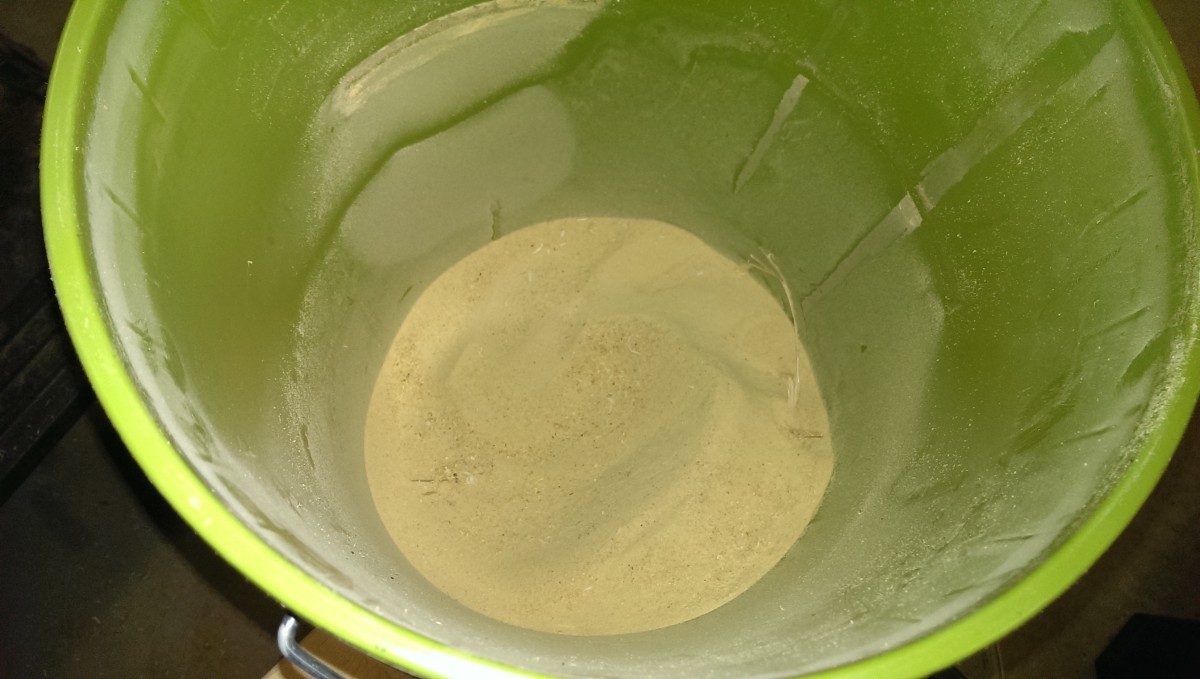
It works
The real test was seeing if it actually picks up dust. As you can see, it does a great job. After less use than you’d think, I had an inch or two of sawdust that made it into the bucket rather than my expensive shop vac filter bag or my lungs.