How to Make a Picture Frame
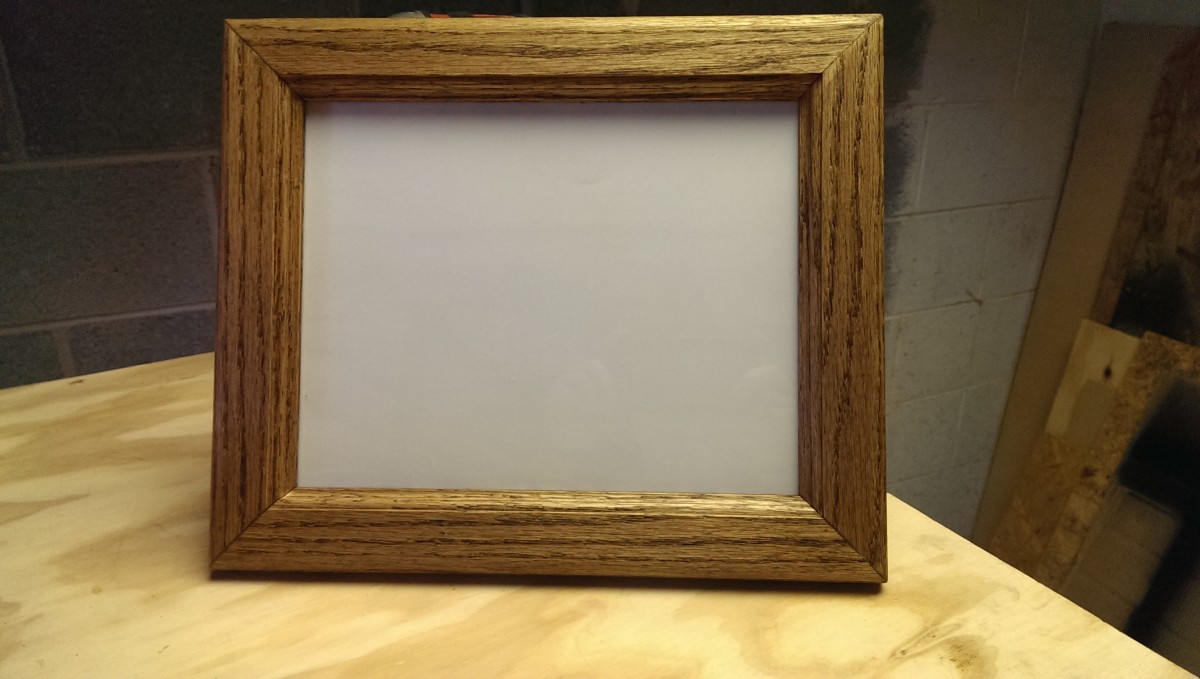
Here’s what the end result looks like
I wanted to do something simple with my new router and router table extension for my table saw, as a gift. A nice oak picture frame seemed like a good project. This can be done easily in an afternoon and really only requires a table saw and a router table.
Materials

I got some oak, picture frame glass, and a backing board with stand
The materials required are pretty basic. First, of course, pick a picture frame size; I went with 8×10. You can pick up standalone replacement glass for standard sizes at just about any crafts store. If you wanted, you could also cut up some acrylic from a hardware store instead.
As far as a backing board, I looked at making one, but it wasn’t worth it. Getting some appropriate cardboard and hinges cost more than simply buying an easel back from http://craft-inc.myshopify.com/ for $1.91 each + shipping, so I went with that. I also had to get the screw-on hooks to hold the backing to the frame; there’s a hundred-pack on Amazon for a few bucks
I also got the straightest, most flat piece of oak I could find. This was before I had a jointer or a planer, so I was relying on a 4-sided surfaced piece of wood, which ended up working out fine. There’s no real reason to pick oak – any wood will do, even including poplar or some other sort of softwood.
Cut and Miter the Oak
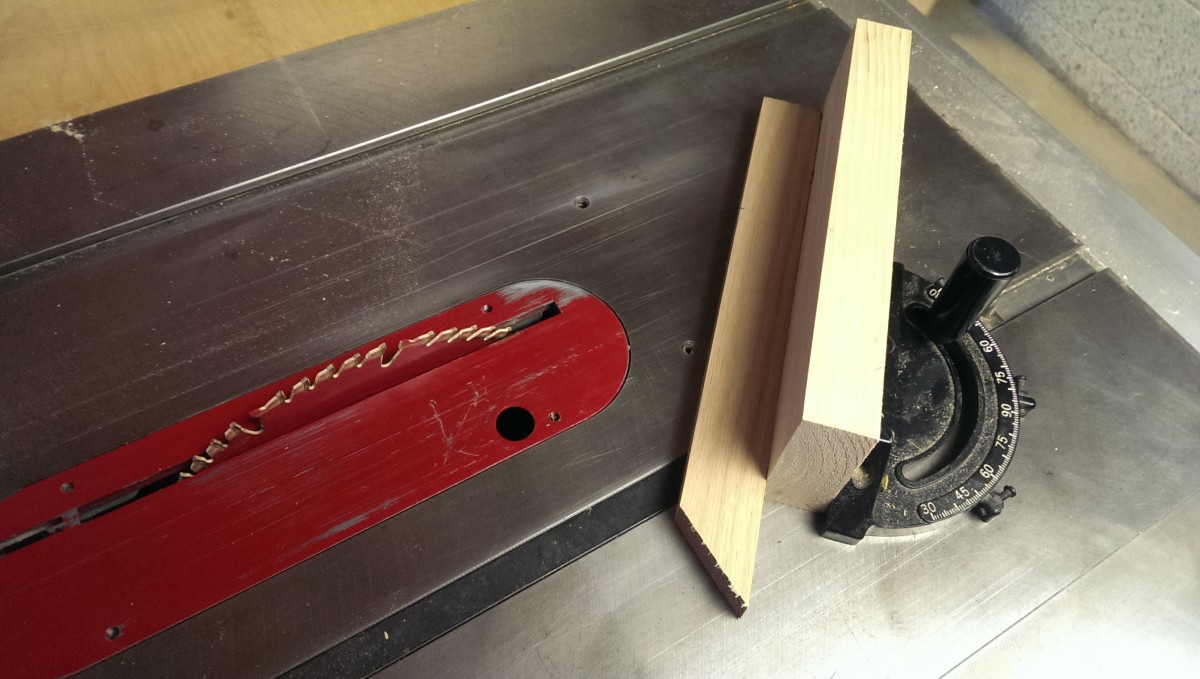
Be sure to use a support on the miter gauge for safety
I knew the pieces had to be big enough that the side edge was maybe 1/4″ smaller than the piece of 8×10 glass, so I just picked some dimensions to make the outside of the frame 9×11 or so. Then, it was simply a matter of using the miter gauge to cut the miters required. A protractor is useful to verify the cuts are really 45 degrees; if it’s off at all here, it will throw the frame out of square.
I’ll also note that I simply did butt joints here, which is gluing the mitered edges directly together. This is the weakest joint you can make, and a lot of people will use a biscuit or some other method for a stronger frame. However, modern wood glue is really strong stuff, and this frame is hardly going to have any stress on it, so I figured a butt joint was enough for this project. If you want to do a biscuit, you could cut as I did and then biscuit the faces together. If you want a more complicated joint, though, you should of course figure that out before making these initial cuts.
Also, be sure to screw or clamp some extra wood to the miter gauge, and clamp the piece to be cut to that wood. This ensures that you have a solid grip on the piece to be cut and keeps your hands away from the table saw blade. Even better would be an accurate 45-degree crosscut sled; I would definitely put such a sled together if I were going to make more than one of these.
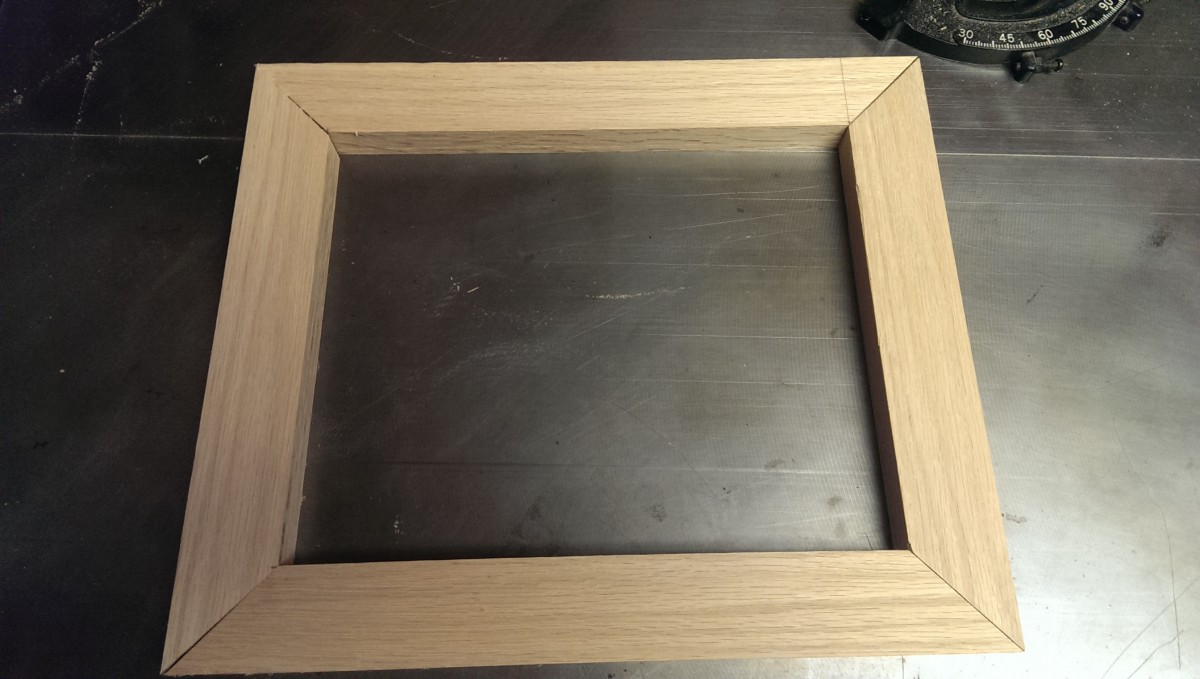
Testing that they’re lined up and square
After doing your best to cut all four even and square, you can then recheck how they came out by fitting them all together. I got it close on the first attempt, but as you can see, it isn’t quite square. Fortunately, since the frame is much bigger than the picture anyway, there is a bit of room for error. I simply double-checked my angles and trued it up until it came out right.
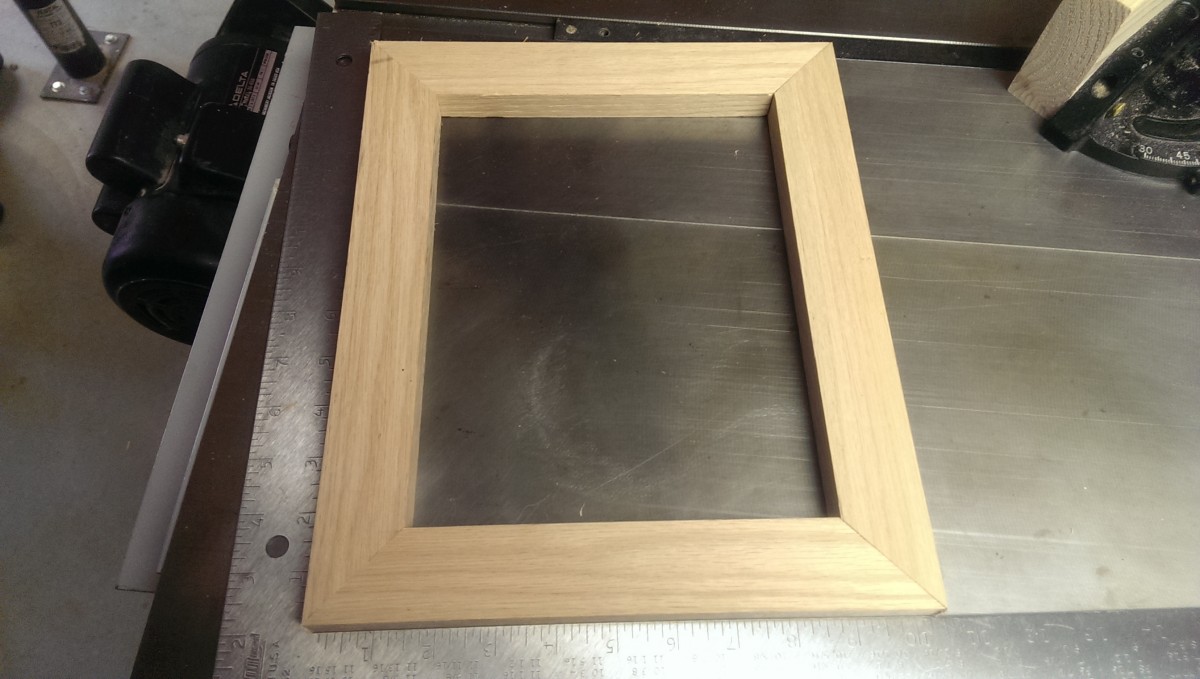
Now it’s nice and square
It turned out my miter gauge wasn’t quite at a perfect 45, but another try got it right. The resulting frame is a fraction of an inch smaller, but that doesn’t really matter. These are the most precise cuts that will have to be made on this project. Since no routing has been done yet, there’s no harm done. With that accomplished, it’s time to make it look nice.
Picking an Edge
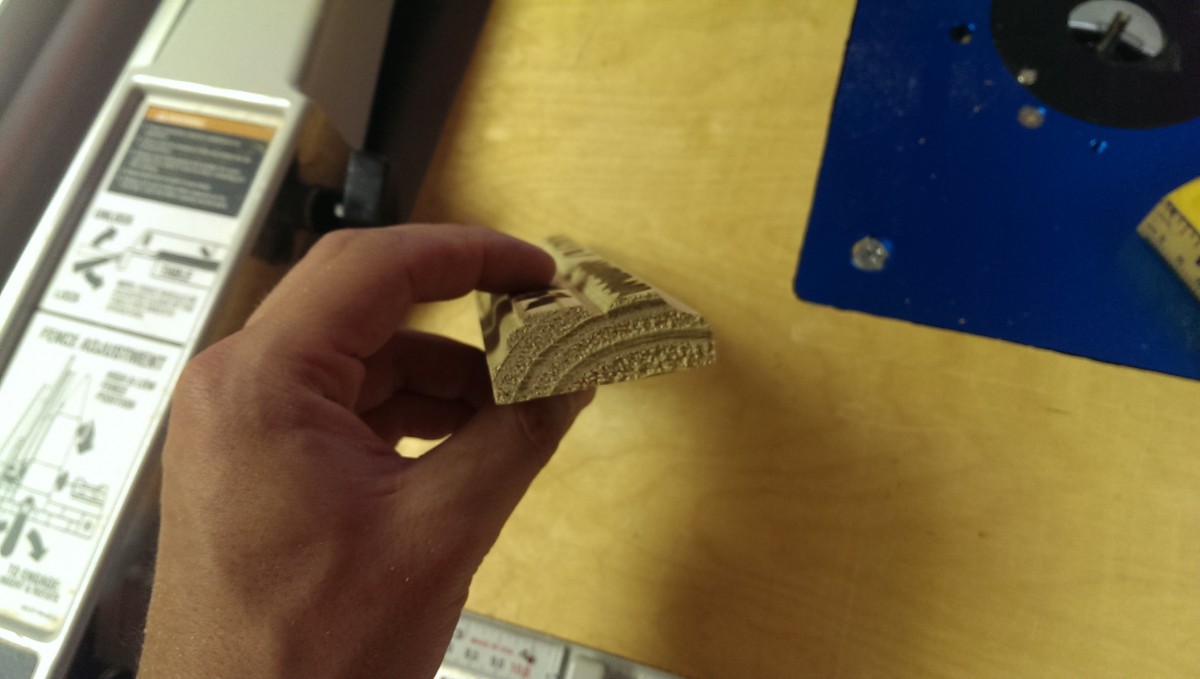
I ended up going with this edge profile
The next step for me was using some scrap pine to figure out what I wanted the frame to look like. My starter set of router bits is
the 15-piece 1/2″ shank set from MLCS
Routing the outer edge
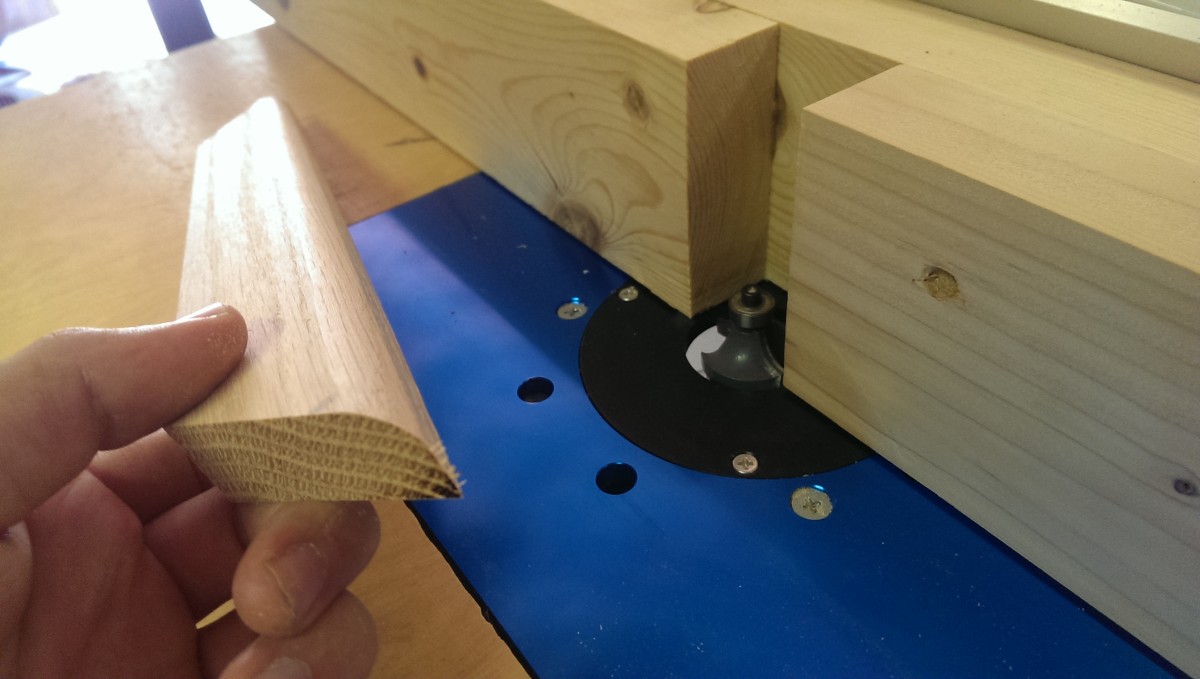
Rounded outer edge after routing
Once I knew which bits I wanted to use, and how I wanted my picture frame edges to look, I was ready to start on the real thing. It was important to pick which edges I routed first. If I had started with the roman ogee bit I was using on the inside, I would have made an unstable surface for this roundover edge.
One thing to note is that oak is a hardwood, and when routing any hardwood like this, it’s wise to do multiple short, 1/8th-inch or so passes. This prevents you from stressing or heating up the bit or router, especially if you only have 1/4″ shank bits. It also helps to control tear-out. If this is your first time dealing with hardwood, like it is for me, it’s worth remembering how much harder the tools have to work versus cutting pine and other softwoods.
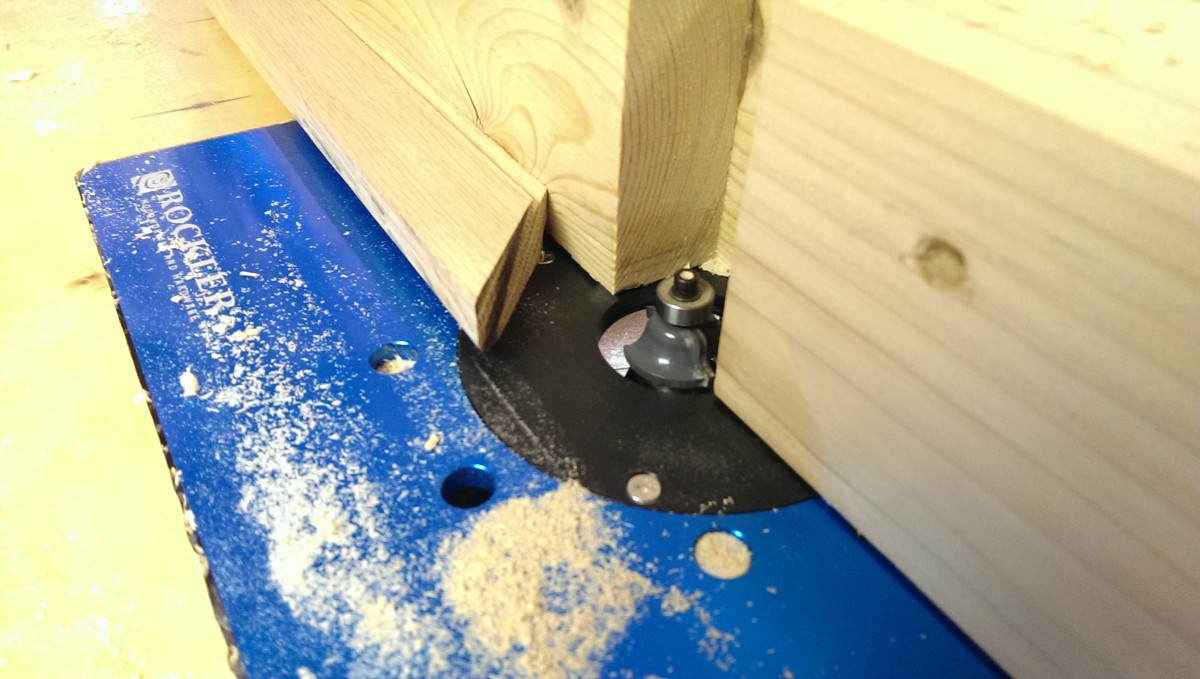
Routing the Picture Rabbet
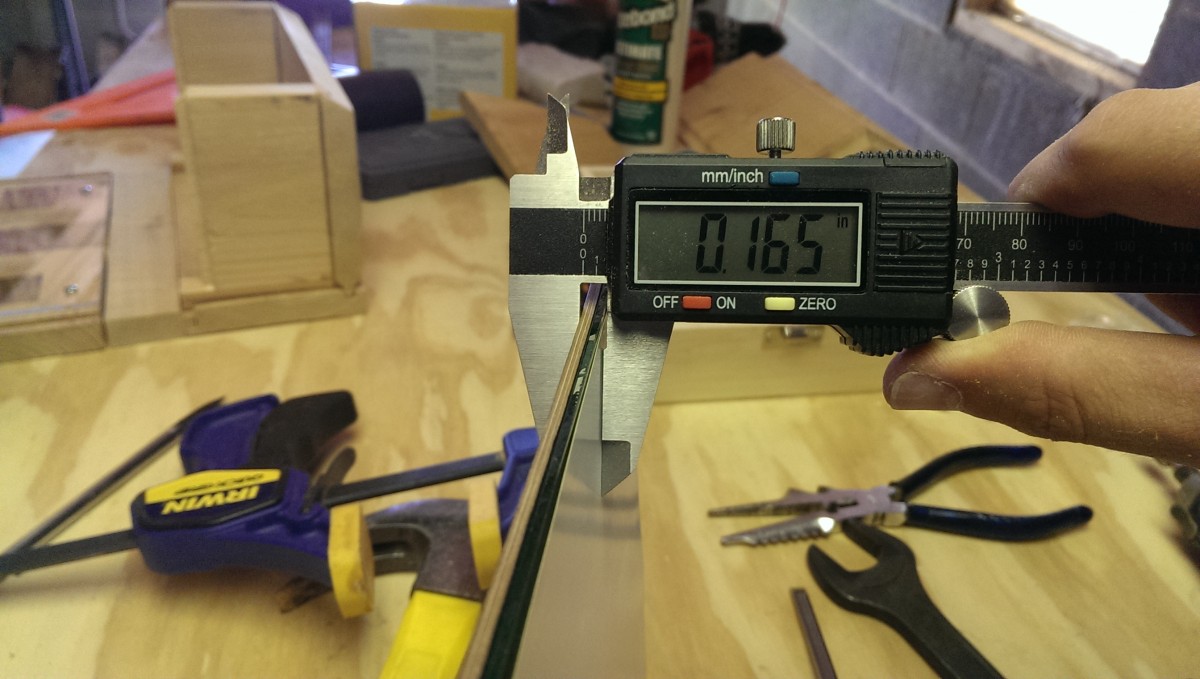
You can use a digital caliper to get glass and backing thickness
My next step was to cut a rabbet in the back inside edge of each piece to provide a space to lay the glass, picture, and backing board. The first step was to figure out how deep the rabbet should be. My goal was to have the backing board, when laid on top of the glass, be right about even with the back of the picture frame. This makes the holding clips fit in nicely later on. I simply used a caliper to measure the total thickness of material that would be sitting in the rabbet.
That measurement tells you how high to raise the router bit / how deep to cut the rabbet into the wood. You also need to figure out how far from the fence to set the router bit / how wide to make the rabbet. You can figure this out by simple math: measure the inner dimensions of your picture frame after cutting and squaring it in the last step. You know the glass is 8×10. The difference between the two tells you how wide to make the rabbet so that the glass can lay comfortably in the frame with maybe a fraction of an inch to spare.

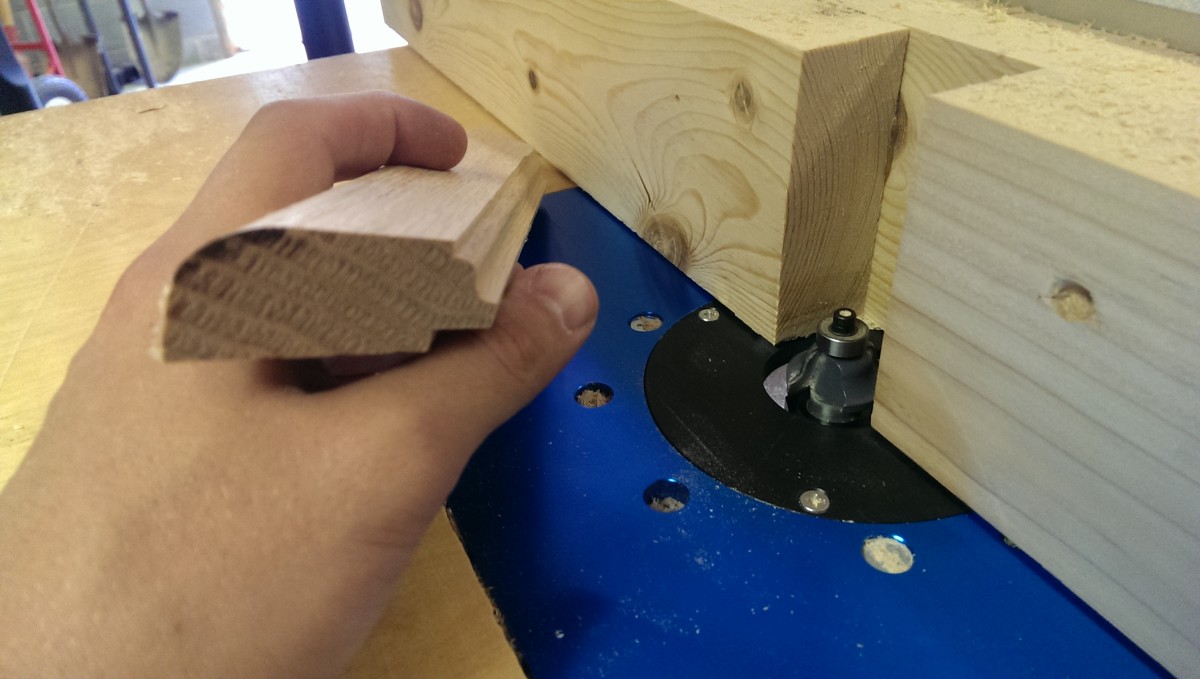
Cutting the rabbets for the glass
Testing the fit of the glass
Doing the cuts is much the same as with the roundover bit. I used the router table for this, but you could also use a dado stack if you have one. Again, don’t take off too much material at once. Of course, you should err on the side of not taking off enough material in this case, and then test the fit after cutting. You can always skim off a little more. The glass is so clean it’s hard to see, but it’s in there!
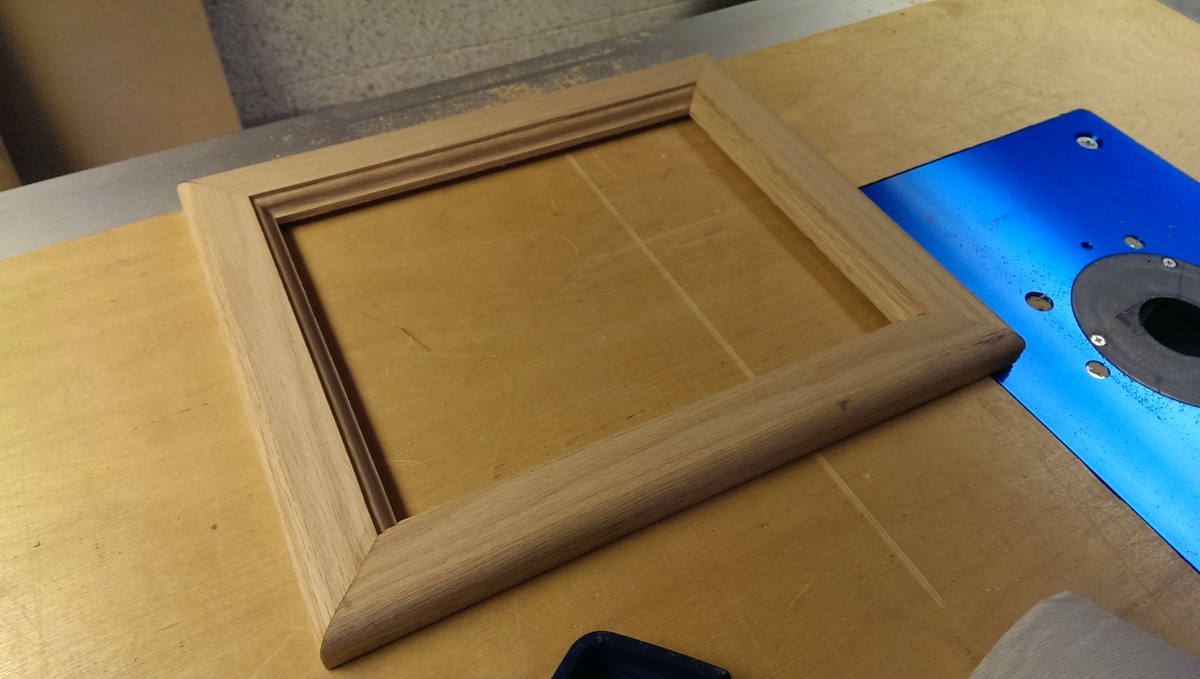
Routing the inner decorative edge
Using a roman ogee bit on the inner edge
Finished inner edge
Then, the last step for me was this inner roman ogee edge. I saved it for last because it removes so much material from the face after the cut is done. I wouldn’t want to do too much more routing after this cut, since the piece’s face is now quite narrow. There is a decent enough amount of wood left between the roman ogee and the backing rabbet for support as well.
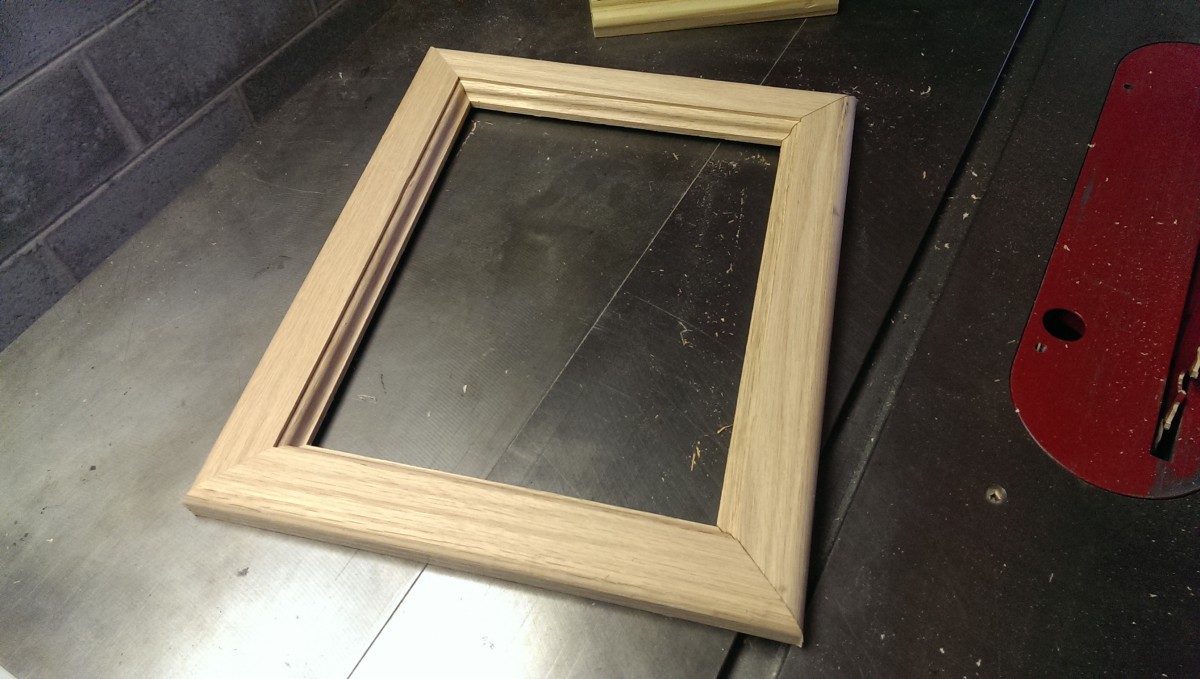
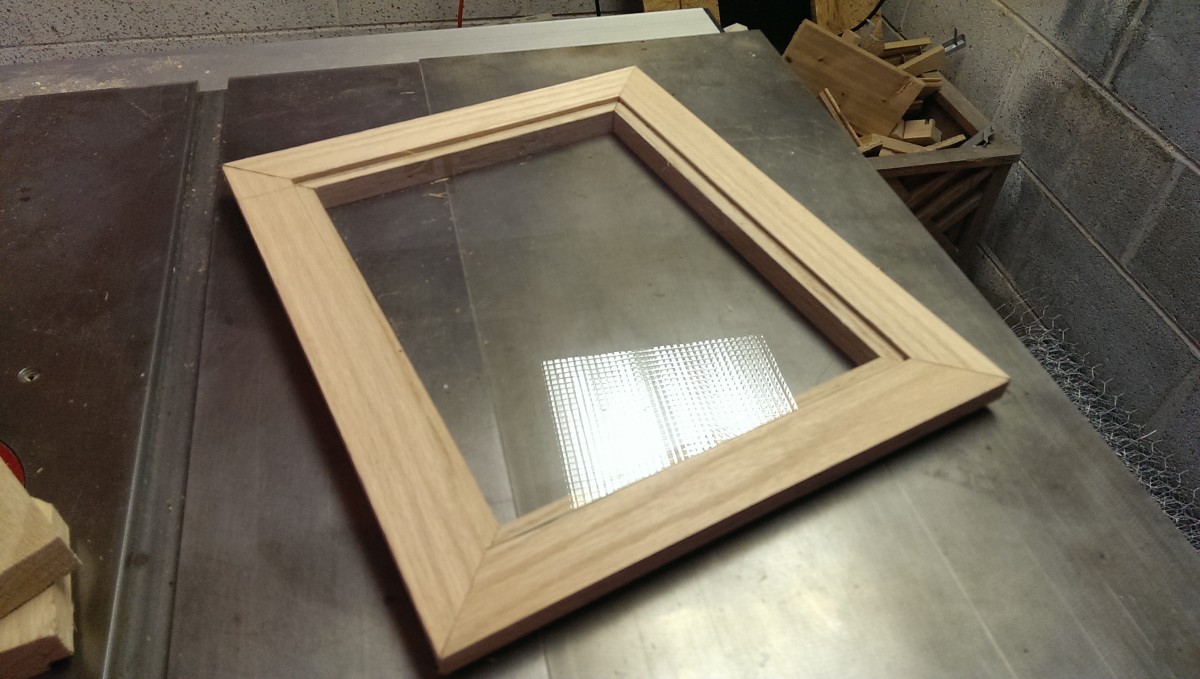
Tada, final look
With that accomplished, the routing is complete, and this is what the picture frame is basically going to look like. This is the last chance to double-check fitment, square, etc before gluing up and staining.
Gluing Up the Frame
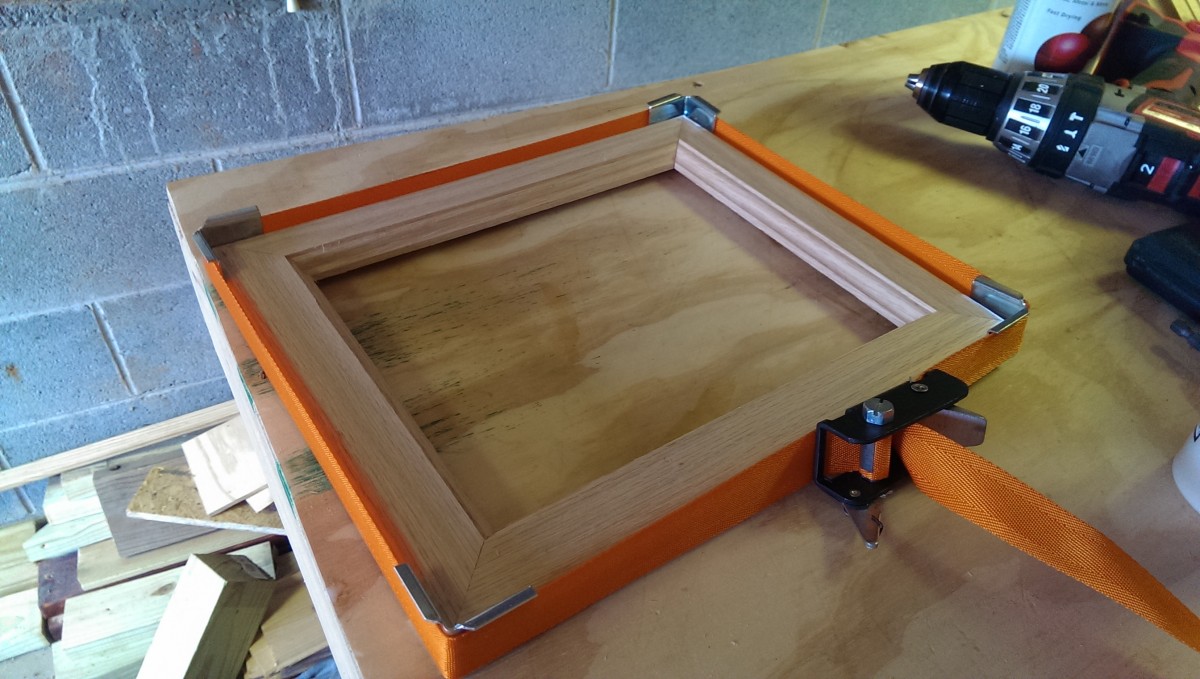
This one time at band clamp, I glued up a frame
As I said earlier, I chose to simply do butt joints on the mitered edges. You can get these band clamps for a glue up like this very inexpensively, or even use a ratcheting tie down as long as you have some hard plastic or metal for the corners as pictured. I first glued it, clamped it most of the way, and then made any final adjustments until it was totally square, the edges jointed smoothly, and it was flat.
Ready for some light sanding
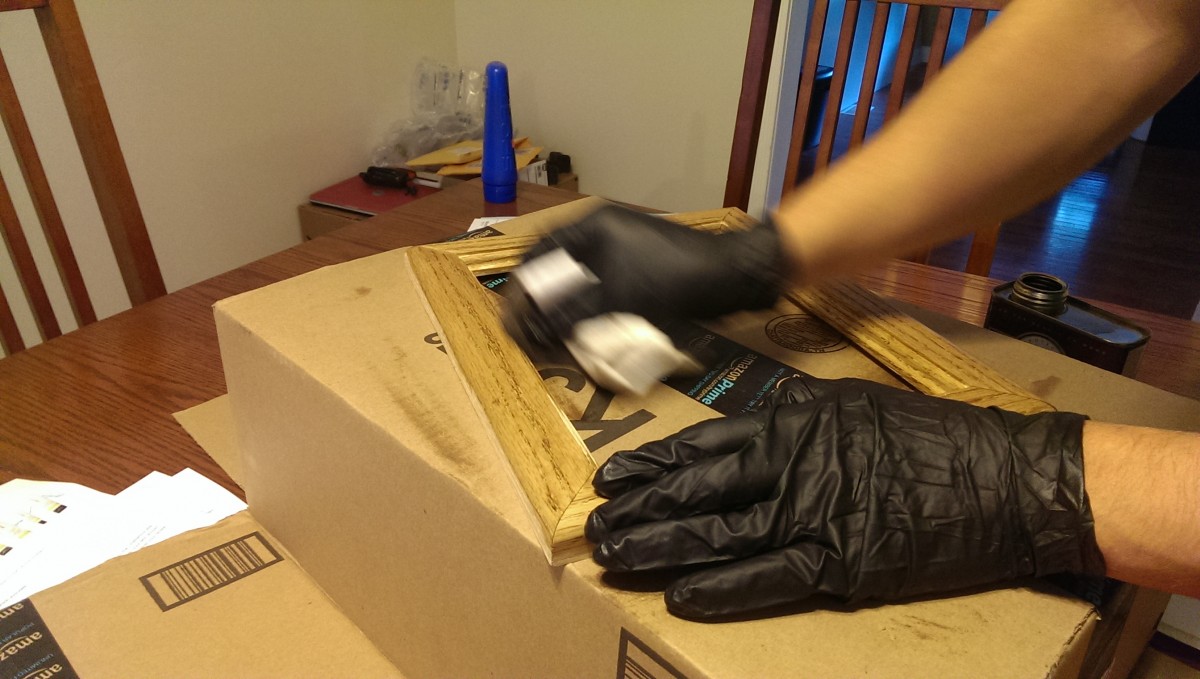
After letting it dry overnight, I was able to inspect my work. It came out square and the edges were nearly seamless, so I was happy. I used some fine grit sandpaper to finish smoothing the wood out. I especially focused on the seams on the 4 corners, making sure they were perfectly flush. A little sanding made them smooth enough that you couldn’t really feel where the wood joined.
Finishing
Applying the stain
Letting it dry on little plastic risers
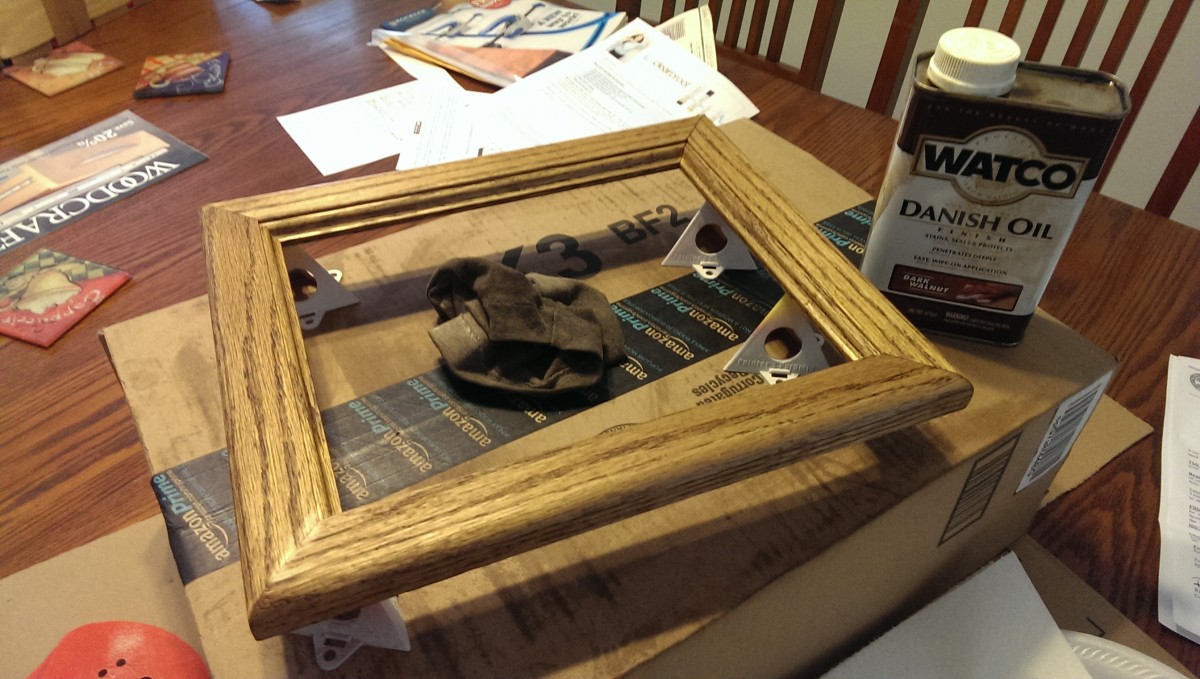
Oak is an open-grain wood, so it has very large pores to soak up stain. Some types of finish will soak in too much and not seal the wood. What I don’t know about staining could fill a book, but some googling revealed that a quick and easy finish that works with Oak is Watco danish oil. This was the only option that was immediately available at the local store, as well. The good news is that it’s an easy, quick dry (overnight), one-application sort of finish. It apparently can fade in direct sunlight over the course of a few years, but I knew this would be displayed indoors.
Applying it is as easy as can be. You simply wipe it on, let it sit for 20 or 30 minutes, and wipe it on again, then let it dry. I am fairly pleased with the result, although it isn’t as glossy or well-sealed as if I had applied some kind of lacquer or polyurethane. I went with the “dark walnut” color, and it also turned out a little lighter than I had hoped.
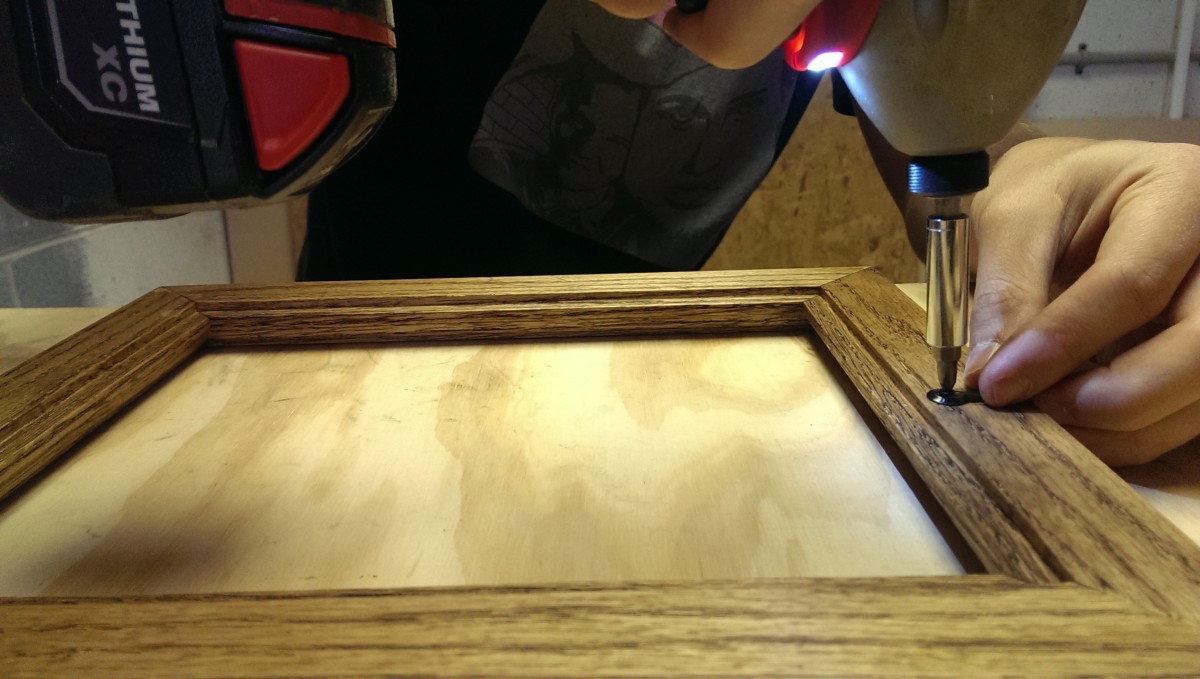
Adding Backing Holders
Installing backing holders
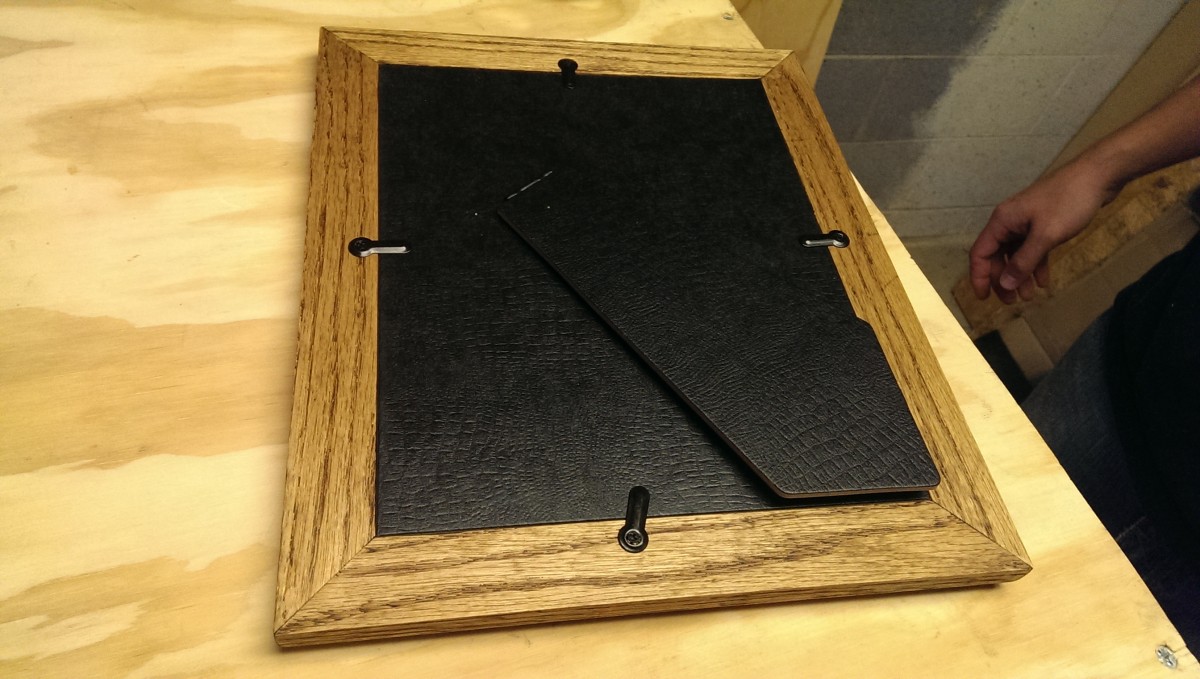
Backing holders installed
The last step is something to hold the glass, frame, and backing to the picture. As mentioned before, you can buy a bucket of these on Amazon for next to nothing
Then, I simply screwed them in gently. You don’t want to go full throttle on the impact driver for obvious reasons. I just gently touched the trigger and got them a little snug. They need to be loose enough to be able to turn, but tight enough that they don’t turn on their own.
Finished
Done
And that’s it. It’s certainly a serviceable picture frame, and it is a good introductory project to using some of these tools.