Adding a TBC to a 2011 F150
My 2011 F150 didn’t come with the factory TBC. Here’s how I added a Tekonsha to the factory wiring. For the record, my truck had a factory 4 pin wiring harness run to the rear bumper, but no hitch and no 7 pin harness. I added the hitch assembly, the 7 pin harness, and the Tekonsha
A 7 pin harness has 7 wires, as the name implies. Left turn signal, right turn signal, hazard lights, brake lights, 12v keyed power (optional, used for charging a battery on a travel trailer typically), TBC signal wire, and ground.
A 4 pin harness has 4 wires. Left turn signal, right turn signal, hazard lights, and brake lights.
The 7 pin harness I bought plugs directly into the factory 4 pin to save you the hassle of having to run those 4 lines. That leaves you just 2 wires you have to run, at a minimum, and the 12v keyed power if you choose to.
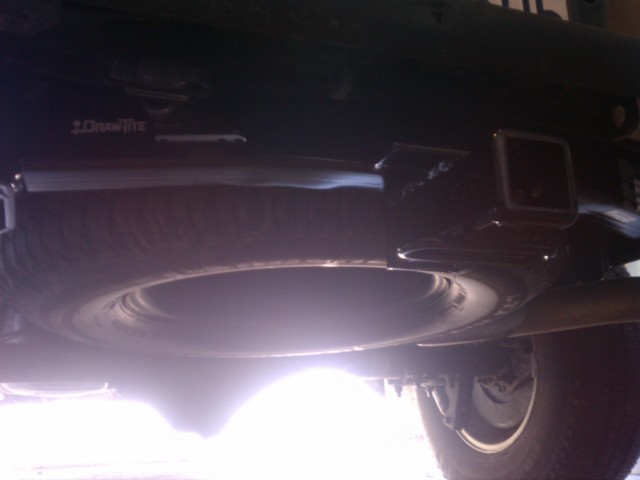
Sorry for the crappy picture here but this shows the new Draw-Tite hitch I added to my truck. I am quite pleased with this hitch. Everything bolted right up and it includes the bracket for the 7 pin harness that I added later.
Step 1 – 12v Keyed and Ground
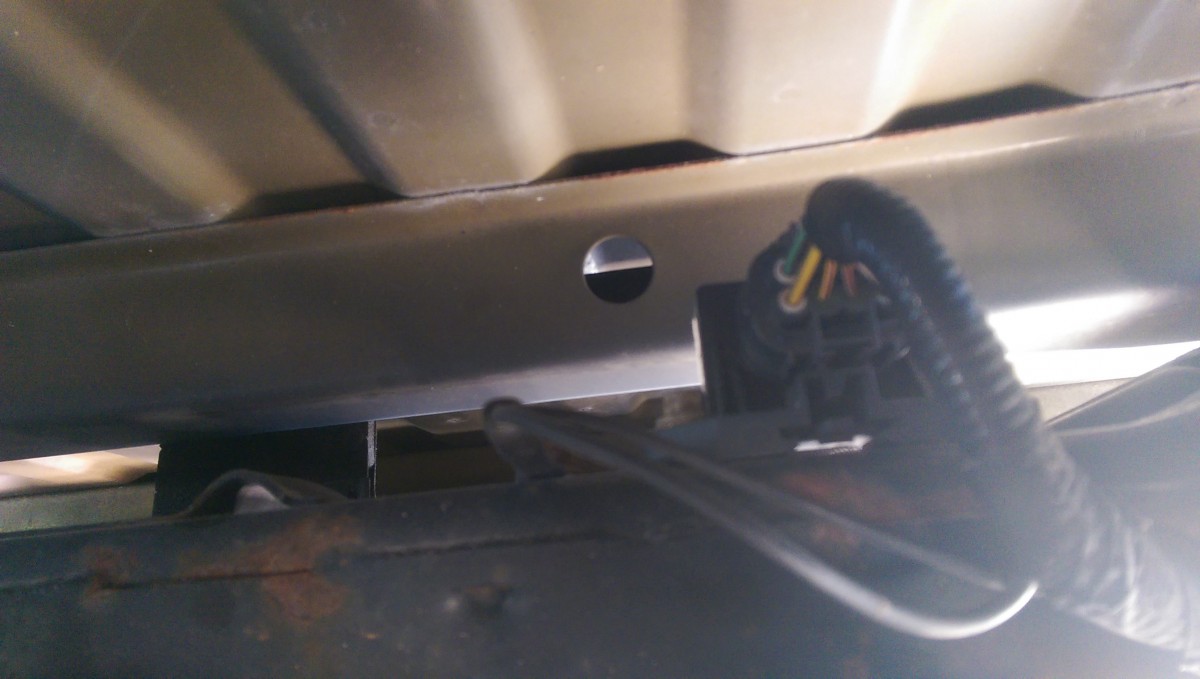
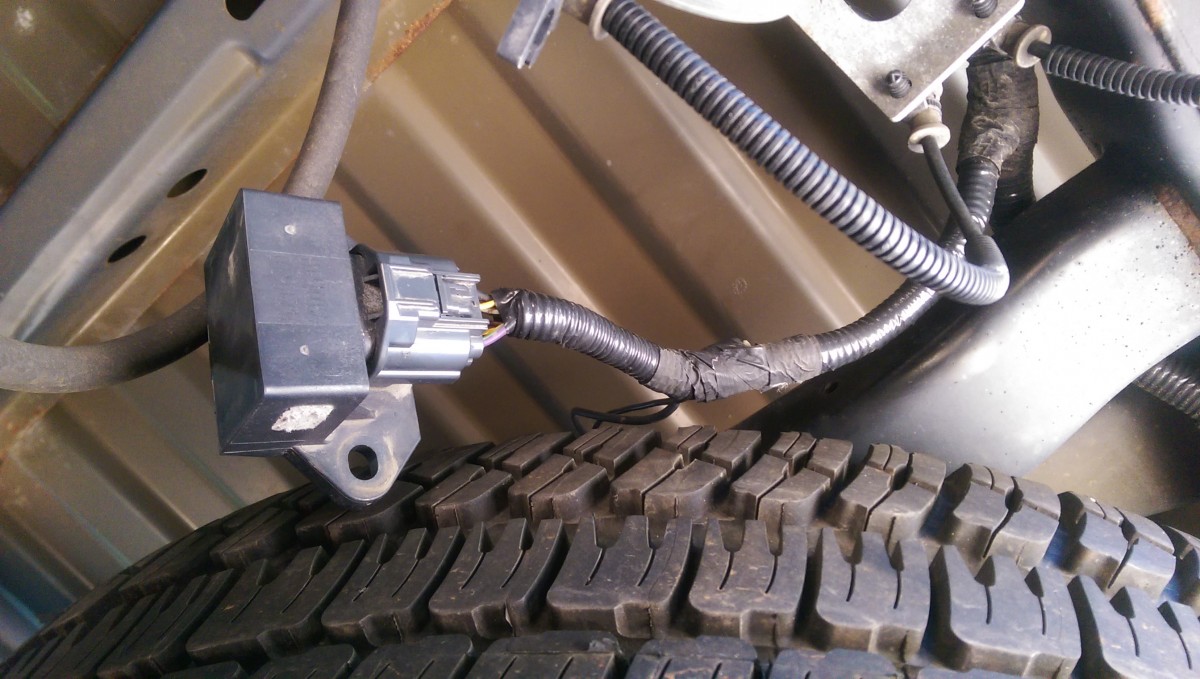
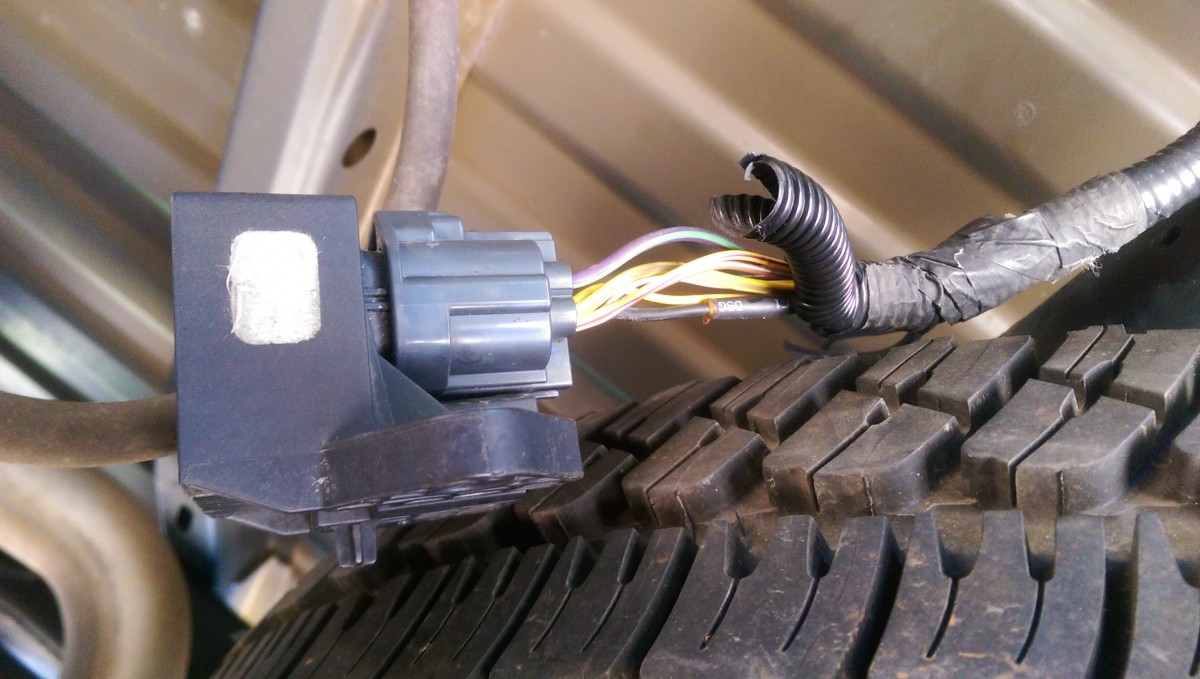
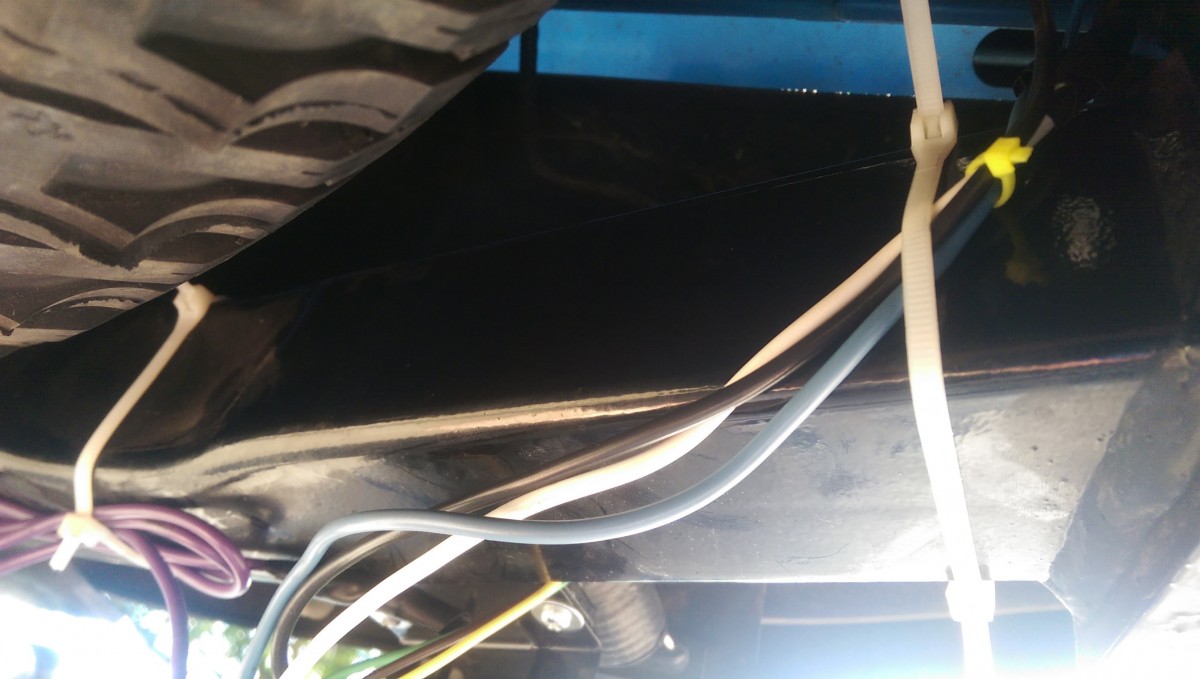
Below are the 4 pictures I took getting the auxiliary trailer wiring harness exposed from above the spare tire. On my truck, this has 12v keyed power and a ground, which I spliced into for the new 7 pin harness. It does not have the trailer brake signal wire! That is up under the hood. The 12v keyed is optional and so is the ground.
I didn’t feel like running a self tapping screw into the frame for the ground so I just unbolted the factory ground from the frame and put the new ground eyelet on the same bolt, with a little dielectric grease.
The 12v keyed power is the green / purple wire (much larger gage than the rest of the wires on this plug, other than ground, which is black). Just use wire taps and splice in.

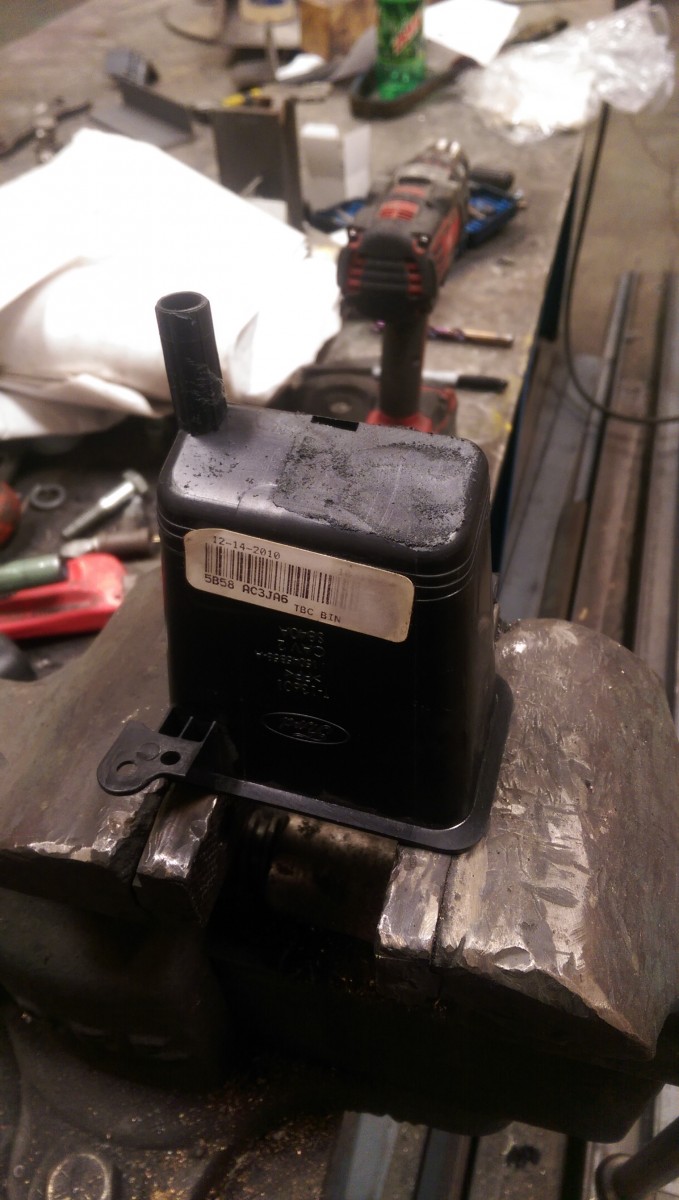
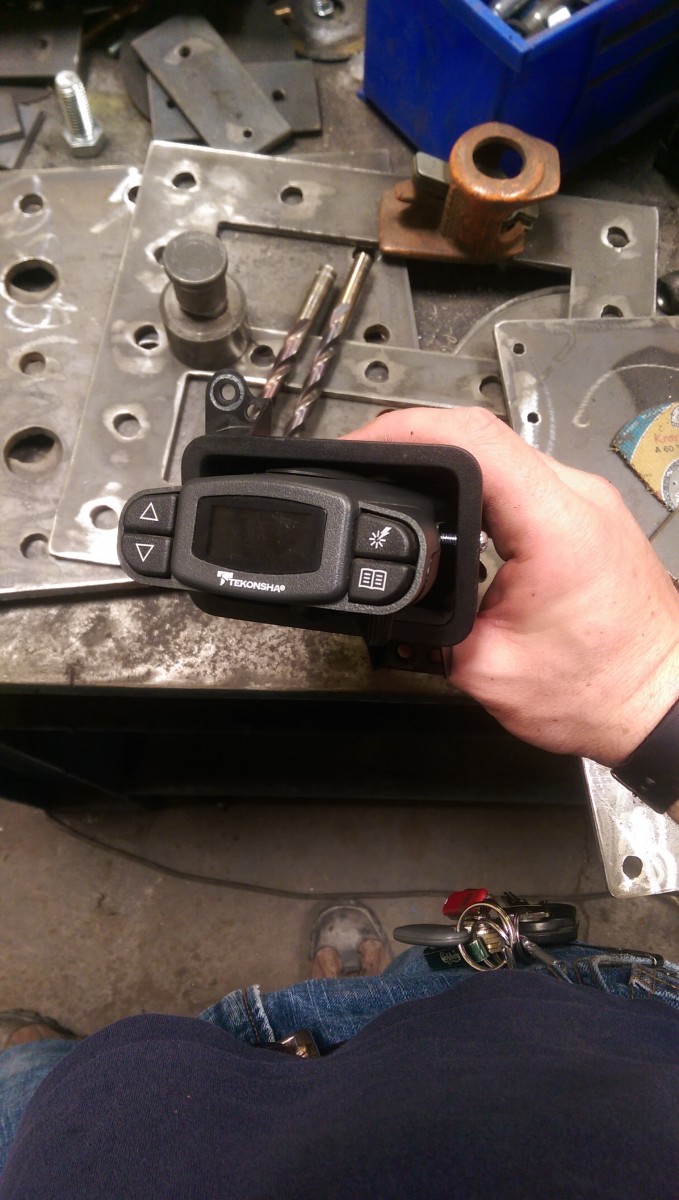
Step 2 – Installing the TBC inside the cab
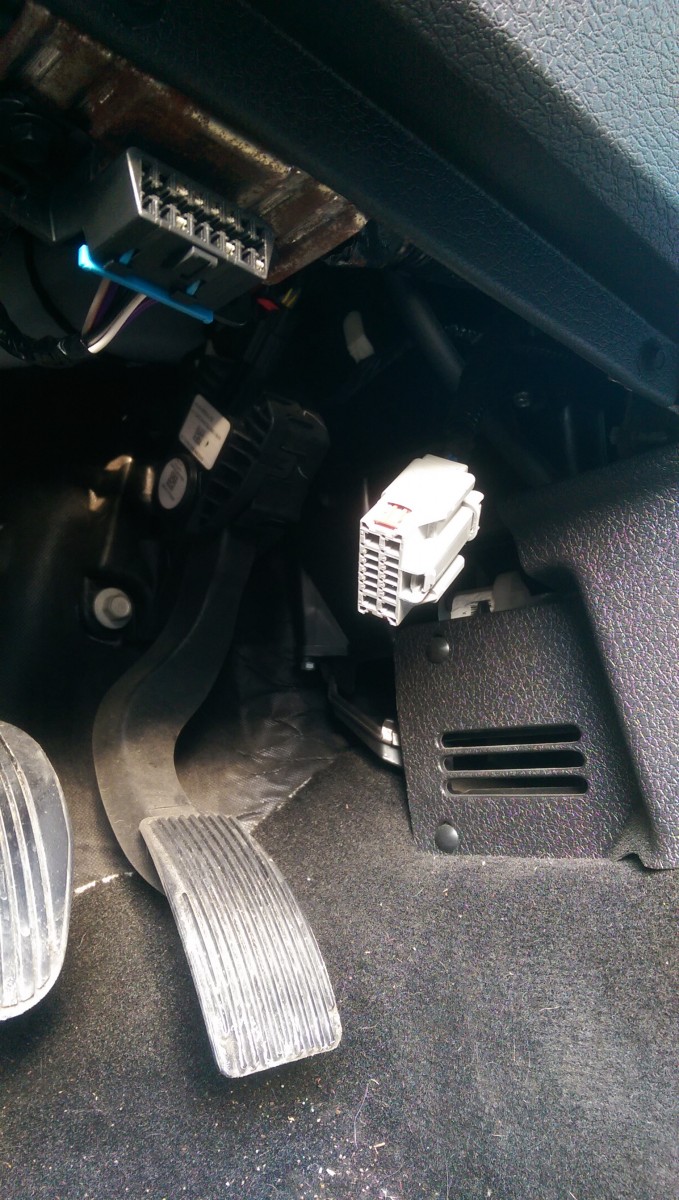
Ford made this pretty easy. The factory brake pedal already has the electronic wizardry in place, all ran to a plug that is capped and taped up out of the way. Tekonsha included a Tekonsha-to-Ford wiring harness adaptor so the only thing left to do is mount the Tekonsha and plug it in!
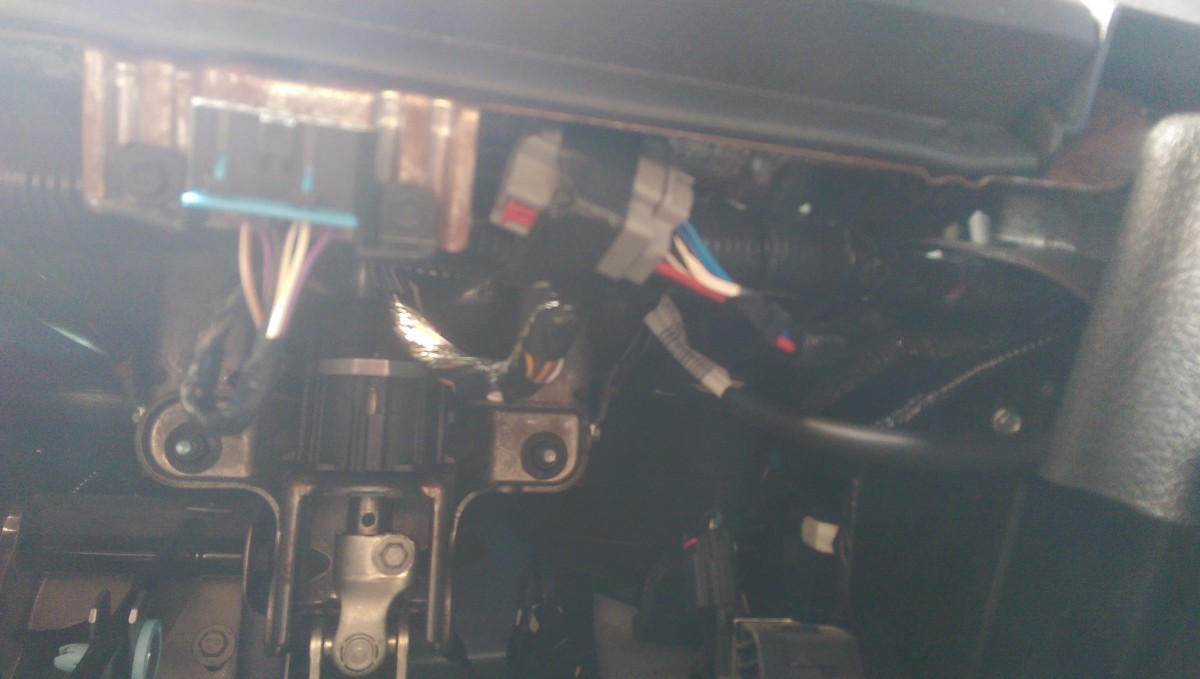
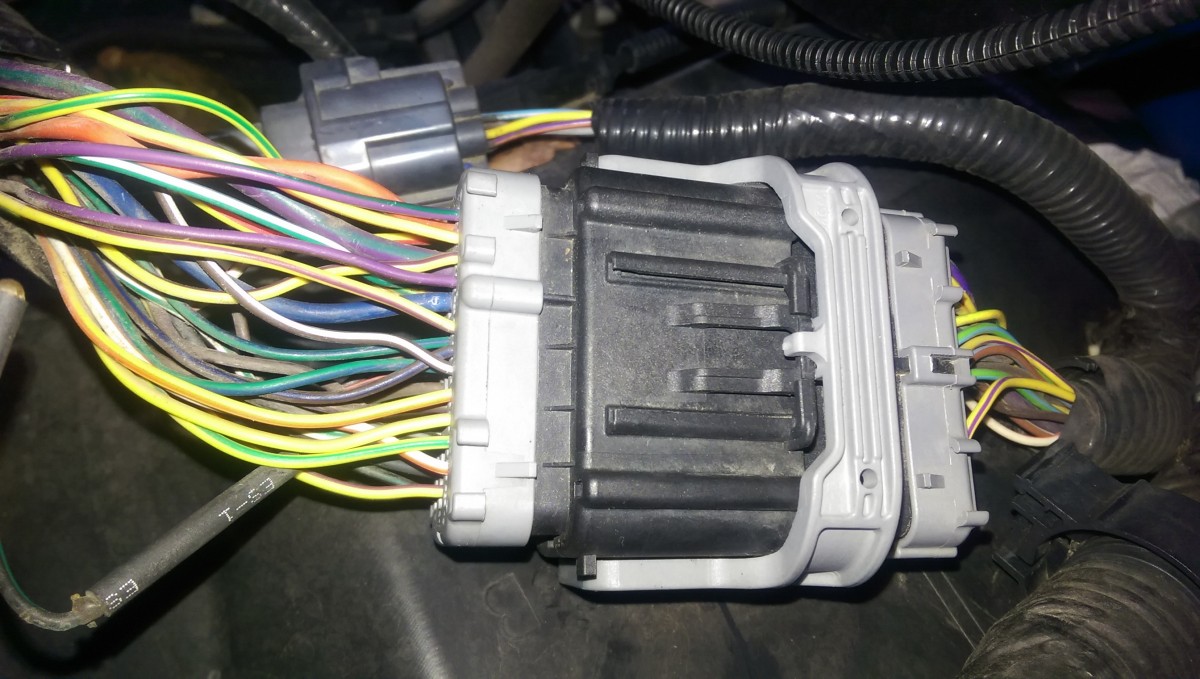
The plug at the top-left of the picture is the OBD2 plug, as a point of reference. The plug at the top-center of the picture is what you’re after. That’s the factory TBC plug, capped and taped up out of the way. Thanks Ford!
Cut the tape and discard.
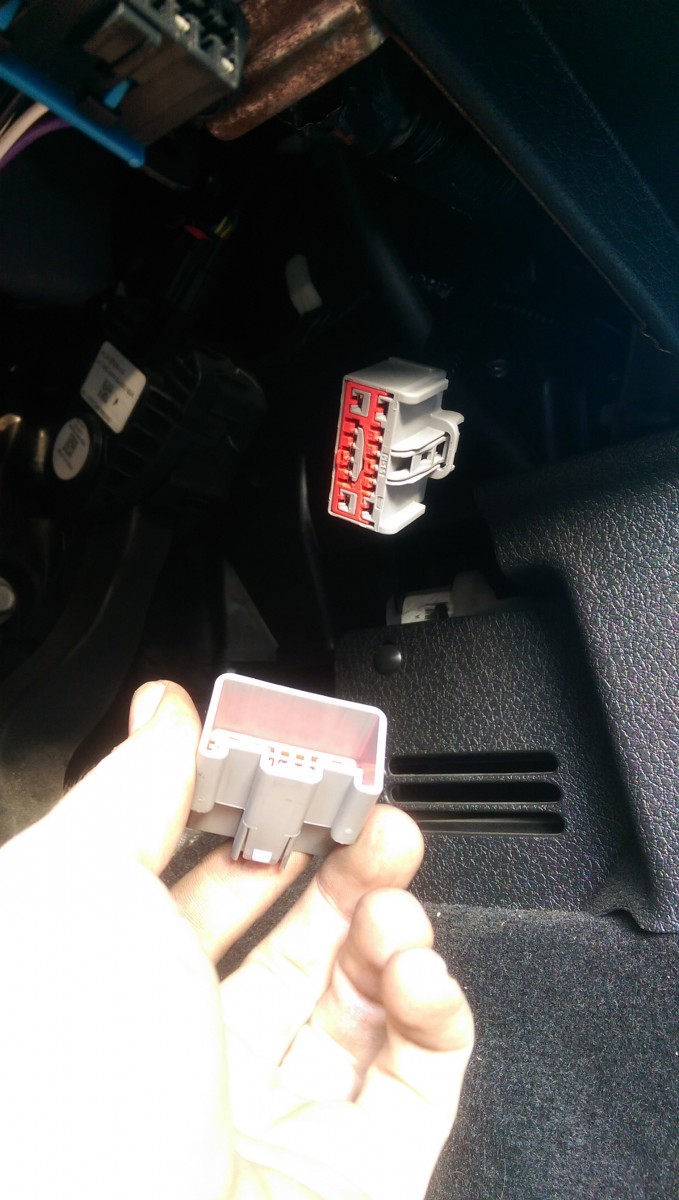
Remove the plug cap.
Removal of the Factory TBC Cubby Placeholder

To remove the facory cubby, pull up on the intermediate trim piece between the gauge cluster and the radio/hvac stack. Start from the bottom and pull out / up. The trim piece will bend and twist but you won’t hurt it. Work your way up and it’ll pop loose enough to get this done. You won’t completely remove it because it is screwed to the gauge cluster surround piece.
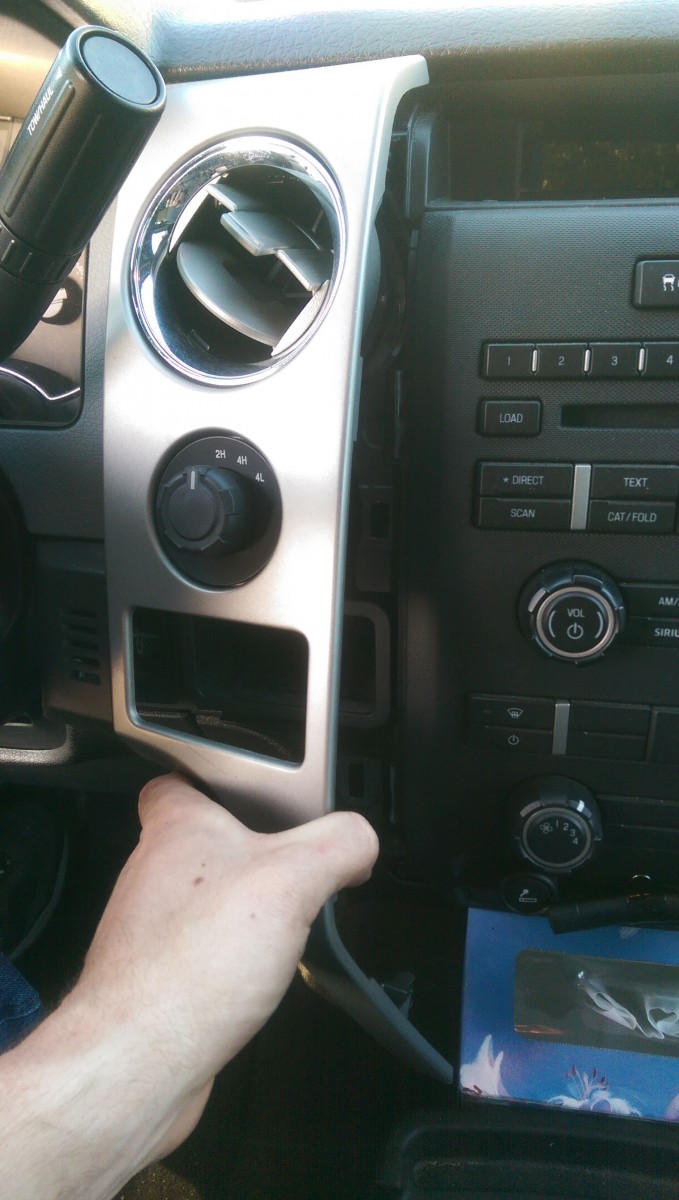
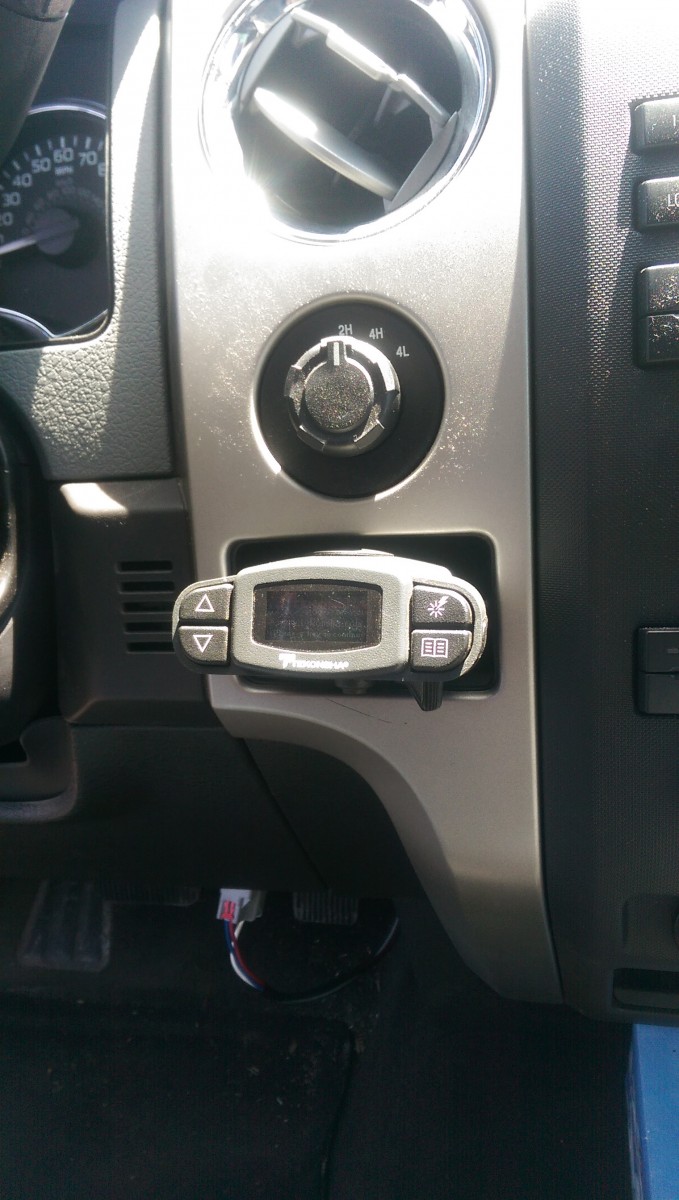
This is the goal. Its tight, but, this is faster than disassembling the gauge cluster surround and completely removing everything. We just want to get to the 2 screws holding that cubby in place. Grab your u-joint!
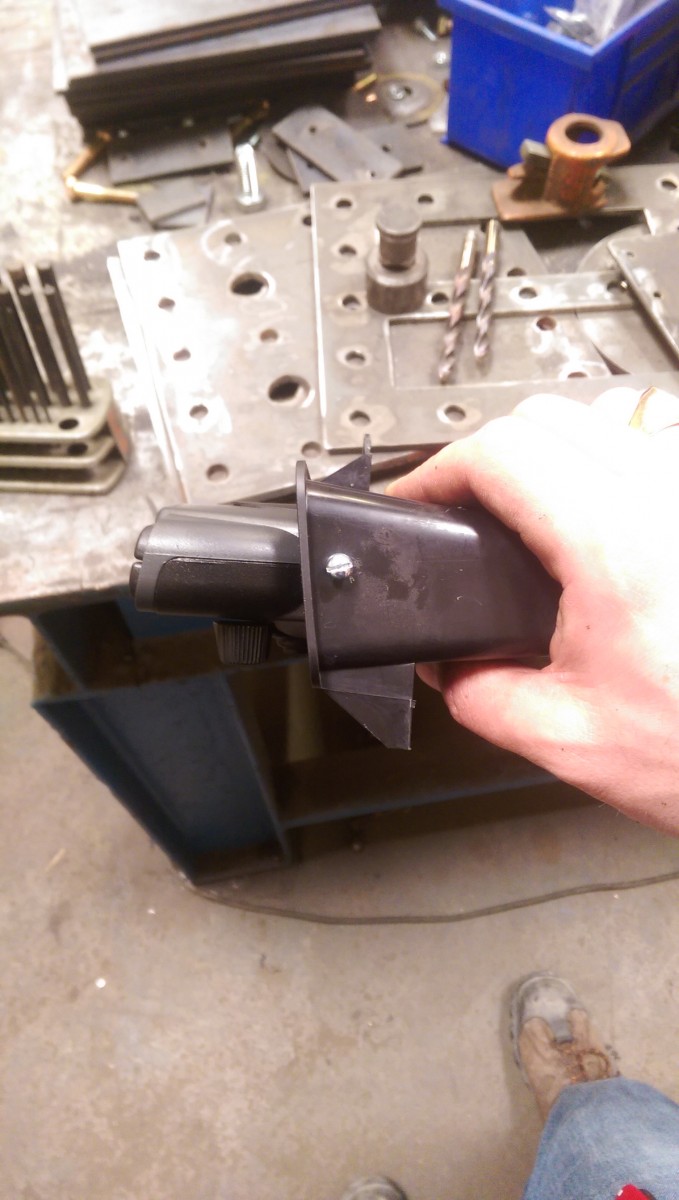
Preparation of the cubby
Here’s the cubby after grinding down the factory plug-holder, which on my truck wasn’t used anyway. Some different years of trucks must have plugged the TBC to the back of the cubby.
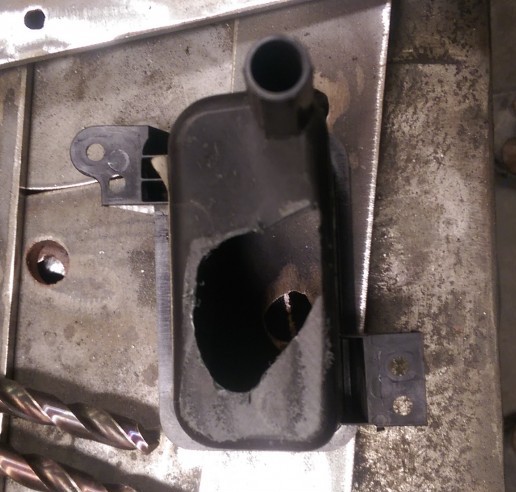
This got gnarly on me. After grinding the plug-holder down, the plastic became so thin that when I went to drill out the back to make room for the new Tekonsha wiring harness, it started shattering on me. Not to worry, you’ll never see this again once its all back together. If you wanted to be fancy you could mill this out, but note that the cubby wont sit straight and level on a table, so it will need to be aligned and jigged to do so.
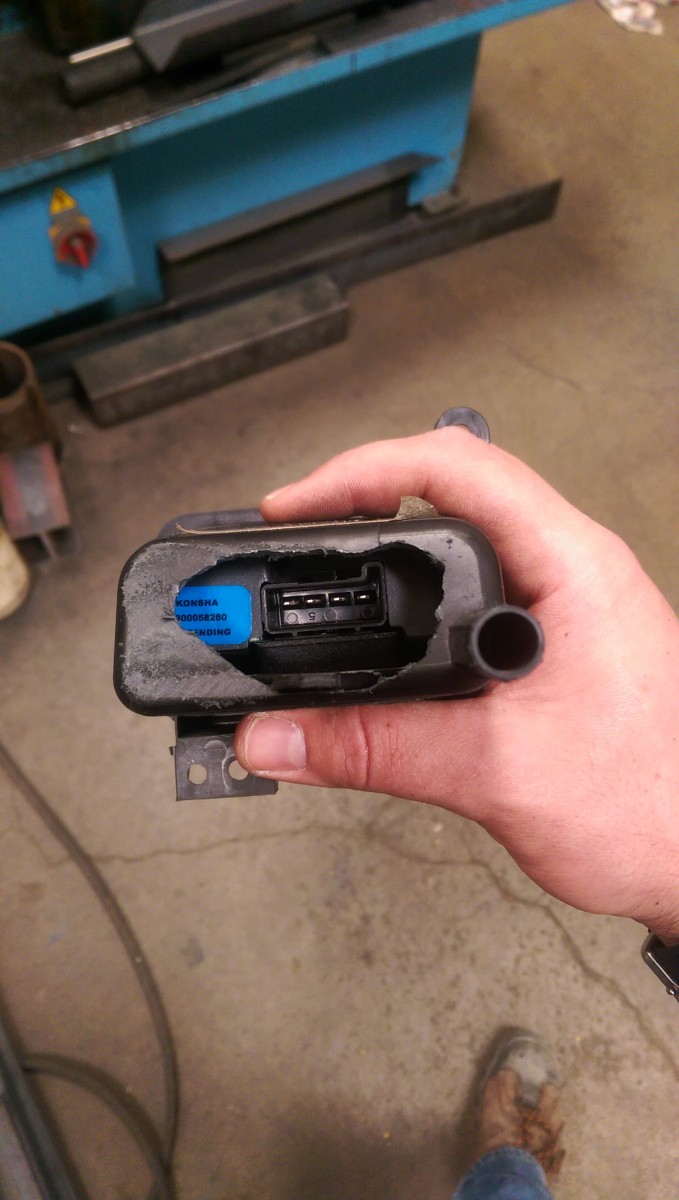
This is what we’re after. Plenty of access for the new Tekonsha plug to run through the back of the cubby and plug into the TBC. Below are the pictures of me lining up the Tekonsha’s mounting holes to the cubby. I drilled some holes and used screws to fasten it to the cubby.
We will now start to put it together in the cab.

Run the Tekonsha-to-Ford wiring harness loosely up under the dash and out the trim piece.
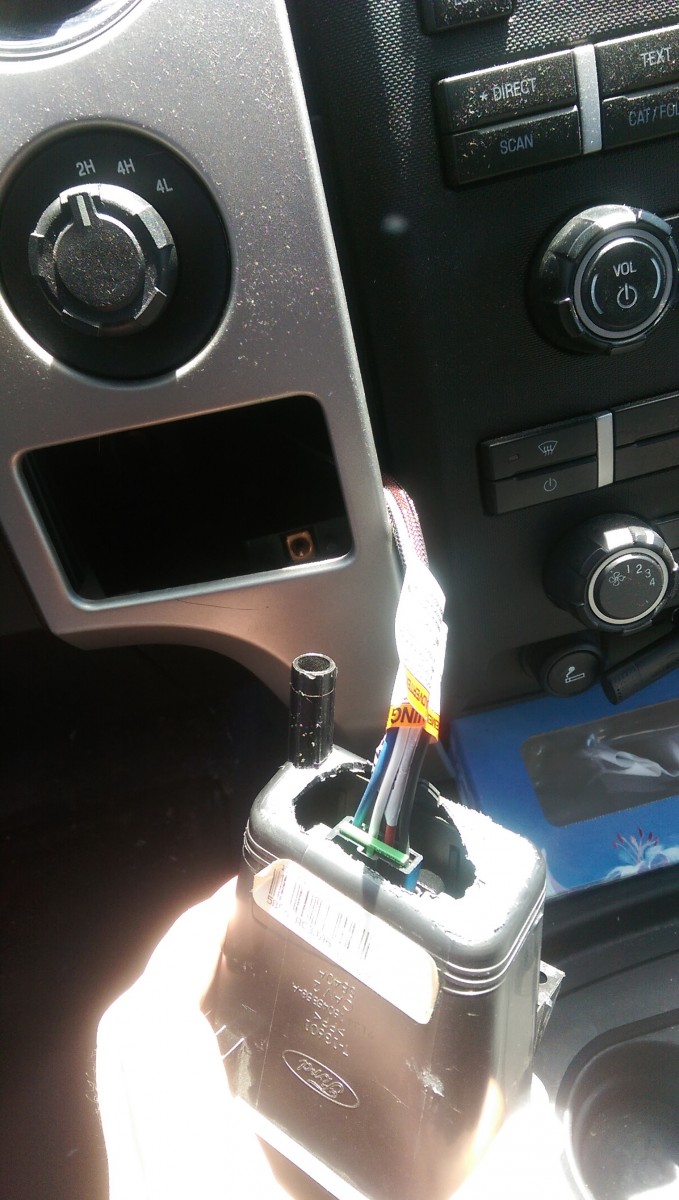
Plug the Teknosha in.
And snap it all back together. There is simply no way to get those 2 screws back in without completely removing that intermediate trim piece. The trim piece has so many mount locations, though, that it holds the cubby and the extra weight of the Tekonsha in place with no problems. I haven’t experienced any wobbling or moving around from the cubby whatsoever. Note that it has the 2 screws and a mounting dowel. That dowel really helps in this case.
Zip-tie the slack from the wiring harnesses up and out of the way.
Step 3 – Running the TBC Signal Wire
My truck had factory wiring from the brake pedal up to the big wiring harness plug on the driver’s side fender. The TBC signal wire goes into this plug, but because I didn’t have the factory towing package, it doesn’t run out of this plug (and to the back of the truck). I just ran a new wire from the 7 pin plug at the back up the frame rail to this plug and tapped in.
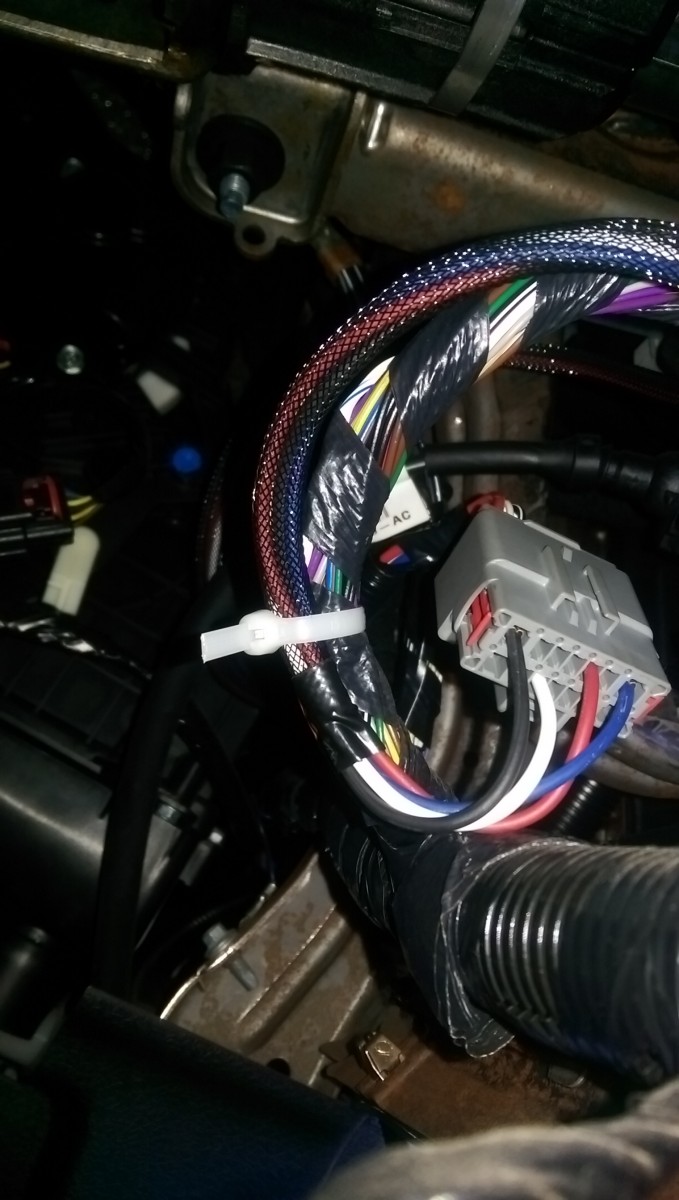
This is the plug you’re looking for, on the driver’s side inner fender.

Locate the solid blue wire on the bottom row of the plug. I had to cut away some of the factory tape and splay all the wires out to get enough access to this wire to tap it. It runs into this plug, from the front, but doesn’t run out of the plug, towards the back. Take your time identifying it.
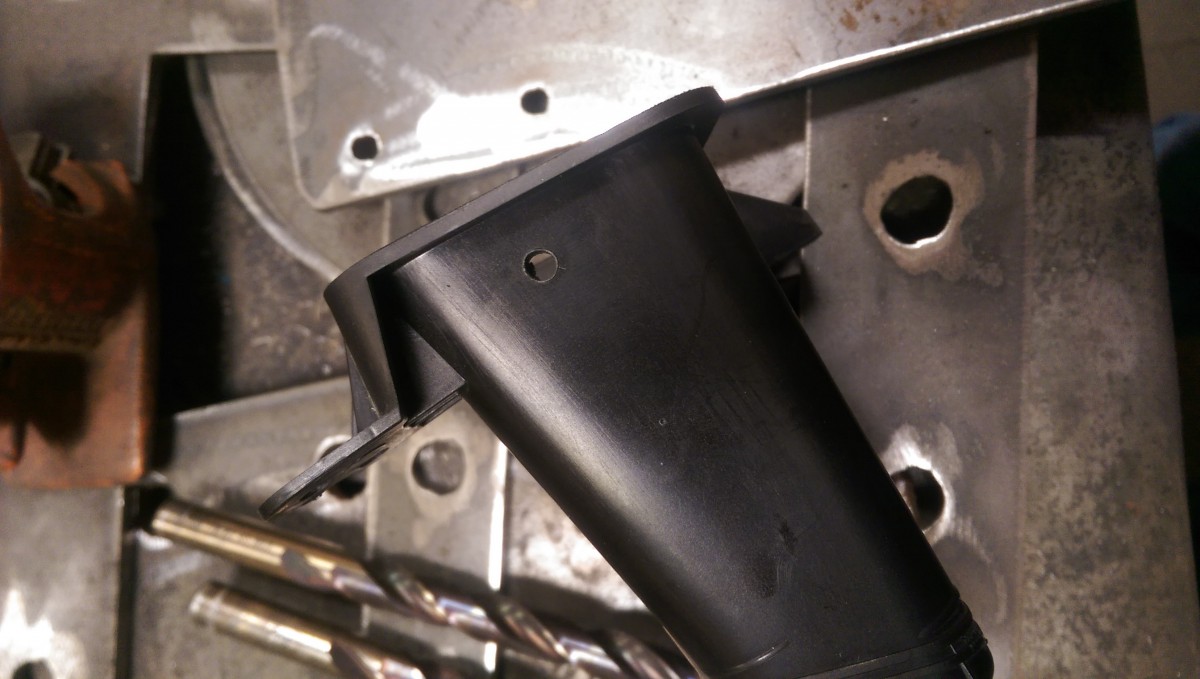
Zip-Tie all of the wires up against the hitch assembly.
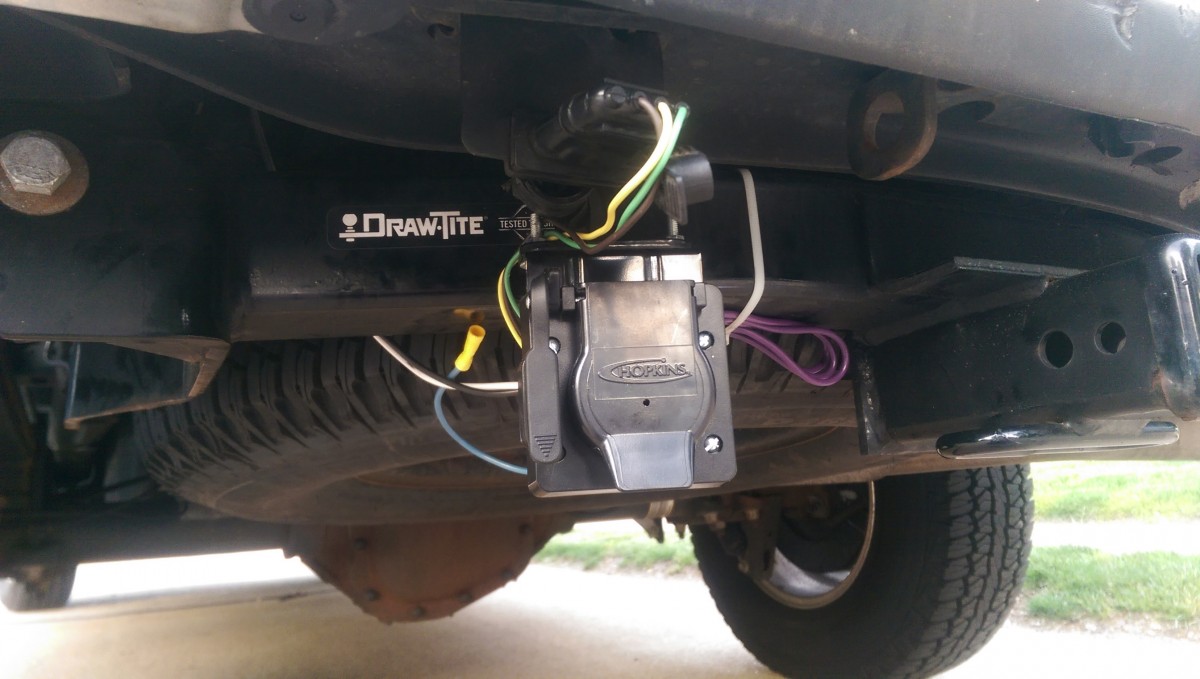
The 7 pin plug mounted beautifully to the Draw-Tite hitch assembly. Voila!
4 pin is not left turn, right turn, running lights, and brake. 4th wire is ground. Brakes are the same lights as left and right turn… but if you are turning the one will flash the other will be solid to show braking..