Changing Brakes on a 99-04 Mustang GT
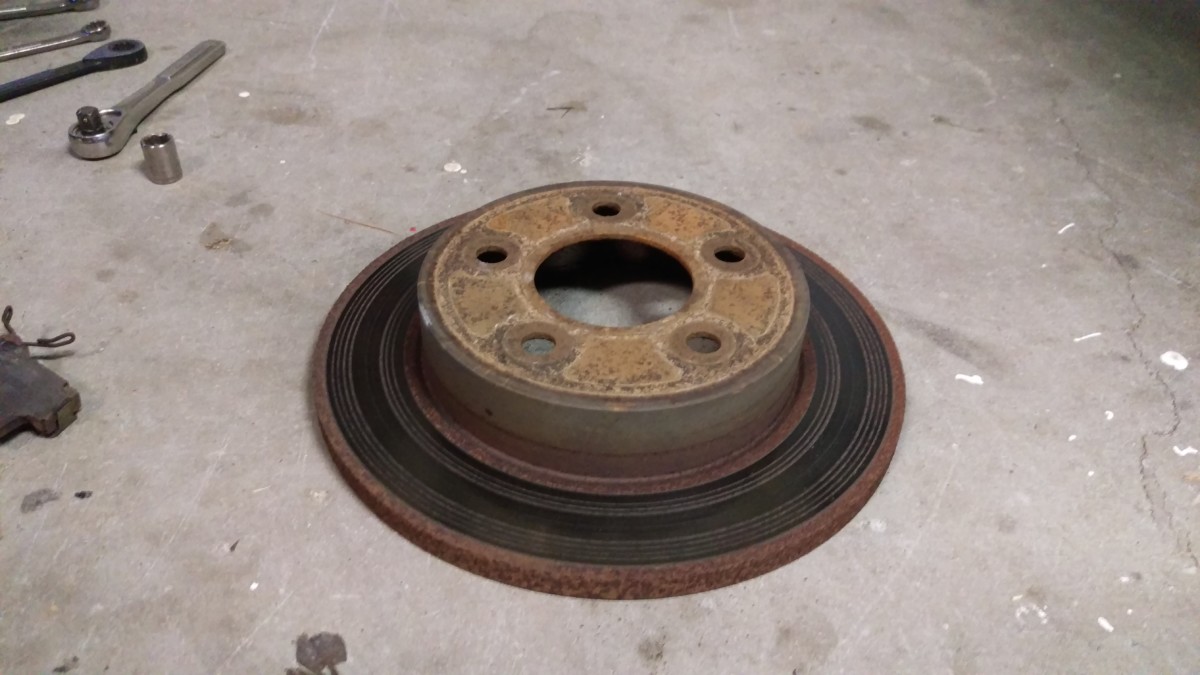
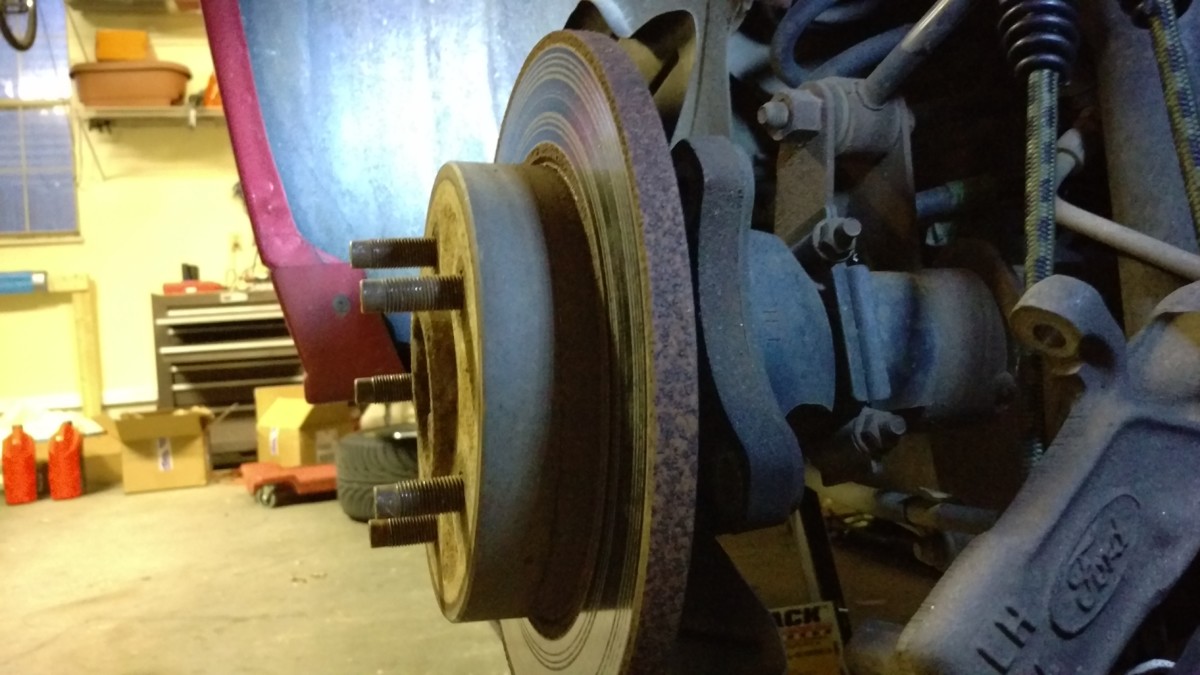
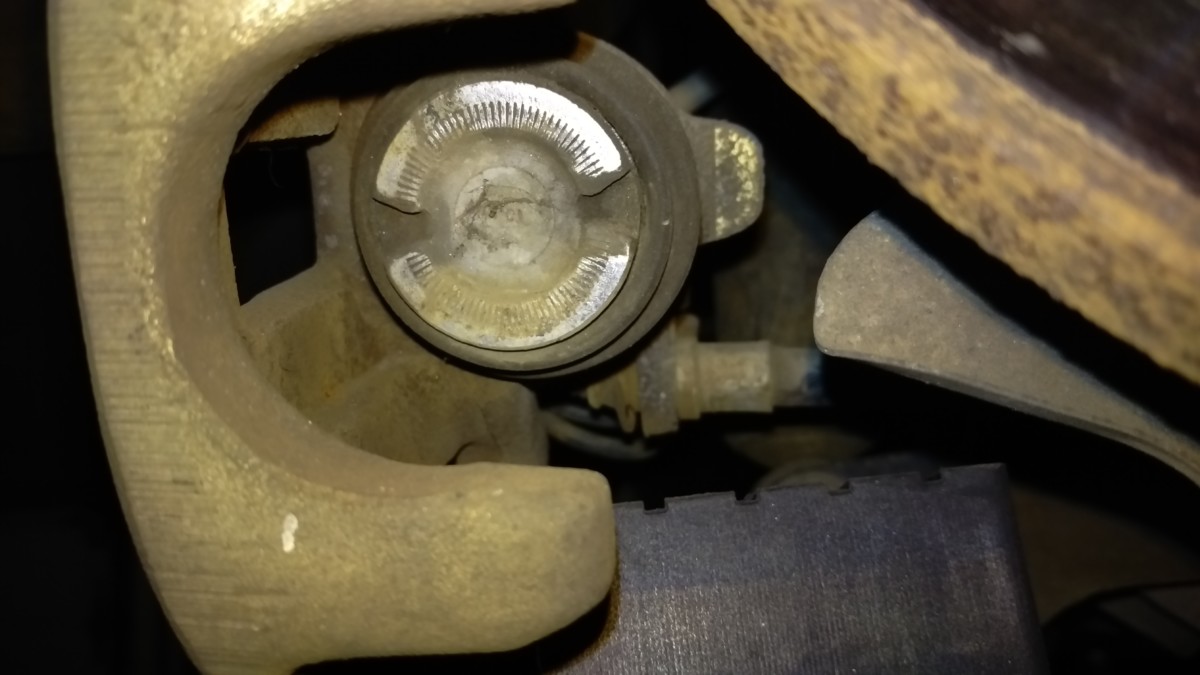
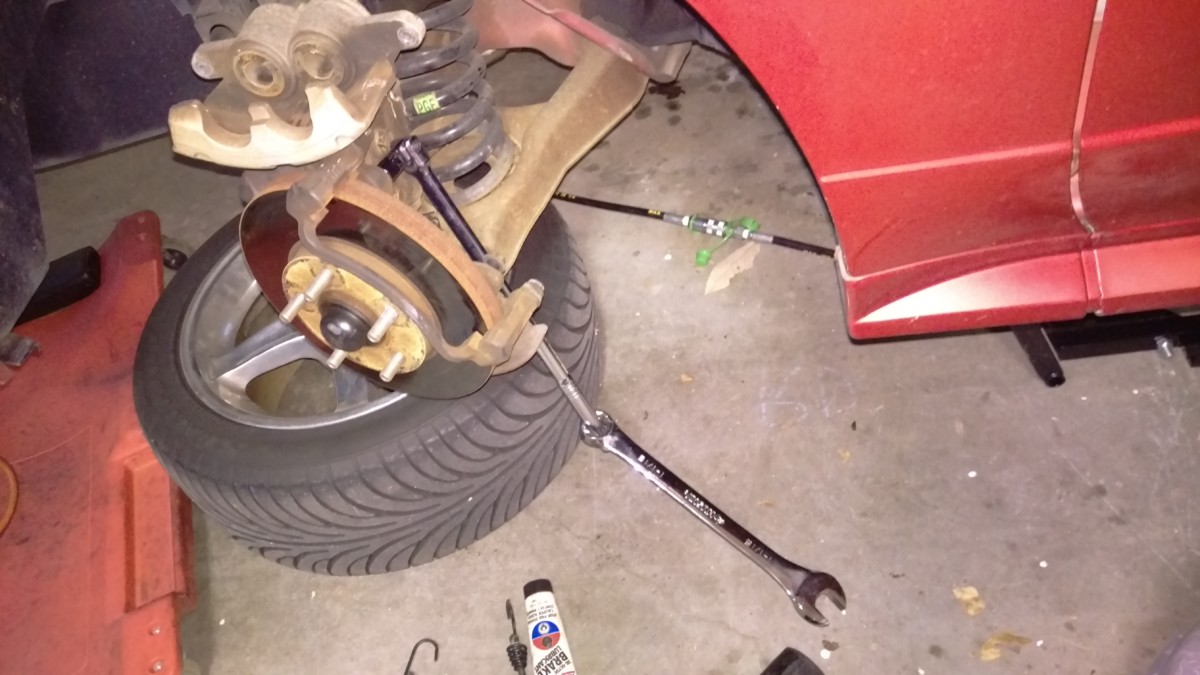
This rotor had a lot of scoring on it, indicating the pad wasn’t fully engaging
When I bought the Mustang, I knew the brakes were going to need attention relatively soon. The driver’s side rear rotor had obvious rust lines running around the center. This is a clear indication that the brake pad is not fully engaging the rotor. If it were, these rust spots would be worn off during use. Fortunately, changing brakes on a 99-04 Mustang GT is pretty easy and costs less than $170 in parts.

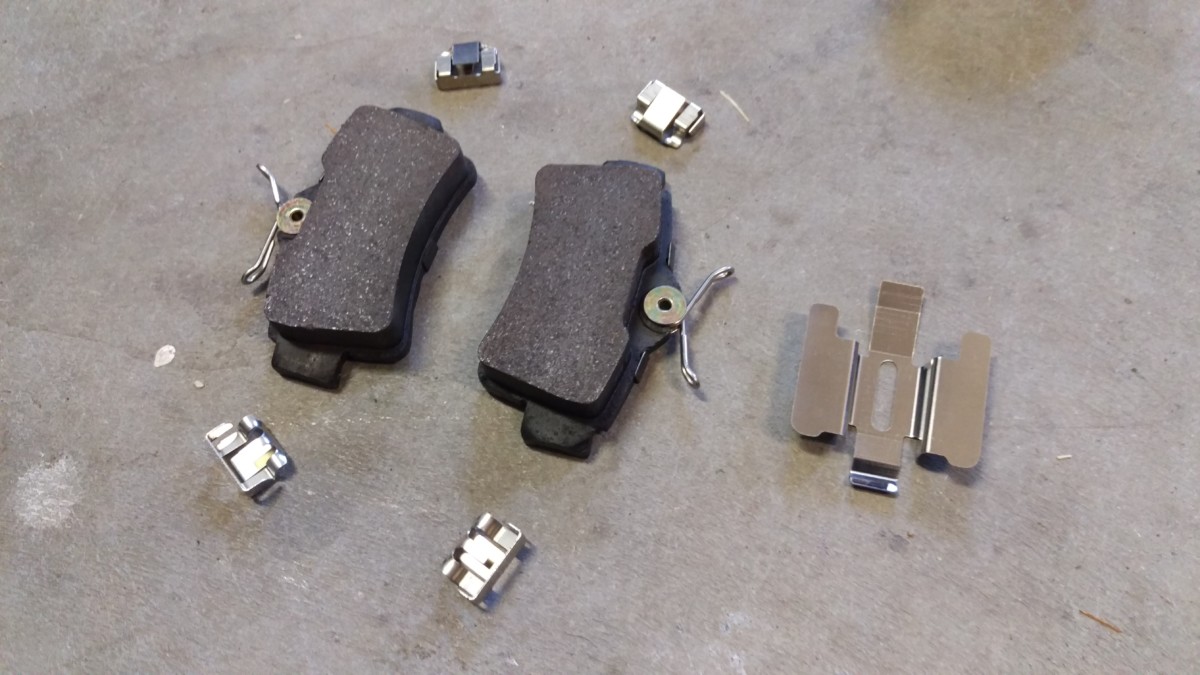
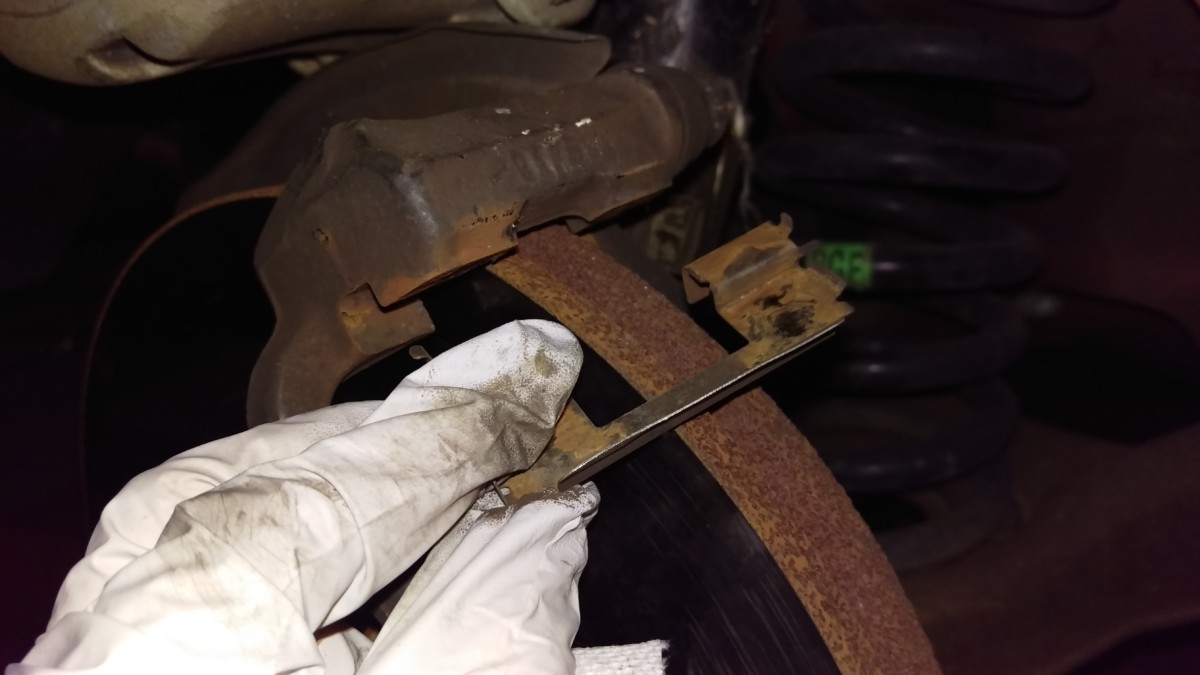
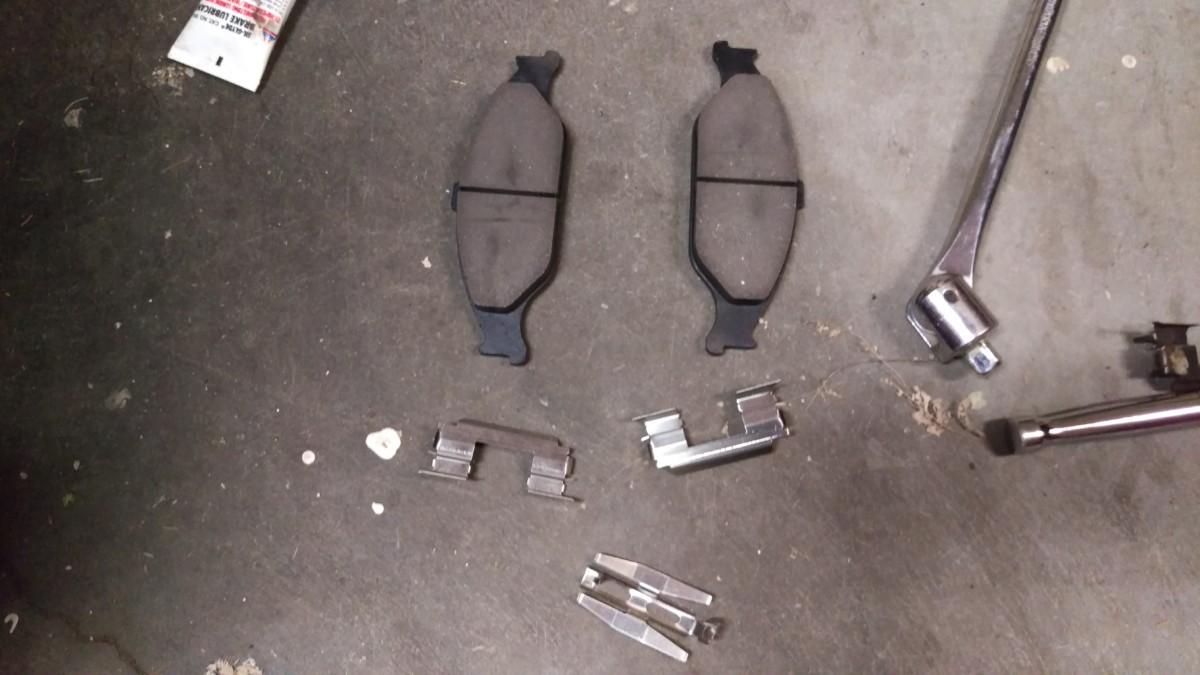
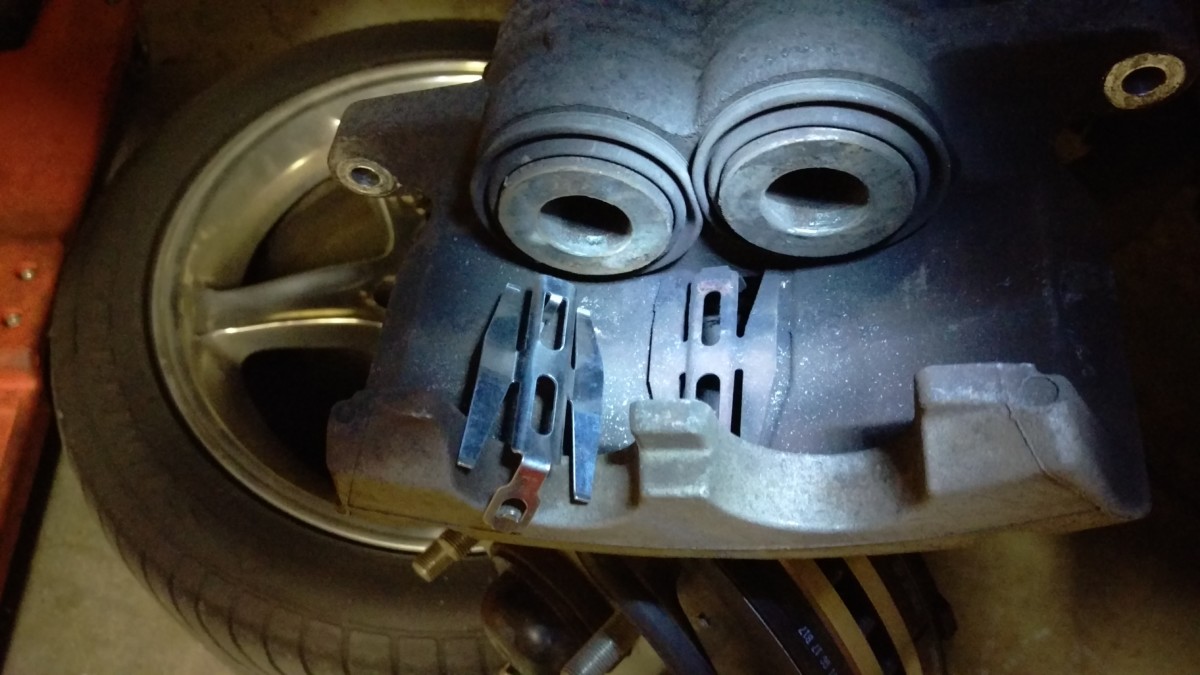
Lesson learned: always check the inner AND outer pads
Still, looking at the outer pads through the wheel, I could see they had plenty of thickness. It seemed like I could put the job off for awhile. Then the brakes started to make quite a racket, and I realized something was up. Here is a picture of both brake pads. The outer is fine, as I said, but the guide pins had lost all of their grease and caused the inner pad to wear down to metal.
Long story short, when checking your brake pads, be sure to check them both! It’s fortunate that nothing bad happened in this situation. And thus, I documented the process of replacing these pads and rotors.
Tools Required
You’re going to want a basic set of wrenches


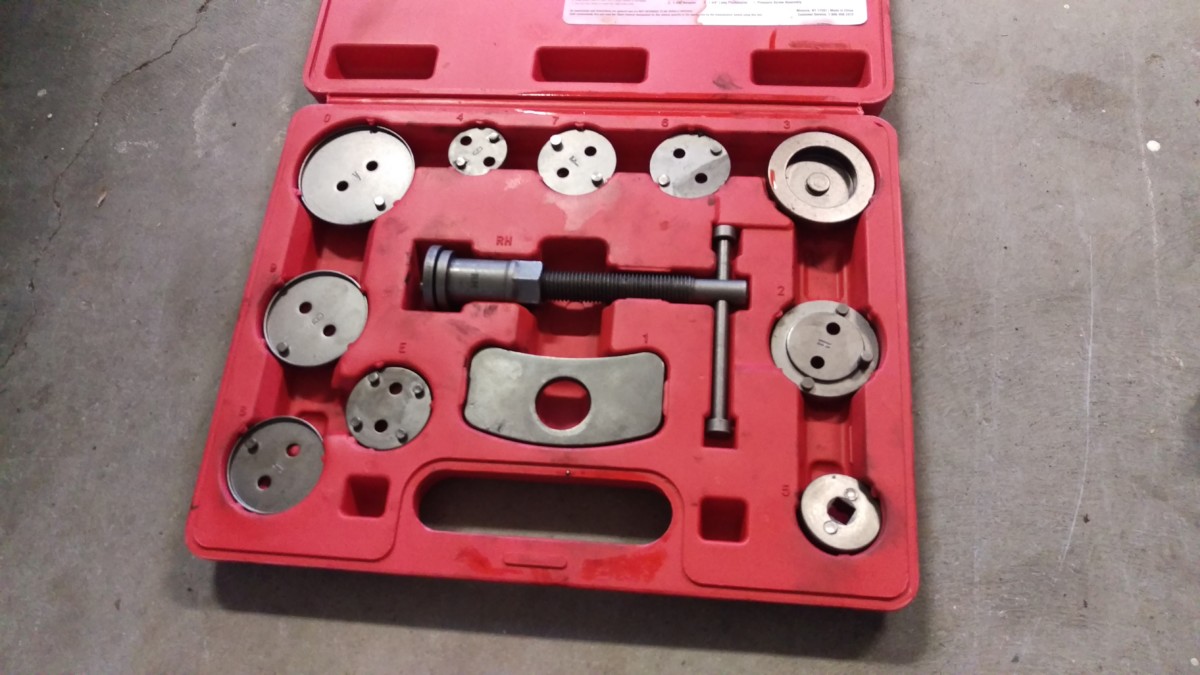
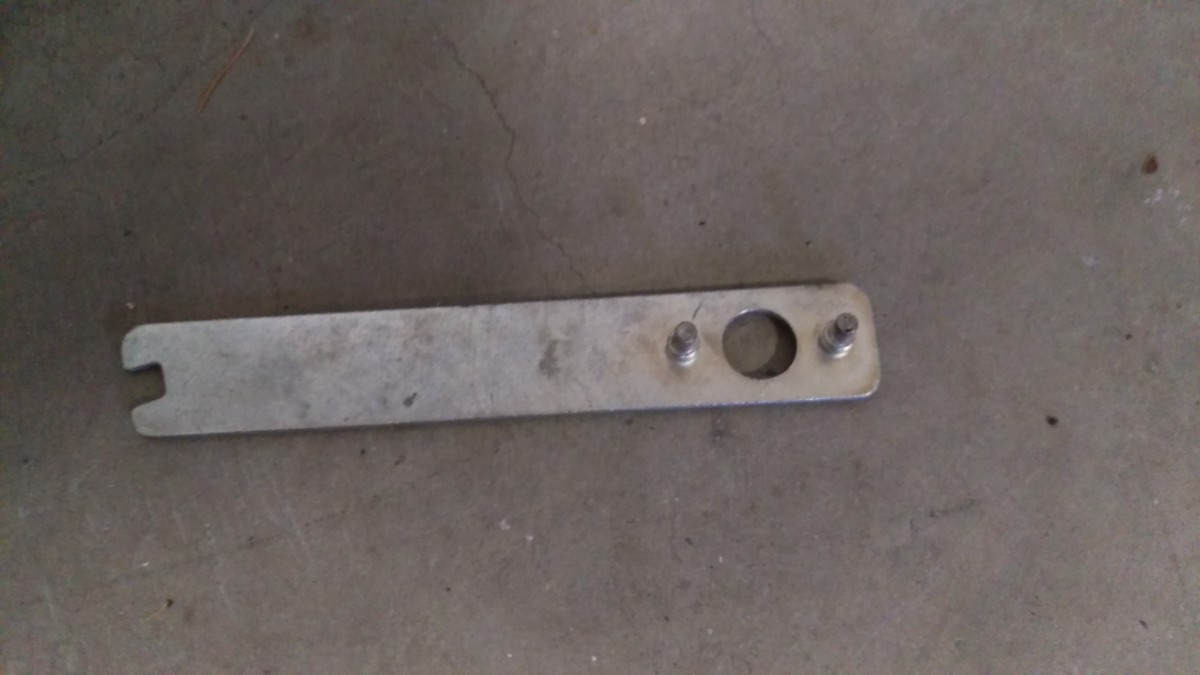
This caliper retraction tool can be rented for free at Autozone
The only specialty tool is this clamp-like device that will spin the rear pistons back into their bores. This is required because of the parking brake setup on the Mustang. Autozone will rent this for free, although you could also buy one if you’d prefer
Parts Required
You’re going to need new brake pads and rotors, of course. I tried C-Tek ceramic pads and found them to be too thick to install. You can try sanding them down, but I don’t think that’s such a great idea. If I had gotten my old rotors turned, they would have probably fit, but none of that is worth the hassle to me.
Instead, I went with NAPA for everything. You need a box of front pads, a box of rear pads, two front rotors, and two rear rotors. The rotors are sold individually, while the pads come in a box of four, one box for the front, one for the rear. Some people will have their old rotors turned instead of buying new ones, but honestly the price is about the same, so I don’t bother.
Beyond the actual rotors and pads, you’ll also need some grease for the slider pins

Getting the Car in the Air
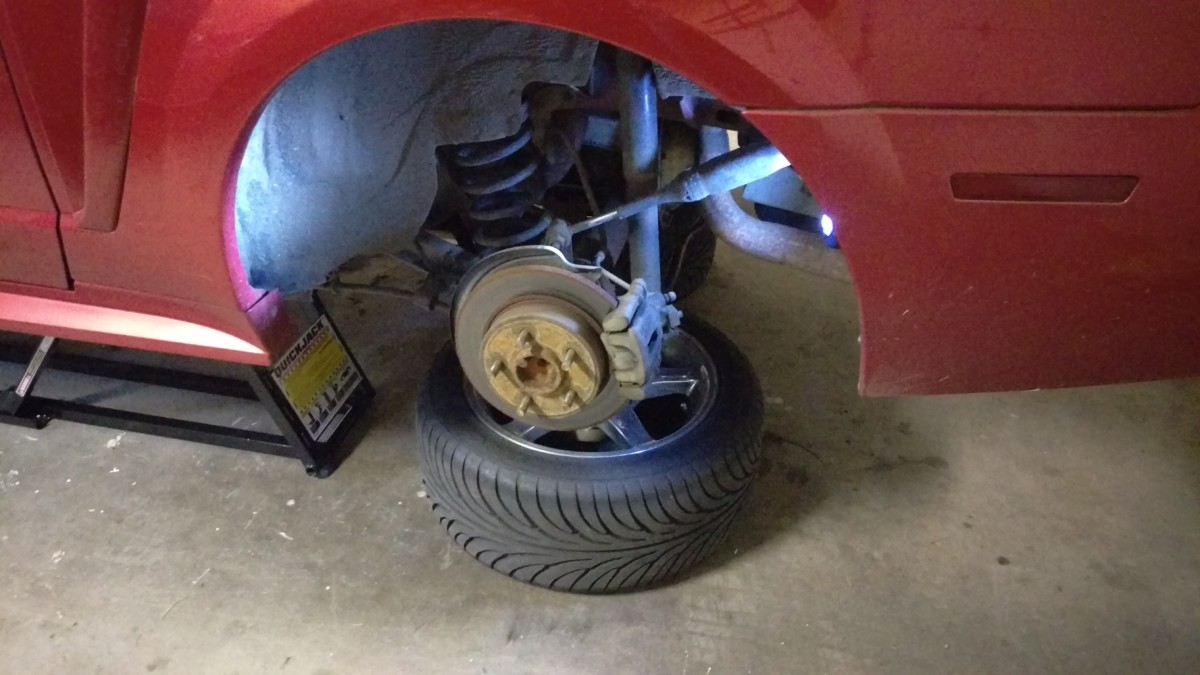
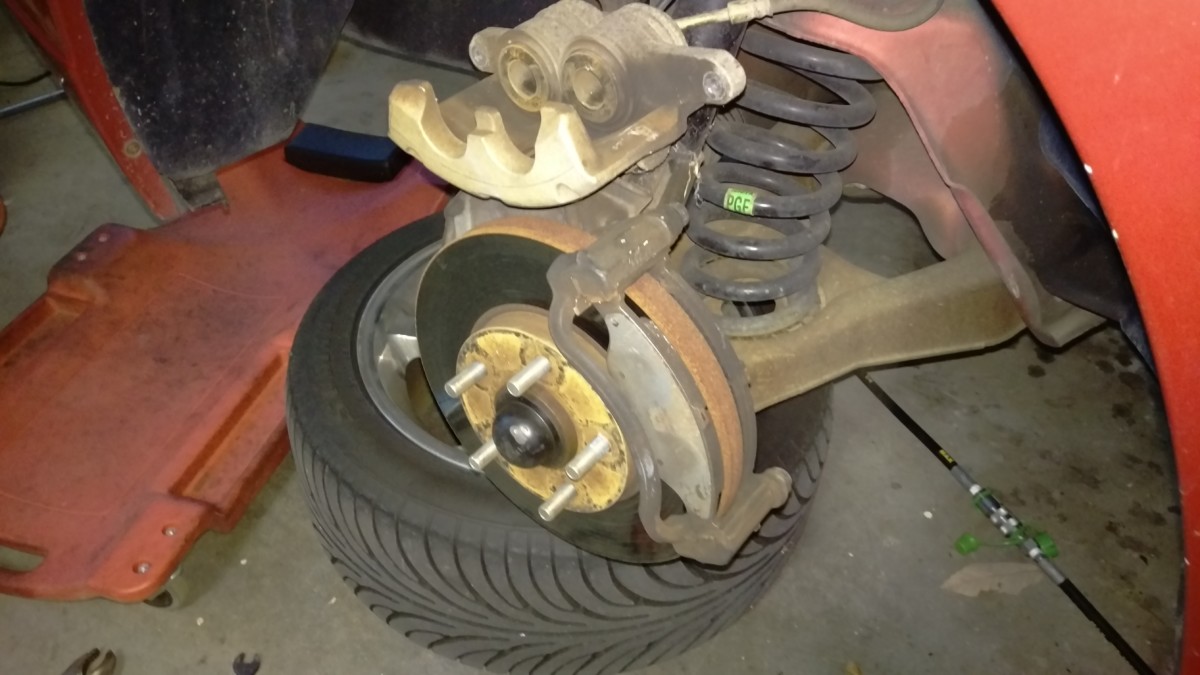
The wheel is removed, ready to start
To begin, get the car in the air. I used my fancy Quickjack BL-5000SLX
I always like to lay the wheels under the car somewhere after removal. If for some reason the car falls, this prevents it from hitting the ground. More importantly, this may keep a car from crushing somebody if the worst happens.
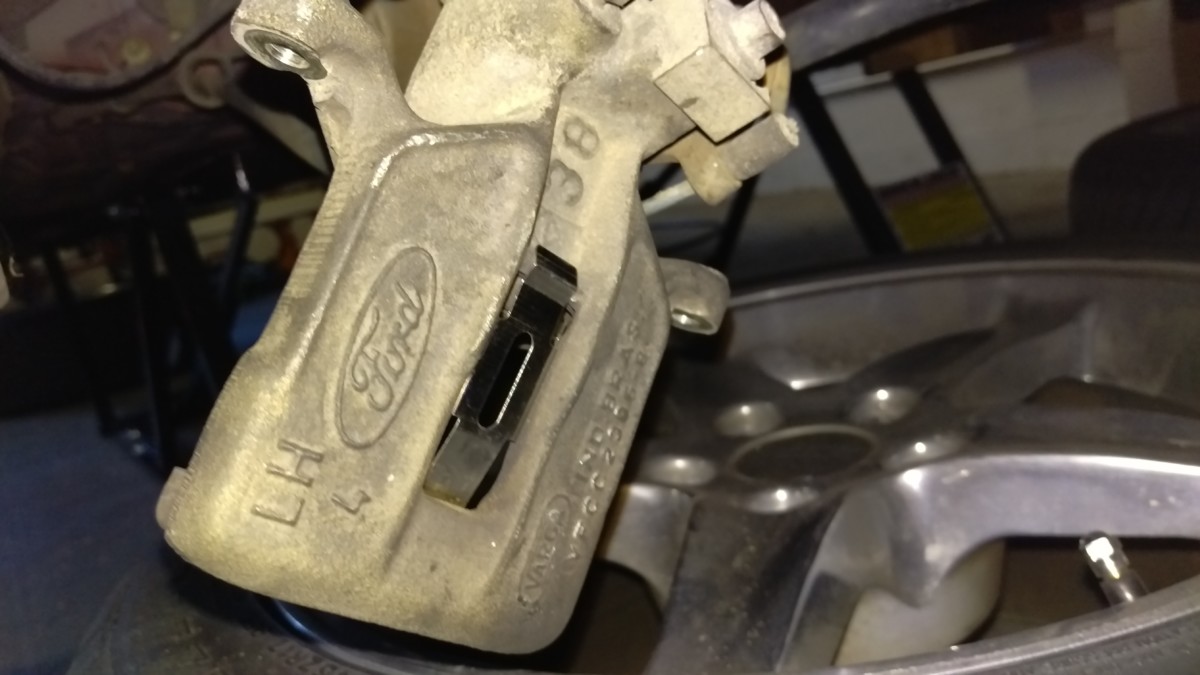
Removing the Rear Calipers
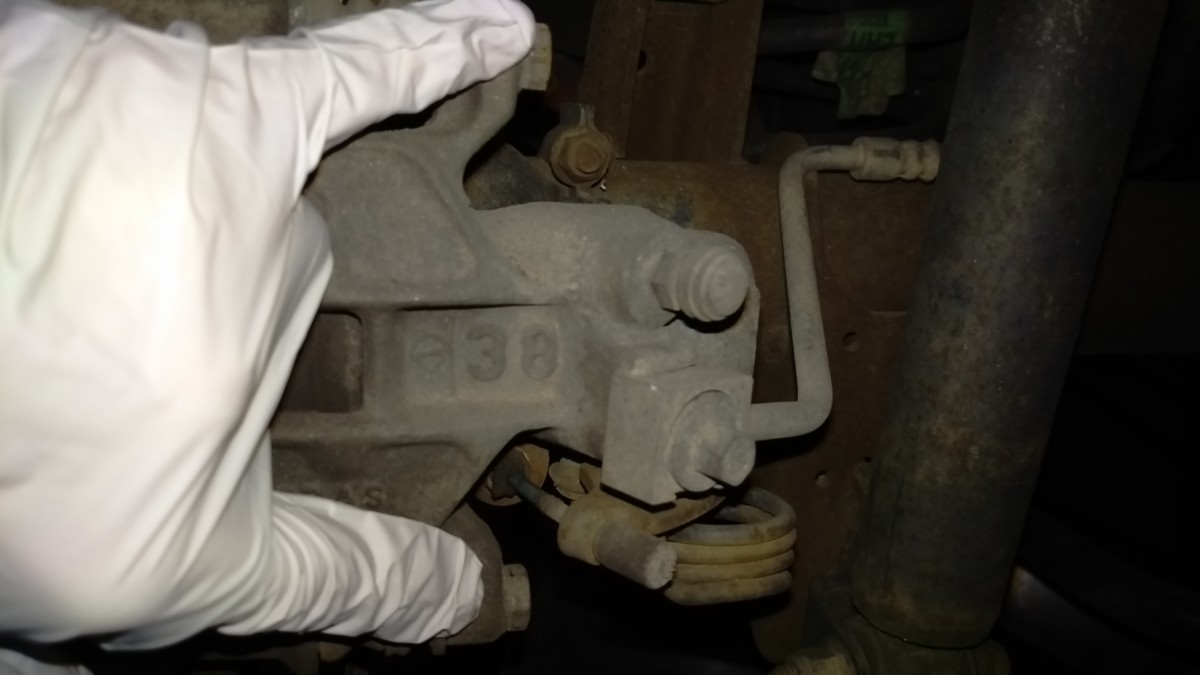
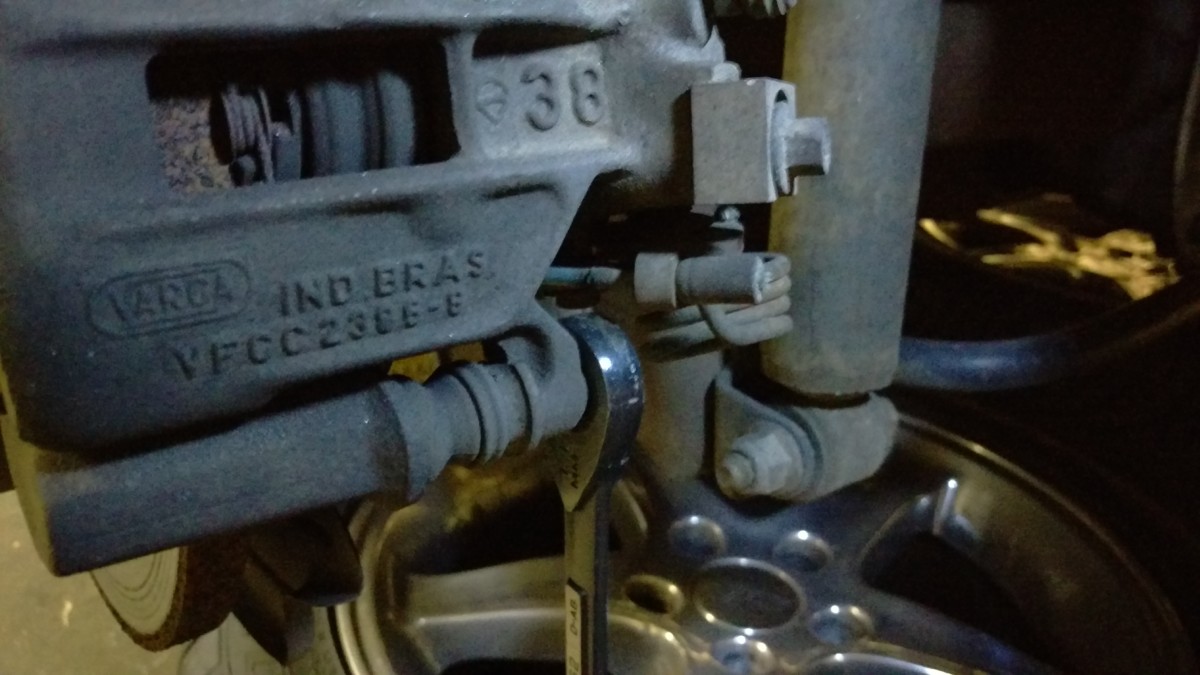
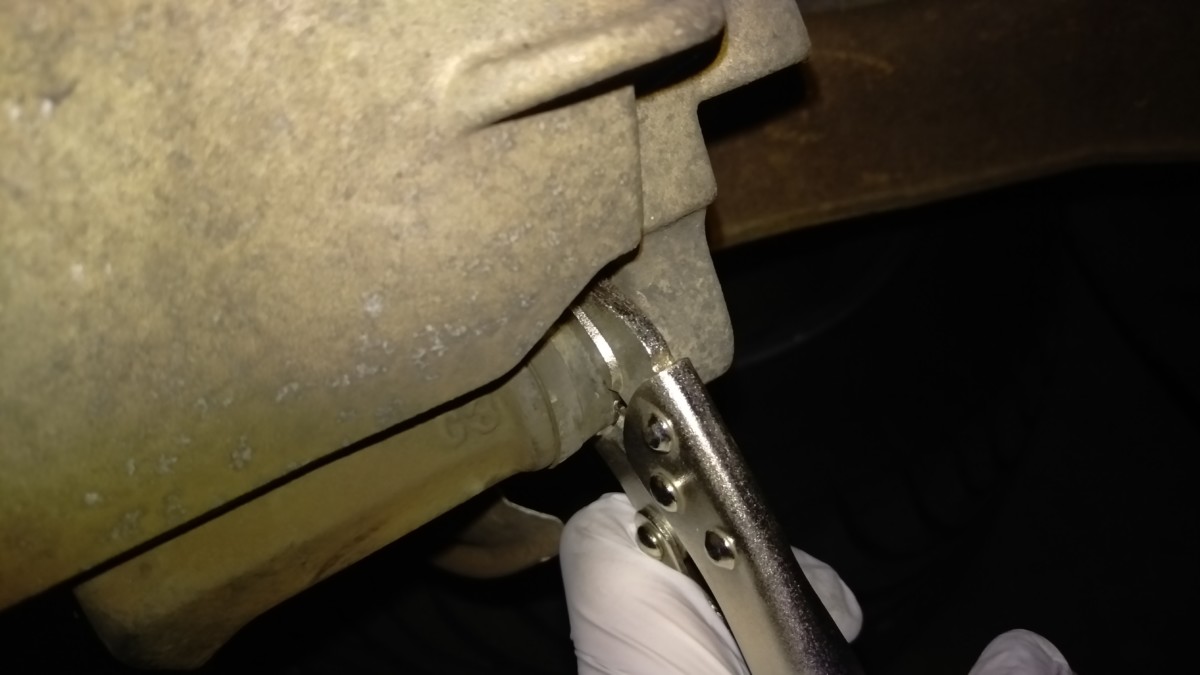
There are two bolts holding each caliper on
There are only two bolts holding each caliper in place. These should be fairly easy to unscrew, but they are really slider pins, so the ends of them aren’t threaded. This means that they won’t come all the way out even when they’re unscrewed all the way. If the pin is spinning in place, you need to pull on it to get it out.
Ratcheting wrenches help here
This is one of those cases where a ratcheting wrench
Caliper hanging from a bungee cord to take stress off of the brake line
When both pins are out, the caliper can be pulled loose. It will still be connected to the car by the brake line, which you don’t want to remove unless you want to get brake fluid everywhere. You also do not want the caliper to hang from the brake line, as that can damage it.
Instead, be sure to either hang the caliper as shown or place it on a box or something to keep slack in the brake line. I find a bungee cord or a ratchet strap works great for this.
Removing the Rear Brake Pads

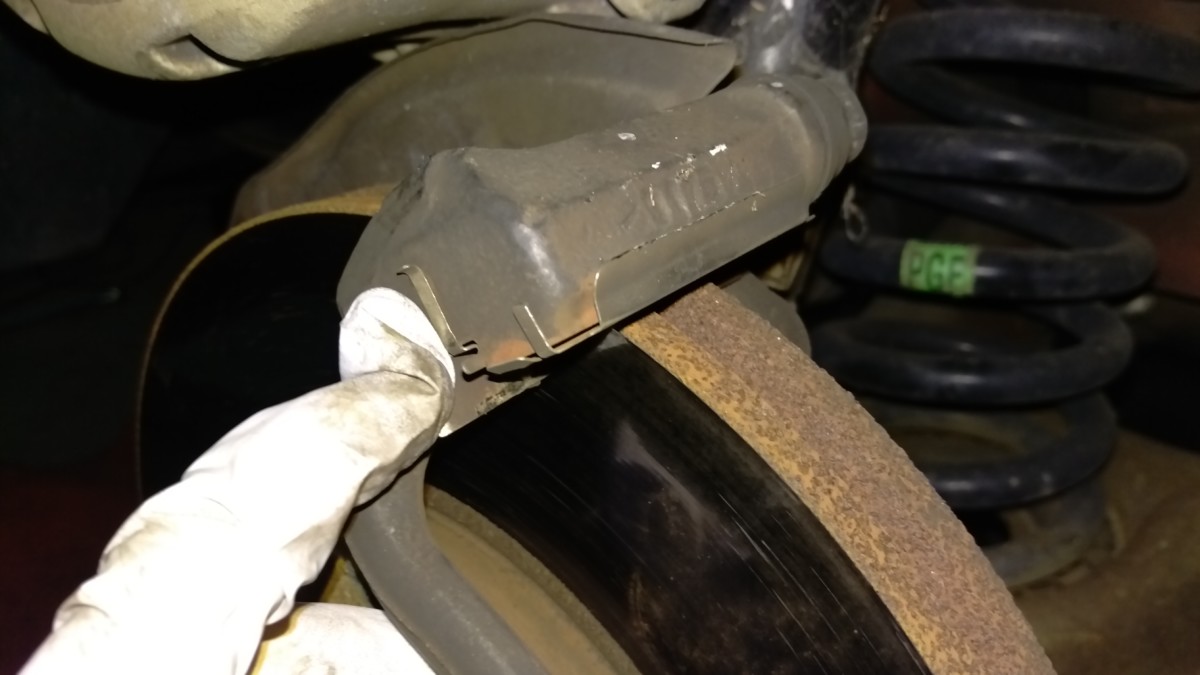
You can just kind of pinch these clips and pull the pads off
Removing the brake pads at this point is extremely easy. You can just pinch these little levers and pull. There are a couple of small metal shims that may or may not fall off of the pads. These should be discarded, as replacements should have come with your new brake pads.
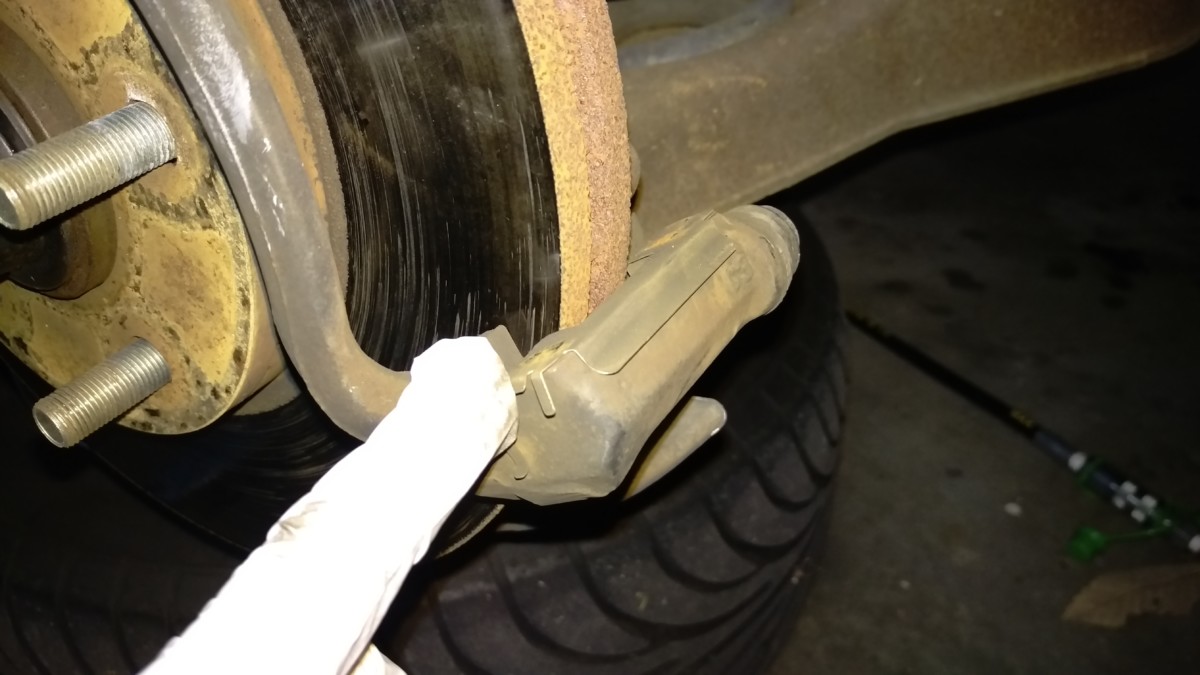
One more reminder: always check the inner AND outer pads
The driver’s rear pad, as shown earlier, had the inside pad worn down to metal. The outside pad still pad plenty of pad left. This is due to the lubricant on the slider pins seizing and preventing the pads from disengaging as they should.
Removing the Rear Rotors
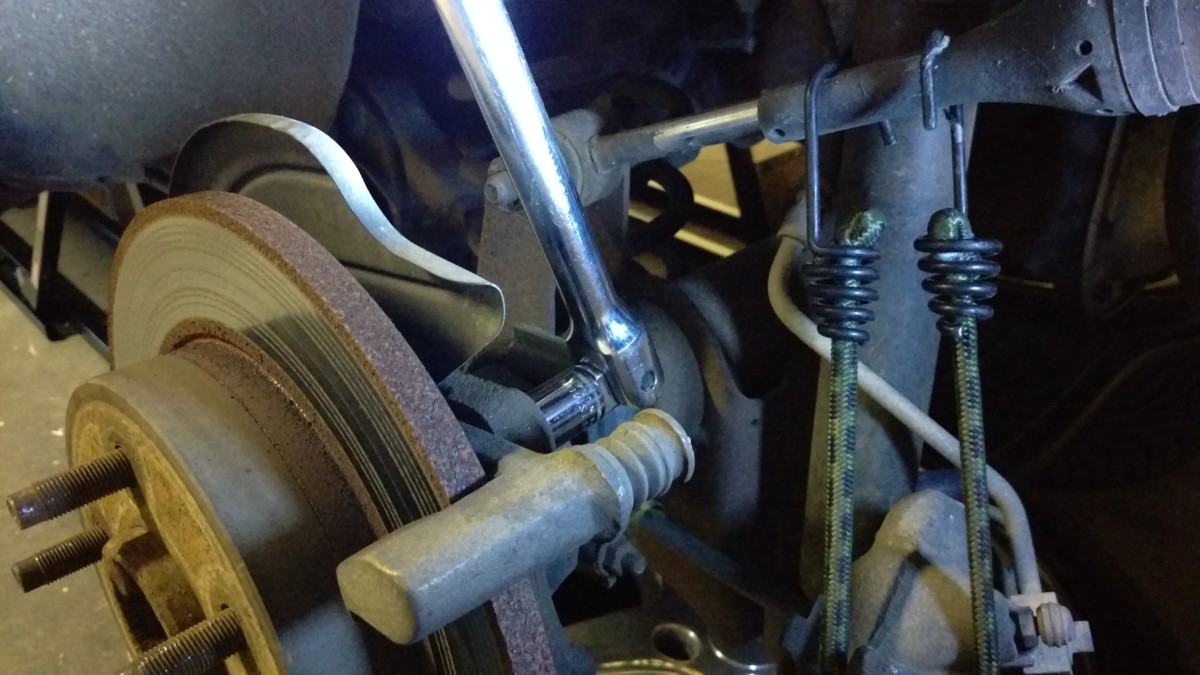
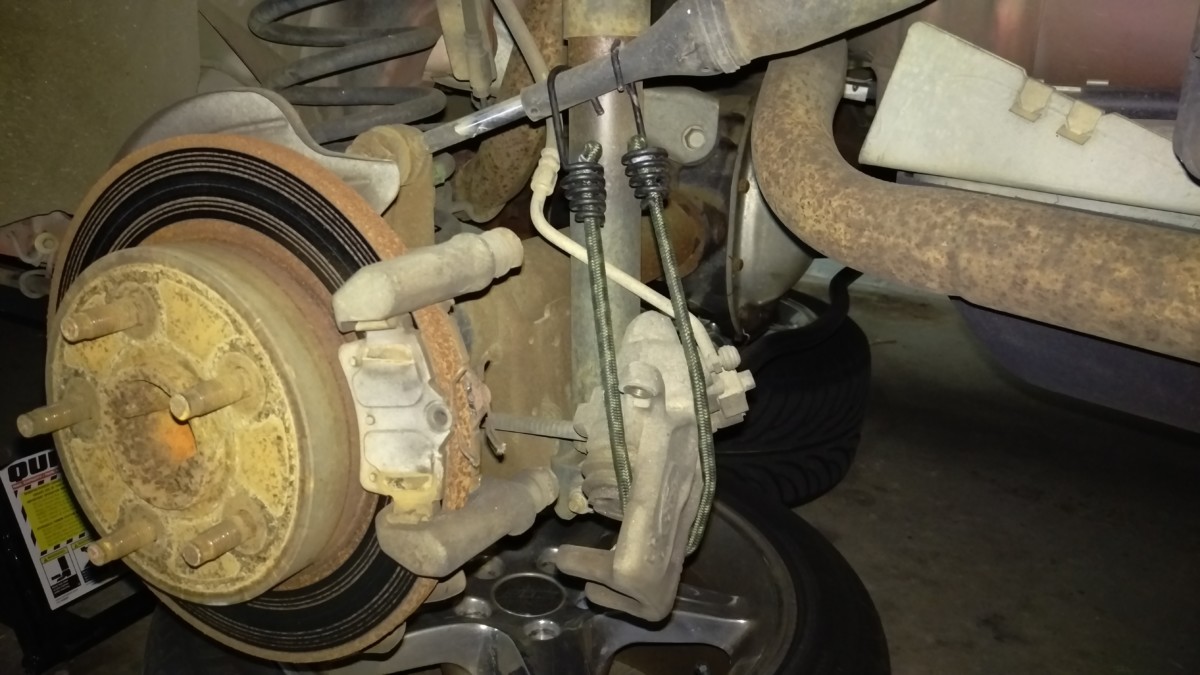
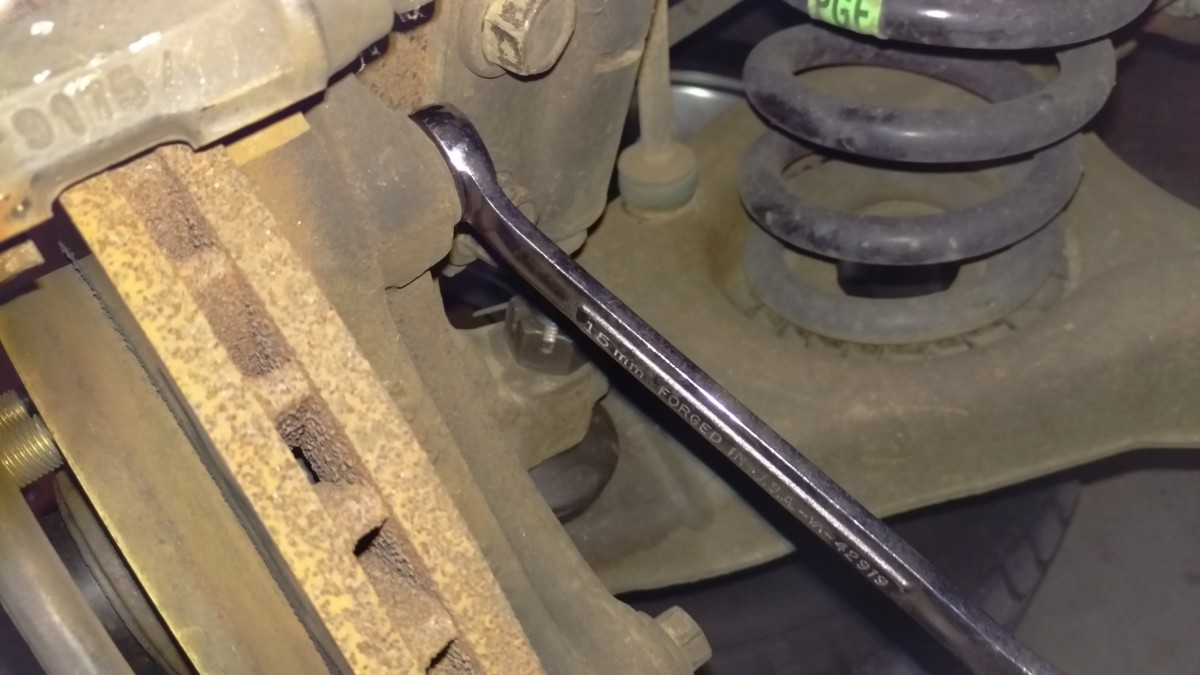
First pad bracket bolt
Lower brake pad bracket bolt
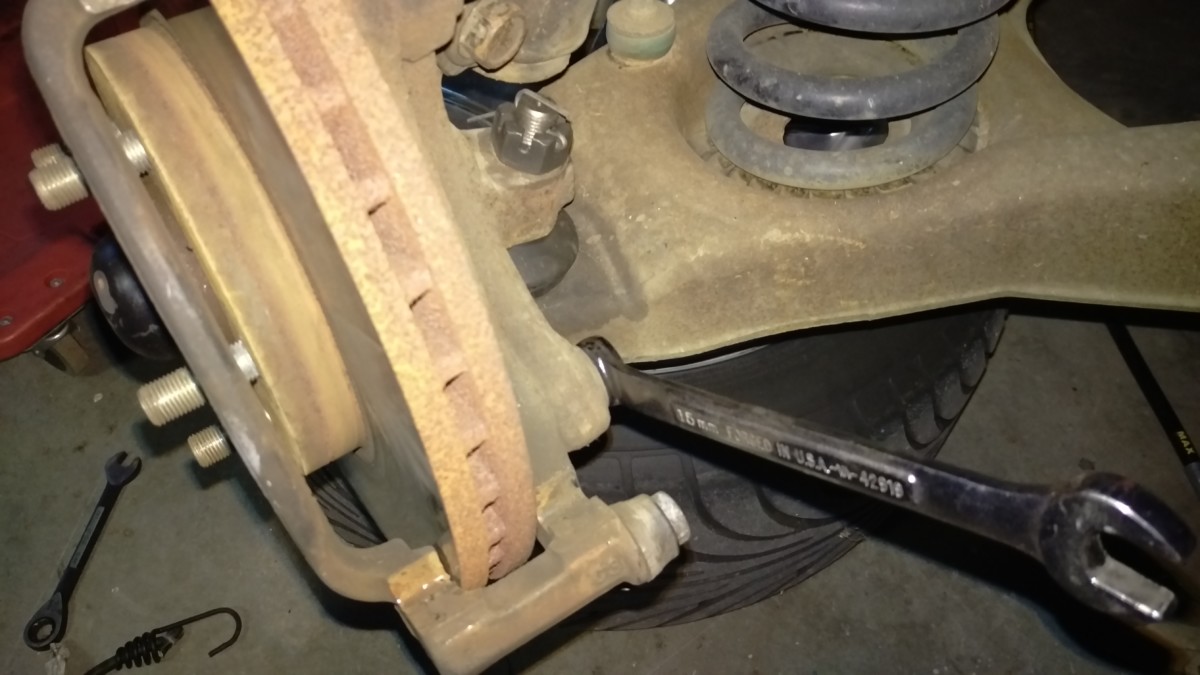
The bracket that holds the calipers must be removed before the rotor can come off. The picture shows the upper and lower bolts with a wrench on it on them. These get significantly more torque than the slider pins, so you may need leverage to get them moving.
For the upper bolt, I used a 2′ 3/8″ breaker bar

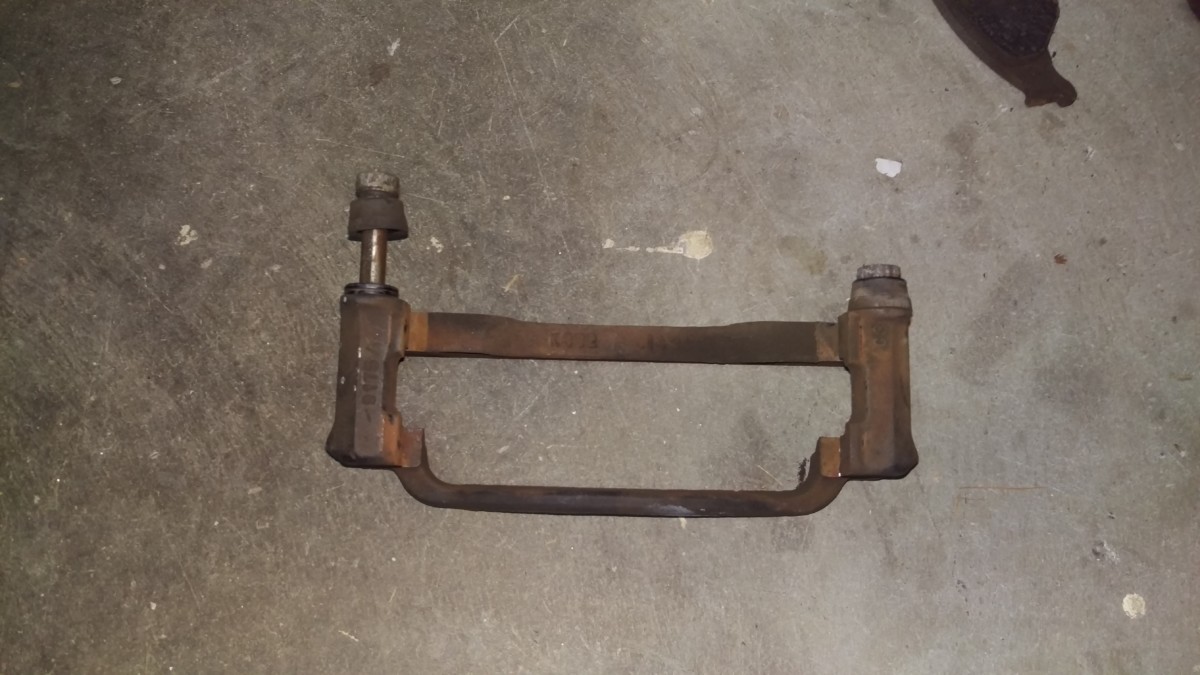
Pad bracket after removal
Once these bolts are out, the bracket will likely fall off. Here it is after removal.
Rotor simply pulls off

Wheel hub after rotor removed
Once the bracket is gone, the rotor will simply slide off. If the car has been sitting like mine, it may require a few taps of a mallet to break the rust loose.
Cleaning up the Rear Slider Pins
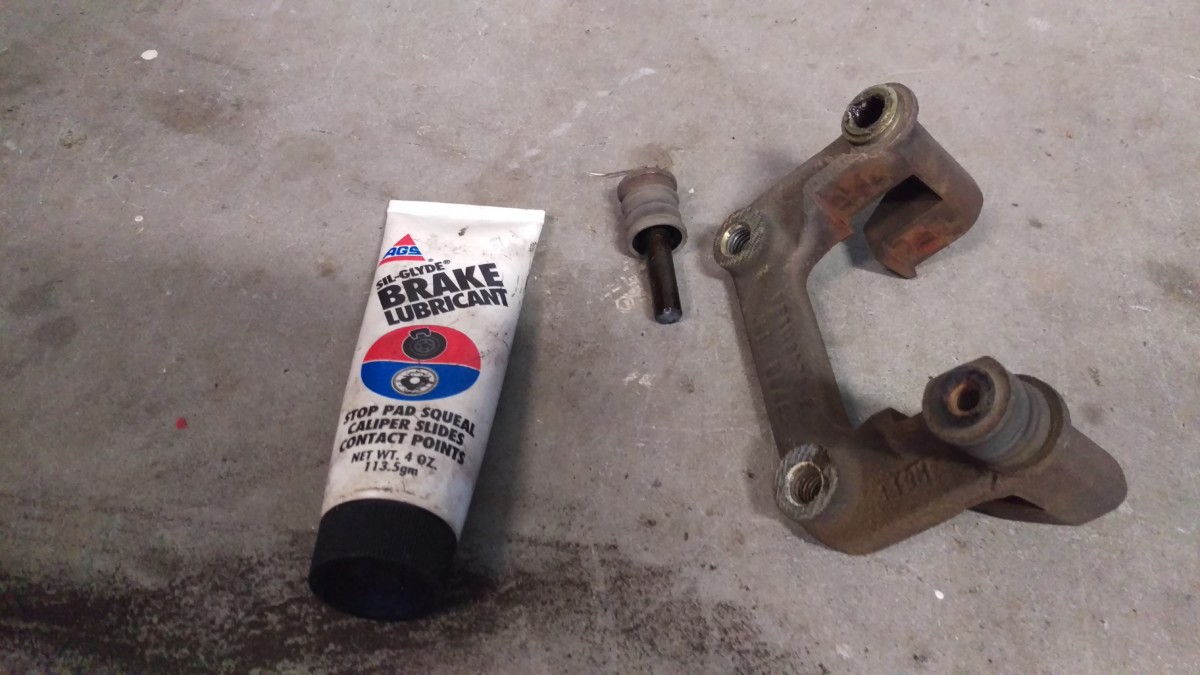
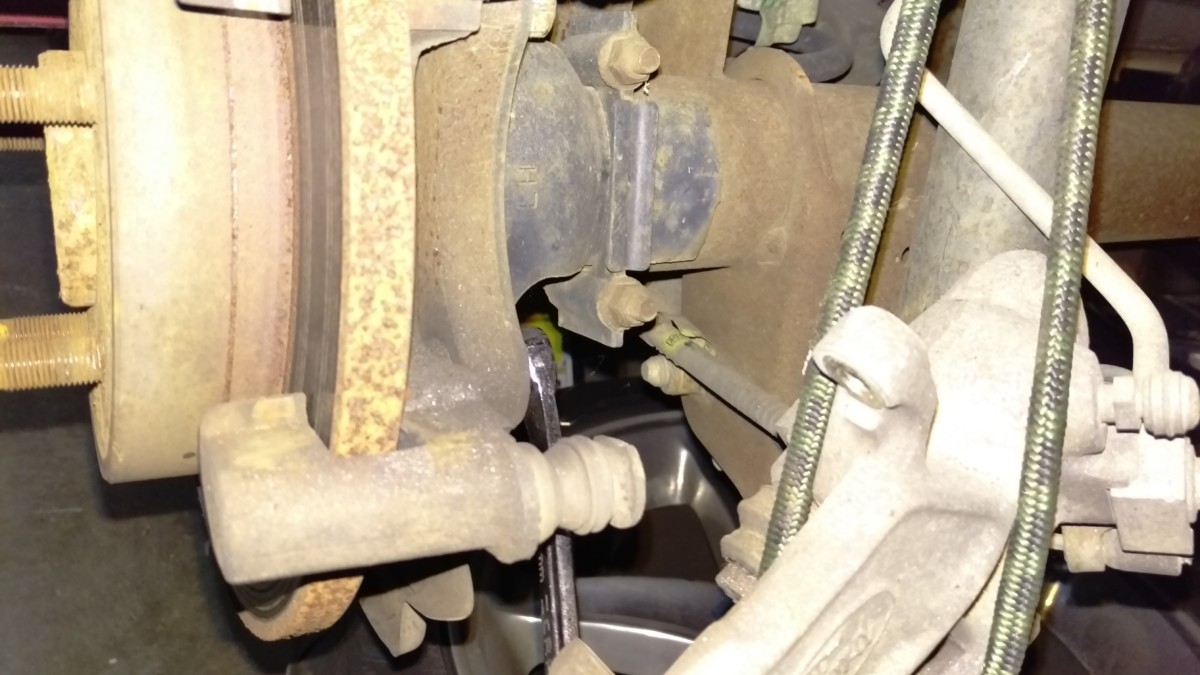
One pin was so seized there was no way it would come out, even with vise grips
Here you can see one of the slider pins is out. The other one is stuck tight – it’s no wonder I had uneven brake pad wear. I tried tapping it in and pulling it out to no avail. NAPA had a replacement bracket for something like $13, so I said forget it and got a new one.
If your bracket is salvageable like my other three were, start by pulling both pins out and clean them thoroughly with brake clean and a rag. The goal is to remove as much old grease as possible. Also check the rubber boots for cracking. The parts store will have a brake hardware kit for $5-$10 that includes these items if they’re cracked. Cracked boots will let the slider pin grease get contaminated and ultimately make the brakes seize, so don’t skip this step.

New hardware
Because my pin was so badly seized, I let the local NAPA have it. $13 later, I had this setup, which included new pins and boots.
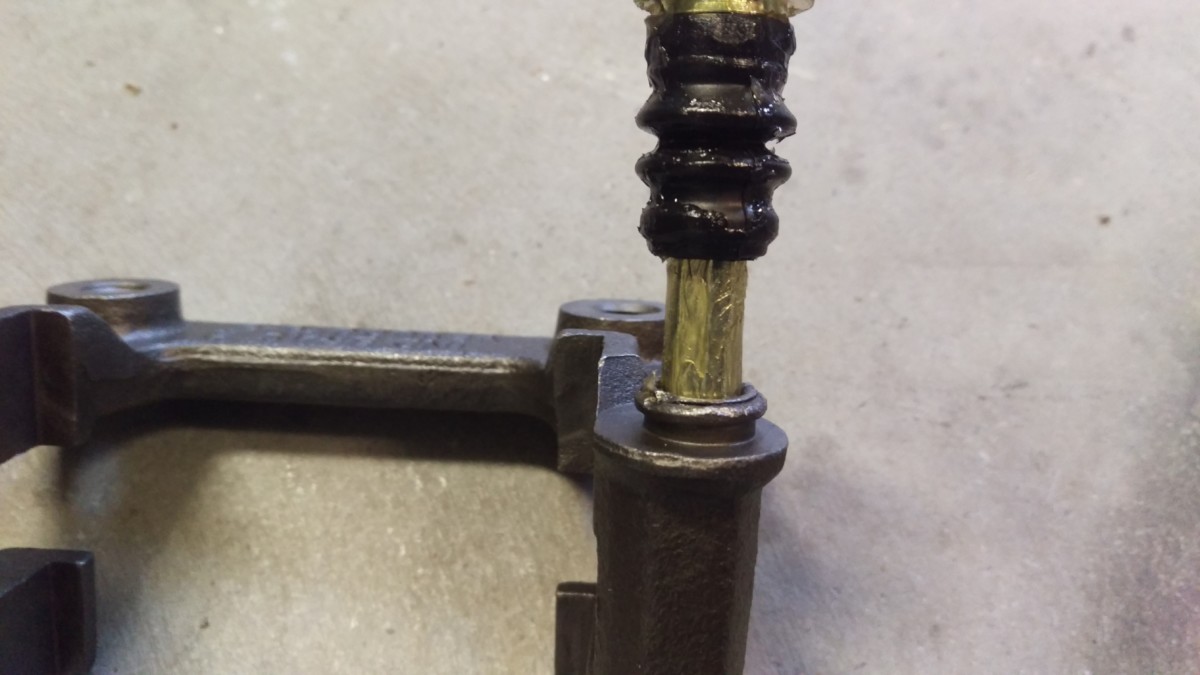
Liberal amount of grease on the new pins
Here’s an attempt to show how much grease I put on the pins. There’s no need to go overboard here, as it will clog up in the boot. I also didn’t mean to get grease on the outside of the boot, I just find it makes a mess. A good liberal coating to help the pin move smoothly is what’s required here. I also get some on a finger and grease up the inside of the bracket.
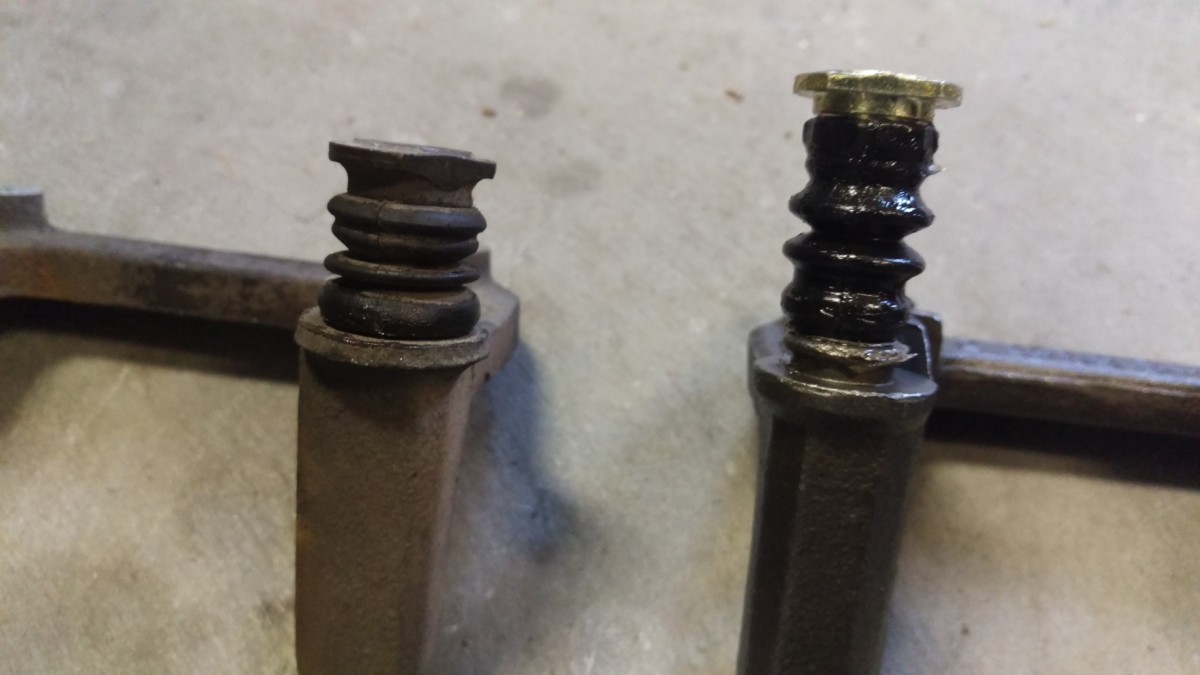
About to seat the boot like the old one was, pictured

This is ready to install
The last step is to seat the boot on the little flange right above the bracket. The first picture shows the new boot not yet seated, next to the old seated boot for illustration. You pinch the boot and force it down, turning it a little bit, and it pops on. Then, I wiped any grease off of the outside of the boot on each pin, and they’re ready to install.
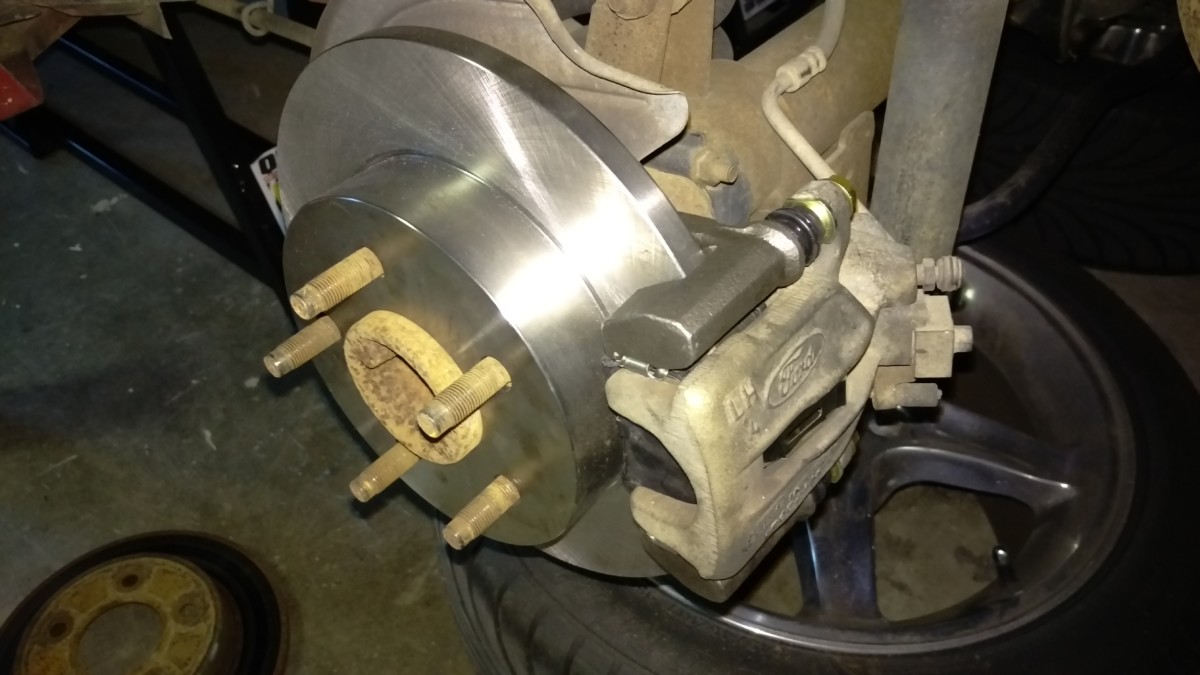
Reinstalling the Rotors and Brackets
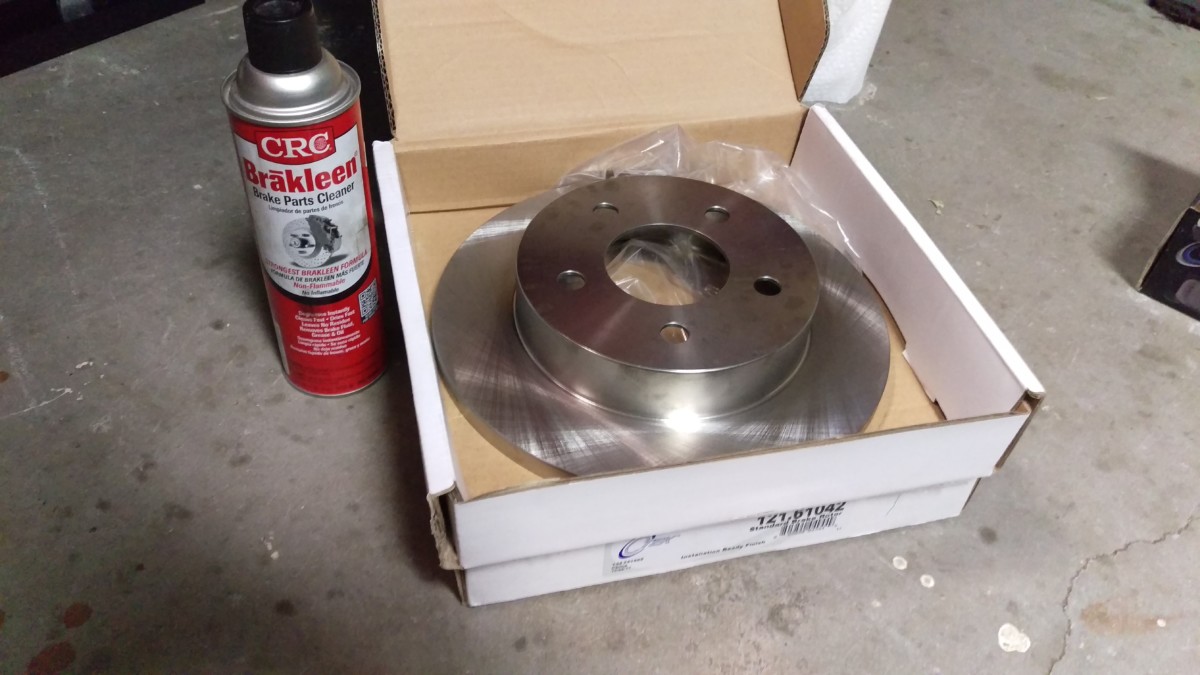
Fresh rotors
The new rotor will simply slide back on the wheel hub in place of the old one. Rotors sometimes ship with packing grease to keep them from rusting, in which case they must be cleaned with brake kleen before use. Grease on your brake rotors will cause your brakes to fail and can easily get you in a wreck.

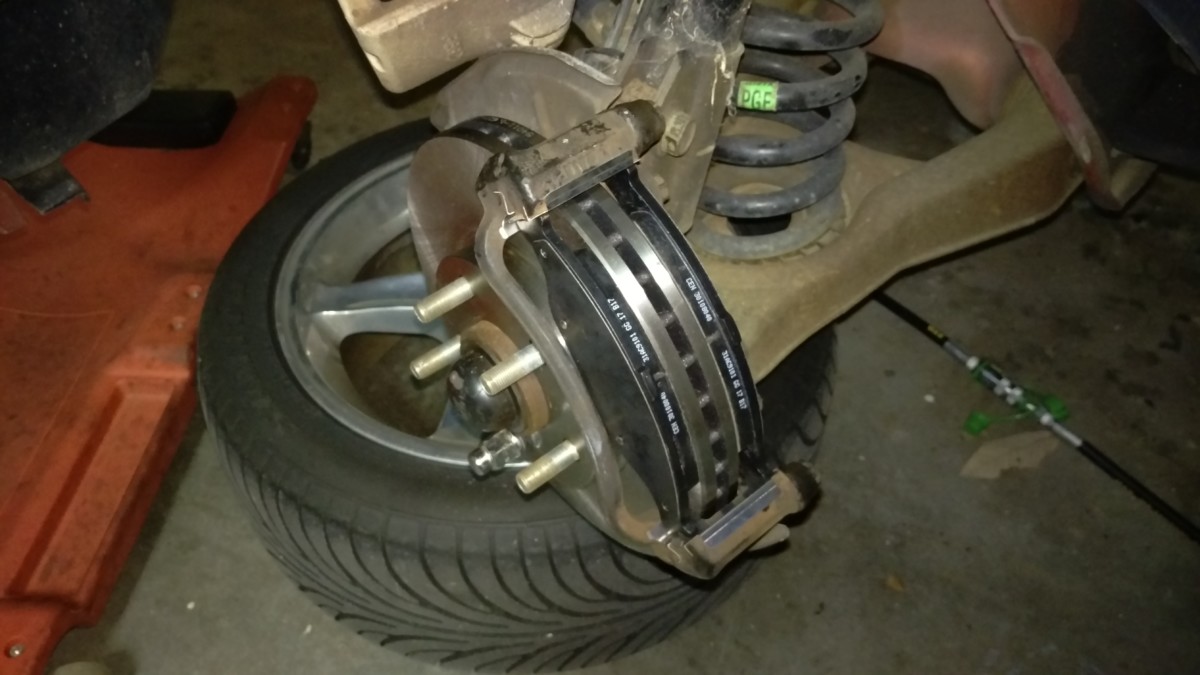
Reinstalled
With the new rotor installed, the bracket can be bolted back in. Both bolts are torqued to 79 lb-ft. It’s difficult to get a torque wrench one of the bolts, so I just made sure it was tight.
Reinstalling the brake pads
New pads (One side) with metal shims
Here are the rear pads and shims for one side.
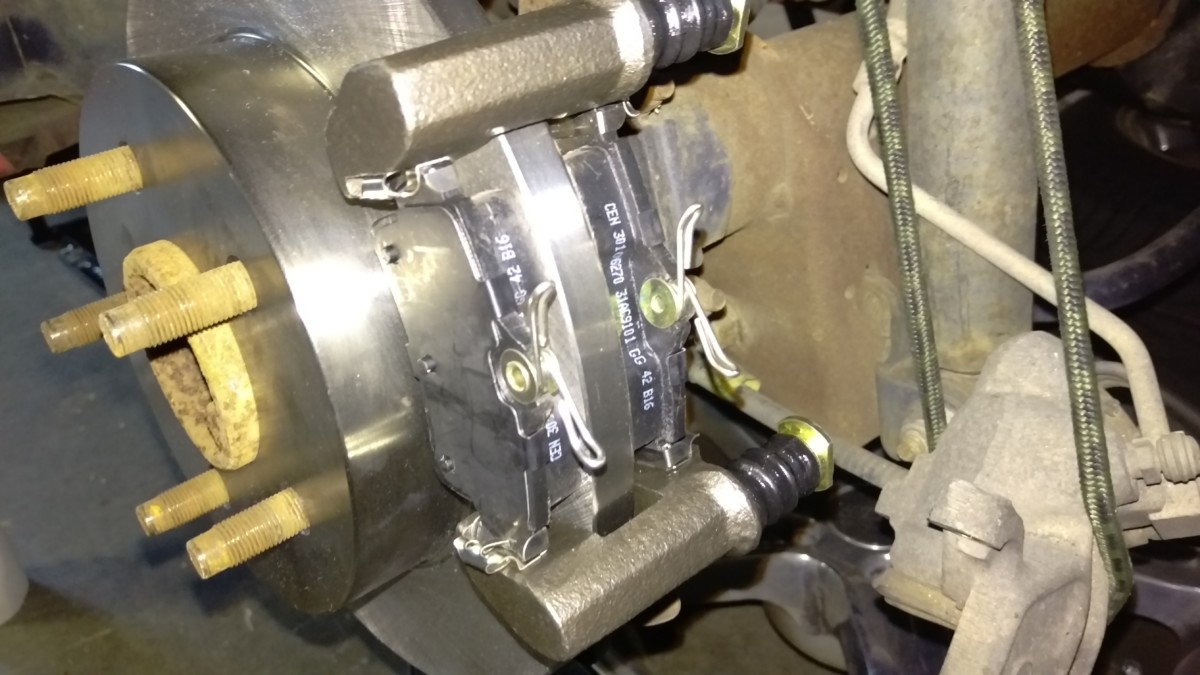
These get placed in the same way they came out
You reinsert the pads the same way they were removed. Place one of the four smaller shims at the top and bottom of each pad.
Retracting the Rear Calipers
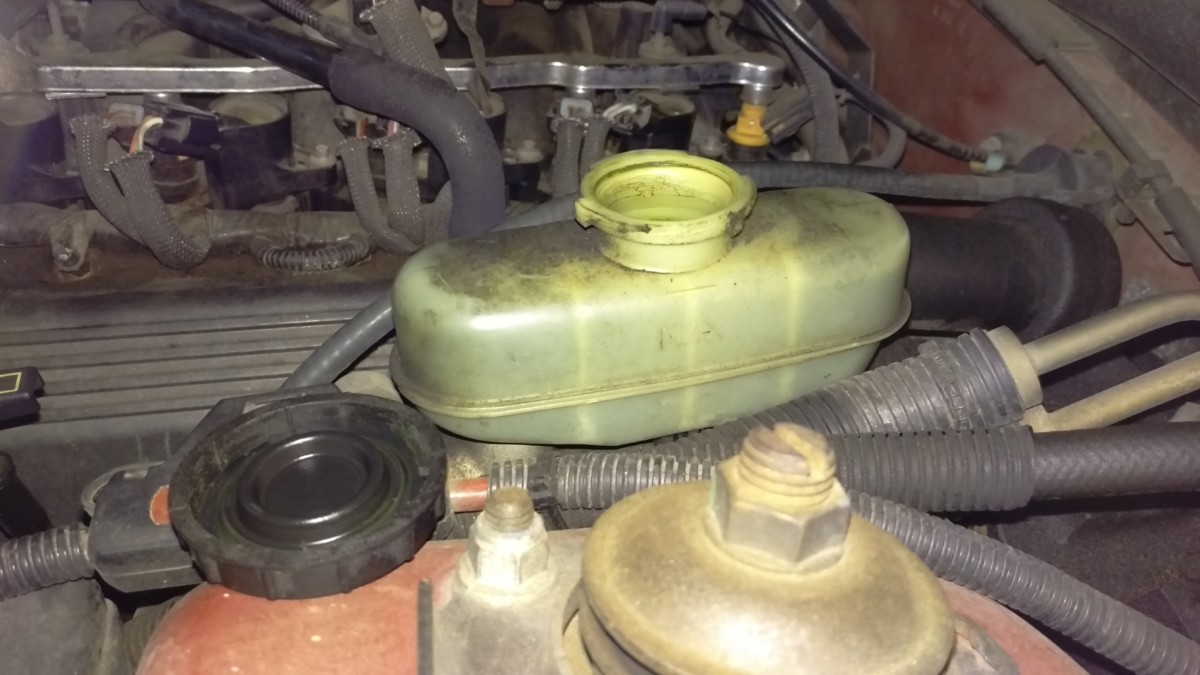
Take the cap off of the brake fluid reservoir
The new pads are going to be thicker than the old ones, since they’re not worn down. Thus, you have to retract the rear calipers before reinstalling, or they’ll not fit. To start, take the cap off of the brake reservoir as shown.
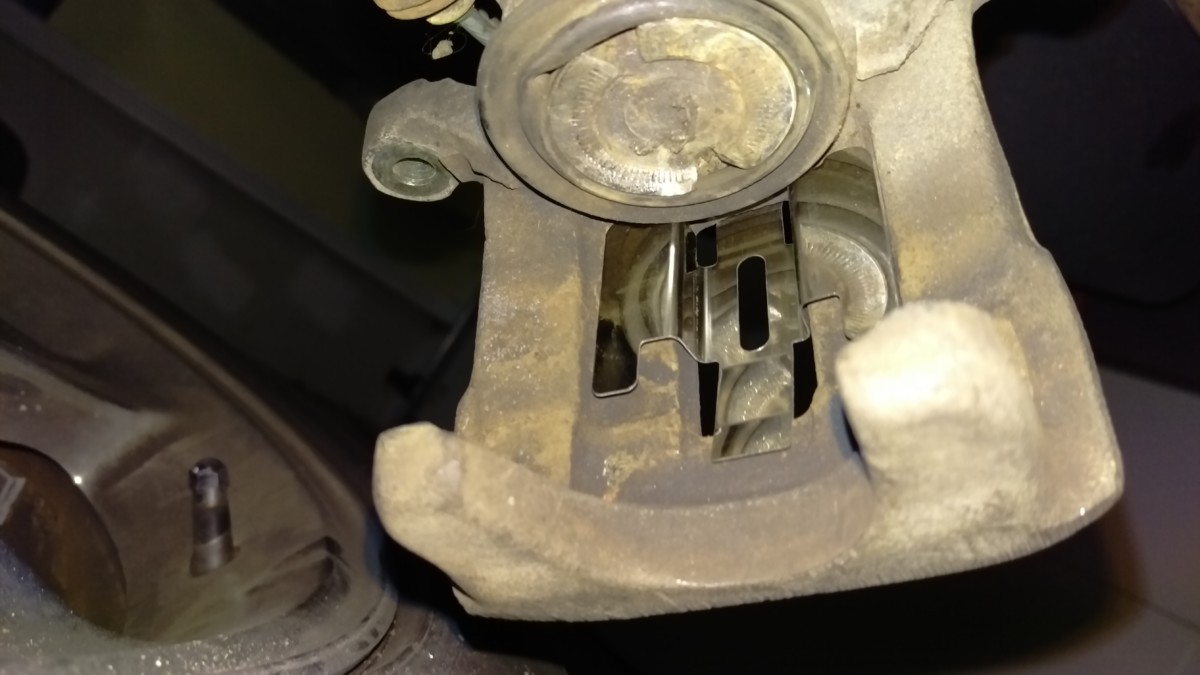
Need to spin in caliper using the two slots pictured
The Mustang’s rear brake pistons retract using the slots shown in the picture. This is where the special Autozone rental tool comes in.
This caliper retraction tool can be rented for free at Autozone
Alternately, one of these angle grinder wrenches can work in a pinch
You can borrow the tool shown from Autozone for free. Alternatively, in a pinch, you can try to use one of these wrenches used to change the disk on an angle grinder. I found this pretty difficult, though, so I’d just rent the proper tool if you can.

Autozone tool after assembly
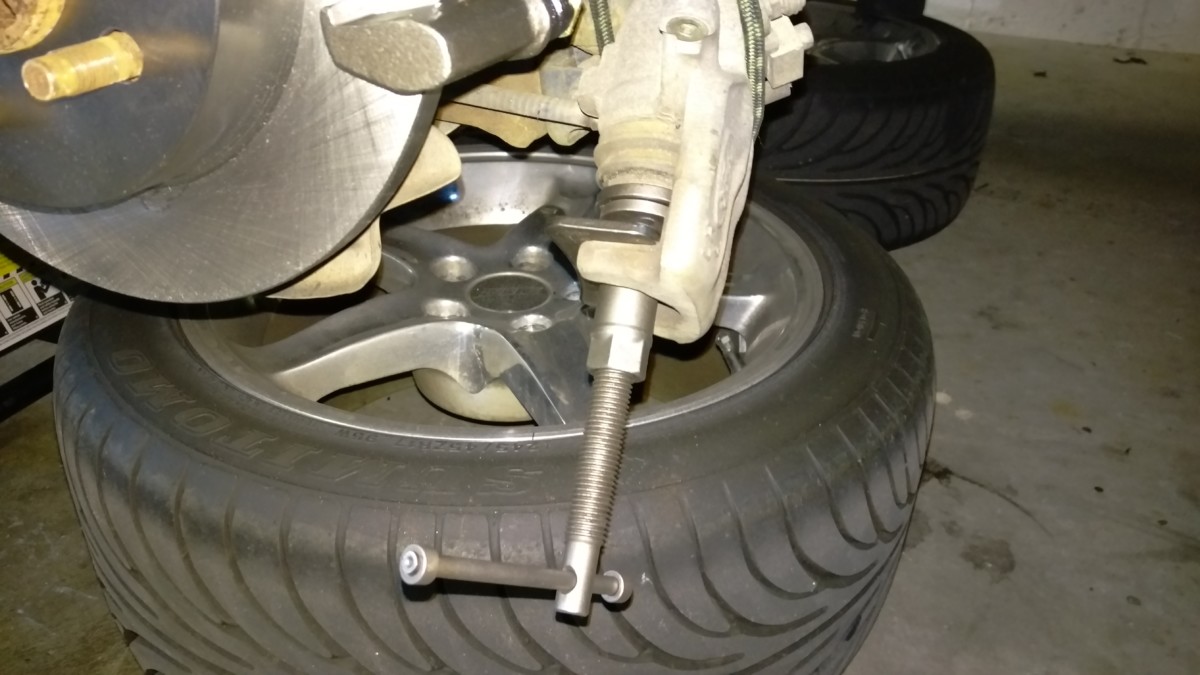
Retracting the caliper
Using the autozone tool is pretty straightforward. Pick the plate that fits into the caliper piston and attach it to the front end of the tool. Slide the pad-shaped backing plate around the handle and on to the back. Then, you can seat the tool inside the caliper. The plate should hold against the back of the caliper, while the plate should fit into the piston. As you crank on the handle, you’ll wind the piston into the caliper while the brake pad-shaped steel plate keeps pressure on the caliper. Don’t forget to reinstall the brake master cylinder cap when you’re done.
Reinstalling the Rear Calipers
Installing new shim in the caliper
View from the other side
Once retracted, you’re almost ready to reinstall the calipers. However, these shims need to be installed first. The brake pad box should have two larger shims, one per side. One of these will seat in the top of the caliper as shown. You simply push them into place.
Rear brakes done
Finally, push the caliper back on to the brake pads and reinstall both bolts to hold it to the bracket. You may need to tap the caliper with a mallet to get it on, as the new pads may be snug. This doesn’t mean beating the crap out of it. If it won’t go on, something is wrong.
If you have trouble, make sure the caliper piston is retracted as far as you can get it. If you still have issues, the cheap brake pads you bought are probably thicker than spec. I saw this when I tried to install Centric C-Tek pads, so I don’t recommend them. Once I got a set of NAPA pads, it worked great.
You may also want to thread a couple of lug nuts onto the wheel studs to help seat the rotor. Sometimes if the rotor isn’t on straight, the pads can’t seat fully.
Torque the bolts into the slider pins to 24 ft-lbs, and you’re ready to move to the front.
Removing the Front Calipers
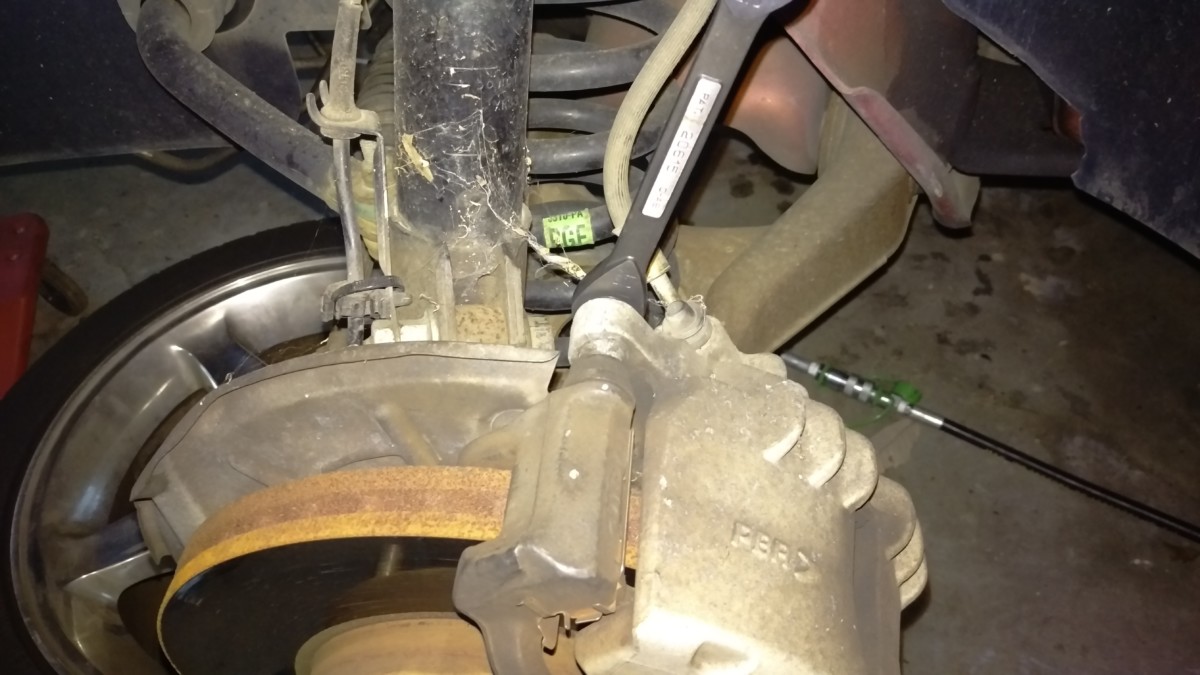
The top front caliper bolt
The bottom front caliper bolt
Here are the two bolts. They’re basically the same as the rear.
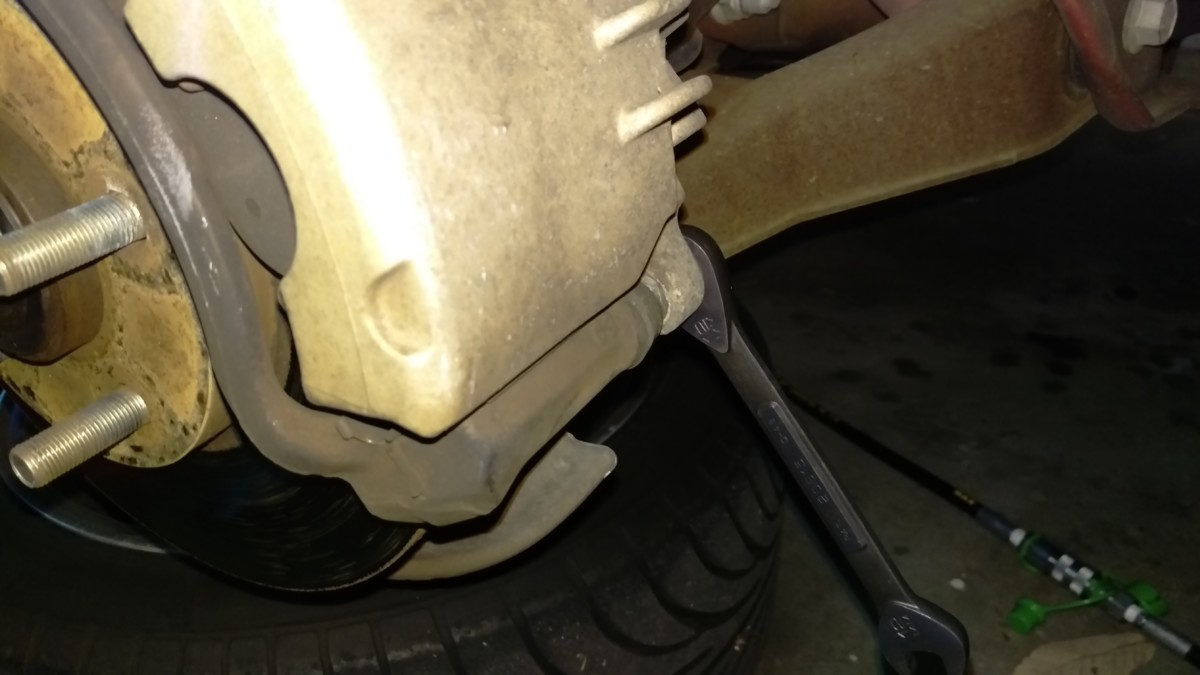
Had to carefully use a vise grip to keep the caliper pin bore from turning
A bit of prying was also required to pull them off
I did find that one of the caliper slider pins wanted to spin freely in the bore rather than break loose. The pin is supposed to have a flat on it so that you can use a wrench to hold it in place. Unfortunately, if there used to be a flat spot, the previous owner marred it beyond use. I set a vise grip to hold it firm enough that the rubber didn’t stretch and tear, but also loose enough to not mess up the rubber from the pressure. It seemed to work fine.
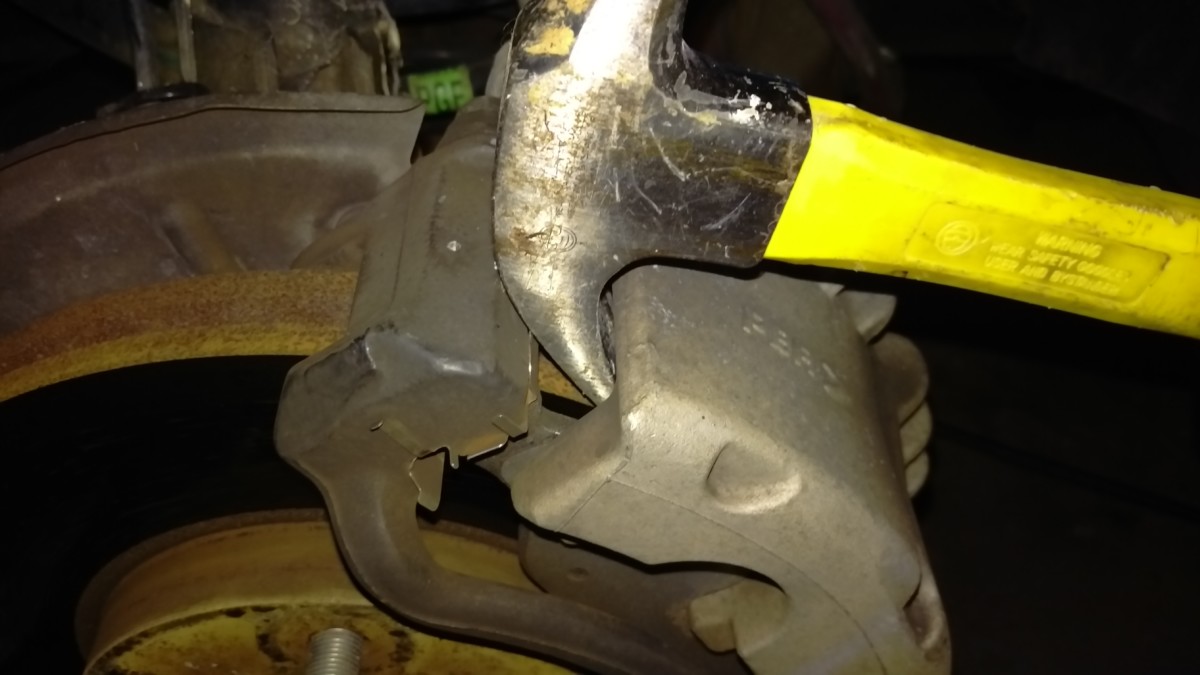
Once the bolts were out, the caliper was pretty well stuck to the pads. I needed to carefully use a hammer as shown to pry it out.
Removing the Front Brake Pads
Front pads after removing the caliper
The front pads simply pull off, just like the rears.
One shim on the top of the pad slot
Showing the orientation of the shim as it came out
The front pad shims look a little different from the rears. Instead of four small shims, there are two larger ones for the top and the bottom. Pay attention to the orientation as you remove these.
The same shim on the bottom
Of course, the bottom shim looks very similar.
Removing the Front Caliper Bracket
The top caliper bracket bolt
The bottom caliper bracket bolt
This procedure is almost identical to the rear. I included shots of the bolt locations for reference.
Removing the Front Caliper Bracket
Doubling up on wrenches gives extra leverage
Removed
The one notable difference is that these bolts were quite tight, at least on my car. It took doubling up on the wrenches as shown to get them free. Even then, I think I might have cranked the steering wheel to get more access and used my electric impact wrench
Changing the Front Rotor

This procedure is basically identical to the rear
I took fewer pictures since this procedure is identical to the rear. With the caliper bracket off, pull the old rotor off and chuck the new one on. Make sure the new rotor has been cleaned with Brake Kleen to get rid of any packing grease. Grease the slider pins and make sure the boots are intact just as with the rear. The front caliper bracket bolts torque to 85 lb-ft.
Reinstalling the Front Brake Pads
Two shims for the pads, one for the caliper
Done
As stated earlier, the front pads only have two pad shims per side. Seat these on the caliper bracket and then slide the new pads on. The final shim is used for the caliper itself, just like on the rears.
Retracting the Front Calipers

6″ C Clamps work best for this
The front calipers don’t have an e-brake, so they’re much easier to retract. First, pull the cap back off of the brake master cylinder, as you did with the rears. Then, put the old pad against the piston and attach two 6″ C-clamps
Reinstalling the Front Calipers
Picture of the new shim vs where it goes
Don’t forget to replace the pictured caliper shim as well. Once this is done, the caliper simply slides on and bolts back up like before. The caliper to caliper bracket bolts take 25 lb-ft of torque.
Wrap-up
And that’s it. Mechanics often charge a lot of money to change brakes on a car. While brakes are safety critical and should be done carefully, changing brakes on a 99-04 Mustang GT is a simple job that can be done by just about anyone. Of course, if at any point you feel uncertain about the procedure, hire expert help to ensure your brakes are safe to drive on.
Well written article with pictures. I was just looking to see if the front caliper pistons need to be pushed in or turned in (I knew about the rear pistons, wasn’t sure about the front). I ended up reading the whole article. Another useful piece of information is the images of the caliper shims, because they can fit a couple ways. If you aren’t familiar with doing this job, it’s a good idea to take pictures as you disassemble things.