Making an Inlay Snowflake Christmas Ornament
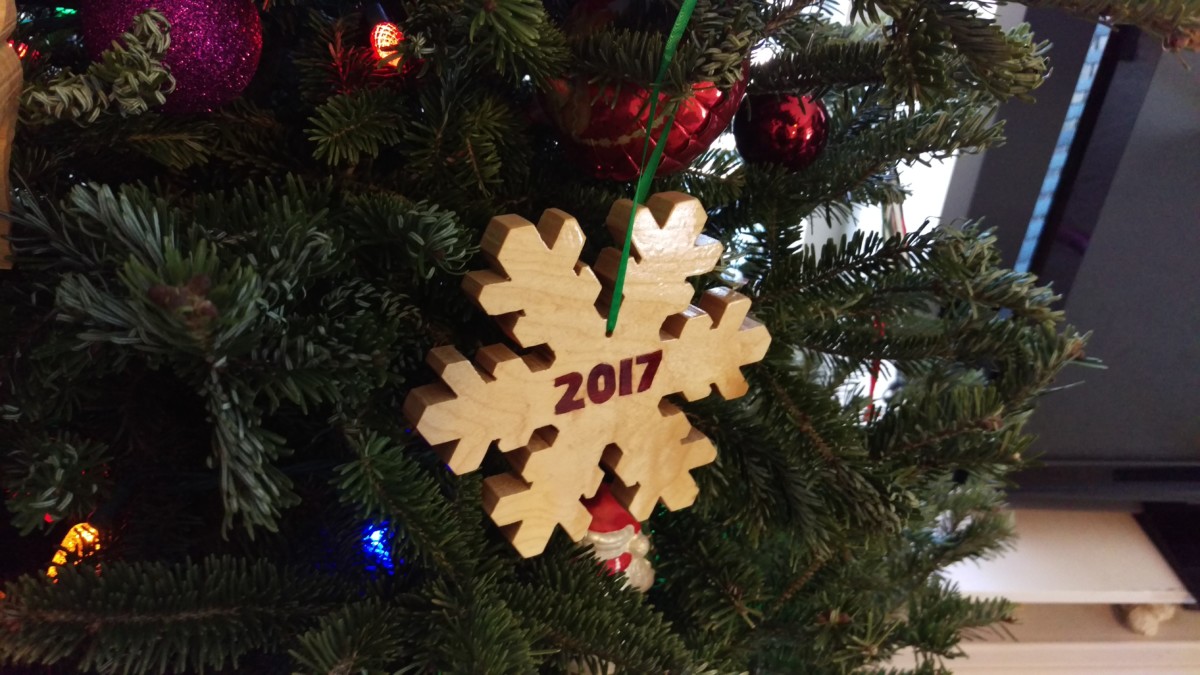
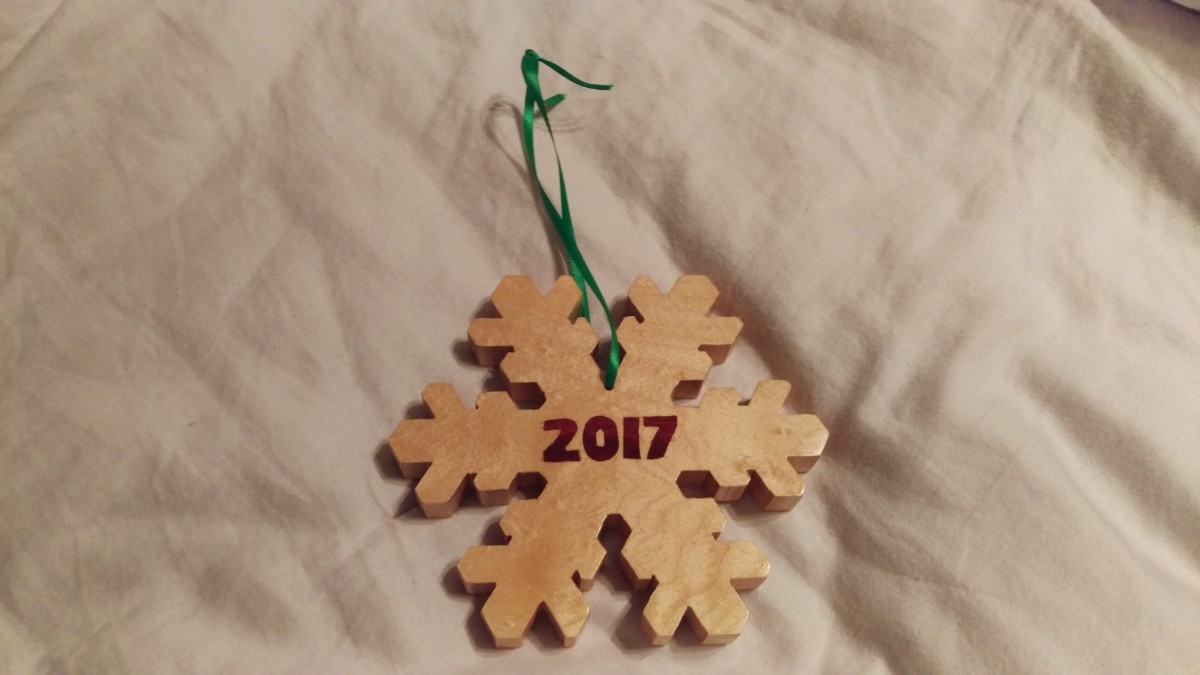
Final product
My wife and I do an ornament exchange on Christmas Eve, and I often make one out of wood, like this Bandsaw Reindeer. This year, I decided to get fancy with some extra maple and bloodwood I had and try some inlay. Making an inlay snowflake christmas ornament was a nice, simple project to practice this technique for the first time.
Specialty Tools Required
Cutting the actual snowflake and letters will require either a bandsaw
You’ll also need a router


Some kind of magnification helps when routing the inlay. I simply used cheap 4x magnifying reader glasses
Another Approach: Inlay Template Kits
This article describes creating an inlay freehand using a router and a small bit. Some people prefer to make inlay with router template kits
This seems like a pretty foolproof way to crank out a lot of the same inlay. On the flip side, your design won’t be able to include sharp corners, because the router bit simply can’t cut them. The freehand approach allows sharp corners by going back with a chisel after routing. Also, for a one-off design like this ornament, making a template just seems like a pain in the rear. I also don’t see how it would work with more complicated designs involving multiple inlaid pieces.
Design
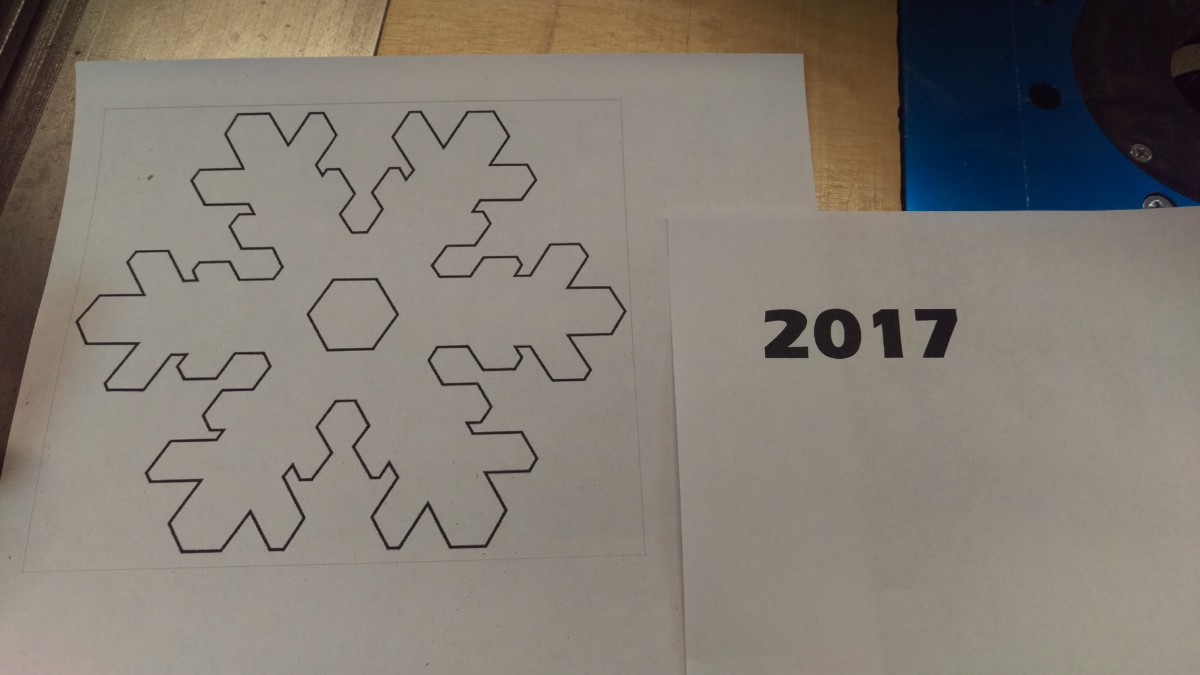
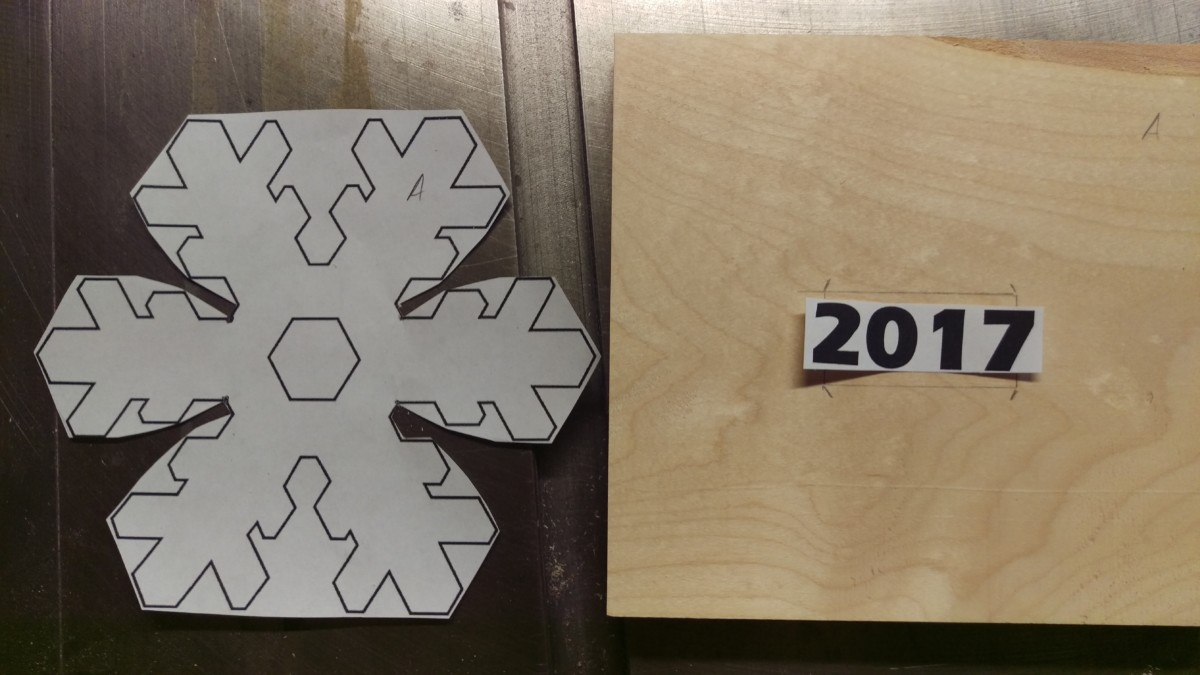
Printing off the design
After a few minutes of Google, I found a snowflake pattern that was simple enough to cut out on the bandsaw and still had enough room at the center for inlay. It resulted in a pretty big ornament, but oh well. The original idea was to do a more complicated inlay, but scaling it back was smart, in retrospect, since this was my first attempt.
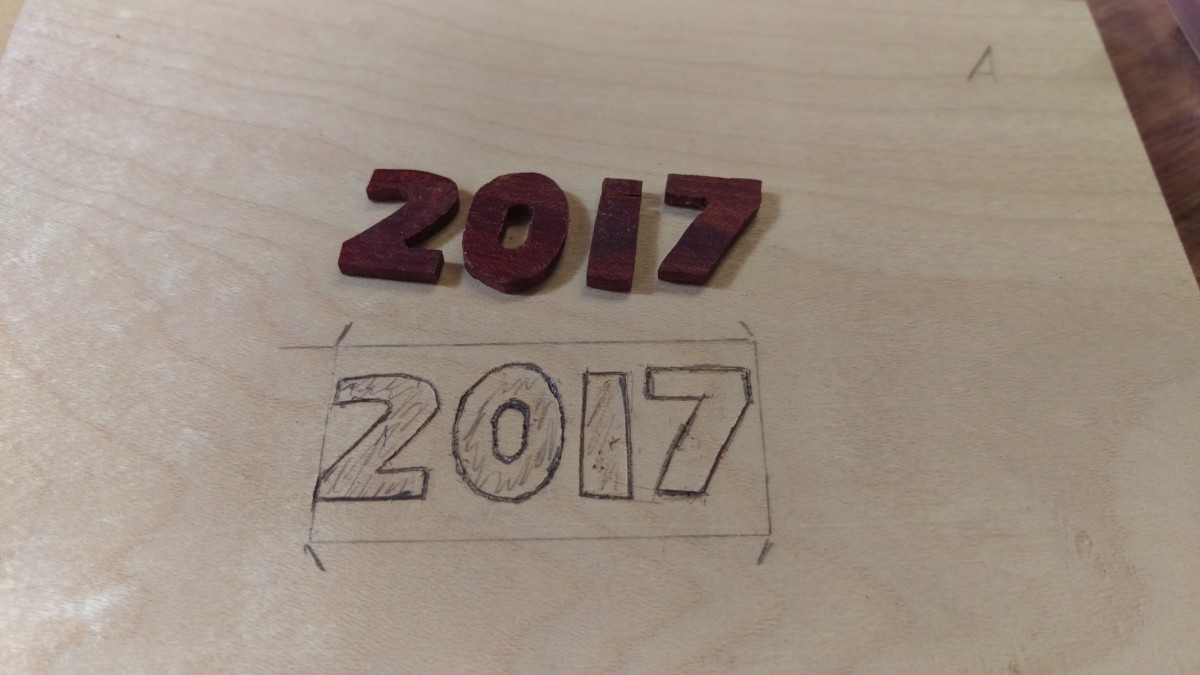
Locating the Inlay
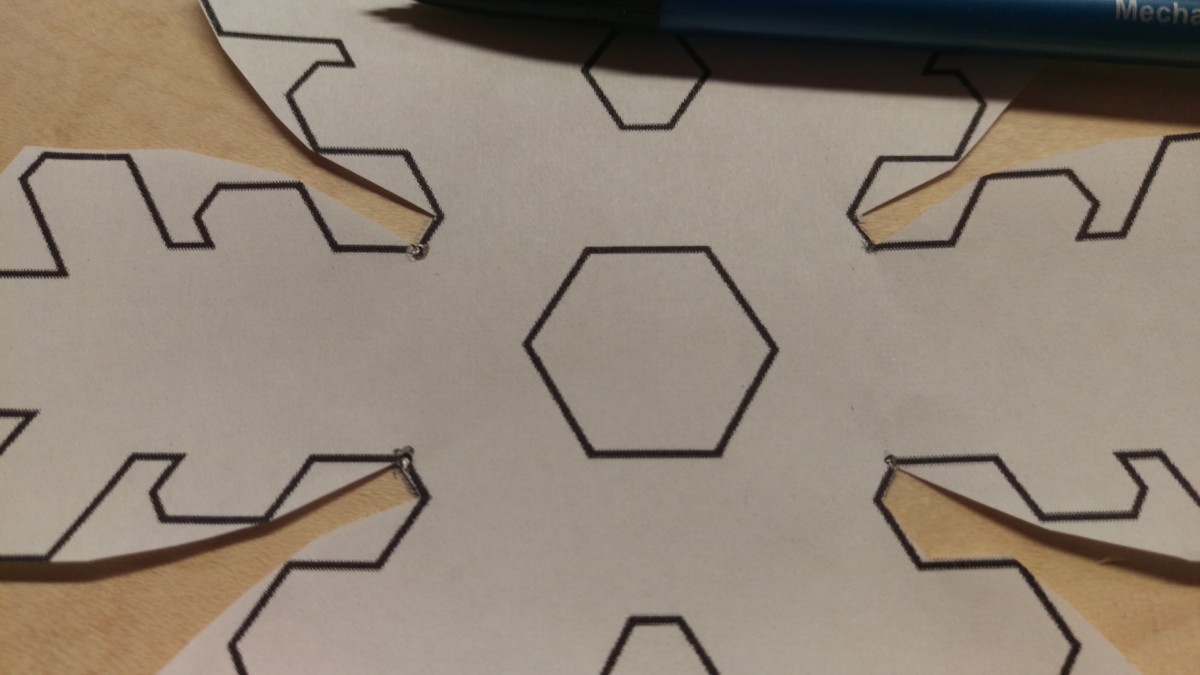
Finding the center of the snowflake to ensure it would fit
I wanted to do the inlay before cutting out the snowflake. While it is a big square piece, the wood is easier to clamp, handle, and place a router on. However, the inlay had to go right in the middle where the snowflake would eventually be. To start, I cut out enough of the pattern to be able to make some marks in the corners of the center.
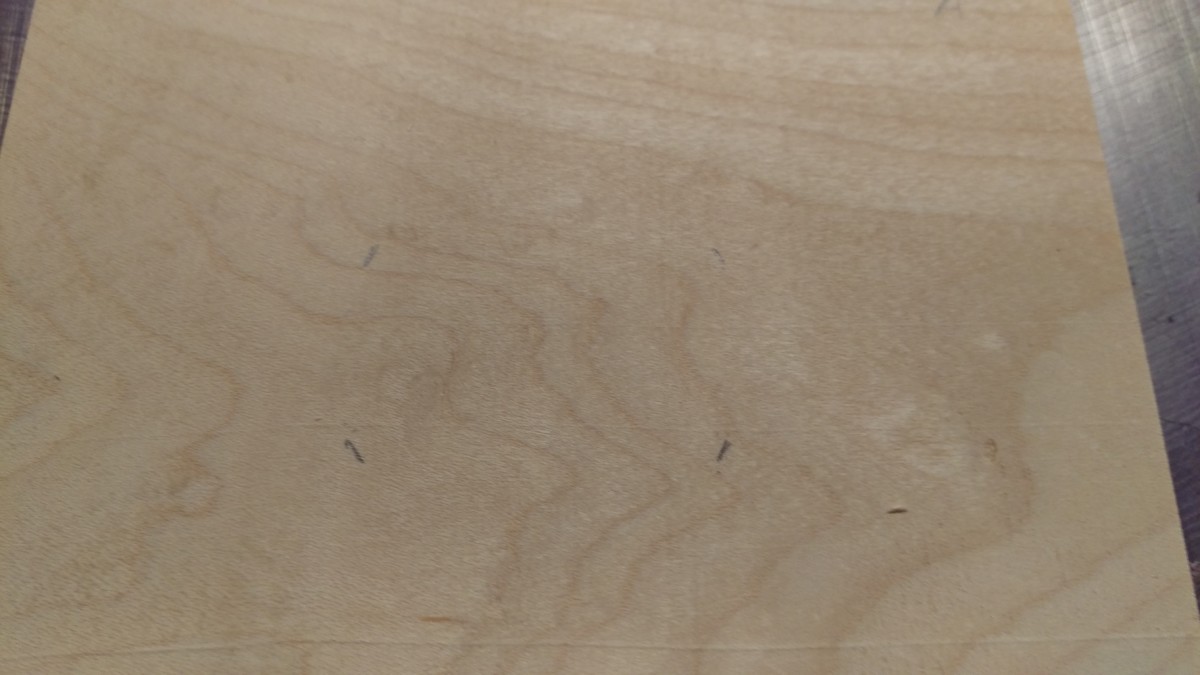
Marks

Lines between the marks
With the marks in place, I used a straightedge to make a box where the inlay should go.
Done
Finally, I can center the inlaid letters and know where they belong.
Cutting the Inlay

Numbers and spray adhesive
For the inlay, I used some scrap bloodwood from a previous project. It had a very vivid red color, and was about 1/8″ thick. The spray adhesive is a great way to stick the paper template to the bloodwood.
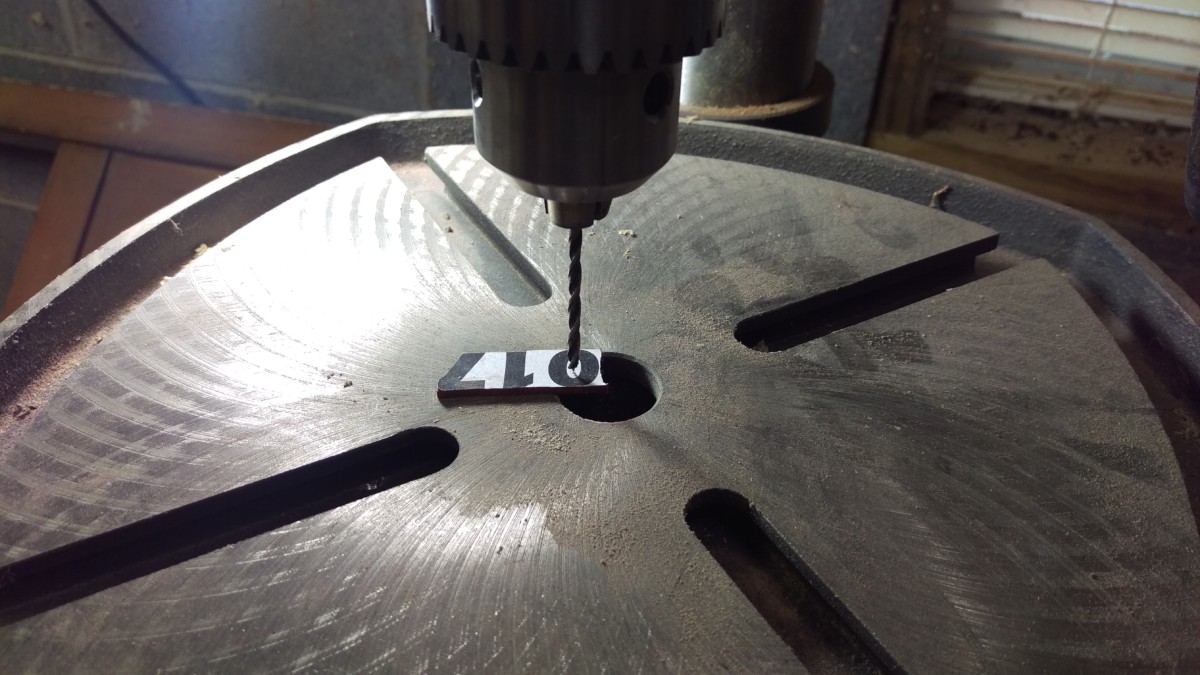
Drill holes in the 0 first!
With the template glued on, the next step is to drill out any interior holes first. I made a mistake the first time by cutting the “0” out before trying to drill it. Once cut out, the piece will be too small and fragile to drill. Doing it before cutting like this solves that problem.

Chiseling
I drilled a couple of holes, top and bottom, on the drill press. After that, a little clean up work with a chisel finishes the job. I’ll note that a scroll saw with a thin blade would have probably worked much better for this, but I don’t have one.
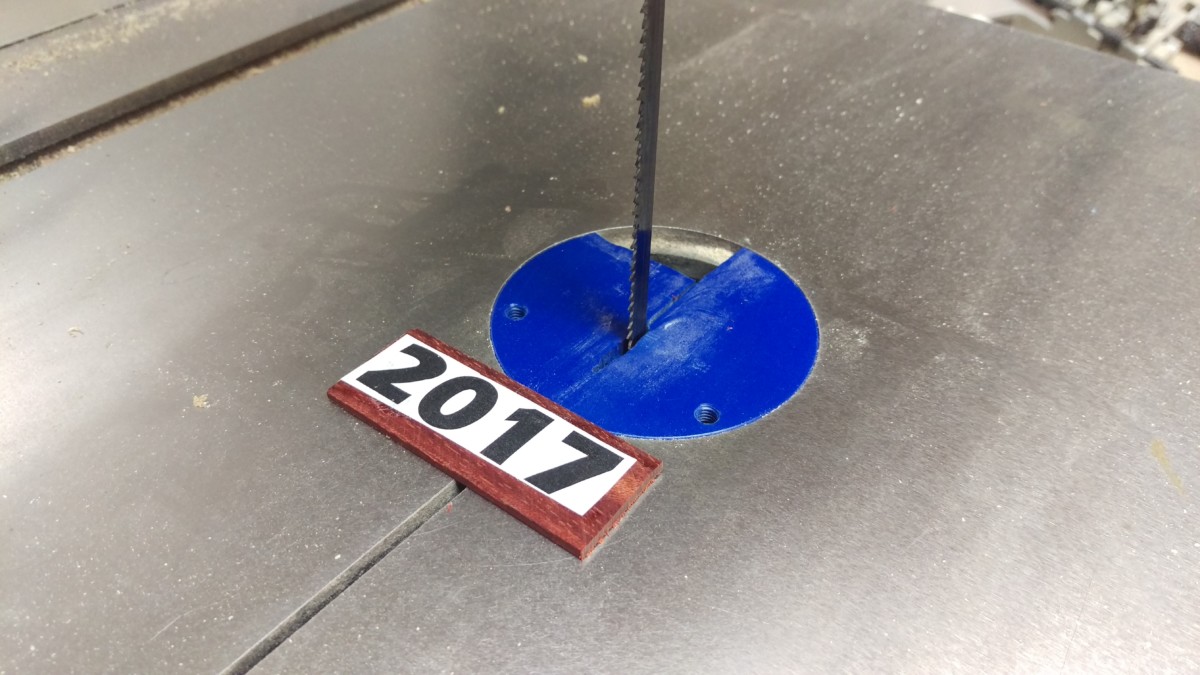
Bandsaw – note, “0” isn’t drilled because I screwed up, but it should be at this point
At this point, the piece is ready to take to the bandsaw. Note that I should have drilled the “0” by now, as I said earlier. The bandsaw is set up with a 1/4″ 10tpi blade, the smallest and finest-toothed blade I have. It would have been even better to have a higher-TPI 1/8″ blade or to simply use a scroll saw.
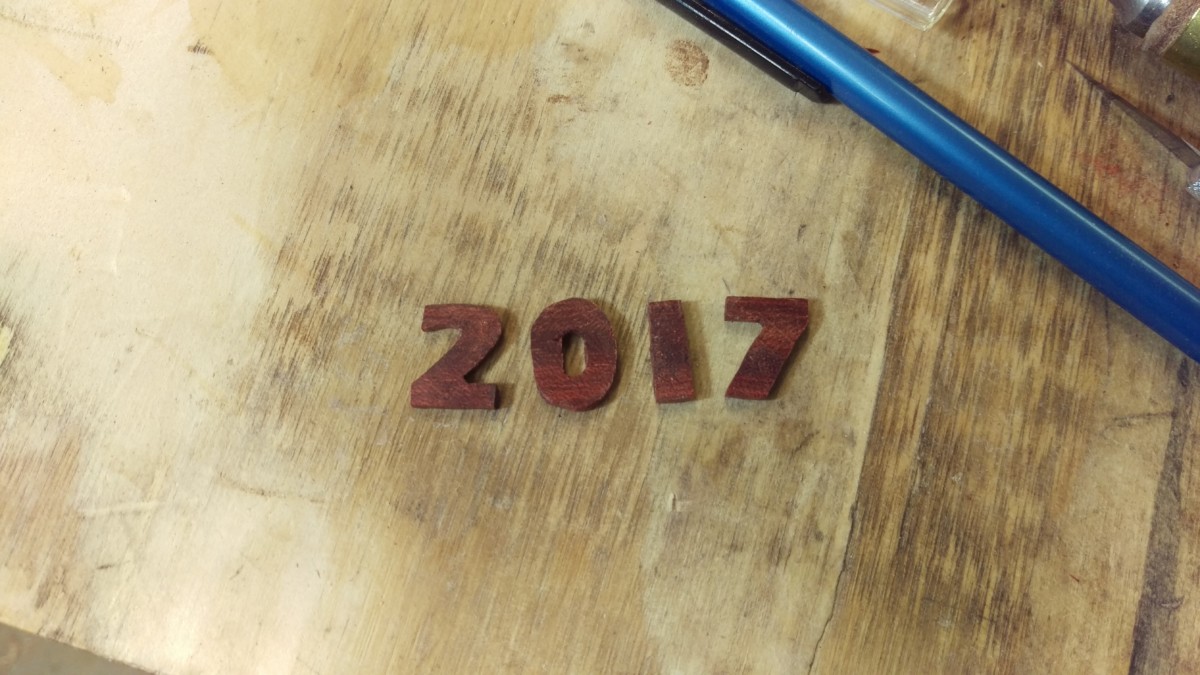
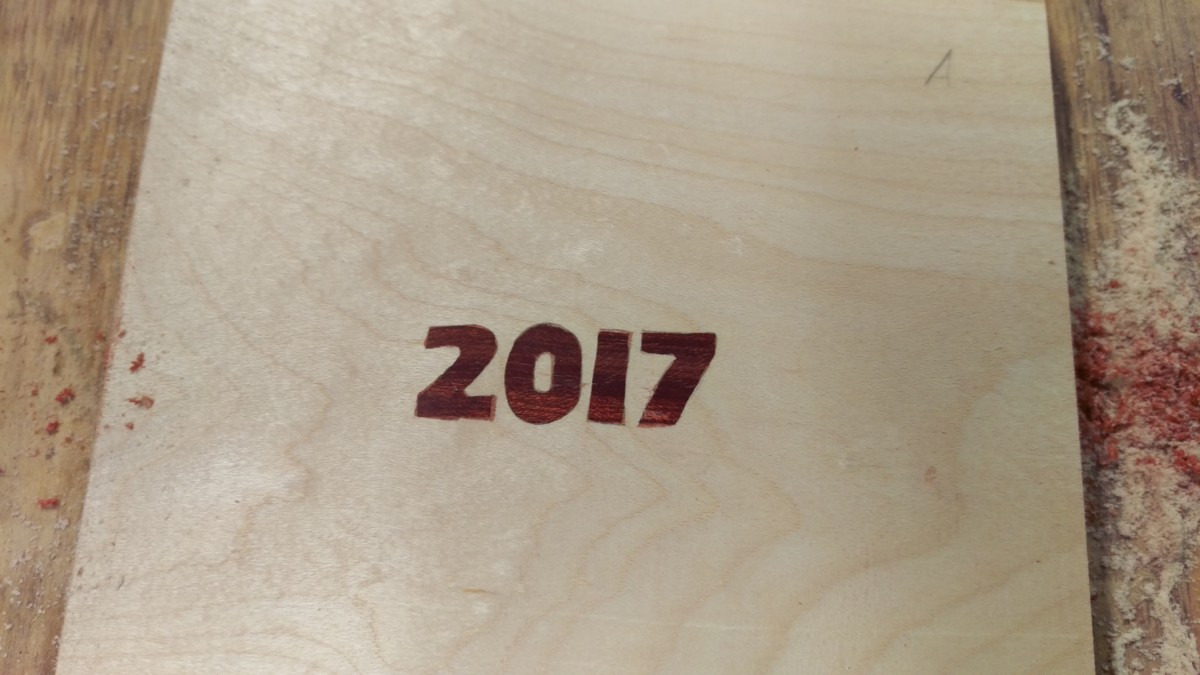
Numbers are ready
After a little bandsaw work, the numbers are ready. Careful use of a small file or bit of sandpaper takes care of any jagged edges.
Tracing the Inlay Pattern
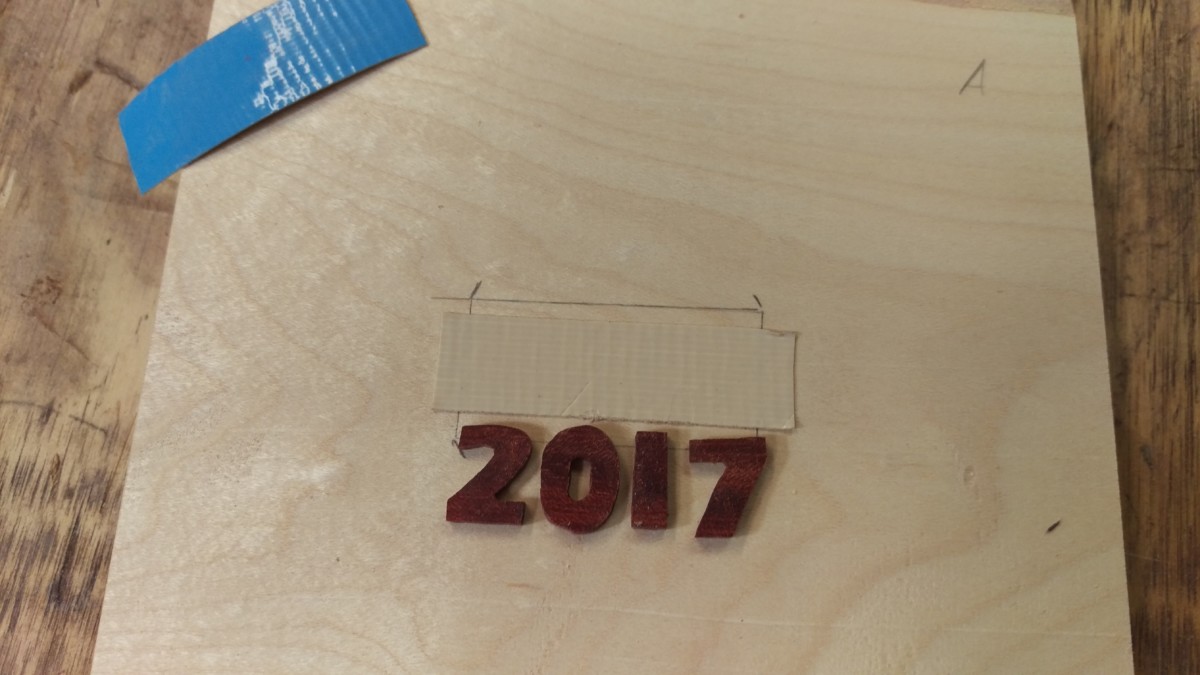
Double-sided carpet tape stuck down to workpiece
Letters stuck down in position
The next step is where the carpet tape and x-acto knife come in. A piece of double-sided carpet tape holds the numbers to the maple in the desired arrangement. I lined them up referencing the bottom of the tape as a straight edge.
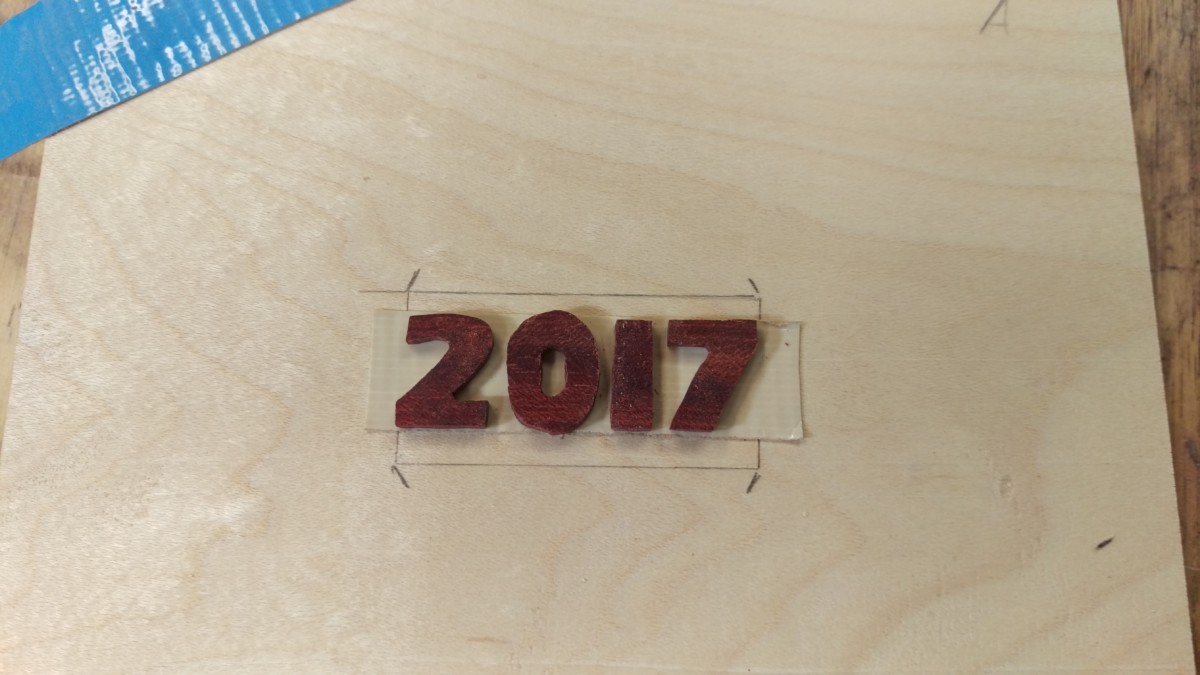
Use the x-acto knife to cut around the letters as deeply as possible
Once the numbers are stuck down, use the x-acto knife to trace them out. I ripped the excess tape off as I went. The goal is to trace as deeply as possible here.
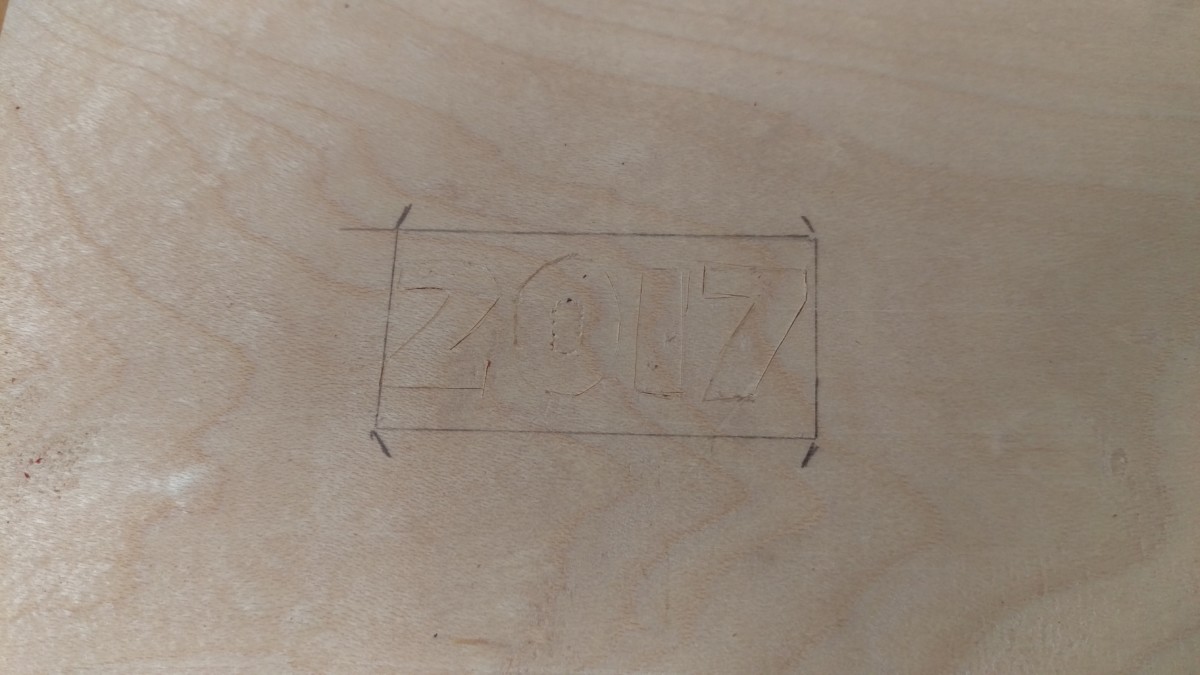
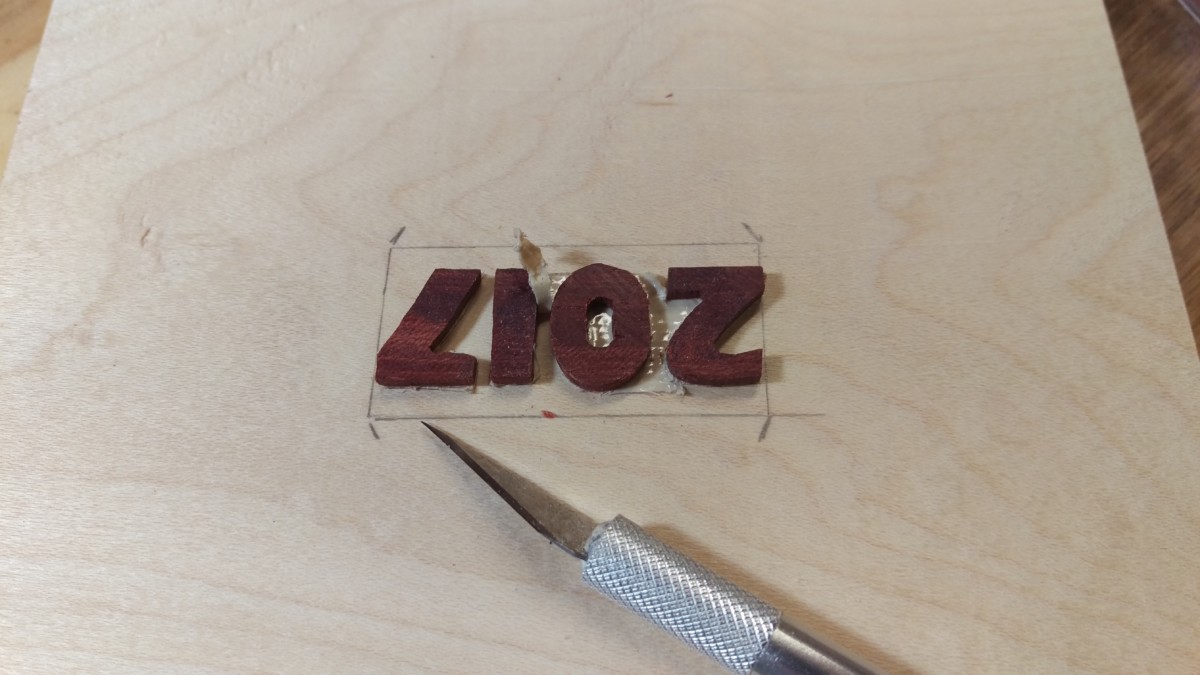
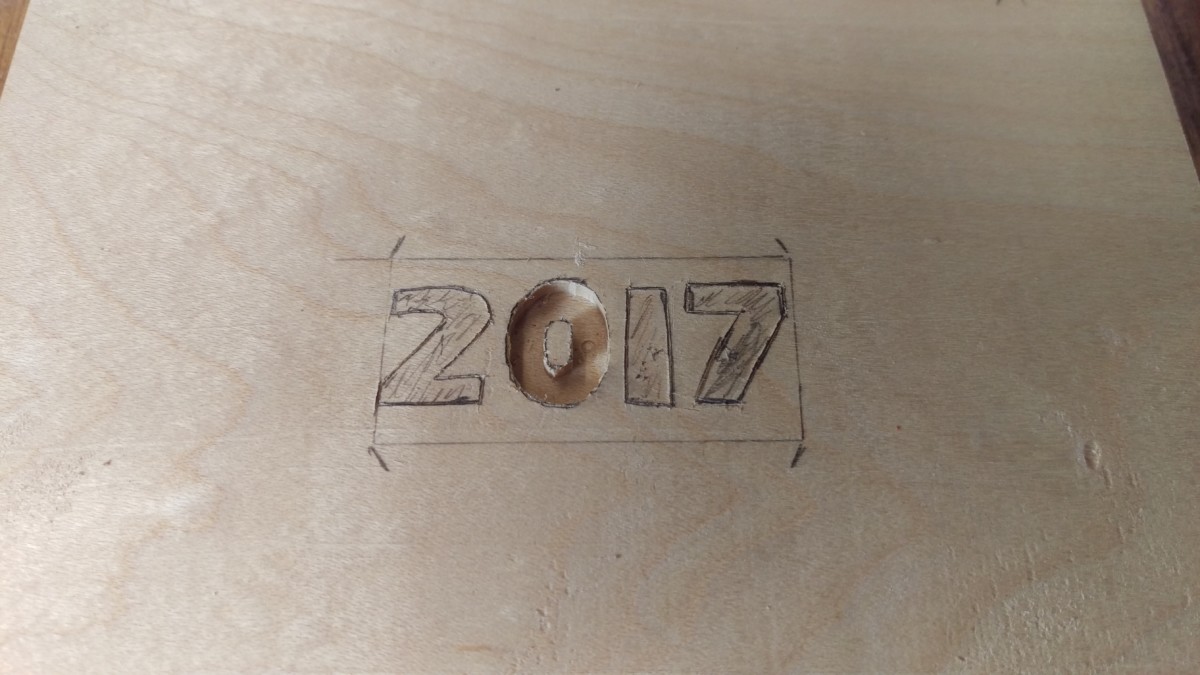
Traced numbers after carefully removing letters
Going back with a pencil to darken the lines
The numbers can break if they aren’t removed very carefully, being so thin. Using a chisel or thin screwdriver and moving gently around the edge worked for me. After getting the numbers off, I went back with a pencil and traced over the lines to help them stand out more. Whenever I’m going to remove a lot of material like this, I also like to lightly fill in the area to remove with pencil, so I don’t get confused and cut on the wrong side of the line. Stupider things can happen when you’re focused on a project.
Setting Up the Router
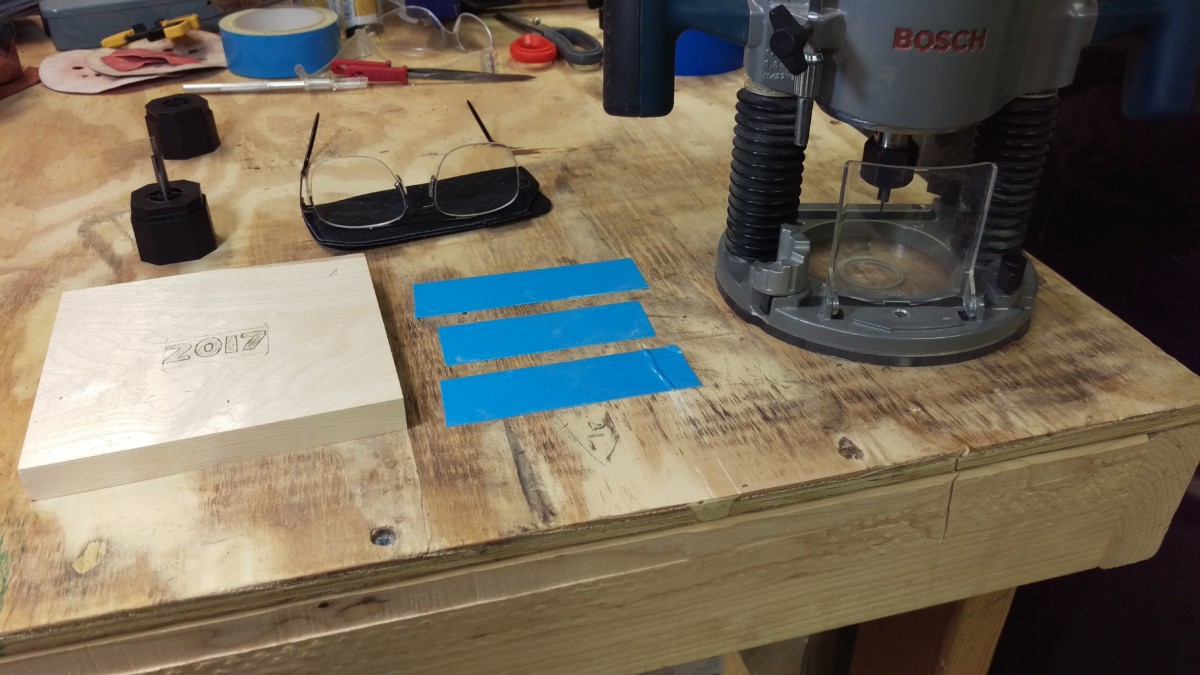
Magnifying readers, router, workpiece, and carpet tape
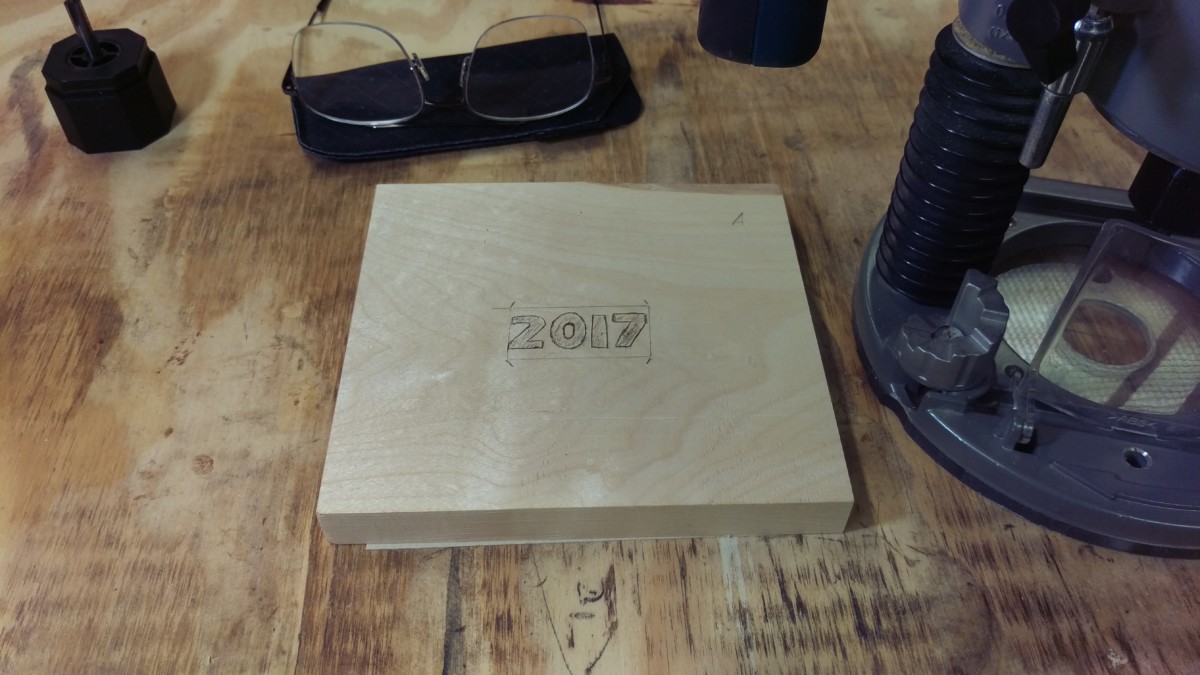
Workpiece taped to workbench
It’s finally time to actually route out the numbers. I use a few strips of carpet tape to stick the workpiece to my bench, as shown. This holds the piece very tight without any clamps getting in the way of the router. There’s also a lamp off-camera that I can shine directly onto the workpiece.
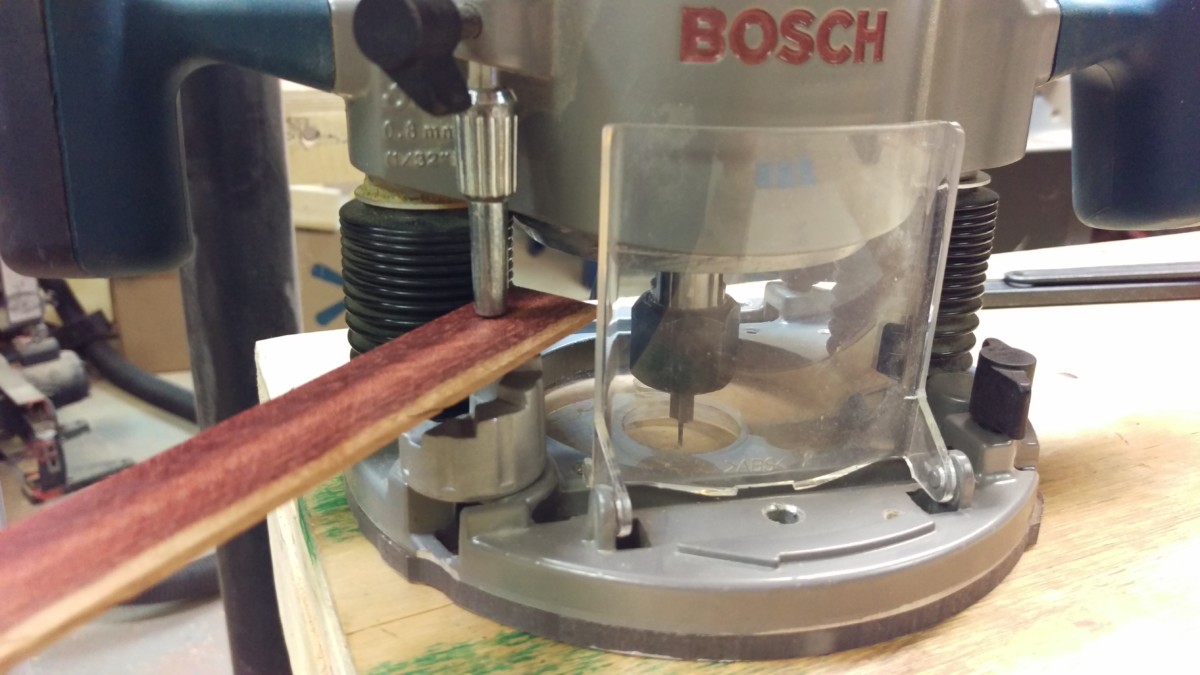
Setting the router depth
It’s also necessary to set the router depth. Generally, you want it to be just a bit shallower than the inlay pieces, so that they stand slightly proud of the surface before a final sanding. I put in my router bit and plunged until it barely touched the table. Then, a piece of the inlay or same-thickness scrap inserted into the plunge mechanism will allow the router to plunge as far as the inlay is thick. The fine adjustment knob can then be used to make it slightly more shallow.
Routing the Inlay
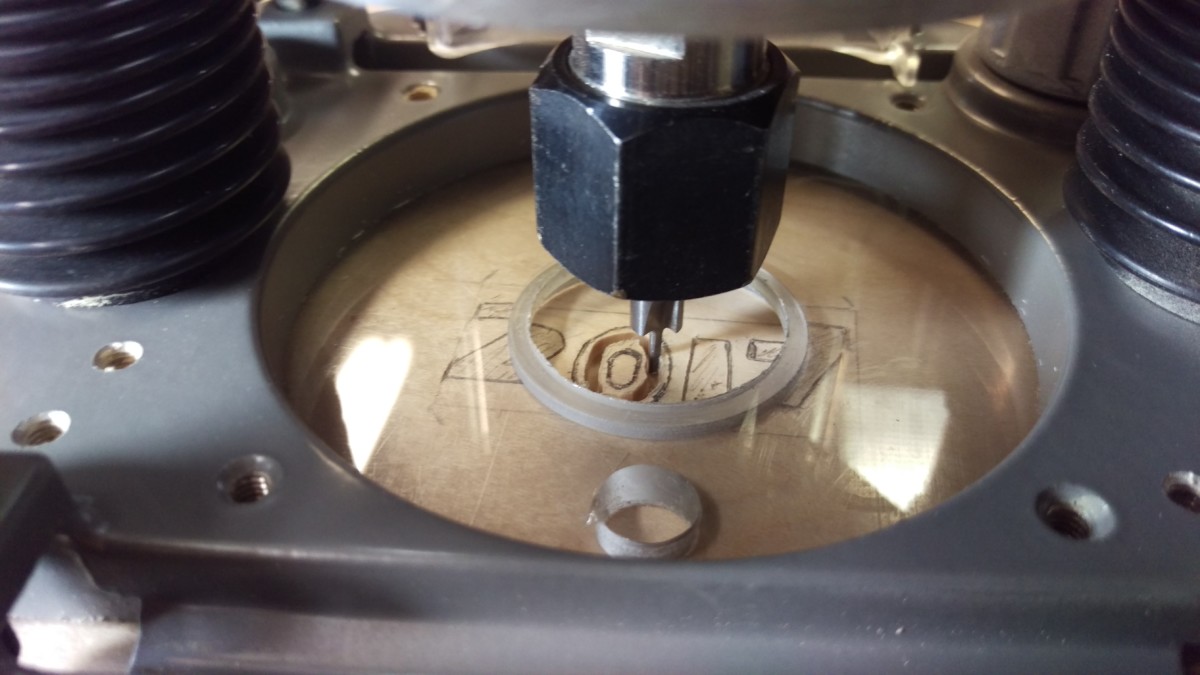
Routing out the inner area
With everything ready, I actually began to route. If these were larger inlay pieces, I would use an 1/8″ router bit to hog out the majority of the material in the center of the inlay. Then, the 1/16″ bit can be used to trim along the X-acto knife cuts. However, these numbers are so small that I simply used the 1/16″ bit for everything. The picture shows my first pass around the “0”.
Finishing up the 0
With the majority of it hogged out, I went back to trim the edges as close to the marks as I could. This is a slow, careful sort of process. The big router is surprisingly easy to control though. Once I hit the score marks from before, there’s a clean edge that remains, letting me know that it’s done. It’s hard to describe exactly what I mean, but if you try it, it is not as intimidating as it sounds.
Remaining numbers routed
After performing the same basic procedure with the remaining numbers, I went back with a chisel to clean up the sharp corners. At this point, I started doing careful test fits. The inlay will fit very tightly, so you do not want to push it in all the way or you may not get it back out. However, I was able to lay the pieces down and partially push them in to verify that they’d fit. In a couple of cases, I trimmed a little further with a chisel.
Gluing the Inlay
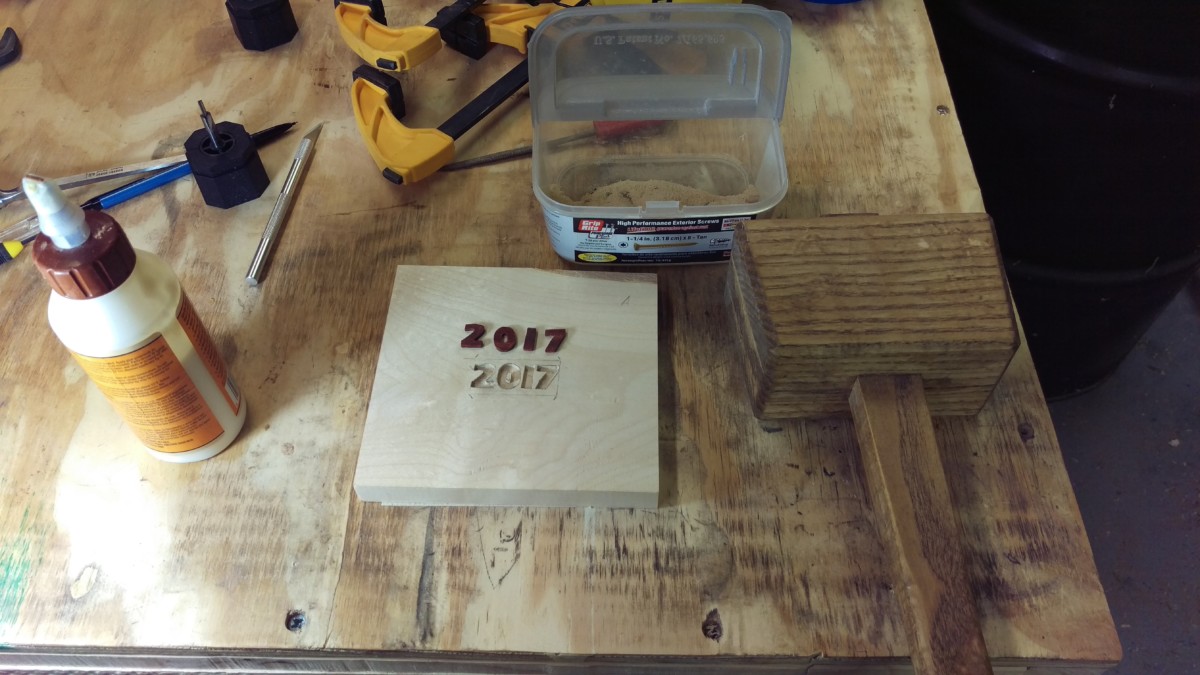
Glue and mallet ready to go
Once you’re fairly confident the pieces will fit, it’s time to actually glue. This is almost certainly going to necessitate a mallet. (If you don’t have one, you can make one like mine pretty easily!) You’ll also probably want some sawdust from cutting your material to rub into the squeeze-out.
For each number, I put glue in its destination spot in the maple. There’s no need to go crazy with glue, as the tight fit will hold it in anyway. You just need enough for a thin layer. Then, I align the piece and try to push it in by hand. When it invariably needs a bit of help, out comes the mallet to tap it home. Finally, I grab some sawdust and rub it into any squeeze out.
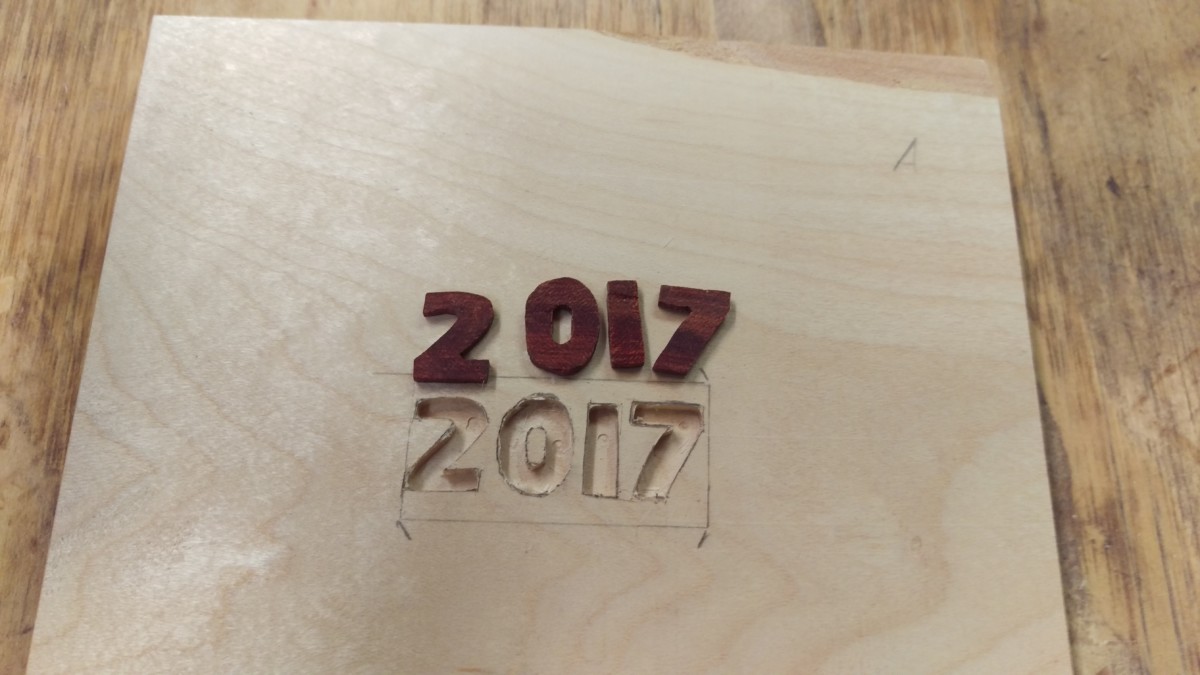
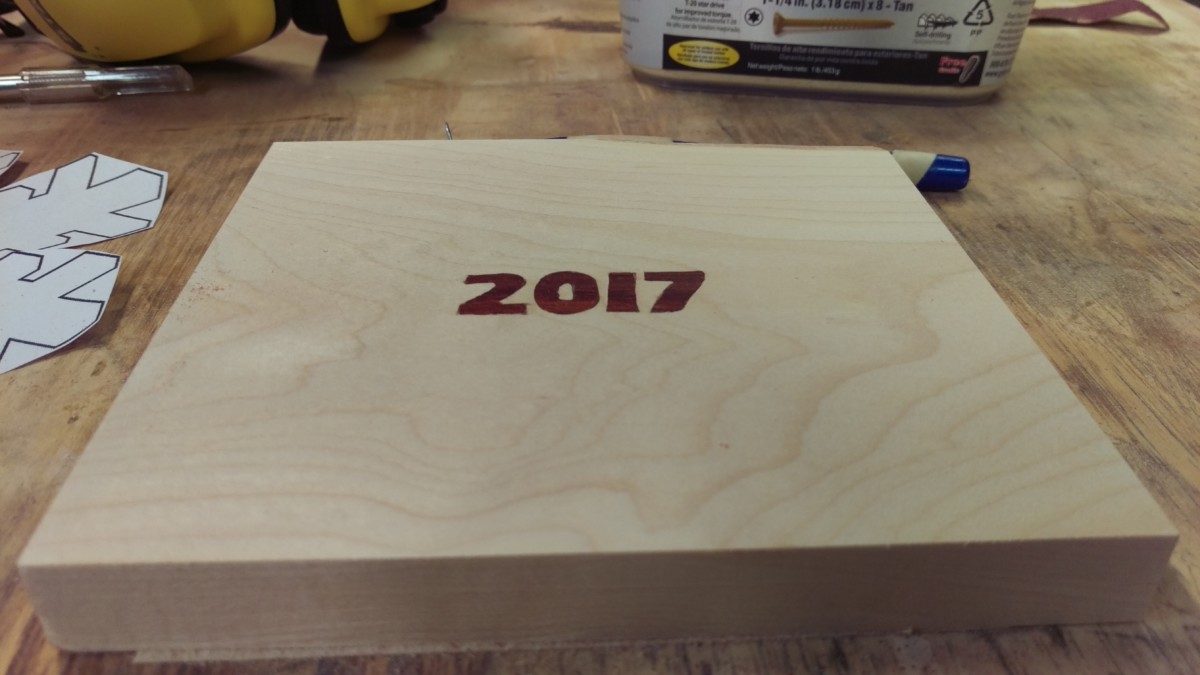
Starting to look good!
With that, the inlay is glued in place. Hopefully everything went according to plan.
Fixing Gaps

There are some gaps, primarily around the 2 and the 0
Once it’s glued in, you will likely still have some gaps, unless you’re much better at this than I am. In which case, I’m not sure why you’re reading this. Fortunately, small gaps like the one indicated near the “2” are very easy to fix.
The fix requires superglue (also known as CA glue) and sawdust. I grabbed some of the bloodwood dust from cutting out the letters on the bandsaw. Superglue sets very quickly, so have the sawdust ready to go when you do this step. Put a few drops of superglue directly on the gap, and then immediately rub sawdust into the superglue. The gap will suck up the superglue, and the sawdust will mix with it, doing a pretty effective job of hiding your mistakes.
All fixed and ready to wrap up
I pretty aggressively filled in all the gaps and am pretty pleased with the results. I think I might have done a bit more gap-filling after taking this picture, as well.
Cutting the Snowflake
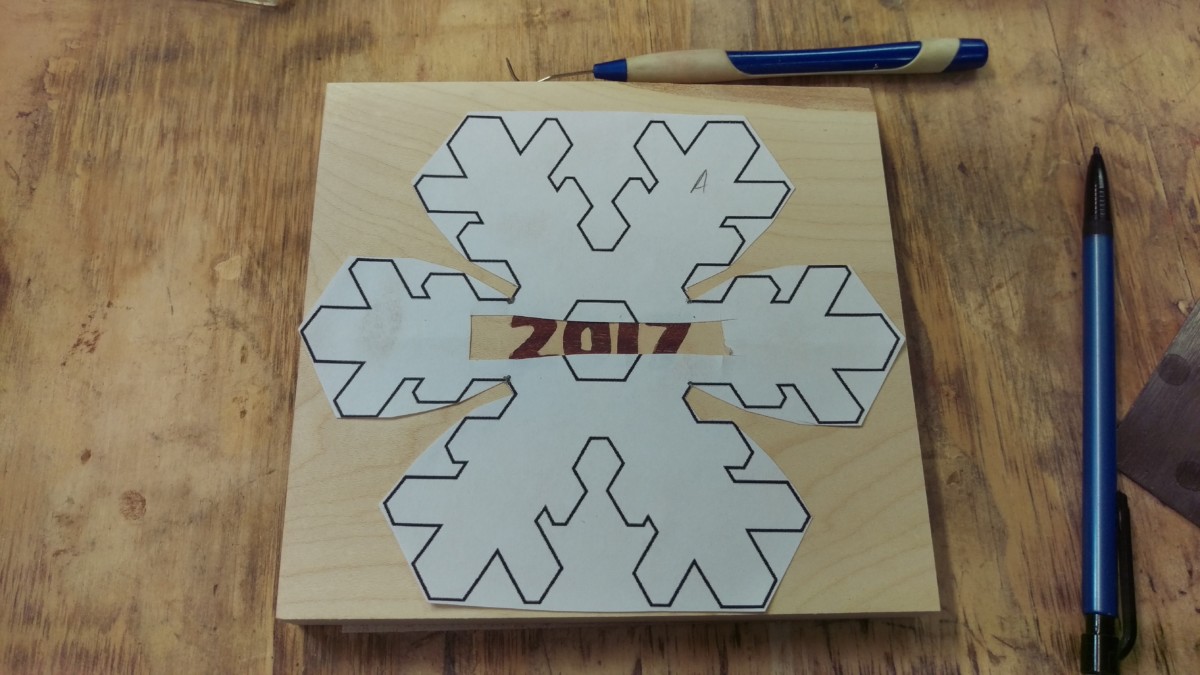
Using spray adhesive again
At this point, all the hard work is done. I used spray adhesive again to adhere my snowflake template to the maple. I used scissors to cut a box out allowing me to ensure the letters are centered and properly located.
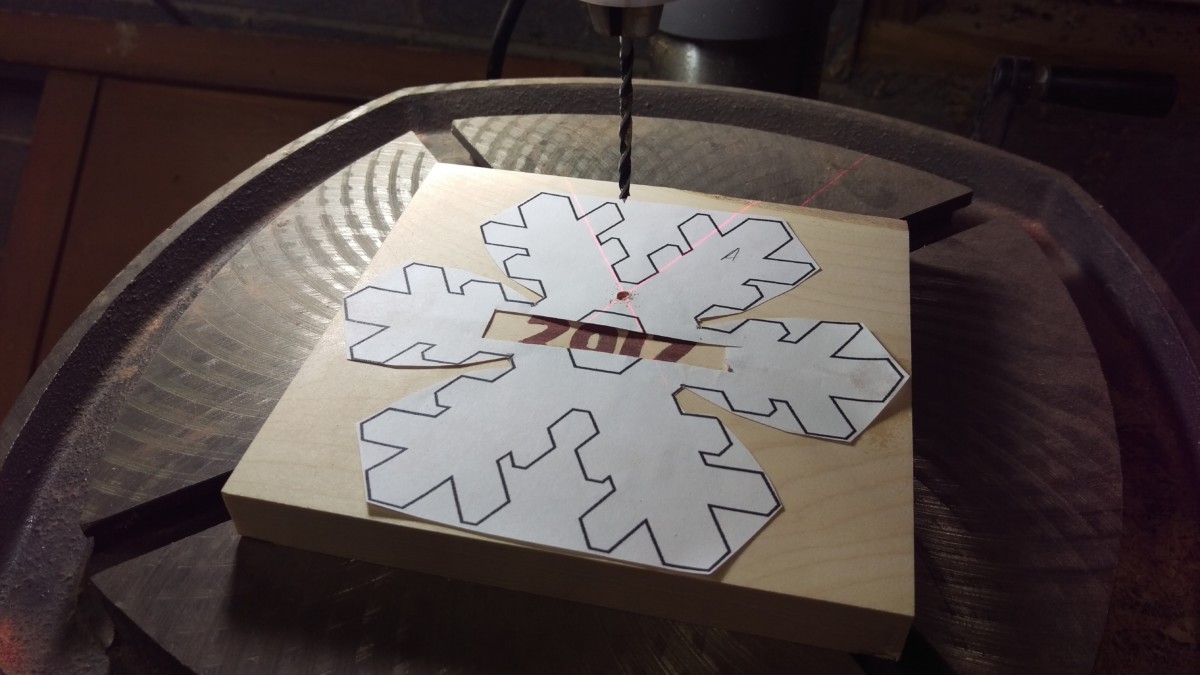
Drill ribbon hole in the snowflake
More progress
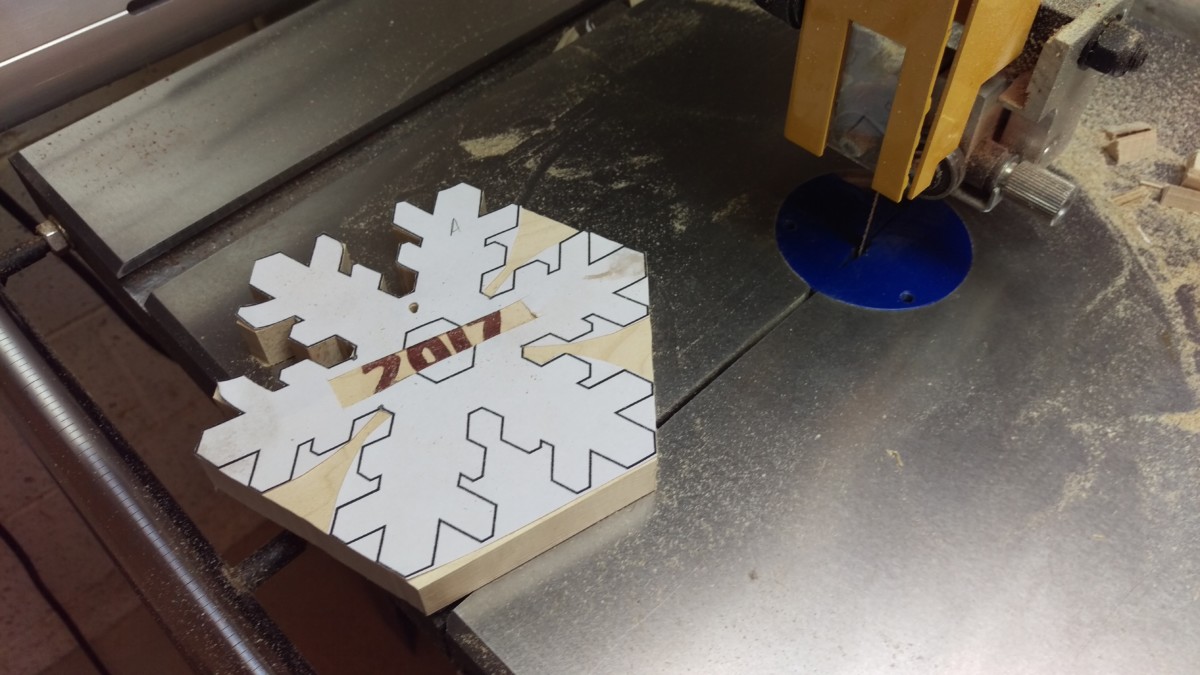
I took the workpiece to the drill press next to drill a quick hole for the ribbon to hang it. After that, it was finally time to cut out the snowflake on the bandsaw. Slowly but surely, the bandsaw made quick work of the pattern. My 1/4″ blade was thin enough for the job, but again a thinner blade or a scroll saw would have been easier to use and left a nicer finish.
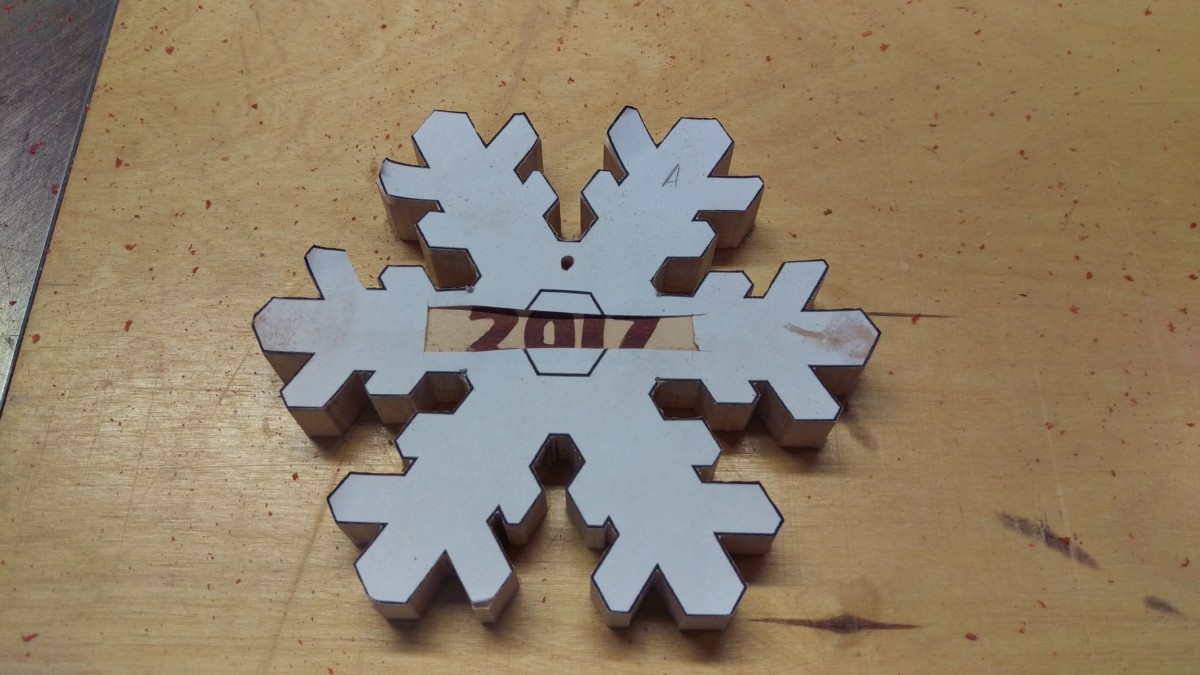
All cut out
Ready for finishing
Once that was done, the snowflake is about ready for finishing. I used sandpaper and a file to clean up the bandsaw edges as best as I could, but they still ended up a little rough. It was pretty difficult to effectively sand the inside edges, which would be another vote in favor of using a scroll saw for this job if I had one.
Finishing
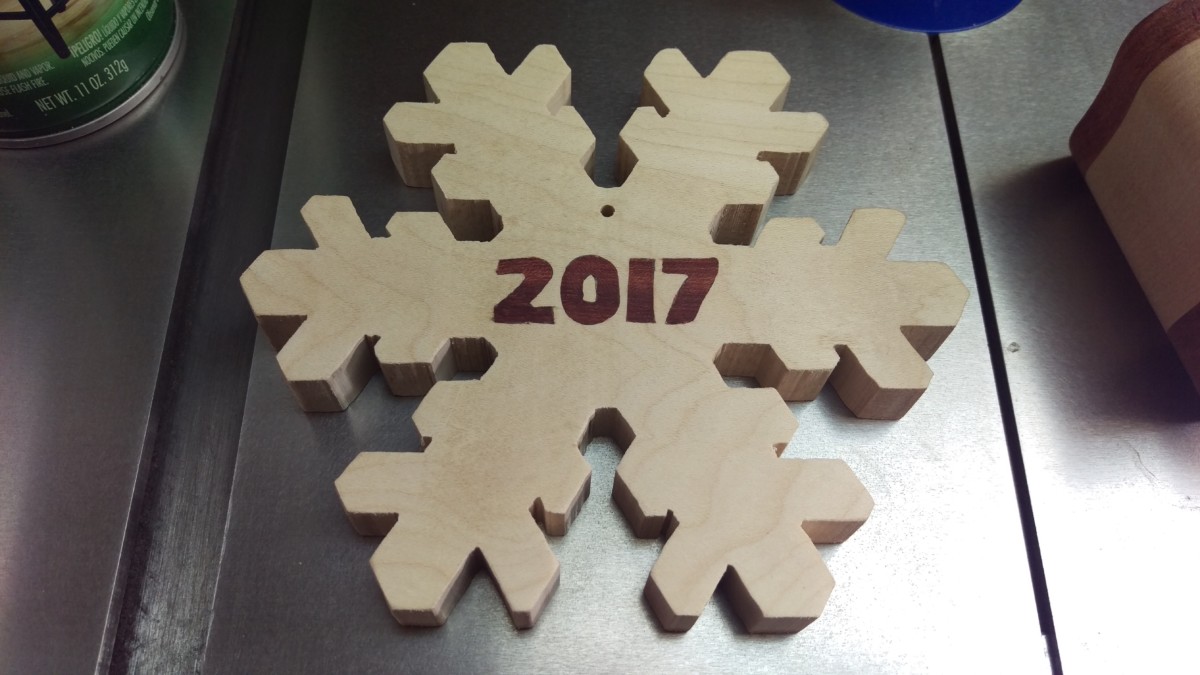
After spray lacquer
I finished the snowflake using spray lacquer out of a can. This is my new favorite type of finish for a small project like this, because it goes on and dries very quickly, and leaves a very smooth finish.

Another shot
I don’t intend to do such a decorative project very often, but this kind of project is a great way to get your feet wet with inlay work.