Making a Two Color Bandsaw Reindeer
Patterns for making a 3D reindeer pattern on the scroll saw have been floating around for awhile. Ronald Walters has a youtube video describing the process. Matthias Wandel took that pattern and increased the size to make it appropriate for a bandsaw. He has a guide over here as well. The only significant change I made to this procedure was to use two different types of wood in order to give the reindeer darker antlers. I think the effect came out pretty well, so I thought I’d post a small writeup.
Matthias’ bandsaw pattern is available for free here. You’ll need to print out that image to use later.
Raw Materials
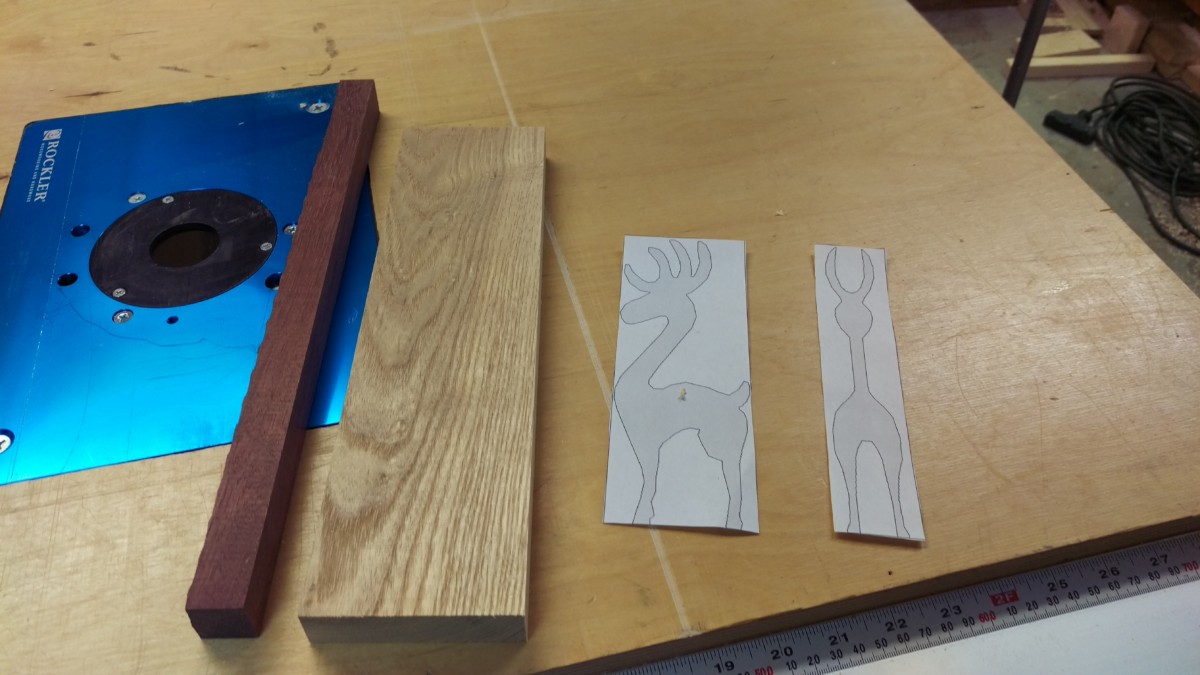
You need two different types of wood and a printout of the pattern
To start, print out the image from the pattern linked above. You also need enough wood. The end goal is going to be a block that is as thick, long, and wide as the patterns that will be glued onto it. The lumber I had was too thin, so I ended up laminating two pieces together. I chose to use some scrap ash that I had from building my daughter’s crib for the body of the reindeer, and some scrap purpleheart from making cutting boards for the antlers.
One tricky thing is that you’re going to want to glue the antler wood to the body of the reindeer along the long grain. This is necessary to get proper adhesion with glue. If you blindly stuck the endgrain together with wood glue, it would simply break. This is fairly straightforward, but it does mean you need a relatively wide piece of wood to make the reindeer’s body, because the board has to be as wide as the reindeer will be tall.
Creating the Block
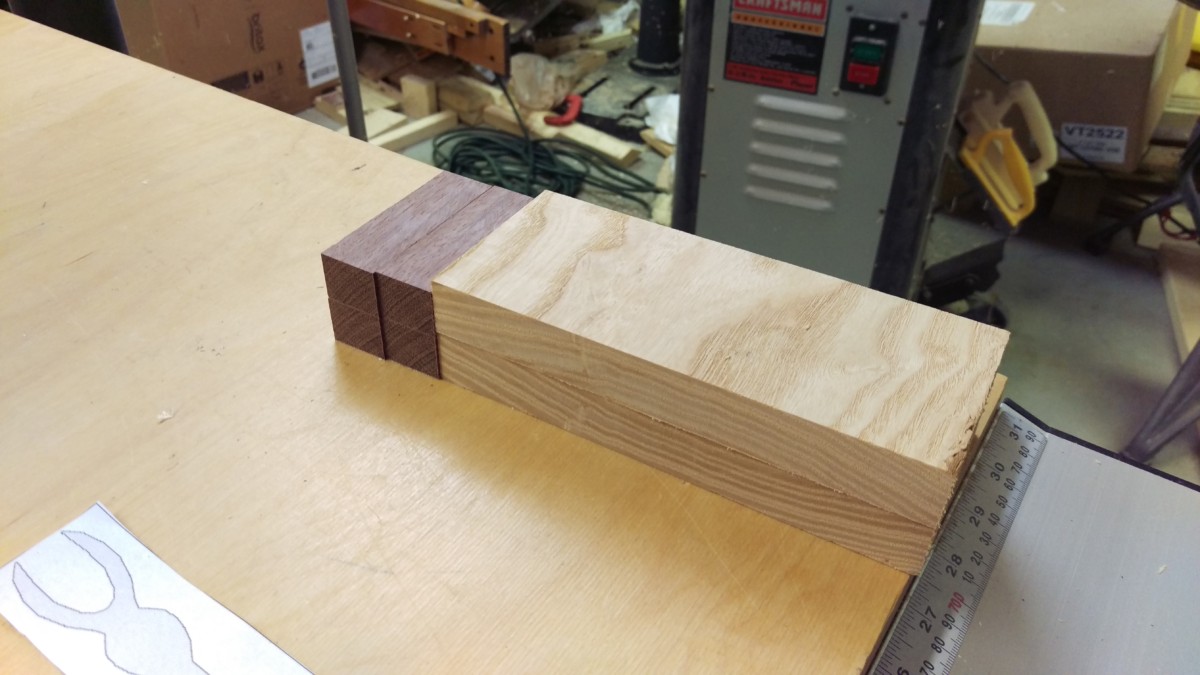
The raw stock after cutting into appropriately-sized blocks
The first step was to cut the raw stock up into appropriate pieces. Slicing the scrap of purpleheart into four pieces was a good match for the antler portion of the pattern. I crosscut the piece of ash to get two pieces I could laminate. Again, it’s worth noting that the end grain is actually facing the camera in this picture. All surfaces to be glued up are long grain, which is critical to getting a strong bond.
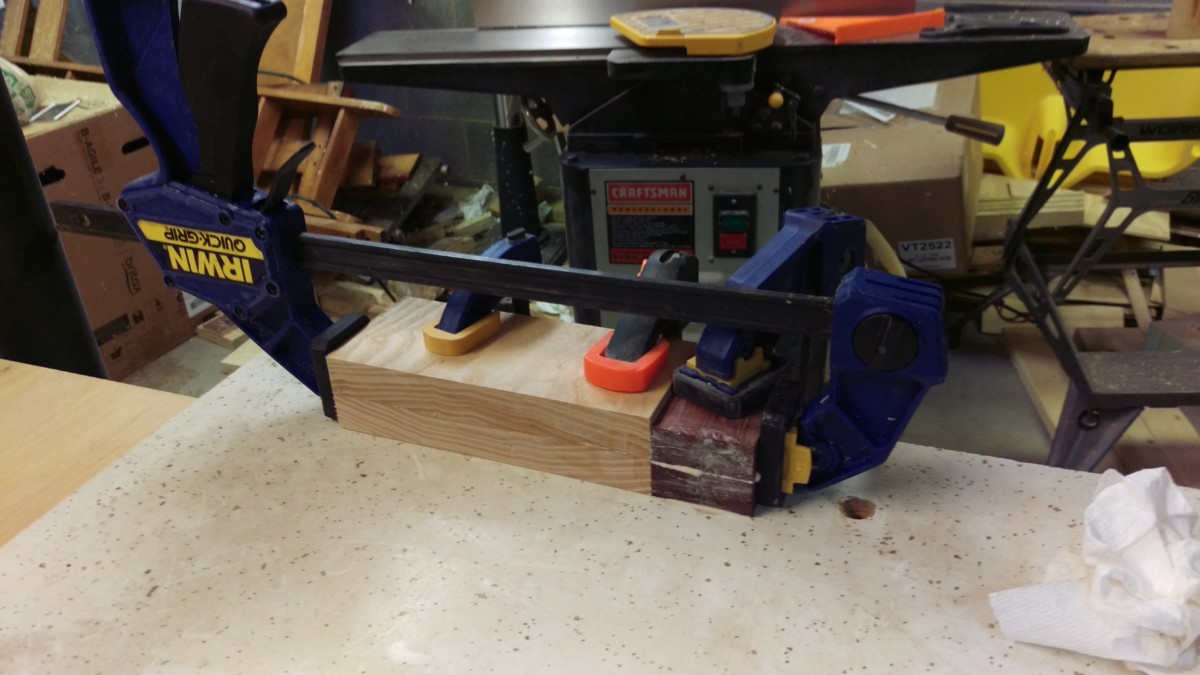
Gluing all the blocks together
Once my blocks were more or less the right size, I glued them all up into a sandwich. The piece is clamped to some scrap laminate, so the squeeze out won’t cause it to stick too badly. The goal with the glue up was simply to apply as much pressure everywhere as possible.
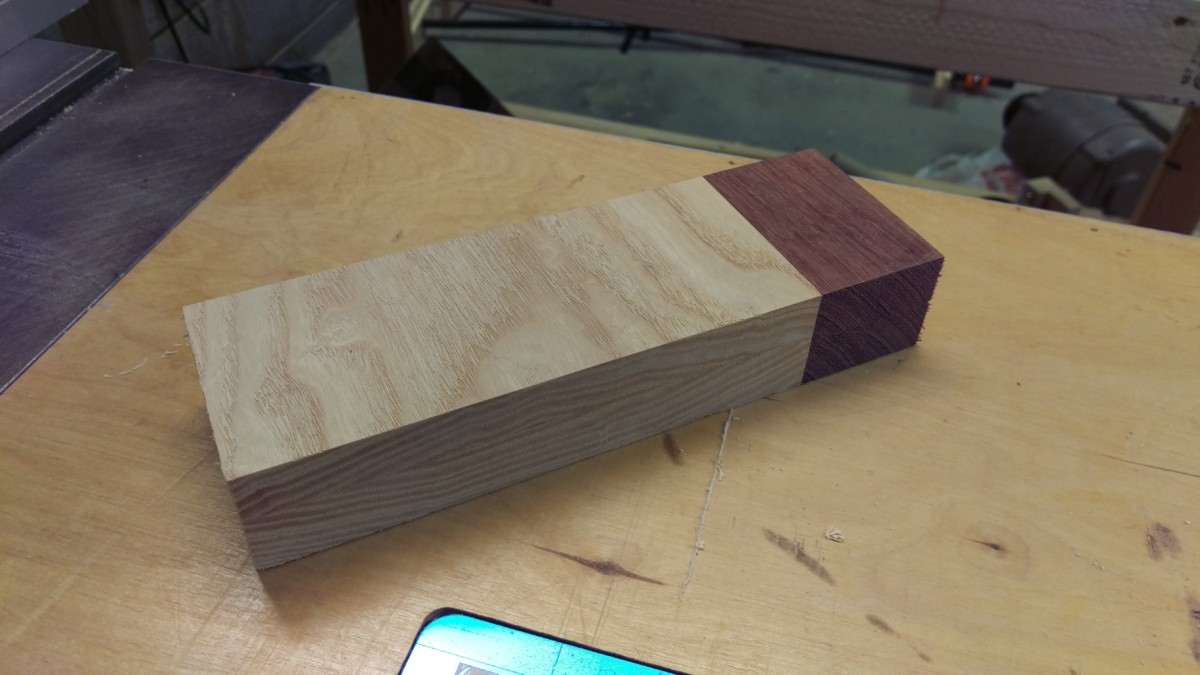
Trimmed the block to pattern dimensions
Once the glue was dry, I trimmed the block down to the same dimensions as the pattern. Also note that the ash was trimmed to the same thickness as the purpleheart. You can actually leave the front profile a little bit thicker than the pattern, as noted in Matthias’ writeup. However, the side profile (the widest part) really shouldn’t have any extra material. You’re going to have to resaw through it on the bandsaw in a minute, so the thinner the easier.
Applying the Pattern

First view

Backside
I applied the pattern with some spray adhesive we had on hand. Glue stick should work equally well. The goal is simply to glue the paper to the wood with something that won’t cause it to bubble or get overly wet. It doesn’t really matter if you can remove it later, fortunately, because we’re going to cut all the surfaces off.
Because there are two different colors of wood, you do want to be sure to paste the pattern down such that where the antlers meet the reindeer’s body on the pattern matches where the two colors of wood are joined. I actually offset this 1/16″ or so because I wasn’t paying attention. Fortunately, it still looked good in the end.
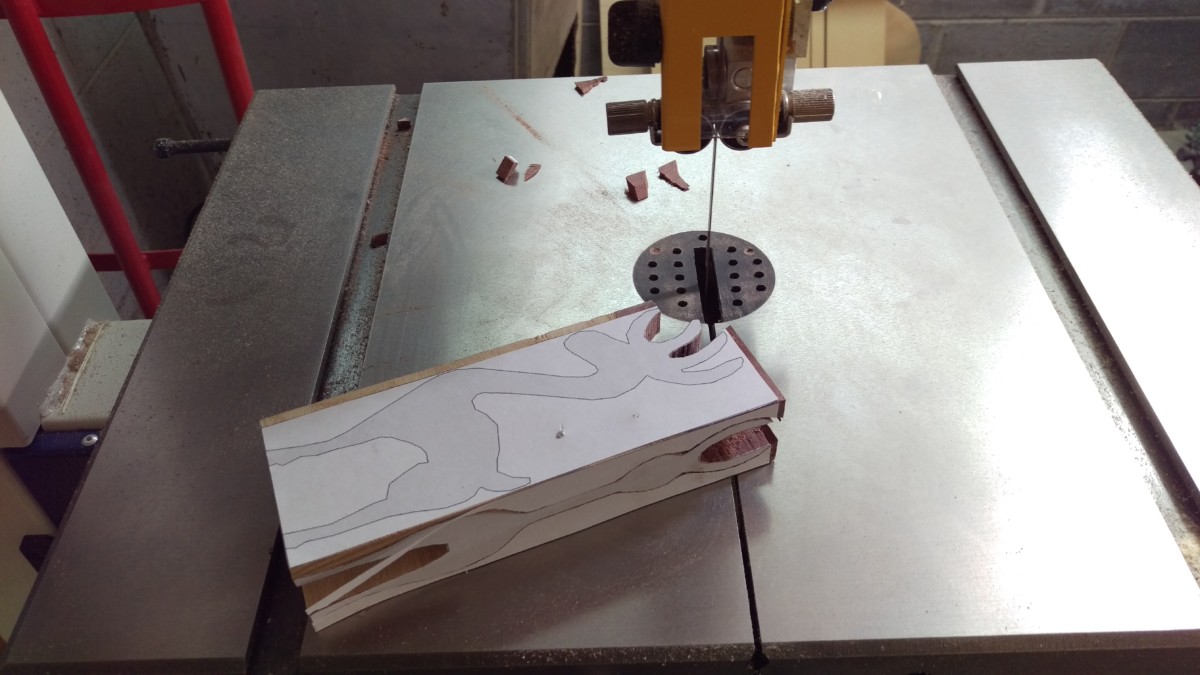
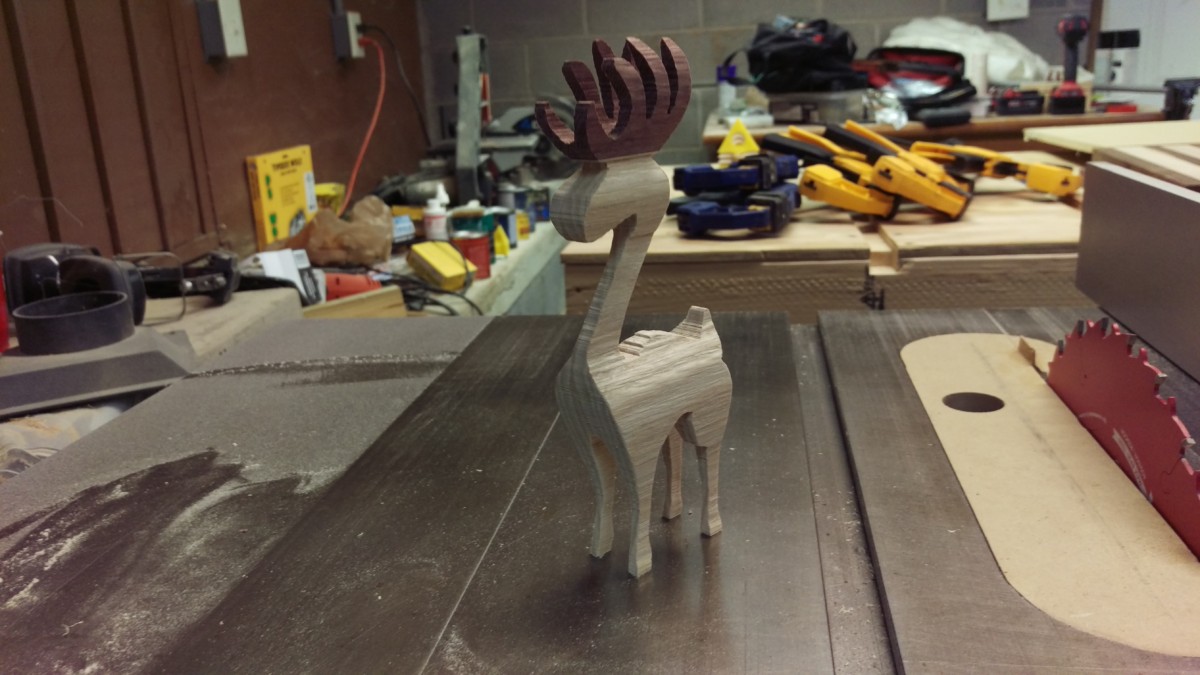
Cutting the Reindeer
Cut upright along the front profile first as shown
I used a 1/4″ 4TPI blade in my 14″ bandsaw
The first cuts should divide the reindeer into three pieces, as shown. You do not want to make any relief cuts at this stage, because you need those two outer pieces later. Try to make the cut in one pass. You can back up and re-cut as needed for tight corners.
You can also sand the sides of the reindeer at this point before proceeding. I find it easier to smooth the sides a bit now, while the sides are still flat, just to get rid of any jagged edges from the bandsaw.
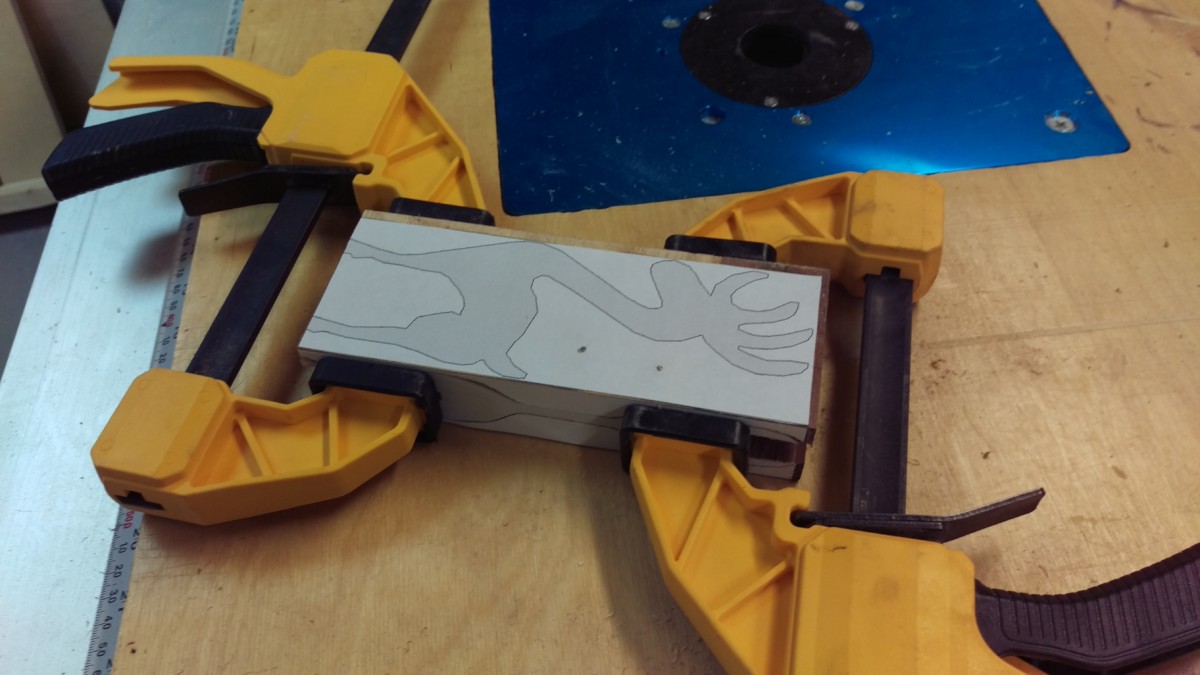
Nail the pieces back together
Next, use some small nails to nail the three pieces back together. This supports the reindeer during the next cuts, as well as putting the pattern back on. I simply clamped it as shown and used some small finishing nails I had in a bin. The nails go in the large blank area to keep from marring the final reindeer.
Cut the side profile carefully
You can now take the workpiece and cut the side profile carefully. I saved the area with nails for last, to help it hold together as long as possible. If you did it first, the rest of the workpiece wouldn’t hold together.
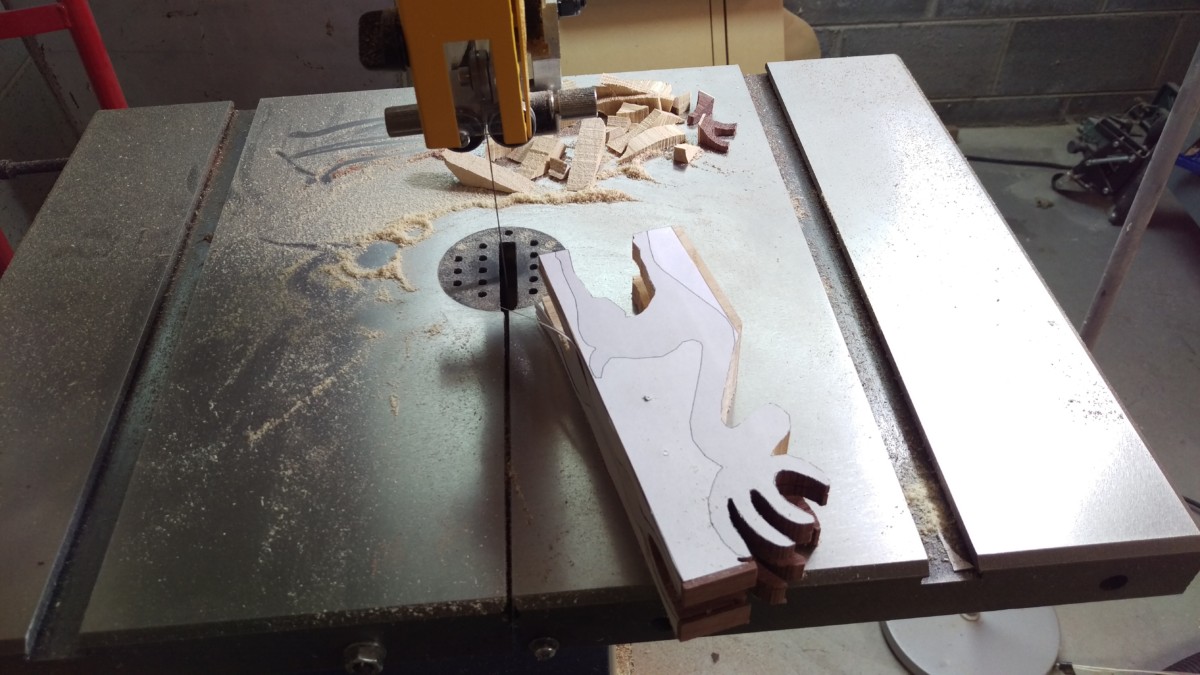
I saved cutting the part with the nails for last
As pictured, I cut the big empty space once everything else was done.
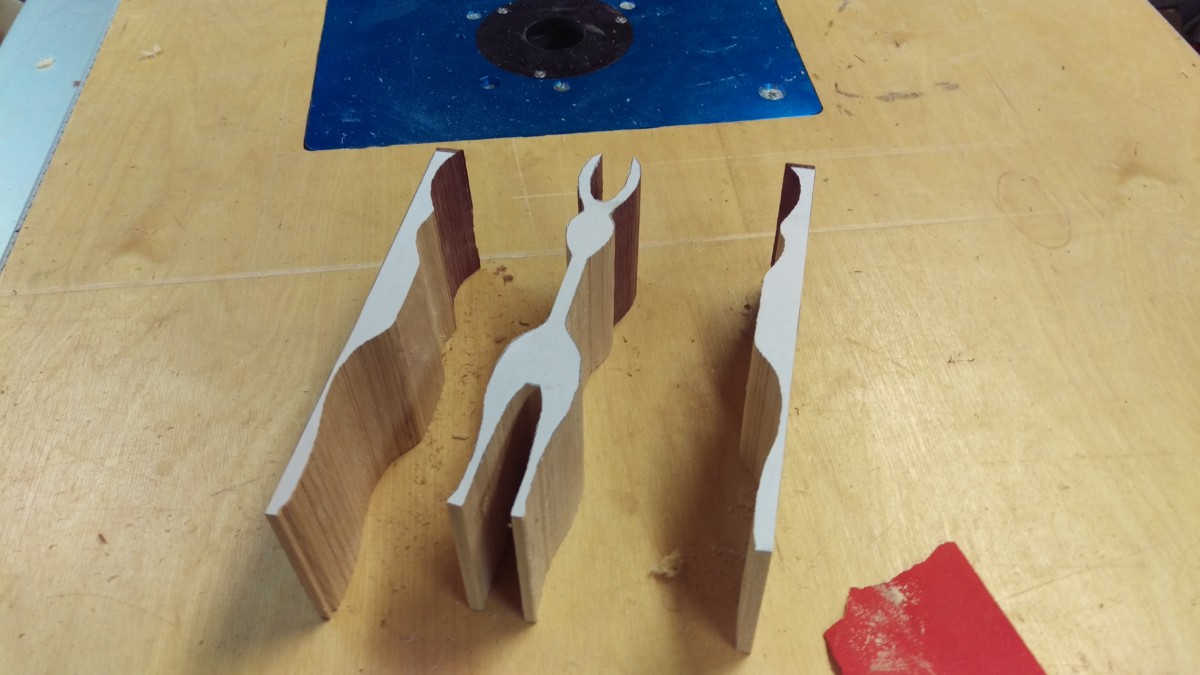
Revealing the Reindeer
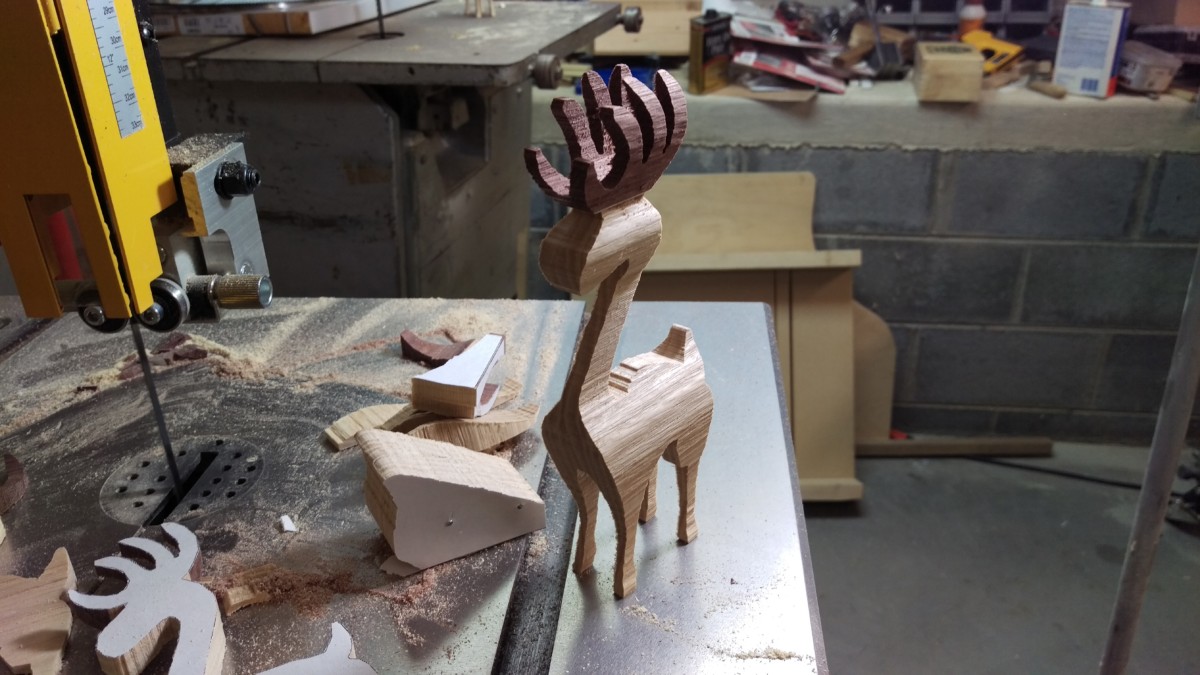
Split apart the pieces to see the reindeer
Different lighting
You can now pull the pieces apart to reveal the reindeer. As you can see, the purpleheart gives a nice antler effect. The purpleheart has turned somewhat brown, but this is normal when purpleheart is worked. After sitting for a few days, it returned to a bright purple.
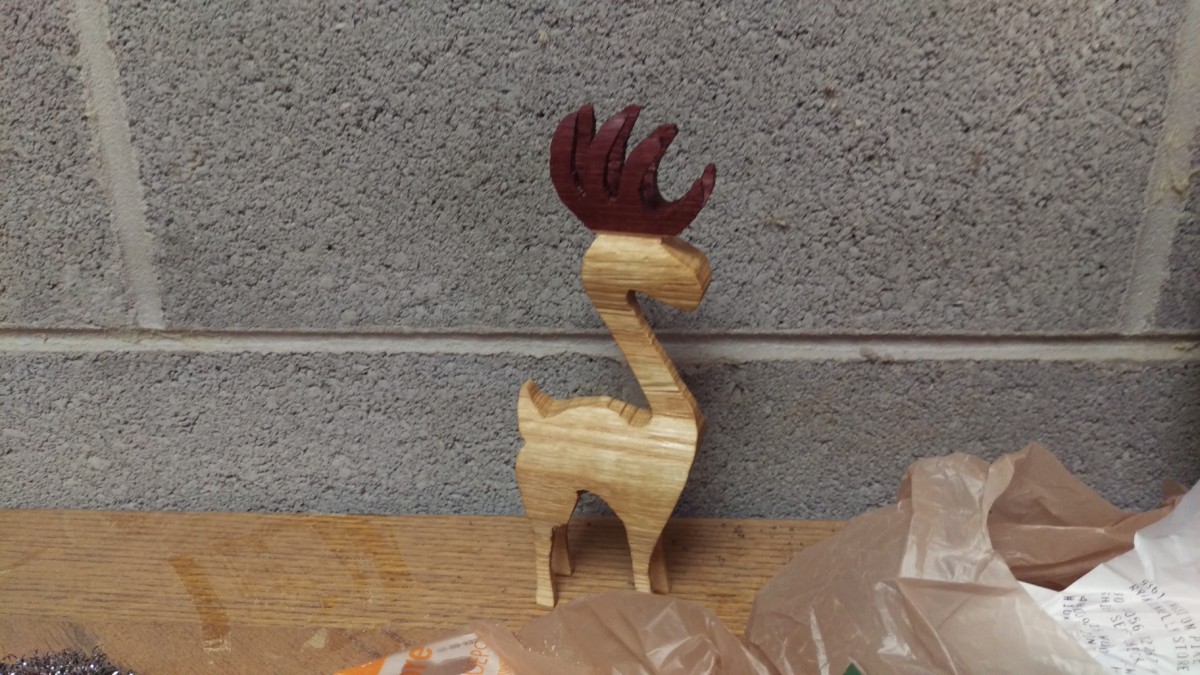
Finishing

Wiping off dust and finishing with polyurethane
I was a little fearful of serious sanding, because I didn’t want to break the legs or neck of the reindeer. A bit of 150 grit took the burrs off of the edges, and I did try to smooth everything else out somewhat. In the end, it’s a little rough, but I prefer it to be a little rough over broken. My fears might be a little overly paranoid, but this was a few days from Christmas and I didn’t want to take chances.
Since I had picked these woods for their color, I had no intention of staining them or anything. A rag dampened with denatured alcohol was sufficient to take care of any dust left on the wood. Then, I gave it a few coats of wipe-on polyurethane. In the future, I think I may try water-based floor varnish like Matthias does, but for now, I still have this can of Minwax poly.
Poly applied and dried
The reindeer was left to dry overnight.
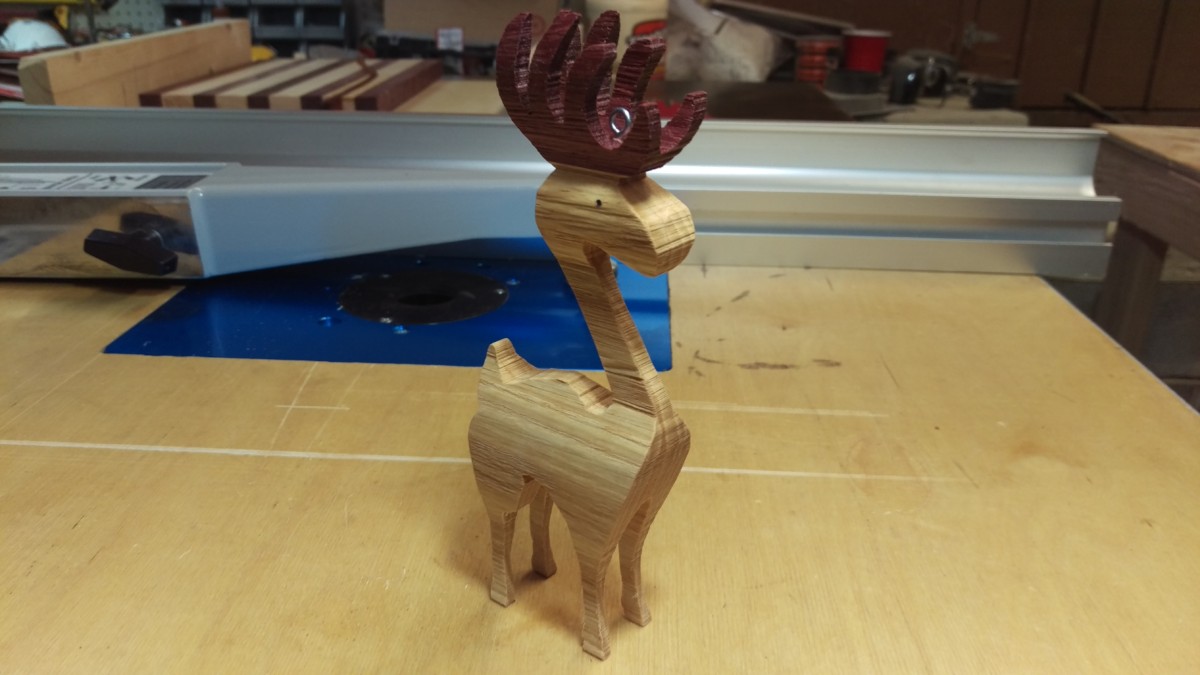
A tiny eye bolt allows it to be hung
My wife and I exchange ornaments every year, and this was for her. Thus, it had to have a way to hang it. I got some tiny eye bolts at the Home Depot. After slightly predrilling with the smallest drill bit I have, I used some needle nose pliers to thread an eye bolt in. It’s in there pretty firmly, and I didn’t break anything.
Matthias’ article says that the scroll saw reindeer, which are smaller, make better ornaments. I personally disagree. Who doesn’t want a 7″ ornament?
The final thing to note is that you can see the end grain seam line slightly, but it blends a lot better than I thought it would. The reindeer’s body has it offset from center, though, which is a bit distracting. I suppose if I did this out of two pieces of wood again, it would be better to plane one piece down to exactly half the thickness I needed, and then cut it, putting the seam in the center.
[…] was in dire need of a bandsaw to finish a couple of Christmas presents (The two-color reindeer ornament and some cutting boards). A bandsaw had been on my list for quite awhile. Ordinarily, it’d be […]