DIY Bike Stand from Harbor Freight Bike Rack
I recently got this Swagman XC Cross-Country
This left me with the question of what to do with my old bike rack. The first stop was Craigslist, seeing if anyone wanted it. Since they’re $40 new, with coupons, nobody wanted to pay even $15 for it. After thinking it over, I decided to turn it into the bike stand I’d always needed. All it took was my Hobart 110 welder
The Old Bike Rack
You can buy these cheap bike racks at Harbor Freight for about $40
Here’s the patient undergoing surgery. It’s a cheap bike rack that was destined for the garbage.
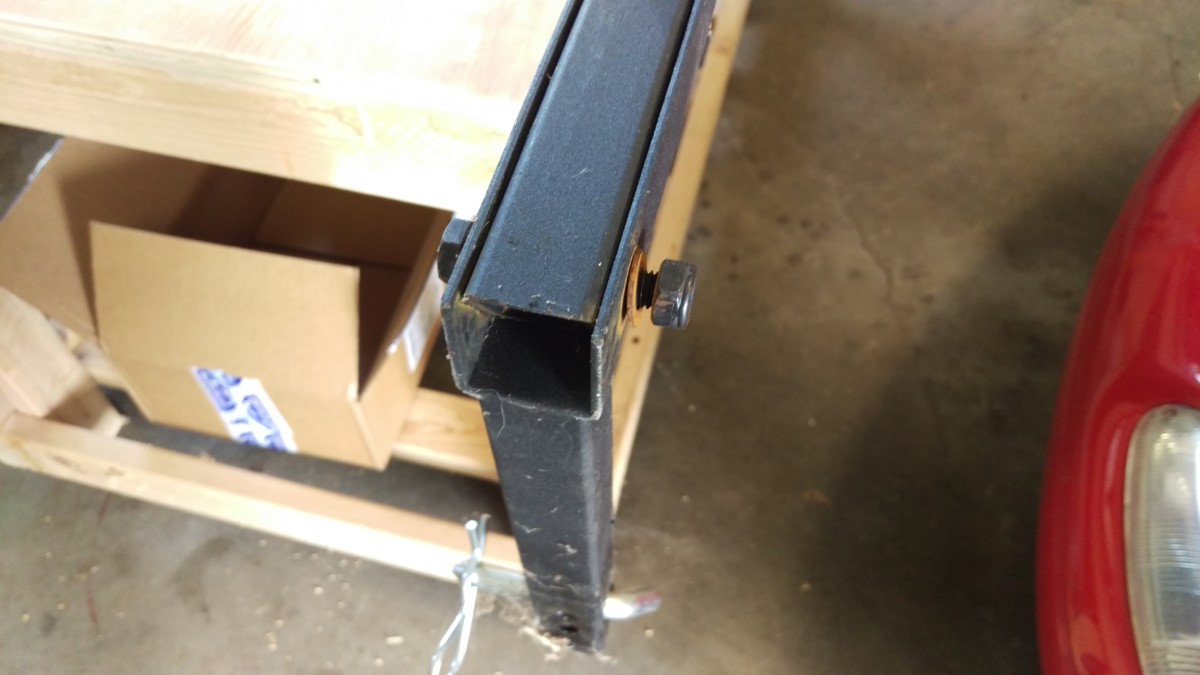
The bottom already has one “leg”
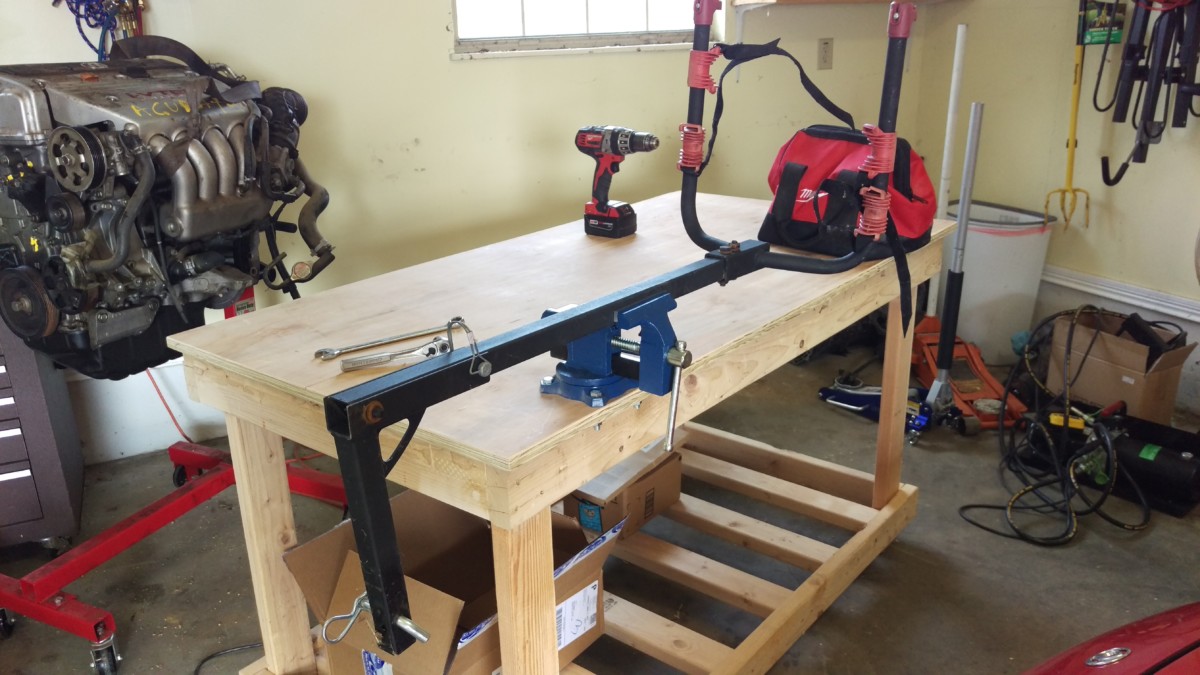
This style of bike rack has a piece of square tubing going into the car’s hitch receiver. It’s perfect for one “leg” of my stand. All it needs are two more legs. Note that the hitch portion unbolts from the rest of the rack. It was easier to do this job with the majority of the bike rack unbolted.
Preparing the Angle Iron
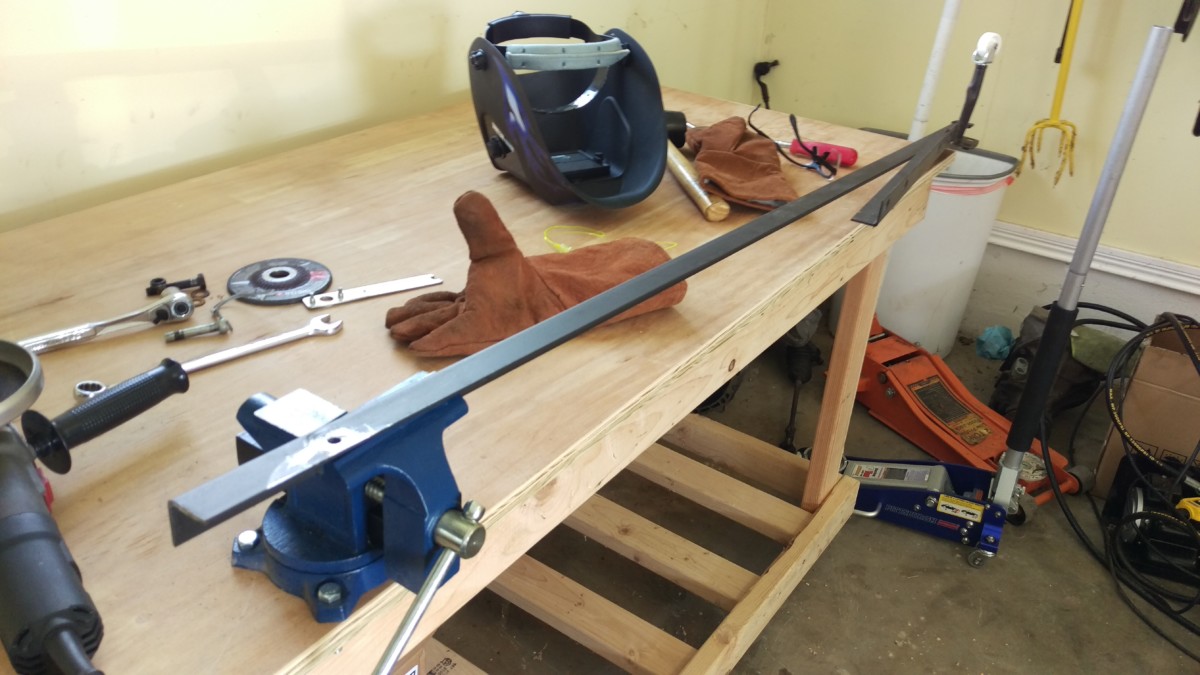
A piece of old bed frame in the vise
A stationary bike stand only has to support the weight of a bike, which is less than twenty pounds. Parts of an old steel bed frame make a perfect source of cheap angle iron for a project like this. Of course, you want better steel for something that really bears a load, but that’s not the goal here.

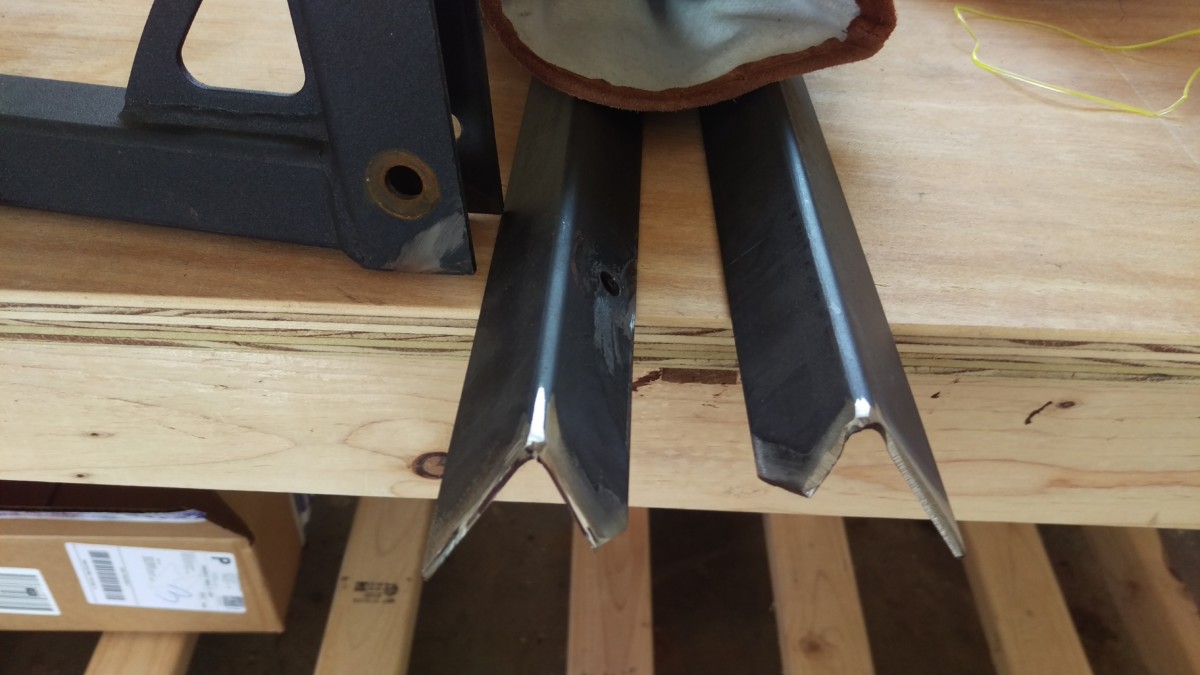
Pie cuts to fit into the rack
I threw the bed frame into the vise and used my angle grinder

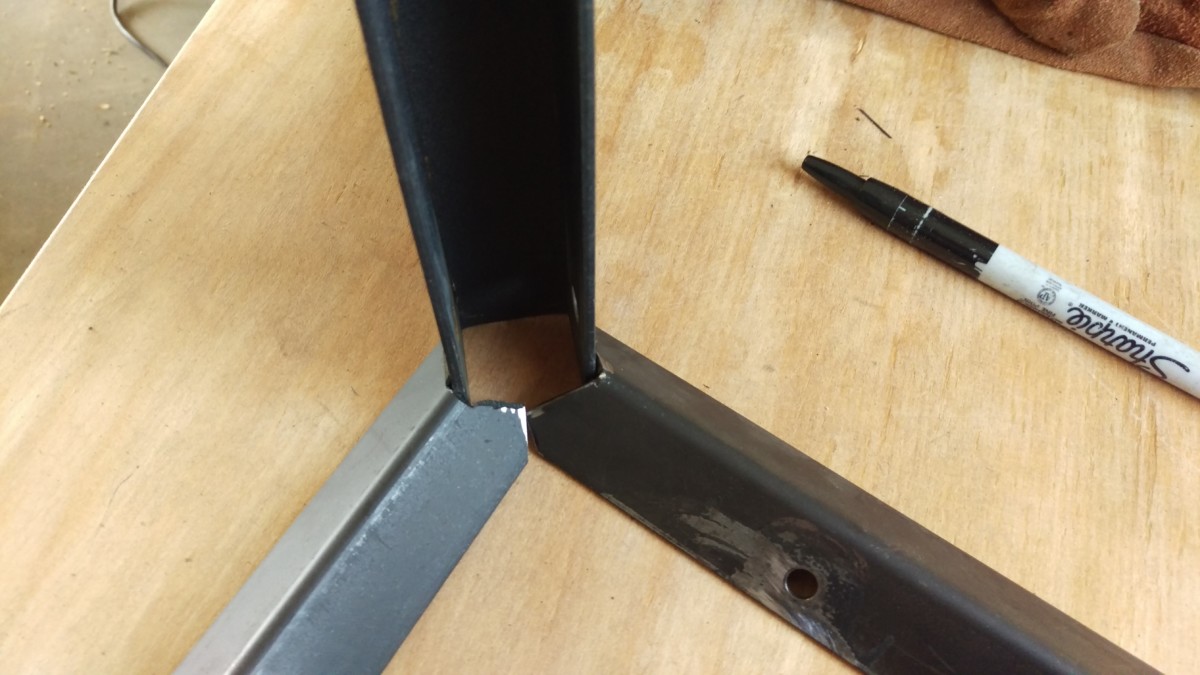
Where the two new pieces meet were notched to fit
I also cut a notch on each of the new pieces, so they would fit together without overlap.
Welding the Stand

How the stand will look, with the hitch mount unbolted from the rack
Here is the progress at this point. With the hitch mount removed from the rest of the rack, I could stand everything up on the bench and confirm it would fit properly.
After using a flap disk to clean the surfaces to be welded
I’m using flux core because I haven’t bought MIG gas for my Hobart yet. This means the weld will be ugly but also that the surfaces need to be especially clean before welding to get a good joint. A flap disk

And here’s my crappy welding
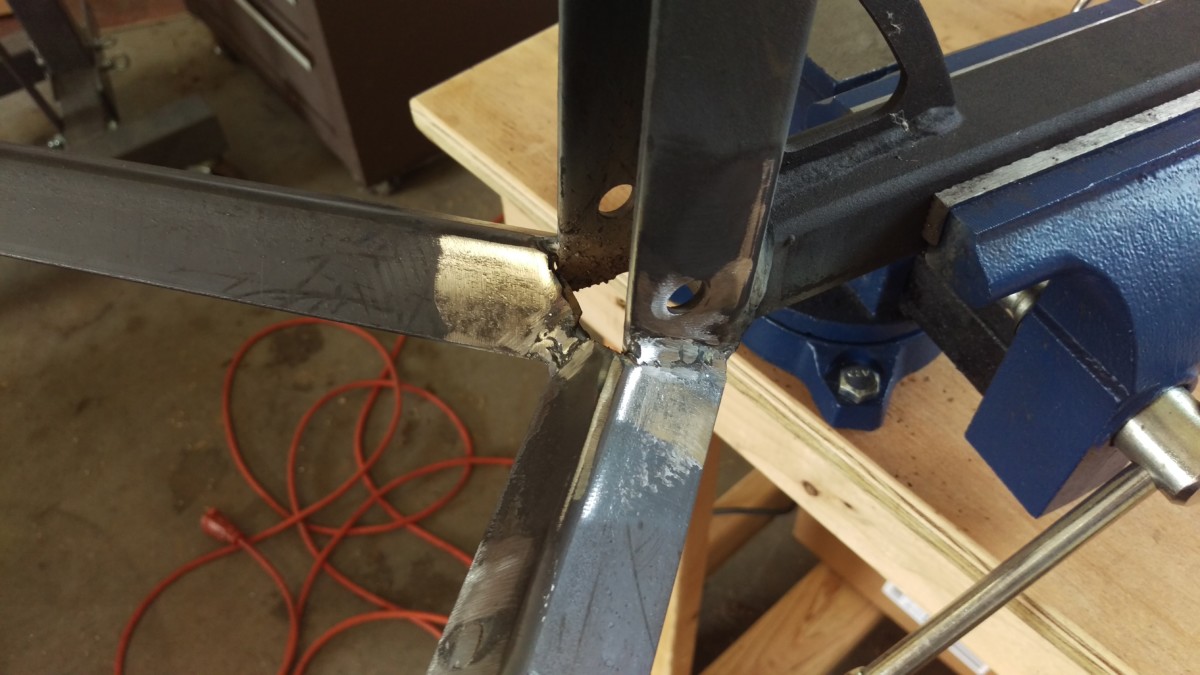
And here’s my crappy welding after “cleaning it up”
Here’s my crappy flux core weld before and after grinding. I actually set the entire assembly on the garage floor first to tack it together. Then, I set the whole thing in the vise and finished up. A real welding table or at least putting some sheet metal on top of this bench would help a lot, but that will have to be a future project. The welds are ugly, but for a non-critical application it’s good enough.
Paint
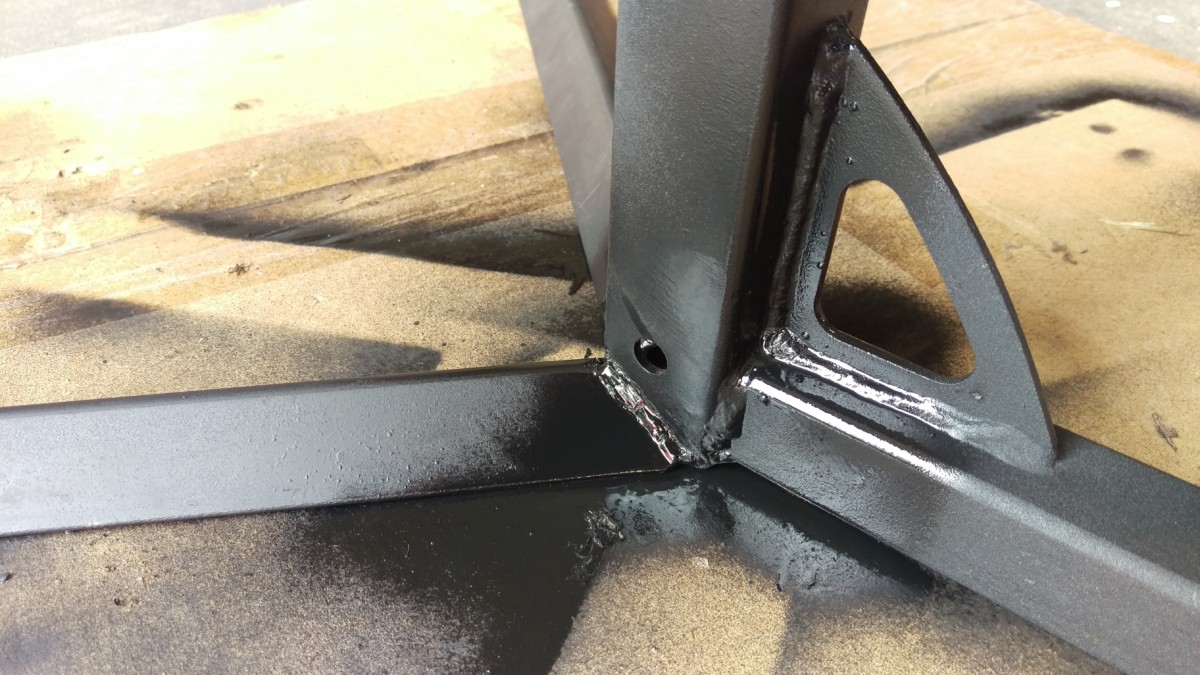
Some black spray paint fixes everything
A small amount of grinder work and some black spray paint fixes all flaws. I hit it with some two in one rustoleum paint plus primer
Wrap-up
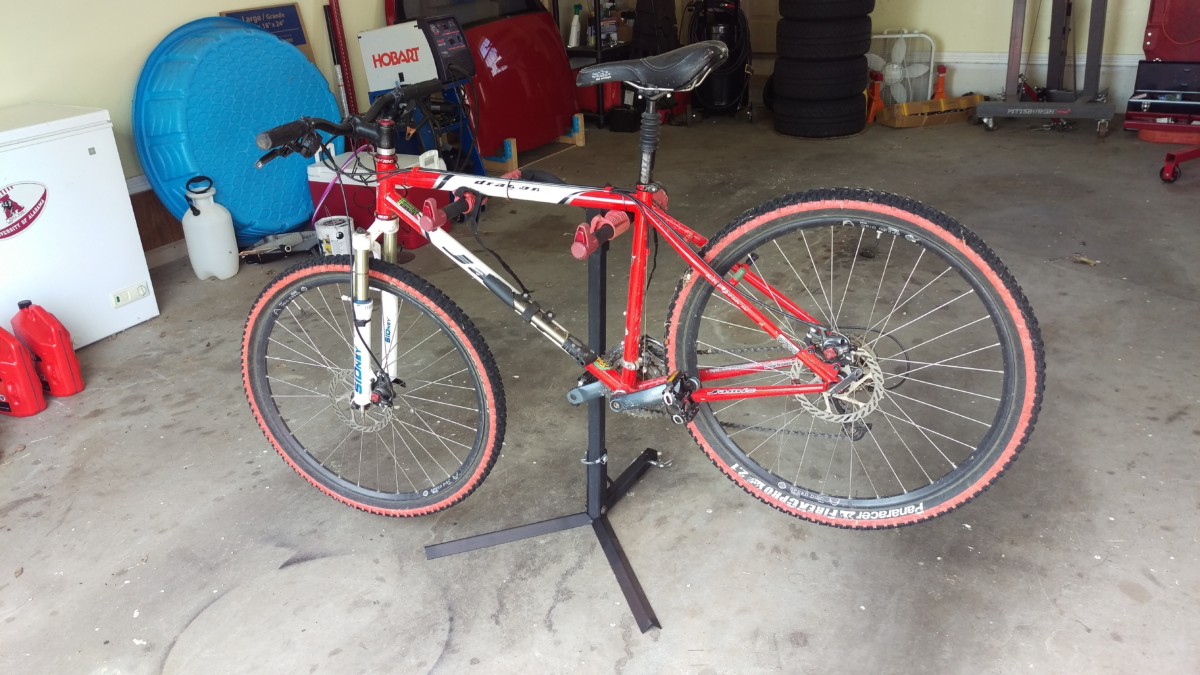
Final product works great
And there you have it. The stand is good enough to do basic bike maintenance on. It also takes up less room in my garage than the hitch rack did, because it is free standing now rather than needing to lean on a wall. In all, this was a good way to make use of something that was otherwise destined to be thrown out.
Also, you may notice I glossed over how to weld. That’s because I am bad at it and don’t consider myself experienced enough to instruct anyone else.