2009-2014 F150 Mirror Removal and Replacement
As you can tell by the theme of my F150 upgrade articles, I bought a very basic truck with almost no options on it. Internet wisdom enlightened me to the fact that the fancy mirrors on higher end trucks are actually plug-and-play with all F150s. Thus, features like the puddle lamps and heated mirror function are already pre-wired to my truck, I just needed to order some new parts and put them on!
If you also bought a base truck and are interested in doing a mirror upgrade, the first step I recommend before doing anything is to follow this awesome center stack removal article here and follow it all the way until the “Removing the old Actuator” headline. What you’re after is to identify the part # on the HVAC panel tag. The reason for this is because this HVAC panel must be replaced with one that has the heated mirror button. Ford offered many different options in terms of HVAC for these trucks, and because of that, there are many different styles of HVAC panel. To add to the complexity, 2009 and 2010 are different than 2011 and 2012, and both of those are different from 2013 and 2014. Within all 3 two-year runs, Ford offered the base panel, like mine, the basic panel with heated mirrors, the basic panel with heated mirrors AND rear defroster, and then the full blown dual zone HVAC panel with heated and air conditioned front seats. Mixing HVAC panels with the wrong options for your truck may not have the outcome you desire, so it is best to bite the bullet and take your center stack out to find your part number.

This is a generic picture of the tag on an HVAC panel just like mine. The important part is the “BL3T…” part #.
In my case, my HVAC panel started with a “BL3T”. It is important when finding the replacement HVAC panel to match the part #s as closely as possible (at least the first 4 characters). I replaced my no-option BL3T panel with another Bl3T panel, but with the heated mirror button instead of a blank. This is about as complicated as this project gets. I just so happened to have a failed heater blend door actuator on my truck, so I got lucky and had to take my center stack out anyway. If you do not have to replace an actuator or do something else back there, I recommend biting the bullet and taking the center stack out anyway to identify your part number. After I had my part number, it took me a few weeks of hunting on Ebay/Amazon/Craigslist until I finally found my replacement panel.
The fun begins once you have the panel figured out, or at least your part #, because then you have to shop for replacement mirrors that have all the features you would like. Since I only do occasional towing, I decided to stay with the non-towing mirrors, however, if you want/need to upgrade to the towing mirrors, this is the perfect opportunity to do so.
I bought non-towing mirrors with basically all the bells and whistles: puddle lamps, blind spot mirrors on BOTH sides, heat, indicators, and obviously power. Here is a link to a generic 2009-2014 F150 mirror search that you can use to find the mirror you like best. Authentic OEM units seem to run upwards of $300 so I went with cheaper knockoffs for about half that.
Unfortunately, I found out that I also had to buy these mirror caps to complete this project because I completely mangled and broke my stock mirror caps trying to get them off. I firmly believe these caps are meant to be put on one time and never removed, but you are welcome to try if you like.
Once you have the mirrors and the correct HVAC panel, you can do the actual install!
Here is my writeup on how to remove the door panels. From there you simply have to swap the mirrors.
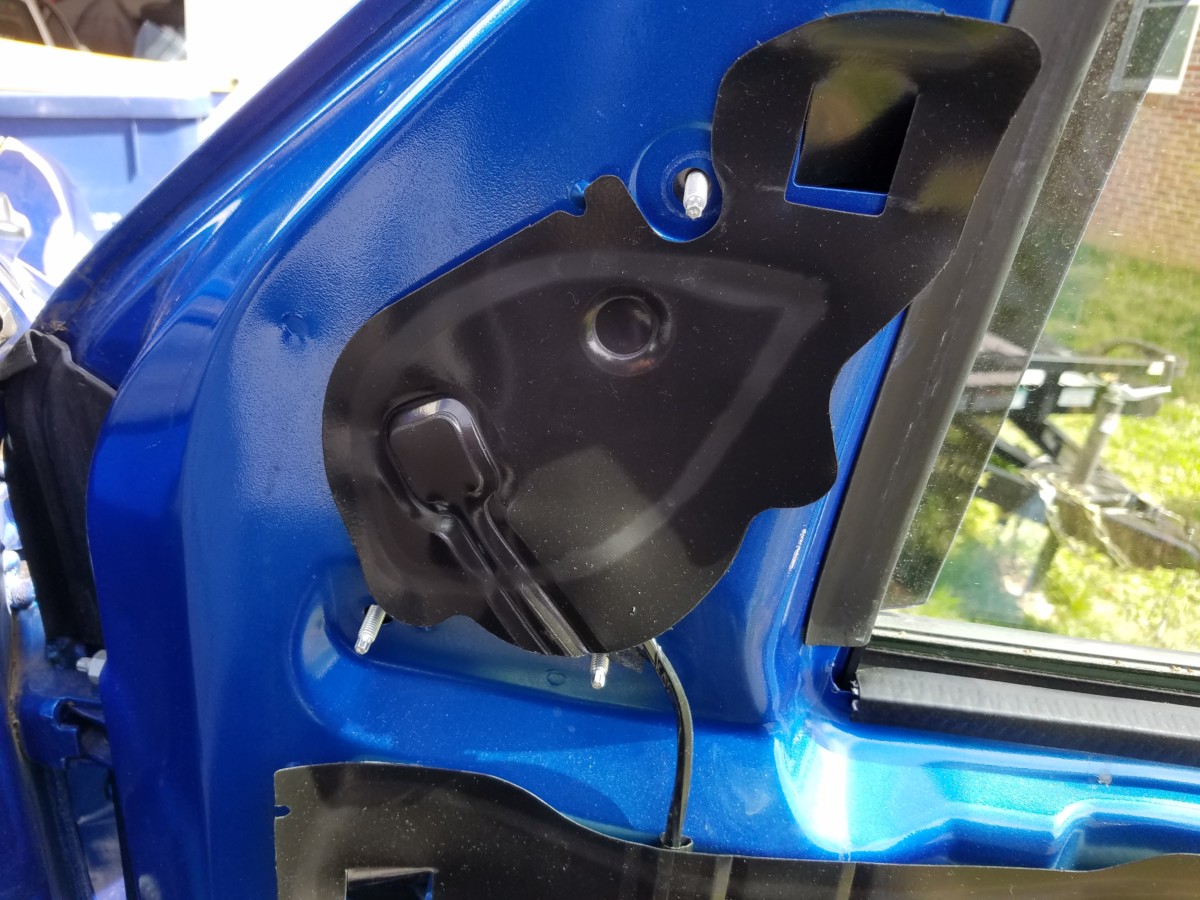
Starting point. Door panels already removed from previous article.
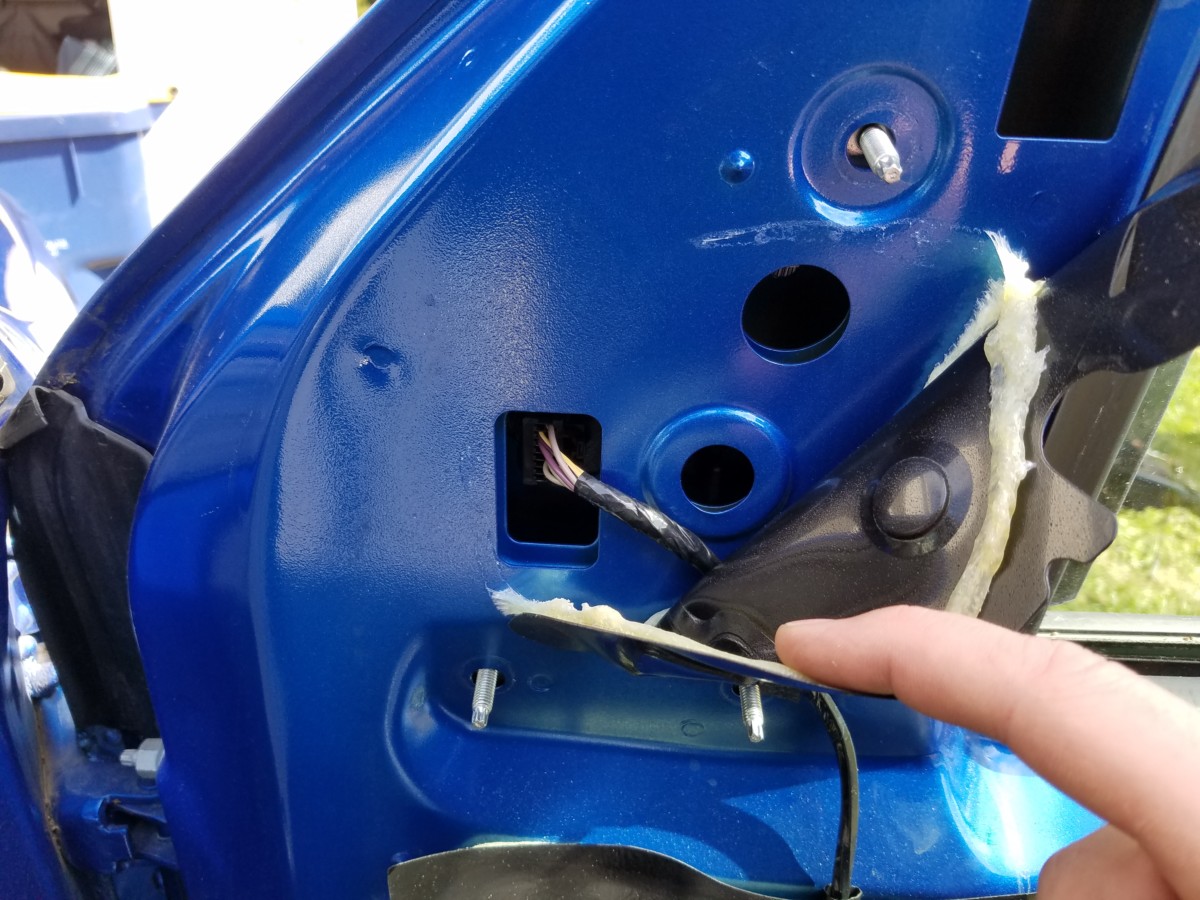
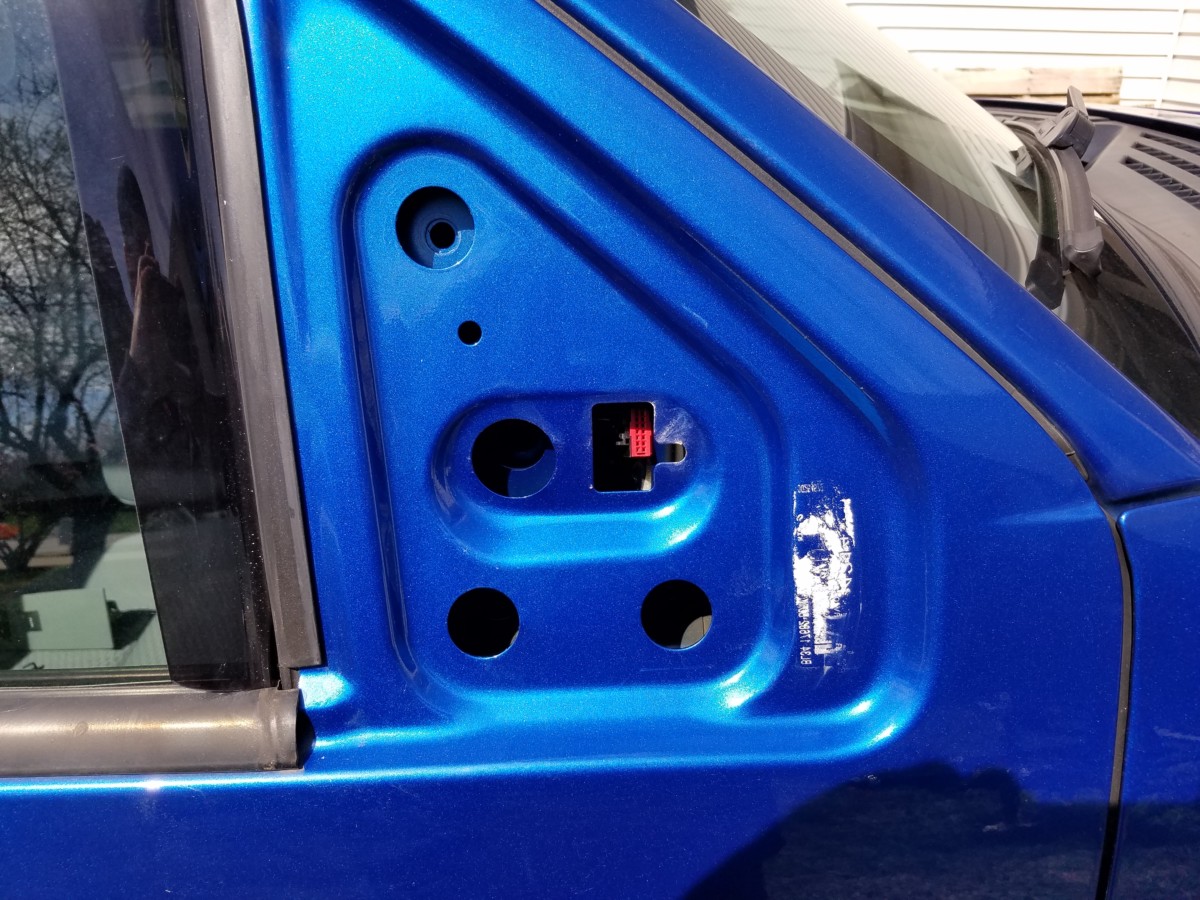
Peel back the rubber vapor barrier to expose the electrical plug, and disconnect. Remove the three nuts holding the mirror to the door. The mirror will NOT fall off or scratch any paint.
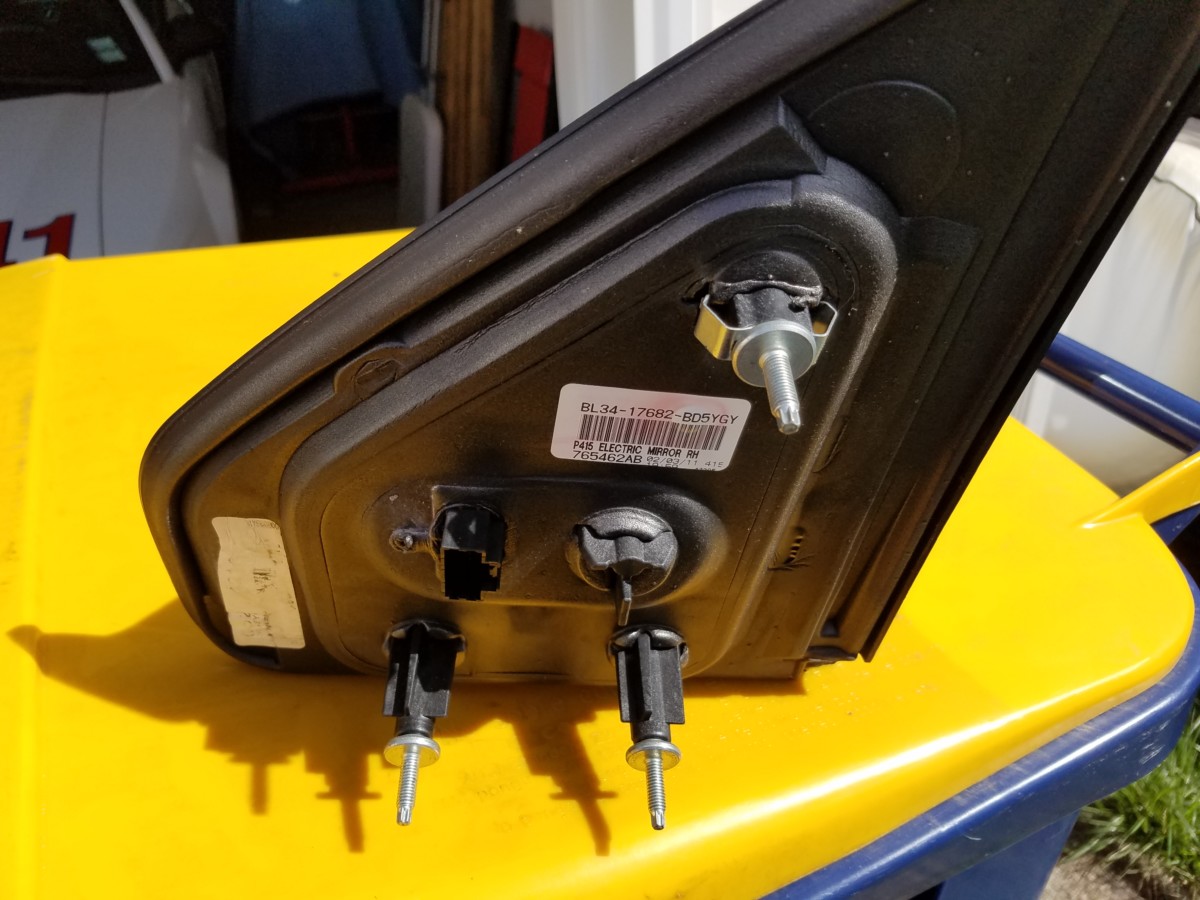
This picture shows the new mirror waiting to go on. Note the top most stud also has the large keeper-spring to hold the mirror to the door even when all three nuts have been removed.
With the mirror finally off, clean around the mirrors weatherstripping and let it dry so it makes a good seal against the body.
Remove the center stack once again to swap your new HVAC panel in and put everything back together. The heated mirrors work only when the engine is on!
(Final pics coming)
Thank you, now i can replace my plain ones with the ones with built in turn signal indicators, great for us older, hard of hearing adults