2009-2014 F150 Door Panel Removal
This is my writeup on 2009-2014 F150 Door Panel Removal.
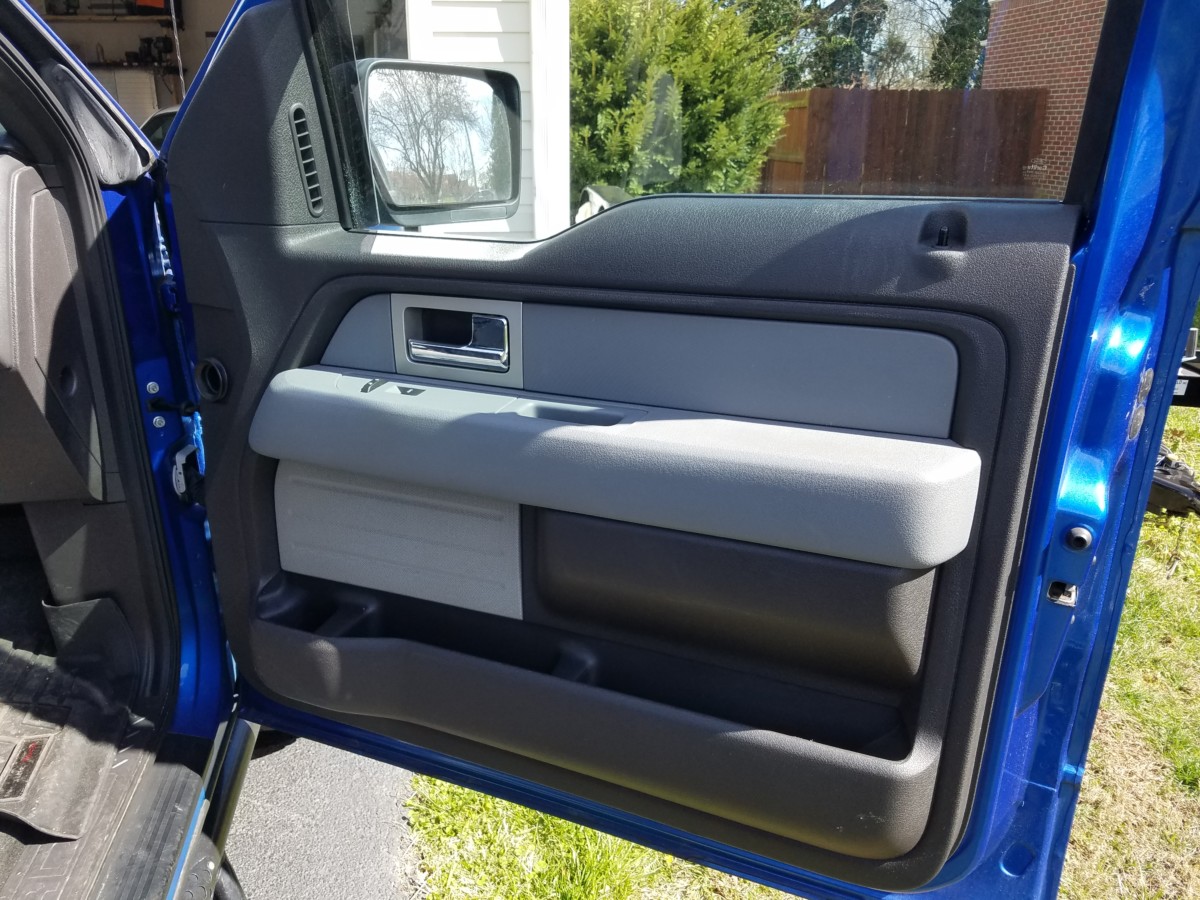
This is the starting point
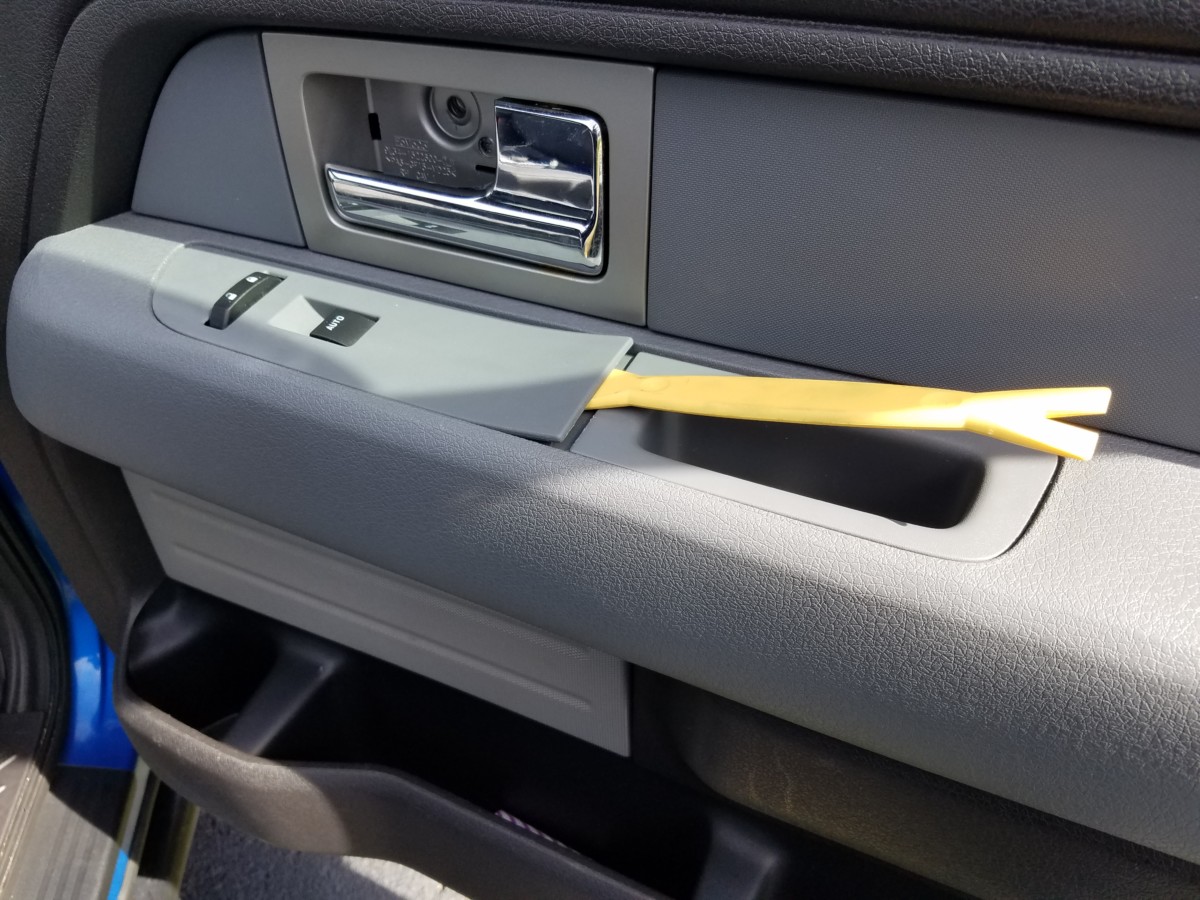
The first thing I recommend doing is getting an old flathead screwdriver that you won’t miss, put some heat to the tip of it with MAP gas or a butane torch, and bend the tip of it so its perpendicular to the rest of the screwdriver, as seen below. I put the tip of my screwdriver in my vise once it was hot and bent with the handle so I didn’t burn myself.

Pictures below show using this tool to remove the small trim panel behind the door handle, which is now a breeze!
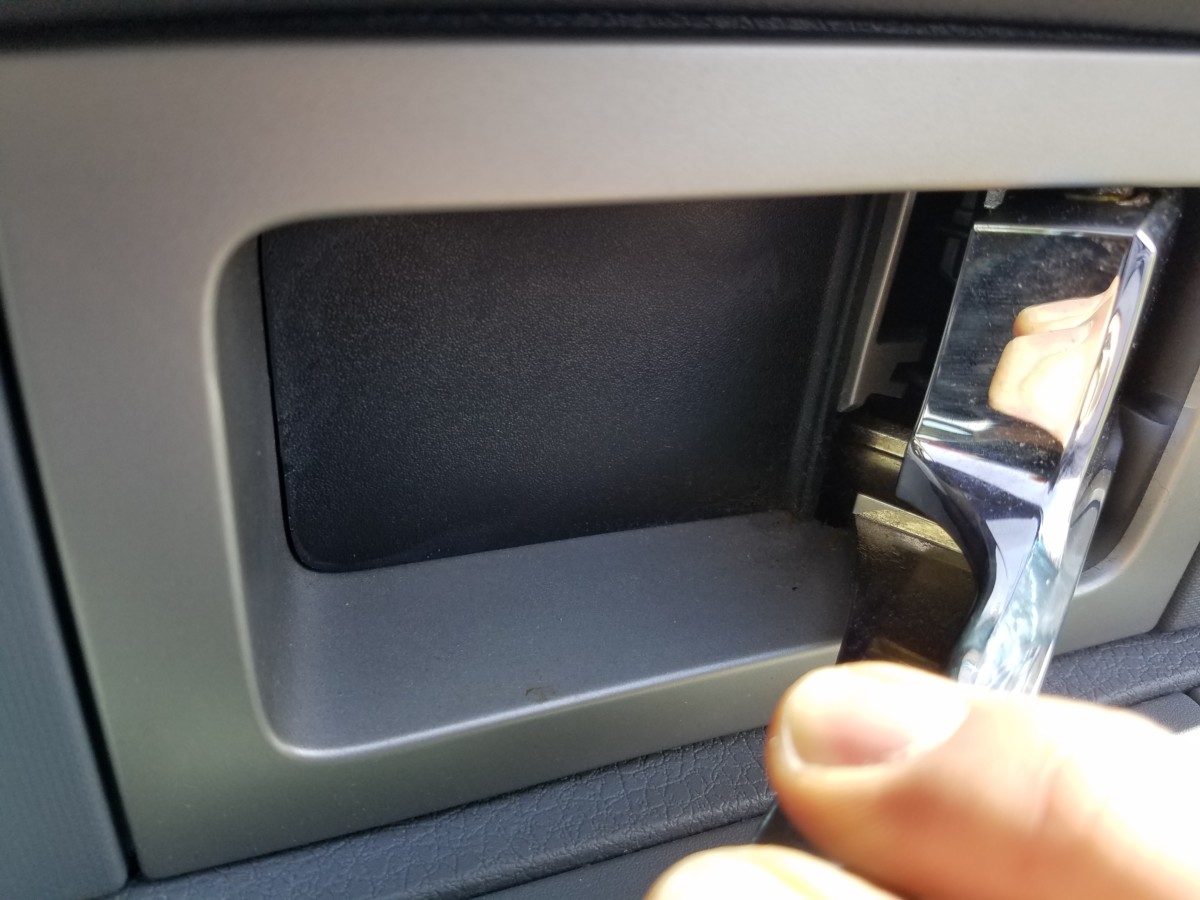 This is the black plastic trim piece you’re after.
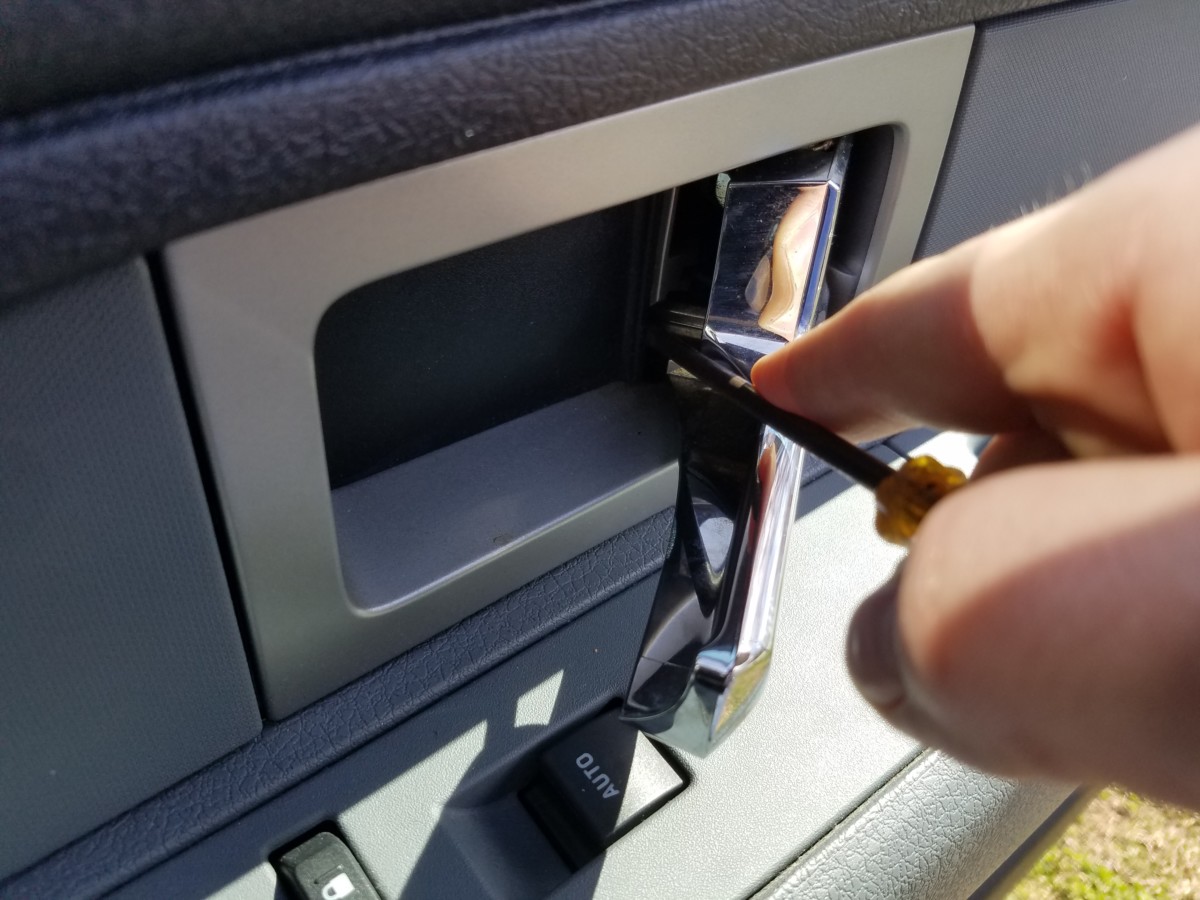 This is hard to do one-handed so I could take a picture but you get the idea. With one hand, open the door handle all the way, and with the other, pop the trim piece out with your new pry tool.
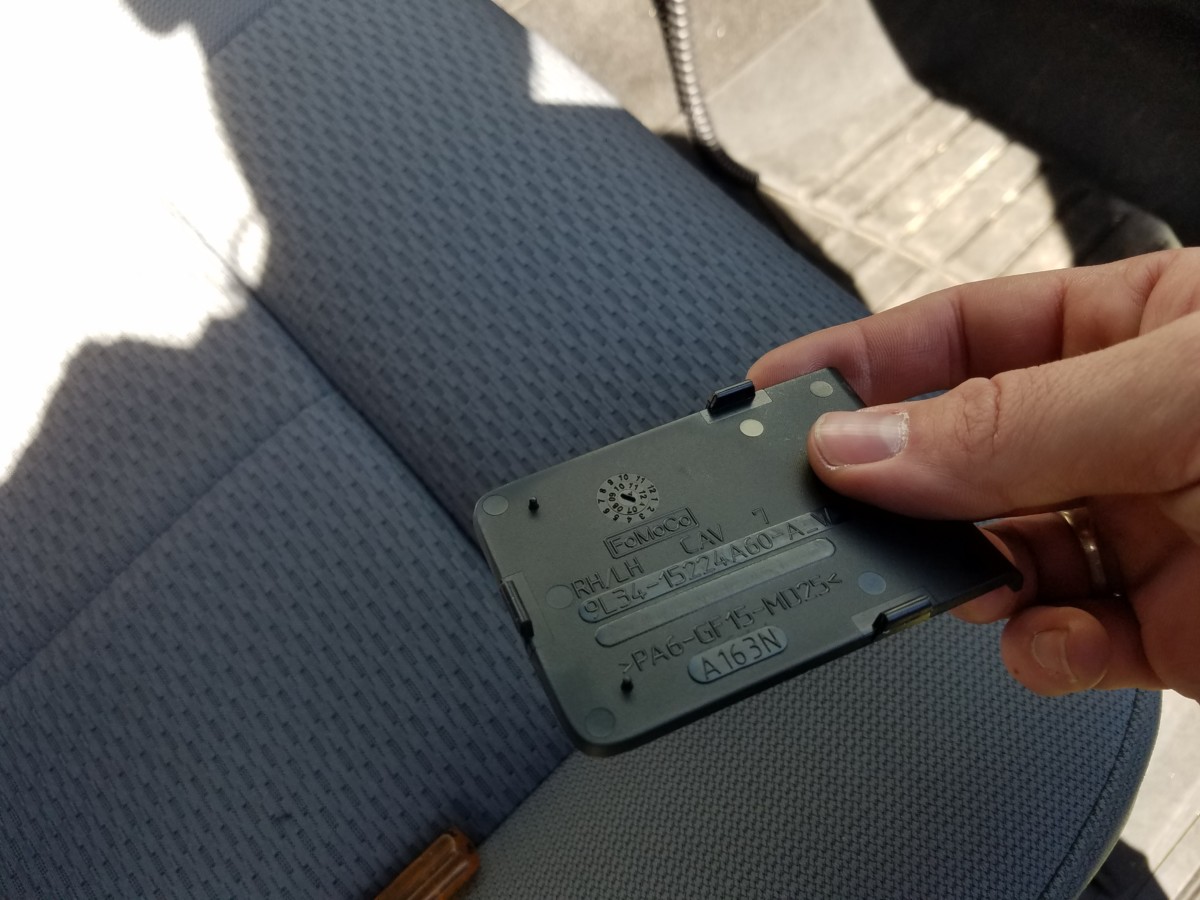 This is the back-side of the trim piece. You’ll bend it to get it out, but you won’t break it (most likely).
After that you have to pry the window/door lock panel up. Use a plastic interior pry tool set, something like this.
Recommend prying from the back first because it is straight (the front is curved). Very small flathead screw drivers are a help here just to get the plastic pry tool started.
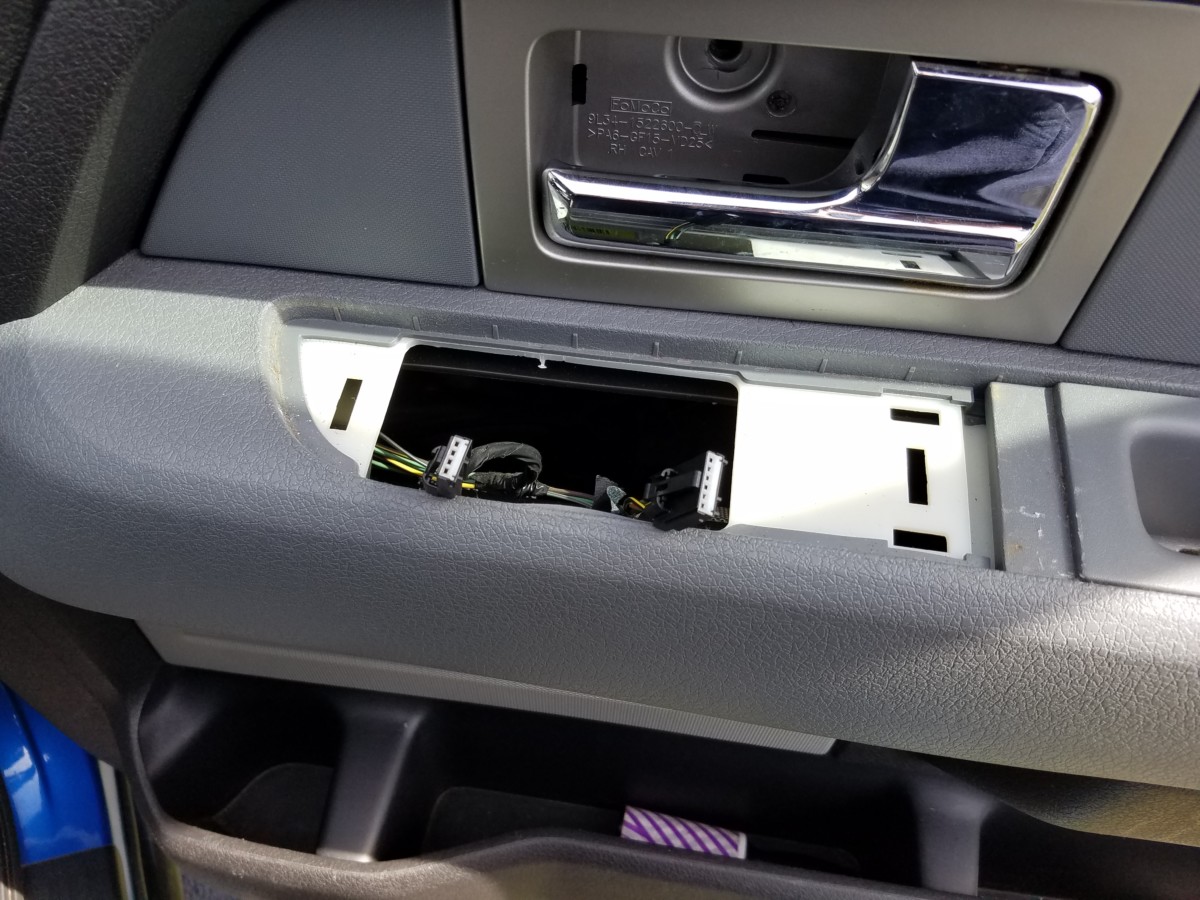
Be sure to unplug the window switch and the door lock switch before setting the panel aside. They are different shapes so you dont have to worry about mixing them up.
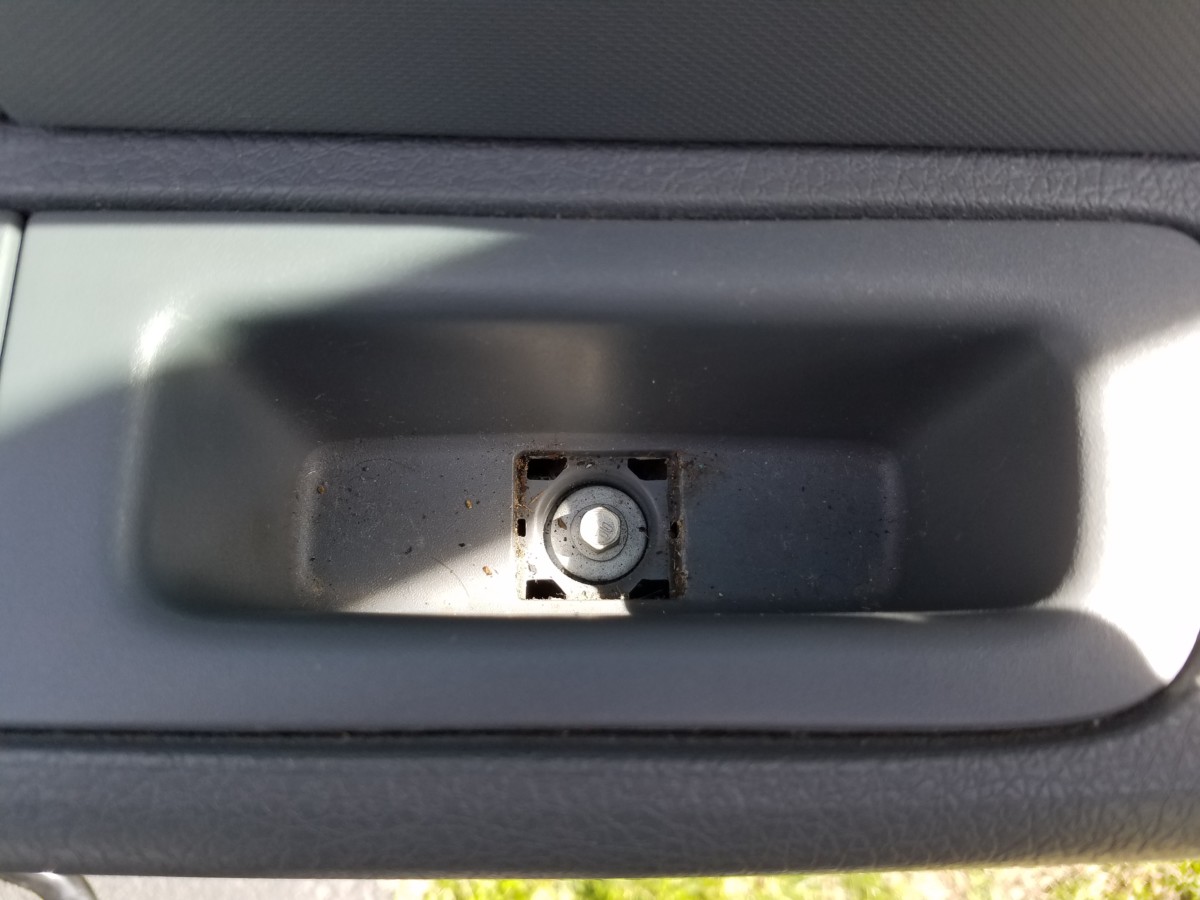
The next one is tricky, but my plastic interior set and some very small flat head screwdrivers came in handy. In the grab handle pocket there is a small square trim piece. Pry up with whatever tools you see fit to expose the screw underneath. Remove this screw. (Sorry for the dirt)
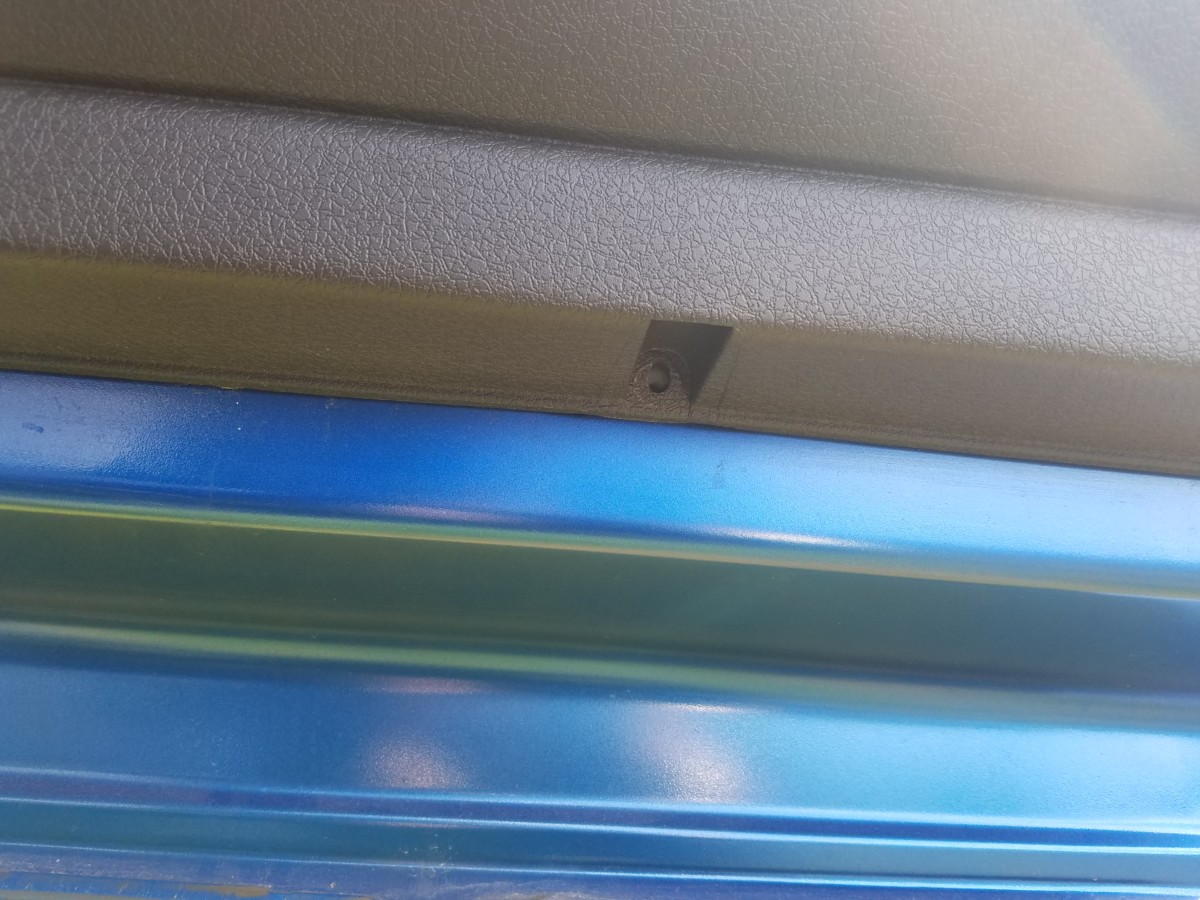 This picture shows one of the screws at the bottom of the door panel that hold it to the door.

Here is another. Remove all screws at the bottom of the door panel.
The door panel is almost ready to come off at this point. From here you lift up slightly on the door panel to begin removing it, but the door handle cable will still be connected to the door handle. Disconnecting the door handle cable is pretty simple.
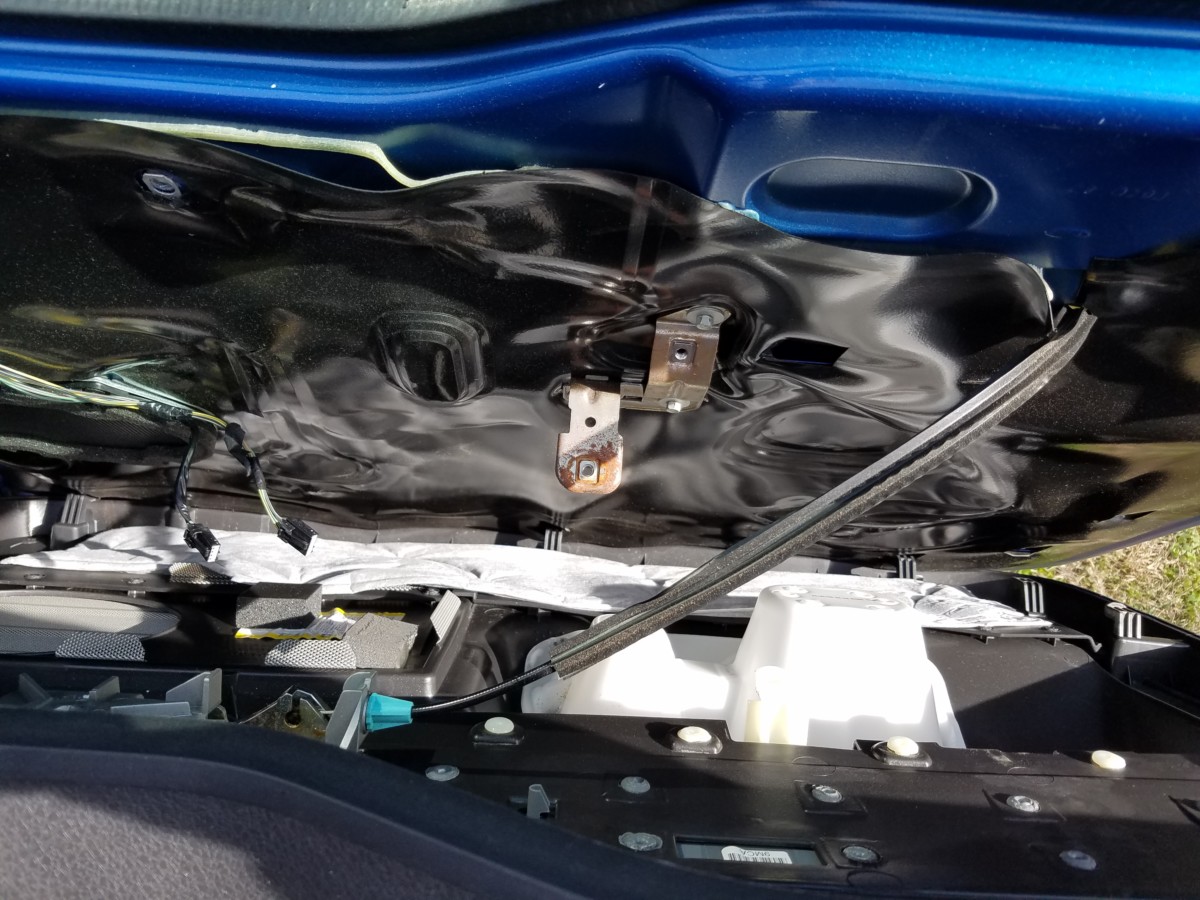
This is showing only the bottom hooks of the door panel still engaged with the door so that you can see the door handle cable still connected.
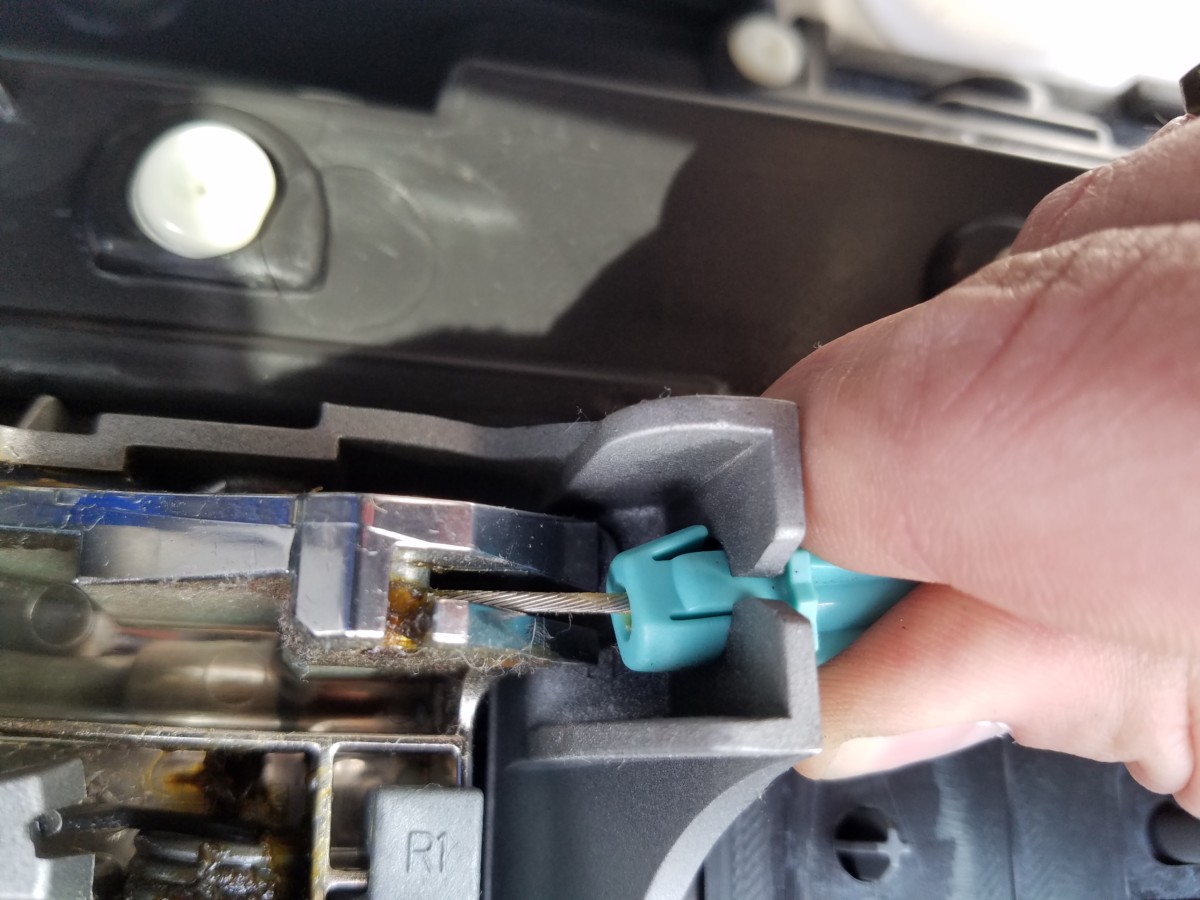 Use a small flathead to gently push up on one of the tabs shown above.
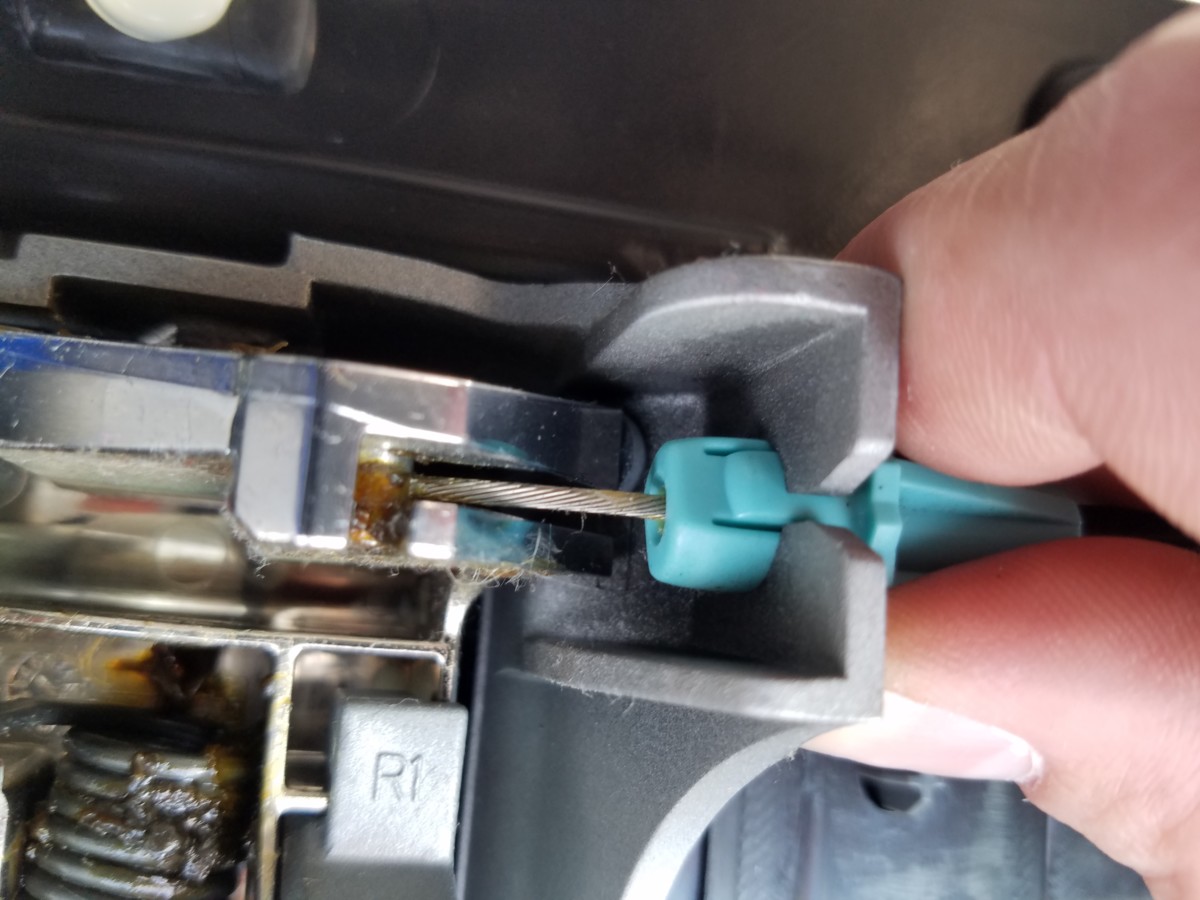 Use the flathead on the other side so both tabs are ready to slide through the bracket. This picture shows the end of my cable with some amber-colored grease on it. You can also see the slot in the handle itself. With the green tab disengaged from its bracket, you swing the entire cable over so that the braided cable lines up with that slot and you can lift up. You can also open the door handle with your other hand if you like.

Finished! Installation is the reverse of removal.
Also, the rear door panels on Supercrews follow almost the exact same procedure, other than having to take a small plastic bracket off.
(Picture coming soon of rear door panel.)
Great instructions. Helped me replace broken door handle.
These instructions are the best I’ve seen. Love the pictures and explanations. I had to remove the drivers side panel on my 2011 F150 to get to the speaker. The only minor problem was the clip on the door that’s used for the screw to secure the panel fell off and went down into the bottom of the door. I was lucky to pull it out using a telescope magnet
Thank you. Your instructions helped.