Making a Bandsaw Box
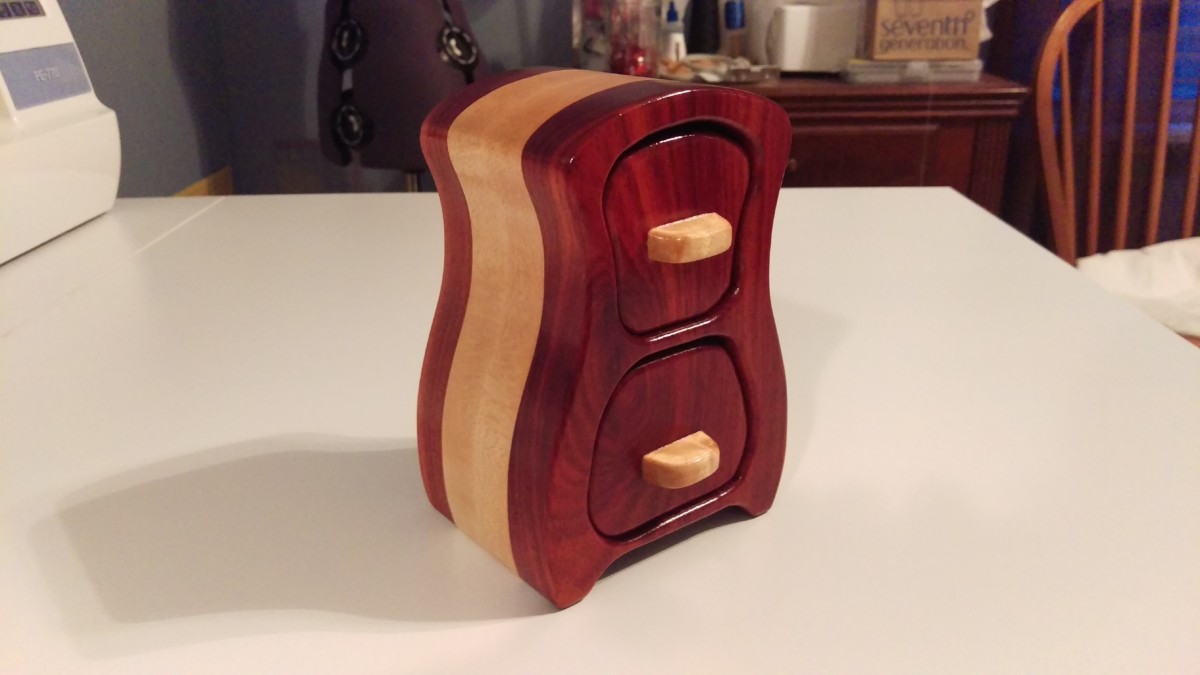
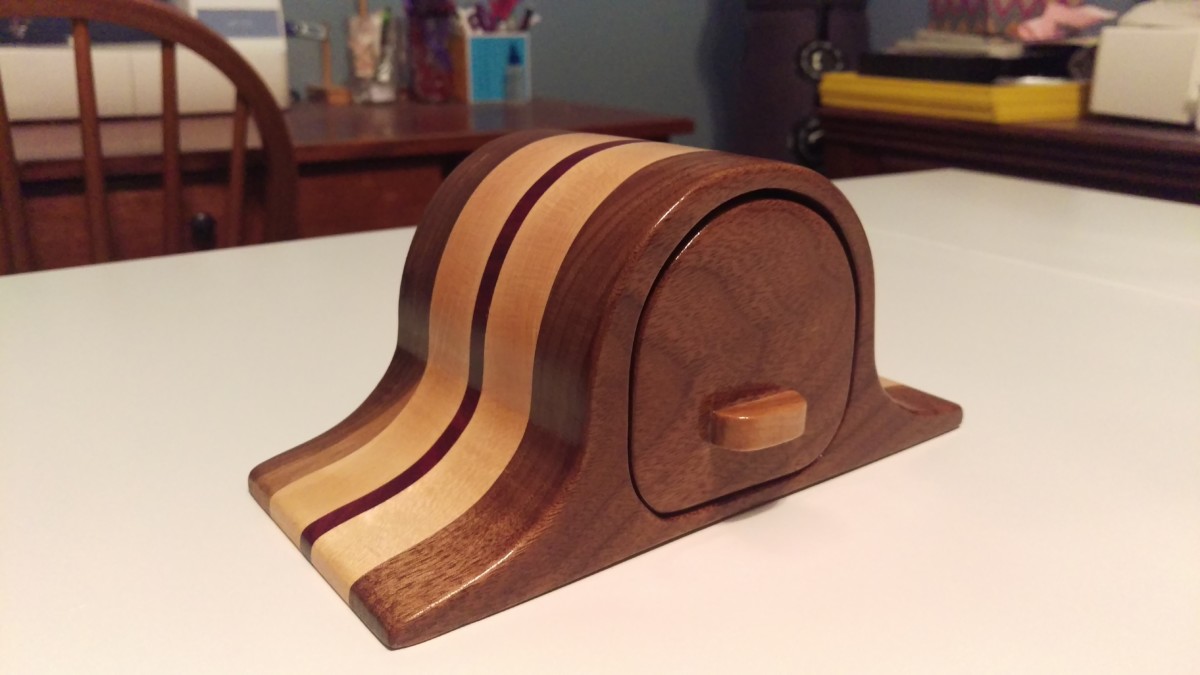
Preview of the end result
Bandsaw boxes make for a neat project if you have the tools. The requisite tool here, of course, would be a bandsaw. I used my Rikon 10-324. To make a bandsaw box, you basically take a large block of wood and cut a box with drawers out of it in some sort of interesting shape. This past Christmas, I made two of them as gifts.
Selecting the Wood

Maple and bloodwood laminate together very nicely
I had some leftover maple and bloodwood from another project on hand. The bloodwood was a particularly vibrant red, and I figured it would go well with the maple. Really any wood could be used for a bandsaw box, even pine, but naturally you want to pick something with nice grain, figure, and color.
You can also laminate several pieces together, so this is a great way to make use of small scraps and cutoffs from other projects.
Design

Sketched out a design and folded in half for symmetry
Now you need to pick out a design. This goes hand in hand with selecting wood for the project, as you’ve got to limit your design to the size of the block available. In this case, I knew my wife wanted a funky dresser-looking box, so I sketched out something similar based on designs I found online.
After sketching half of it, I folded the paper in half and cut it out, to ensure it would be symmetrical. Note that this isn’t a requirement, as bandsaw boxes are frequently asymmetrical. Just make sure it has some kind of bottom to stand up on.
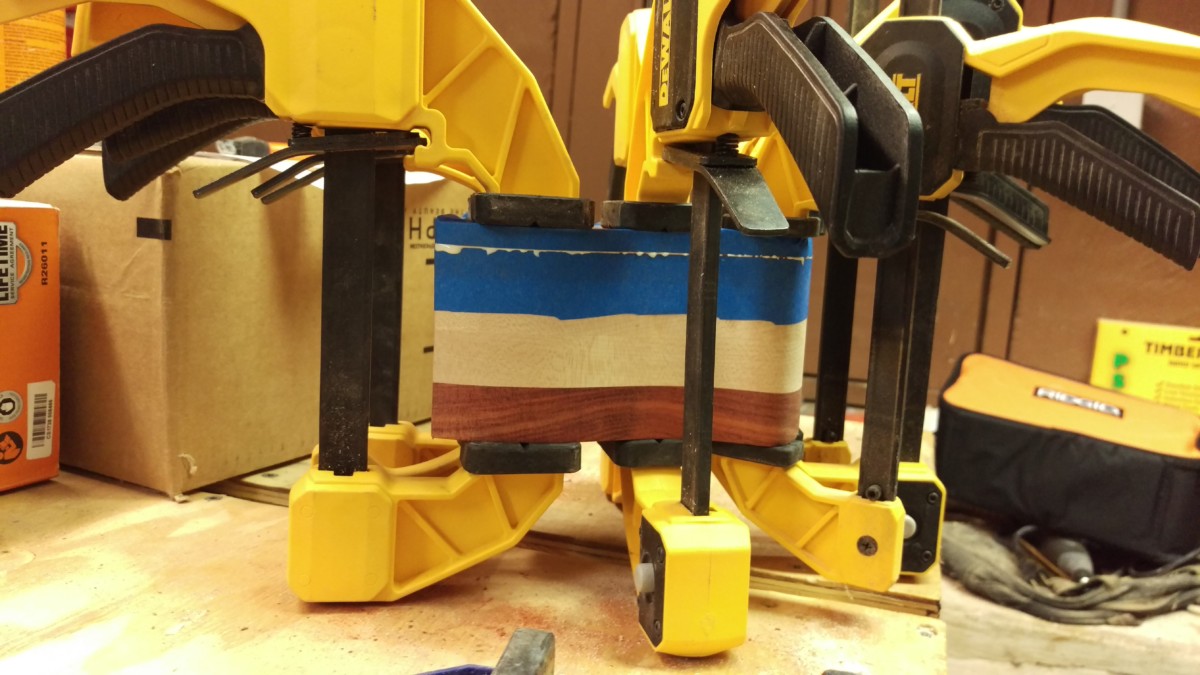
Laminating the Wood
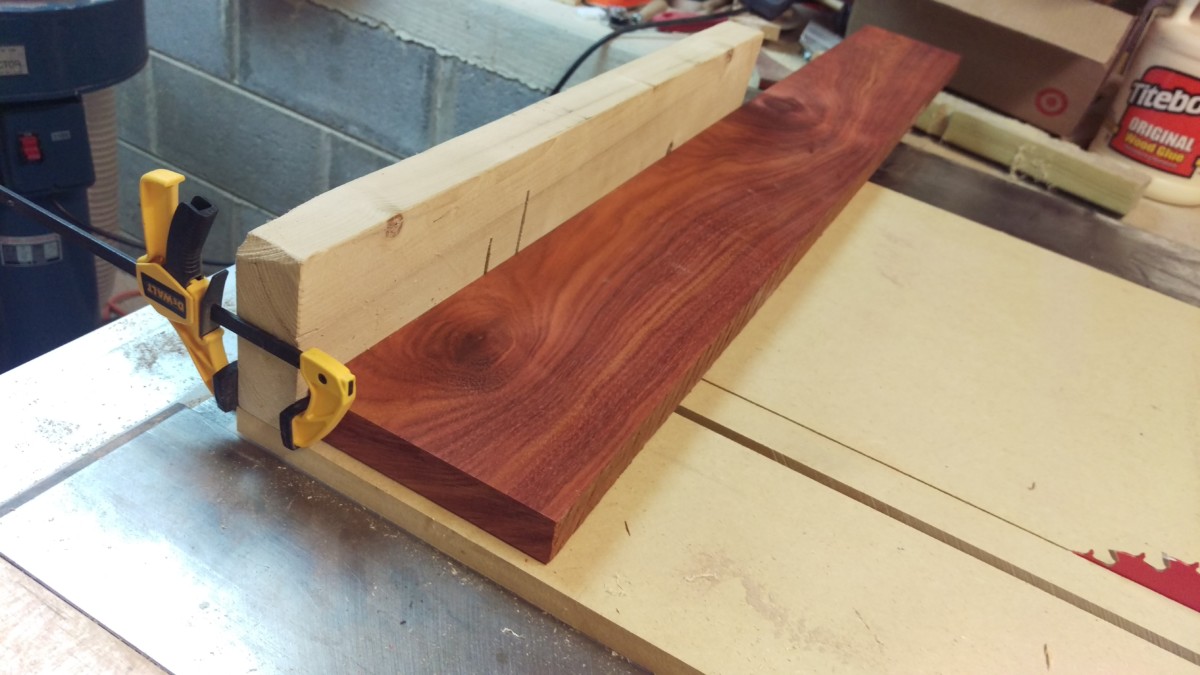
Cutting down the bloodwood using a small table saw sled
Since I’m using a couple of thinner boards, I need to glue them together to make a solid block. In woodworking, this is referred to as laminating. Once the boards were jointed and planed, I cut them into consistent pieces using my small table saw sled.
This could have also been done on the bandsaw. Most importantly, make sure the pieces to be laminated are all very flat, to eliminate gaps from the final block.
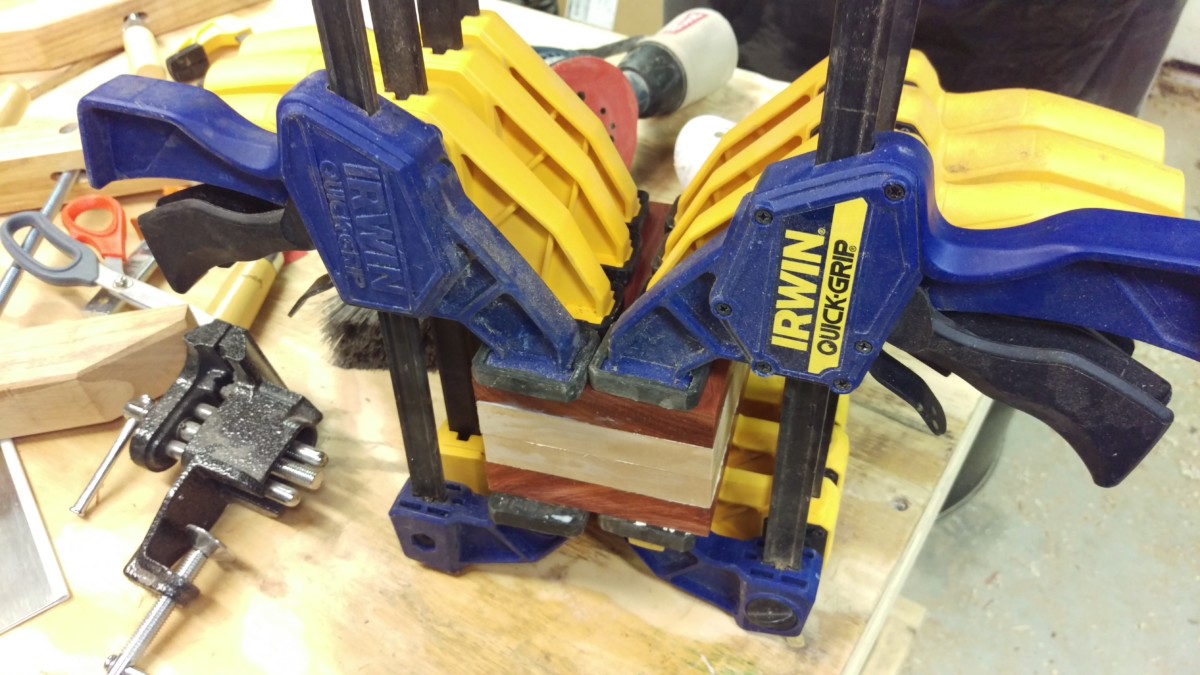
You can never have too many clamps

You know the glue penetrated when you get some squeeze out
Titebond 2
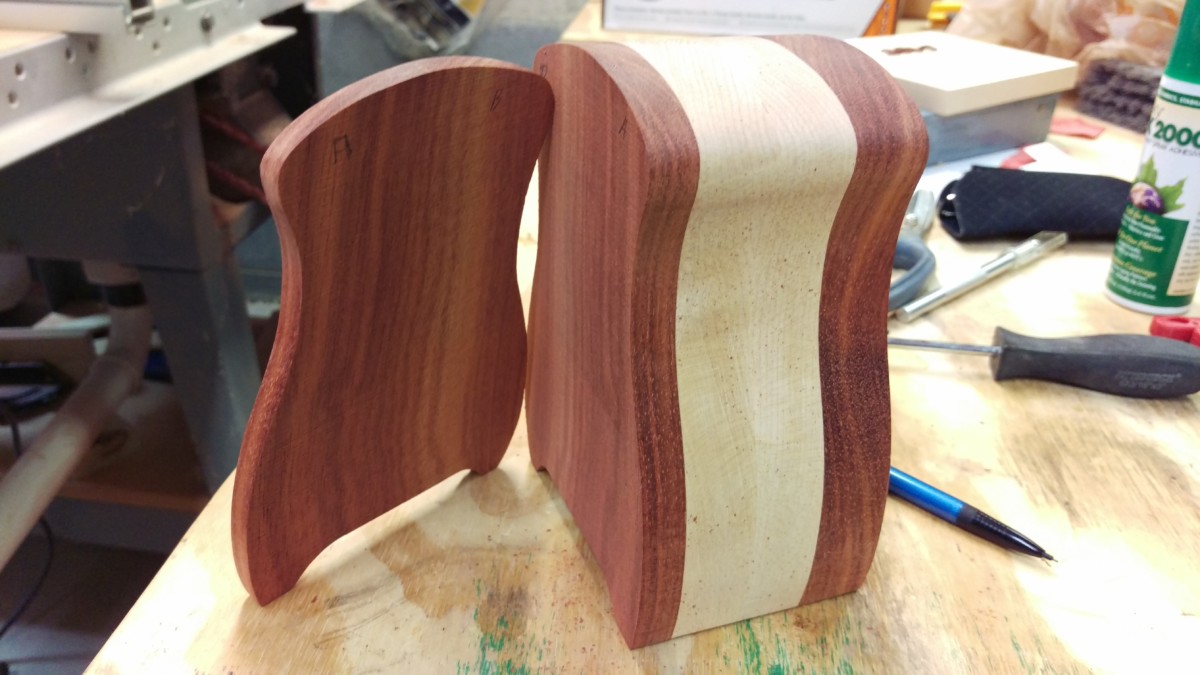
Cutting the Outside

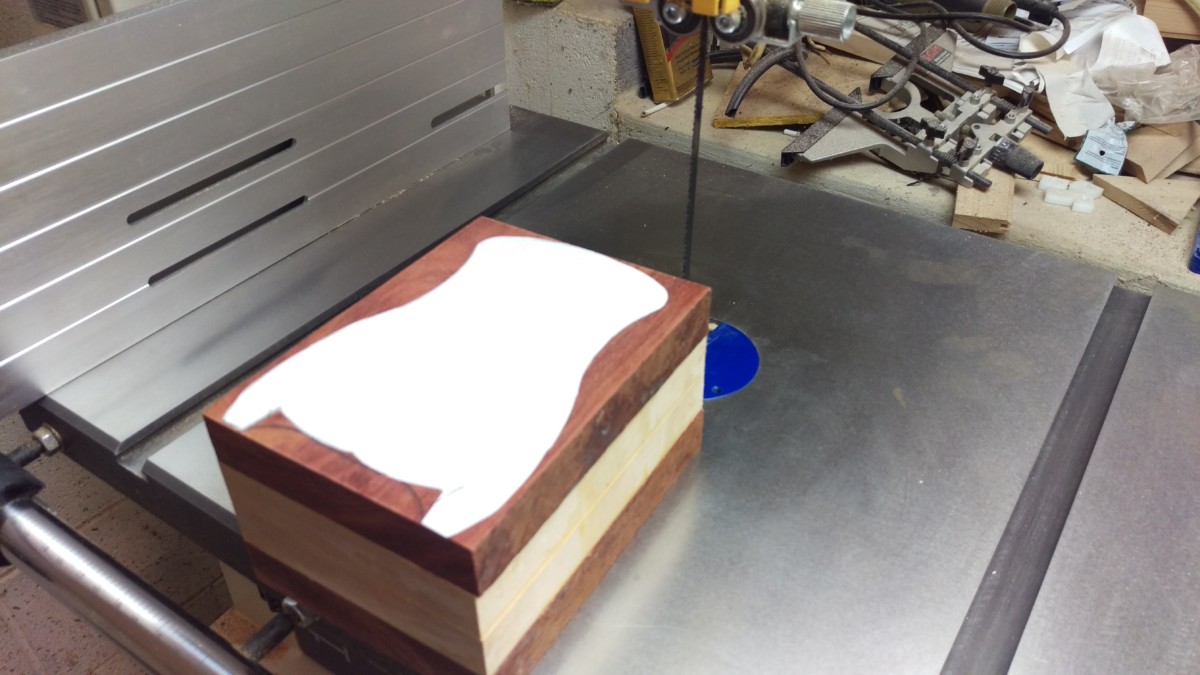
Glue on the paper template you cut out earlier
Once you have a solid block of wood, you can cut the outside of the box. I used some spray adhesive
Cutting the outside
Outside cut
Once the pattern is pasted on, you can cut the outside of the box. I used a 1/4″ 10tpi blade
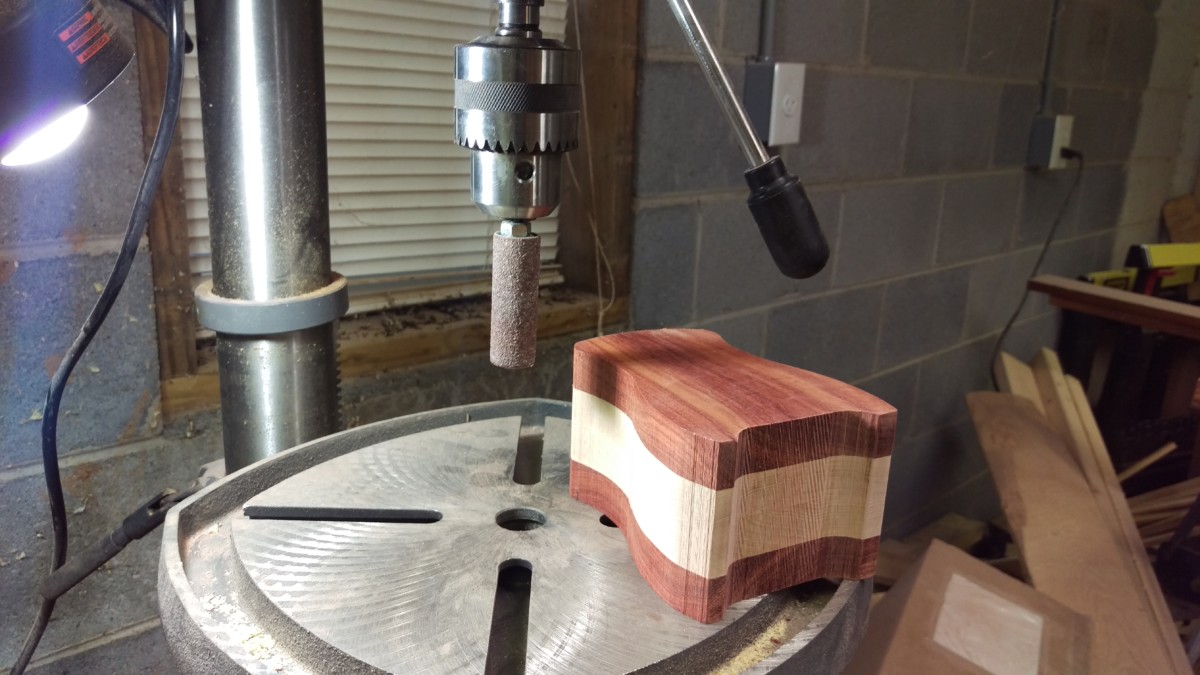
Sanding the Outside
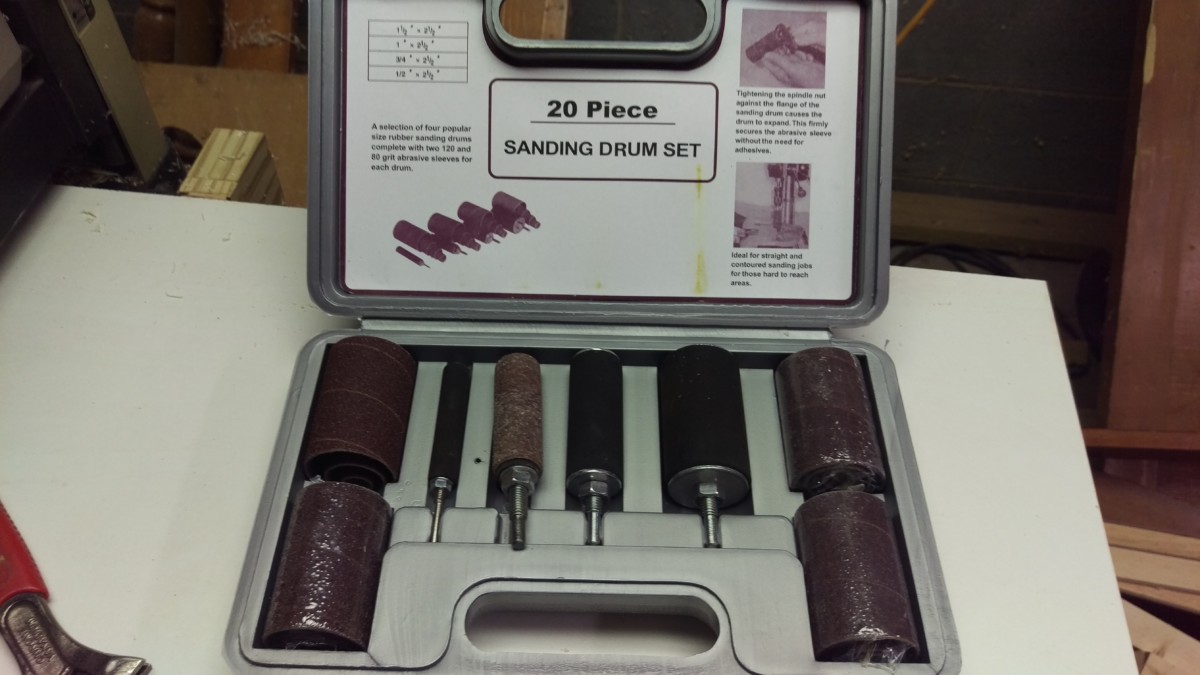
Drum sanding kit for my drill press
Drums make it easy to sand curves
I find it easiest to go ahead and do the bulk of the sanding on the outside at this point, while it’s still a solid block of wood. This isn’t a final sanding, as you’ll make two new glue joints later on. I just like to knock down the majority of the bandsaw marks.
One of these little drum sanding kits

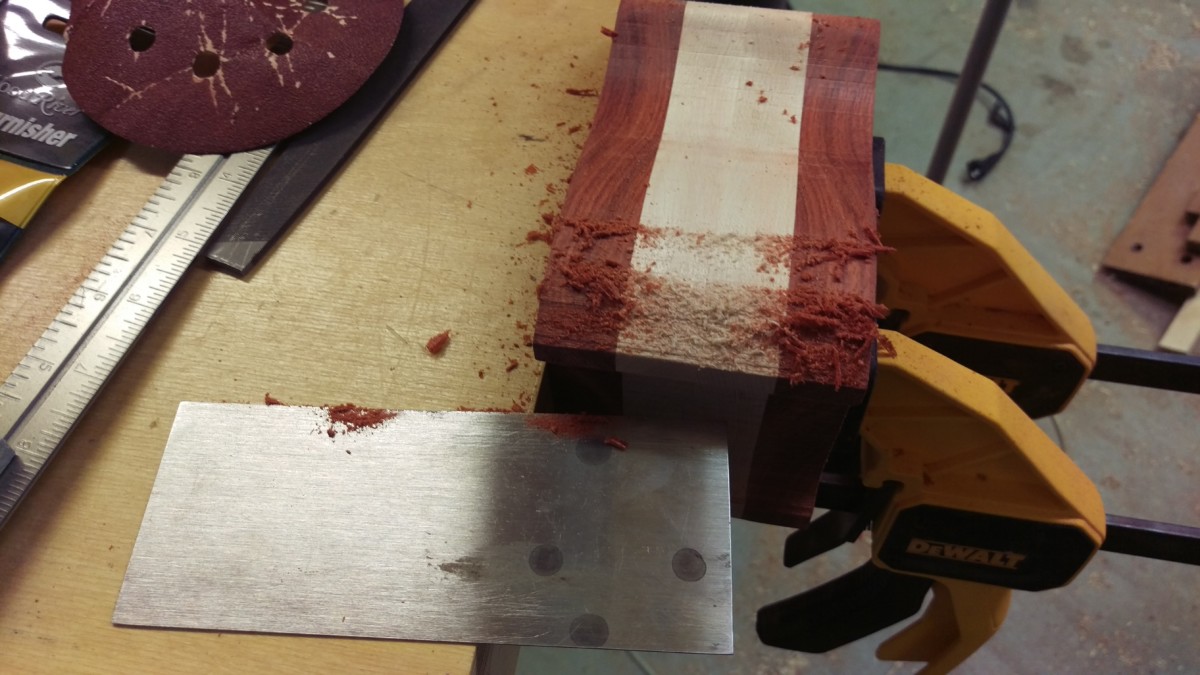
A cabinet scraper works well too
A much cheaper tool that does a good job is a cabinet scraper

Cut Off the Back
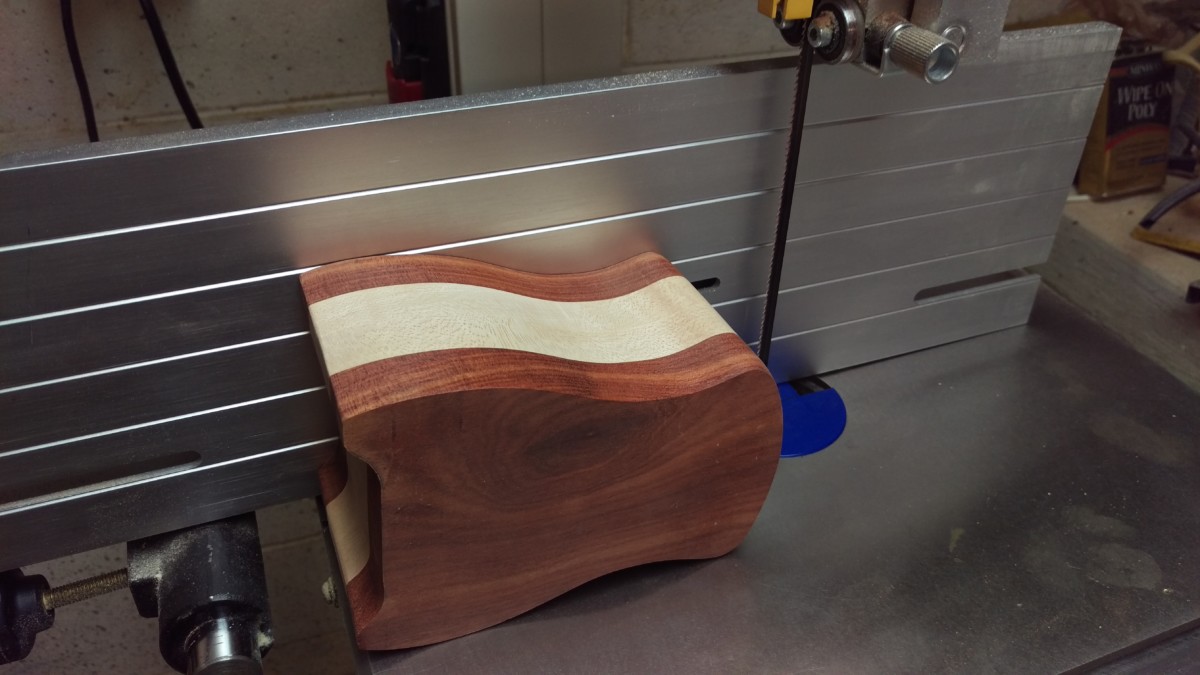
Cutting off the back
Back cut off
Once the outside is acceptably smooth, the next step is to cut off the back of the box. This involves using the bandsaw to cut about a quarter inch slice as shown.
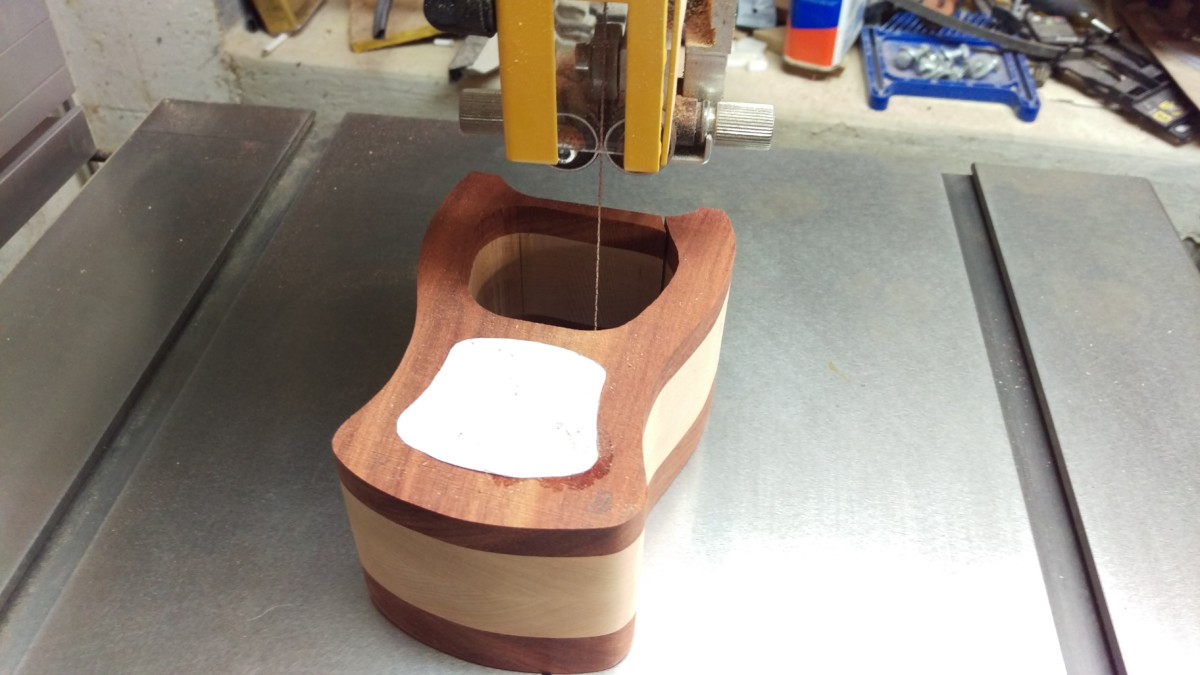
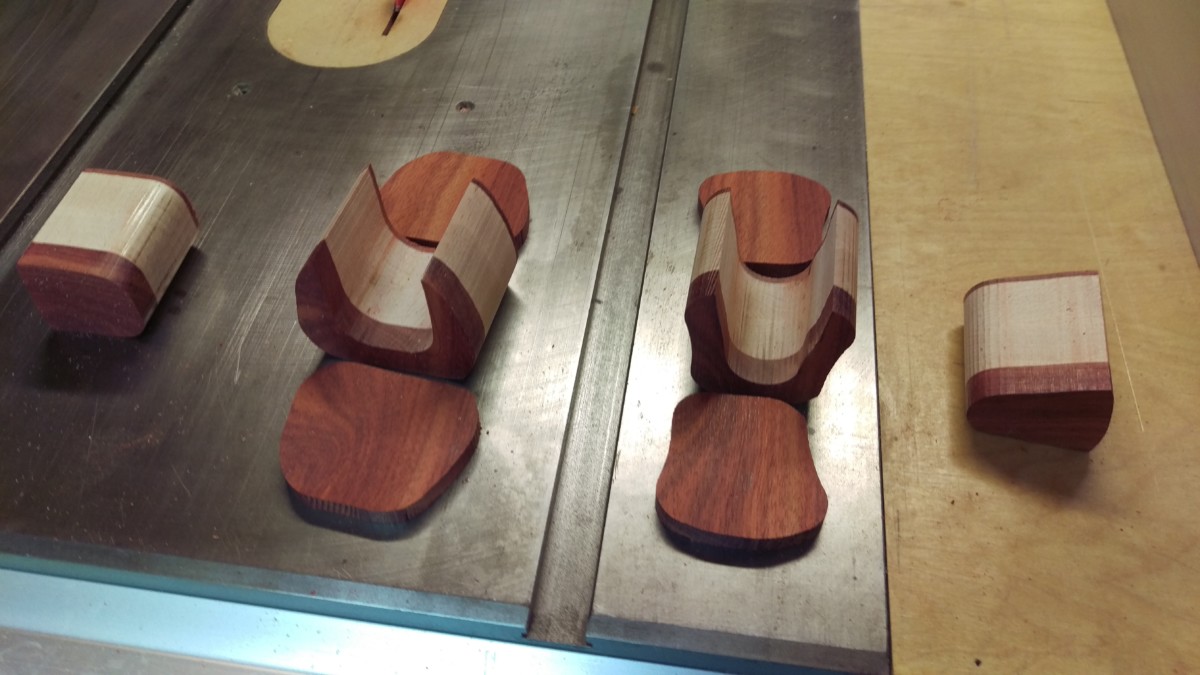
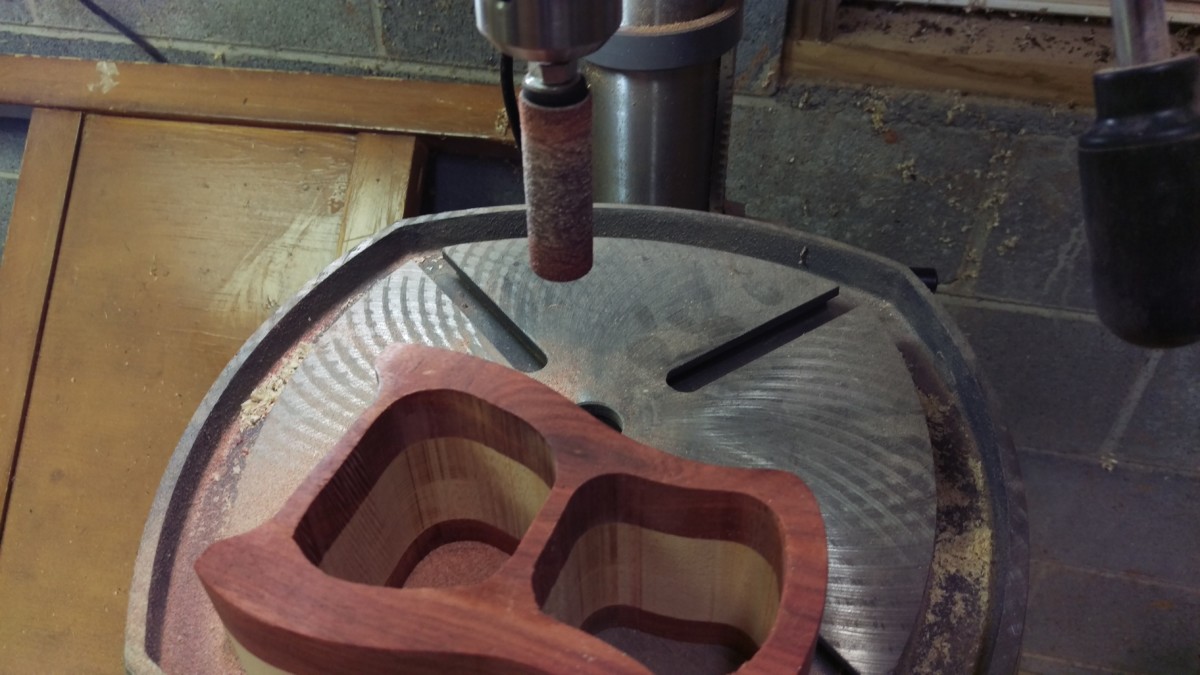
Cut the Drawers
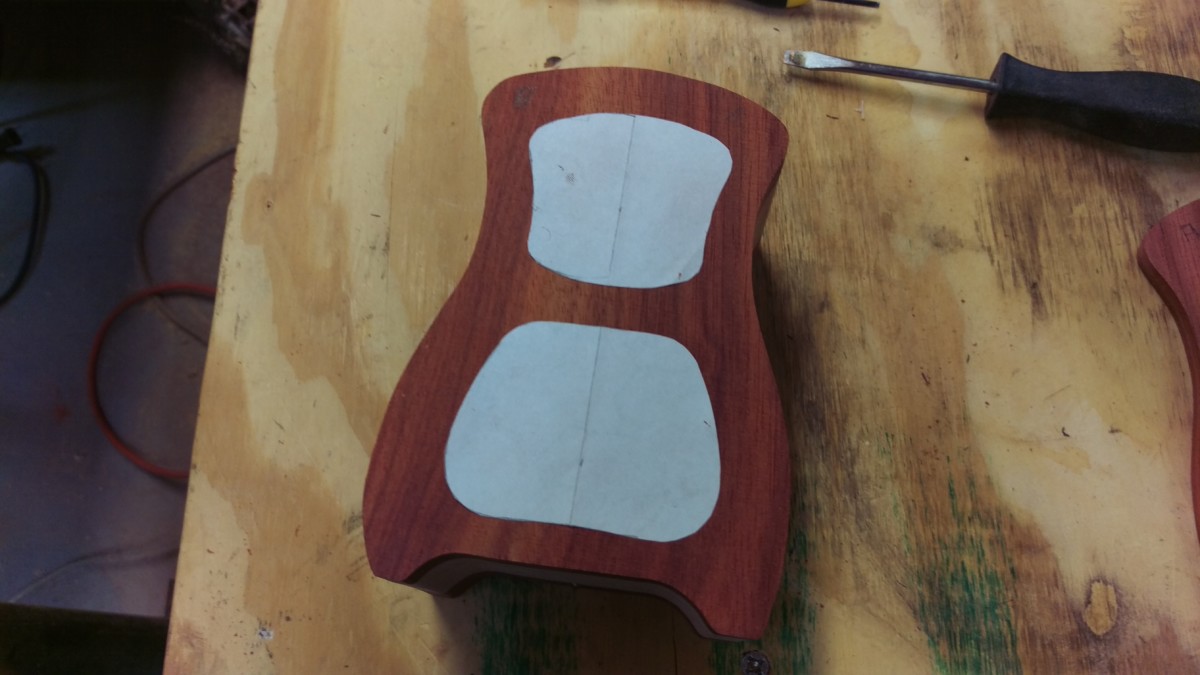
Drawers pasted onto the block
Cut the drawer out in one smooth pass, exiting through the entry point
Set the back of the box aside for now. Glue or draw the drawer shapes on to the main block and cut them out on the bandsaw. When cutting the drawers out, it is important to make one smooth pass. Go straight into the wood, cut the outline of the drawer, and stop the bandsaw. With the blade off, you can get the blade back out through the entry kerf.
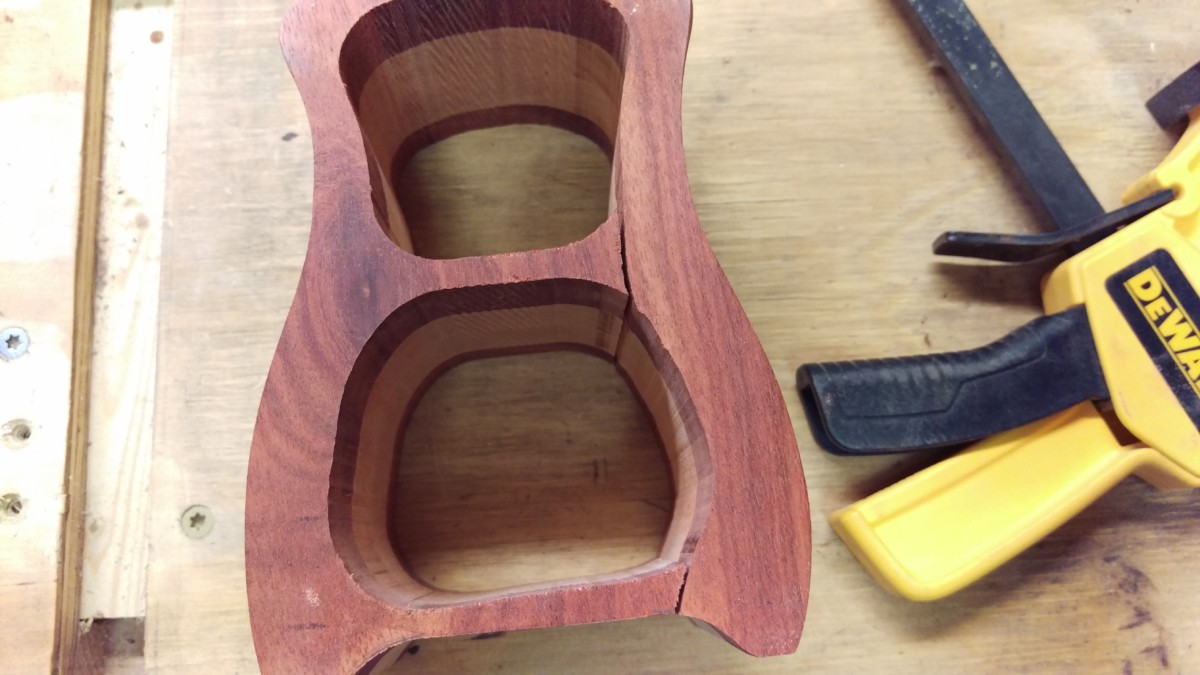
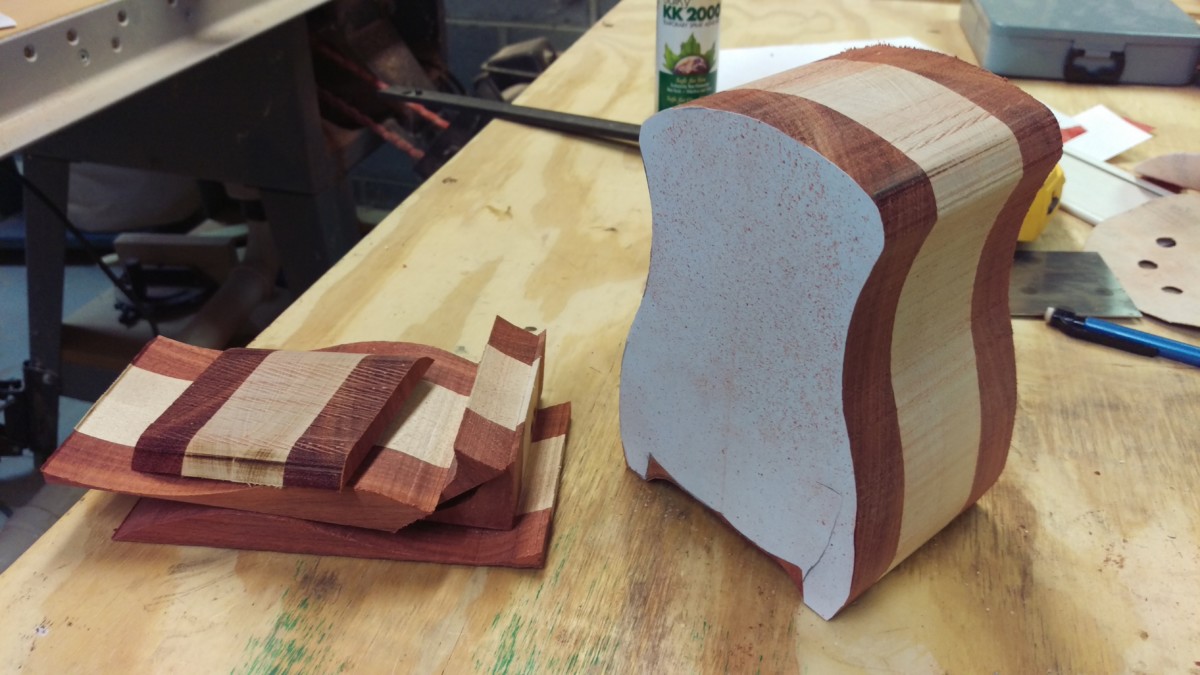
Drawers cut
Here is the box after cutting the drawers out. Note that there are two kerfs. Try to position them in a place on the box that will be somewhat hidden.
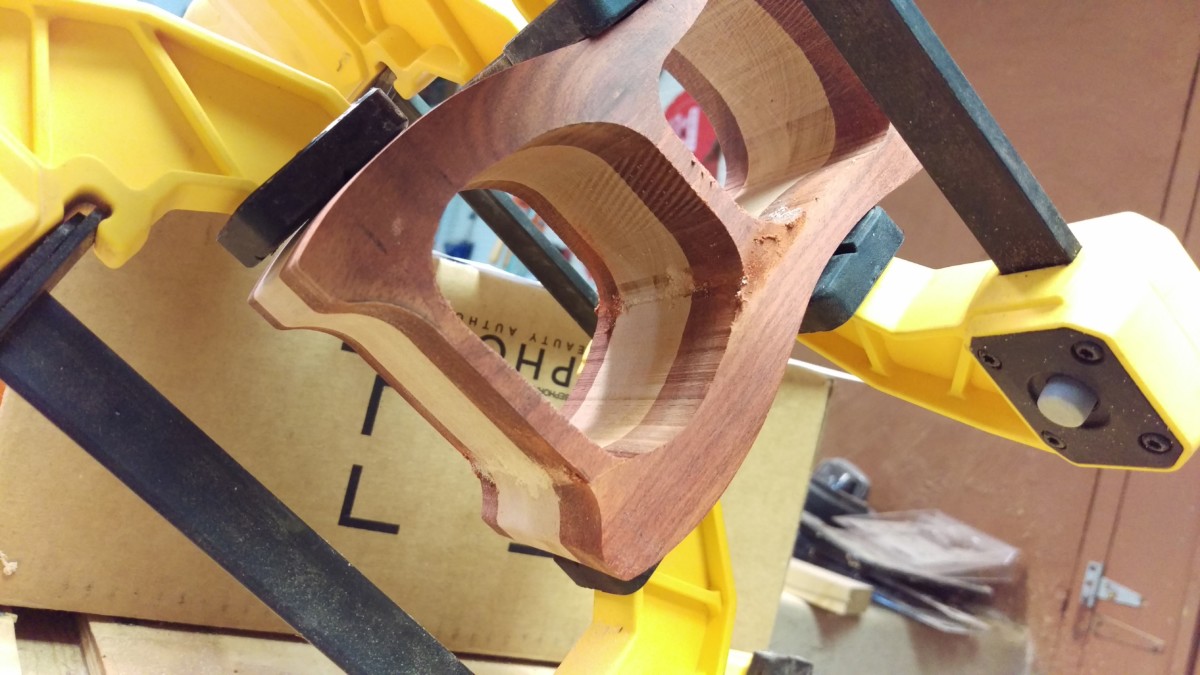
Gluing the Box Kerfs
Glue the kerfs back together
with the drawers cut out, the box can be glued back together. The two bandsaw kerfs should be filled with glue and aggressively clamped to close them back up. Rubbing sawdust into the squeeze out helps to hide the kerf later on.
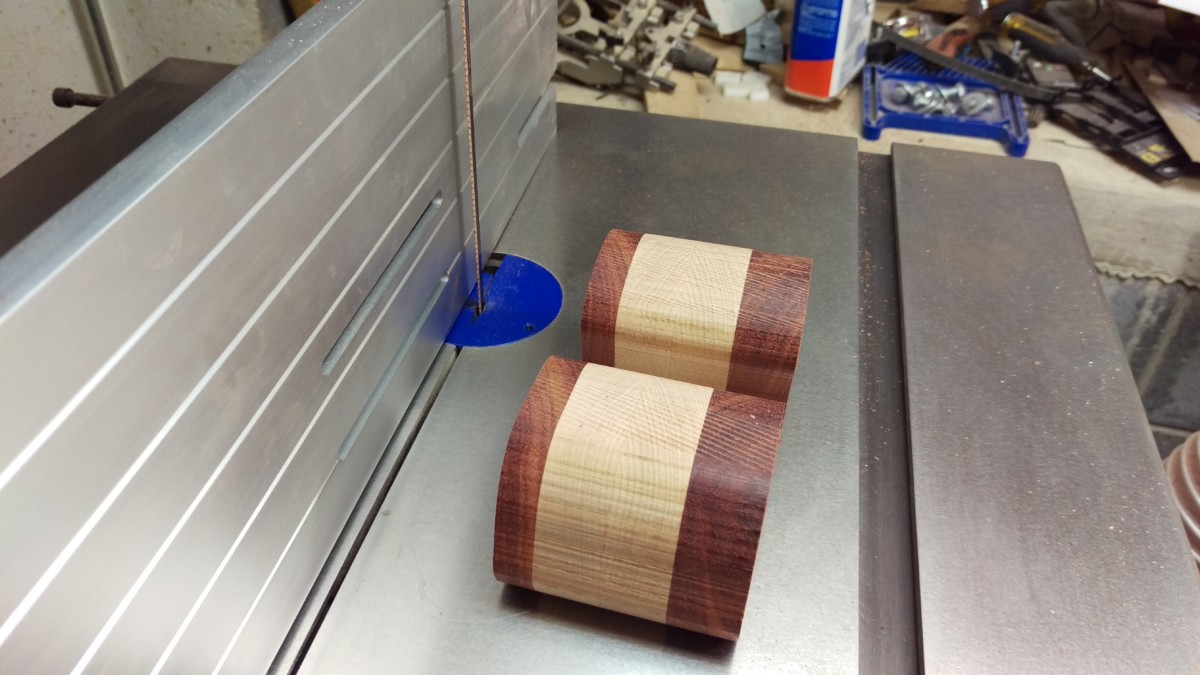
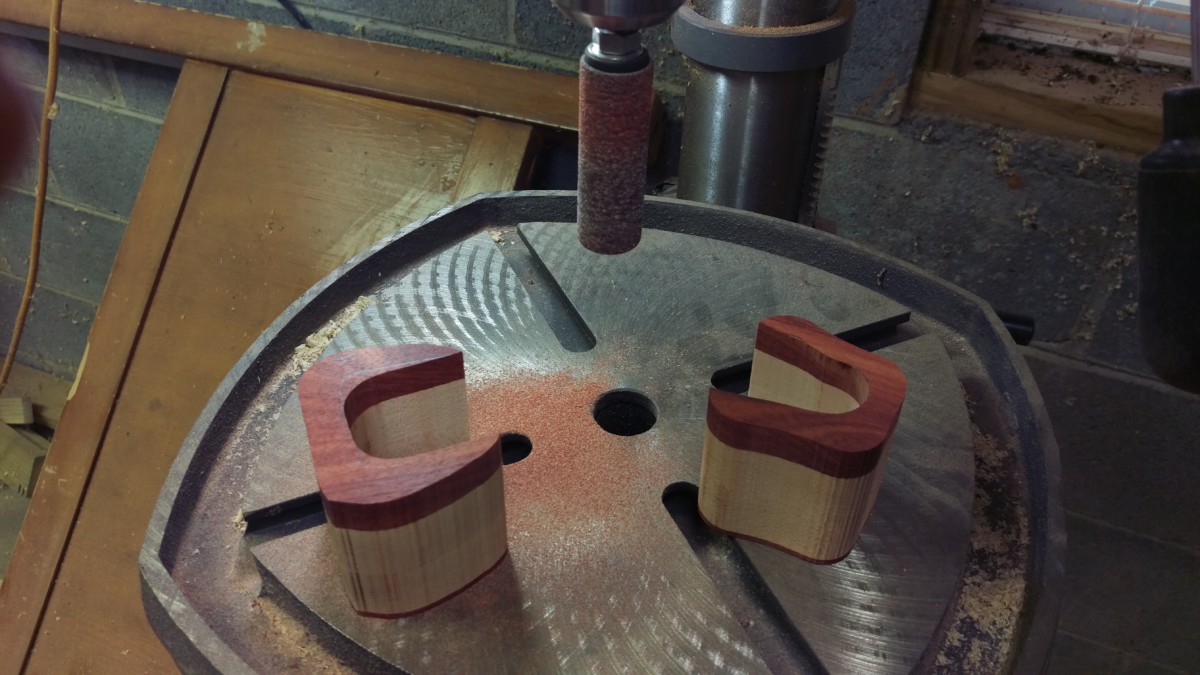
Cutting the Drawer Pieces
Cutting the back and front of the drawers

Cut apart
While the box kerfs dry, you can cut the drawer pieces. To start, the fronts and backs of the drawers need to be cut off as shown.
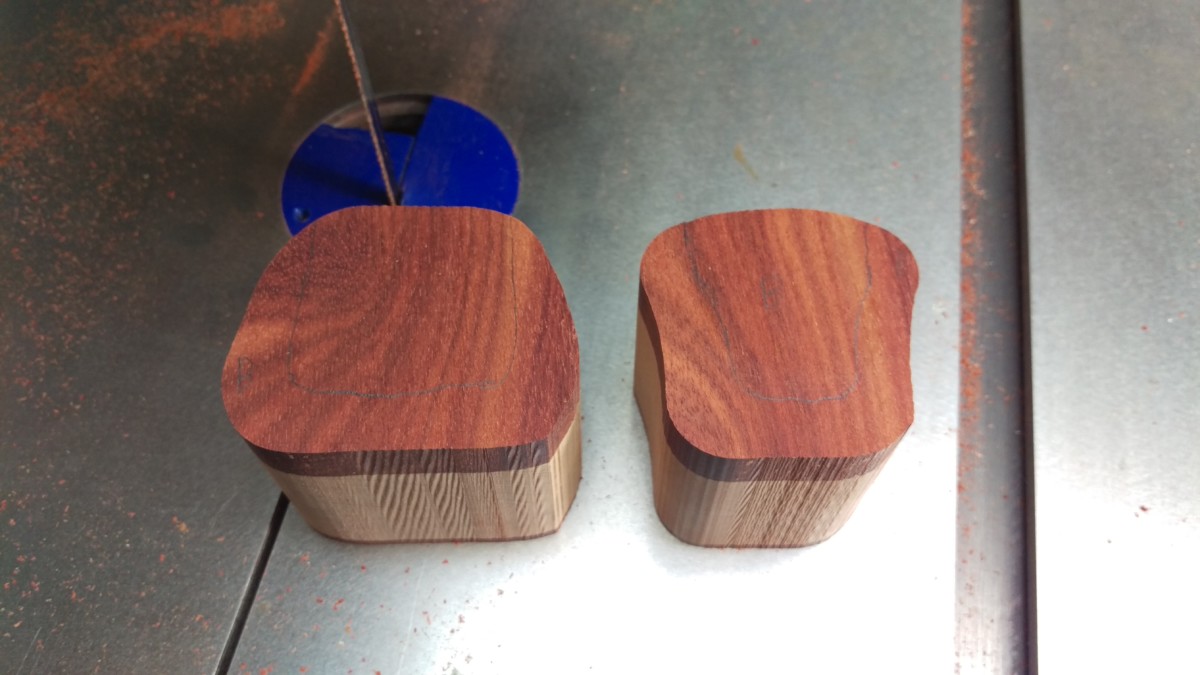
Cutting a U shape
The drawers cut and ready to sand and glue
Once the fronts and backs are cut off, the middle of the drawers should be cut in a U shape, to form the storage space for the drawer. Once the front and back of each drawer is glued back on, the drawer will be complete.
Sanding and Assembling the Drawers
Drum sanding before glue up
I find it helpful to sand the inside of the drawers now, before gluing up. It’s a lot easier to get the sander in the inside at this stage.
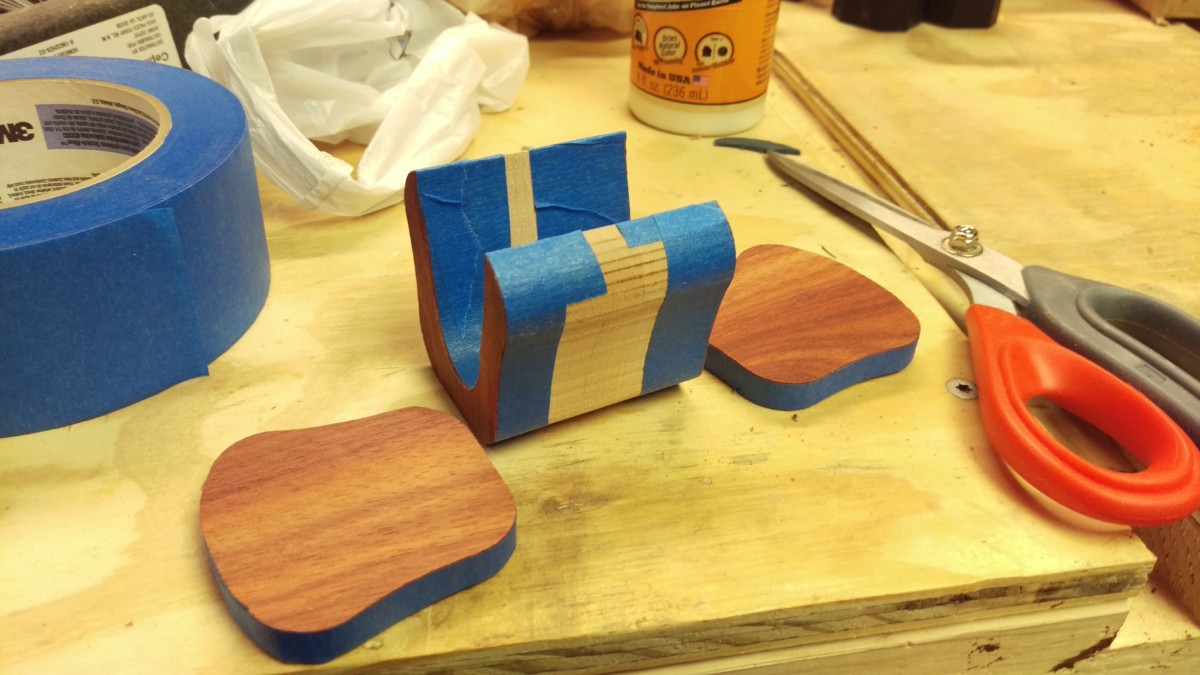
Tape up to prevent squeeze out

Clamped down
I went a little overboard, but painter’s tape before glue prevents squeeze out from staining the wood.
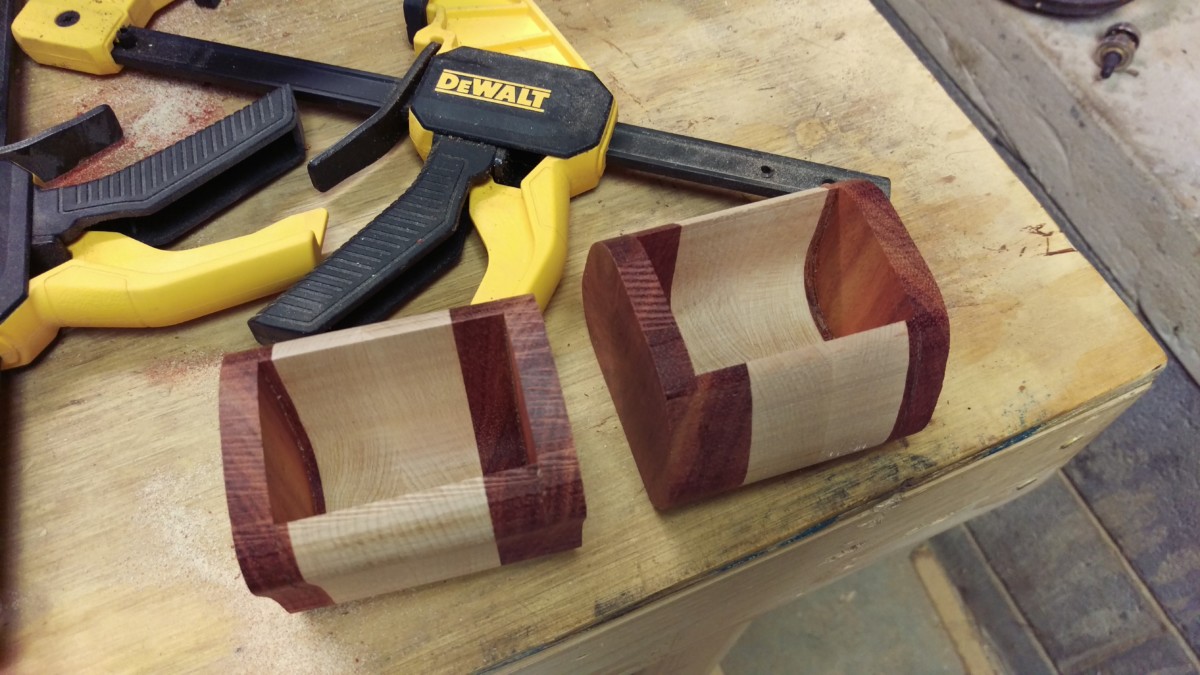
Done
Once the glue dried, I peeled off the painter’s tape. The drawers are now assembled.
Sanding and Gluing the Box’s Back
Same drum sanding technique
Same tape and glue technique
I used the same basic technique to put the back on the main box. I also paid attention to the drawer kerfs in the box at this point, making sure they were adequately cleaned up and hidden.
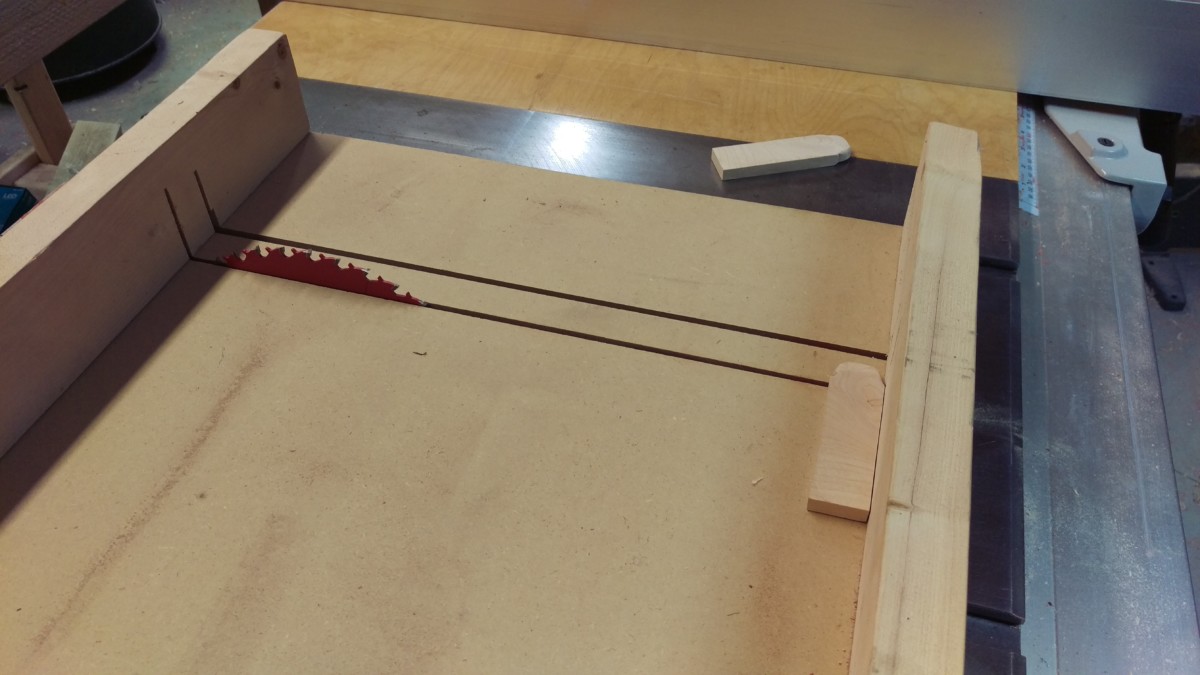
Making Drawer Pulls
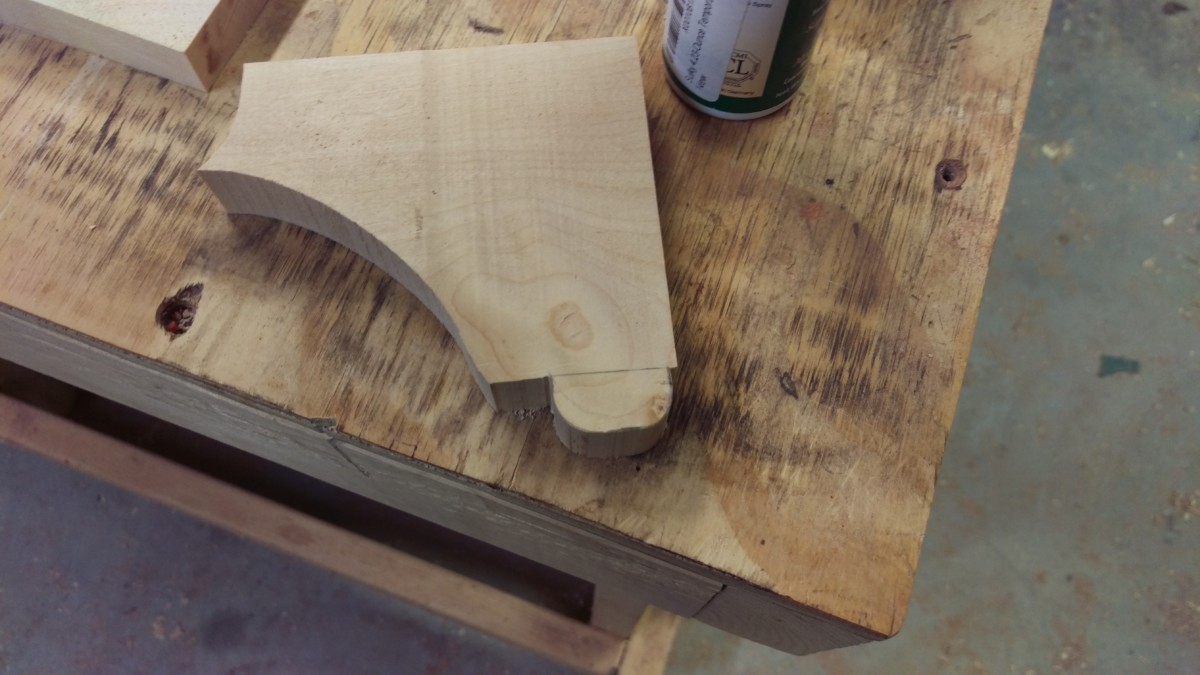
I made this D shape on the bandsaw
I chose to make D-shaped drawer pulls out of maple. To start, I took a piece twice as thick as I needed and cut out a shape I liked on the bandsaw. The excess material makes it easy to safely handle.

Cutting down on the table saw

Cutting into two
The table saw then takes care of cutting the big piece down into two smaller pieces, still attached to some excess material intentionally.
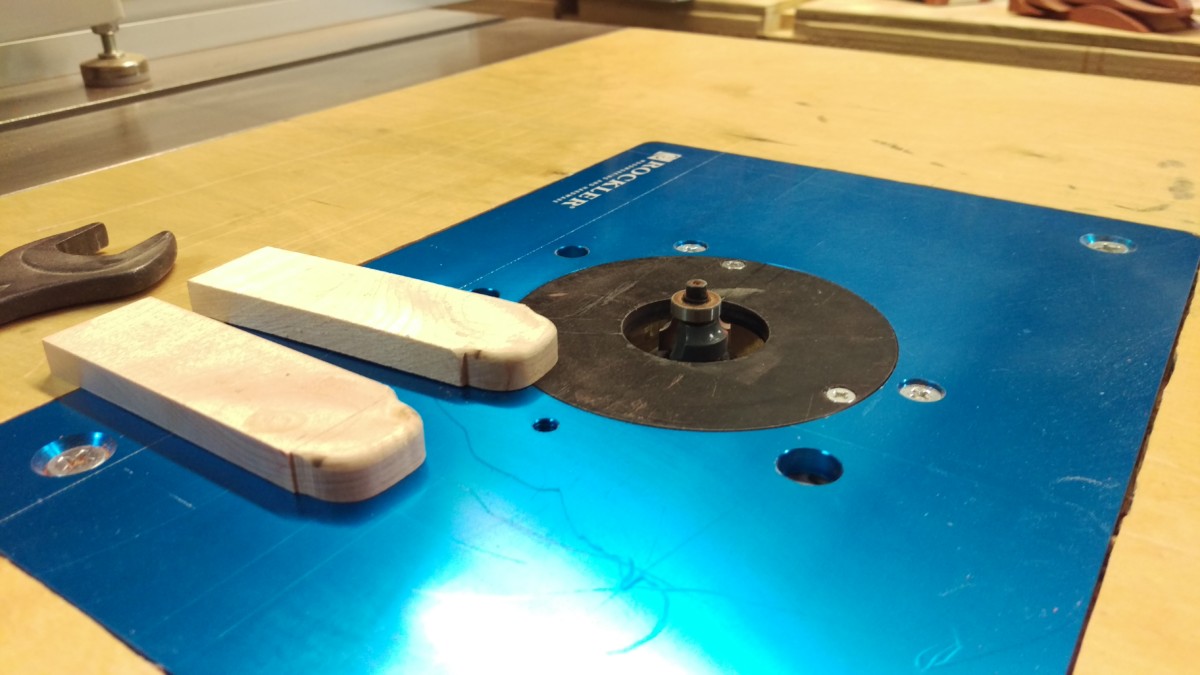
Roundover bit
The router table with a roundover bit easily cleaned up the edges. I followed this with sandpaper.
Cutting off with a table saw sled
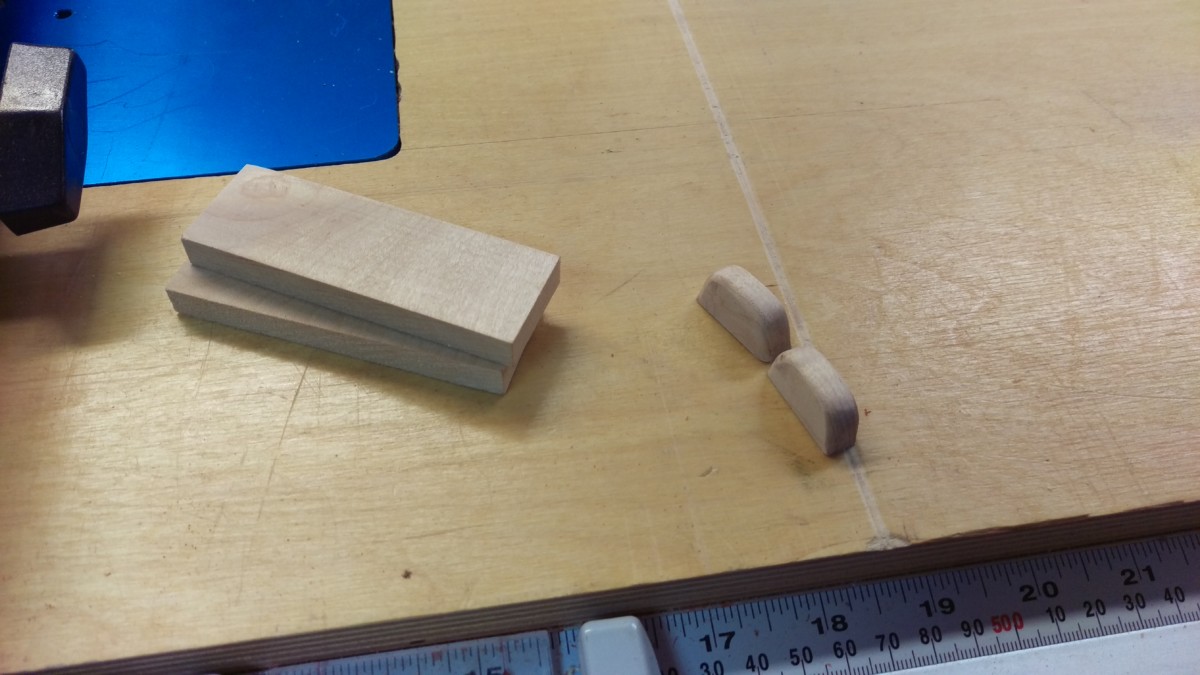
Done
Lastly, the handles are cut off from the excess material using a sled on the table saw.
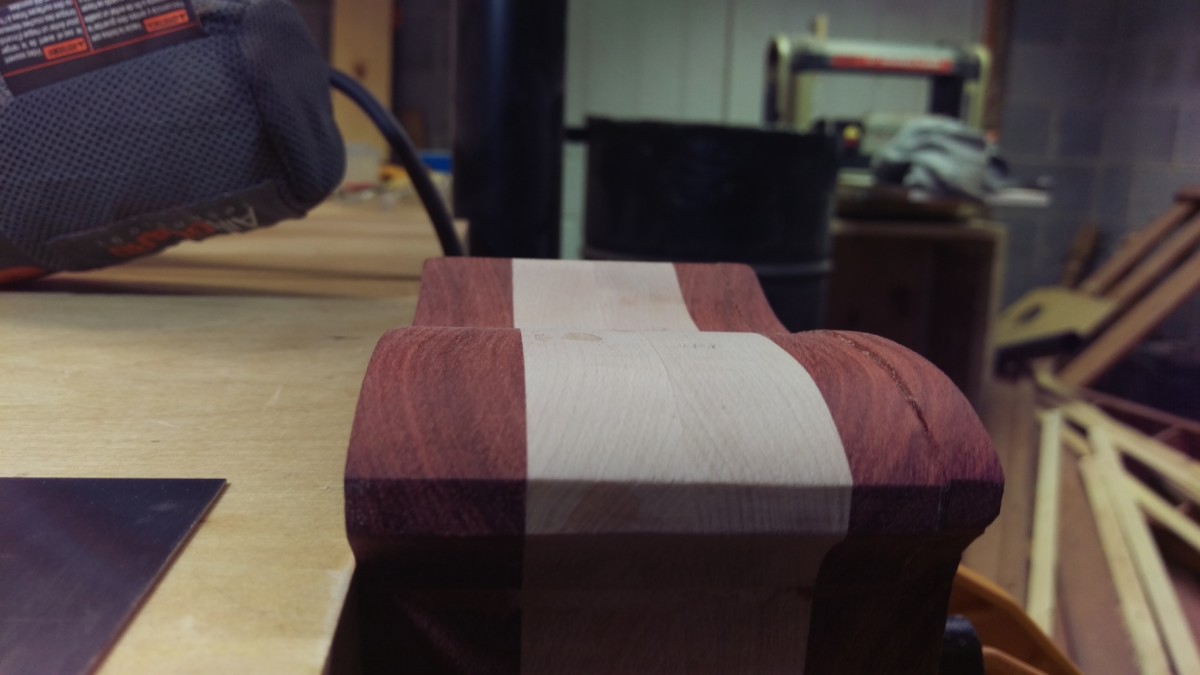
Glued on
And here are the pulls after gluing them on to the drawer. Note that the glue joint is cross grain to cross grain, which is very important. If the pulls were end grain, this wouldn’t stick nearly as well.
Final Sanding and Scraping
Ridge from back of box
Cut down with the cabinet scraper
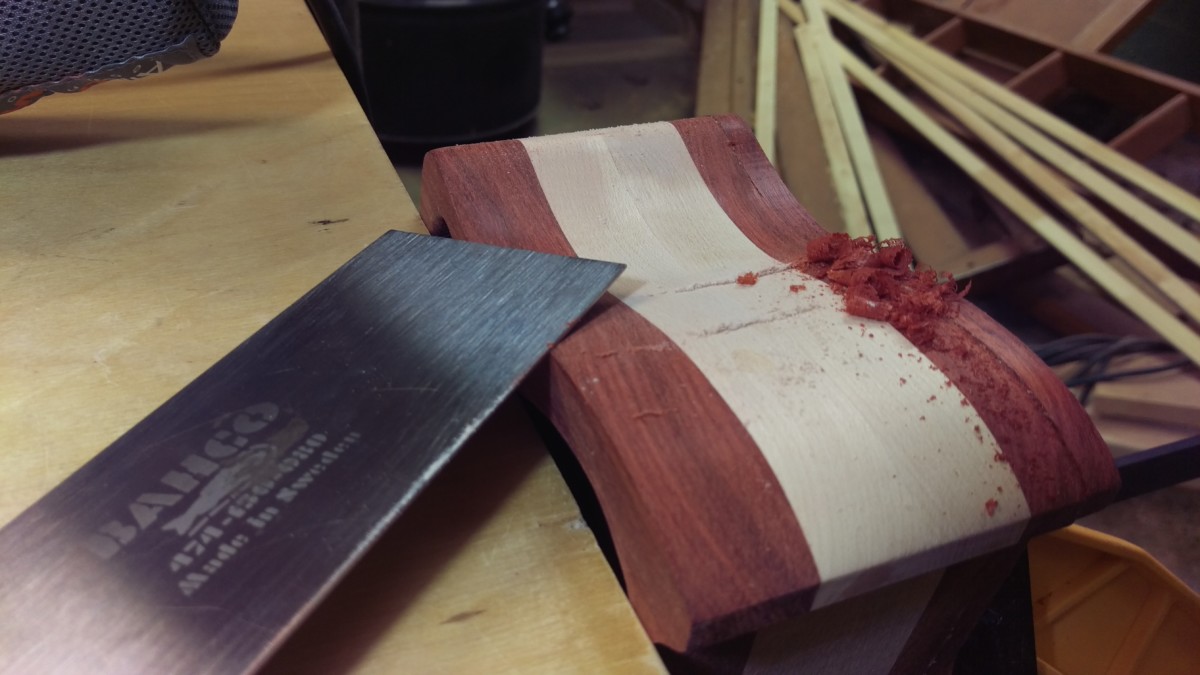
With everything glued up, the box is nearly done. A cabinet scraper will quickly knock down the ridge from the back of the box and any other places that don’t feel good to the touch. I also used an 1/8″ roundover bit on the front and back of both the drawers and the box itself. This also helps disguise any uneven gap between the drawers and the box.
Finishing
Spray lacquer
For projects like this, I have found spray lacquer
Wrap-up
Finished

Drawers open
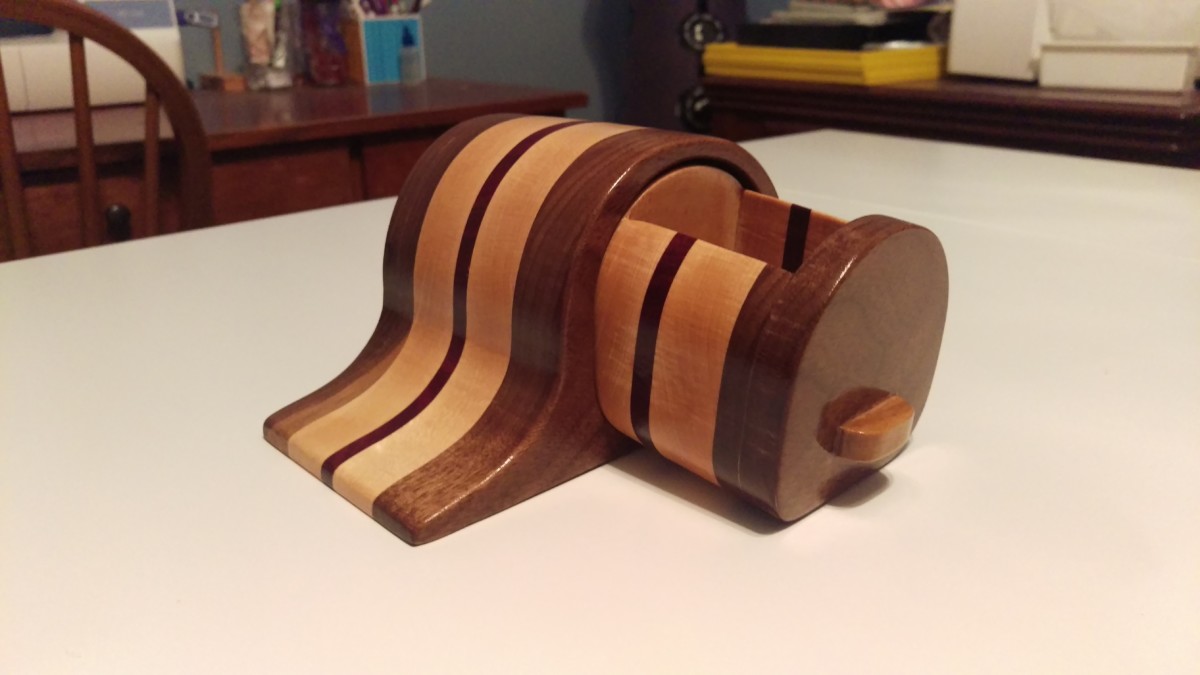
And here is the final product. I think the gloss from the spray lacquer really brings out the grain and colors in the maple and bloodwood.
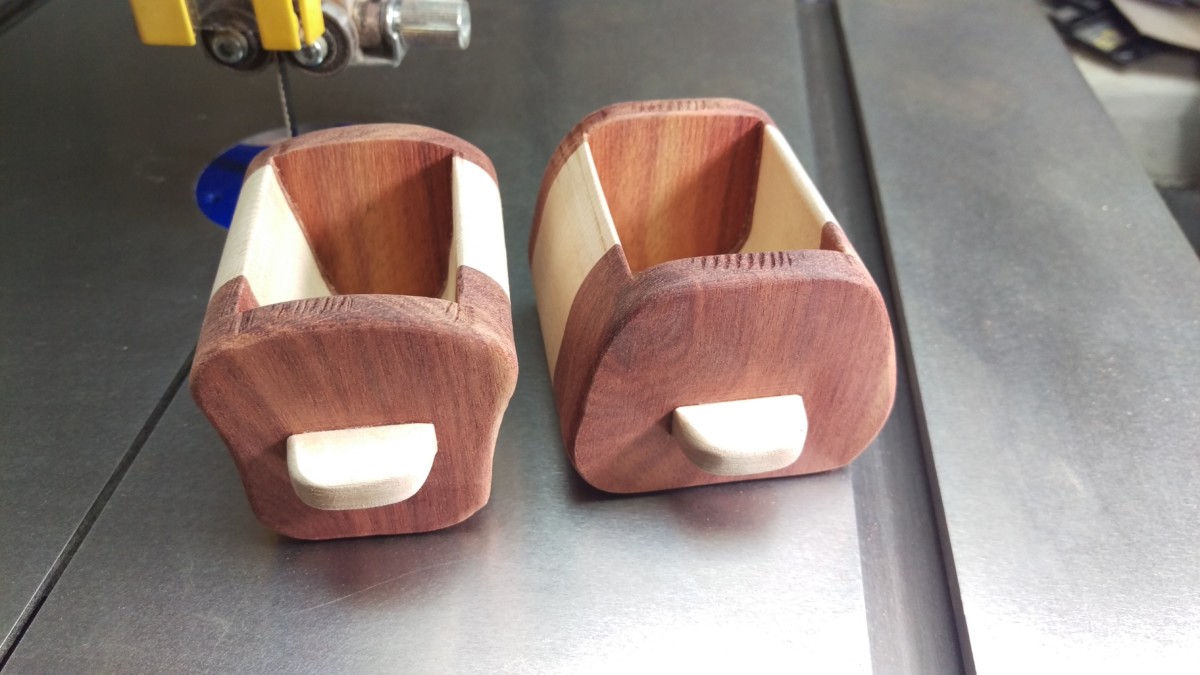
Another box
Walnut, maple, and bloodwood
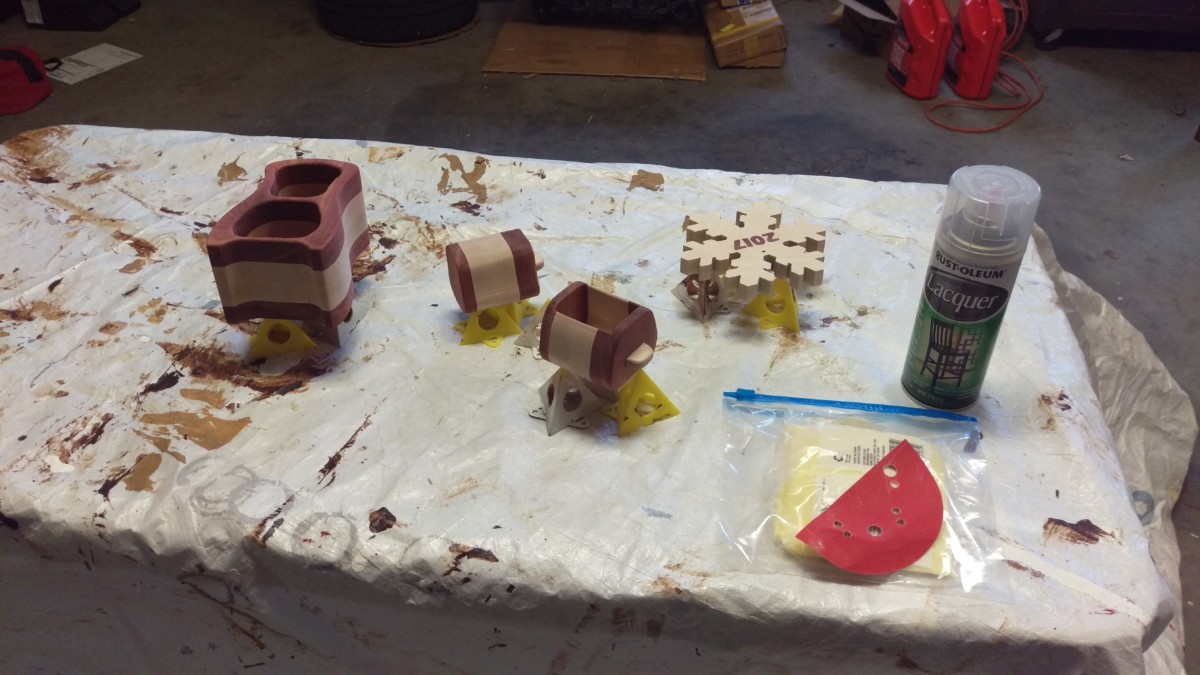
Here is another box I made out of walnut, maple, and bloodwood. These boxes are easy to make and can be made in any design you can imagine, making them great gifts.
What size was the wood before glue up? I usually only have 1×6’s on hand. Which you know is less than that. Would like to see you show us how to do that. Thx.
Hi Michael – the nice thing about bandsaw boxes is that you can get creative with them and make them out of any material in basically any pattern. 1×6 lumber will work just fine – I would just laminate as many as you’d like to get your desired box size.
Laminating 6 pieces of 1×6 together like I glued up in the article would be a nice 4.5″ deep box. That would probably be a good start?