First Welding Project: Shop Trash Can from Steel Barrel

Finished product
Just recently, I caught a Hobart 135 MIG welder for sale on Craigslist. It also came with a cheap welding cart and a couple of spools of both MIG and flux core wire. Based on how much new Hobarts cost
If it isn’t already obvious, I’m extremely new to welding. This is simply a writeup of my experiences buying a used mig welder and flux core welding a very basic first welding project.
Mig vs Flux Core
A square is a rectangle, but a rectangle is not necessarily a square. All mig welders can weld flux core, but not the reverse. Both mig and flux core welding work by feeding wire on a spool through a gun. A ground clamp is fixed to the piece to be welded. When welding, wire fed through the gun arcs through the workpiece and the clamped ground.
The difference between MIG and flux core is how this reaction is shielded from the atmosphere. Shielding ensures a nice, clean weld. With MIG welding, welding gas is fed in from a tank through the gun. This is typically a mix of argon and carbon dioxide. With flux core welding, the wire has a core that burns off and provides shielding, hence the name.
Generally speaking, flux core produces uglier welds but is cheaper to operate. It is also useful outdoors, where wind can disrupt MIG shielding gas. MIG produces nicer welds and is generally the standard in basic welding operations. Both processes are probably the easiest to learn to do, compared to TIG or stick.
Harbor freight, among others, sell cheap flux core welders
Project Shop Trash Can

55 Gallon Steel Drum
I had a 55 gallon steel drum laying around from when I had tried to use it as a burn barrel. Mechanics buy motor oil in drums this size, and they have other uses as well. They’re cheap and easily to obtain. Since making my leaf catcher for my mower, I didn’t need a burn barrel anymore.
My shop really needs a rolling trash can to replace the cardboard box I’ve been using. All this barrel needs is a handle and some casters to perform the job. An outdoor trash can from Home Depot would have worked too, but this gave me a way to repurpose the barrel and get some welding practice.
Surface Prep
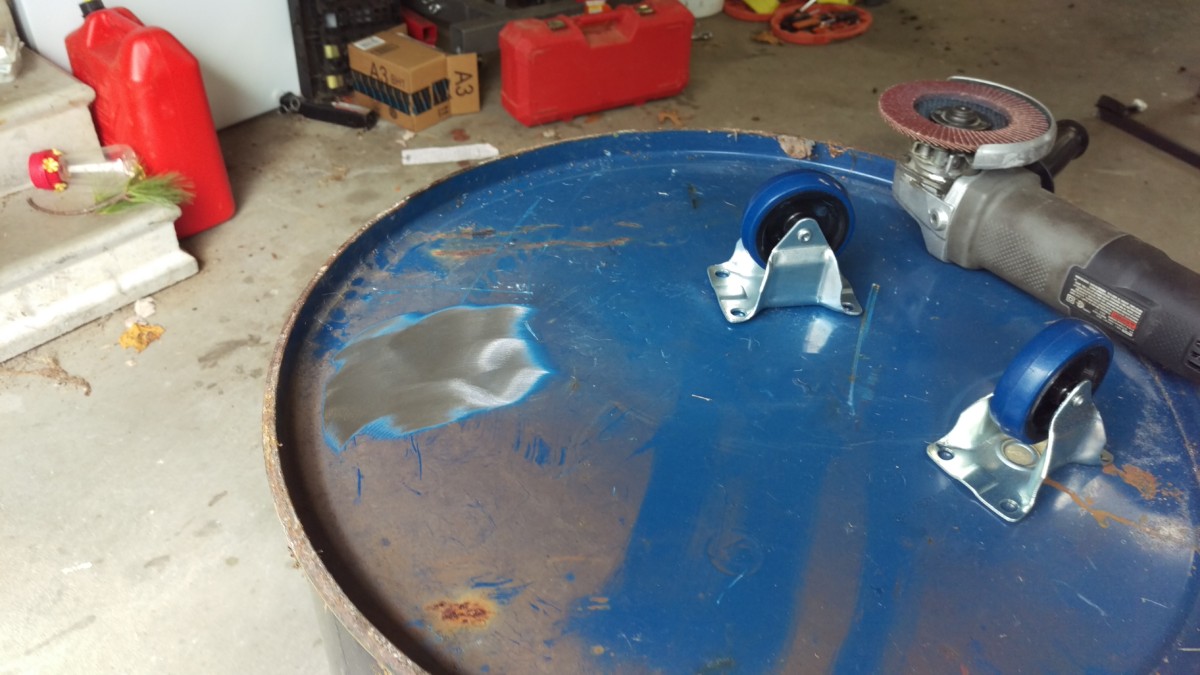
Using a flap disk on the drum
For this project, I used flux core rather than full MIG. This was primarily because I didn’t have a bottle of shielding gas yet, but I did have a lot of extra flux core wire. As a result, the welds are pretty ugly.
Regardless of the welding process, surface prep is important. In my case, I was welding on a grungy, rusty old steel barrel. Using a flap disk


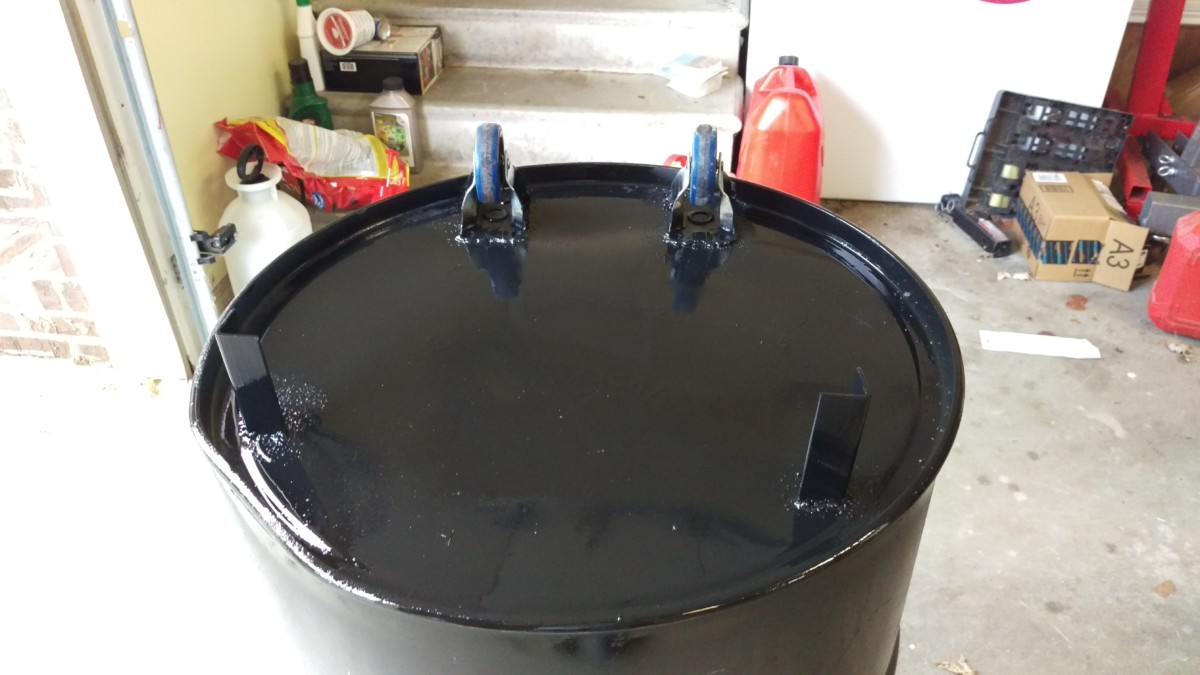
Welding on Casters

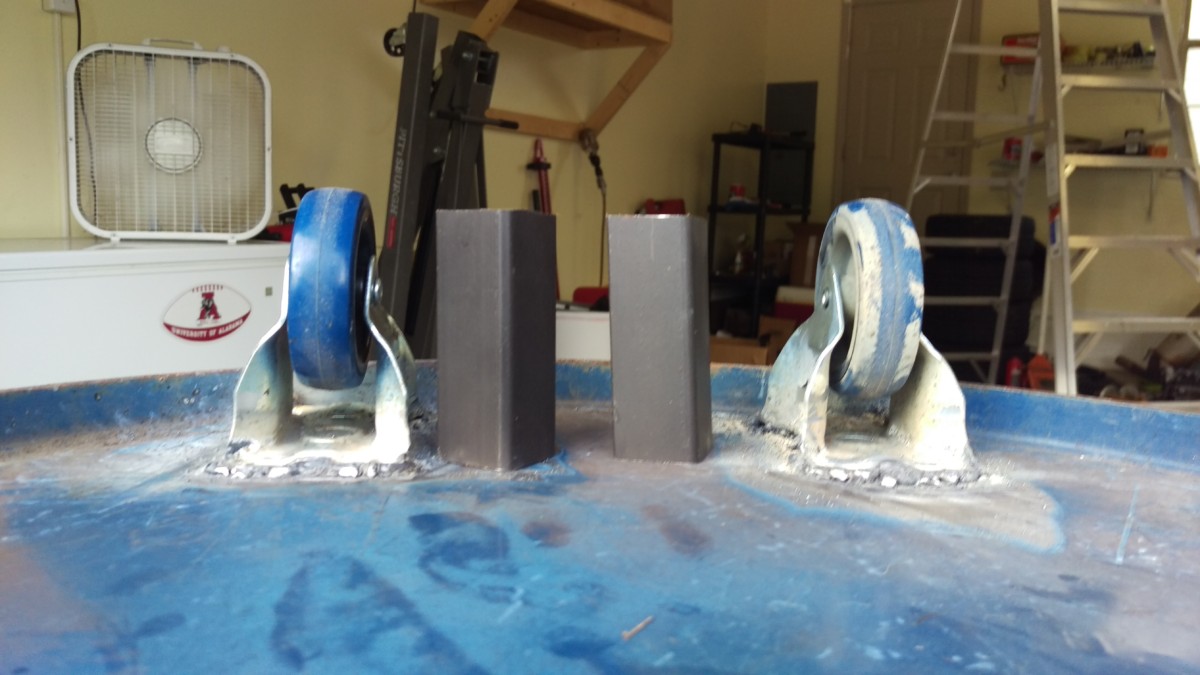
Casters after welding
I got two cheap fixed casters
Welding wasn’t really necessary here, if I’m being honest. The casters would still work if they were bolted in. However, getting bolts run through the bottom of a 4′ tall barrel is pretty annoying. Plus, this let me practice welding.
Owing to the thin metal, I turned the machine to a low voltage and feed rate. I also gave the caster mounts a quick swipe with the flap disk to remove any galvanized coating. I made sure the wheels were as close to parallel to each other as I could so it would roll smoothly. Finally, I just ran a bead along the edges. Fairly straightforward, even if the results aren’t pretty.
Angle Iron from Bed Frame

Bed frame as angle iron material
For some unfathomable reason, the previous owner of my house took a twin mattress with him, but left the frame and box spring behind in the attic. Fortunately for me, the bed frame is a free source of low-grade angle iron. I cut pieces out of the length shown for all of the angle used in the rest of the project. A thin cutoff wheel

Welding Barrel Supports
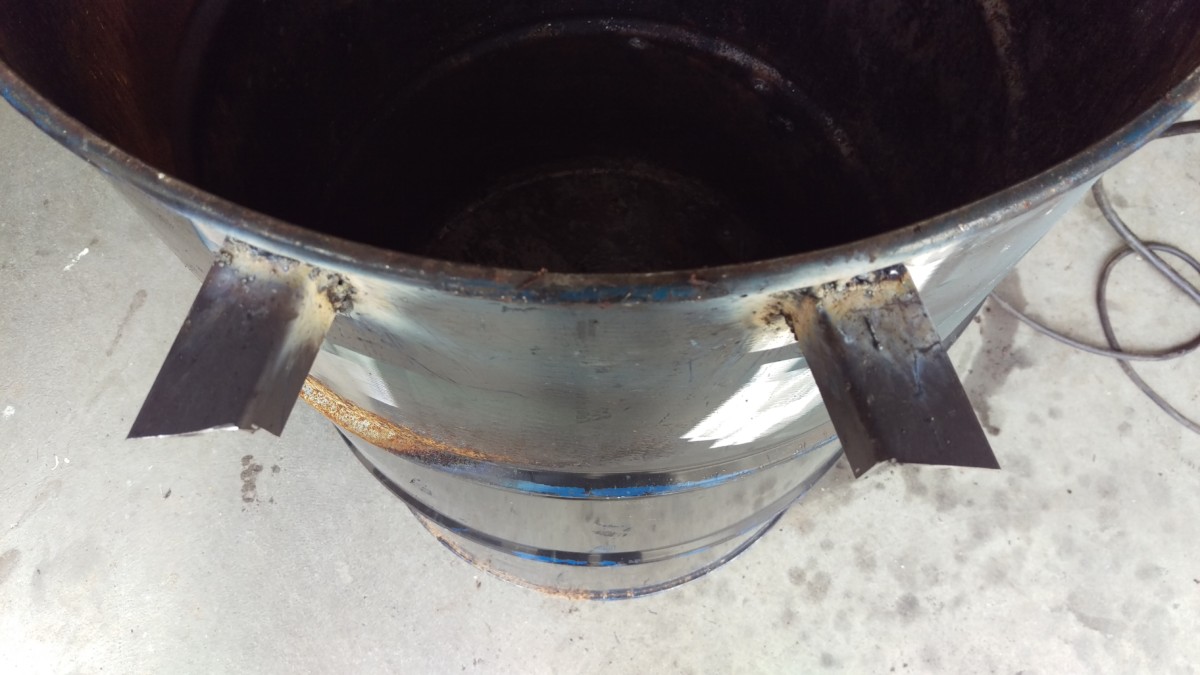
Supports cut to height
The barrel needed a couple of supports to hold it upright when not being wheeled around. A couple of scrap pieces of angle worked perfectly. In the picture, I’m simply verifying that I cut them to the correct height. I’ll note that a chop saw

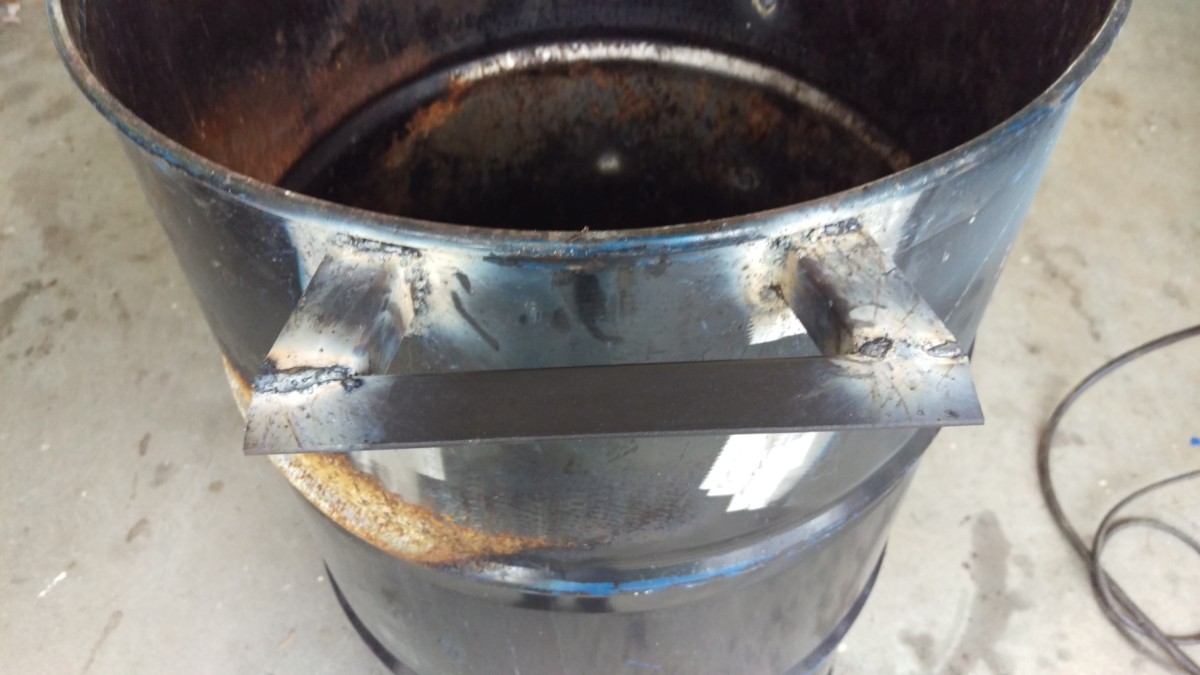
Welded in place
After lining up the pieces of angle iron, I went ahead and welded them as before. Again, I went easy on the voltage when welding to such thin sheet metal. If you overcook it, you can burn through. The resulting weld is ugly, but it penetrated and held.

Bottom finished
And here is the bottom finished. If I did it again, I would space the wheels out further. The final product ended up being a little tippy, but it’s manageable. My fear was that if I moved them too far apart, they’d be too far towards the middle of the barrel to actually allow it to tilt.
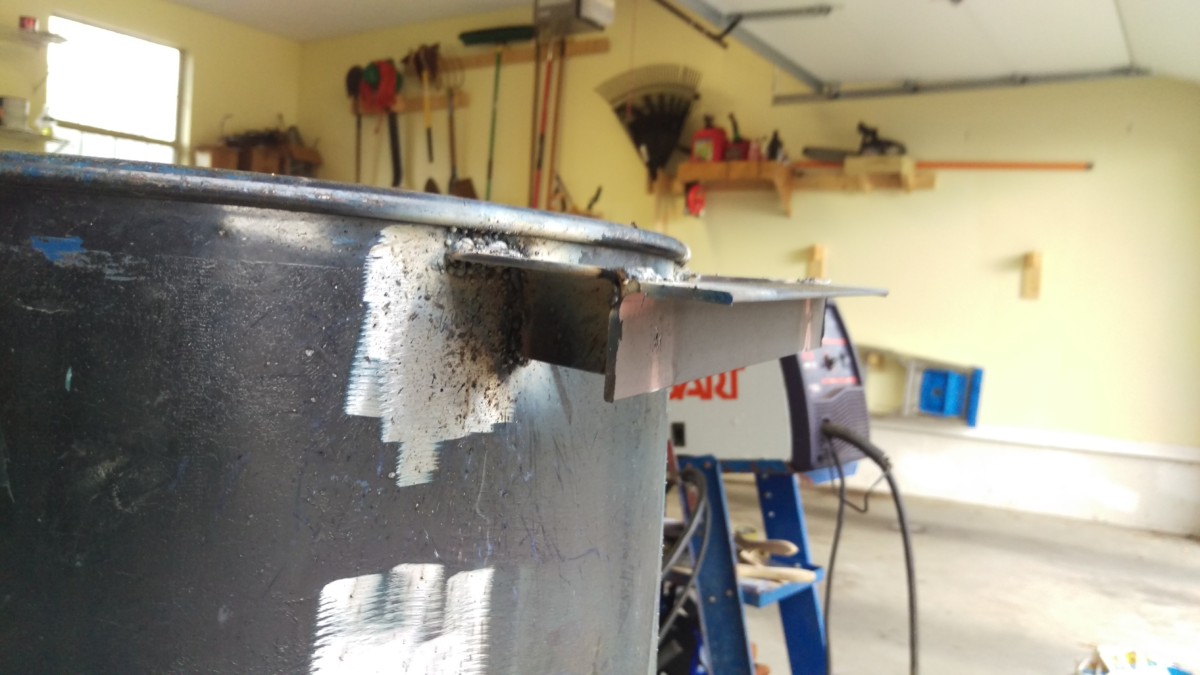
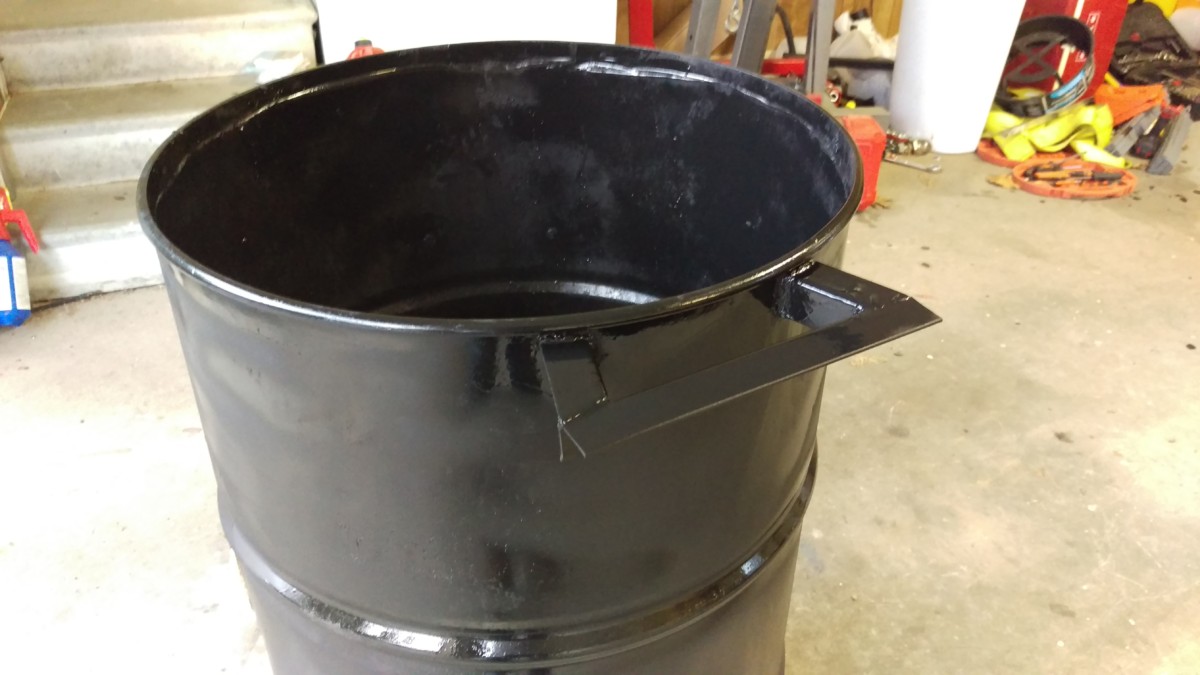
Adding a Handle
Handle start
The trash can would also need a handle. Fortunately, the angle iron with some pie cuts should do fine. In some respects, welding is a lot more convenient than woodworking. You don’t have to worry about wood movement or anything, you can just clamp something up and weld it in place.
To start the handle, I cut a couple of small pieces of angle iron out. I intentionally made the cuts at an angle (pie cuts) so the handle would be relatively parallel to the barrel and reach properly. The barrel’s sides are thicker than the bottom, so I was able to turn the voltage and feed speed up on the welder.
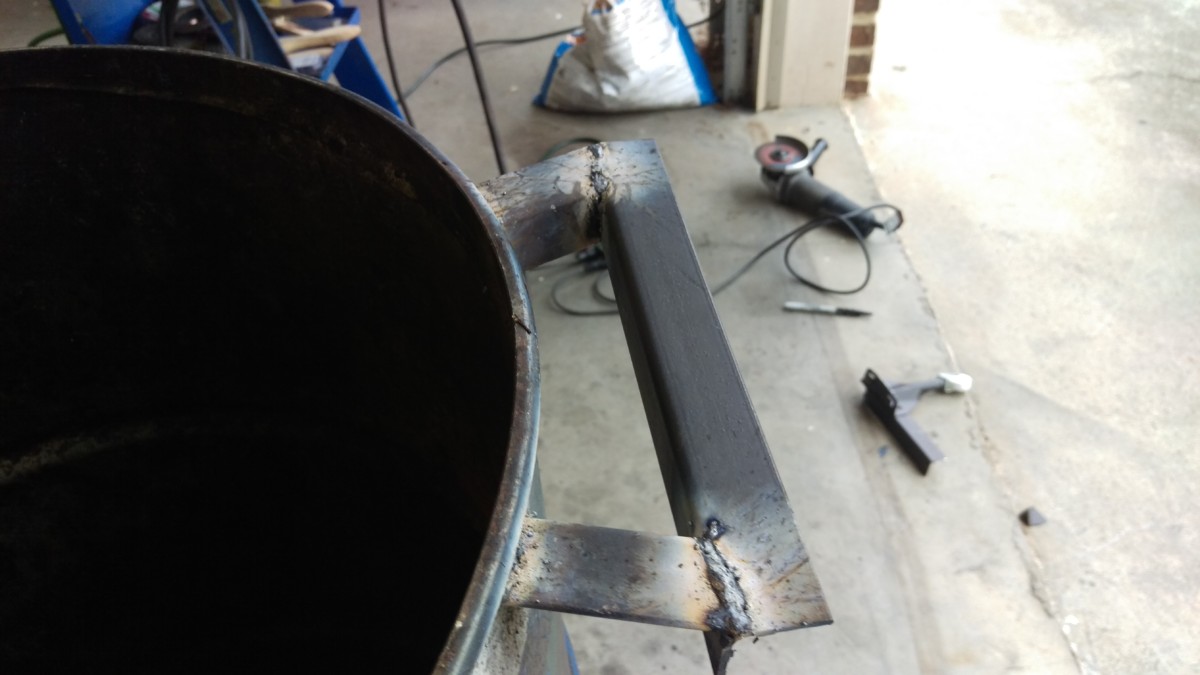
Handle placed on
Here you can see the handle just about complete. I faced the angle iron in the orientation shown to make it comfortable as a handle. The angle iron is 1/8″ thick, so I was able to simply set my welder according to the chart on the door for 1/8″ material.
Another perspective
Final view
And here it is finished. I ended up grinding my ugly welds down a bit to improve the look before paint. I did notice my welds getting significantly better as I got more practice.
Paint
The bottom after grinding and paint
After all the welding was done, I used the angle grinder and flap disk to pretty up the welds as much as possible. Finally, I went to town with some Rustoleum 2-in-1 primer and spray paint.
Painted the handle and barrel
After the bottom dried a little bit, I flipped it back over and took care of the rest. It was worth touching up the sides of the barrel to prevent rust. In addition to the handle, I also was sure to get the inside of the barrel where the welding process had burned off the paint.
Conclusion

Done

Almost looks like I know what I’m doing
Finished product
Once the whole barrel was painted, it looked a lot less dingy than it did at the start. It rolls around very easily and of course has tons of room for shop garbage. The only minor complaint is that the two wheels are close enough together that it’s a bit tippy, but I can live with it.
In all, this turned out to be a great first welding project. Starting with a simple and non-critical project, I was able to play around and get my feet wet.