DIY Mower Leaf Catcher for $80 (Now $30)
Finished mower leaf bag solution
Our house is on a little over half an acre, and there are several maples right around our yard. As a result, we get a good number of leaves every year. In the past, I have both manually raked the yard and used a leaf blower. Even loading everything onto our 18′ trailer, we still ended up hauling a couple of trailer loads of leaves to the front to be picked up. Long story short, I was tired of dealing with all of this and figured there must be a better way.
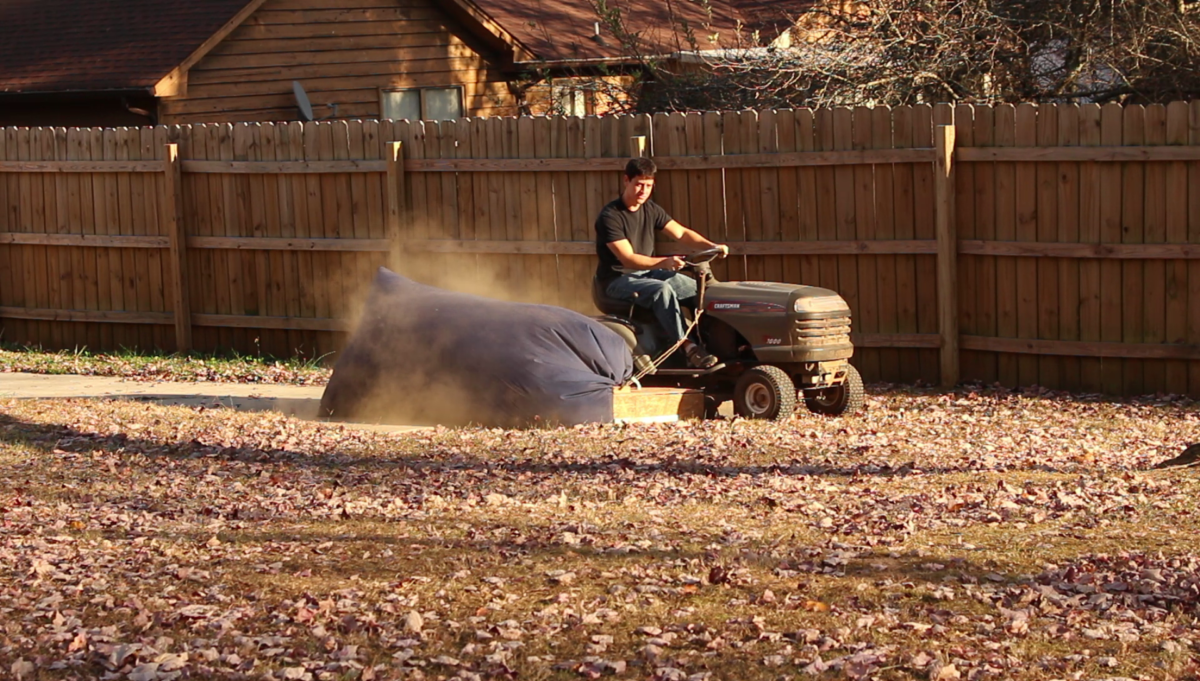
I kept looking at my riding lawnmower, thinking that since it already sucks up leaves, it should be possible to put it to use. There are several commercial products available, such as the Cyclone Rake, but they all seem to cost $1000-$1500. Instead, I managed to create a DIY mower leaf catcher for $80. Here is some video of it in operation.
Update: Many other companies now sell these bags, including this $30 one with a zippered bottom for easier emptying.
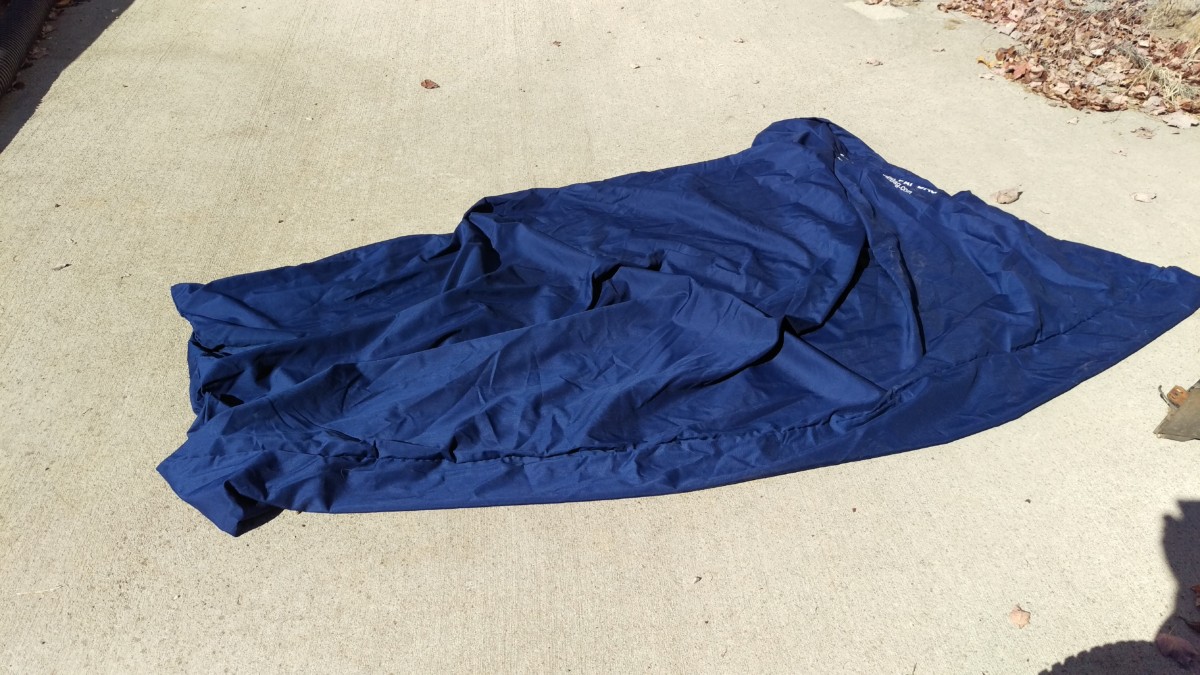
Huge lawn bag
Amazon has this lawn tractor leaf bag
$70 $30, you get an enormous cloth bag that is supposed to tie around the leaf catcher on your mower and drag across the ground. When the ground up leaves are ejected out of the side of the deck, they will get spit into this bag. Since the bag is cloth, air can flow through it fairly easily.
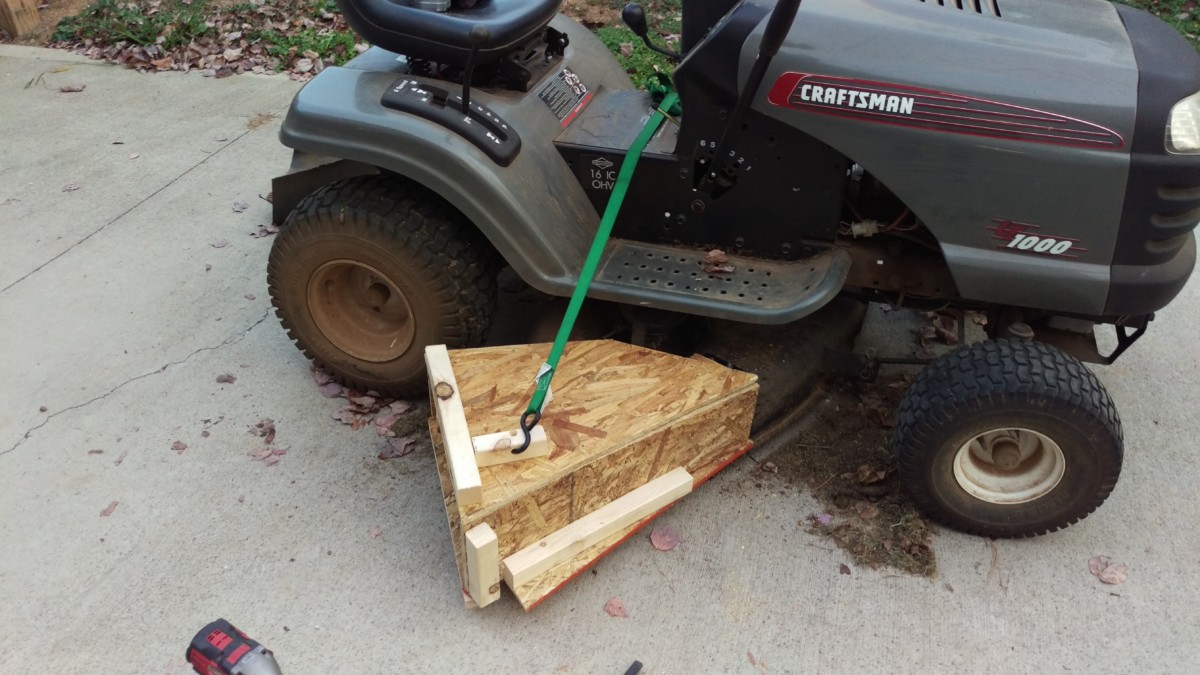
My solution for attaching the bag
While this is pretty straightforward, there was one issue: I didn’t have a leaf catcher for my mower. After checking prices, it appears they cost at least $300-400. I decided I definitely wouldn’t do that, but I would go ahead and buy the leaf bag
By the way, the bag itself could be something you could make yourself as well. I figured for the price, it was worth buying, though. The bag is about 4×8 when laid spread out lying flat on the ground. I would guess it would take about 6 yards of fabric to make one, and it’s pretty thick material. Assuming that cost $6/yard, that’s $36 in materials, plus having to sew it, etc. However, there’s no reason you couldn’t do it.
Shopping List
- Lawn Tractor Leaf Bag
- 4×4 or larger sheet of Oriented Strand Board (OSB) – Available at Home Depot or similar for about $8
- 1 piece of regular pine 2×2 – Available at Home Depot or similar for about $2
- A jig saw
- A circular saw
- A cordless drill or impact driver
- 1″ deck screws
– I prefer the ones with hex heads since they strip less easily
- Wood glue
- A small piece of steel, maybe 4″x6″ and 1/8″ thick or so


The Approach
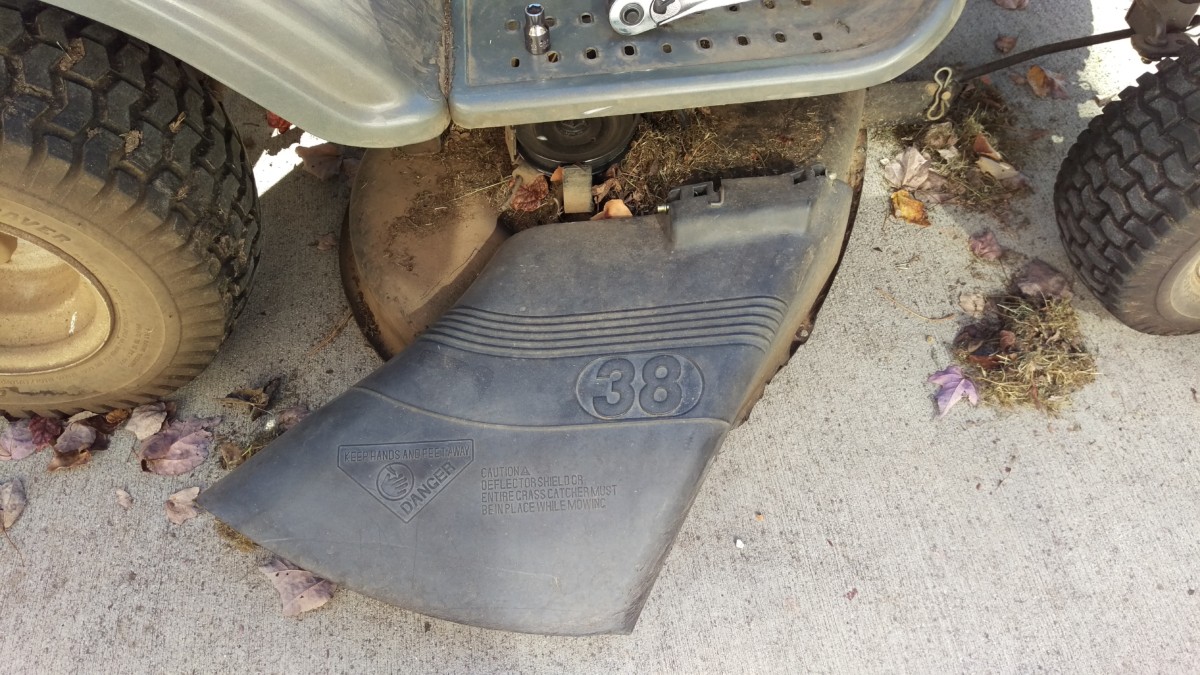
The grass deflector for my mower
Since I didn’t have a leaf catcher, I figured I could simply make a chute out of wood, attach it to the deck, and tie the lawn tractor bag to it. To make it attach to the deck, I modeled it after the grass deflector that was already on the mower deck, pictured.
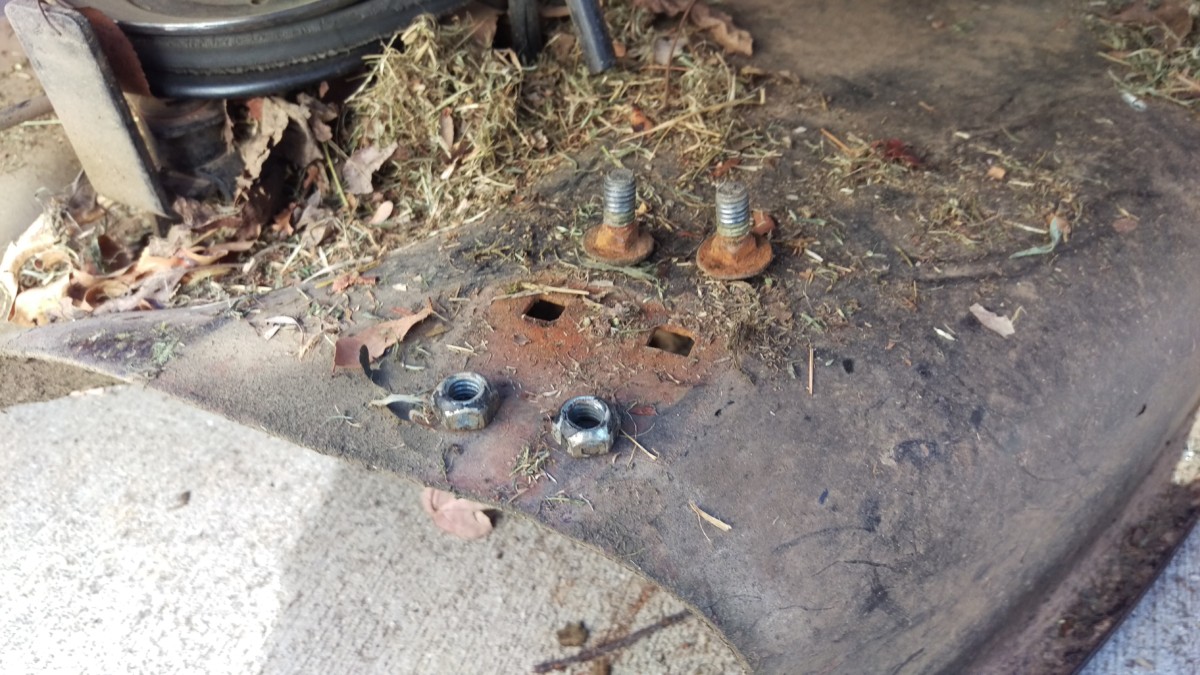
The deflector is attached with the two bolts pictured
The deflector attaches to the mower deck with only two bolts, pictured. I decided to reuse these two bolts for my leaf catcher chute. They’re designed to have a very small profile on the inside of the mower deck, presumably so that the blades don’t hit them. If you decide to replace yours, be sure they clear the blades safely!

The deflector entirely removed
With the deflector removed entirely, I could see the area I was trying to box in with a chute. I ended up using the deflector I had taken off to help make a pattern, as well.
Creating the Chute
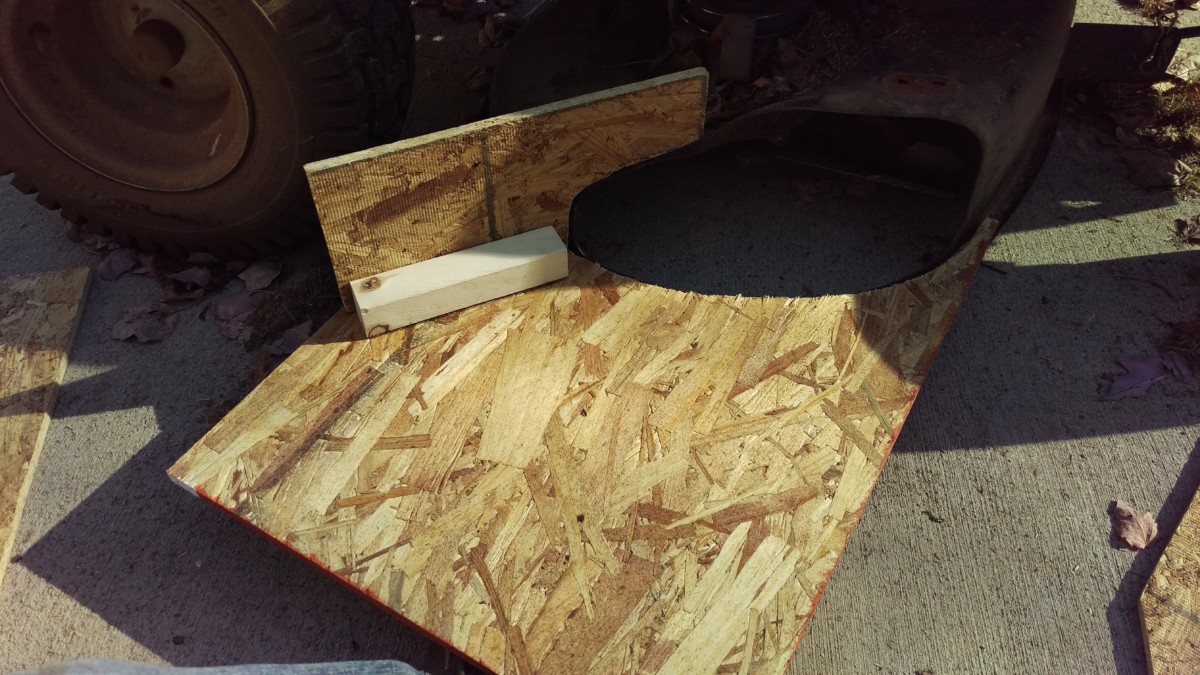
Cutting the bottom was fairly easy with a circular saw
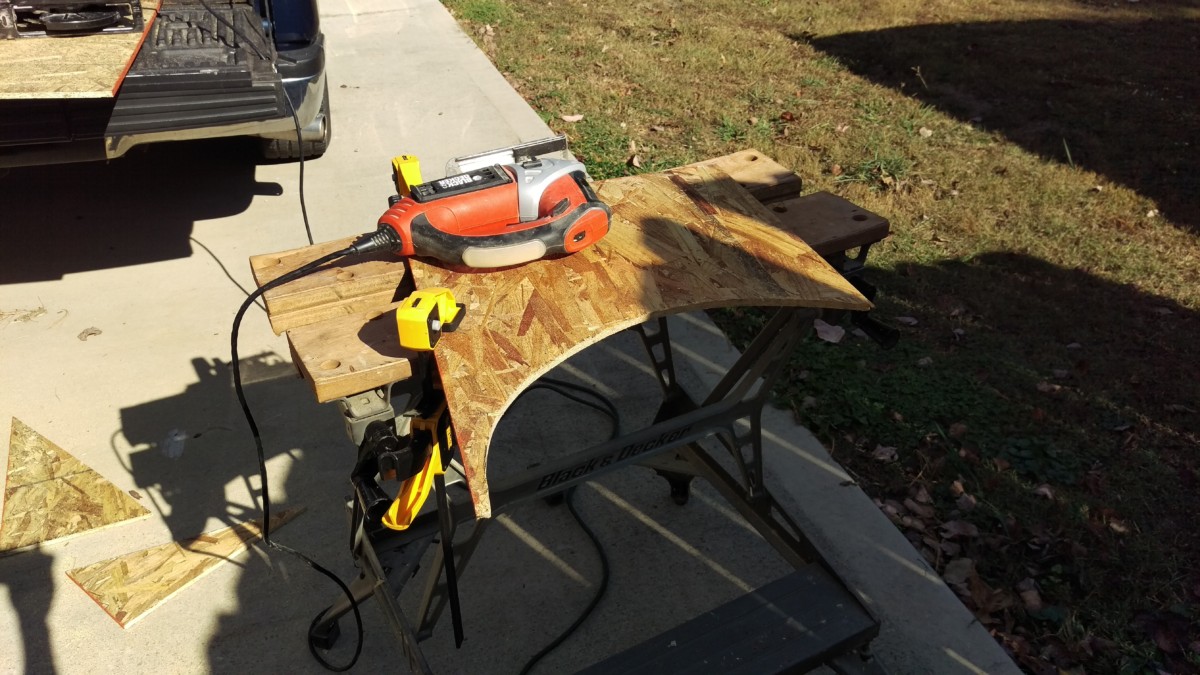
The bottom after cutting
I ended up really just going straight forward without much of a plan. The first step was to create a bottom for the chute. I cut off a larger piece of OSB then I needed and used the jigsaw to cut out a curve to match the mower deck.

Mocking up one side
Then, with the mower deck fully lowered, I was able to hold up a second oversized piece and cut it down to make the right side. The right side just needed to be a straight piece of board.
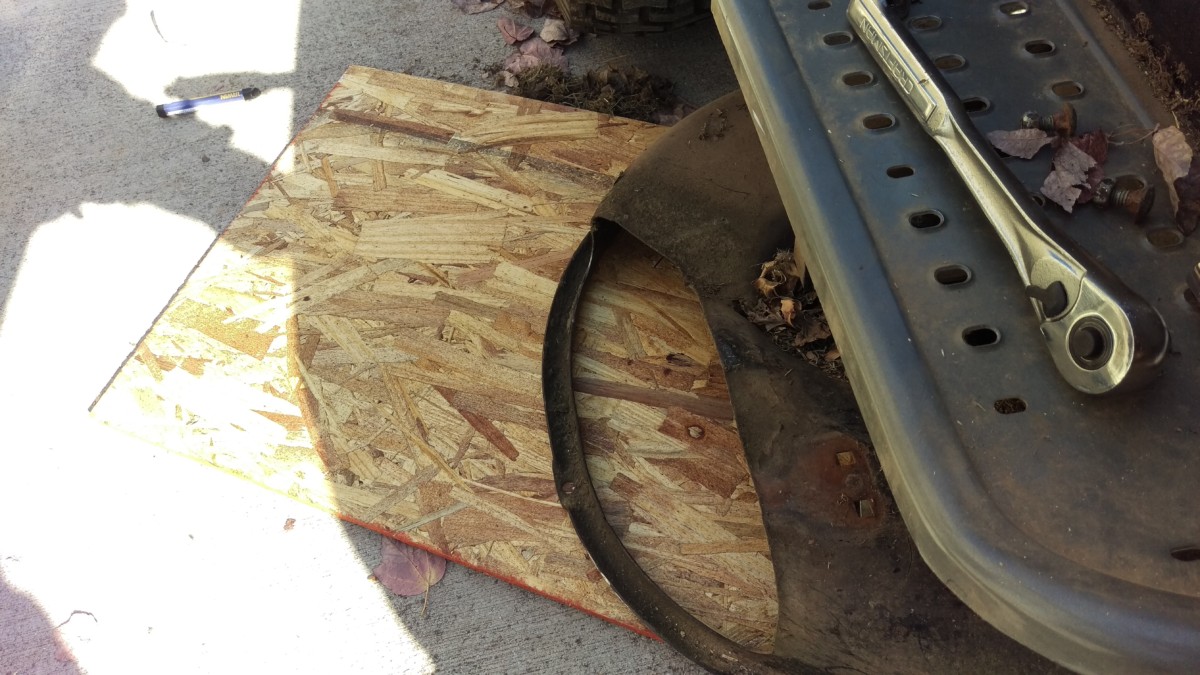
Using the grass deflector to cut away the left side
Left side ready to be screwed together
The left side needed to match the mower deck profile. Fortunately, the existing plastic deflector already had this notch cut out of it. I traced it as a template and cut it off with the jigsaw. Then, I cut a small piece of 2×2 to use to mount it to the bottom.
I used 2×2 to mount both sides
I also used some 2×2, deck screws, and wood glue to mount both sides. On the right side, the 2×2 is actually on the outside. My thinking was that it may clog if placed on the inside, since it is directly where the leaves will be shot out of the deck. I’m not sure if this was entirely necessary. I’ll also note here that it is possible to do nicer joints for these corners than simply screwing and gluing 2×2, but that takes more time. To be honest, this was something I hacked together in a couple of hours. My goal was to get the leaves up once a year, not to make a masterpiece. If I owned a lawncare business, I would want to do a better job.
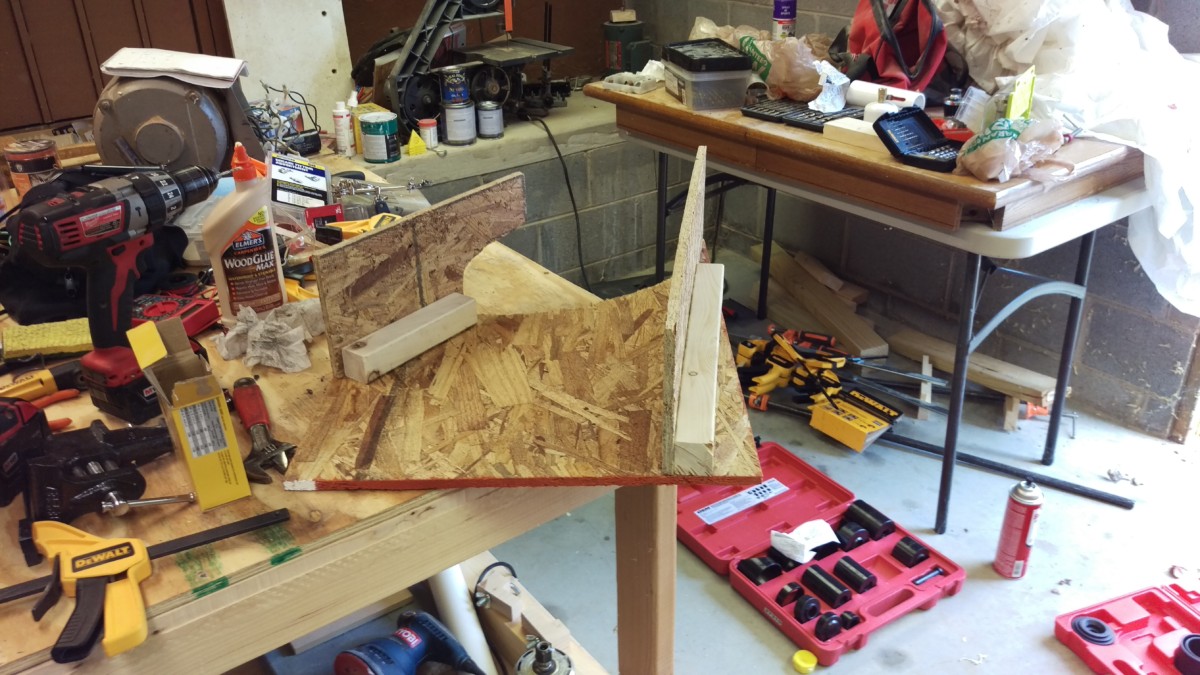
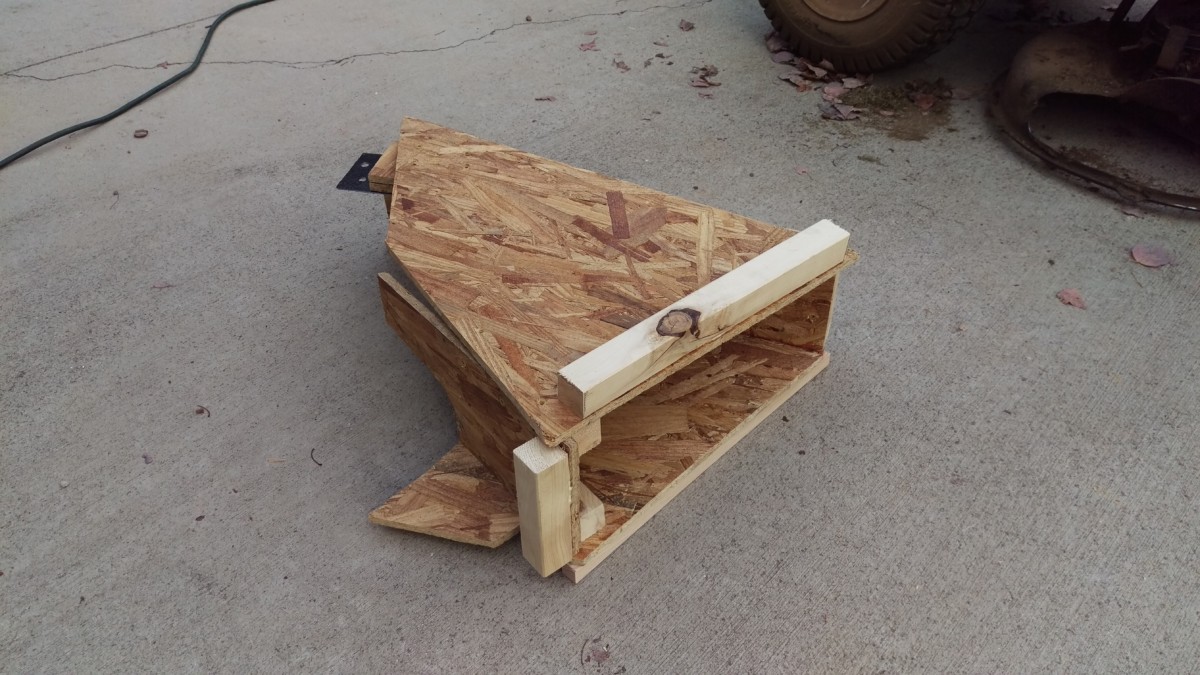
Mocked up with the top
I mocked up the top last, after connecting the bottom and sides together permanently. The top is simply a piece cut to fit the profile of the bottom and sides, cut with the circular saw.
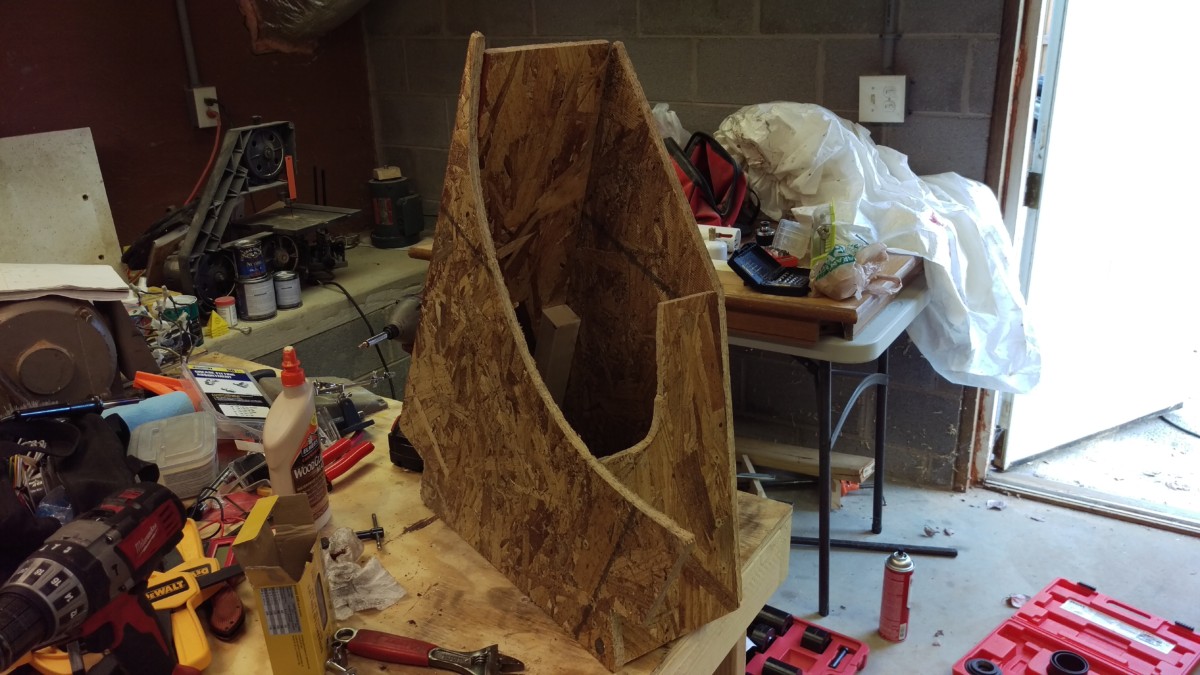
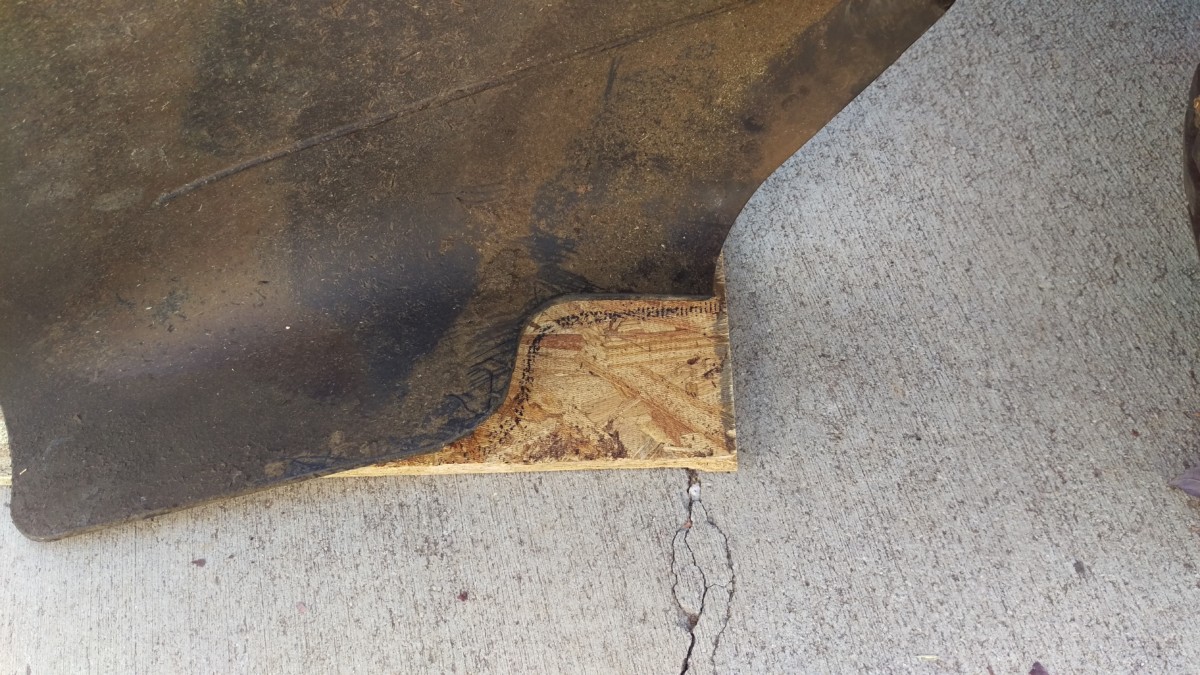
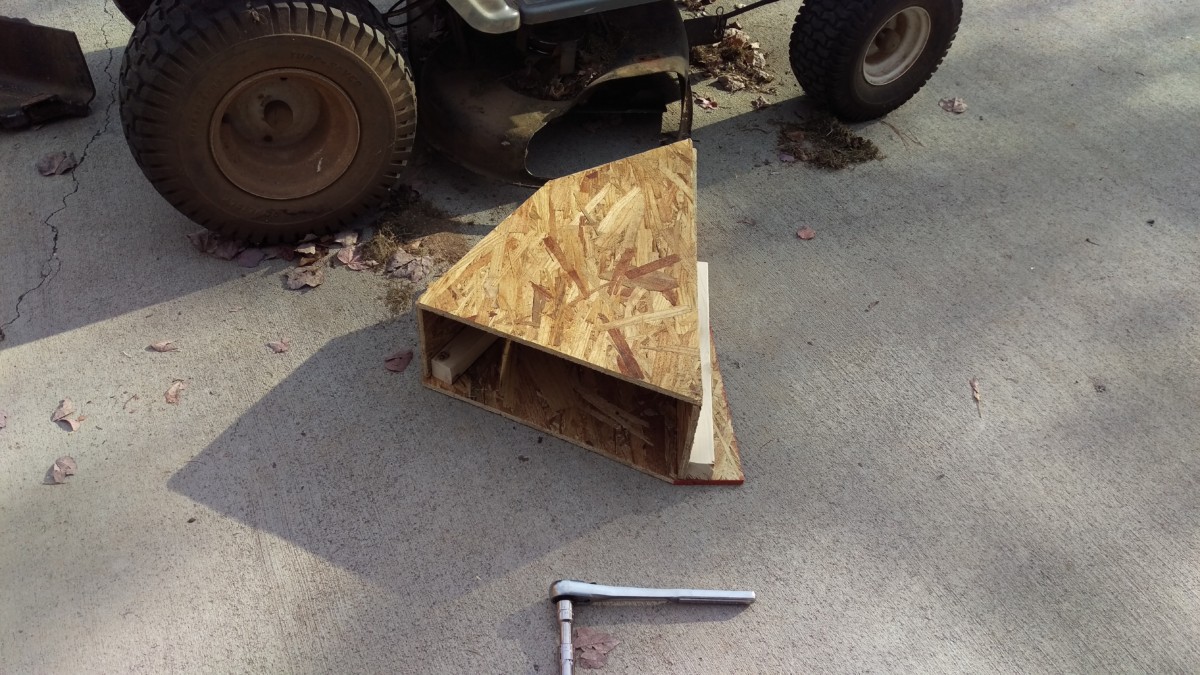
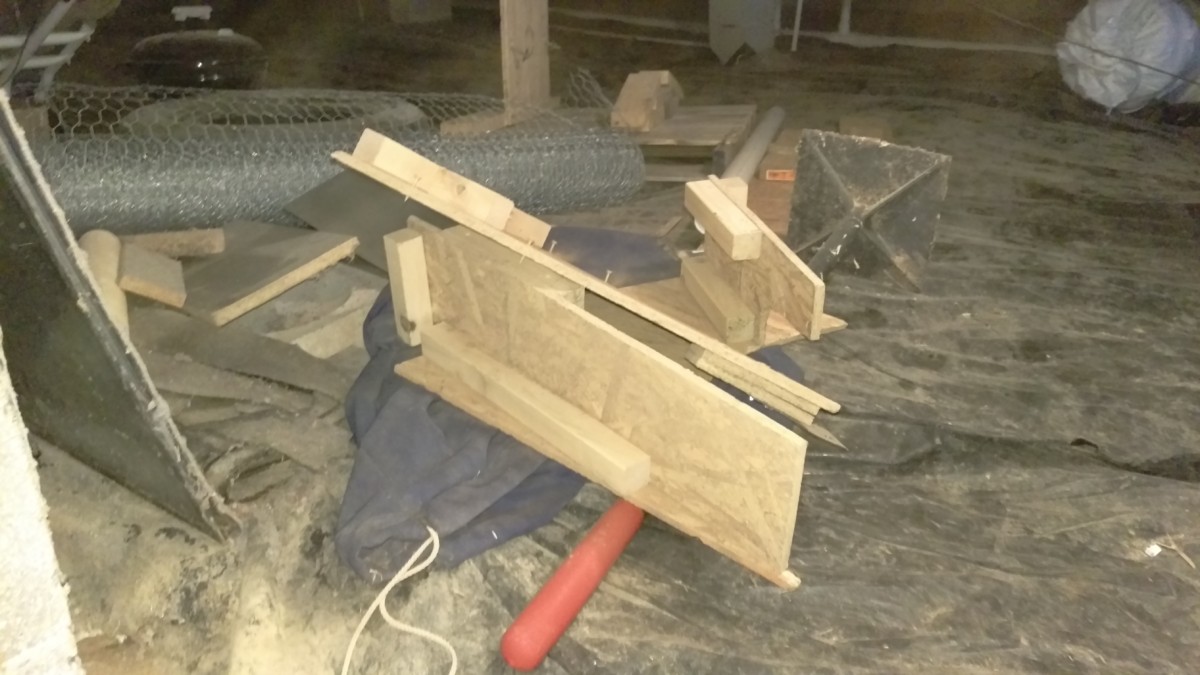
Another view of the chute
Here’s another view of the chute as it will go together. Here you can see the cutout for the deck. It’s worth noting that it doesn’t have to exactly match the deck profile, although you’ll have less dust the closer you get. It should still work if it’s simply square-ish but larger than the deck outlet opening.
Attaching the Chute
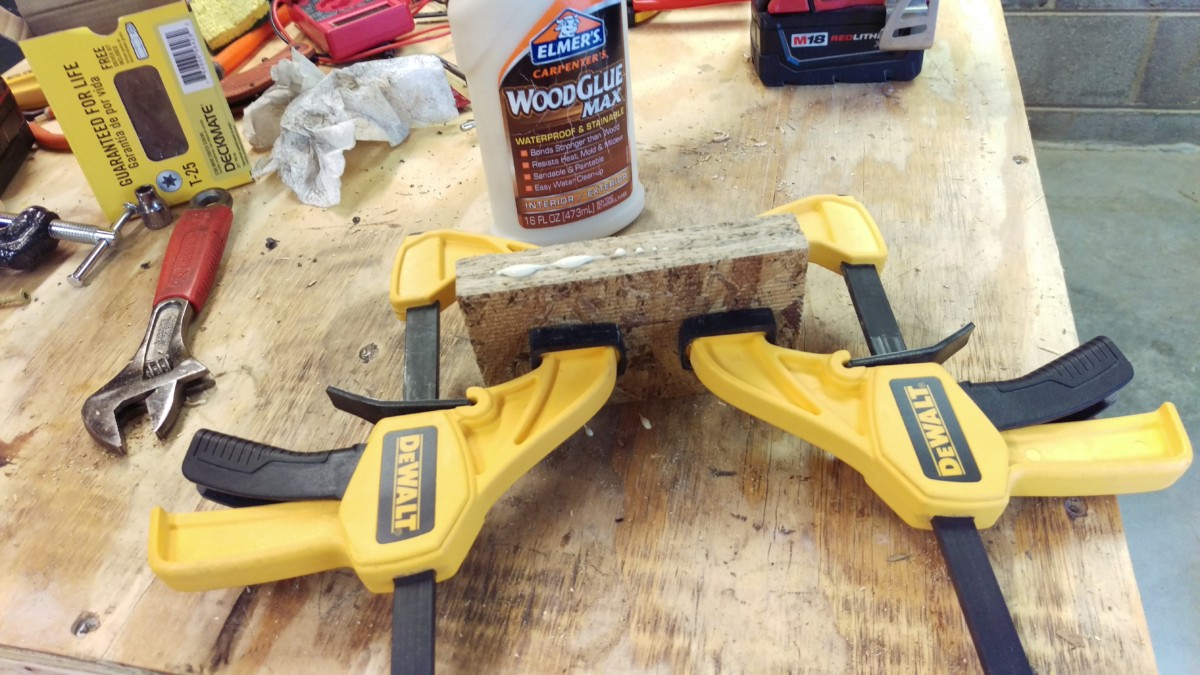
Sandwiching OSB
Now I needed to attach the chute. to the deck. I glued and screwed a couple of small pieces of OSB together to make one thicker piece.
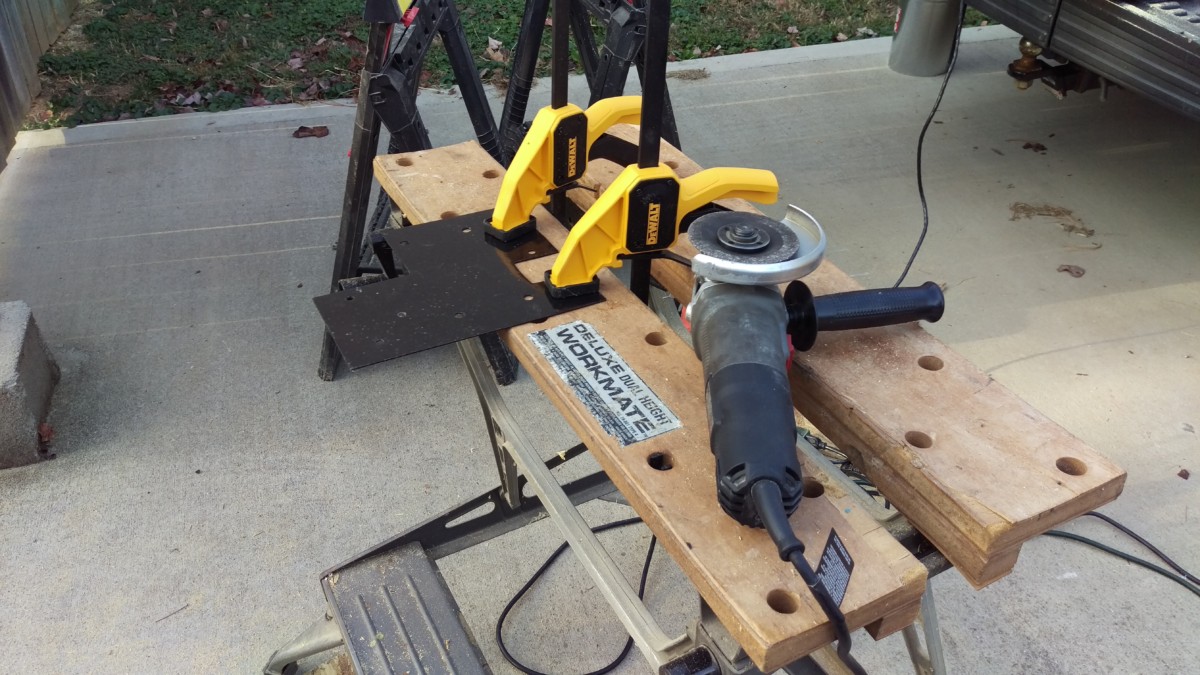
Cutting off a piece from some old steel scrap
I had some scrap steel, approximately 1/8″ thick, lying around. I cut a piece off that is approximately 4×6 using a cutoff wheel on my angle grinder. There are a variety of tools that could have been used to do this, or you could simply buy the right size steel plate to begin with; it’s fairly flexible, I just needed something to attach to the deck that was thinner than the OSB without being too weak.
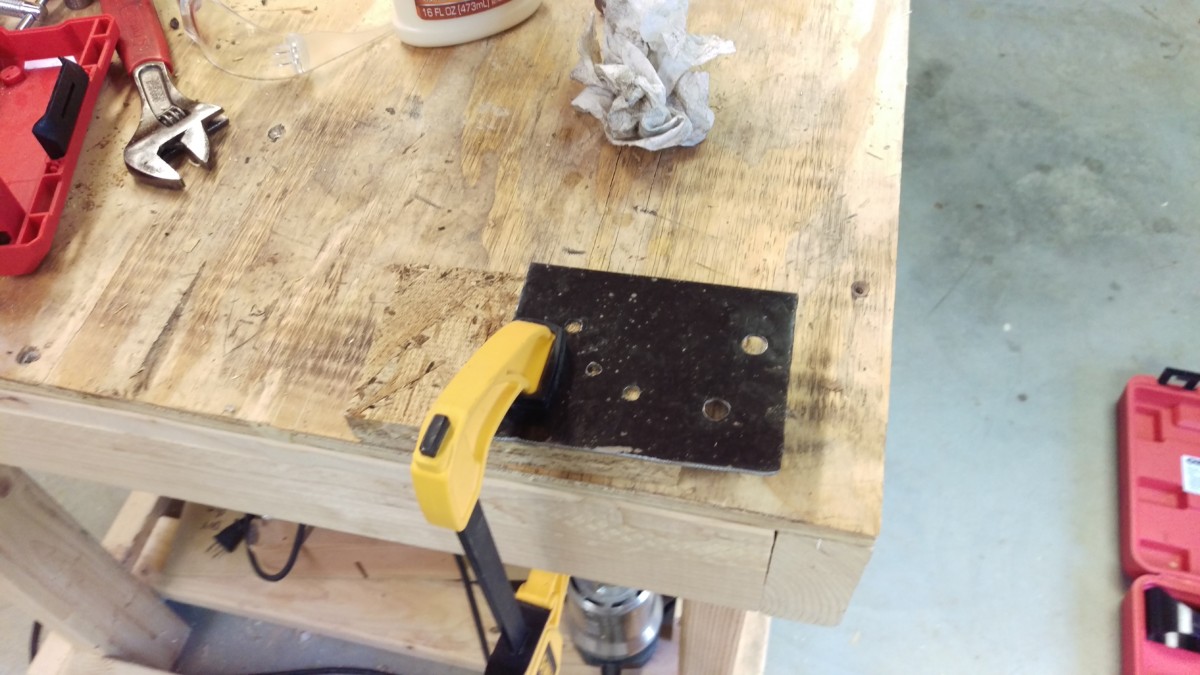
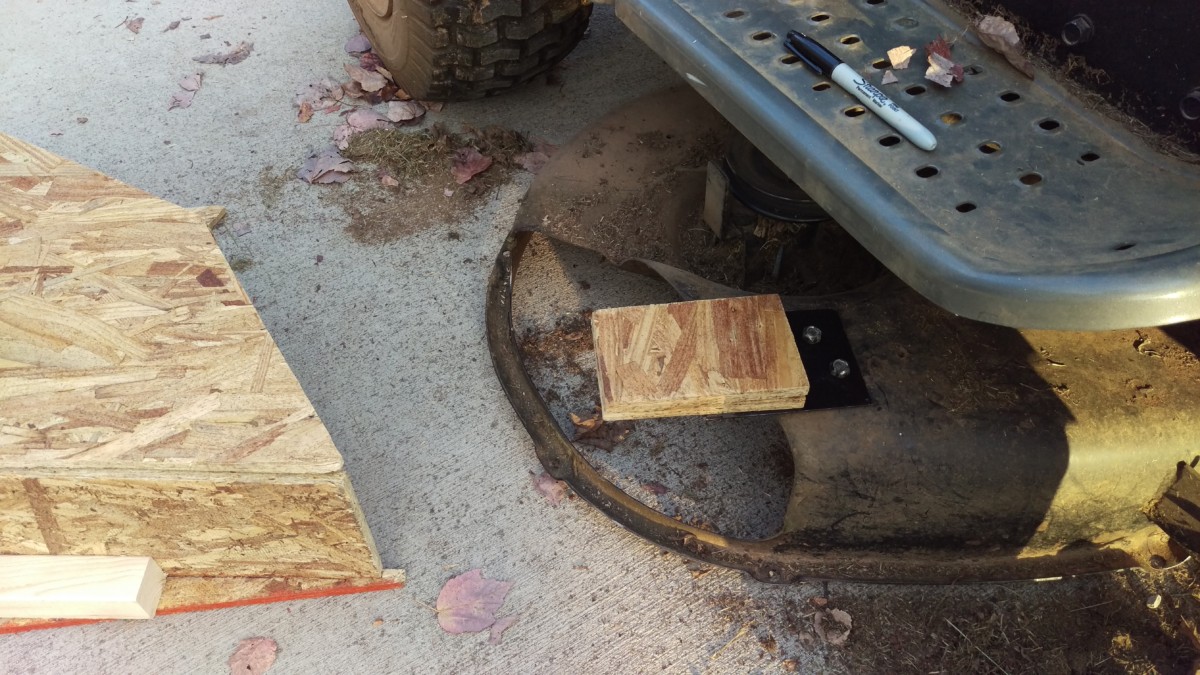
Drilled holes to match the mower deck
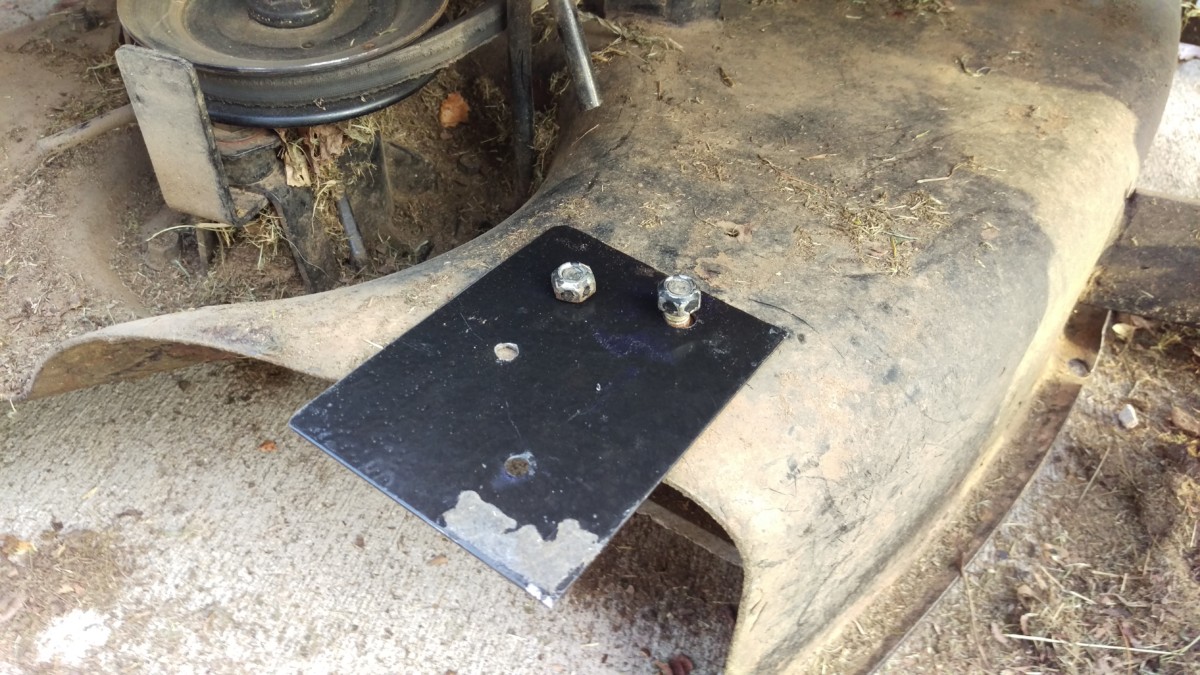
I put a couple of holes in the piece of steel to match the existing holes on the mower deck. This way, I can reuse the existing bolts for the grass deflector, as shown.
Screwed the steel to the osb pieces
Attached to mower deck where it will be
I used some metal screws to fasten the steel to the small pieces of OSB from before. This gives me something to screw the top of the chute into that will bolt to the mower deck.

Attached
Attached Alt View
Lastly, I used some more deck screws to attach the OSB to the top piece of the chute. At this point, I am able to connect the top of the chute to the deck, and then screw it to the rest of the chute. This will become more clear in a second, but the top of the chute is not glued to the sides, only screwed in.
Adding a Lip for the Bag
Lip

Lip Alternate View
The lawn tractor bag needs a lip to cinch around, otherwise it will probably just pull off. I simply used more 2×2, and screwed it to the sides of the chute all the way around as shown. I didn’t bother worrying about the corners, as that would have introduced potential fitment issues for no real reason. As long as the bag can’t slip off, this should be sufficient.
Attaching the Contraption
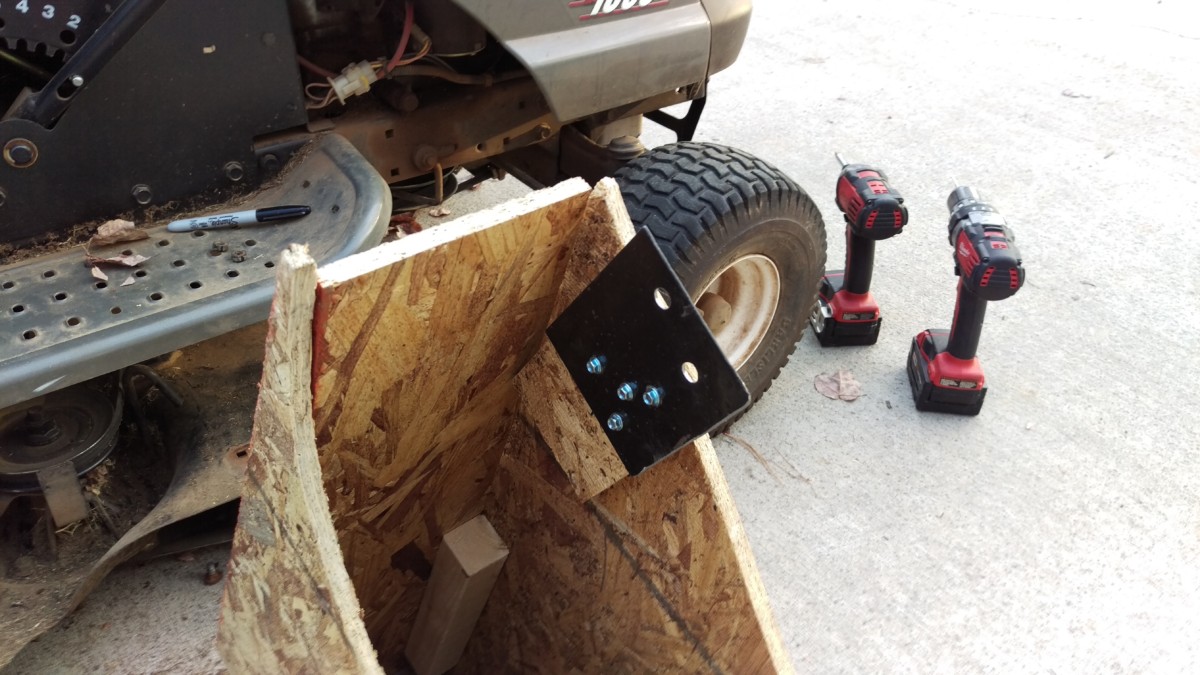
Step 1: Attach the top to the mower
As I mentioned earlier, the bottom and sides are all glued and screwed together. The top panel, however, merely screws into some 2×2 mounted to the upper parts of the sides. The pictures should help to clarify. To install this contraption, I first remove the plastic grass deflector. Then, I attach the top to the deck as shown, using the metal plate and two pre-existing deck bolts. The rest of the chute is in the picture purely to support the top. You can see the two upper pieces of 2×2 that the top will be screwed into.

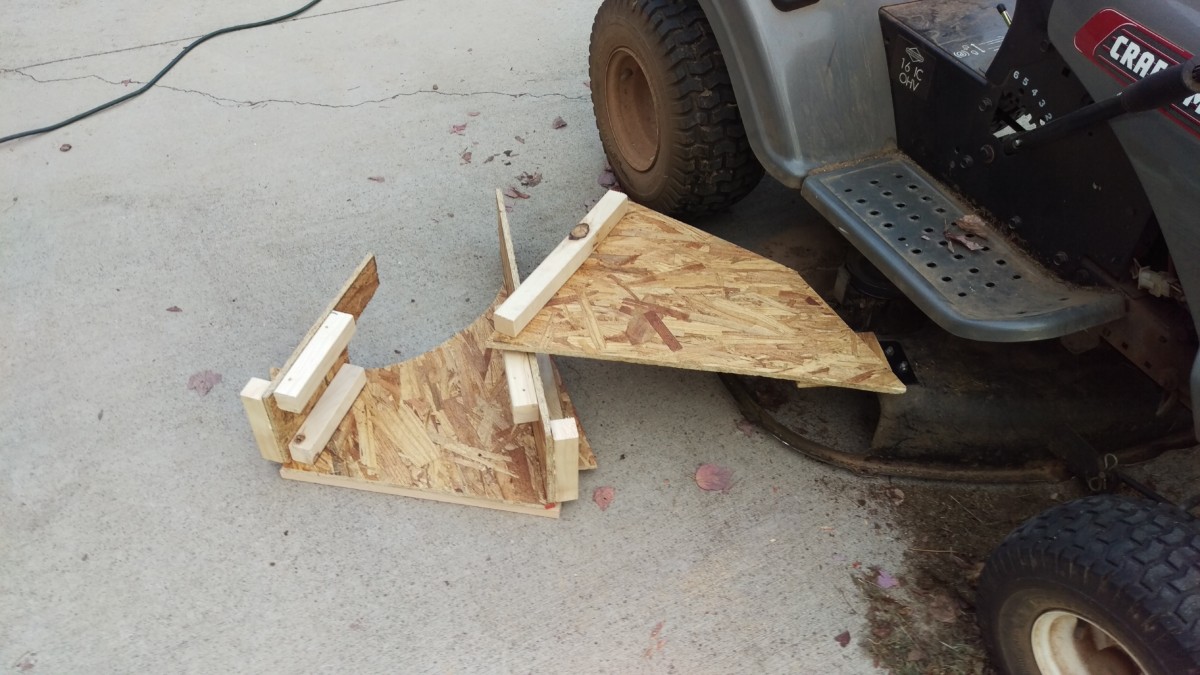
Step 2: Attach the bottom
Then, with the mower deck fully lowered, I put the bottom in position and use a cordless drill to screw the top to the sides/bottom. The result is as pictured. The reason to do it this way, rather than permanently assemble it, is that it makes it a lot easier to access the bolts going to the mower deck. In a future iteration, I may replace the screws with bolts, as the wood the screws are screwed into is starting to strip after only a couple of uses.
Supporting the Weight
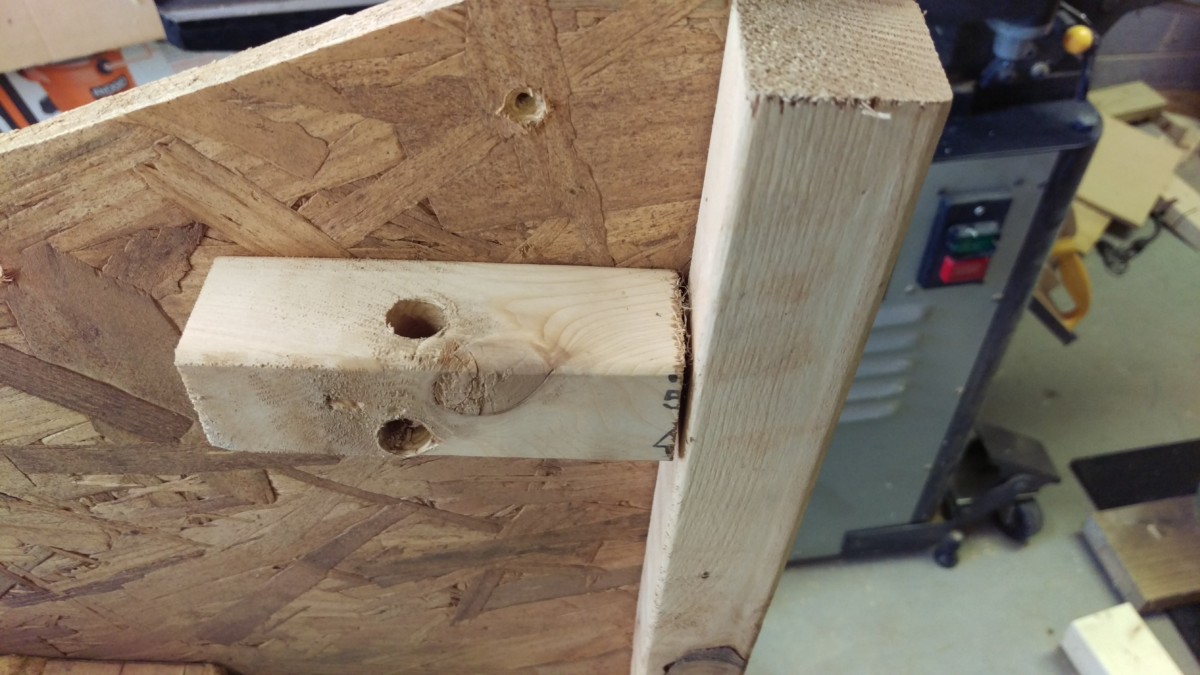
Support block
At this point, I was ready to test this thing out. My concern though was all that weight on the mower deck. I ended up putting a small block of 2×2 with a hole in it into the top of the chute, as pictured. The ratchet strap connects from this block to the frame of the mower on the other side. The idea is that this will help support the chute and keep it from having as much downward straight. I’m not sure if this really did anything.
Before with the block
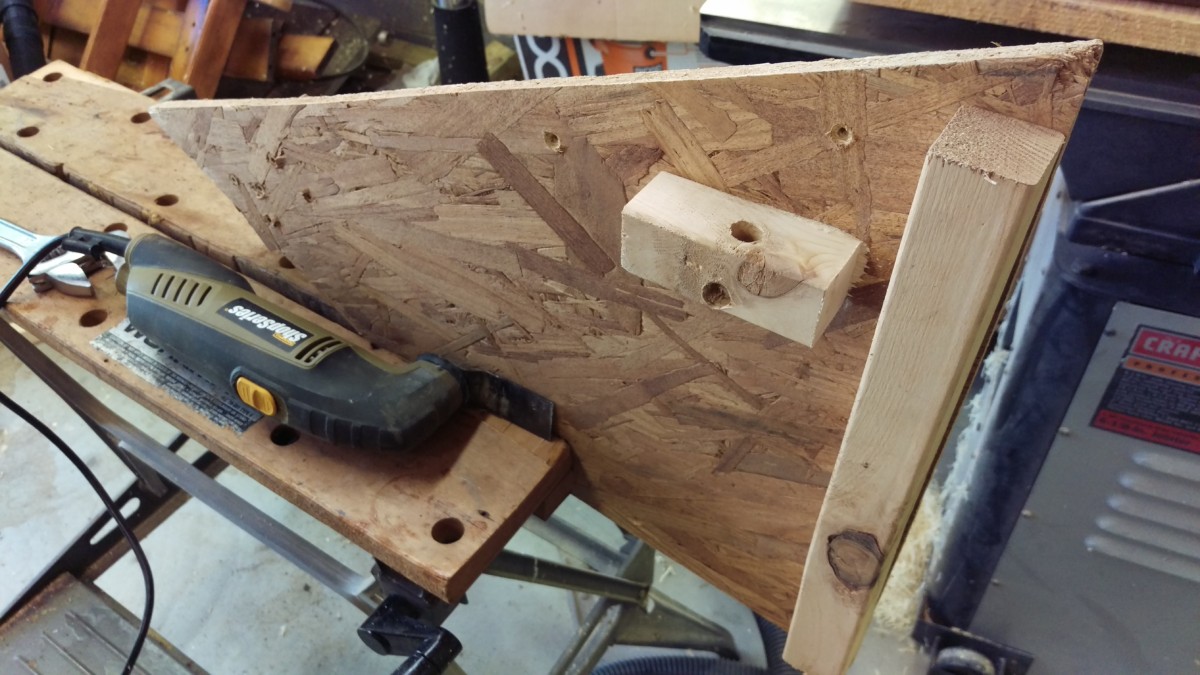
After with the block trimmed
I realized belatedly after adding this little block that it impeded attaching the bag to the chute, so I went back with an oscillating multitool and trimmed it up a little bit.
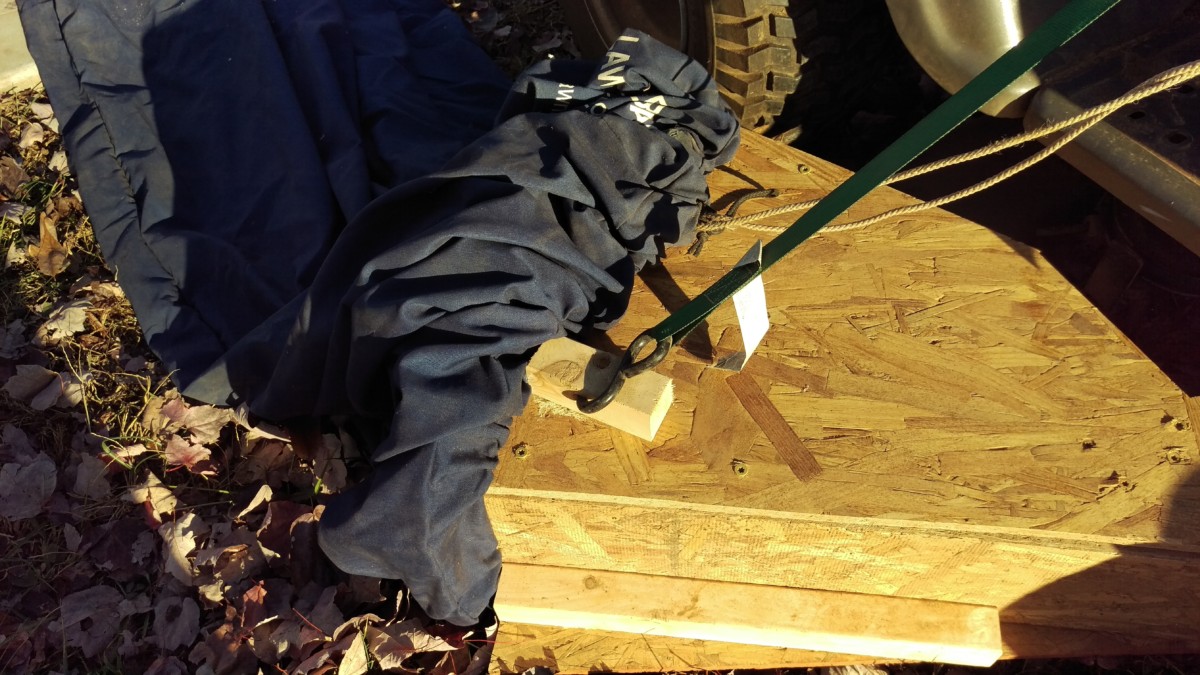
The bag attached
Afterwards, as you can see, the bag sits flat around the chute when it is cinched down.
The Results
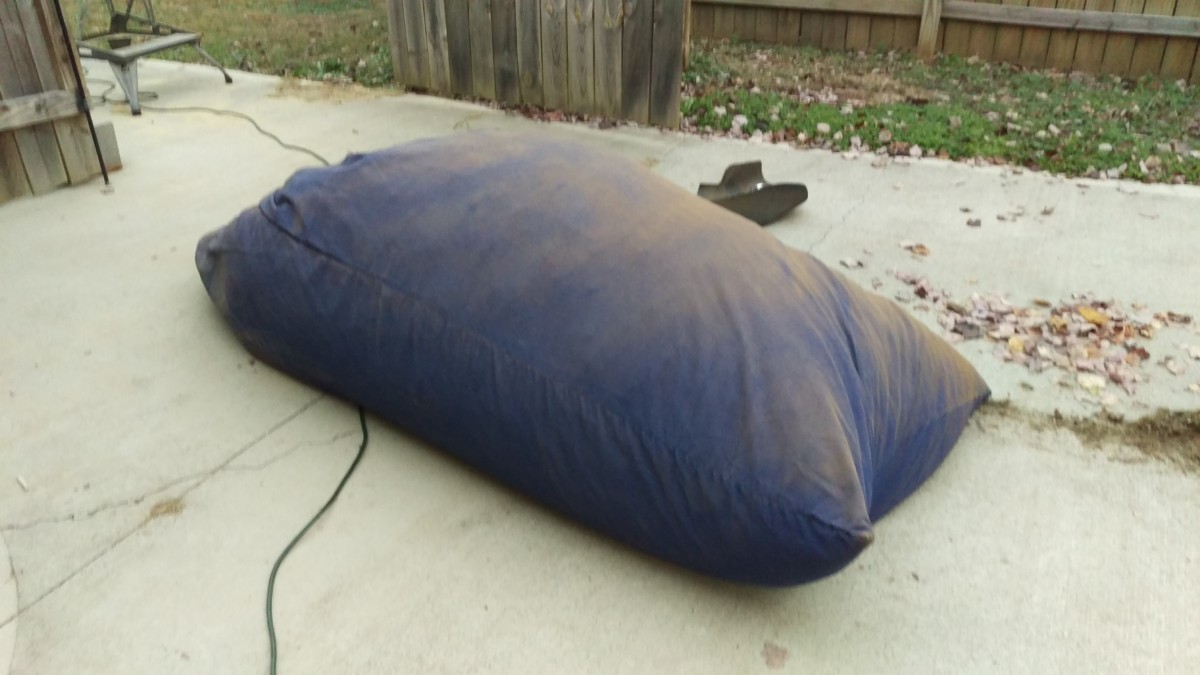
The first bag of leaves collected
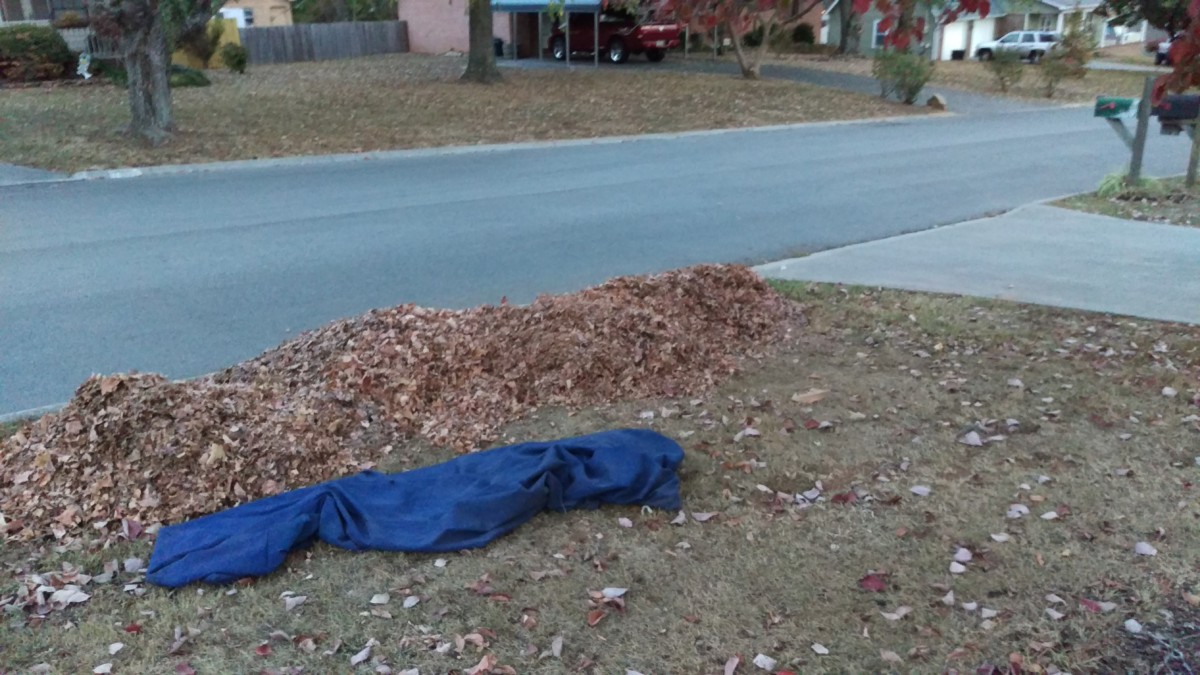
Leaf Pile
Terrible night picture
As you can see, this prototype was a resounding success. While I don’t think buying a $1500 cyclone rake is worth it for the average homeowner, this simple DIY mower leaf catcher for $80 makes a lot of sense for anyone with a lot of leaves and a riding lawnmower. Where it took a few days to get up all of our leaves last year, it took an hour or two this year. It’s a tremendous improvement.
Further Lessons Learned

A leaf pile from a second round of collecting a few weeks later
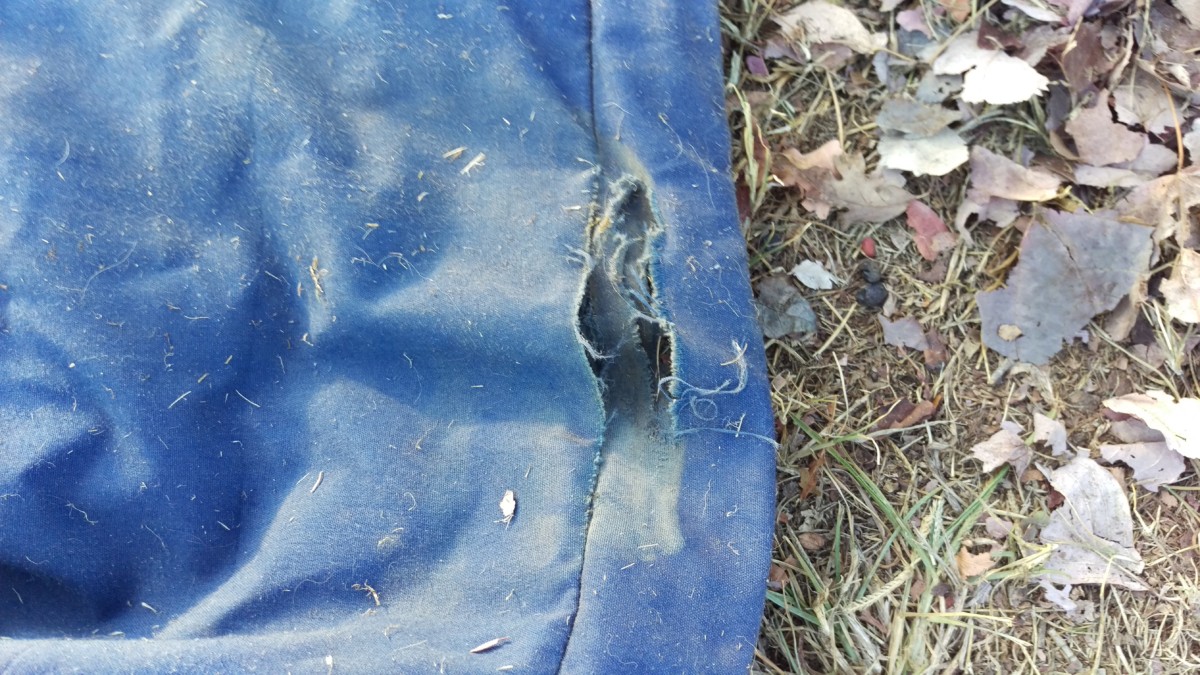
Tear in the bag
I used the whole contraption a second time as more leaves fell, to finish cleaning up my yard for the year. There is one major drawback to this design that I was concerned about the entire time, and that is that the bag isn’t protected against the back right wheel. I intended to hook the chute to the back of the mower and cover the wheel, but got lazy when only this part of the design worked so well. It turns out my fears were founded.
The first time I used it, I was very careful to avoid tight left turns to keep the bag from getting ground under the right wheel. The second time a few weeks later, having been impressed with it, I ignored all of that, amped up the speed, and took tighter turns. As you can see, this wasn’t a great idea, as the bag started to get chewed up. Going forward, I fully intend to have some kind of rear wheel cover.
I also found out that this can be extremely dusty, especially with the very dry weather we’ve had here in Tennessee. Some of it is impossible to cut down on, as there is even dust coming out of the bag itself. Some of it, however, results from the drawstrings on the bag loosening up and creating a gap around the chute. For next year, I intend to use a ratchet strap rather than a draw string to secure the bag, which may require sewing. I think this will do a better job securing it.
More leaf pictures

Leaf Pile 1
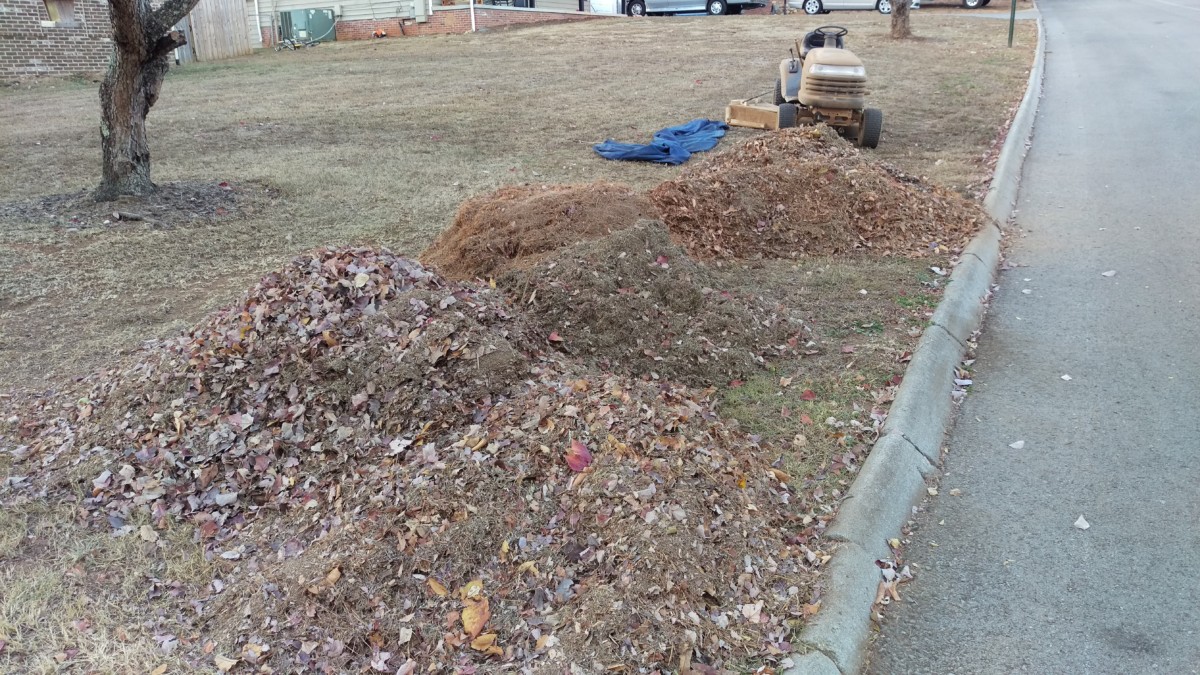
Leaf Pile 2
Storage
As you can see, it did a great job getting up a whole lot of leaves both times it was used. Additionally, I found it far superior to a rake for pine needles, as it will easily mulch them and pick them up, where a rake often struggles. My final favorite thing about this design as compared to a Cyclone Rake or other trailer-based solution is storage. The chute and bag can be thrown in my crawlspace until next year, hardly taking up any room.
[…] drums this size, and they have other uses as well. They’re cheap and easily to obtain. Since making my leaf catcher for my mower, I didn’t need a burn barrel […]
This was timely. I didn’t look at when you did the ‘contraption’ but I need one, love to ‘design/invent’ and like your idea and pictures. Question, please: Have you used it enough to see if the bag dragging on the ground as it gets more full is creating unusual wear on it? I have a large lot and I know how heavy leaves get when mulched and thrown in a bag this size.
Thanks,
David
Text at 205.910.2234
Thanks for the comment! The bag is designed to be dragged, albeit normally under a bagging attachment, so it’s pretty thick material. I have not worn any holes in it once a year for 3 years on a 0.6 acre lot.
That said, one issue with my design as it sits is that the bag can get caught by the rear tire on right turns, and that does wear a hole in it pretty quickly. I plan to weld up an arm from the wooden piece to the rear hitch and mount a wood plate to keep the bag away from the tire, but haven’t gotten to that yet.
You’re right though – a trailer type setup would be a more ideal solution that would last longer. It would also require more expensive materials – depending on design, you might need a gas vacuum and you’d certainly need an axle, wheels, etc – so it’s tough to say whether it’s worth it.
For me, I think the bag will last for mowing a relatively decent sized lot for as long as the mower does, so I accept the design limitations.
I’m actually quite surprised by how heavy the bag can get. I thought it would really start to drag when it gets full and put a lot of strain on the mower, but in practice I find that I’m unable to lift the bag to dump it out long before I have issues from the weight affecting mower, the contraption, or the bag.
If you have a flexible shaft grinder in your DIY workshop, you will be able to complete the work within 5 to 10 minutes per blade. Make a template of blade profile before you start your work and compare frequently. This is necessary to ensure that you do not over cut at a place.