Installing a Racing Beat Sway Bar and End Links
A common upgrade for Miatas is stiffer sway bars, particularly the front bar. On my car, I have the Racing Beat 54105 1.125″ tubular bar with 0.125″ sidewall. This is a good front bar for a lot of applications. I also have the Racing Beat 90-97 end links, although if I did it all over again, I would order 949Racing’s kit. Installing a racing beat sway bar and end links is a straightforward procedure, but there are a couple of gotchas to be aware of.
Different Sway Bar Options
In general, everyone gets a front Racing Beat sway bar. Miatas need a stiffer front bar than rear bar for balance, so it’s important to pick bars that pair well together. If you’re running stock springs, that will also affect your choices. Ideally, you will get springs and sway bars at the same time. That said, I had Goodwin’s recommended front/rear Racing Beat pair on stock springs for awhile, and it greatly reduced the body roll I was experiencing with the weak stock springs.
If you have stiffer than stock springs, I would definitely follow 949Racing’s guidelines. The order page for the 949Racing kit includes a selection of front bars paired with their own rear 14mm bar. Emilio has recommendations on which bar to run up front for each model year range and intended use.
The rear bar choice depends on your intended application. For track use, Emilio’s guide should be perfect. Running a 14mm rear bar with the appropriate front bar allows the vehicle very neutral handling while allowing it to rotate easily. This is what I use, paired with the aforementioned 54105 Racing Beat front bar and 700/400 Xidas. Many autocrossers find they are faster with a setup biased toward understeer. To achieve this, they often reduce the rear bar to either the factory 11/12mm size or by removing it altogether.
Different End Link Options
You also need to decide on end links. This guide discusses setting up Racing Beat end links, but honestly I bought my set before I knew any better. If you choose to buy Racing Beat end links and intend to lower your car, you should go with the NB links, even on an NA. The NA links are too long for any Miata with a pinch weld height less than about 5.25″. I inadvertently bought the longer links, and I was barely able to adjust them short enough. The 949Racing links will likely work best of all, and they are included in the sway bar kit referenced above.
If you have the Racing Beat links and find yourself needing to make them shorter, it is possible. The Racing Beat links have a double-ended stud that is threaded to M10x1.25 and is 85mm long. This allows for a minimum length of 107mm. The 949Racing links go down to 92mm. Thus, you need to shorten the 85mm link by 15mm (107-92) to get the same minimum length.
Unfortunately, M10x1.25 threaded rod is very hard to find. However, McMaster-Carr sells an M10x1.25 bolt 70mm long. A 5 pack is $10, although you only need 4. If you buy a pack and cut the heads off, you now have 4 70mm threaded rods. You can use these to shorten NA links down for sub-5″ pinch weld heights. Disclaimer: If you do this, it is at your own risk; it is certainly safer and easier to simply buy the proper links in the first place.
Sway Bar Brace Kit
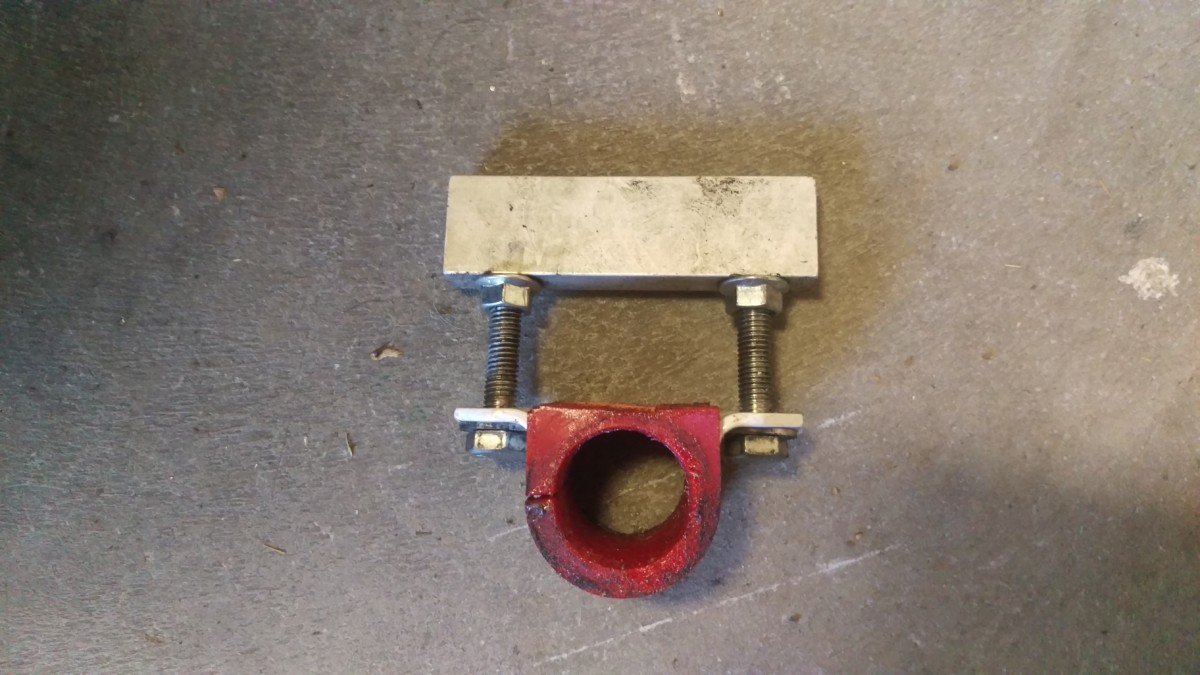
The Racing Beat block kit
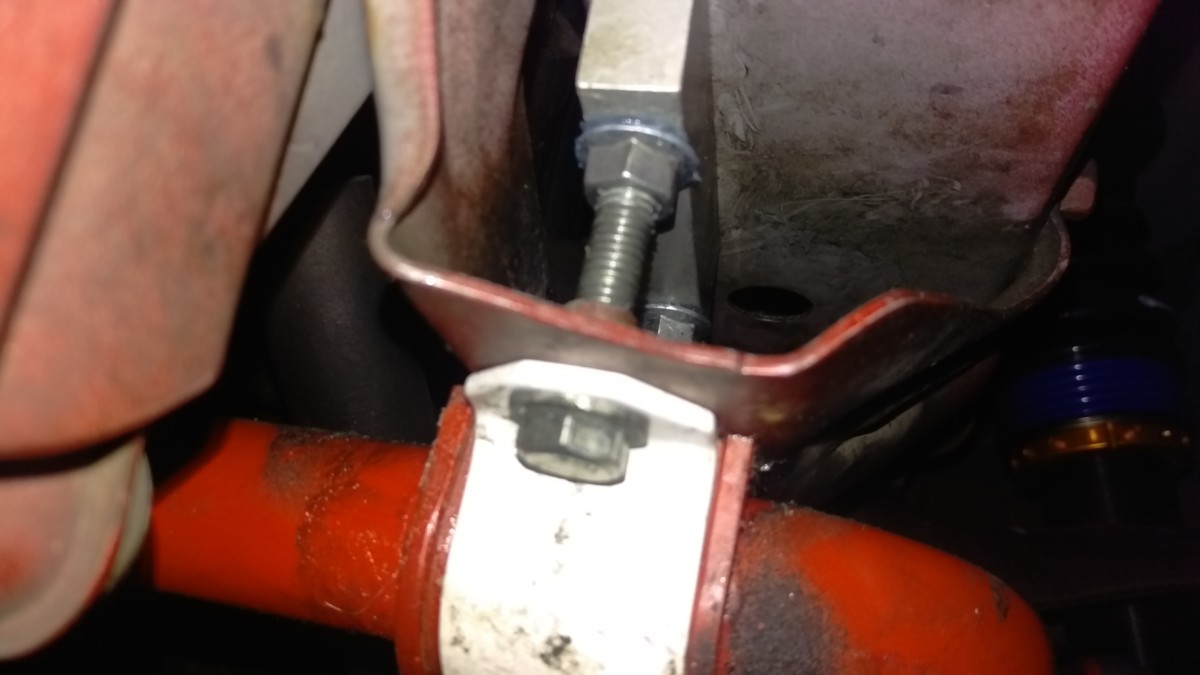
Brace kit after installation
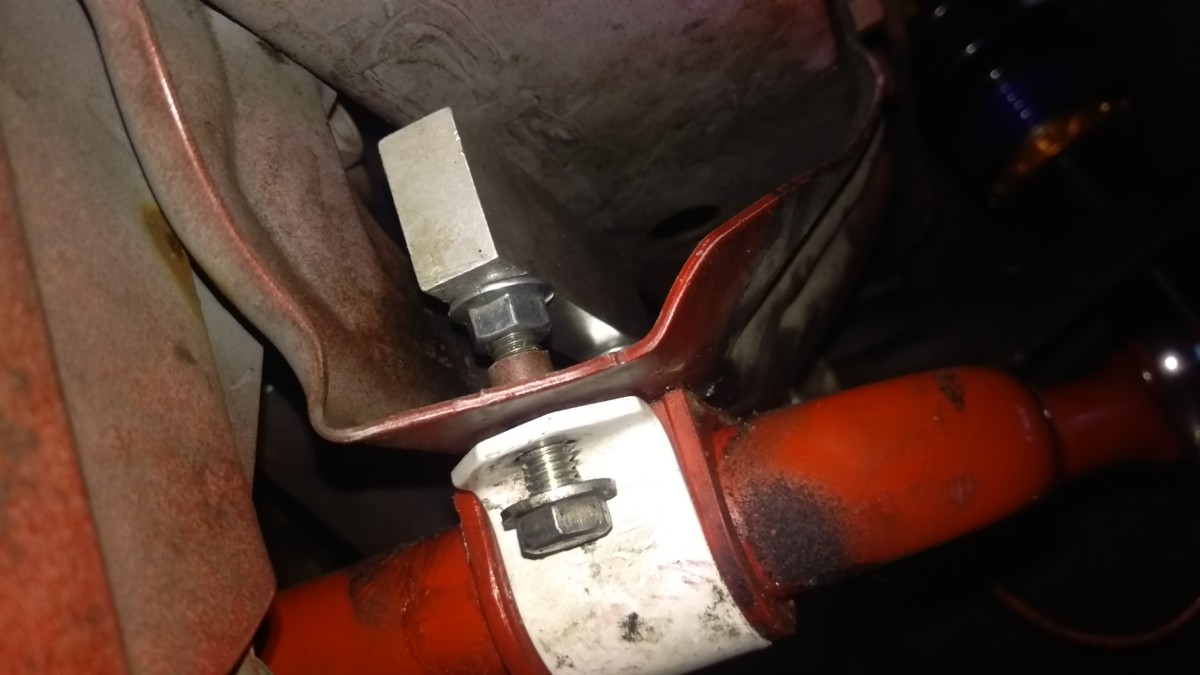
If you install one of the Racing Beat tubular front bars, they are stiff enough to actually rip off the mounting brackets on the front end. The 949Racing kit will include the Racing Beat brace kit. This kit is also available from Goodwin and other vendors. The above pictures demonstrate how it works.
Basically, you replace the stock sway bar bolts with a much longer one. This one presses against an aluminum block with two holes drilled into it. A flanged nut runs up the bar and pushes against the block. This arrangement allows the stronger area above the bracket to take some of the force, instead of relying solely on the thin sheet metal bracket itself. It is also possible to weld in stronger sway bar mounts instead, but this block brace is much easier to install and deal with.
Fixing the Racing Beat Bushings
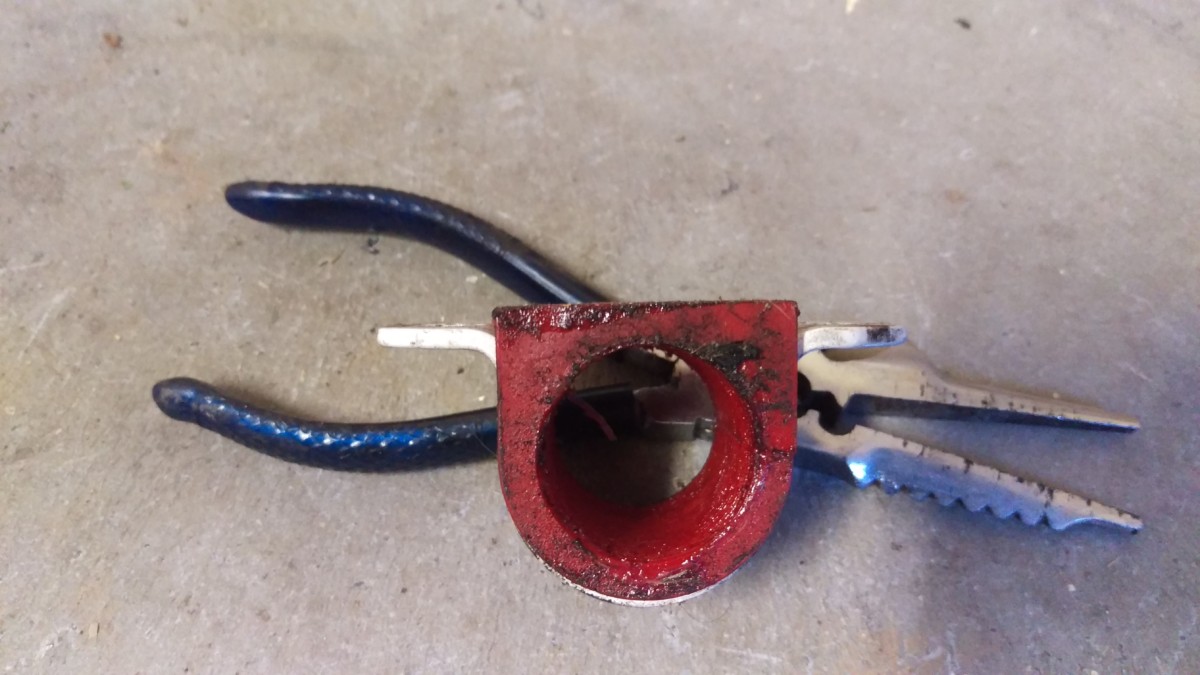
The racing beat bushing extends past the bracket that holds it
Racing beat sway bar bushings have a known defect, or at least did when I bought this bar in 2015. They use a generic polyurethane bushing that is a bit too tall for the bracket that secures it to the frame. You can see this in the picture above. The problem is that when installed and torqued properly, this puts too much pressure on the bushing and it freezes up. To find out if this is a problem for your bar, simply bolt the sway bar in place and see if you can move it easily.
The bar should move smoothly with minimal force. If you have to really push on it, it’s bound up and won’t operate properly. Fortunately, it’s fairly easy to fix.

Line to trim the bushing
First, I marked where I wanted to trim the bushing with a Sharpie. All I’m doing is making the bushing flush with the bracket.
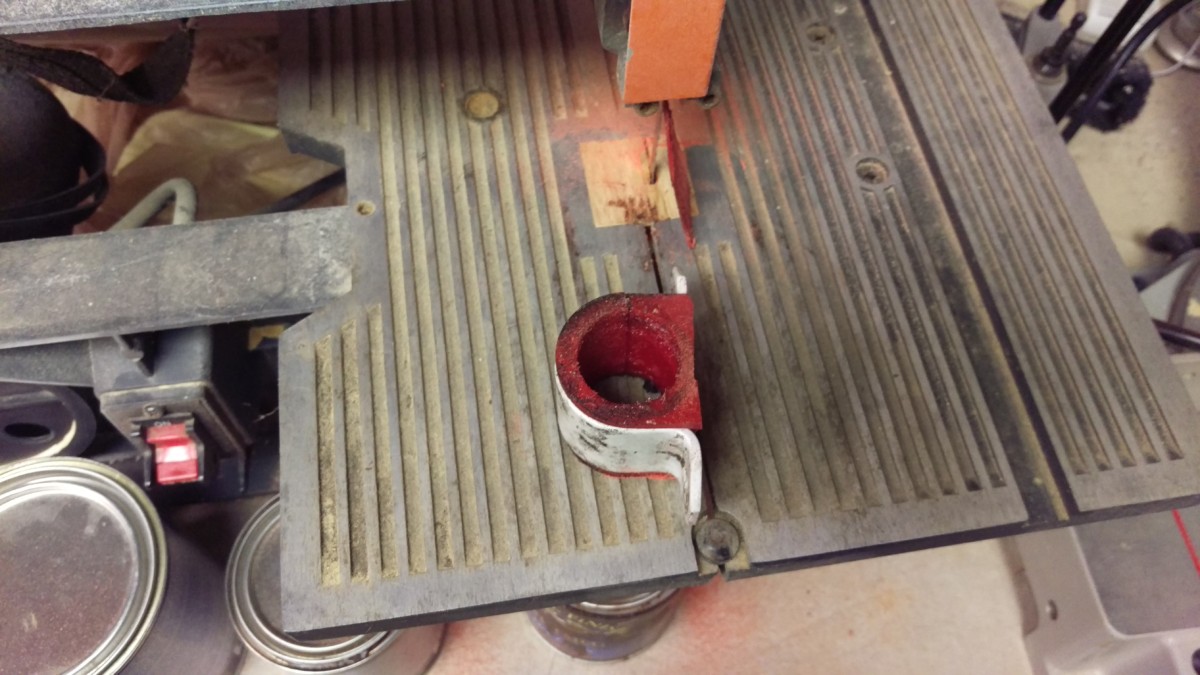
I used a bandsaw, but a lot of other tools will do the job
Then, I just sliced it off with my small bandsaw. You don’t have to use a bandsaw for this. A belt or disk sander could shave the bushing down pretty quickly. A table saw with an appropriate crosscut sled to get your fingers away from the blade should work as well. Even a hand-held oscillating multitool, angle grinder with a flap disk, or a regular old hacksaw would probably work.
Installing the Block Brace Kit
The Racing Beat block kit
Once the bushing is fixed, you can put the bar in the car. For details on removing the old bar, you can see the coilover installation writeup. The block kit will be installed into the car as shown. You don’t need to assemble it like this out of the car; this is just for demonstration purposes.
Get the bolts in and lined up first
To start, bolt both sides into the car as shown. You want to put the bar in place and run the bolts up through the stock sheet metal sway bar mount. Don’t fully install the bolts yet or there won’t be room for the block. Instead, thread on the flange nuts and place the block on top of the two bolts as shown.
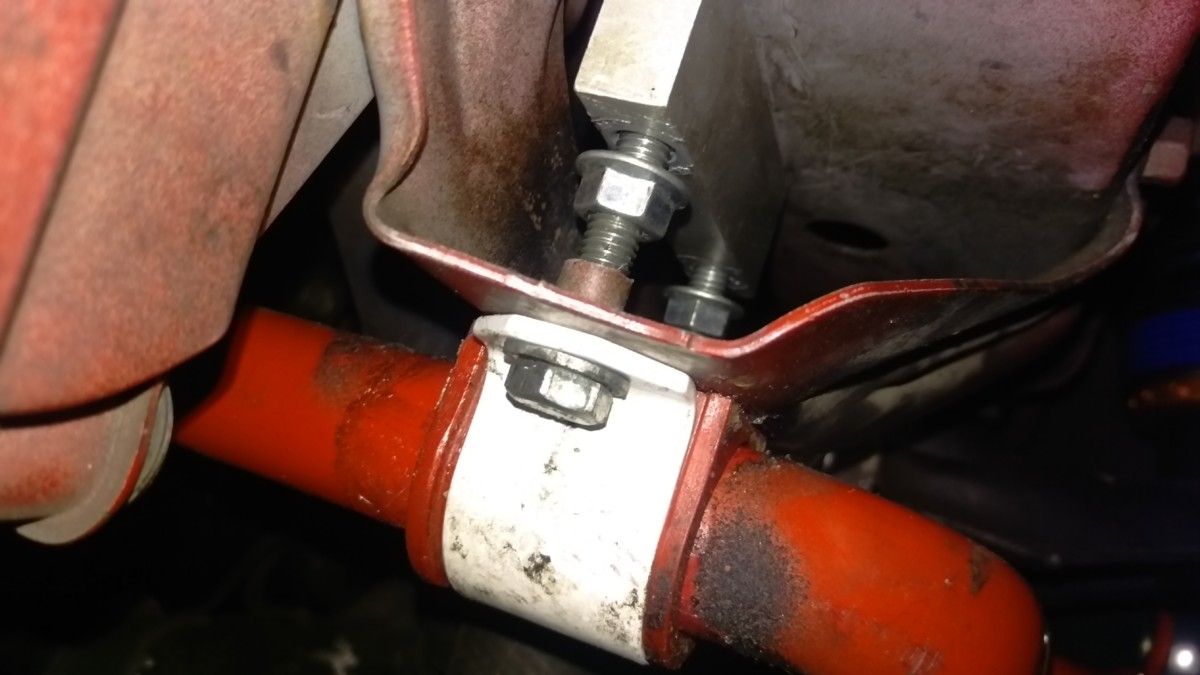
Bolts torqued down
Once you have the block lined up, you can go ahead and torque the sway bar bolts down. They only take 15 ft-lbs or so. When they’re tight, you should be able to rotate the sway bar smoothly up and down with only a slight bit of effort. If you have to really push on it, you didn’t trim enough bushing off.
Blue loctite the snot out of it
There have been reports that the flange nuts for the block brace come loose too easily. Fortunately, a good fix for this is liberal amounts of blue loctite.
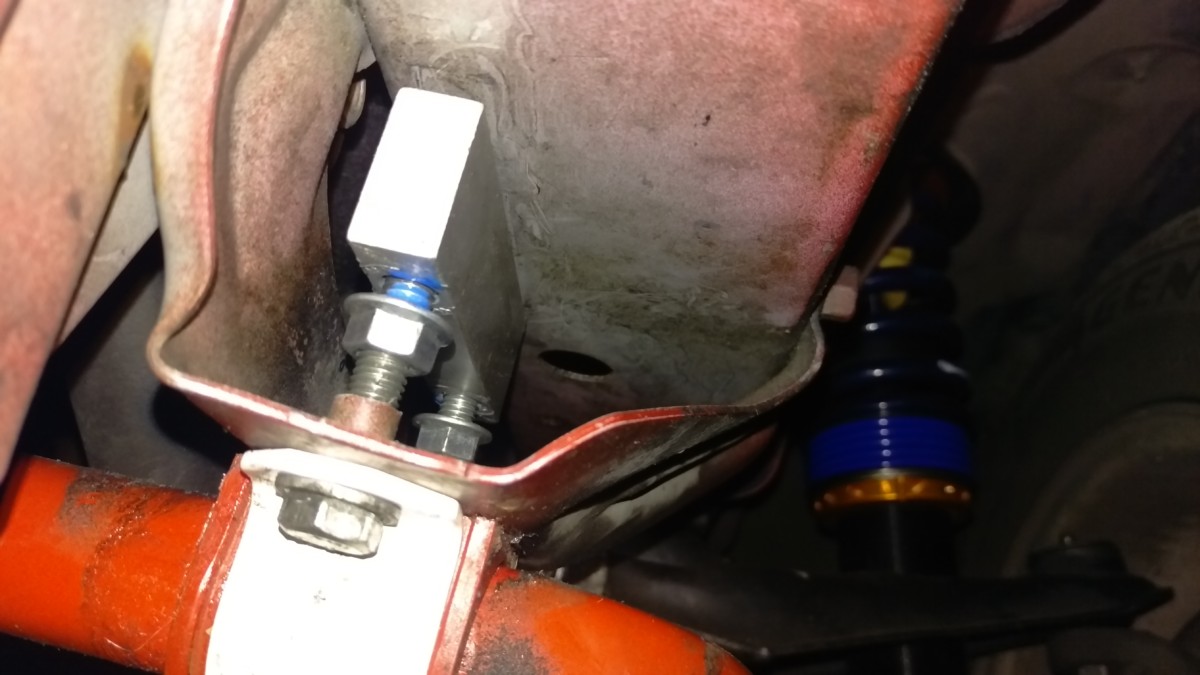
Brace kit after installation
And finally, you can use a box wrench to tighten down the flange nuts to the brace kit. Having this rigid connection will support the sheet metal mounting location below.
Adjusting the End Links
The final step in this process is to adjust the end links. If your car is still at stock ride height, you could simply set the end links to match the stock length and move on. More than likely, though, you’ve got adjustable links because you’re lowering your car, so read on.
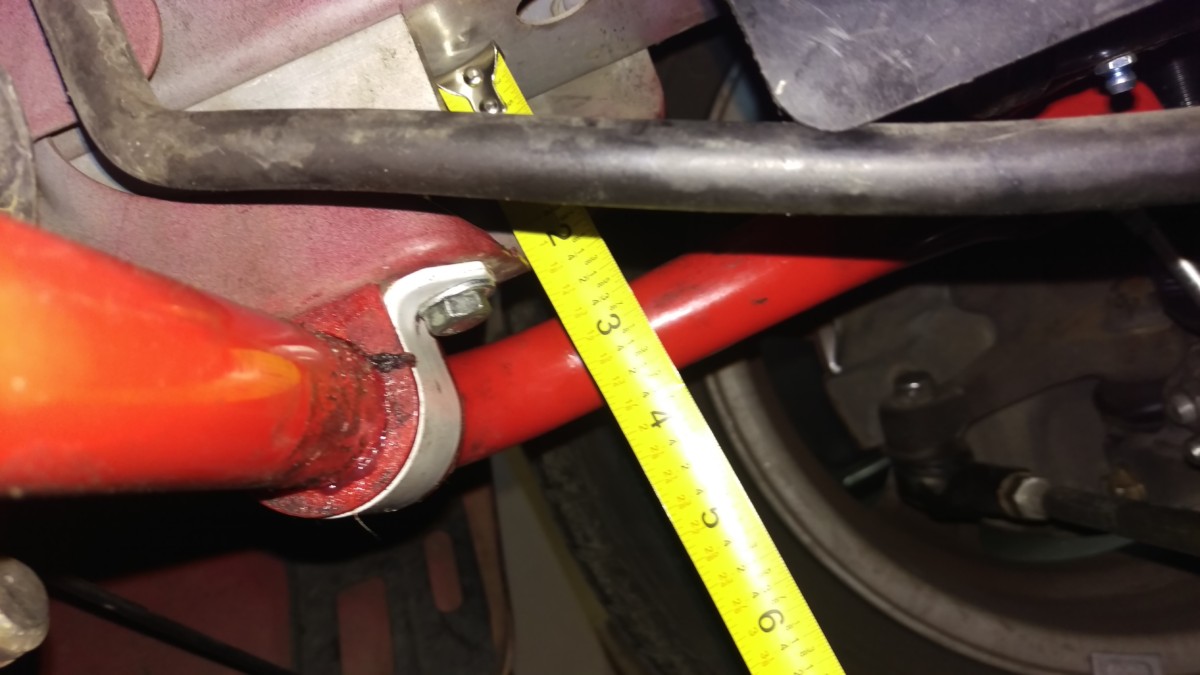
Measuring subframe height at front of sway
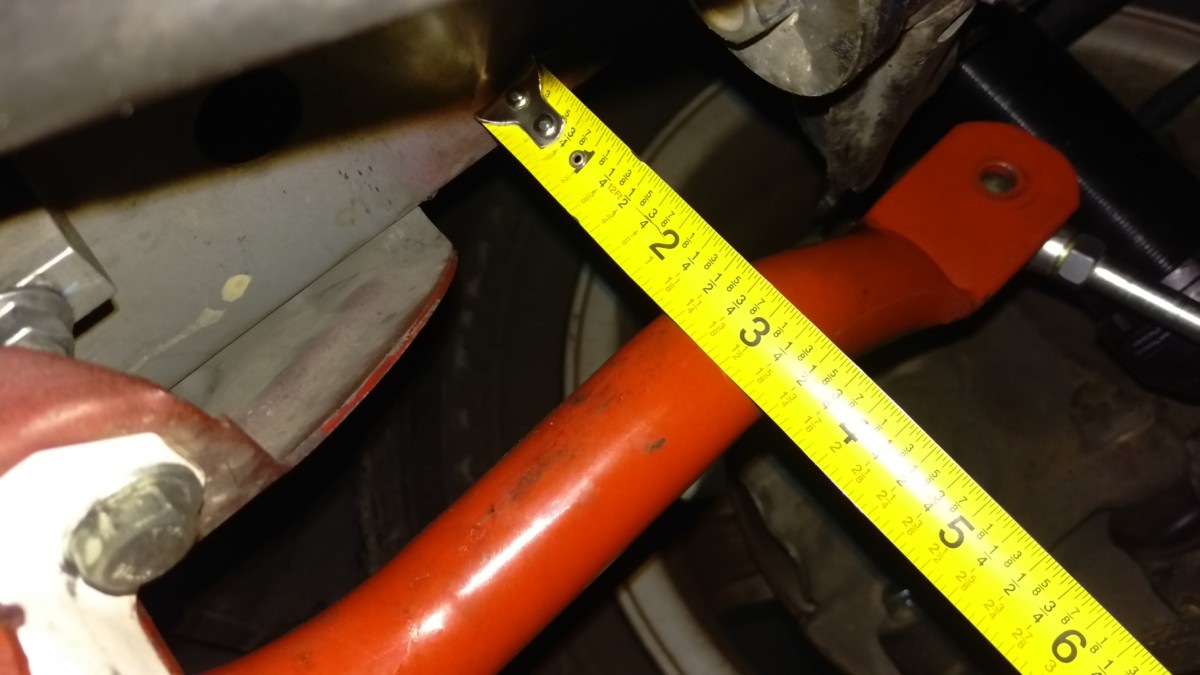
Measuring height at rear of sway
949Racing has a document describing how to install their end links. Per their instructions, the goal is to get the sway bar level at the resting ride height. My method for doing this is pretty straightforward.
I simply measured the distance from the flat subframe area above the sway near the front mounts and near the end links. I moved the bar up and down until these two distances were even. This allows me to be sure the bar is level to the car even if it’s not level to the ground. It’s not super precise, but it should be good enough for most purposes.

Started one side bolted in
Once I had an idea of how high to place the bar, I adjusted the end link for one side until it roughly achieved that height. Then, I put the bolt for one side in and loosely tightened it down.
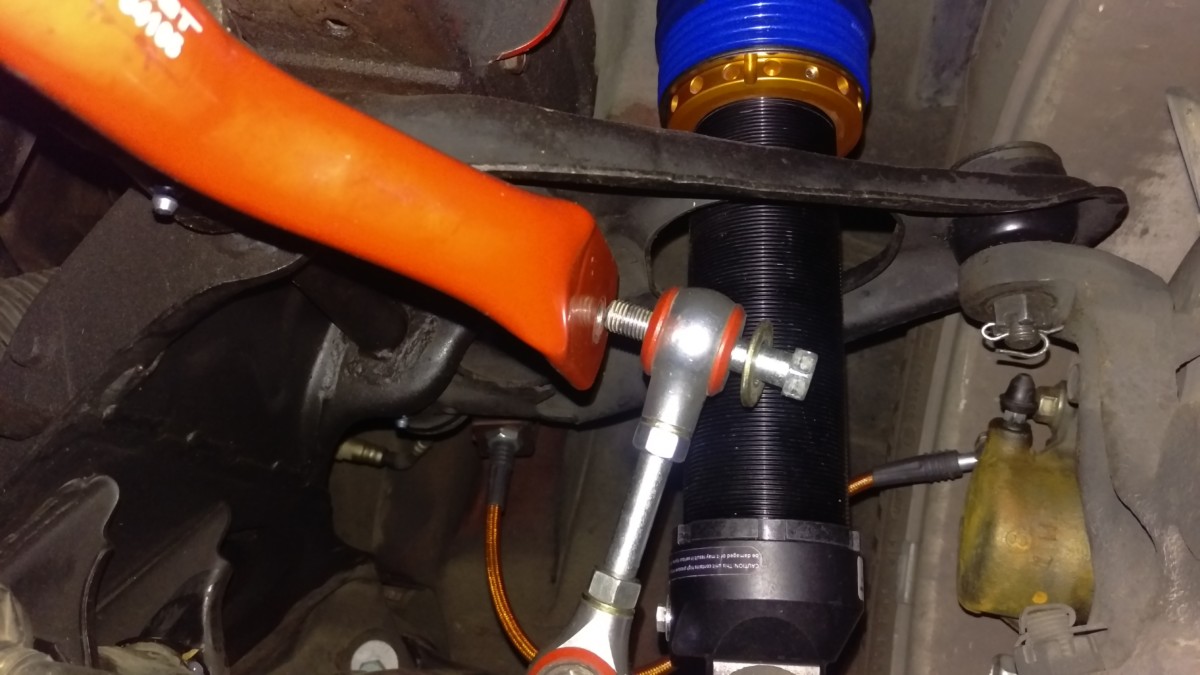
The end link should line right up with the hole
And here is probably the most important step. On the other side, I adjusted the end link so that the bolt hits the hole without having to bend or force it. It should drop in relatively smoothly. It looks a little high in the picture, but it’s actually just a deceptive photo. When the end link is tilted forward to bolt up, it fits perfectly. As you can see, with my 5.25″ ride height, I had to adjust the NA Racing Beat end links as short as possible. 949Racing’s end links or the NB end links would have given me a better adjustment range.
The goal with this last part is to ensure you aren’t preloading the bar. (Unless, of course, you’re preloading on purpose, in which case you know what you’re doing enough to not need this guide!) A preloaded bar means that there is force on the bar at resting ride height, because you had to bend the bar to get the end links connected. This can help getting the car to rotate in certain circumstances, but most commonly the average joe should simply try to set the bar neutral. The method described above results in a neutral bar.
At this point, you can torque down both end links on both ends. The procedure for installing the rear suspension is identical to the front.
Conclusion
Beefier sway bars really helped my car stay stable in turns. Some amount of body roll is desirable, but the stock sway bars and springs combine to produce very large amounts. It’s important to pair the right bar to your suspension setup.
Also important is proper installation and adjustment of the end links. In particular, I ran my Racing Beat sway bar with untrimmed bushings for a year. I didn’t know how much the sway bar was binding until I trimmed the bushings down. The difference was very noticeable.