Miata Hitch Installation
I like to go mountain biking. Previously, I had been using my truck to transport my bike. This works, except it meant on a nice day when I wanted to bike ride, I had to leave my fuel-efficient convertible in the garage and take my F-150. This didn’t make a whole lot of sense. Fortunately, Miata hitch installation is very easy, solving my problem.
To go with the hitch, I installed a Swagman XC2
Other people use trunk racks for this. I find hitch racks are easier to take off when not in use, keep the trunk free, I can use the same rack on any car with a receiver, and don’t scratch my paint. I ended up going ahead and getting a class I 1-1/4″ hitch receiver for the car. Miatas aren’t exactly tow vehicles: in fact, Mazda doesn’t rate the Miata to tow anything. However, thanks to demand from folks with bike racks and tire trailers, there are plenty of options.
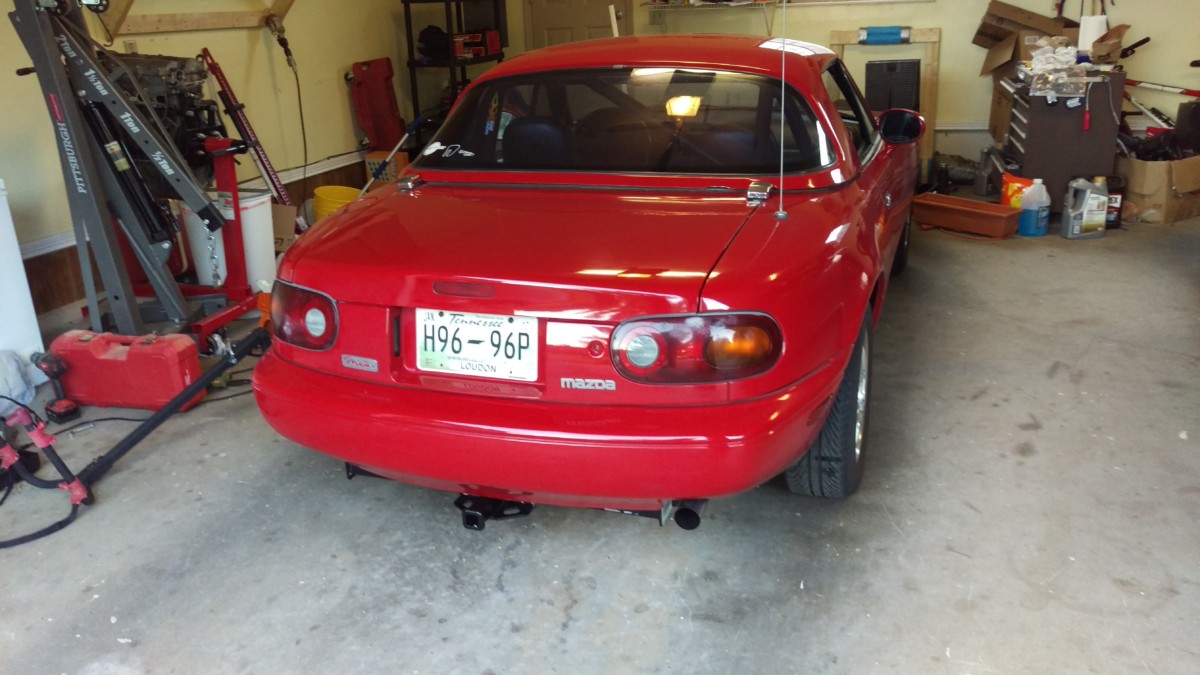
Installed Hitch
Almost all of them mount to the tow hook area behind the bumper. Some of them are more hidden than others – mine, in particular, is very visible. Flyin Miata and Bethania Garage both sell hidden hitch receivers that are very lightweight. Flyin Miata’s hitch in particular is extremely light at 5 lbs.
The Curt hitch
The hitch

The hitch and mounting hardware
All of the Miata hitches I have seen follow the same basic pattern. They’re really a simple crossbar with a 1-1/4″ receiver welded to it. The ends of the crossbar bolt in two places to the rear tow hook mounting areas that are part of the subframe. This gives the hitch a very solid mounting point.
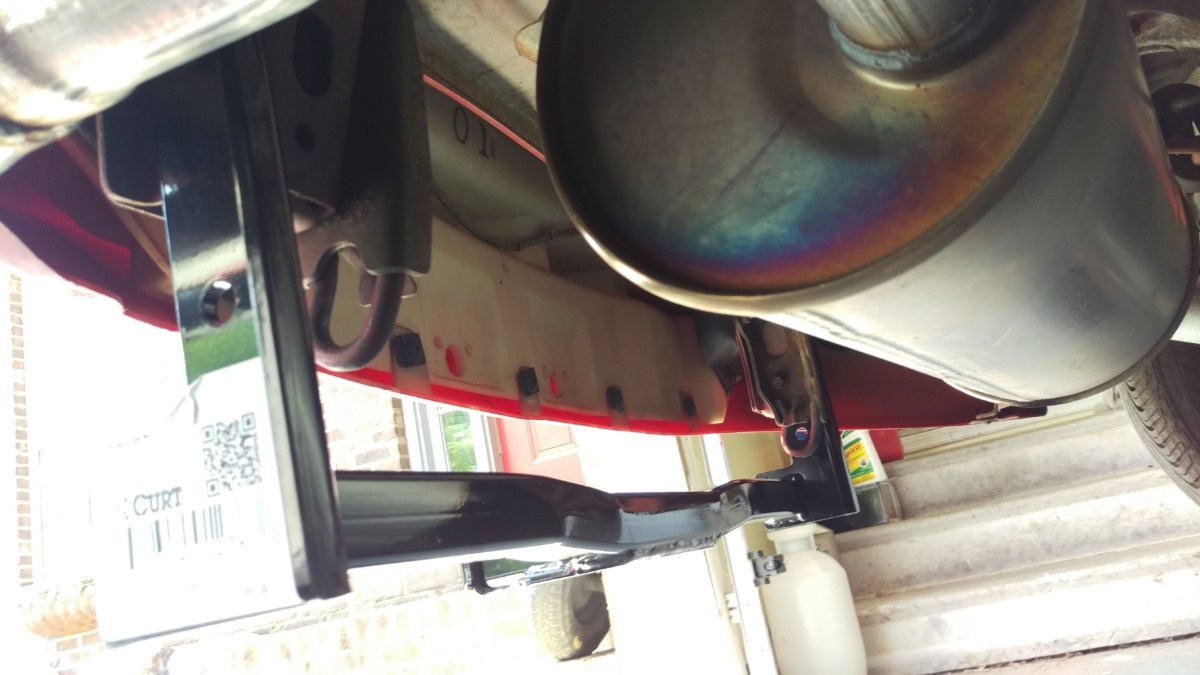
This is where the hitch will be installed
The hitch installs with 4 bolts in the location shown. There are two ways to do the install of this particular hitch, and I highly recommend the second way.
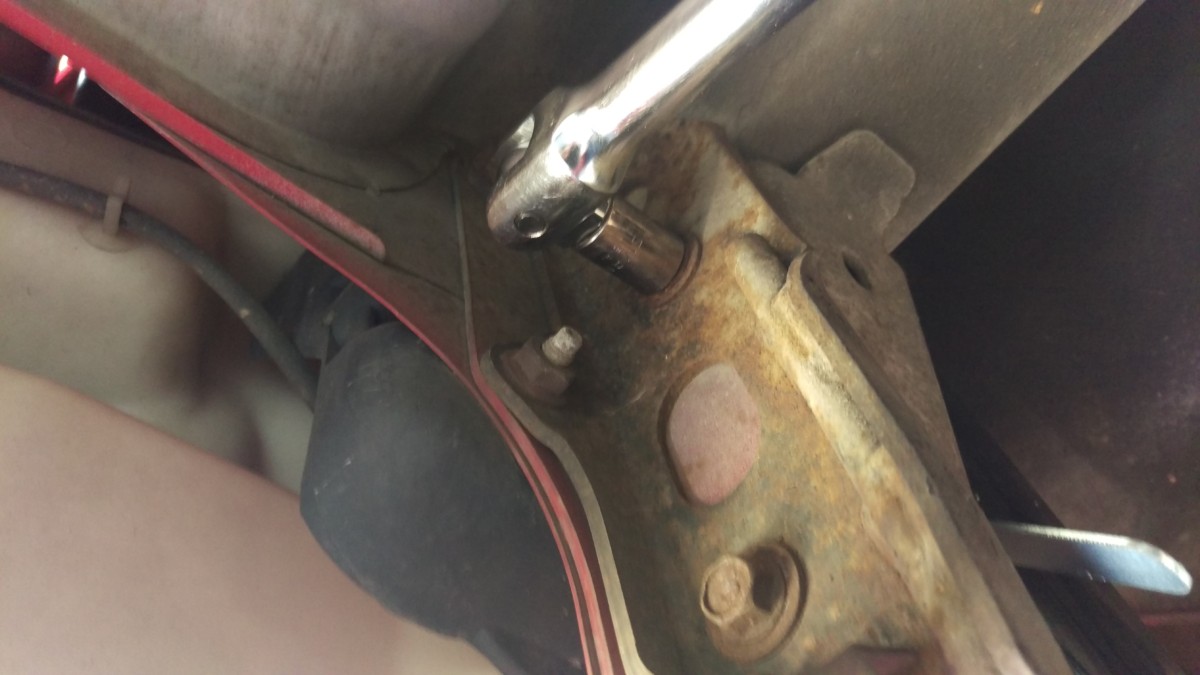
Installation – the stupid way
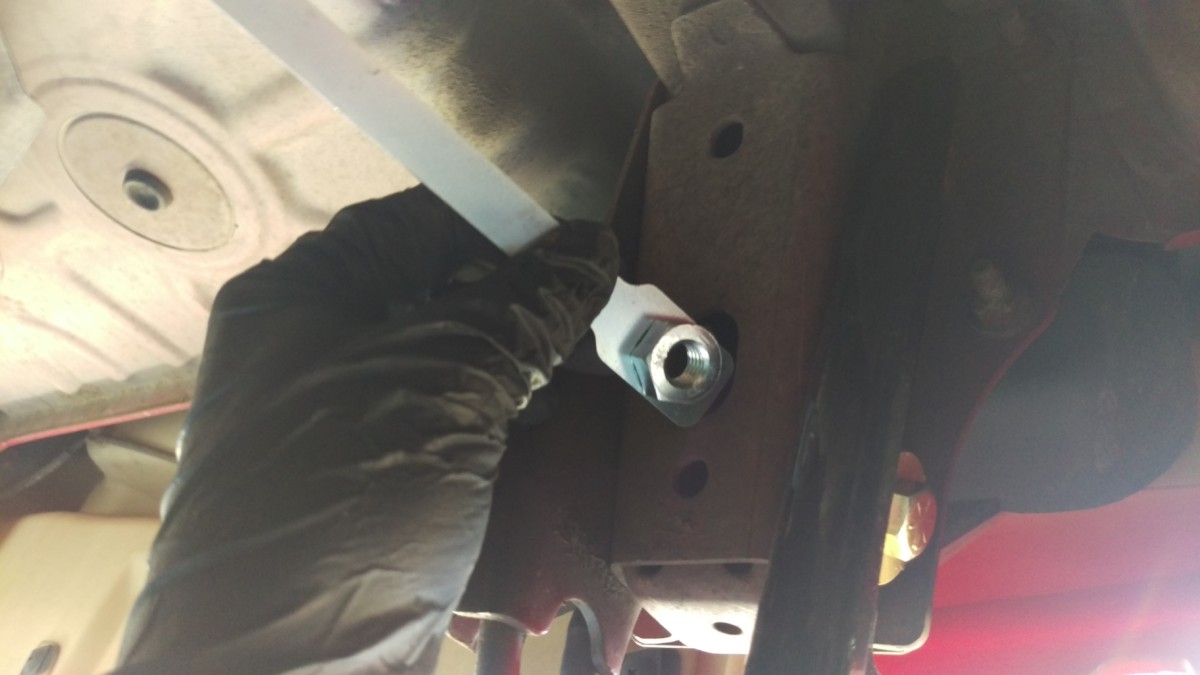
This stupid strap nut thing is a horrible design
The way Curt intends for you to install the hitch is to use these 4 strap nut things. I’m not sure what they’re real name is. They’re a bit of aluminum with a nut loosely welded on the end. The idea is that you stick them in the rear tow hook support bracket as shown, put the bolt in from the outside, and tighten it up.
This is dumb
So many problems here. For one thing, getting this lined up and threaded in is extremely annoying, especially for the upper bolts. If you manage that, the strap itself will curl up as you try to tighten. There is not nearly enough resistance to properly torque the bolt. And all of this is done to avoid drilling through the other side, which is what I ended up doing.
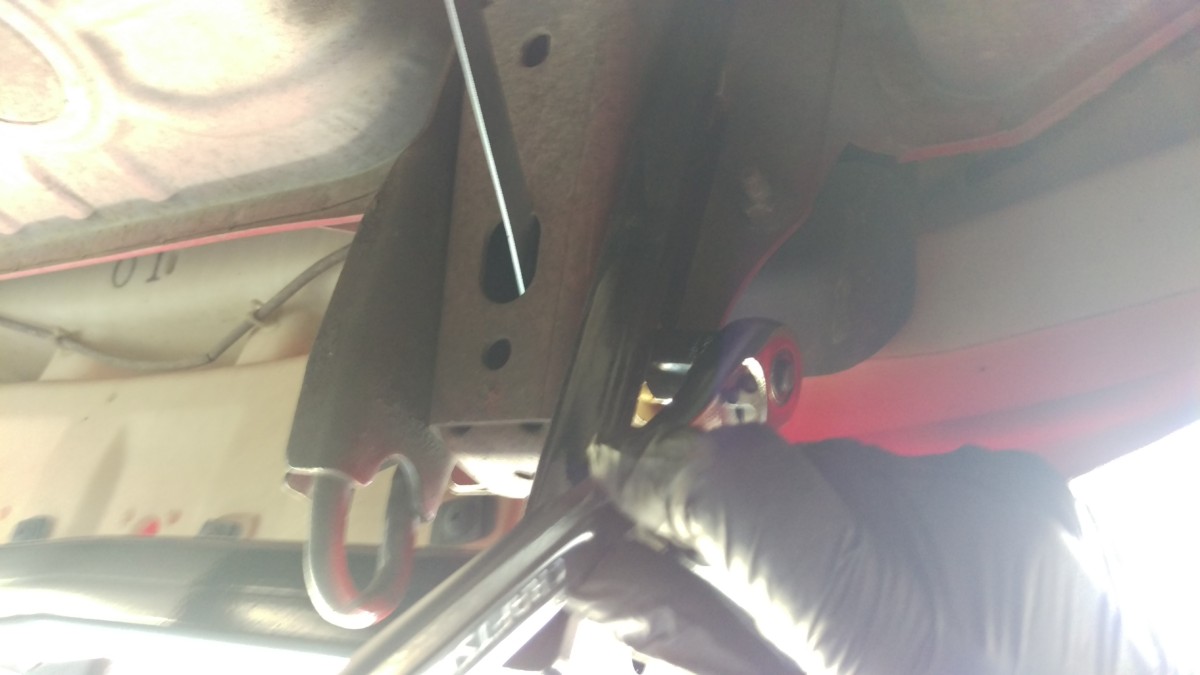
Installation – the not stupid way
First, undo the tow hook bolts
The holes used by the four hitch bolts exactly match the tow hook bolts on the other side. Thus, it’s a whole lot easier to simply drill the tow hook bolt holes out a little larger, and run a big grade 8 bolt through the whole mess. To do this, start by undoing the rear tow hooks. You can even re-install these if you’d like afterwards.
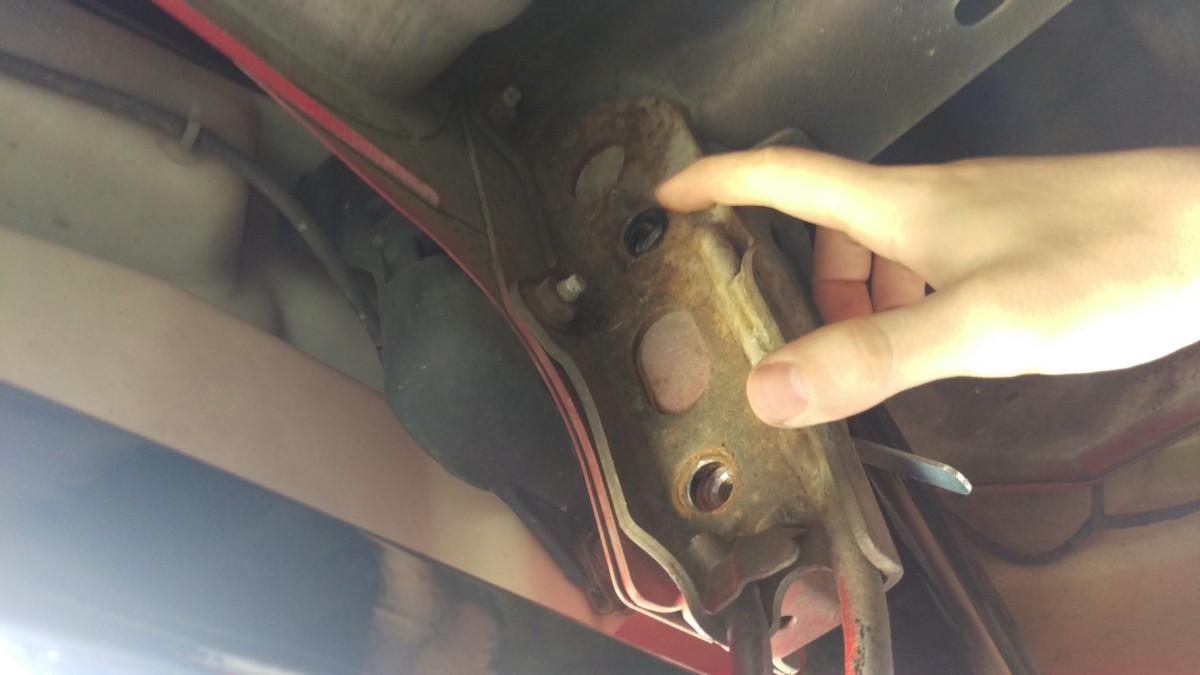
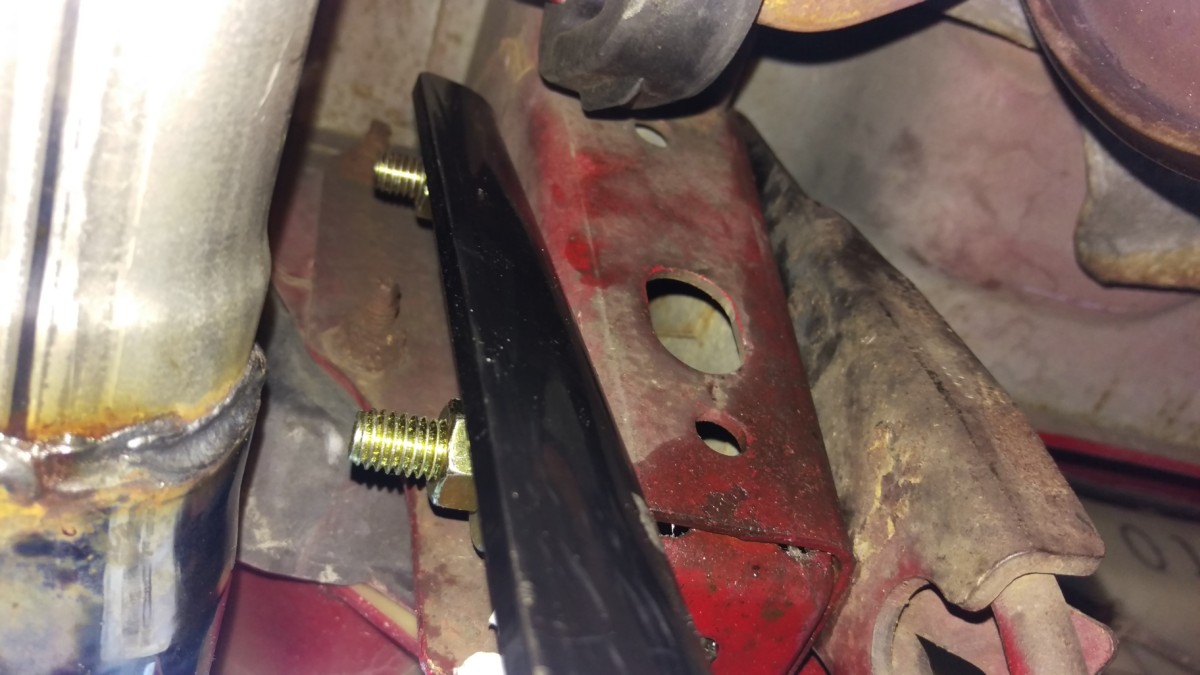
The target bolt holes
Here are the two bolt holes to be drilled out.
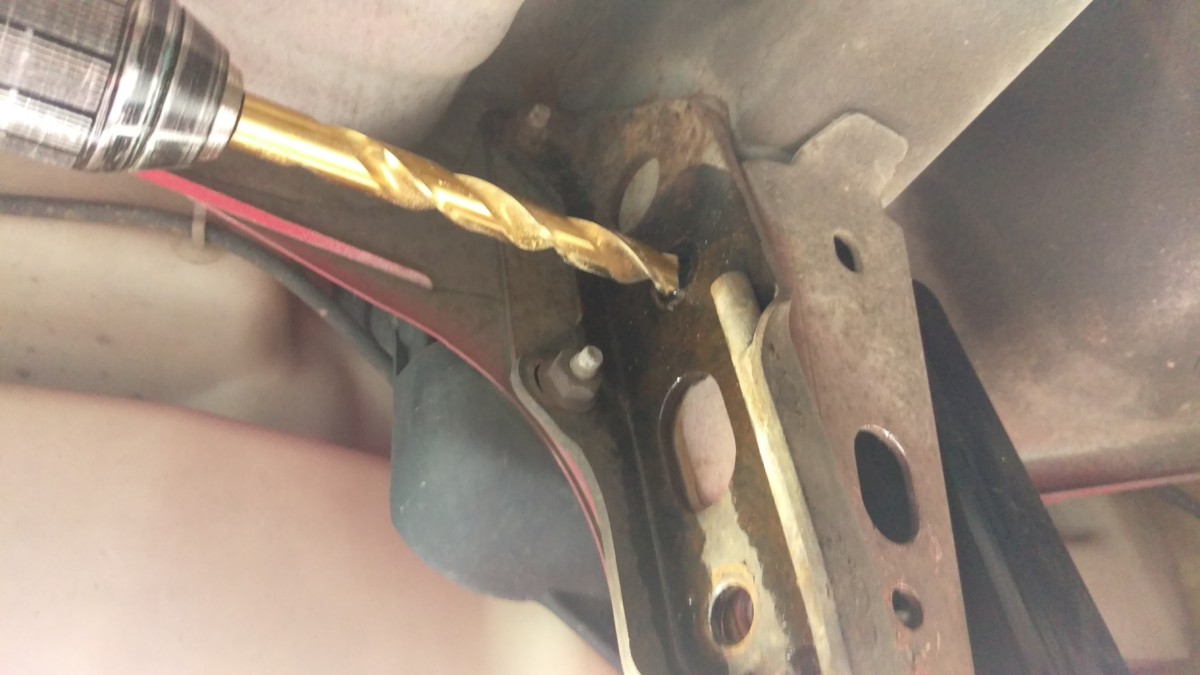
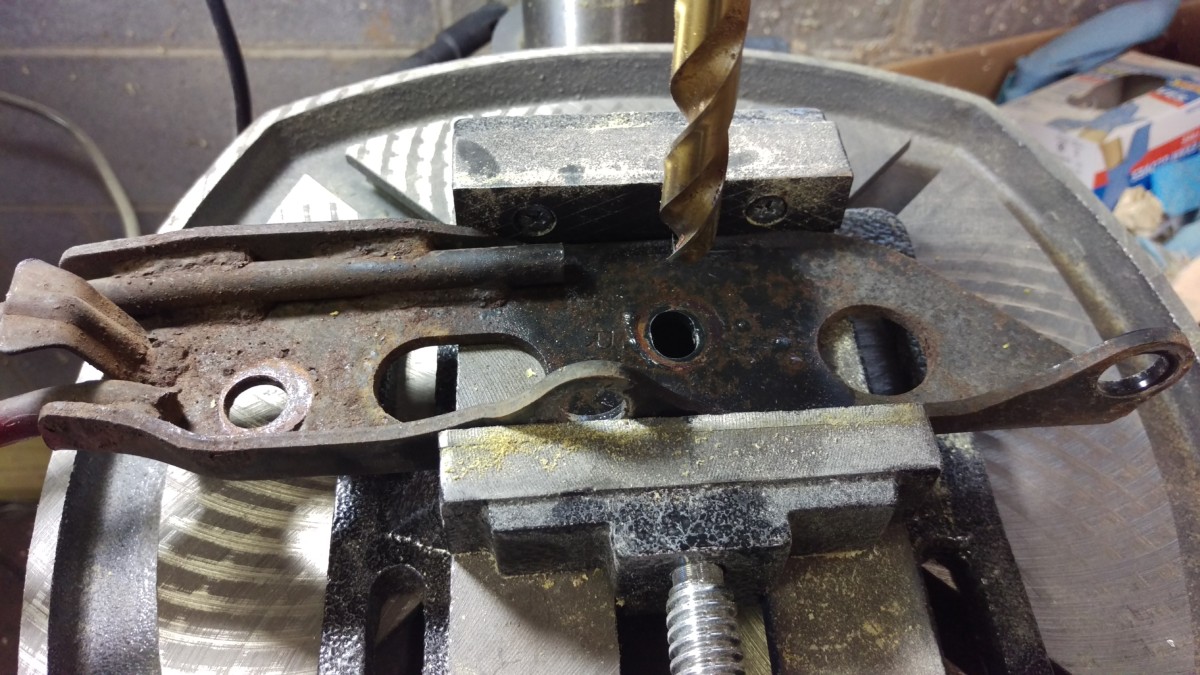
Drill to the same size as the other side
I simply drilled from the inside. The bolts were 7/16″ – highly recommend using a cobalt or titanium metal bit for this. Using high speed steel to drill steel takes awhile and wears the bits out. Also, as always with drilling metal, put some kind of lubricant down to keep it cool. You’ll notice that I left the tow hooks on as I drilled. This was intended to keep them lined up properly, but it didn’t quite work as noted below. If you don’t want keep your tow hooks, ignore this step.
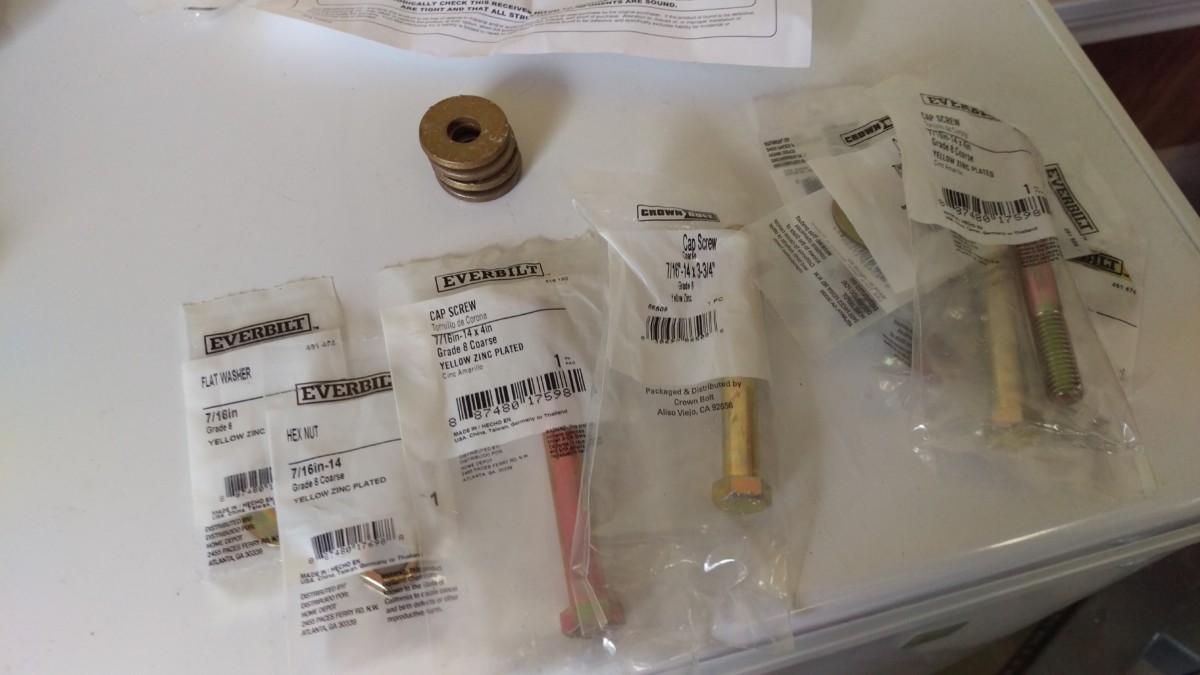
You need to buy new installation hardware
Obviously, the bolts and nuts that came with the hitch won’t be long enough, so you need to take a trip to the hardware store and grab a few grade 8 bolts and nuts in the same diameter, but longer. The ones I got are pictured. Grade 8 might be overkill, but it sure won’t hurt.

Two of the washers won’t quite fit without a flat spot
The washers need a flat spot ground into them to fit flush, otherwise they will hold the bolt off of the bracket. This is quick and painless with an angle grinder, although you could also use a dremel in a pinch. Once this is done, you’re ready to bolt it up, unless you want to keep the tow hooks. If you do, skip down to the next section.
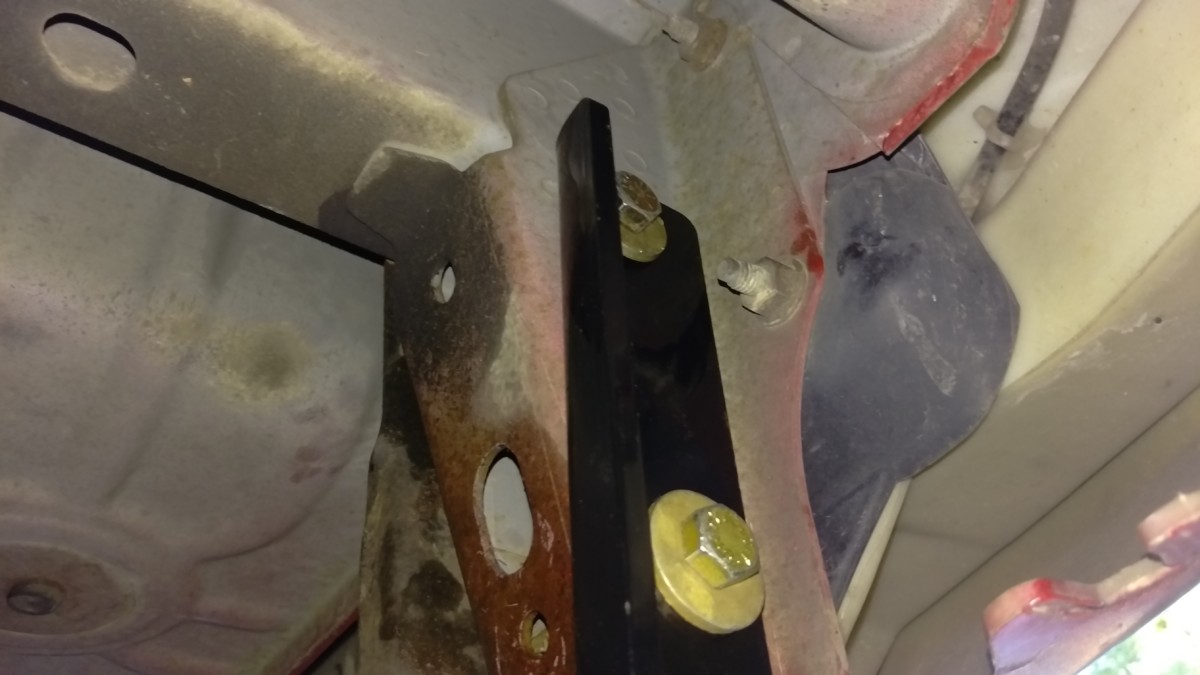
Installed – Driver
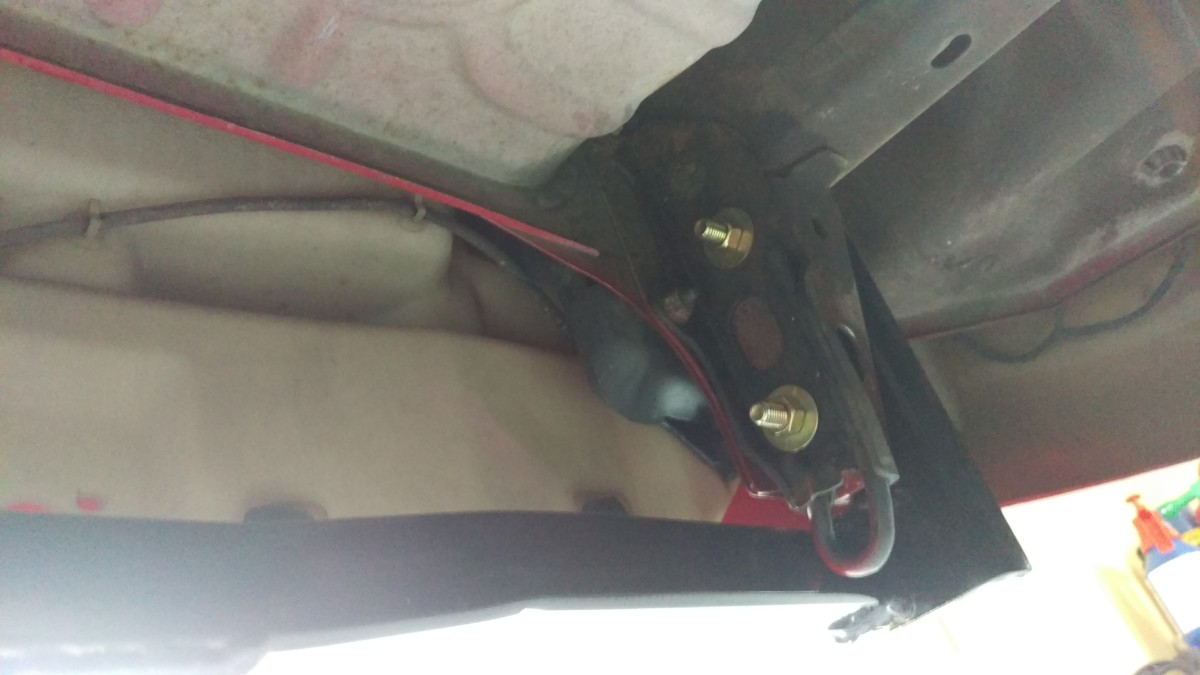
Installed – Driver inside

Installed – Passenger inside
Installed – Passenger
Once that’s all wrapped, you can run the bolt through the whole, washers on both ends. This allows you to torque it down properly and easily remove it later if desired. If you wanted to revert to just the the tow hooks, you can leave the grade 8 bolts in place as they are.
Optional: Keep the tow hooks
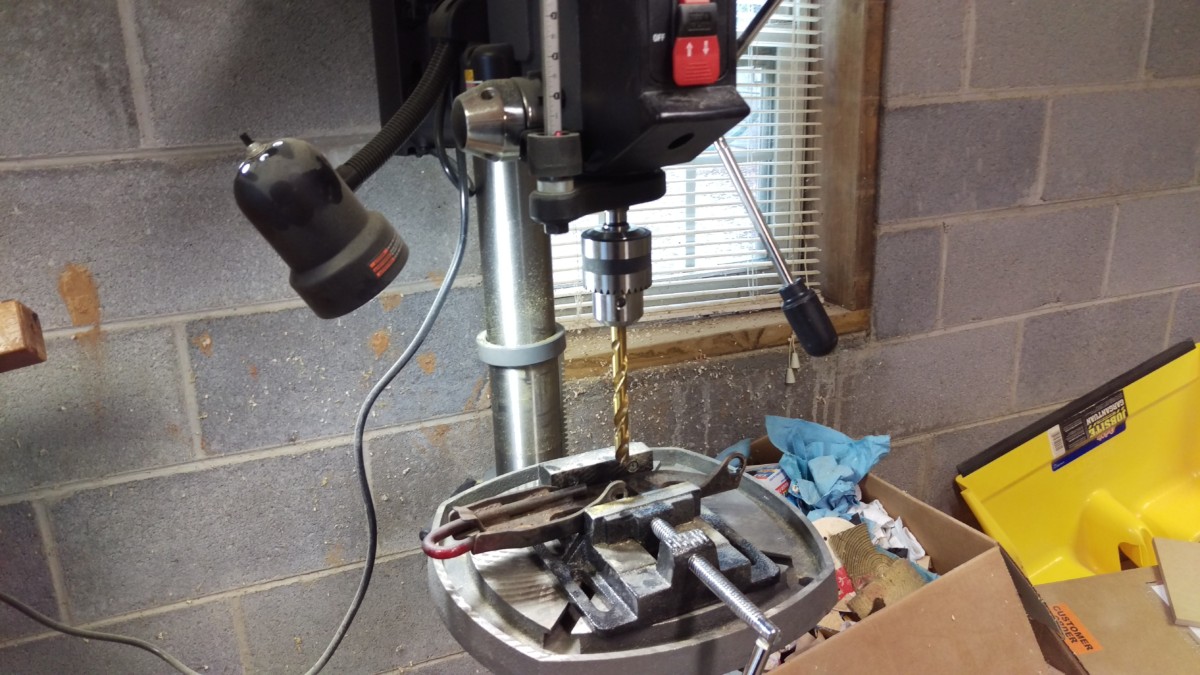
Drill presses are the greatest thing ever
Slow speed with plenty of oil
If you don’t want your rear tow hooks, you can just put them on a shelf or chuck them in the garbage. If you’d like to keep them, I found that they need to be drilled out to a slightly larger size, such as 1/2″, to line up with the bolt easily.. I did this on my drill press, although you could probably do it with a hand drill, just not as easily.
Wrap-up
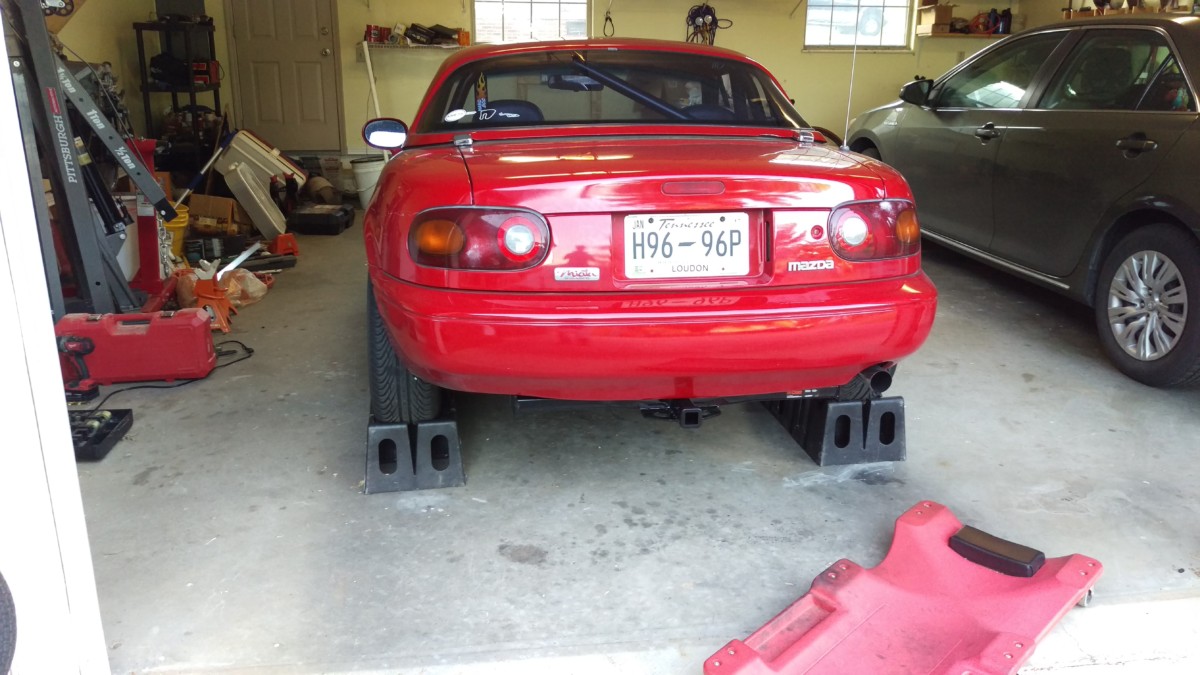
The hitch with car on ramps
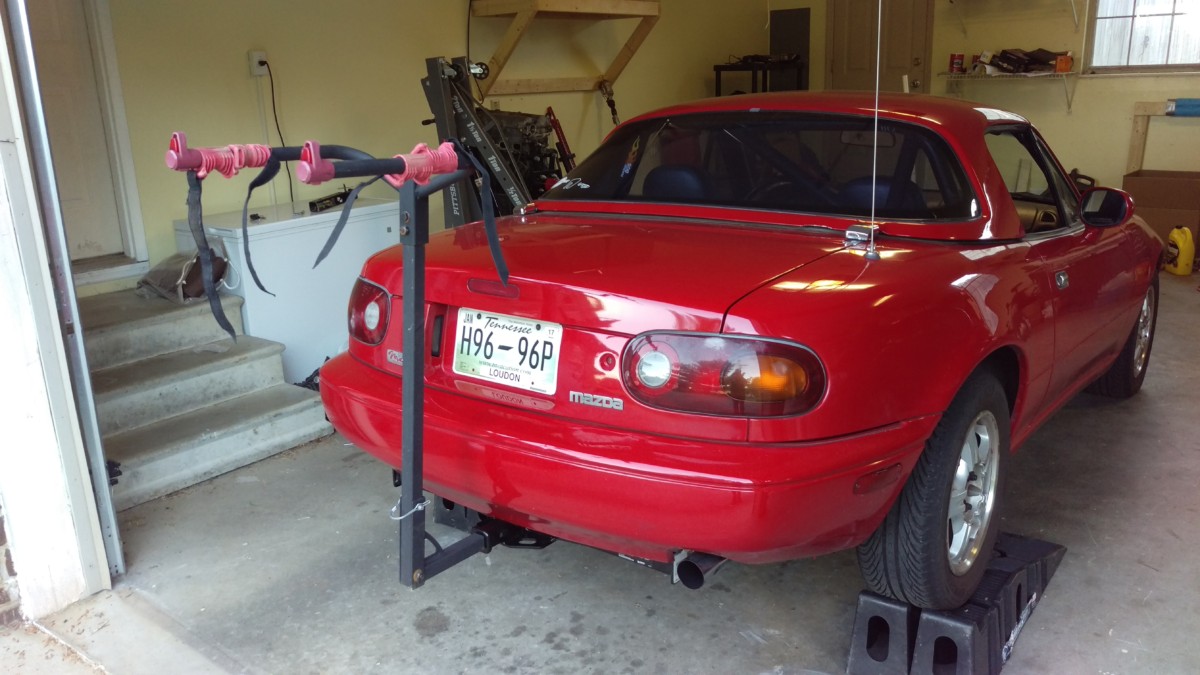
The hitch with the old bike rack
In all, I’m happy with this product
The only note on that I have is that for whatever reason, perhaps because of the low profile of the Miata, the style of bike rack shown tends to make the bike lift up at the bottom going down the highway. It stayed on, but this prompted me to upgrade from the crappy $40 Harbor Freight bike rack pictured, which I had bought five or six years ago. I went with a Swagman XC2
My biggest regret with this hitch is how far it sticks under the car, because the hitch now scrapes then I load the car on my trailer for track day. On the plus side, it guards my actual bumper from scraping, and the underside of the hitch can be touched up with spraypaint very easily. An additional bonus is that I find lifting the rear of the car by this hitch to be very easy, as opposed to trying to get my floor jack to the differential, where there’s not much room.
(Note here: folks will tell me “don’t lift by the hitch, the Miata is only rated for 200 pounds of tongue weight!” Full disclosure, I am making zero guarantees and have to officially recommend you use the factory jack locations. That said, know that the tongue weight is based on what the car’s rear suspension can handle, and we’re talking about a car that has really weak rear springs from the factory. This is not the same as the amount of weight the hitch can hold. Based on where it’s mounted, I don’t see any issues with this, and I see zero flex when I use it as a jack point. That said, I always put jack stands under the pinch weld once the car is in the air before working on it.)