Quickjack BL-5000SLX Setup Guide
The Miata is getting an engine swap soon. In advance of that, I wanted a way to get the entire car in the air. After much deliberation, I bought a Quickjack BL-5000SLX
I found the setup trickier than it had to be. This Quickjack BL-5000SLX setup guide documents the gotchas I found. These instructions should work for any recent model of Quickjack.
Tools and Supplies Required
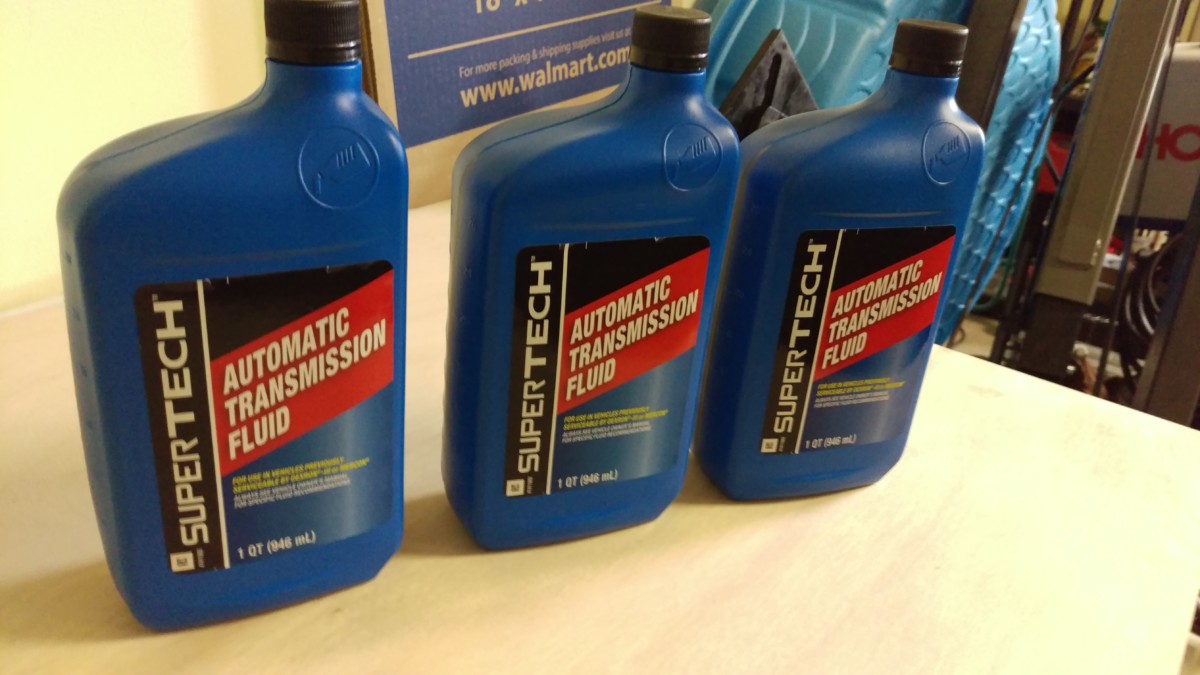
Cheap ATF from Walmart
You don’t need a whole lot of tools to set this up. It really boils down to a 5mm allen wrench


You also need an air pump, such as a regular bike pump
Prepping the Power Unit Quick-Disconnect Fittings
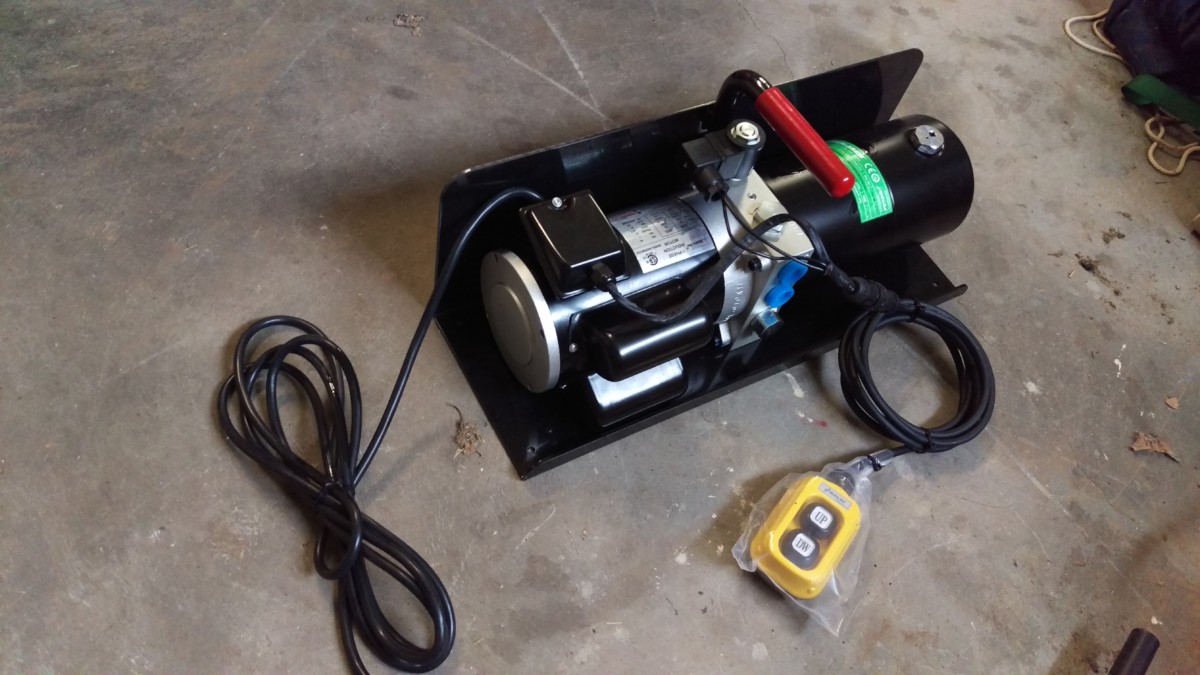
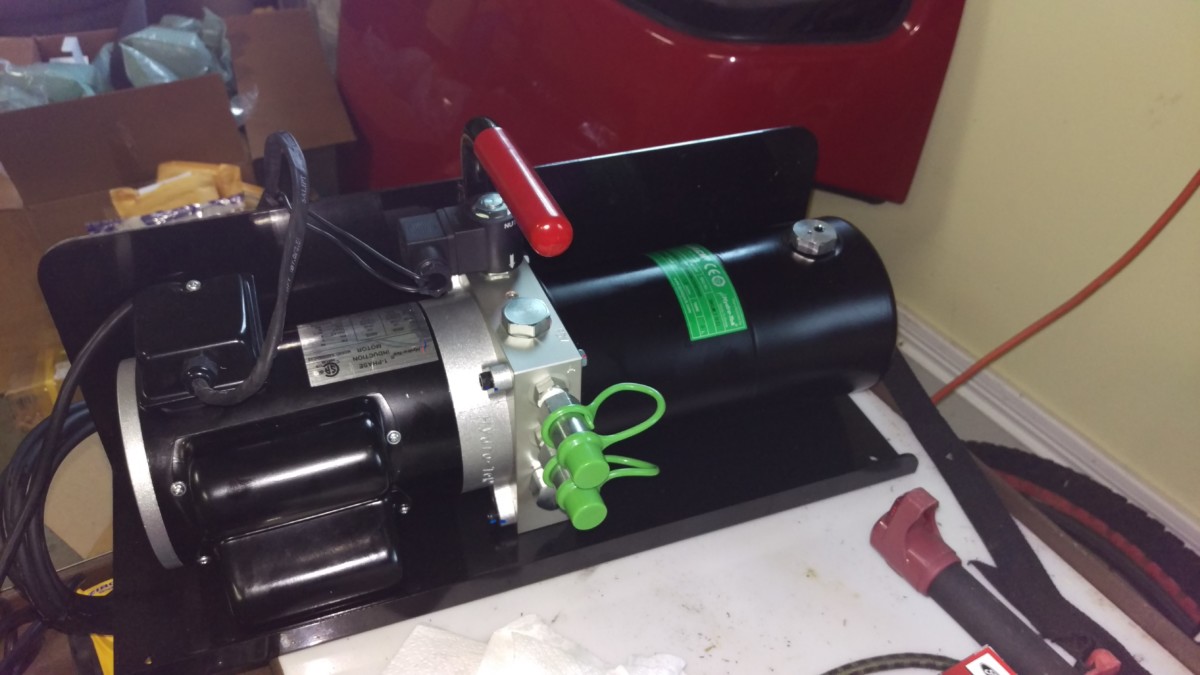
The power unit as it is out of the box
The first thing to do is to install quick-disconnect fittings on the power unit. Here it is fresh out of the box.
It’s worth noting that I have the made-in-Korea unit with the yellow control. Apparently these are more reliable than the ones made in China that have an orange control, according to the internet.
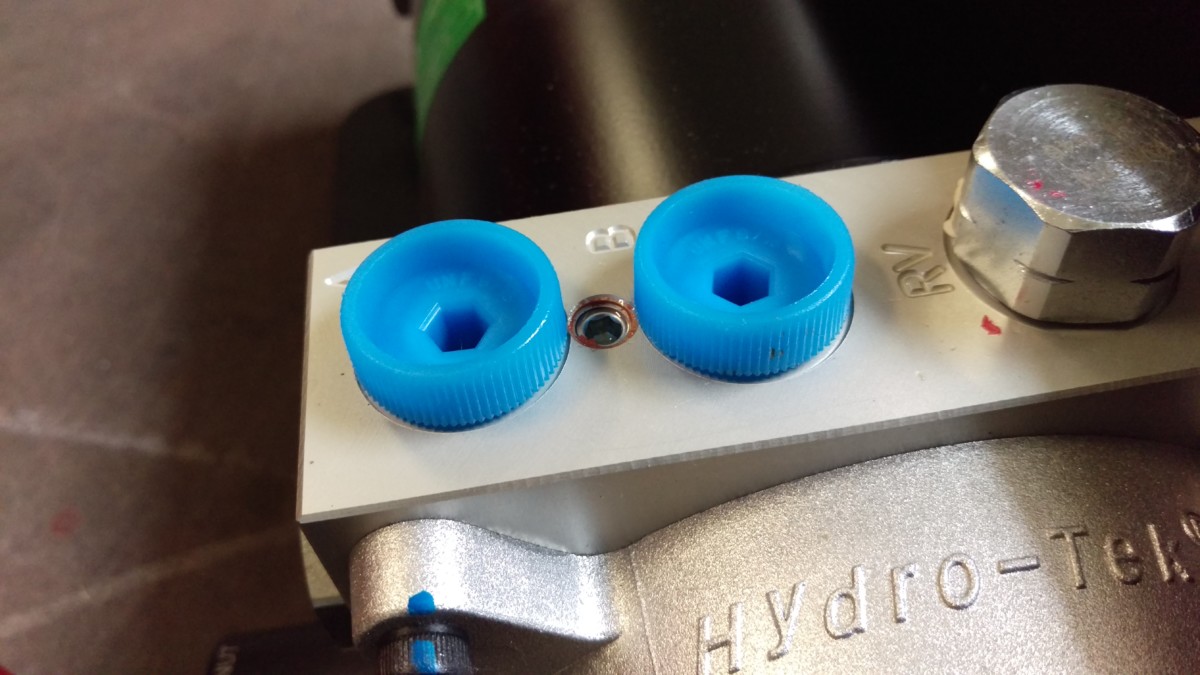
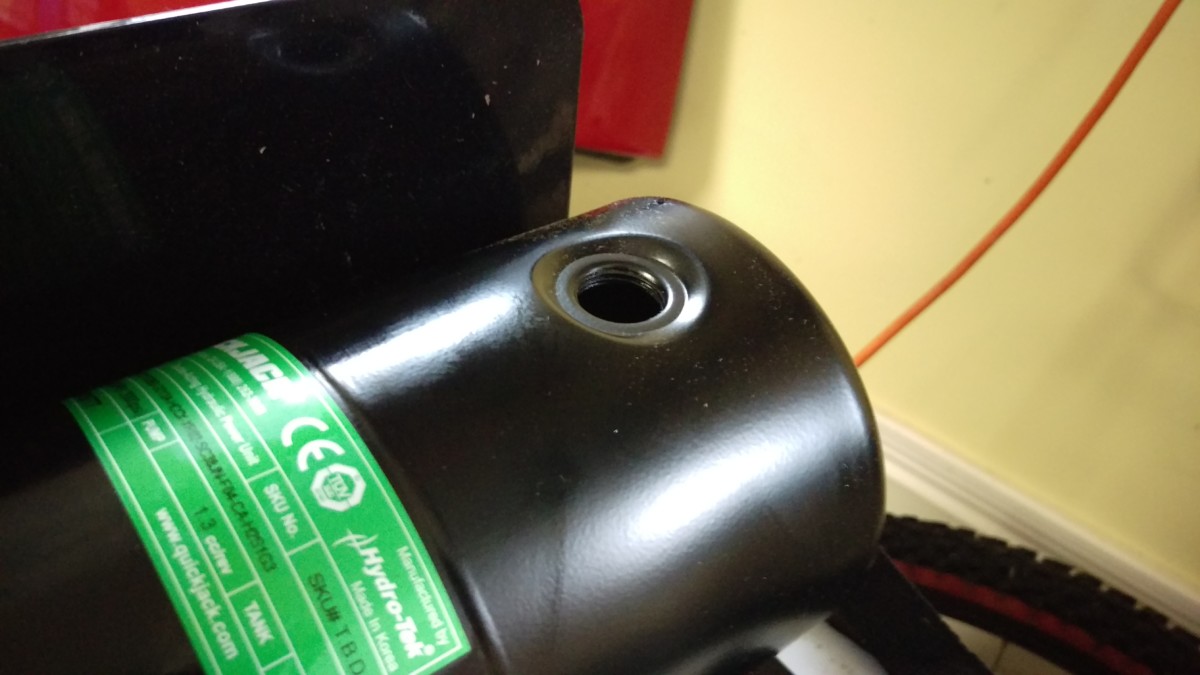
These caps cover the hydraulic ports
The first step is to remove these blue caps. They have allen wrench slots, but I found that they simply unscrewed by hand. They can be discarded after removal.

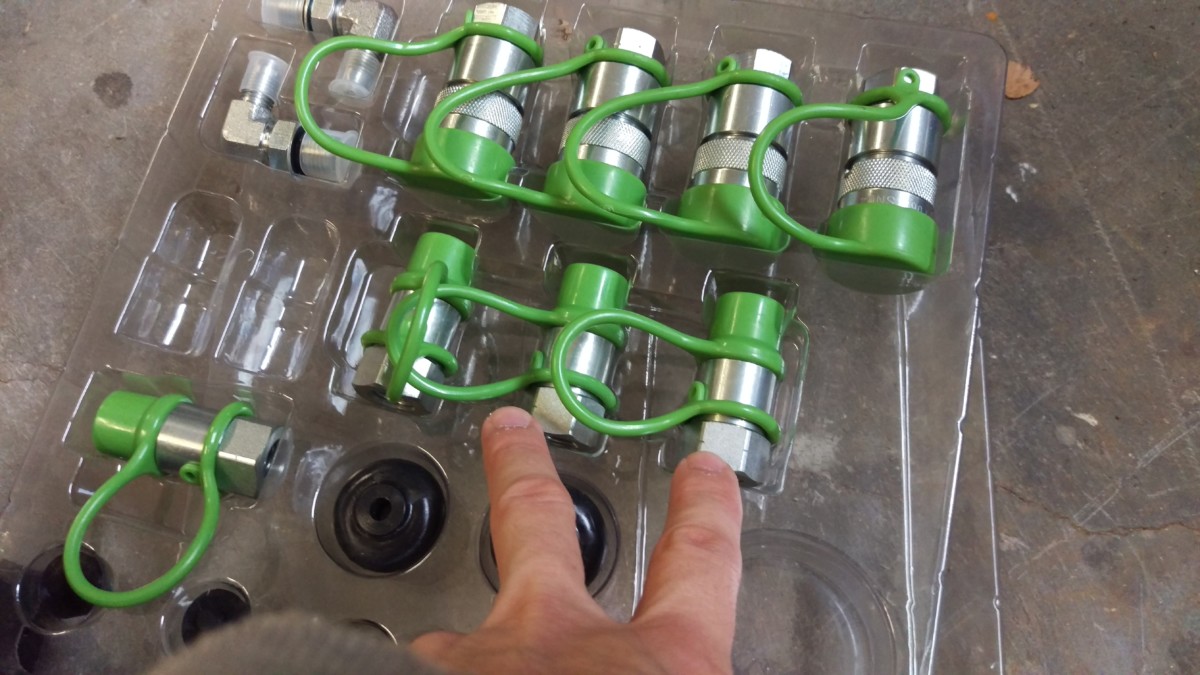
A big box of fittings

Adapters for power unit
The QuickJack should have come with this box of fittings. There is also Teflon plumber’s tape, and some rubber pieces. I don’t actually know what the rubber pieces are for.
In any case, you need to pull out the two straight adapter fittings in the second photo.
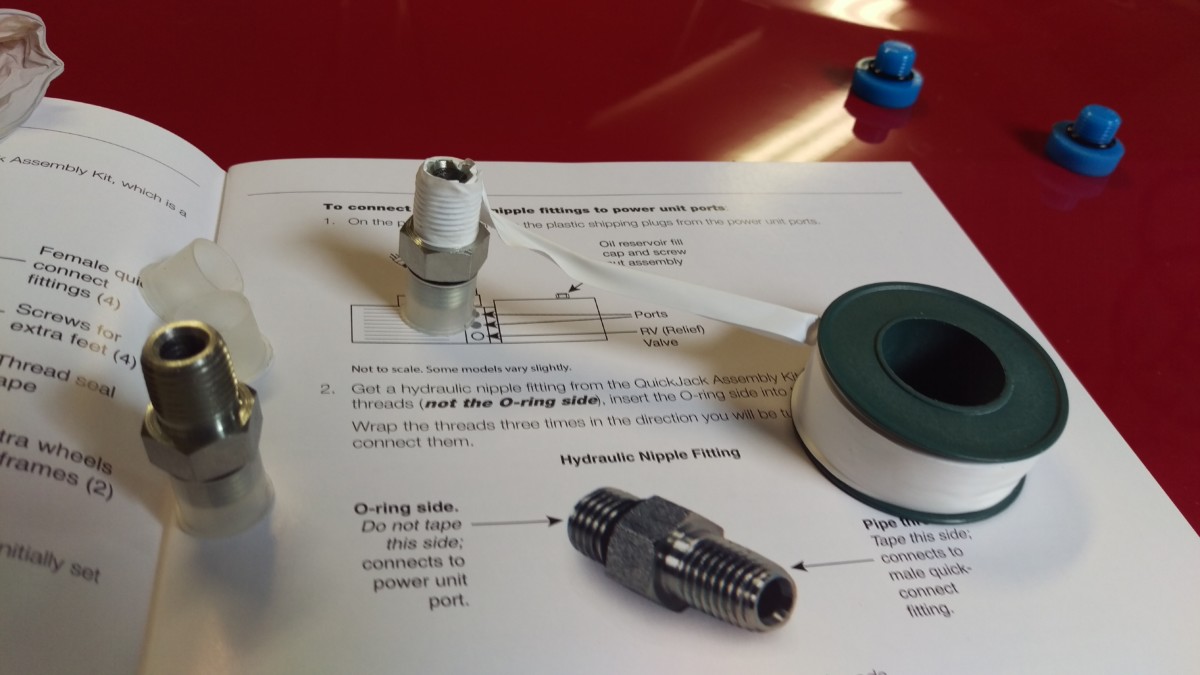
Teflon tape around the side without an o-ring
Both of these fittings should be wrapped in the Teflon tape on the side shown. This is the side without the black o-ring. Wrap it in the orientation shown, so that the tape won’t be unwound when the fitting is screwed in. I wrapped it 3-4 times.
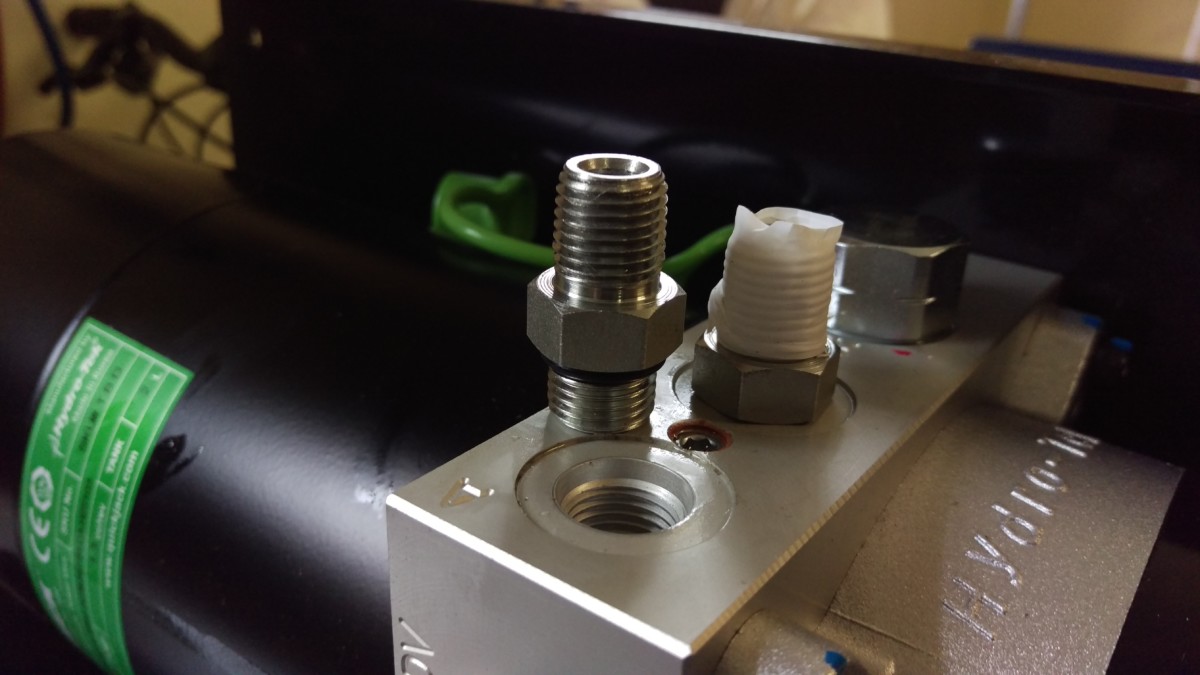
Install the adapter Teflon side out, o-ring side in
Now you can screw the fittings into the power unit. Install them o-ring side in. I found out that they will actually screw in either way, which was very confusing for the next step! I gently tightened them with a small crescent wrench. Like any plumbing fitting, you do not want to over-tighten these or the seal the o-ring makes will be broken.
Use two of these quick disconnect fittings
Now you want to grab two of these quick disconnect fittings.
Install these on the Teflon side of the adapter
Go ahead and screw one of these to each of the Teflon sides of the adapters. Like the adapters, they should just be snugged down gently. No pet gorillas required or they will leak. I pulled off the green dust covers just to make tightening them easier.
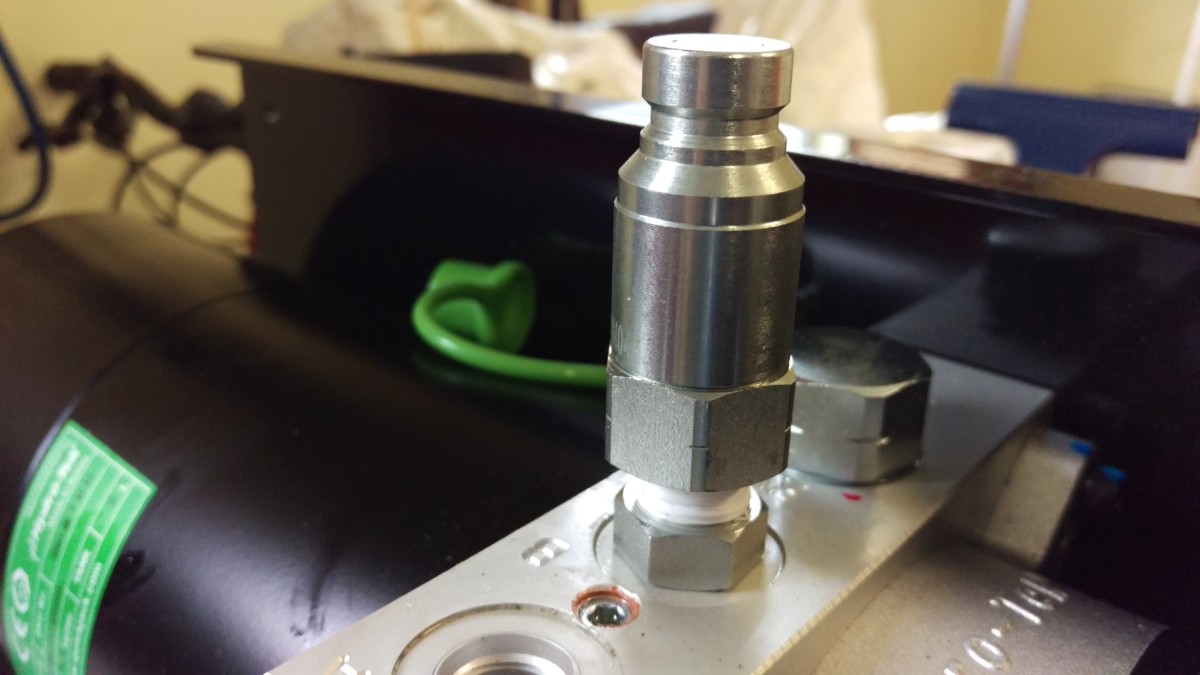
Ready
The picture shows them ready to go. Note that the quick disconnect fitting won’t go all the way down on the adapter.
Filling the Power Unit with Fluid
Put the power unit right side up before filling
The power unit needs to be filled with fluid. As I said earlier, I used some $2 Walmart Supertech ATF. 3 quarts is plenty.
Fill from this hole
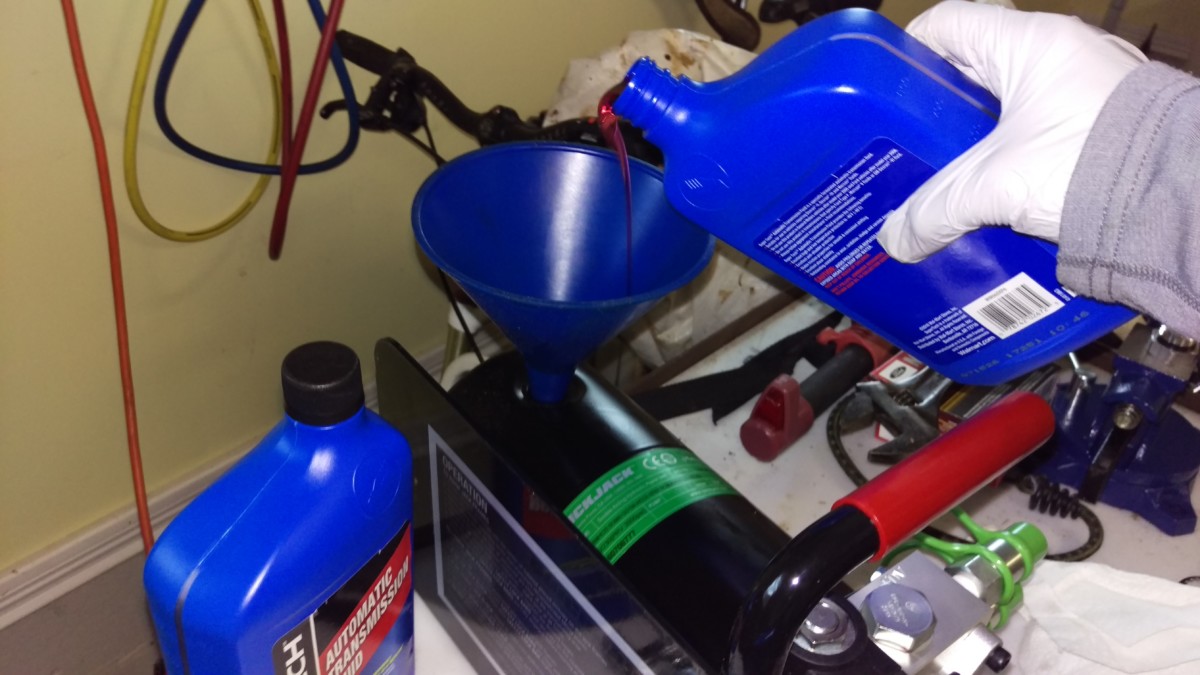
Use a small funnel
The ride side of the frame has a fill plug that can be removed with a wrench. Once it’s out, use a small funnel

Note that it will probably flow slowly, as the venting isn’t great. At least, it wasn’t on mine.
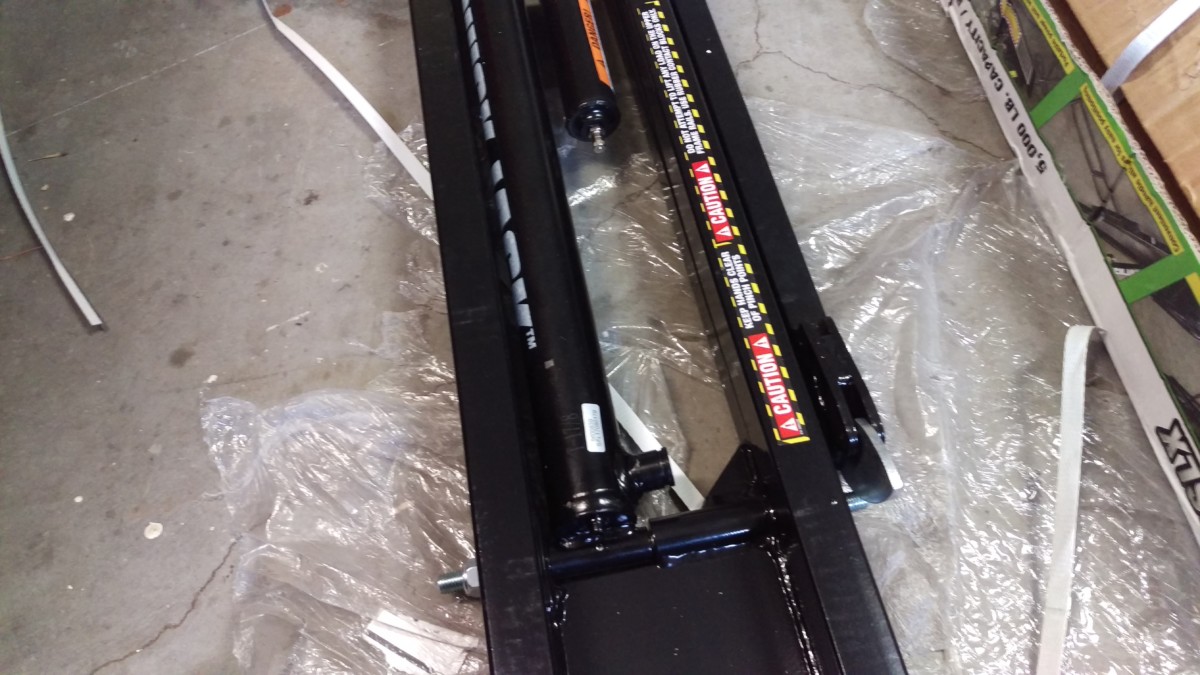
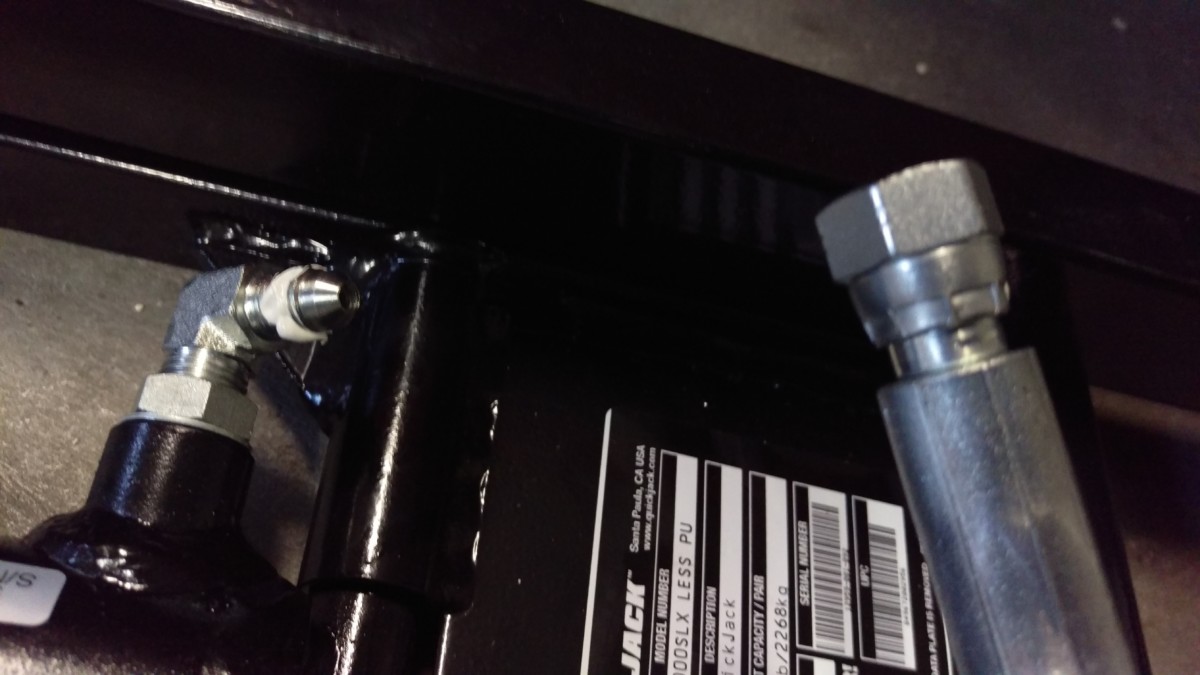
Adding Quick-Disconnect Fittings to the Frames

The frames use elbow adapter fittings
The frames also need quick-disconnect fittings. There are one of these elbow adapters for each frame.
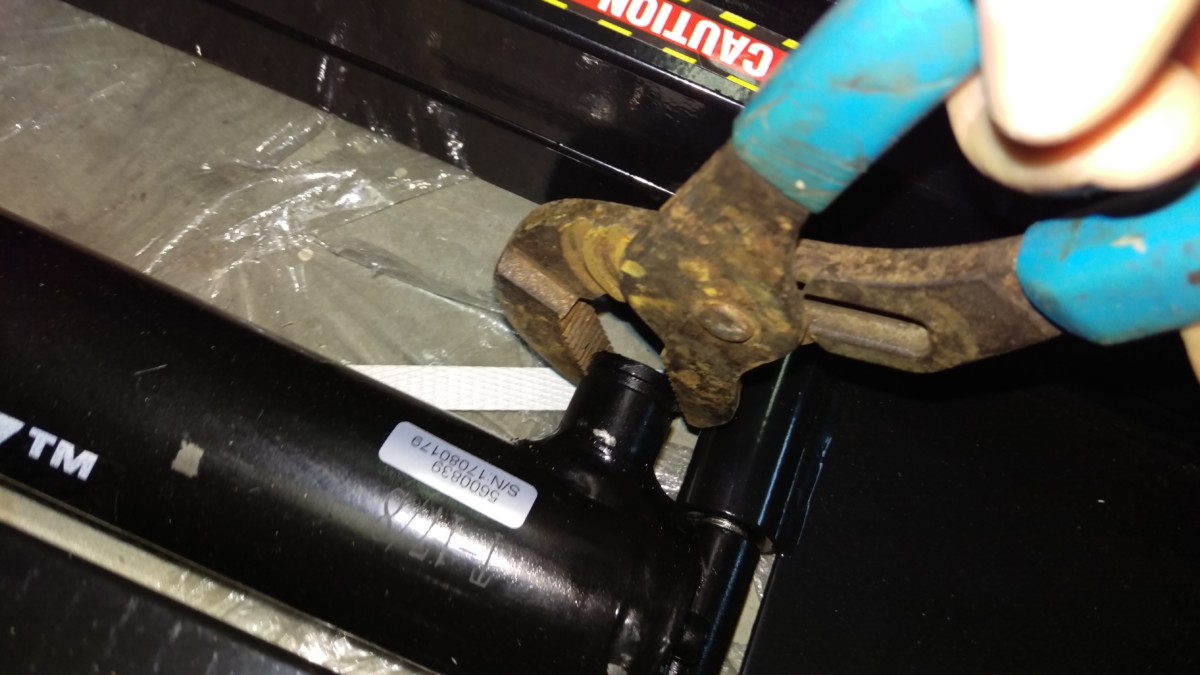
Remove this dust cap from each frame
Perspective shot on its location
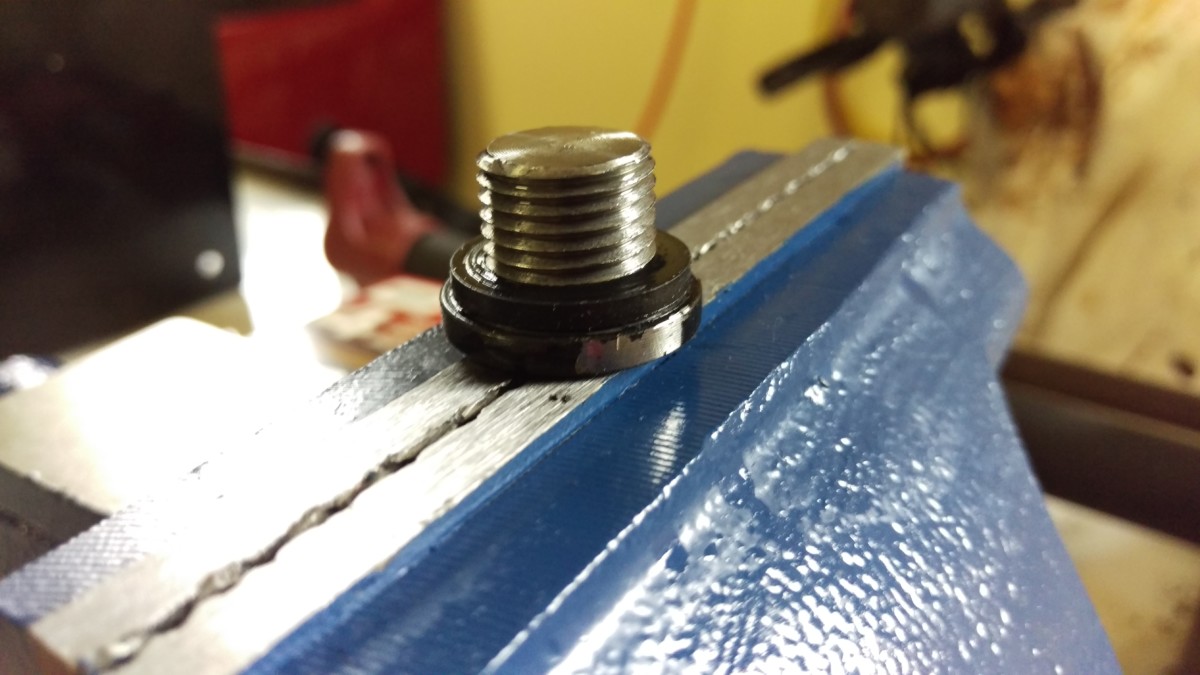
Dust cap after removal
Each frame will have this dust cap on it. It needs to be unscrewed. You can use an allen wrench, but I’m lazy and grabbed a pair of channel-lock pliers instead. They’re discarded after removal, so damage is irrelevant. The removed dust cap is also pictured (before discarding).
Now, as a tip, I’d recommend going ahead and taping the non-o-ring portion of the elbow connector now. it’s annoying to do once it’s installed in the frame.
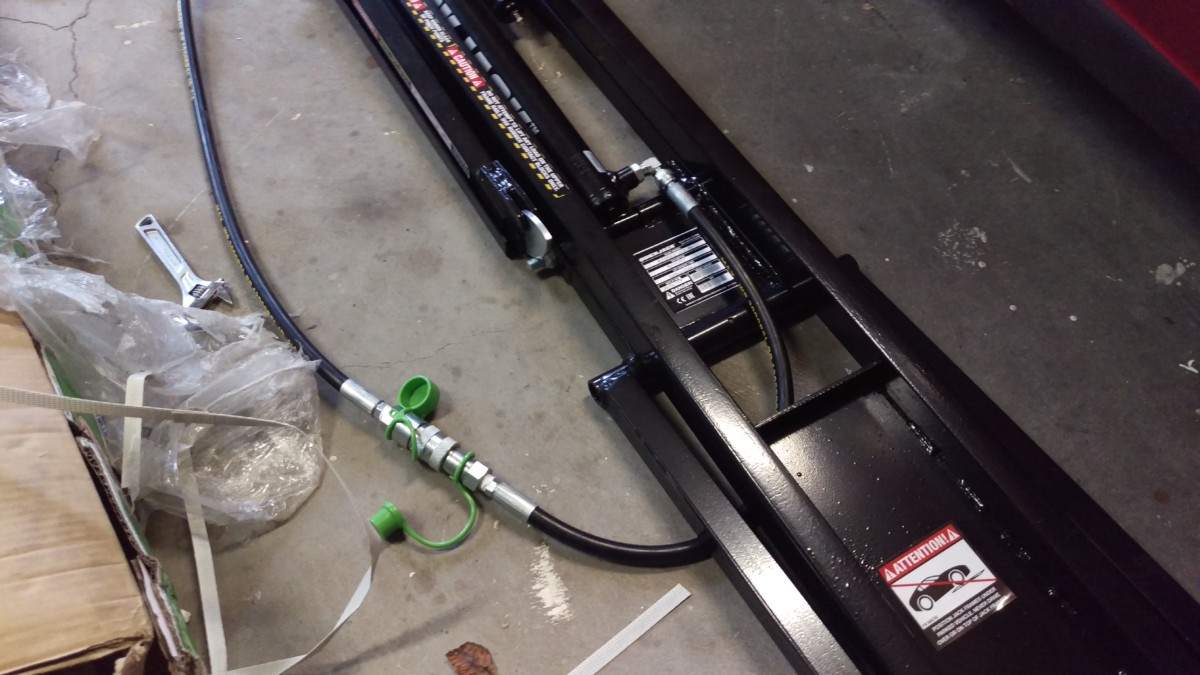
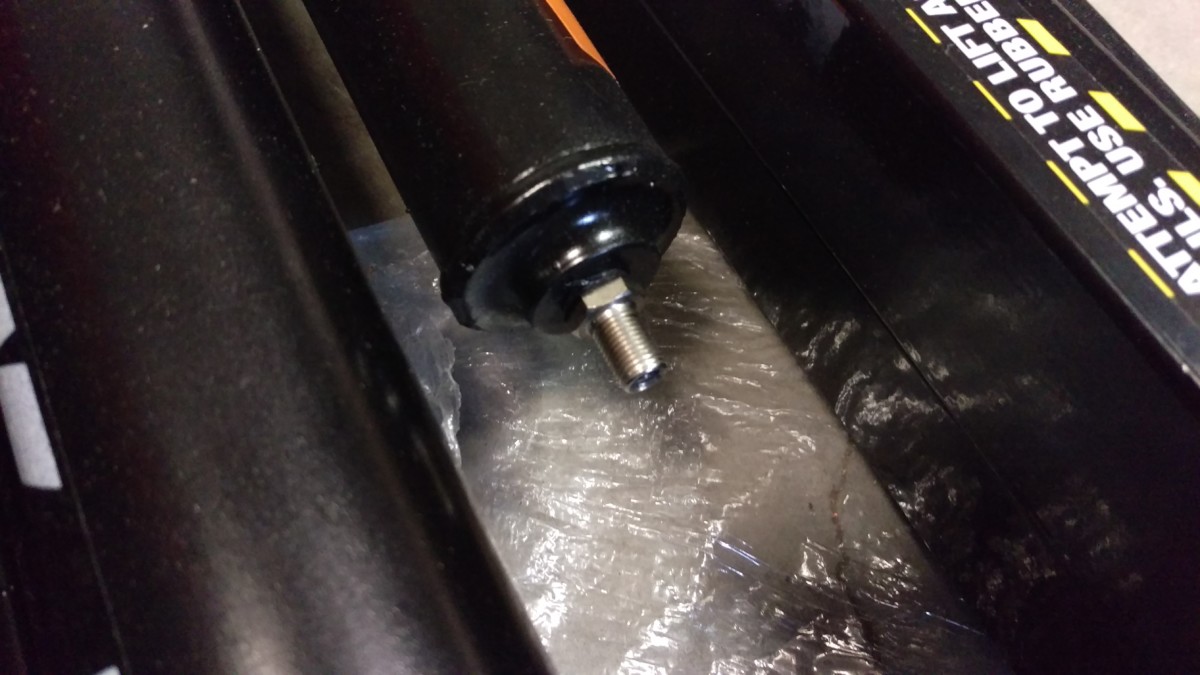
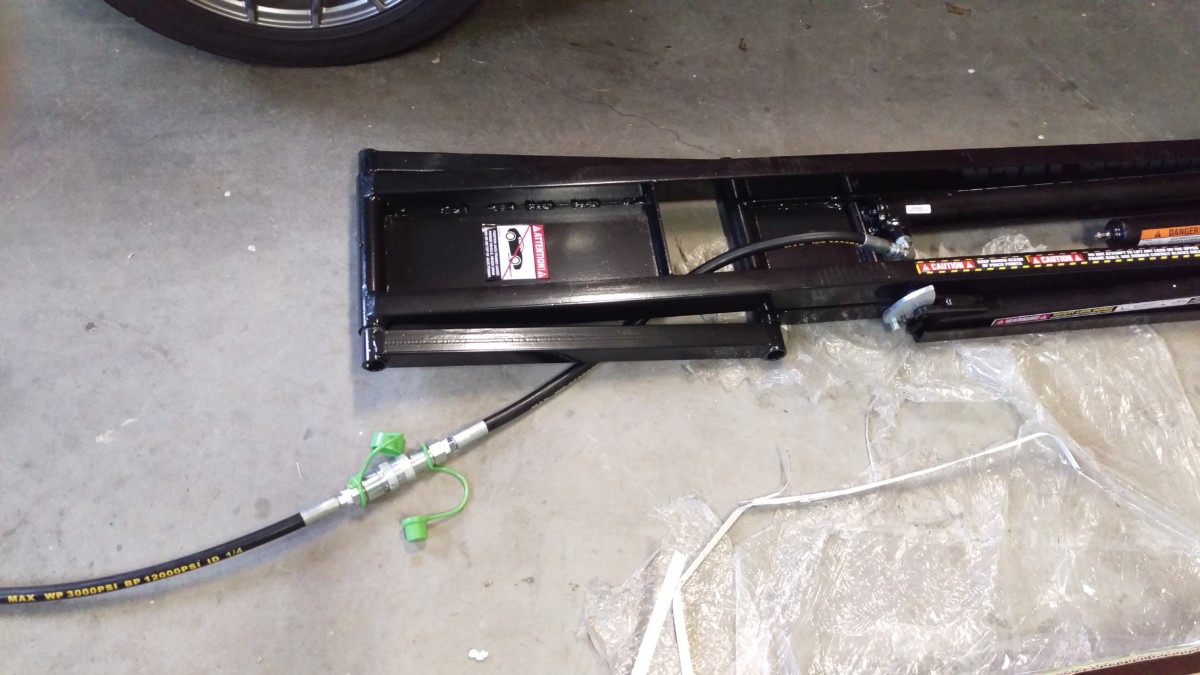
Skipping ahead a second, this is how the hydraulic line is routed
Skipping ahead for just a second, here is how the hydraulic line is routed through the frame. Keep this in mind while installing the elbow.
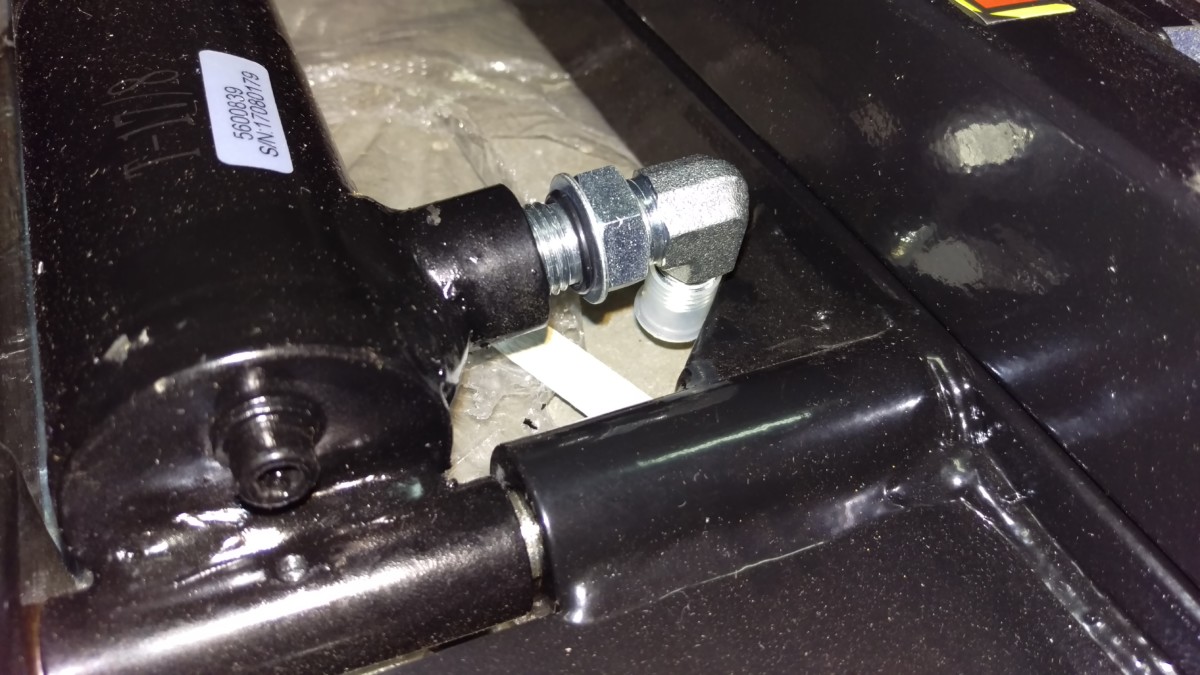
Elbow during install
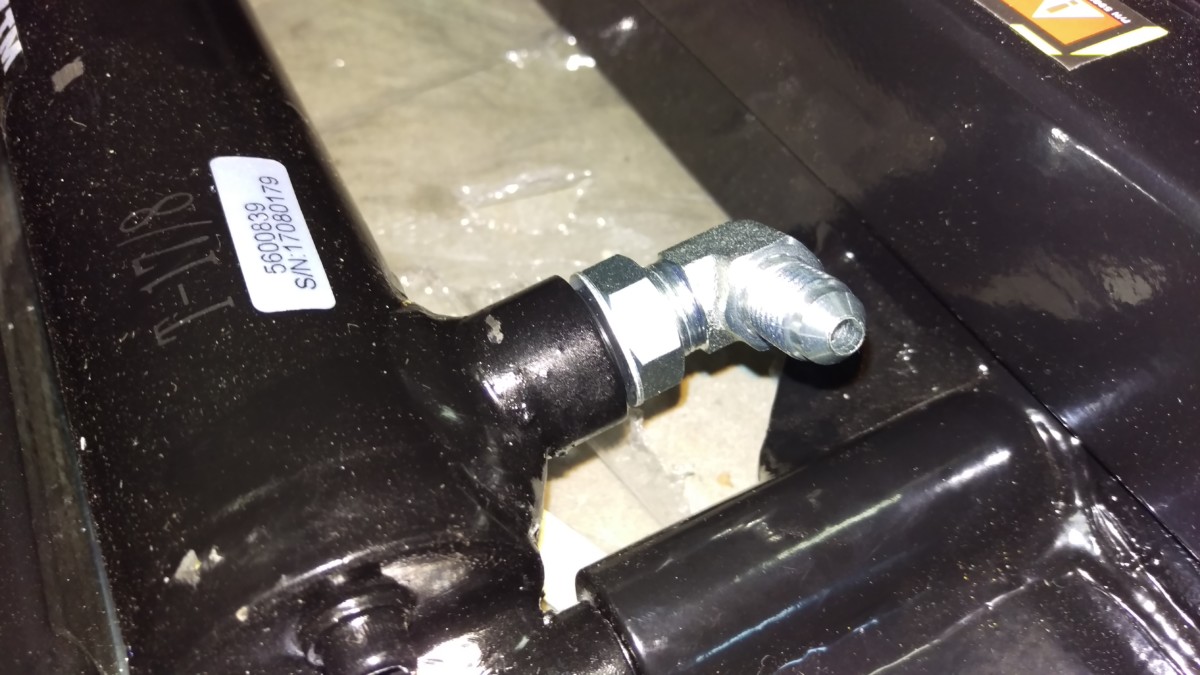
Orient the elbow properly before tightening down
The elbow’s o-ring side is screwed into the frame by hand. I had to remove the dust cap for it to clear, and you may even have to lift the frame up a bit. Once screwed in most of the way, you can tighten the lock nut down using a wrench to secure it in the orientation desired. The pictured orientation is probably slightly high, but it works. Do this with the elbow oriented so the hose can route as shown above in the preview picture earlier.
Prepping the Short Hoses
There are two short hoses that go with the frames
There are two short hoses that go with the frames. They need a quick disconnect on one end.
These two quick disconnects
These two quick disconnects are used. They are identical to the ones used on the power unit. There are four total of this type provided.

Apply Teflon tape to the male end of the short hose
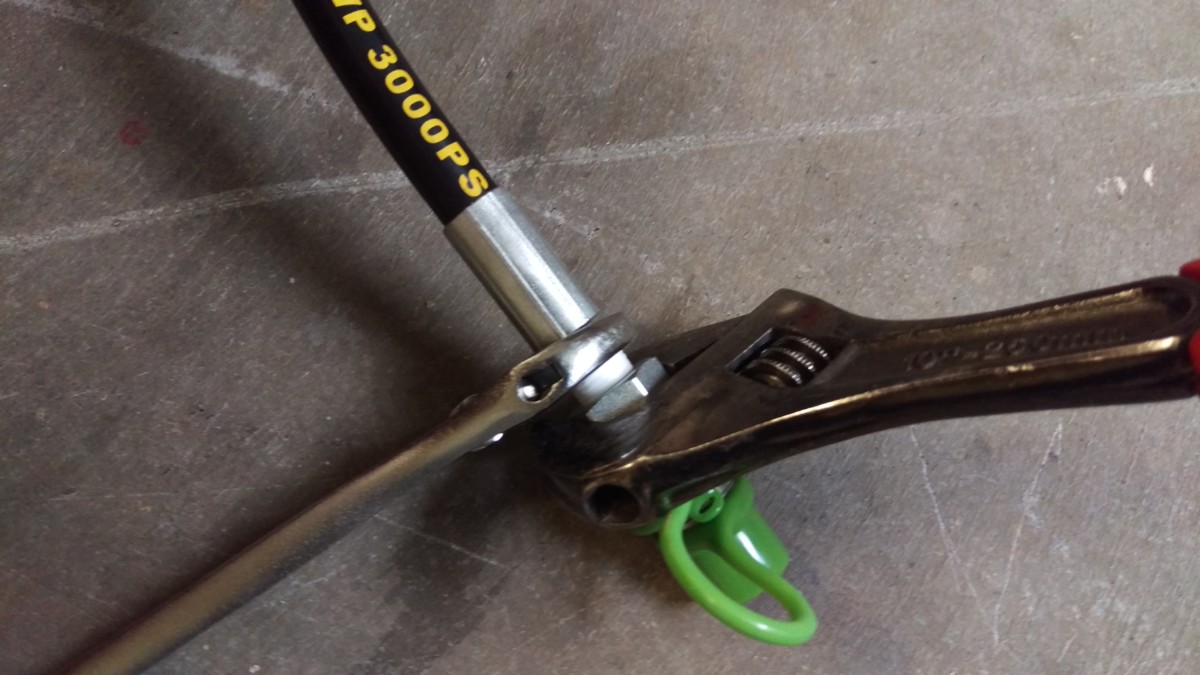
Gently snug it up with two wrenches
The two quick disconnect fittings install on the ends of the short hoses with a male connector. The male connector of the short hose needs Teflon tape applied, just like the power unit adapter fittings. The tape should be wrapped in the orientation shown. Once that’s done, the quick disconnect can be screwed on to the short hose and snugged down using two wrenches as shown.
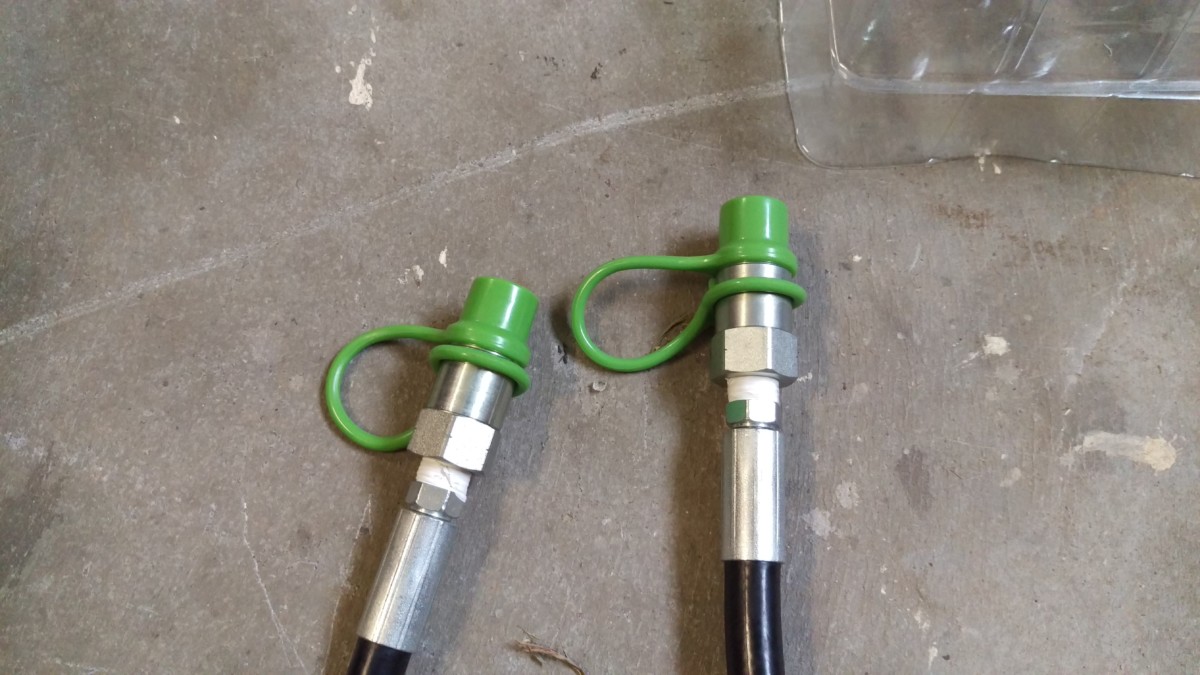
Ready to connect
And here they are, ready to be connected.
Connect the Short Hoses to the Frames
Short hose connected to frame
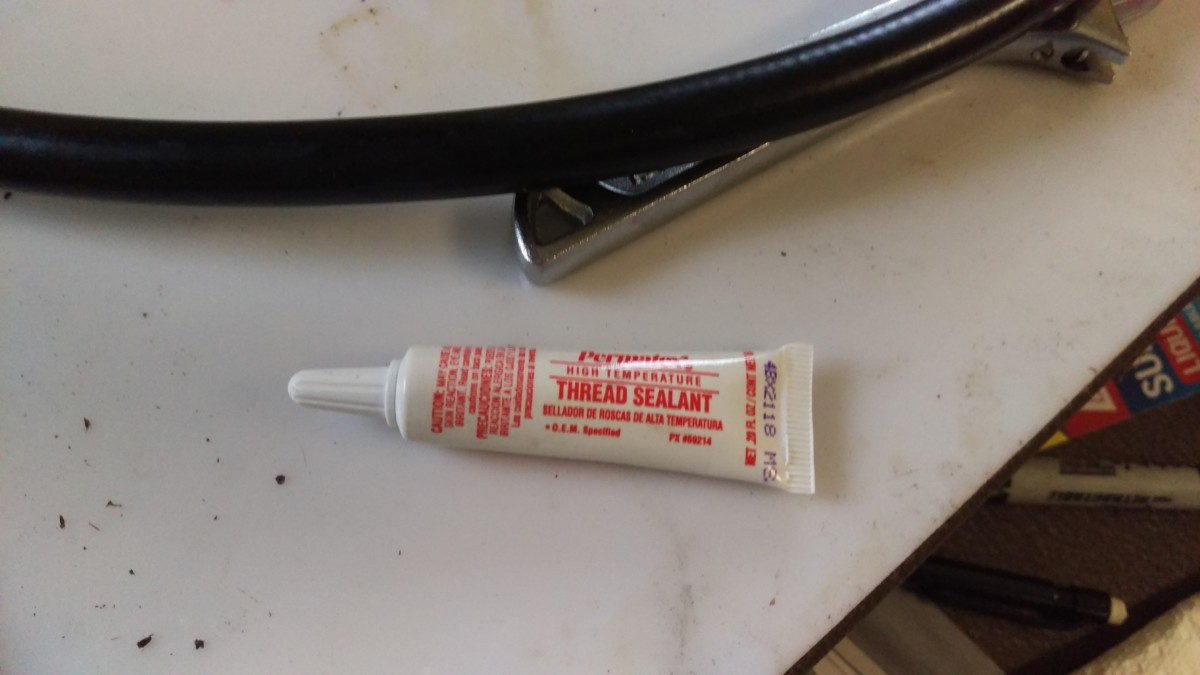
Permatex Thread Sealant
The female end of the short hose screws onto the elbow connector on the frame. The manual says that thread tape is optional here. If you followed my earlier advice, you taped this connection already. Personally, I found the Teflon tape annoying to apply, although I’m sure it would work. Instead, I grabbed my handy Permatex Thread Sealant
Pressurize the Frames
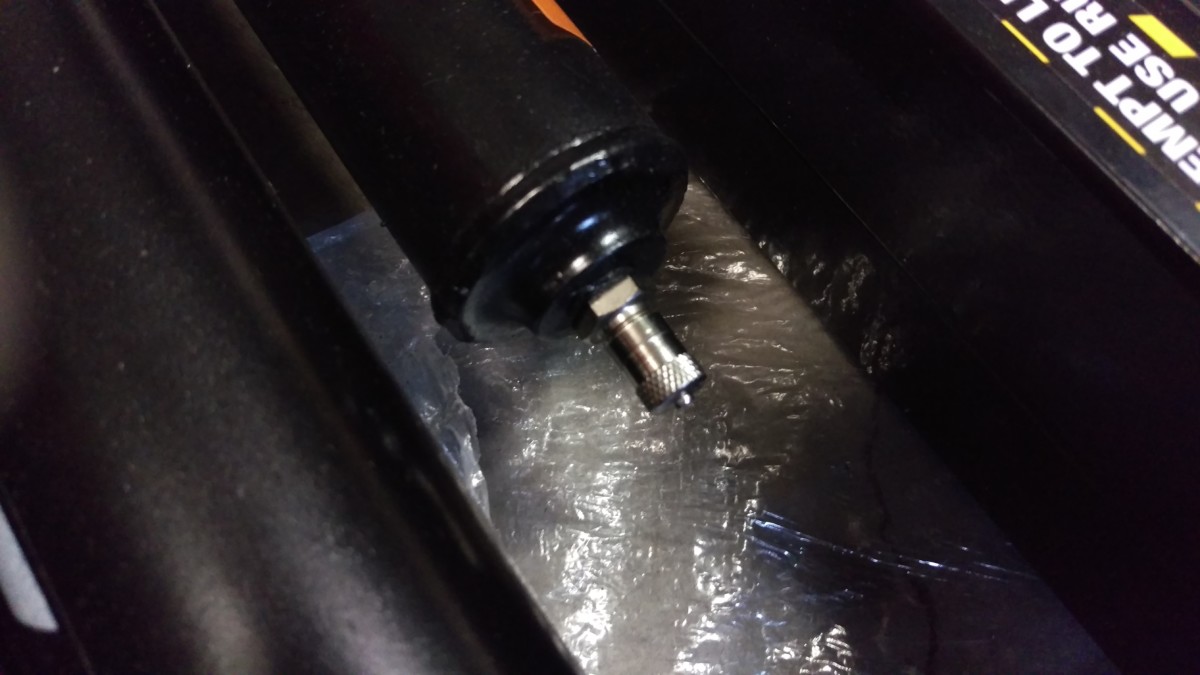
Schrader valve on frame
Schrader valve with dust cap removed
The frames have a pneumatic air chamber that needs to be pressurized. An ordinary bike pump
The pictures show the Schrader valve that is removed while pumping up the chamber. Don’t forget to put this dust cap back on afterwards, unlike all the others.

Pumping air into the frame
Here is my bike pump attached. Remove the dust cap and pump the chamber up to 50psi. Quickjack makes it sound like you have to be dead-on, so I double-checked mine with my fairly-accurate longacre tire gauge
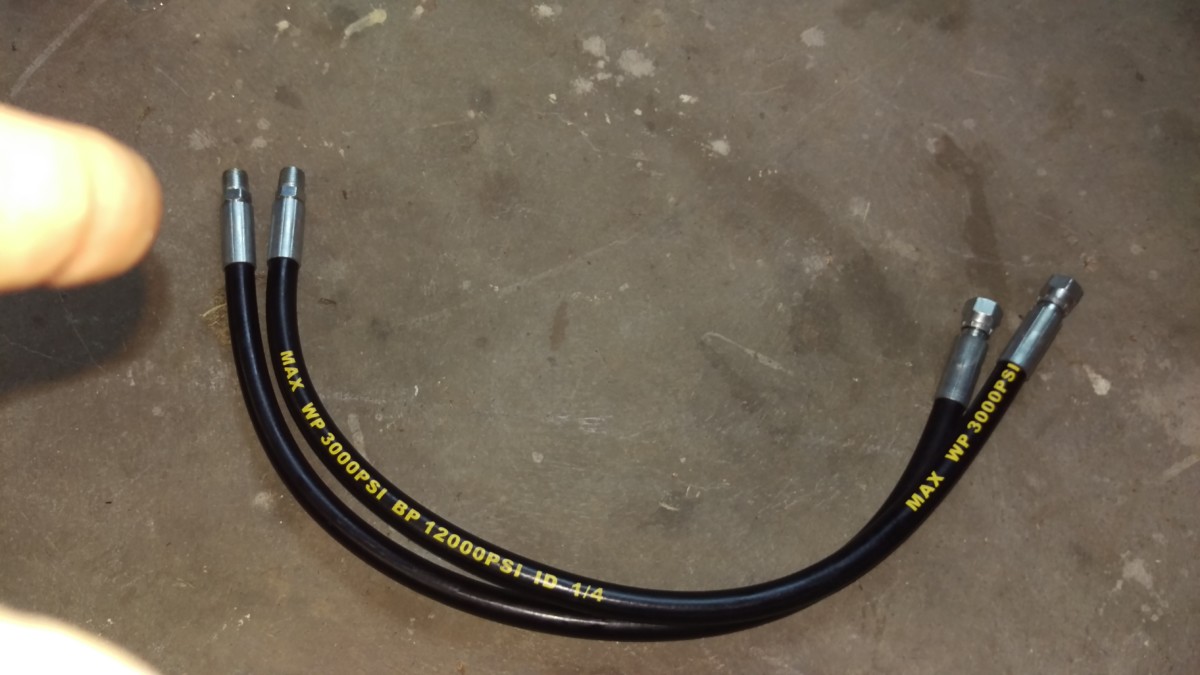
Prepping the Long Hoses
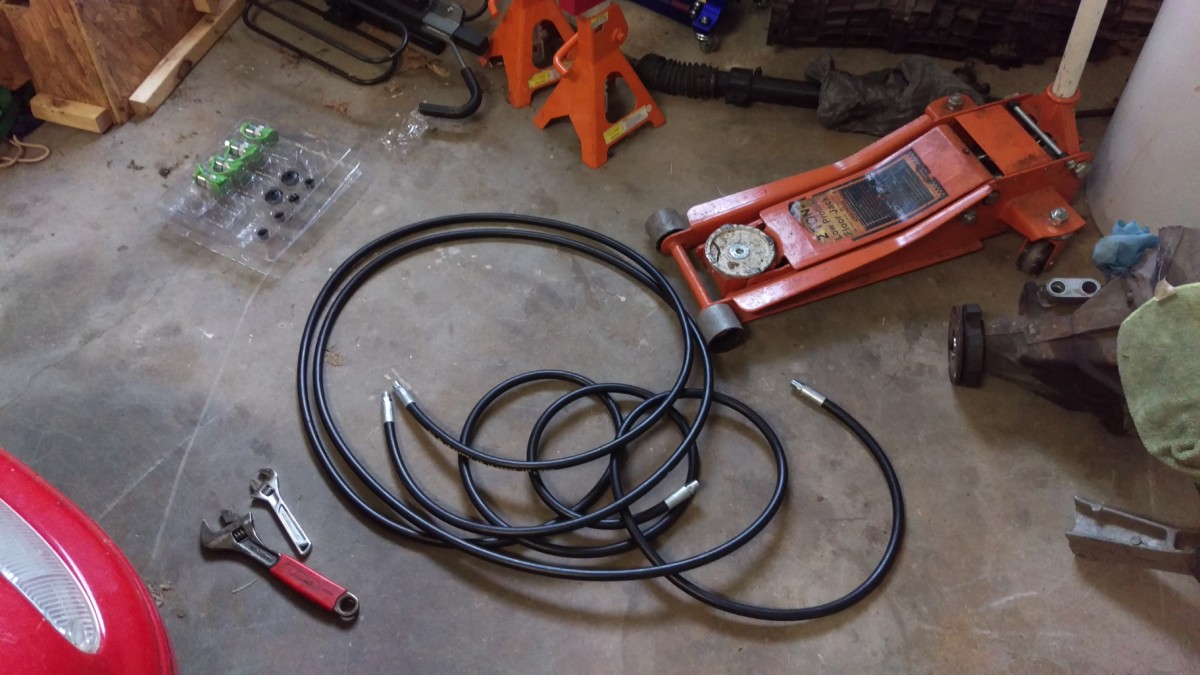
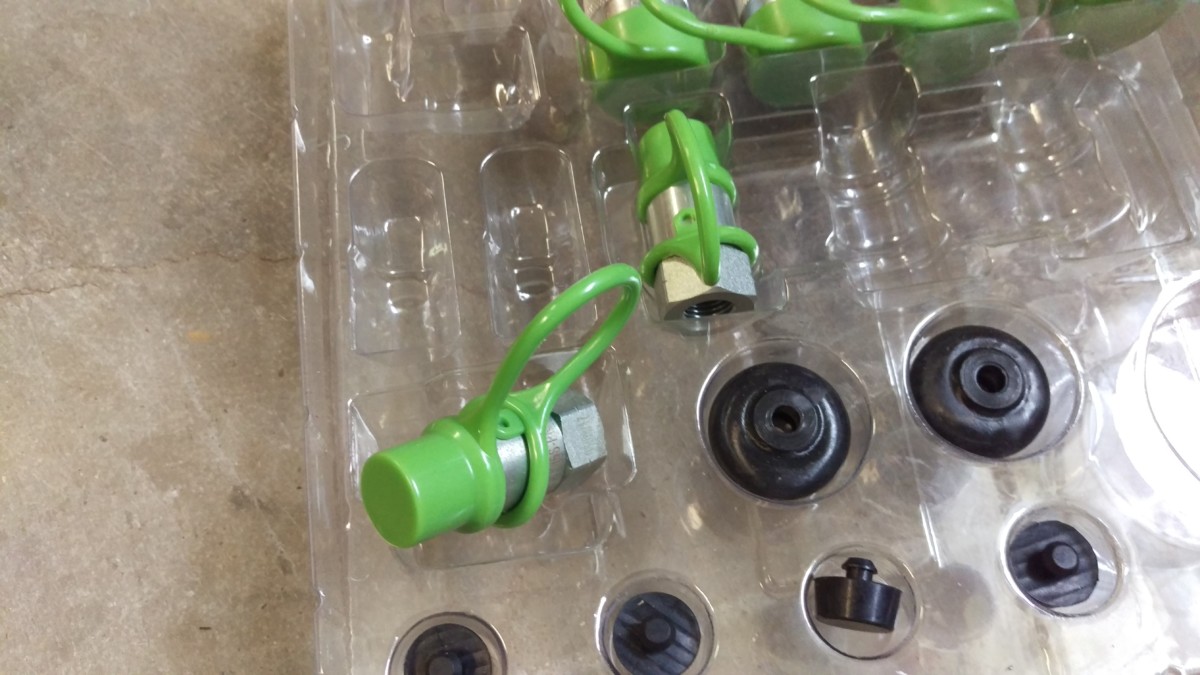
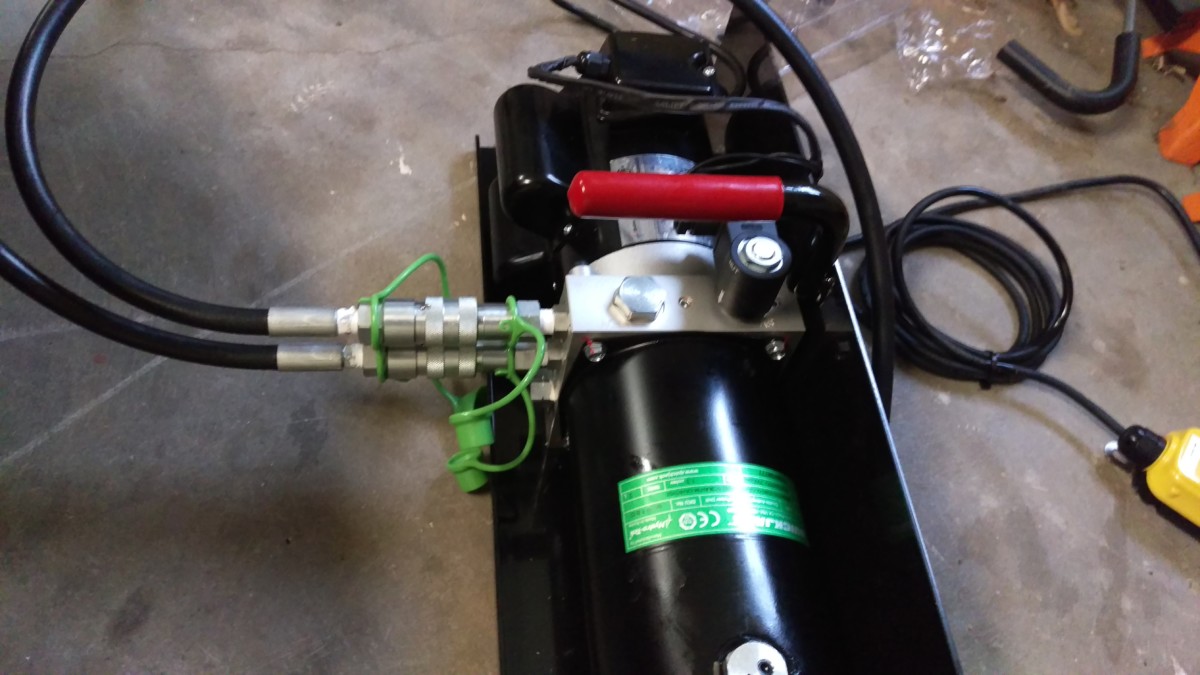
The long hoses and their four quick-disconnect fittings
The two long hoses connect the power unit to the short hoses attached to the frames. They use the remaining four quick disconnect fittings, also shown in the top right corner of the picture.
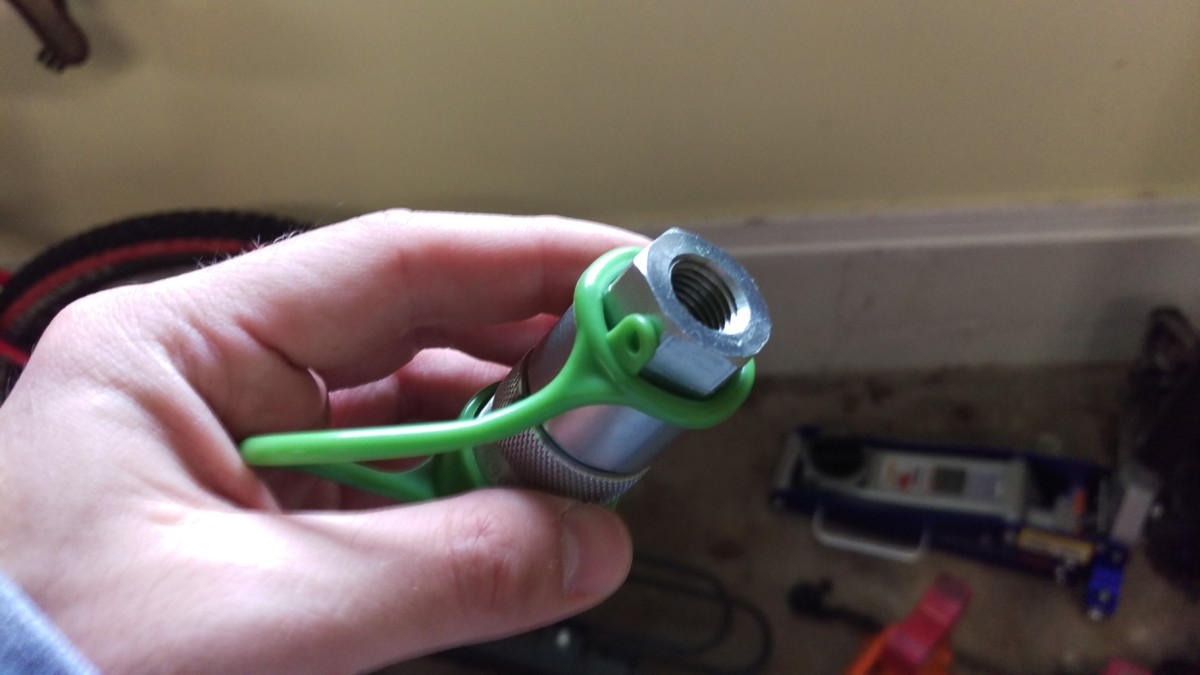
Close up of the fitting
Here’s a closeup of one of the big quick disconnect fittings. Each hose gets one of these fittings at each end, four in total. This fitting is installed just like the short hoses. Teflon tape on the hose’s fitting first. Then, thread the fitting on by hand. Finally, snug it down with two wrenches, being careful not to over-tighten.
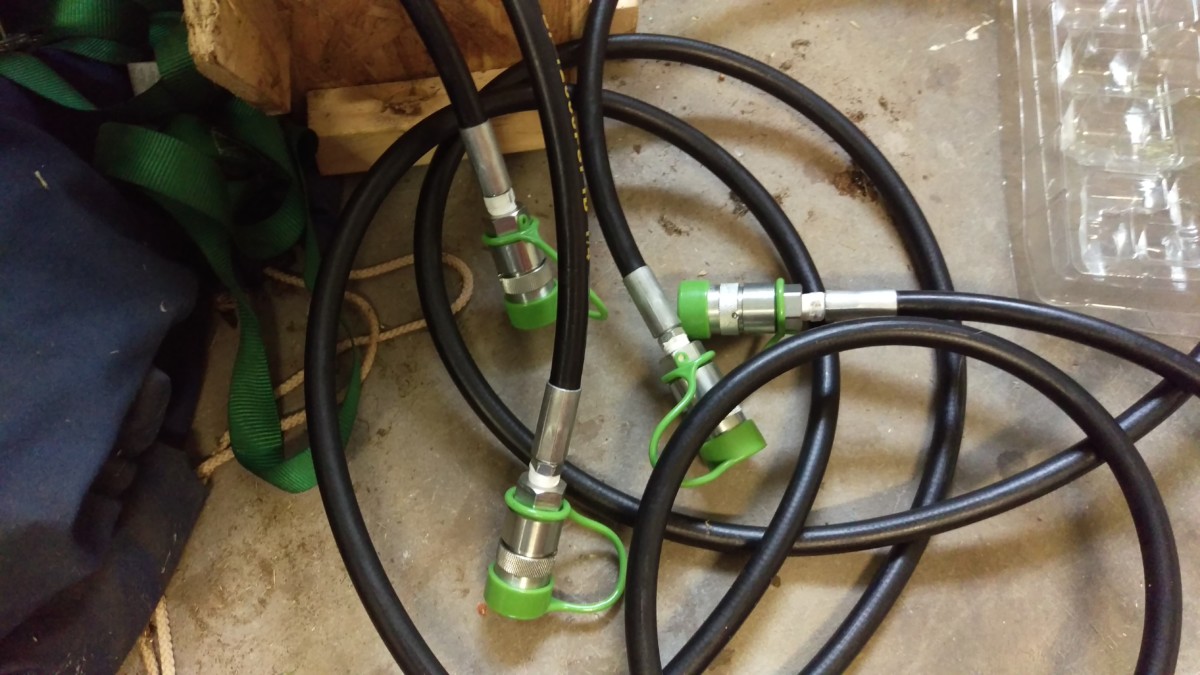
Long hoses ready for use
Once all four fittings are on, the long hoses are ready for use.
Connecting the Quick-Disconnects and a Test Run
One frame with hoses connected
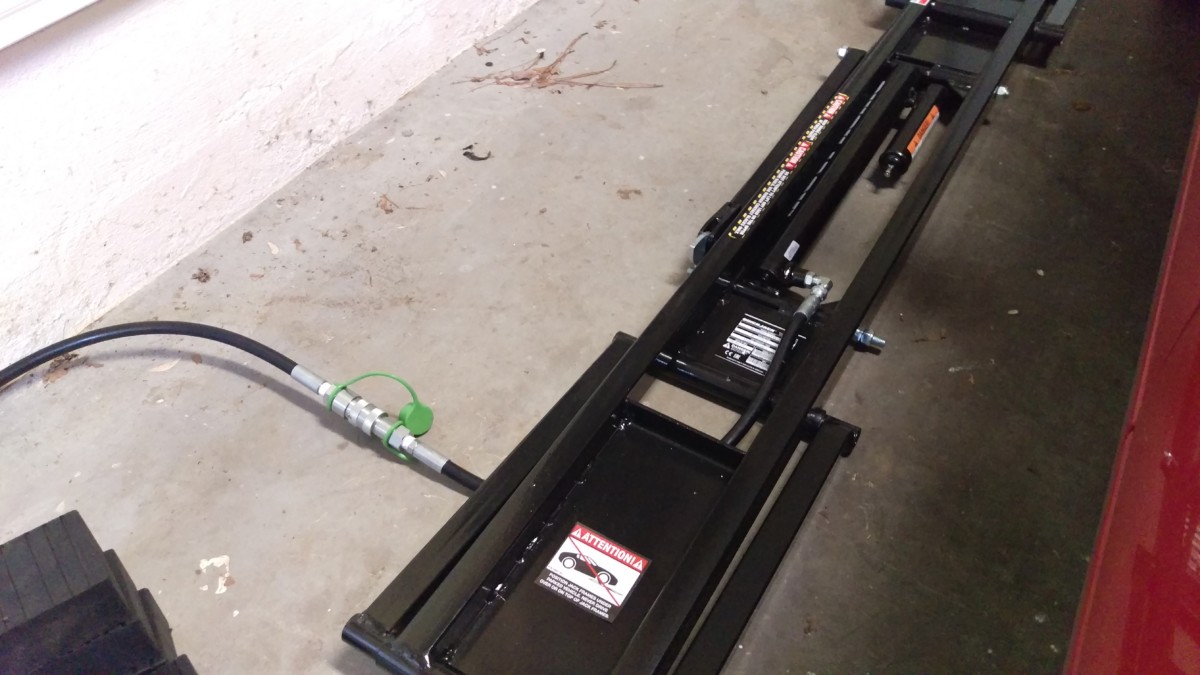
Other frame with hoses connected
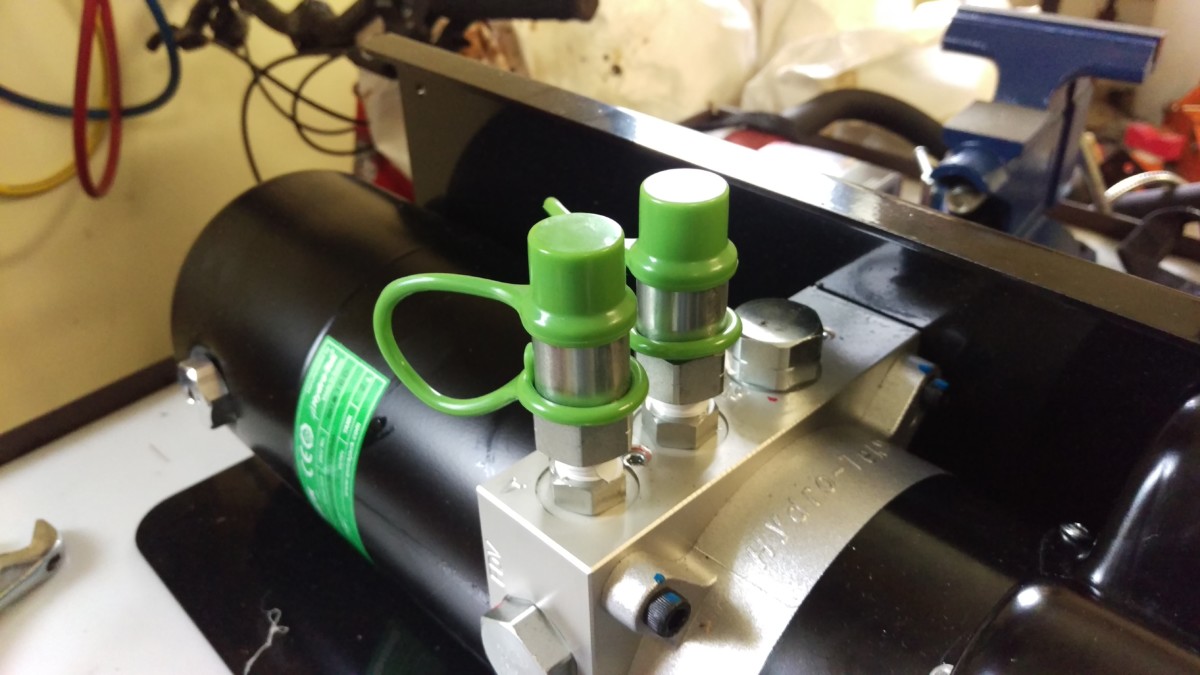
Power unit connected
With all that done, the quickjack is in it’s “hang on the wall” state. I leave the short hoses connected to the frames, the long hoses sitting free, and the power unit disconnected from everything else.
To do a test run, simply connect a long hose from each frame’s short hose and the power unit. You simply push the quick disconnect fittings together until the release ring clicks. The hoses should be routed under the frames as shown.
Prime the Pump
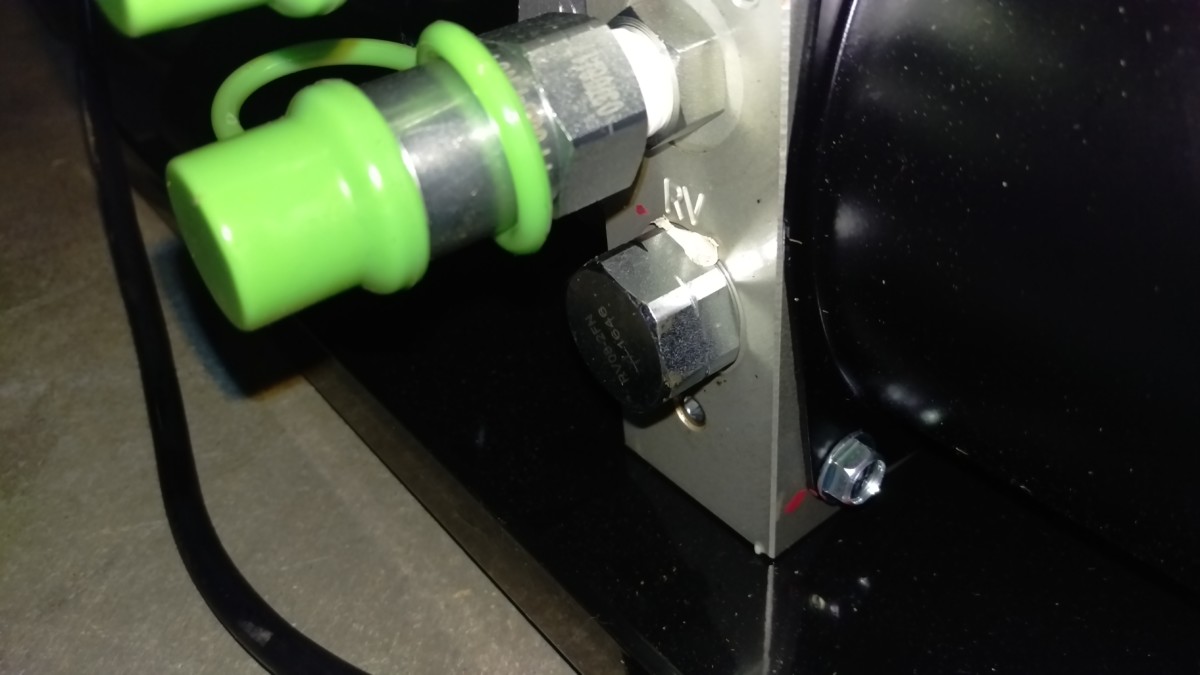
RV stands for “relief valve”
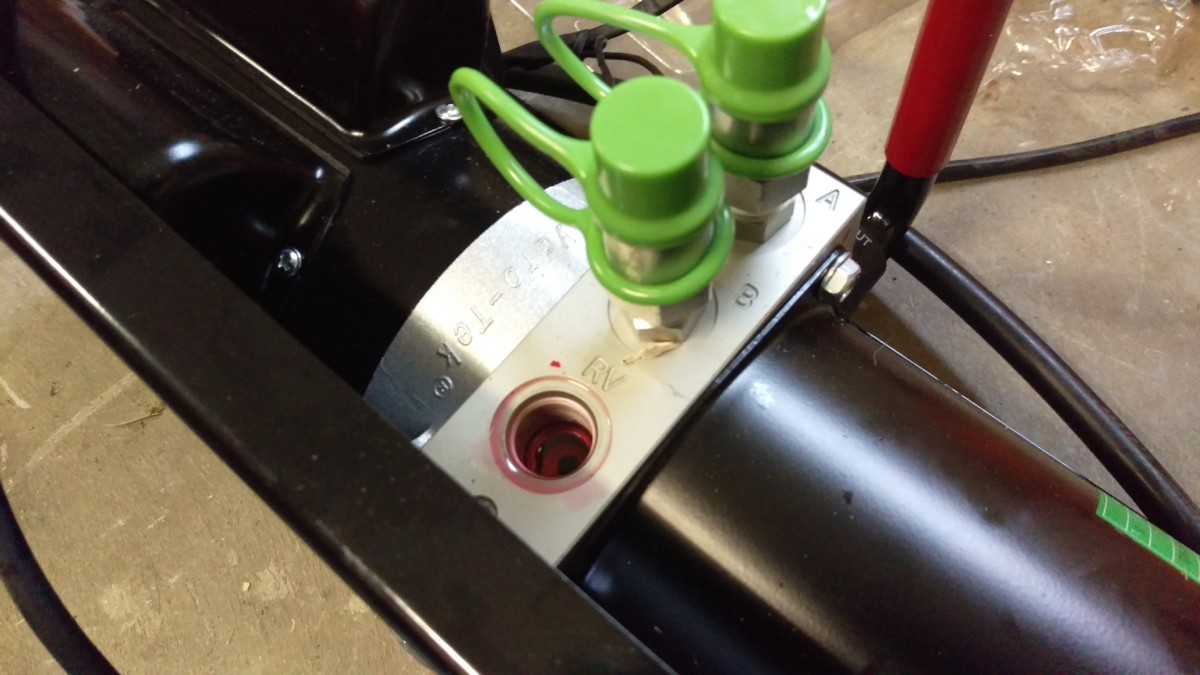
Turn the power unit on its side so the relief valve faces up, then remove the cap
Note Before doing this: DO NOT raise the frames past the first lock without weight on it. Quickjack says they won’t come back down, especially the first time.
At this point, you can plug the power unit into the wall and hit the “up” button. Don’t go too long! You’re just making sure the frames move. If you’re like me, they will NOT.
If the frames move, you can skip to the next section to bleed the lines. If the frame don’t move like me, no need to fret, just prime the power unit. This involves flipping it on its side, so the port marked “RV” is facing up. Then, unscrew the cap over the RV port. Finally, hit the “up” button on the controller for a second. You should see bubbles come out. Reinstall the relief valve cap and move on to the next section.
Bleeding the Lines

Bleed screw for frame
Even once the frames can move, there is going to still be air in the lines that you need to get out. To do this, use a 5mm allen wrench to loosen this bleed screw on one of the frames. Then, hit the up button. You’ll hear air coming out, followed by fluid. Once fluid is coming out, stop pressing “up”. Retighten the bleed screw and perform the same procedure on the other side.
Wrap-up
Miata in the air
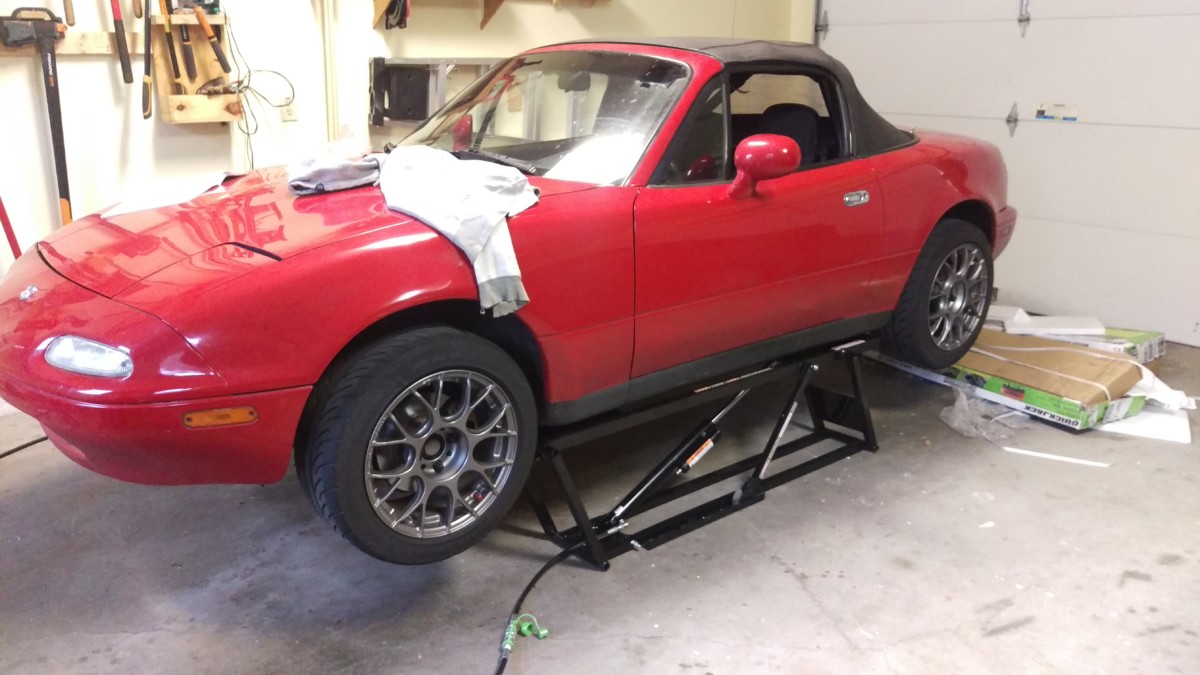
Another view at max height with 2″ blocks
And that about sums it up. Once you’ve done all this, you should have a working Quickjack. To store it, simply disconnect all 4 quick disconnect fittings. You can lean the frames against a wall, stick the power unit somewhere, and hang the lines on a hook. Or whatever it is you want to do.
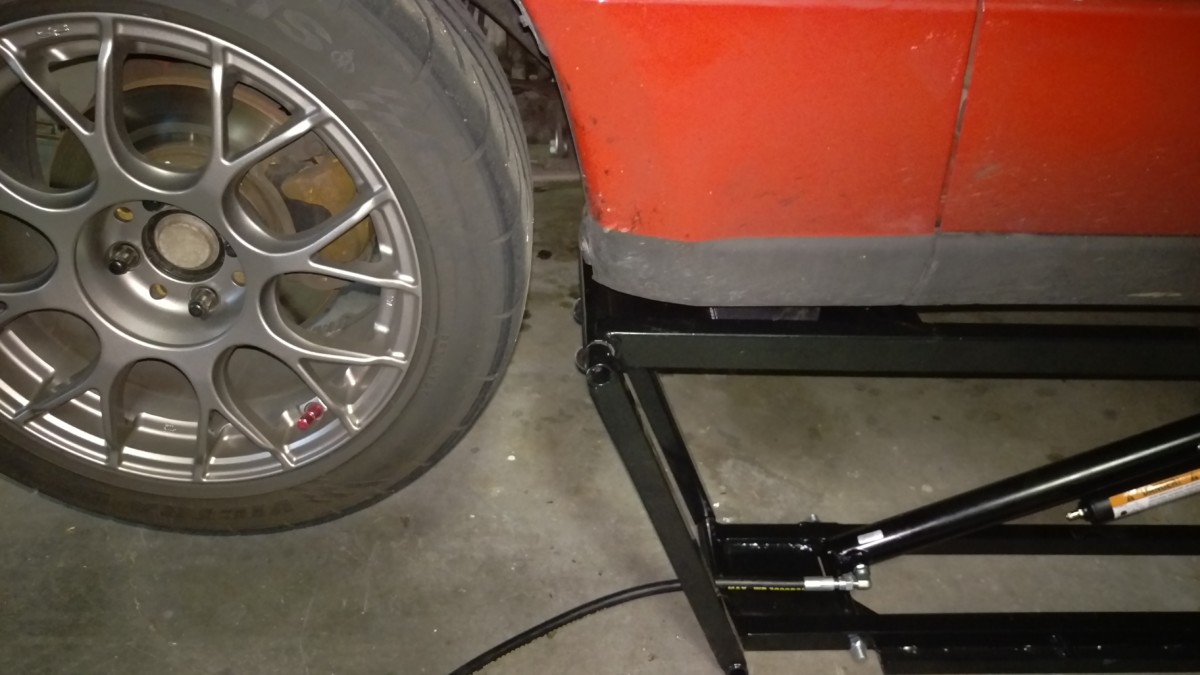
To actually jack up a car, place either the 2″ or 4″ blocks on the trays on the Quickjack frames. Slide the frames under the car, positioning the blocks on the jack points. Make sure the frames are within 2″ of parallel to each other. (You can measure the distance between the two frames at the front and back to verify if necessary.) Hit “up”, and let it go.
The frames make a loud clank as they go past the stops. There are two locking heights, a shorter and a higher one. More details on safe usage of the Quickjack is outside the scope of this article, but available from Quickjack themselves.