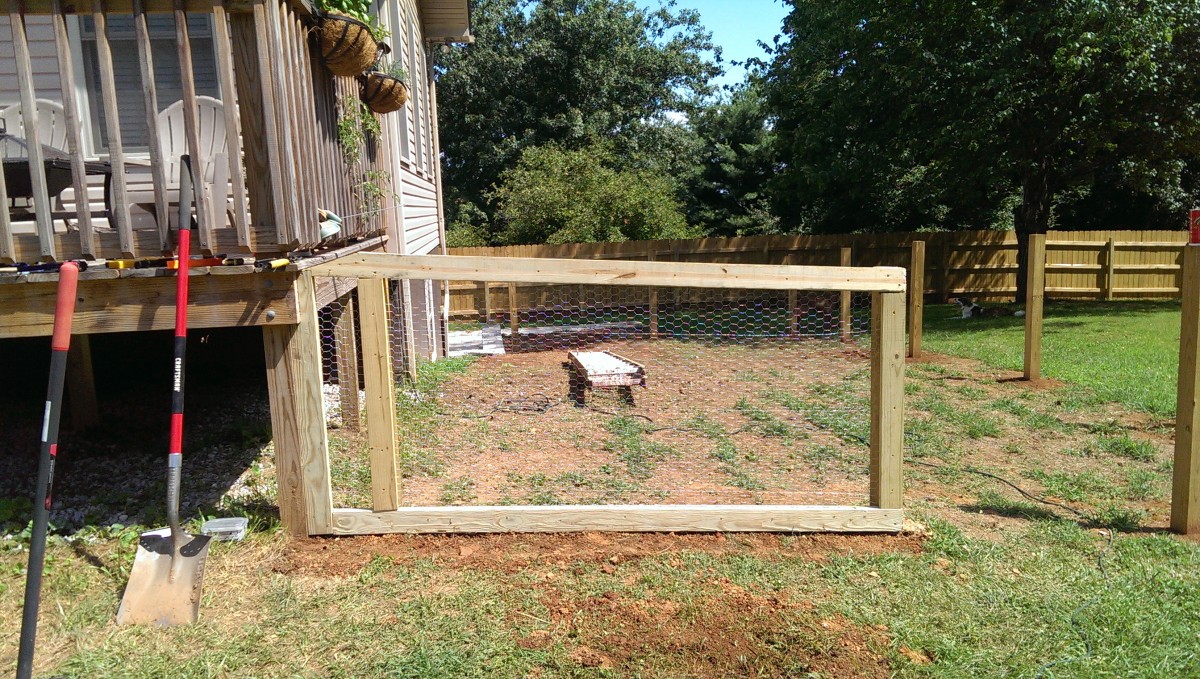
Simple 4′ Garden Fence
My wife wanted a garden with some fencing to keep dogs and rabbits out. We didn’t want to spend a lot of money on it, and we wanted to be able to easily rip it out when we moved, in the event that the next owners didn’t want it. A common option for this is T-post and hexagonal wire mesh. It’s easy and cheap.
However, I don’t care for the way it looks. If we were on acreage and had t-post on the back acreage or something, that’d be fine, but we’re in a suburban house. I wanted something that looked a little nicer. After searching through other projects online, we settled upon a hybrid approach where we sandwiched the hexagonal mesh in pressure treated 2×4 halves. I think the resulting 4′ garden fence looks a lot nicer, it allowed us to have a proper gate, and it wasn’t too much more expensive than T-post.
After doing this project, we also added some raised beds and mulch.
Prepping the Area
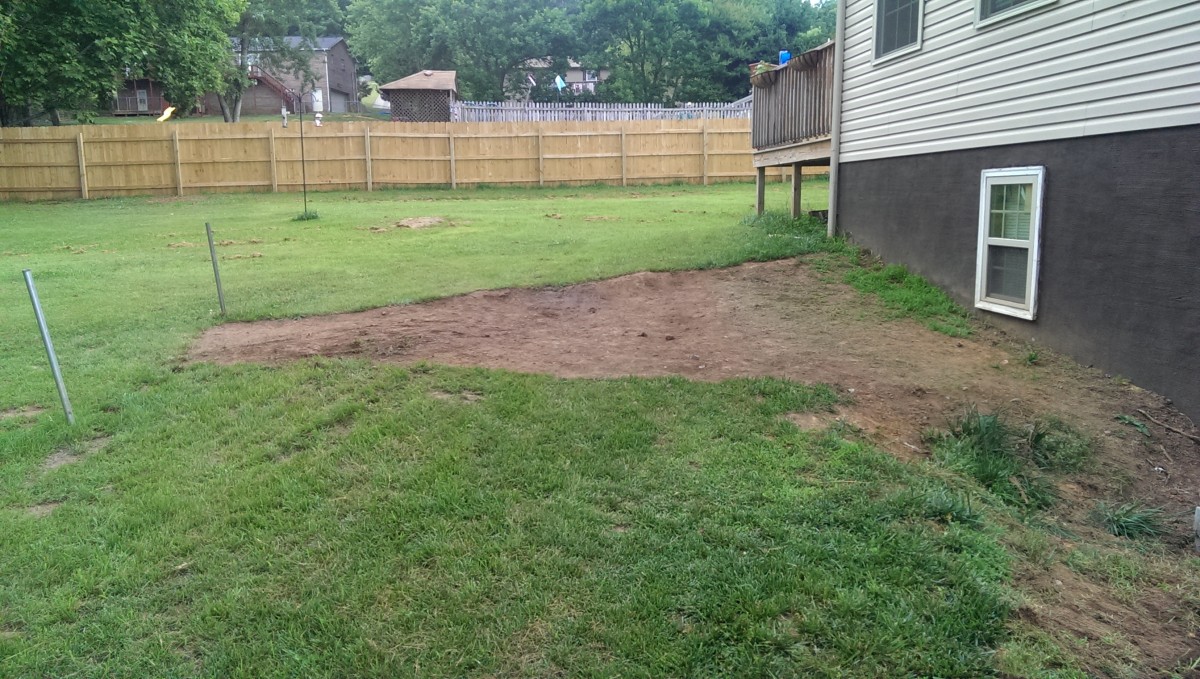
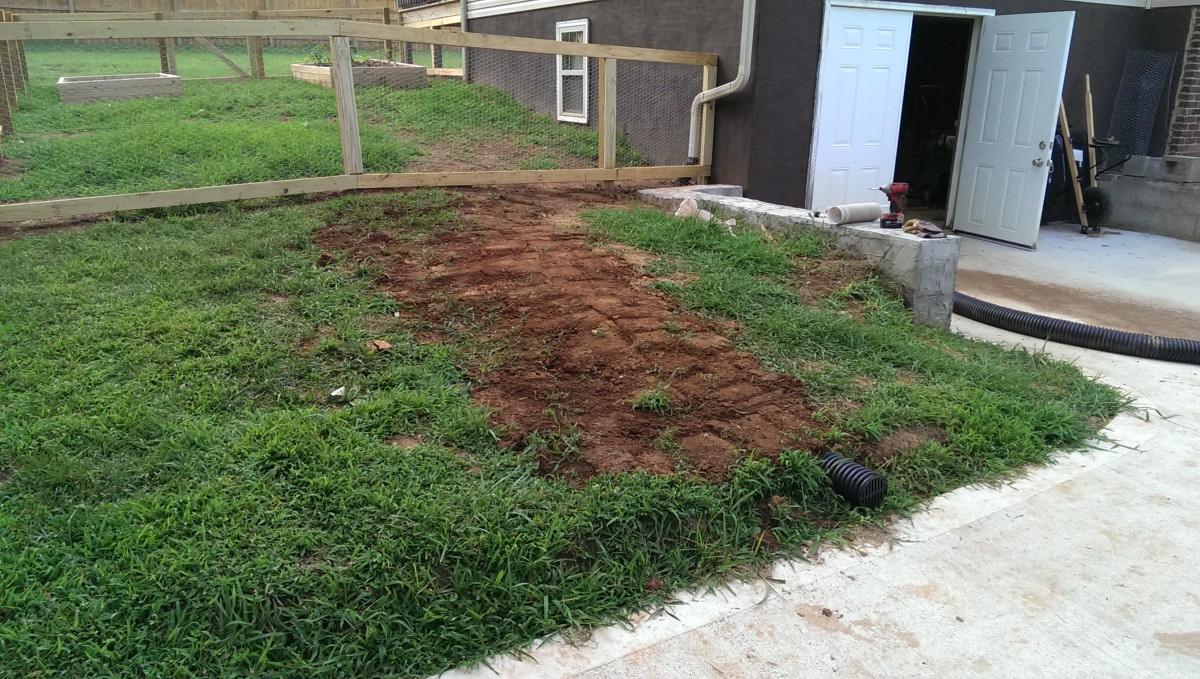
We put the garden right behind the house so that it would get enough sunlight. One potential issue here is termites; having wood right up against the house like this can be a problem. Fortunately, in our case, we have a standing-height crawlspace made out of cinderblock, so wood from the fencing doesn’t reach up past the wood on the house. There isn’t any reason you couldn’t make the fence free-standing away from the house, the same design should work just fine.
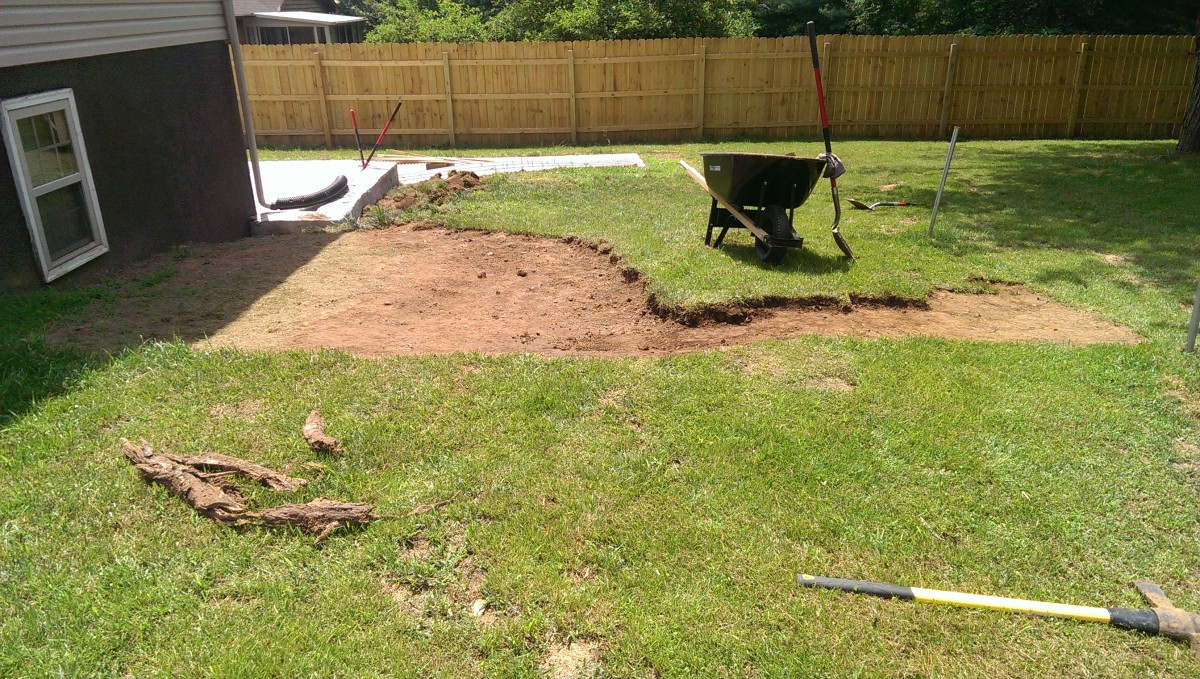
Using a shovel to level the ground out
One issue to start was that the ground was not very even. We didn’t need it to be level, per se, but we did at least need for it to have a consistent slope for the fence. I started by simply using a shovel and digging up the most obvious high sections.
After using the shovel
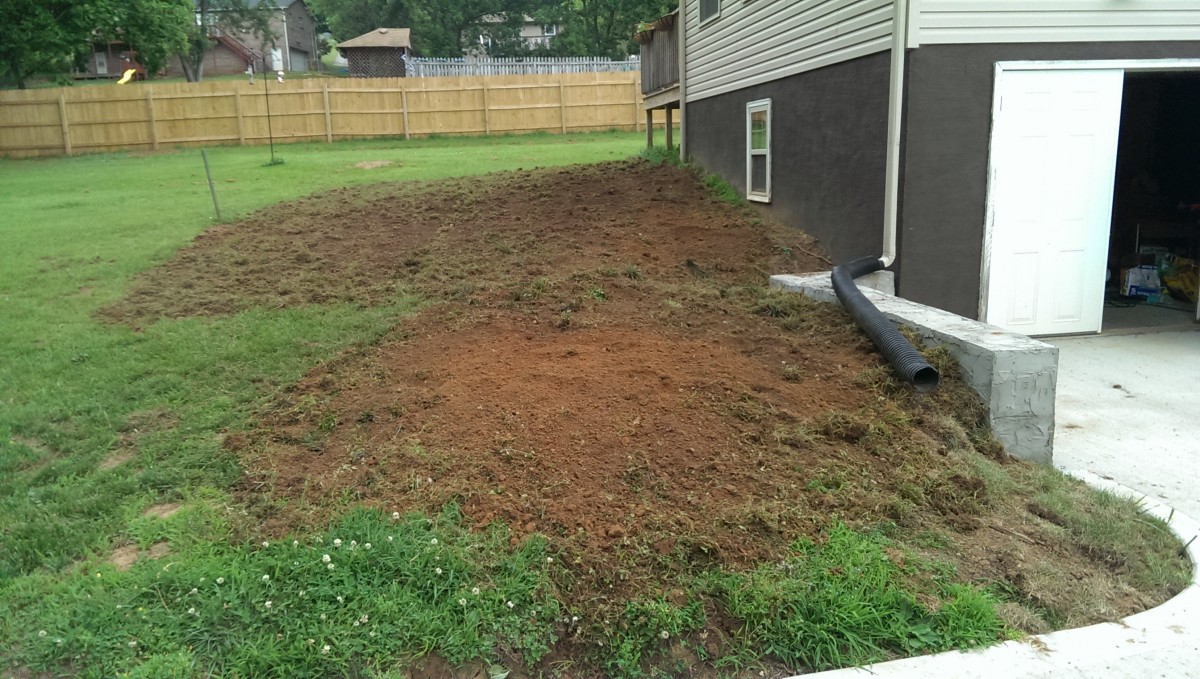
This evened things out a good deal, but it still wasn’t quite right. Getting it flatter at this point was a huge pain with the dirt being compacted and hard.

Power tiller rental to the rescue
After tilling was complete
I went to the local Home Depot and rented a relatively large tiller for something like $40. This chewed up all the remaining sticks and roots, as well as broke up the ground. I was able to use a shovel and a stout metal rake to finish leveling everything else out. I also used a handheld 10lb tamper to compact the soil down as best I could. This helps keep the ground from shifting as the dirt settles, but it isn’t perfect.
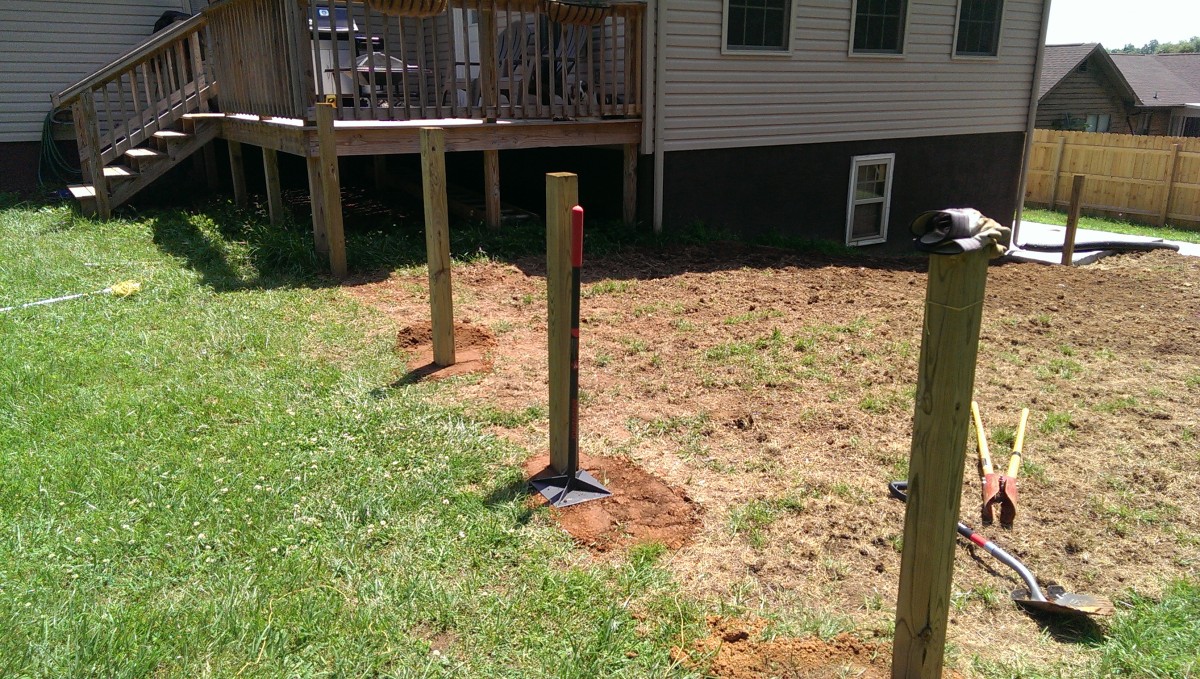
Installing the Corner Posts
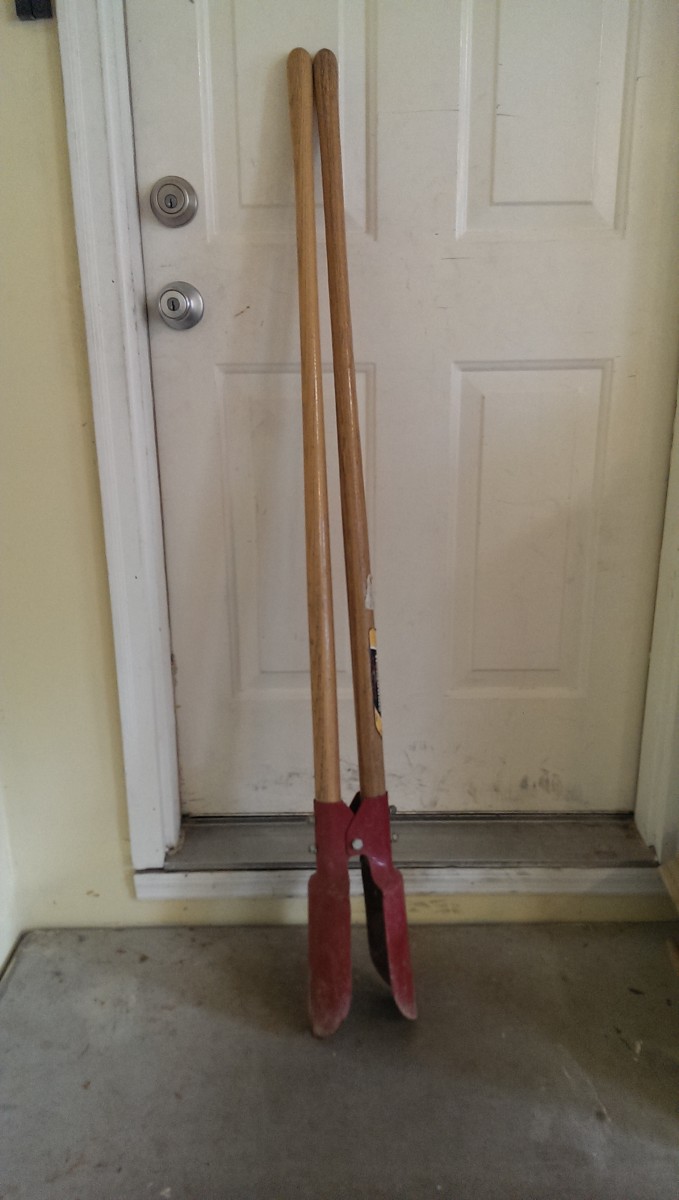
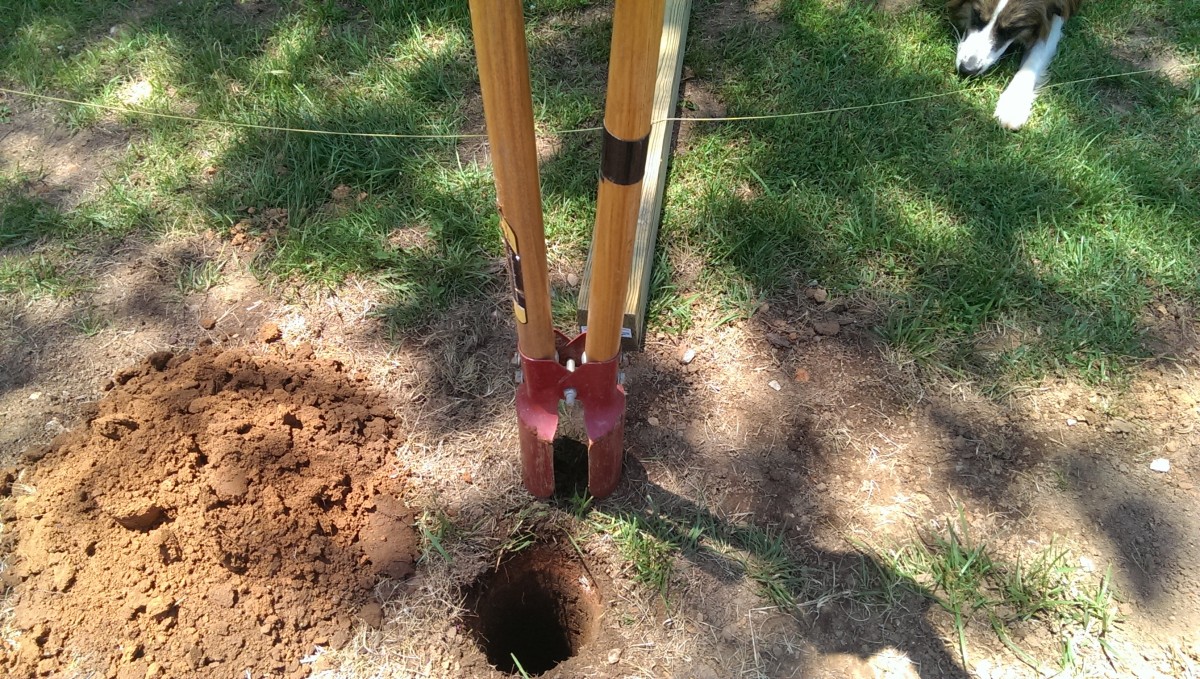
Post-hole digger
Now the fence-building begins in earnest. I used a post-hole digger. For the large 6′ privacy fence, an auger was a better choice, since there were so many holes to dig. For this little garden fence, I only needed 8 or 10 posts. I measured the space I needed and got enough pressure-treated 4×4 to have a post every 6′ or so, and two posts for the gate area. I ended up getting 8′ 4x4s to have a little extra length on the posts if I needed it when it came time to cut them down. The goal was to sink them 2′ in the ground and have 4′ above-ground, plus or minus. 6′ 4x4s are slightly cheaper, so it is certainly possible to use them.

Measuring with 2×4’s
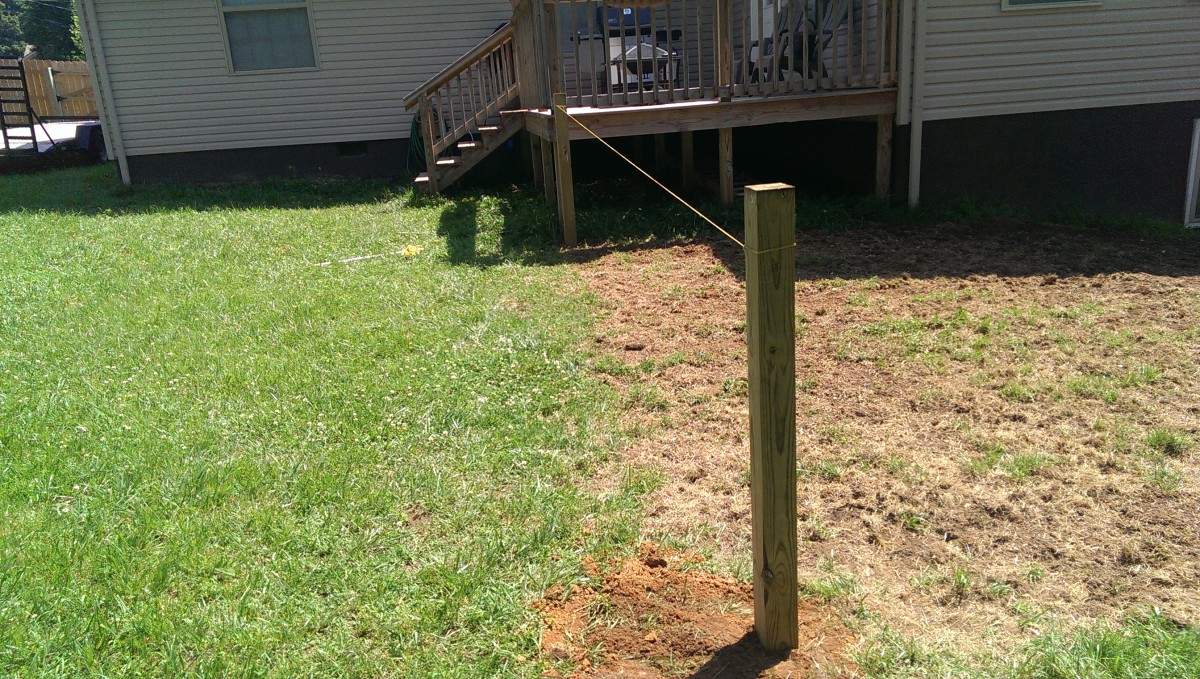
I ended up using some pressure-treated 2×4 I would later incorporate into the fence to measure post placement. I marked them with my distance between posts and laid them out to form straight lines, marking where the posts should go. I started by digging and putting in place the corner posts.
Using the post-hole digger
Finished digging – dirt up to tape line
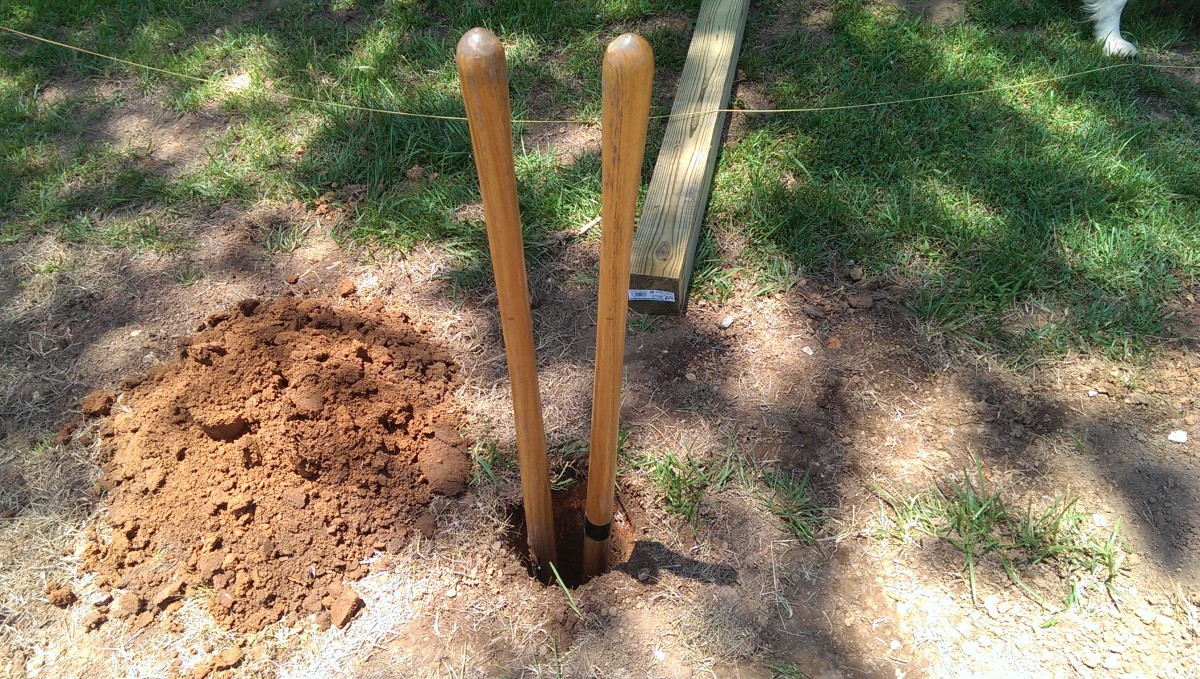
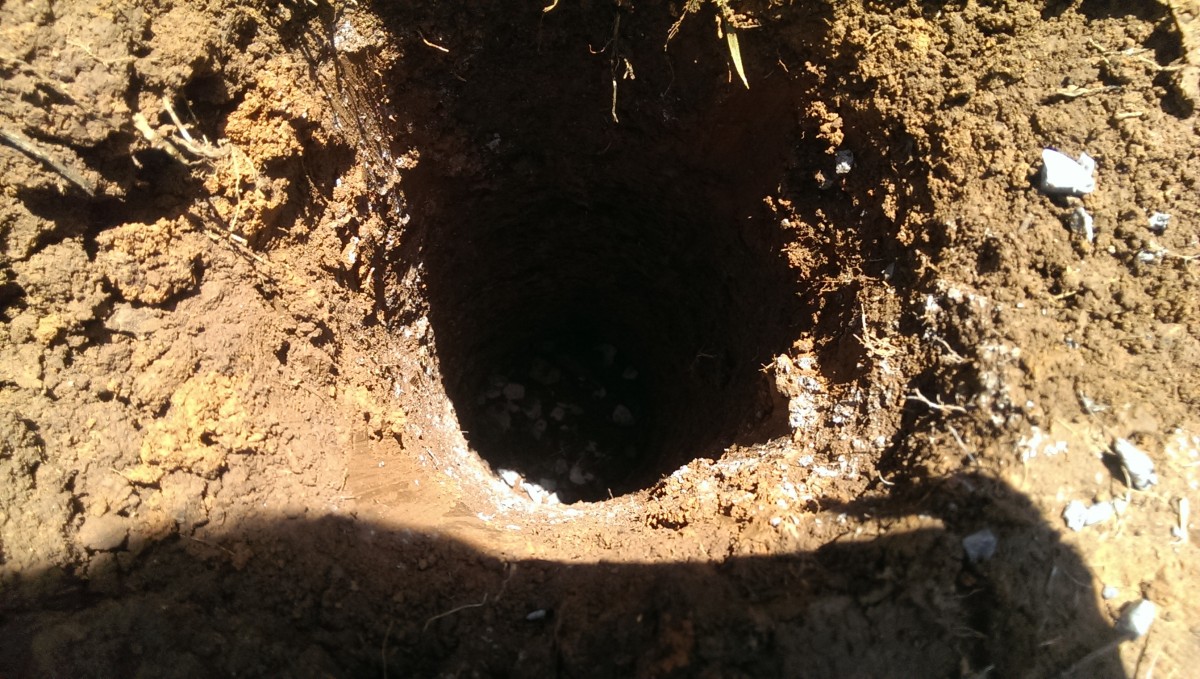
There’s not much to digging with a post-hole digger. It’s basically a double shovel. You simply jam it down into the dirt, pull the ends apart to hold the dirt together, and pull it out. There’s a limit to how deep it can go for a narrow hole, because eventually the jaws won’t close very well. However, it can dig a much more narrow hole than you’d be able to accomplish with a regular shovel.
Post marked at 2′
Hole deep enough, down to mark
I also marked 2′ from the bottom of the post, then sat it in the hole to verify depth. This let me double-check the tape on the post-hole digger.

Bulk gravel is cheaper than bags
Gravel prevents rot
Before actually burying the post in, I added a few inches of gravel to the bottom. I don’t remember if I accounted for this with regards to the 2′ mark on the post or not, but it isn’t a big deal either way. A few inches of gravel will help water drain better under the post and prevent it from rotting as quickly. A few bags will get the fence done, but we needed it as part of other projects, so we got a scoop of it in our truck bed locally for about $8. (A scoop is several hundred pounds of gravel out of a bulldozer.)
Filling in level
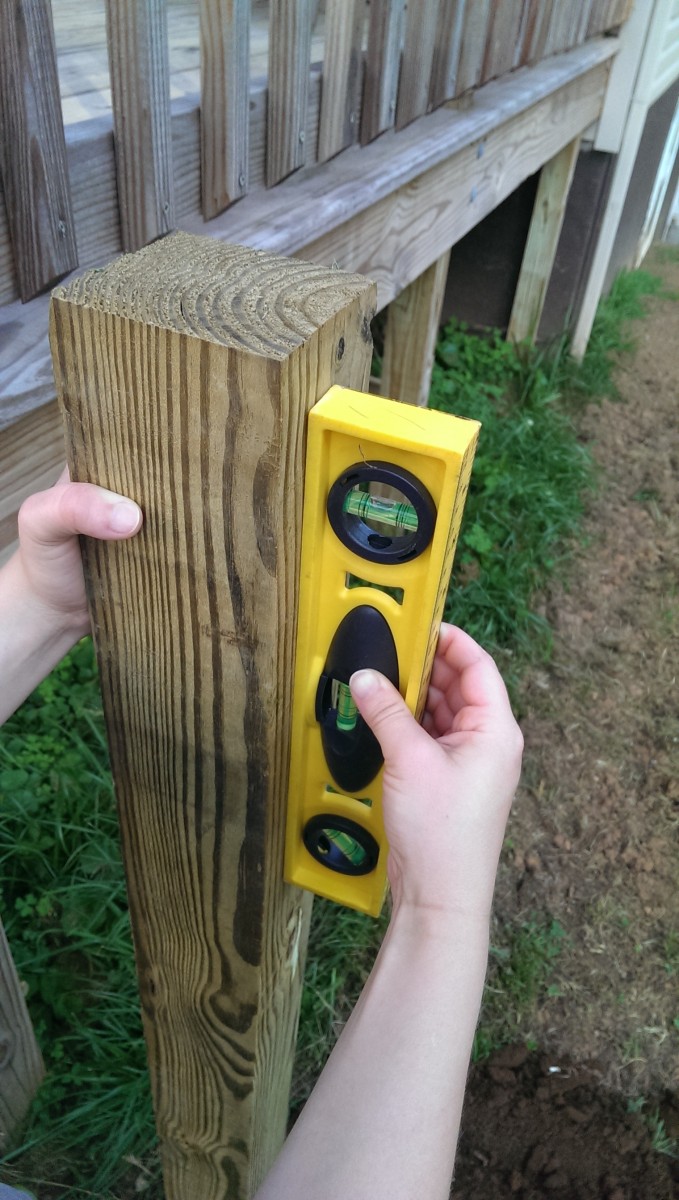
Then the post gets dropped in, with dirt filled around it and tamped down with the tamper. As I filled the dirt in, I used a level to verify it was going in straight. You want to get your posts straight up and down, not crooked, so the stringers between them line up properly.
On the big fence, every post had concrete in this step, and that’s a standard way to make strong, solid fence posts. In this case, though, we wanted the fence to be easily removed, so I skipped the concrete. Since the majority of the fence is lightweight hex mesh and it is only 4′ high, sinking it 2′ in the ground provided plenty of stability, especially once the whole thing was screwed together.
Installing the Middle Posts
Stringing for the middle posts
Gate post placement
Gate posts after installation and tamping

Posts completed
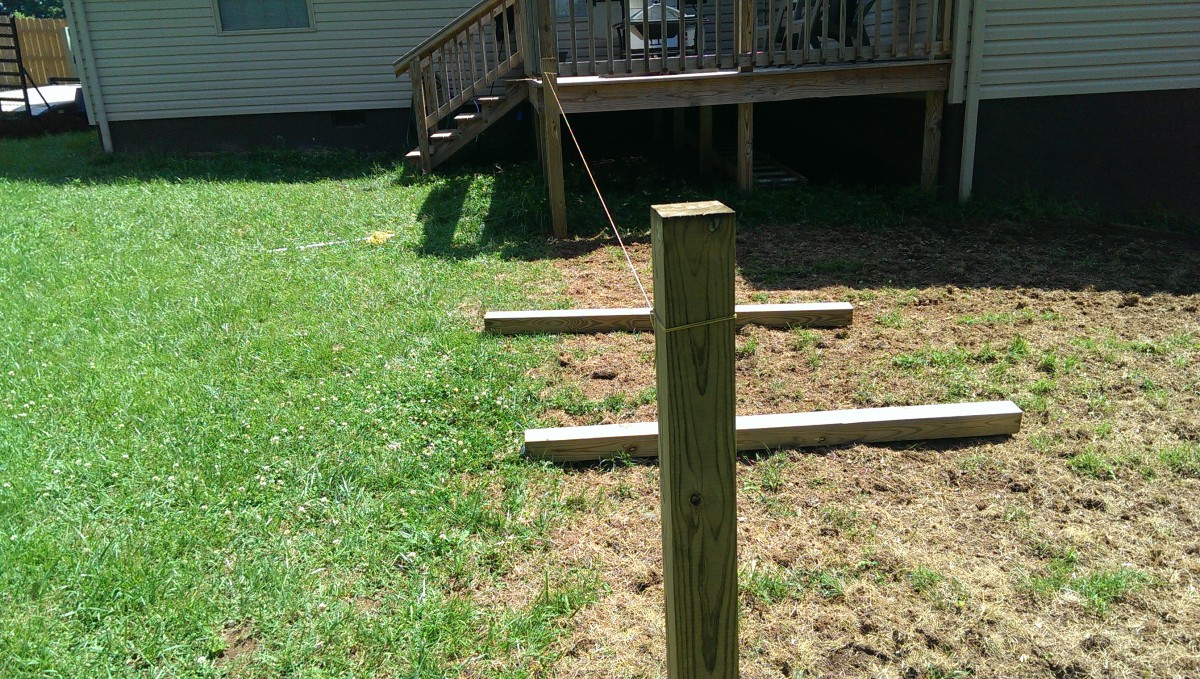
With the corner posts done, it was time to install the rest of the posts in-between. The goal here is to get the posts lined up with the two corners, so they are all in a line and facing the same direction. To do this, the most common trick is to simply run a string from one post to the other, then dig a hole to place the post in line with that string.
In the pictures, I’m actually putting in the two center posts that will surround the gate, which is why they’re closer together than they would otherwise be. I held them up against the string, marked where the post should go, and then began digging, double-checking as I went. The rest of the procedure for putting these posts in is exactly the same as the corners.
Routing a Downspout Part 1
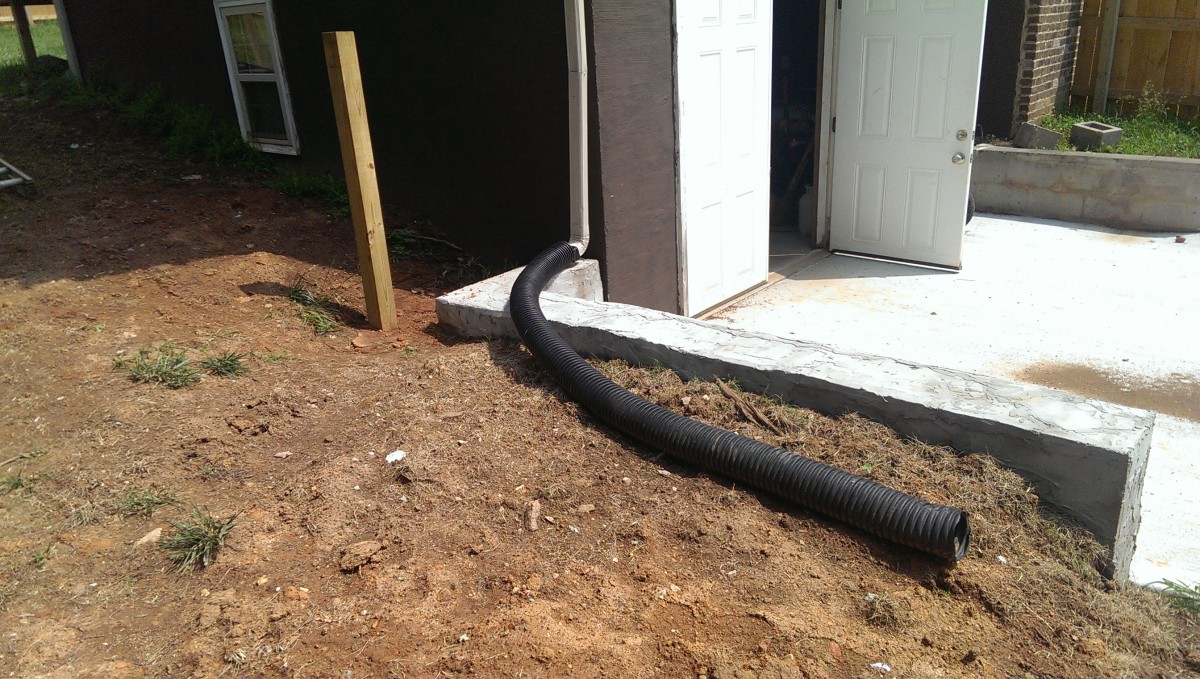
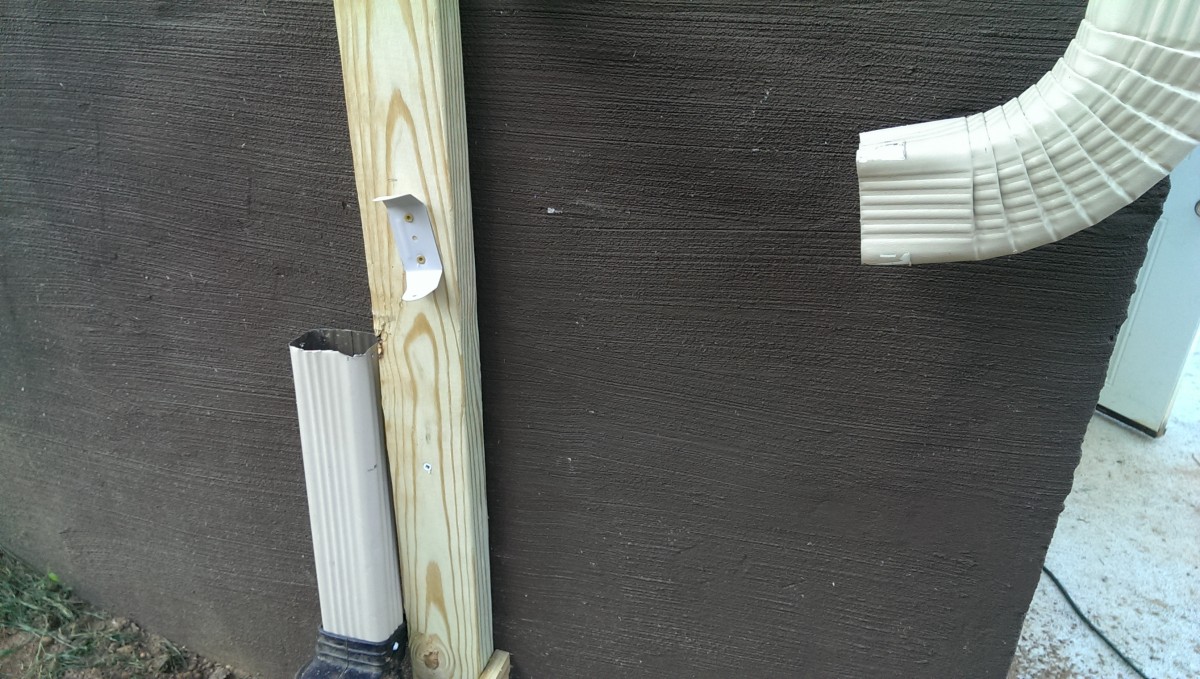
This is how the previous owners had it
One issue to consider with our placement was a downspout that would come down right near the fence. As a result, we had to figure out what to do about that in the course of this project. The previous owners just had some black corrugated pipe sending the water to the back of the yard. This worked fine for drainage, but it didn’t look very nice and wouldn’t work with where we wanted to put the fence.

Extension from big box store
Screws for downspouts
The downspout had to be redirected over
I ended up removing the final piece of the downspout, and getting a bent extension at the big box store to redirect flow to what would be the inside of the fence. We had to get a small can of paint, color-matched from a length of the existing downspout, because the previous owners had painted everything this grey-beige color.
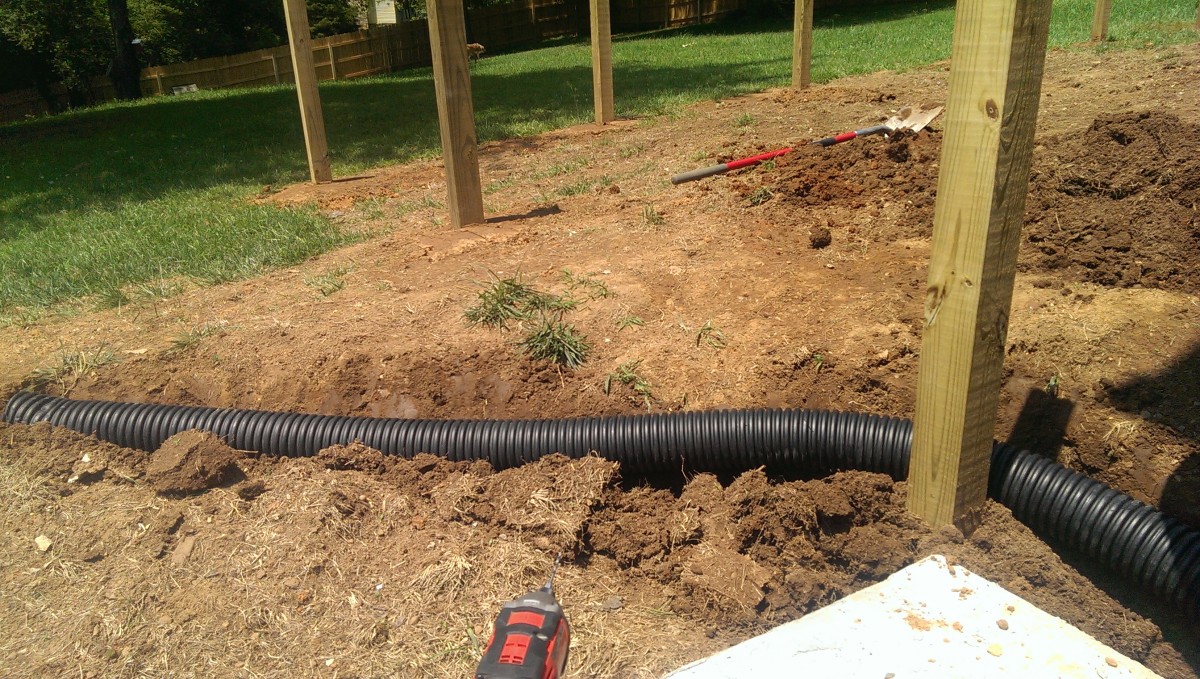
Digging pipe under fence
Digging part two
Once it was clear how it was going to be routed, the final step was simply digging a trench to bury the line in. Note that if you’re going to bury downspout pipe, you should really get smooth PVC rather than corrugated plastic like this. I already had this on hand ready to go, but in retrospect, that wasn’t a good decision. Subsequent times I’ve buried drain pipe, I’ve used 3 or 4″ PVC.

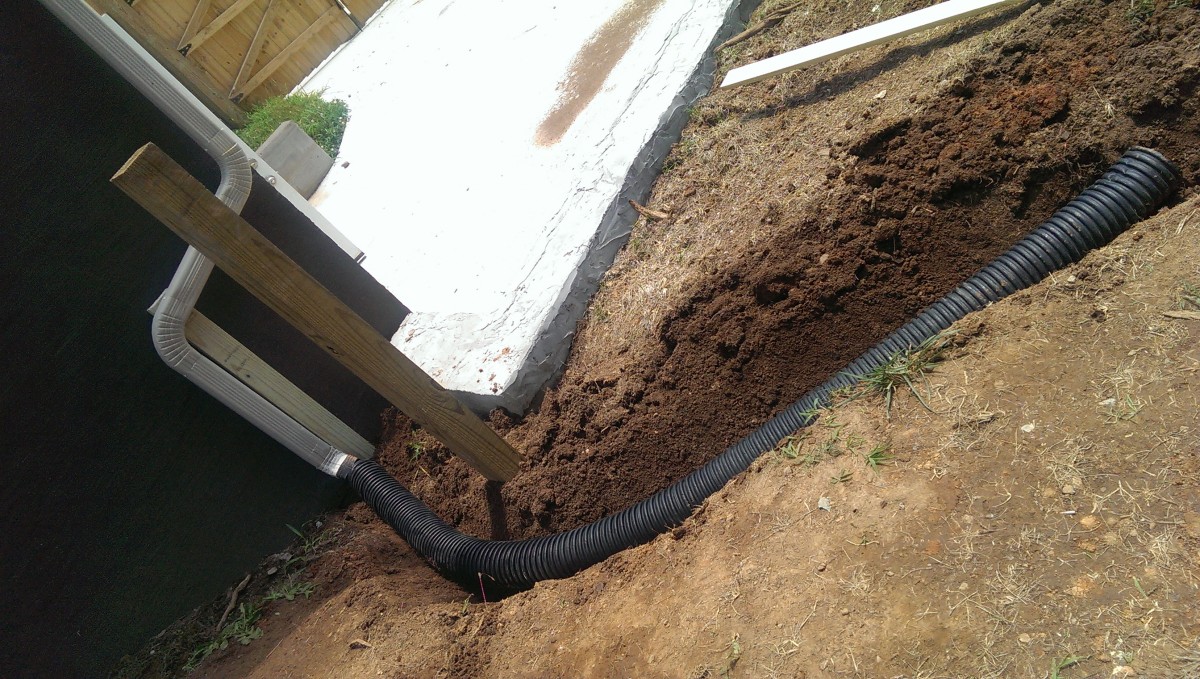
Mostly done
Once that was done, I was able to connect up the pipes and extensions and have the pipe laying in its trench. I held off finishing up until later, to make sure it didn’t interfere with the fence itself, further below in Part 2.
Trimming the Posts

Sawzall / Reciprocating Saw

Using the Sawzall on the post, if you can’t see the video
The posts need to all be the same height. I simply marked them at 4′ and lopped them off with a reciprocating saw. A circular saw will produce a straighter cut, but it won’t cut all the way through and it is more difficult to see if you’re actually cutting where you want to be. The body of the saw gets in the way. I wasn’t too concerned about having a slightly crooked cut. There are sawzall jigs to do this and get a straighter cut, as well.
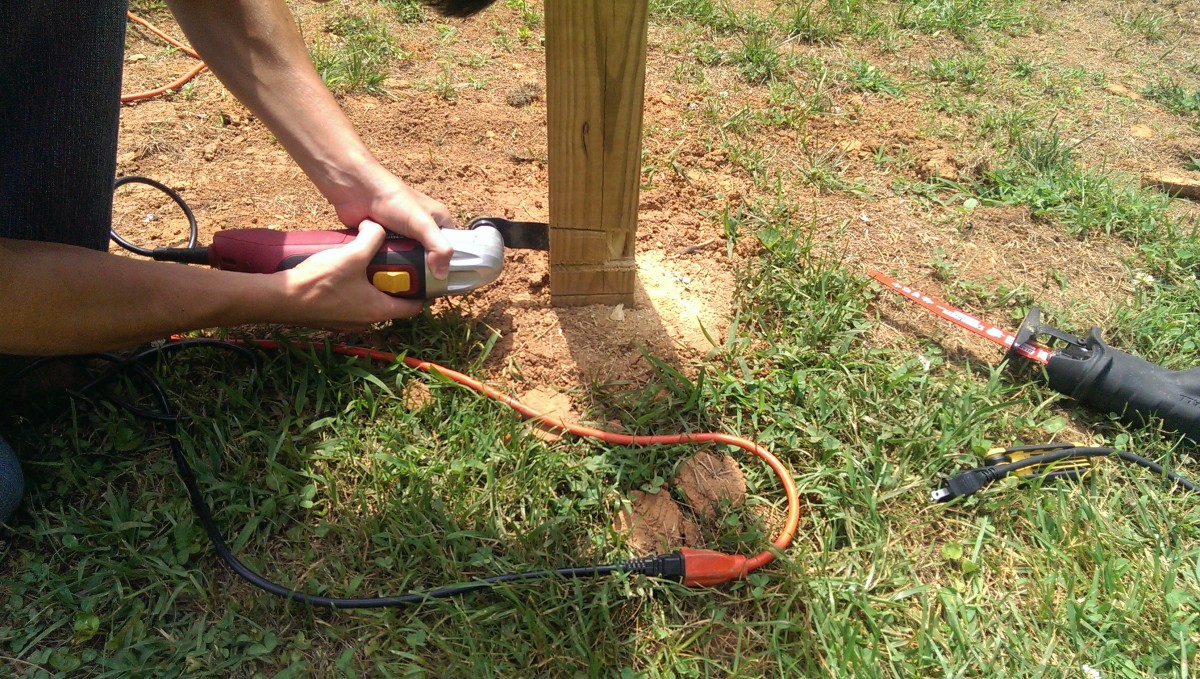
Slotting the Posts (Optional)

Oscillating Multitool from Harbor Freight
Cutting Bottom Post Notch
Half of 2×4 sandwich with mesh installed
Other half on
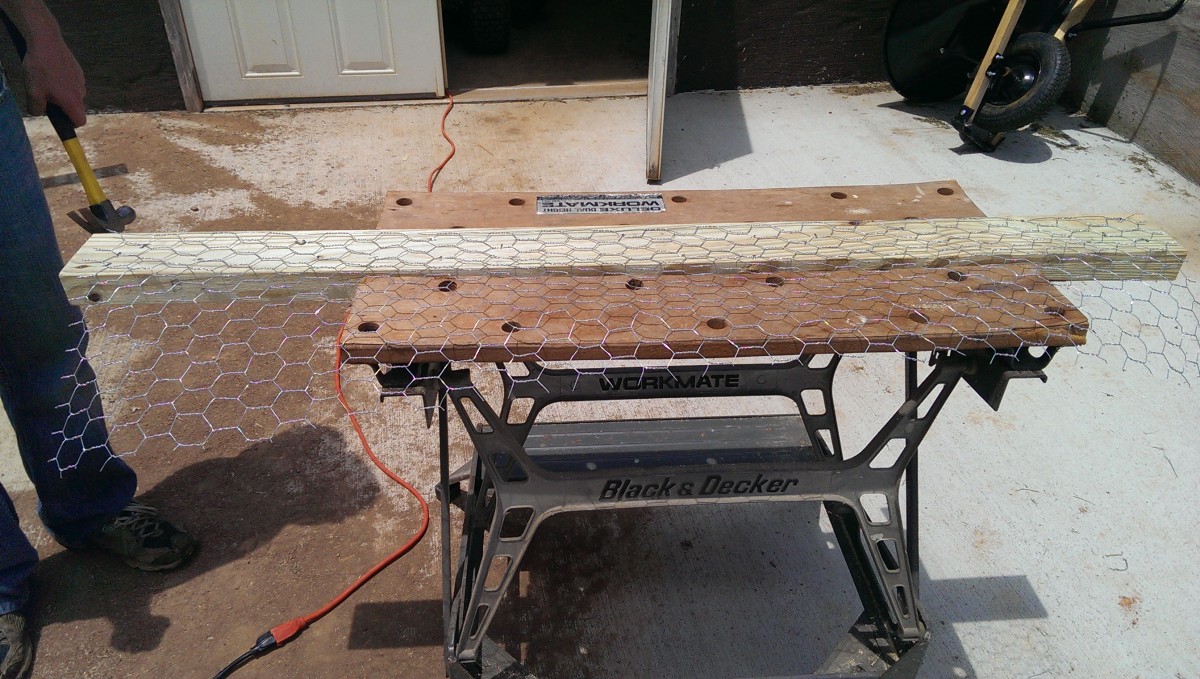
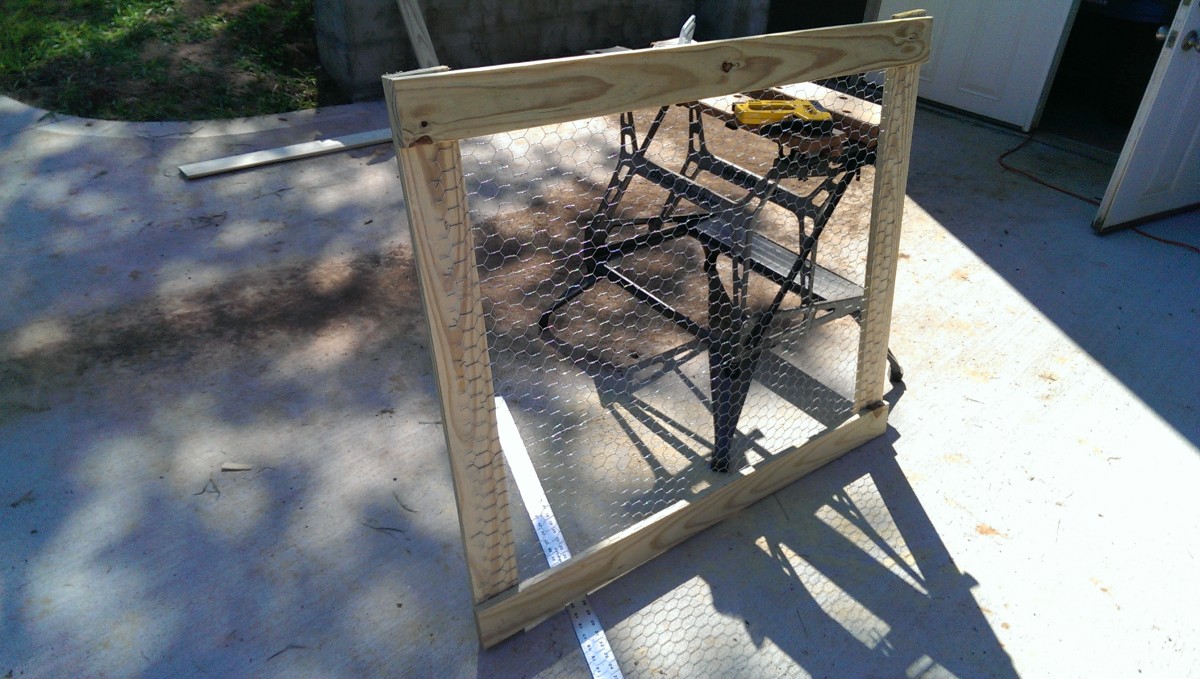
The goal for the rest of the fence is to sandwich hex mesh between two halves of a 2×4 running along the fence. I added the above pictures to try to clarify the procedure. Basically, you have 2 1×4’s running horizontal between posts. They are inset flush into the posts. Then, you staple down the wire mesh. Lastly, you use 2 horizontal 1×4’s and 2 vertical 1×4’s screwed in to hold the mesh.
This whole explanation is just to say why this is optional. I wanted to set the rear most horizontal 1×4 (the white 1×4 in the first picture) into the 2×4 (brown) to get one flush surface to staple the hex mesh onto. If you wanted, you could use up more 1×4 for verticals, screwing it into the 4×4, and spend a bit more money on wood but save some more time. It can be done either way and accomplish approximately the same thing.
Slotting Procedure (Still Optional)
Cutting Bottom Post Notch
As pictured above, I made heavy use of my oscillating multitool. A Sawzall was also handy if you have it, although it is optional. Basically the goal is to just cut a 3.5″ wide, 3/4″ deep slot in the 4×4 post where the 1×4 will go. Remember that a 1×4 is actually 3/4″ by 3.5″ in real dimensions. In both cases, I just held up a piece of lumber (2×4 or 1×4 works) and marked off where it hit both posts. Then, I cut that slot as pictured. There is also video of this procedure:
If you have a Sawzall, the top slot is even easier: it’s going to sit at the top of the post, so you can simply cut the chunk out in two strokes:
Installing Horizontal Stringers
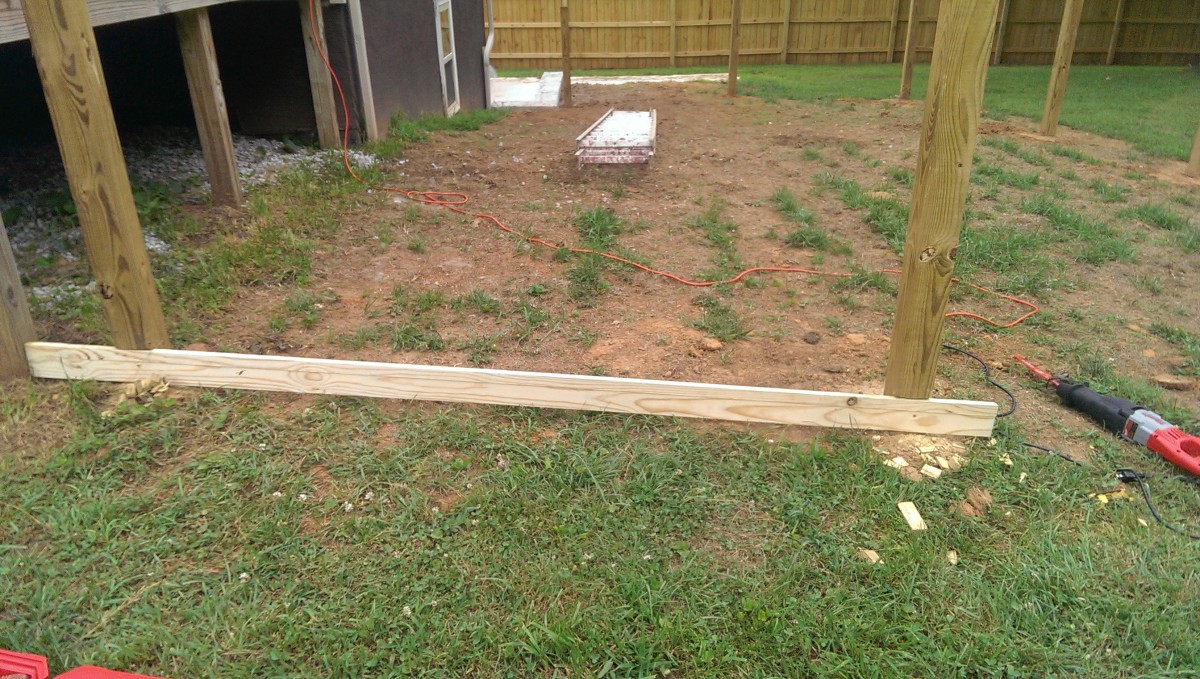
Simply screw these in with some good deck screws
Close-up of one side
Or whatever you want to call these. The next step is to install the stringers into the posts. I actually ripped pressure-treated 2×4’s in half to make the 1×4’s, sandwiching them on the side I cut them on because only the outside of the wood is pressure-treated. You should really do this on a large bandsaw. It can possibly be done on a table saw, but I don’t believe it to be safe and won’t recommend it. The alternative, of course, is to simply buy pressure-treated 1×4, which will cost a bit more.
In some cases, I cut it to length on my miter saw, then screwed it in place. In this case, I apparently screwed it in, then cut it to length with the Sawzall. Either method produces a similar result. I used a single 2.5″ deck screw for this part. When the other half of the sandwich is put on, another couple of 2.5″ screws will go through both pieces of wood.
If you opted not to slot the posts, you need to also add a piece of 1×4 against the posts vertically to keep a flat surface for the mesh to go on.
Digging a Trench

Anti-digging trench

Finished trench before mesh
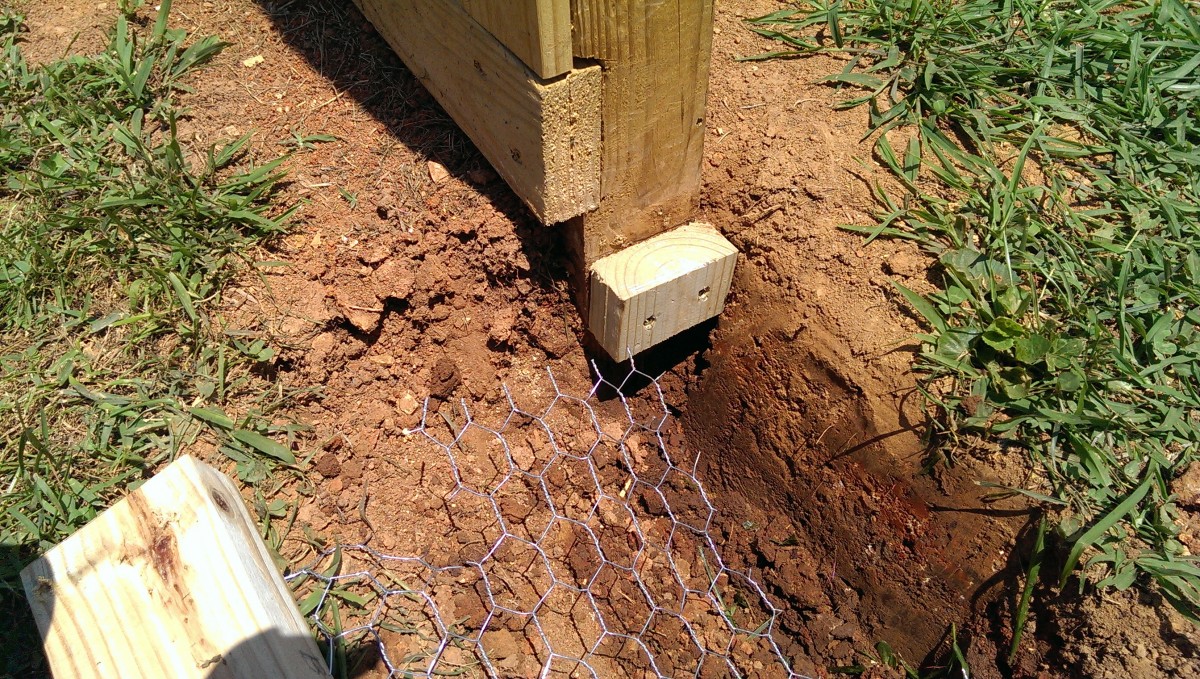
One of the best features of this fence design is its ability to keep out rabbits and dogs that like to dig. This is optional, but it has worked wonderfully. Before putting the mesh on, I dug a trench approximately 6″ deep along the fence. Then, I make sure the mesh goes all the way 6″ down into the trench, and cover it all back up. Aesthetically, you can’t see it, but if an animal attempts to dig under the fence, they’ll hit wire mesh and stop. So far, we have seen no rabbits in my wife’s vegetable garden, despite them being abundant in our yard.
Adding the Hexagonal Mesh

A 100′ Roll was more than enough and cheap
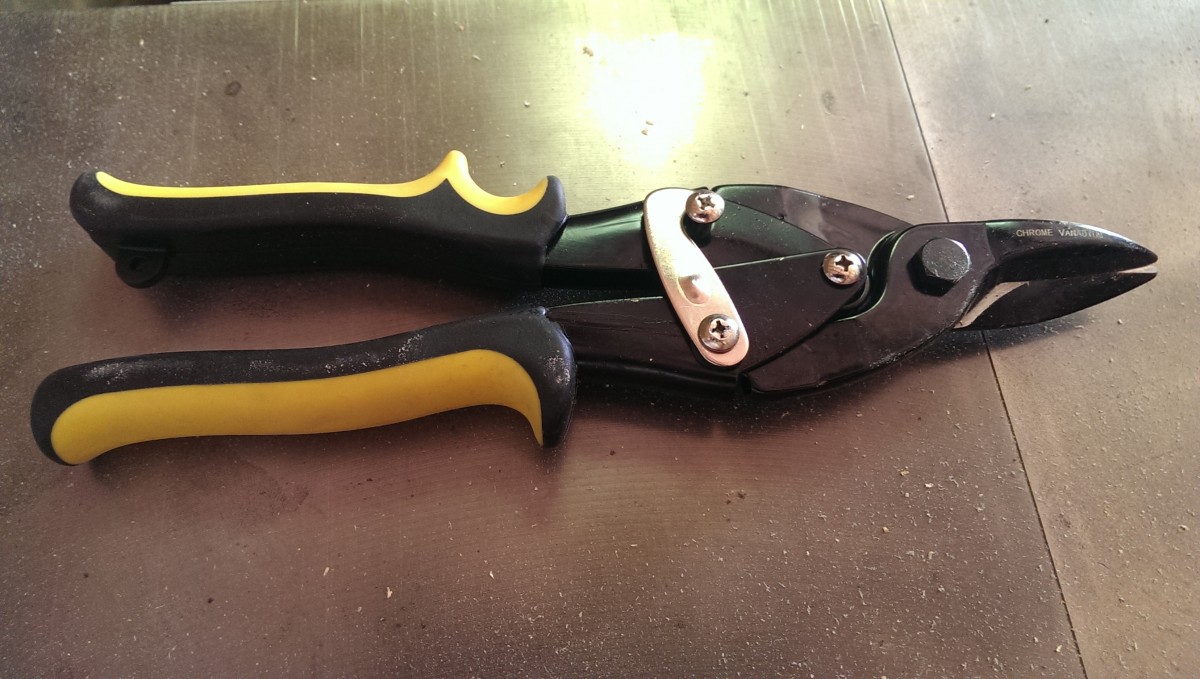
Aviation snips cut the mesh easily
A cheap staple gun helps position the mesh

Poultry staples hold the mesh permanently
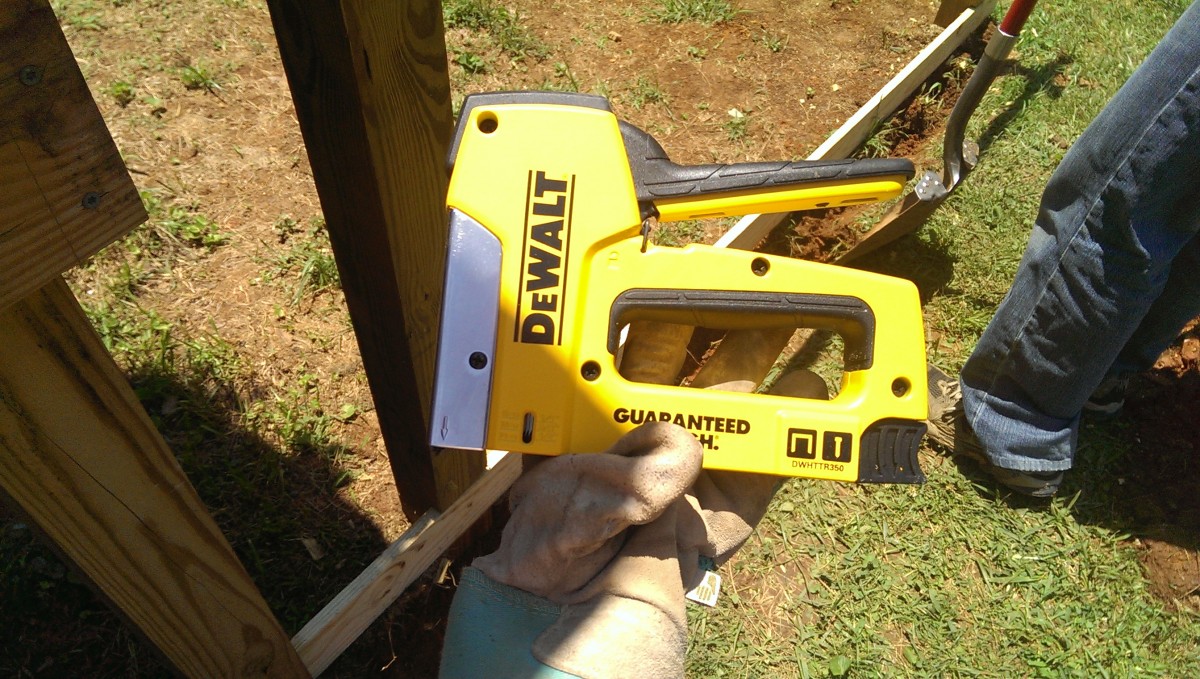
Putting up the mesh is fairly easy, with the help of the right tools. It also helps to have two people. We ended up stapling one corner of the mesh with a regular staple gun. Then, one of us held it as tight as possible while the other added regular staples to hold it in place. This got it stretched nice and tight to prevent sagging. This is primarily for aesthetics – the mesh will hold just fine if it’s a little loose, it just won’t look as polished.
Once the mesh is temporarily stretched and stapled, it’s time to add thicker poultry staples. The little staples in a regular staple gun aren’t up to the task. However, the poultry staples have to be hammered in. It’s a much slower job, which is why we used the staple gun first and came back with the hammer second.
Lastly, you can use aviation or tin snips to trim away the excess wire mesh. We actually cut it so it sat inside the wood a little bit, to make sure it wouldn’t be visible once the fence was complete.
Finishing the Sandwich
After picture

After closer up
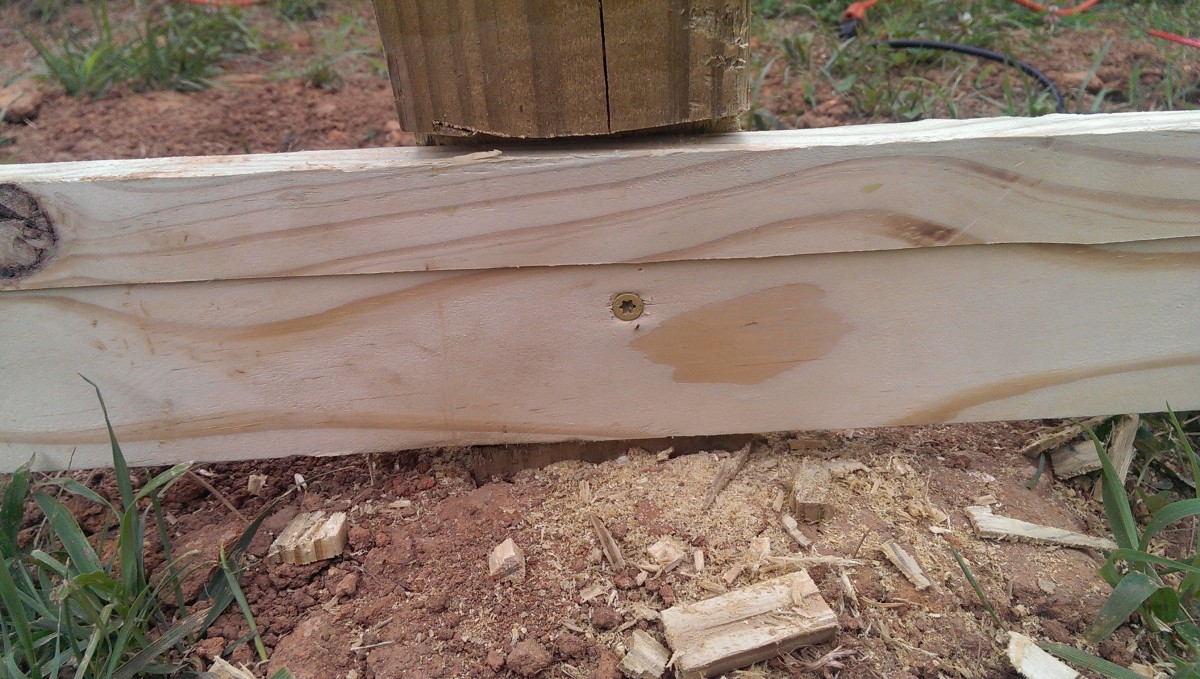
Once the mesh is done, you can simply attach the rest of the 1×4 by screwing it in. Note that I did add one more piece of 1×4 against the post after this picture was taken. Where 1×4 was attaching to the post, I used 2.5″ deck screws. Where it attached into another piece of 1×4, I went with 1″ or 1.25″ deck screws so they wouldn’t go through too far. Personally, I greatly prefer deck screws to wood screws in nearly all circumstances. They grab much, much better and have hex or square heads so they don’t strip as easily, either.
Trickier Sections
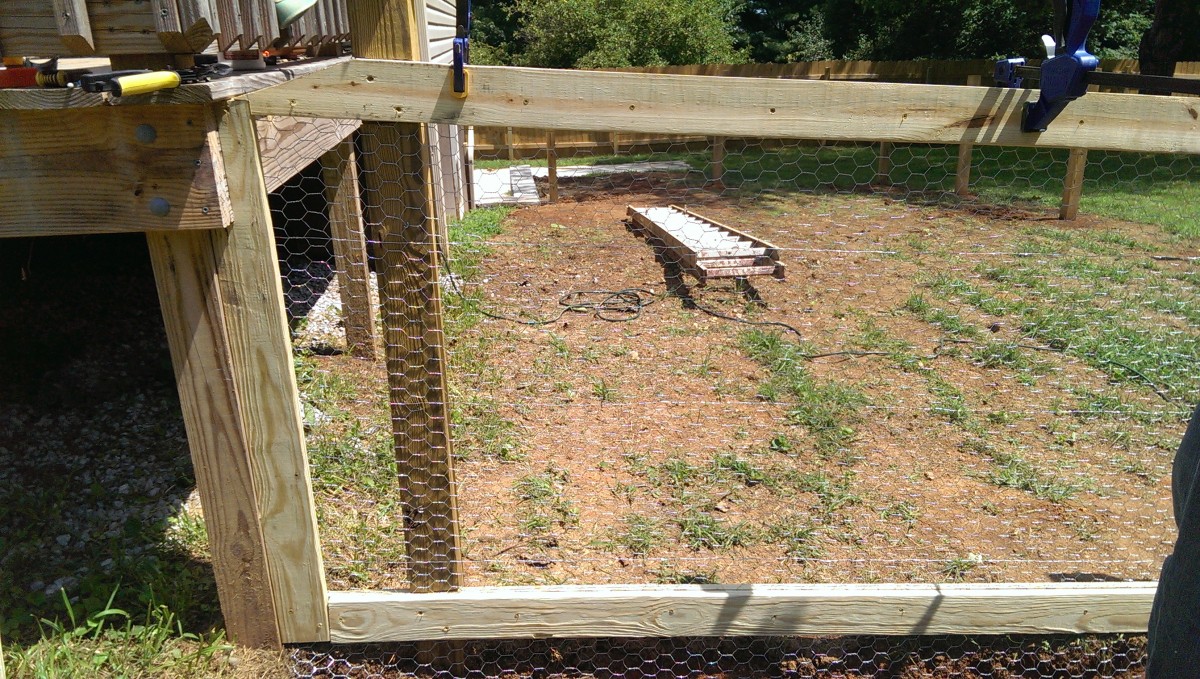
Attaching to the deck
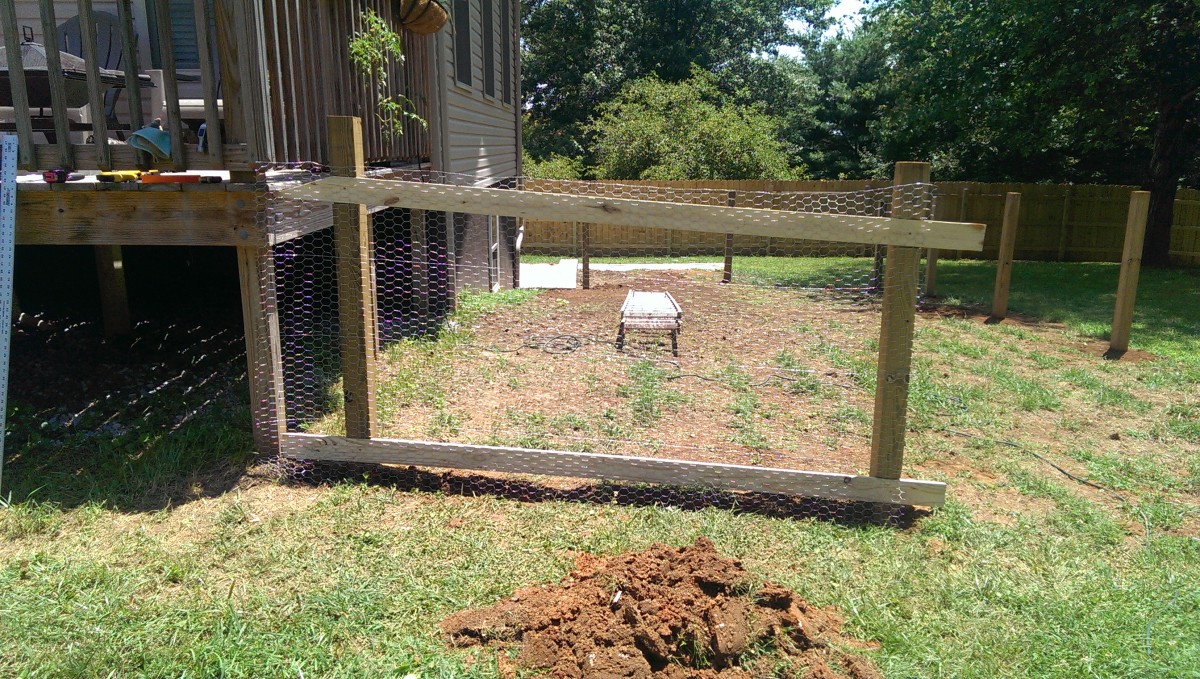
In my case, my fence was going to butt right up to the house and deck. You can see a few pictures back how I handled the fact that the fence was slightly taller than the deck itself. I ended up putting in an extra vertical 2×4 past the post, and cutting pieces so that it sort of jigsawed together and had what I think is a fairly nice slope to make the lines look even. I screwed it straight into the decking, as well, to keep that section of the fence anchored. This picture shows how I did that more clearly.
I also needed to add mesh over the base of the deck itself, to make sure the dogs and rabbits couldn’t enter the garden that way. I ended up simply doing a modified fence right against the deck. I didn’t want to actually use staples on the decking itself, in case it needed to be removed, so I used screws sparingly to attach new 1×4 as pictured. I also did the same 6″ trench to bury the mesh that I had done everywhere else.
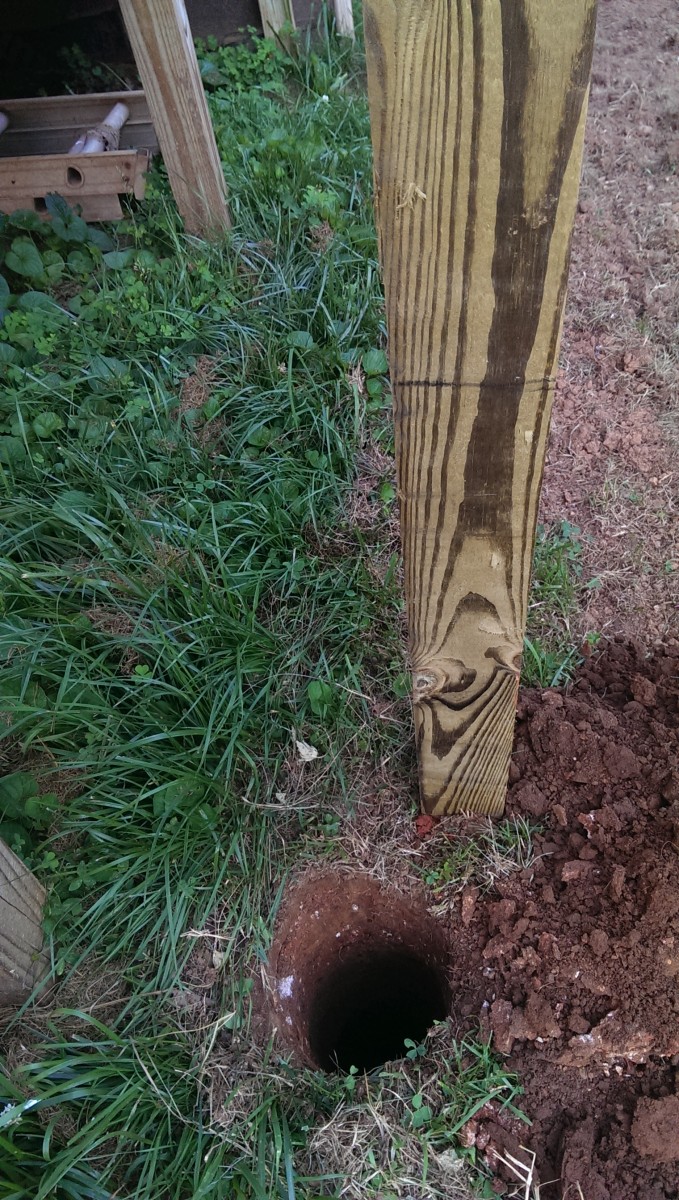
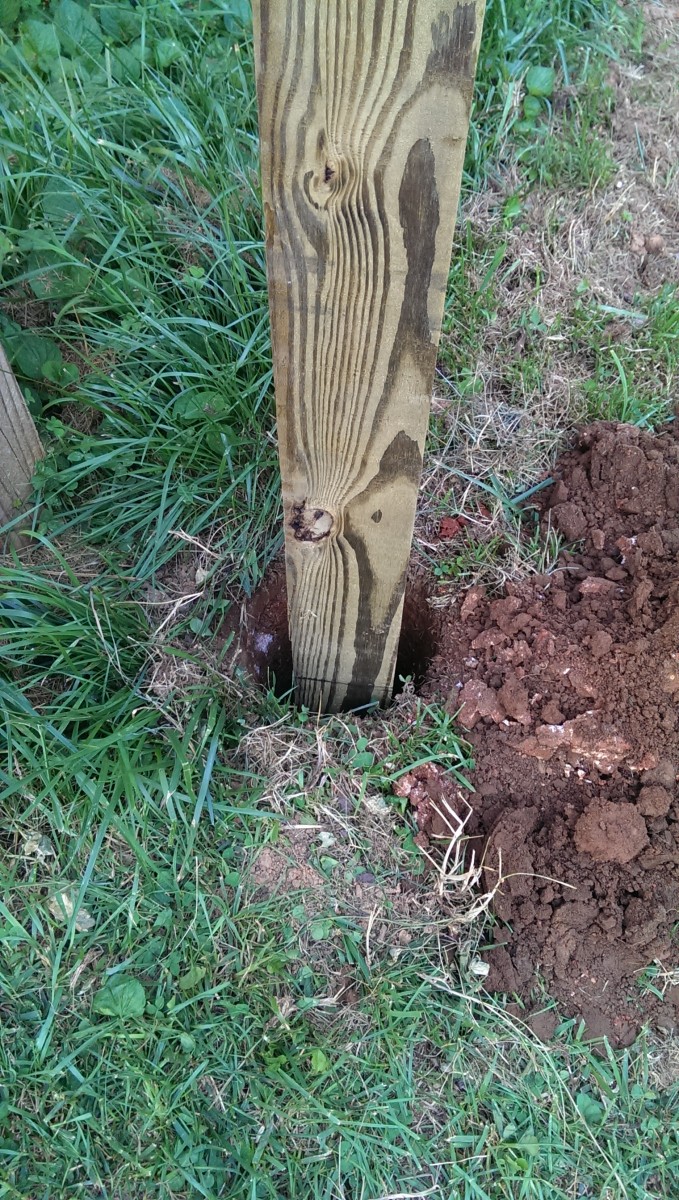
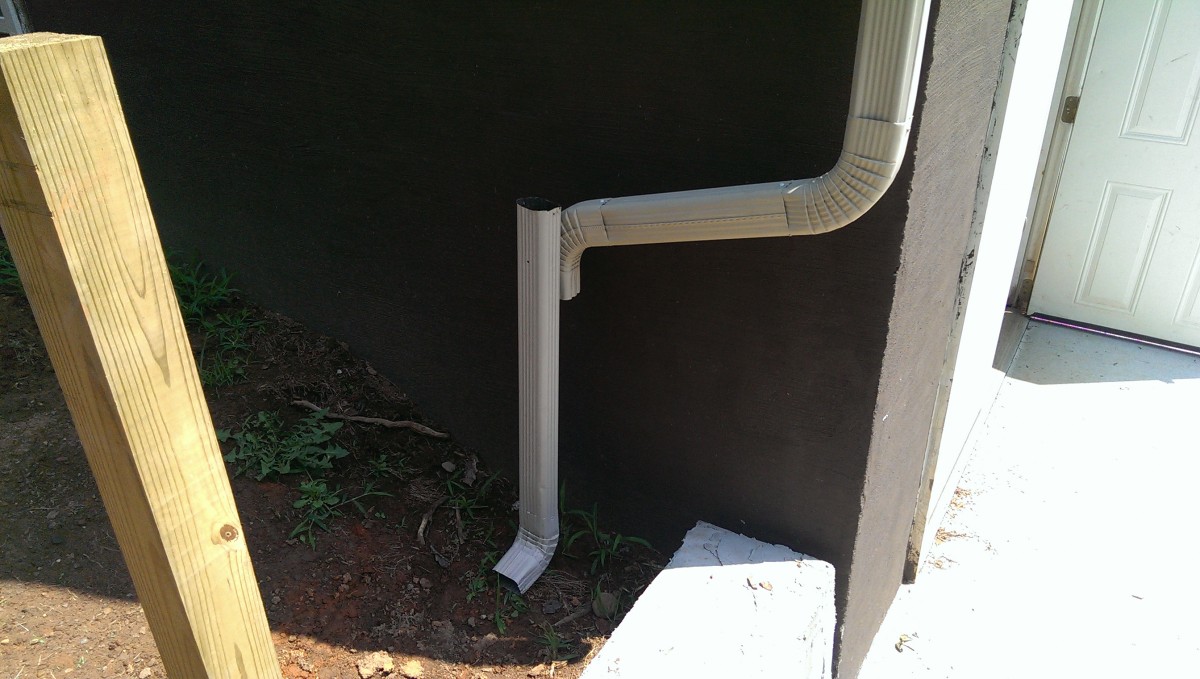
Routing a Downspout Part 2
As I was finishing the sections, I circled back to the downspout. Once I had the posts up and knew what the fence was going to look like, it was time to get the drainage pipe buried. As I said earlier, if you do this, you should use smooth PVC. It wasn’t smart to bury corrugated pipe this deep, as it can clog. It’s not the end of the world, but I may have to dig this up and service it at some point.
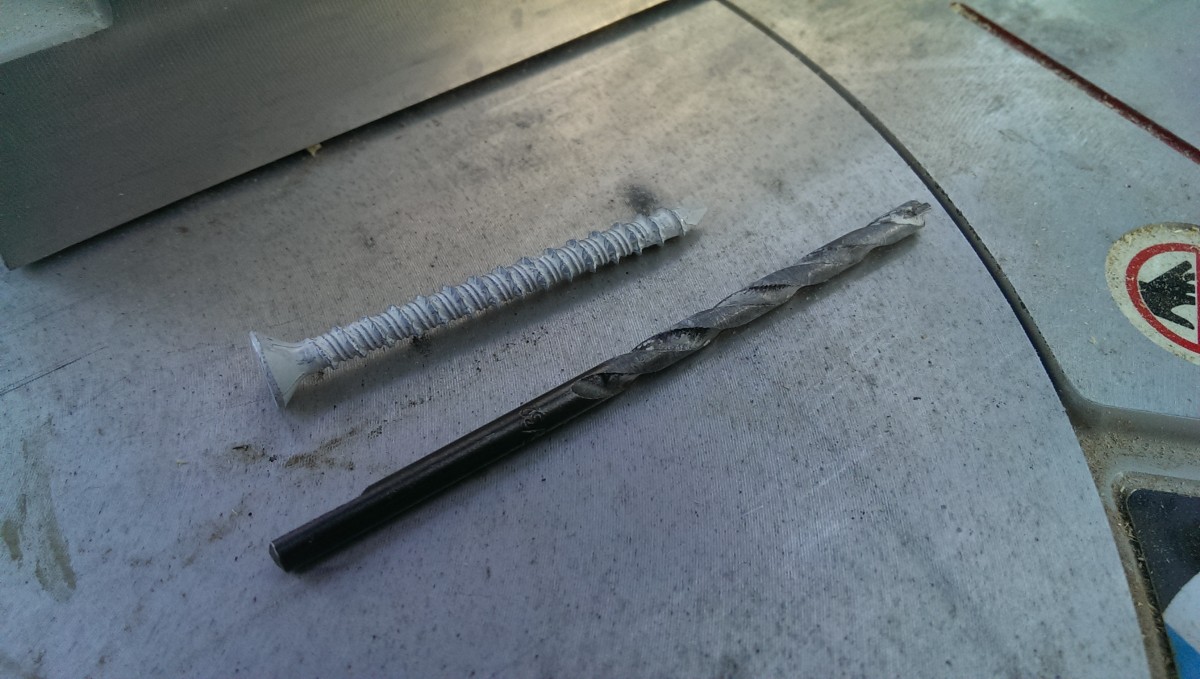
Tapcon screw

Downspout bracket
2×4 screwed to wall after lining up the downspout bracket
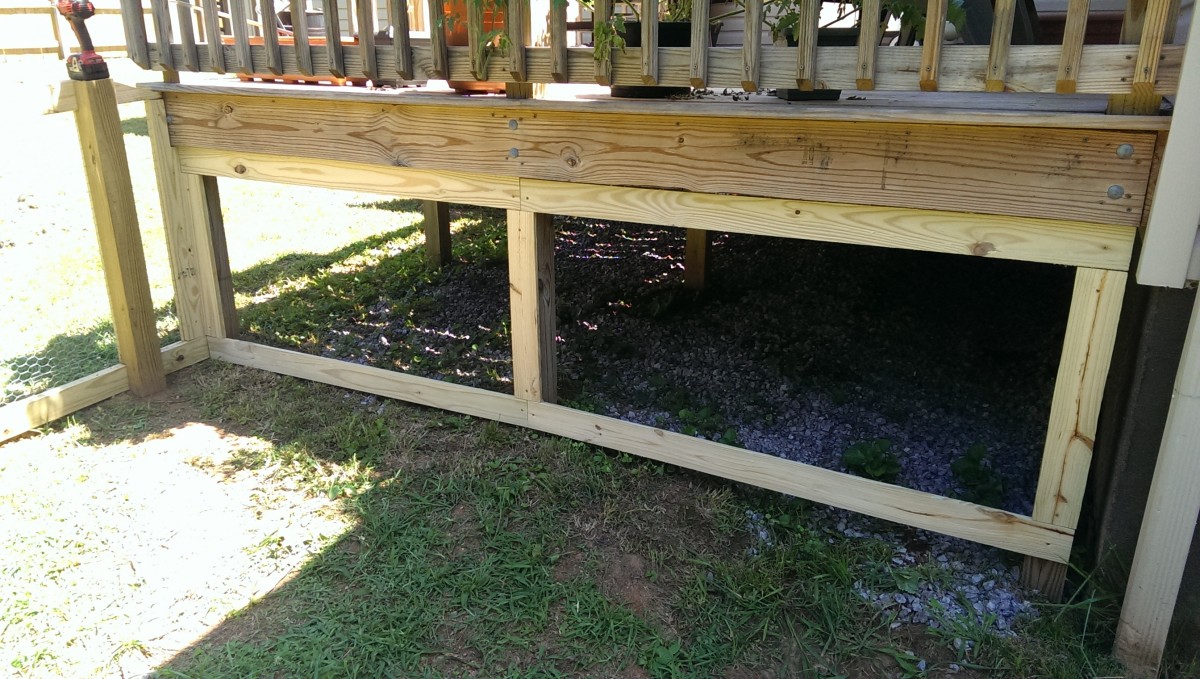
I ended up attaching a 2×4 to the wall using two tapcon screws, which are made for concrete, so that I could have something to anchor the fence against. This fence was for rabbit proofing, so I wanted it to go all the way to the wall. I secured a downspout bracket to it after test fitting my extension.

Downspout secured
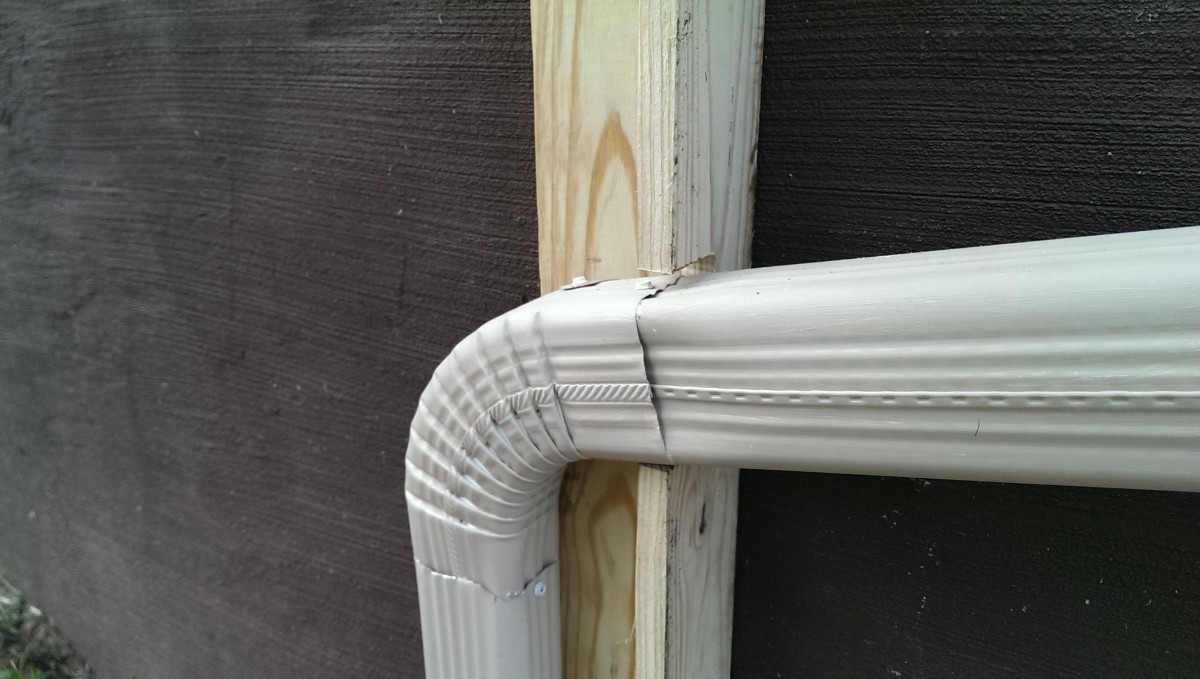
Closeup of downspout bracket

Notch for downspout
I used the 2×4 as a pseudo-post to attach the horizontal 1×4. I also put a backing piece of 1×4, pictured, to hold the wire mesh. I had to notch the 1×4 to allow the downspout to go through unimpeded, as shown. Beyond that, it was a simple matter of screwing everything together.
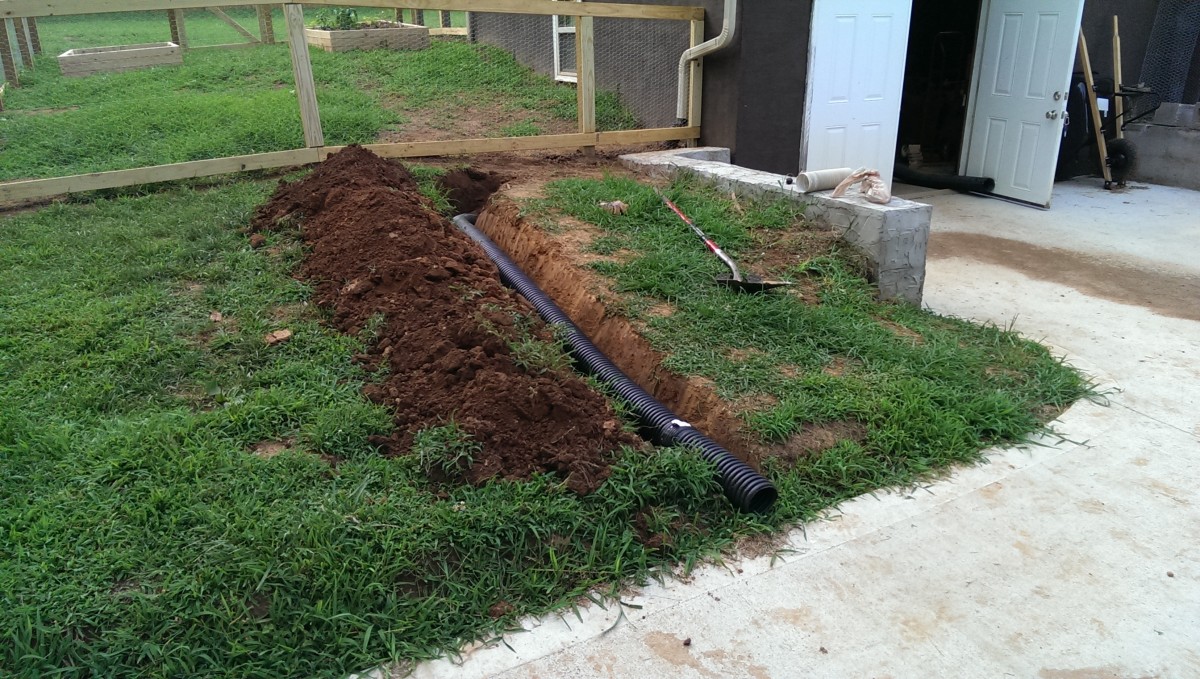
Burying line
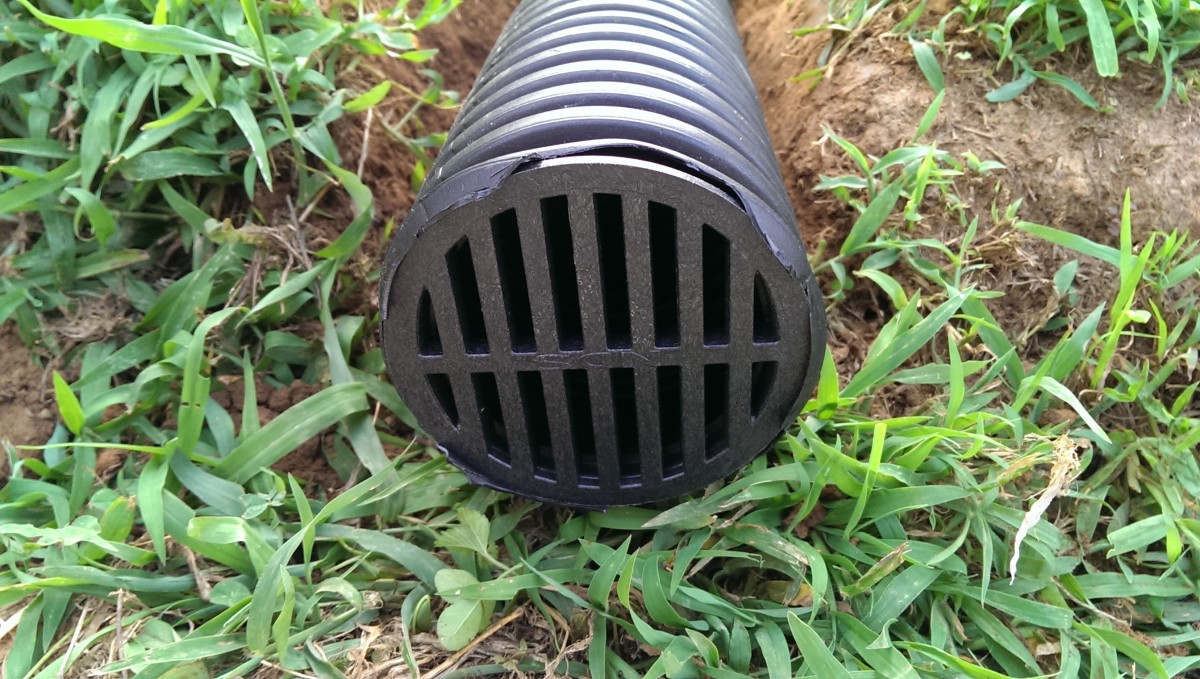
Drain grate
I finished the trench and waited to fill it in until after I finished the fence section, to ensure everything had enough clearance and was placed flush. I threw a cheap grate on the end of the drain, which lets out on the pavement, to keep critters from going up the drain pipe.
Downspout done
Beyond that, I finished up the section as normal. I cut a hole in the mesh to go around the downspout, which was now running through the fence. This seems to have held up pretty well. My wife ended up planting marigold on that section of the fence to add some color, and it also covers up the downspout. We also got some more dirt to backfill that area, since it was a low spot, later on.
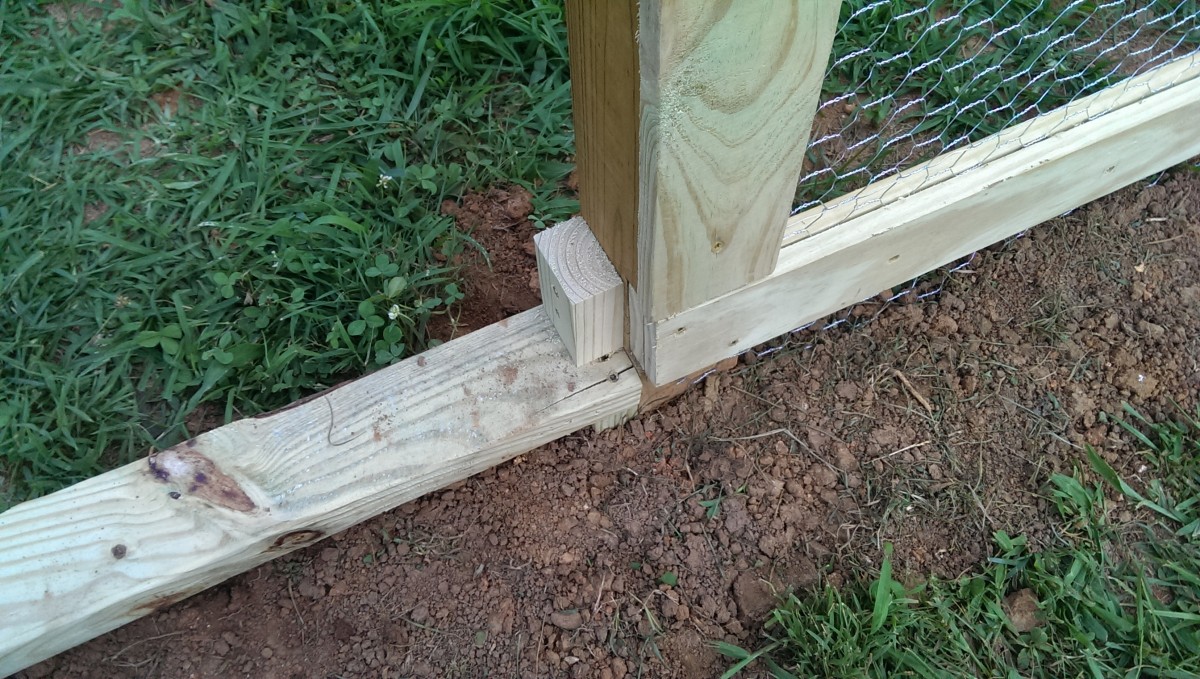
The Gate Bottom
Gate bottom mesh
Gate support blocks

Gate bottom installed
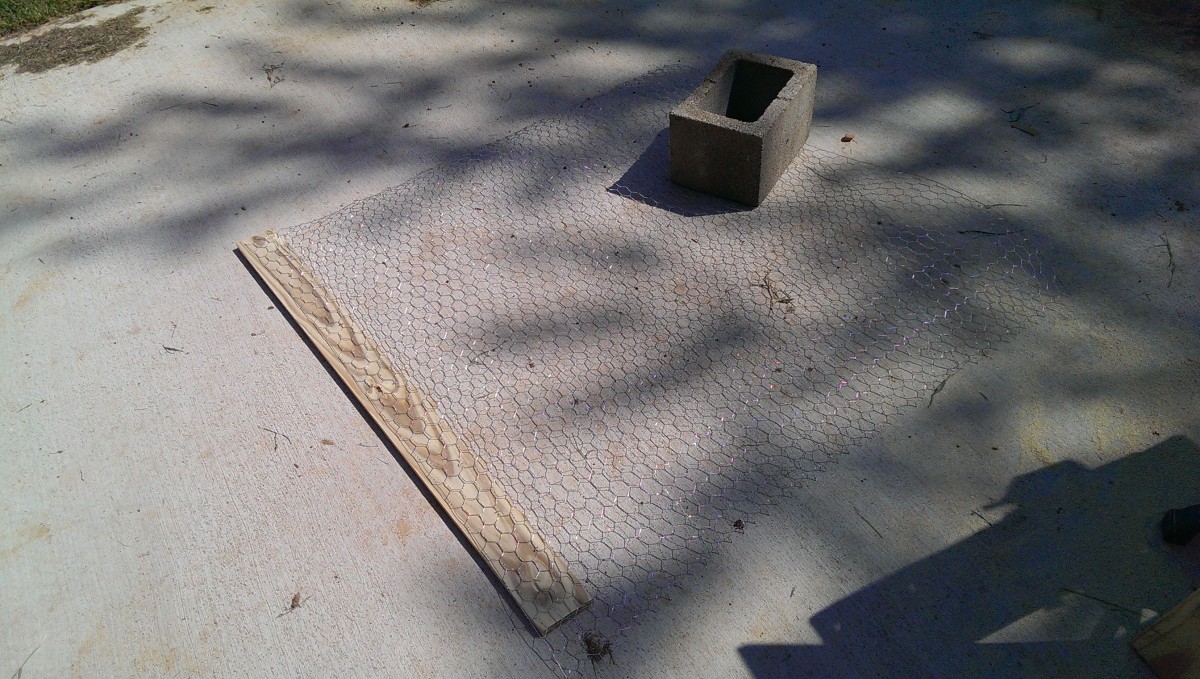
Before doing the gate itself, I needed a way to dig-proof the gate opening. It would be pretty frustrating to spend all of the time to dig out and bury mesh around the perimeter only to have the gate itself be a weak spot. To fix that, I cut a piece of 2×4 as long as the gate opening, and stapled some mesh to it.
I cut some small blocks of 2×4 and screwed them into the gate posts, making sure they were level and low enough so that the gate bottom would sit more or less flush with the ground. You don’t want to be constantly banging into this with a wheelbarrow, or you will damage the fence over time. The blocks give the gate bottom something to rest on during installation and also give you something to screw the gate bottom into. Screwing the gate bottom into the posts would be difficult. With that done, simply fill in the trench, and the gate becomes no more vulnerable to digging than any other part of the fence.
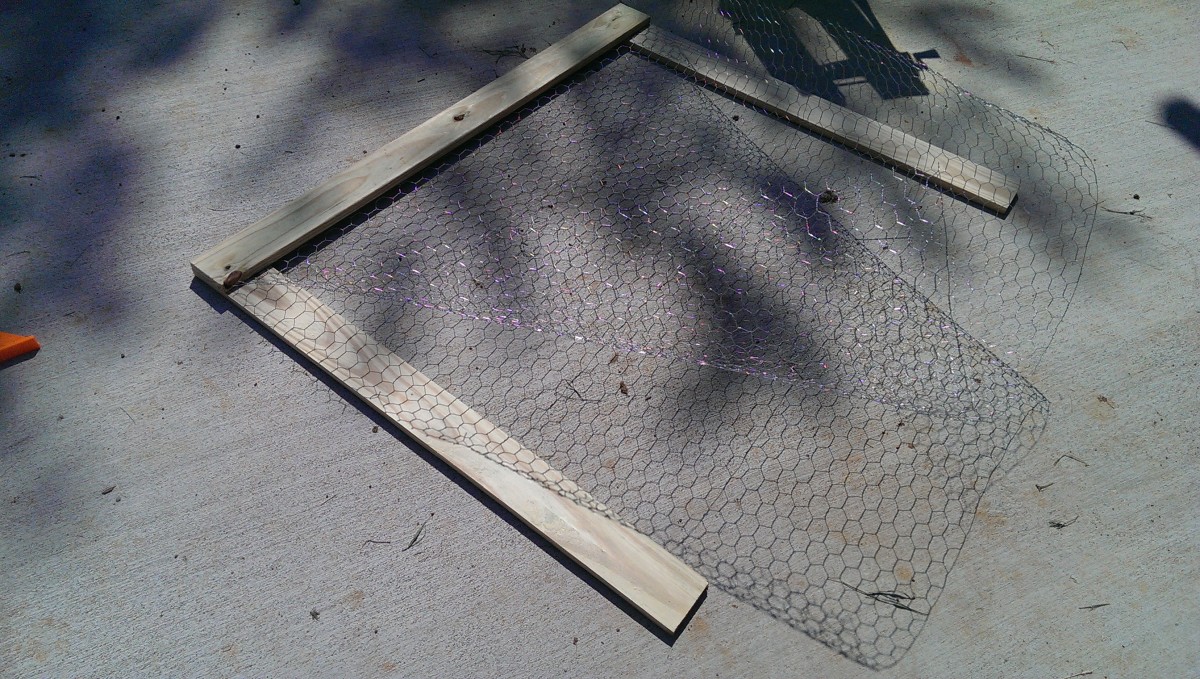
The Gate
Top of gate with wire mesh attached
Sides attached to top
As gates go, this one is fairly simple. It’s only 4’x4′, and only uses a couple of hinges and a simple latch, with one diagonal cross brace. To start, I cut the top piece of 1×4 the full width of the gate. Then, I cut two more pieces the full length. I was able to staple wire mesh to the top piece and then temporarily secure the side pieces to it with a screw.
Bottom installed
The goal here is to have the two halves of the sides and top overlap, so the whole thing holds together, as pictured. In other words, the front 1×4 across the top and bottom will be longer than the back, and vice-versa for the sides, so that all the pieces can be screwed into each other. The picture shows this halfway through to illustrate.
I wanted to make the gate mostly square, but I kept holding it up to the actual spot where it belonged in the fence to make sure it would match the slight slope. This is why there is a little excess material between the halves to be cut off later on.
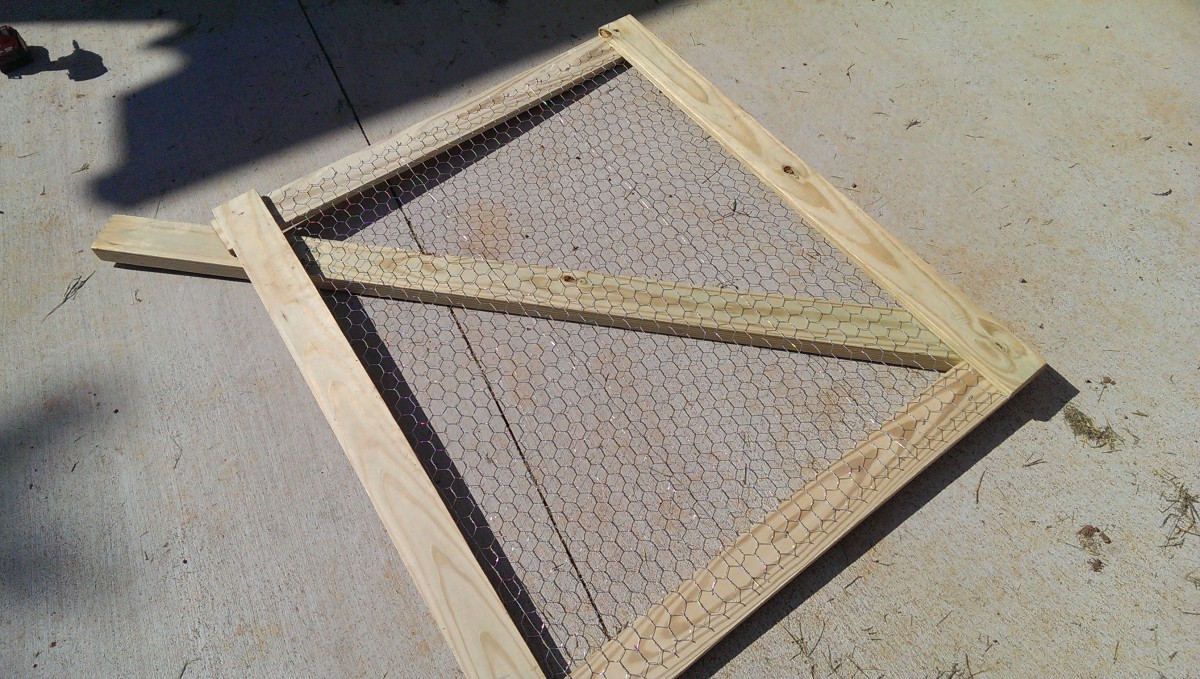
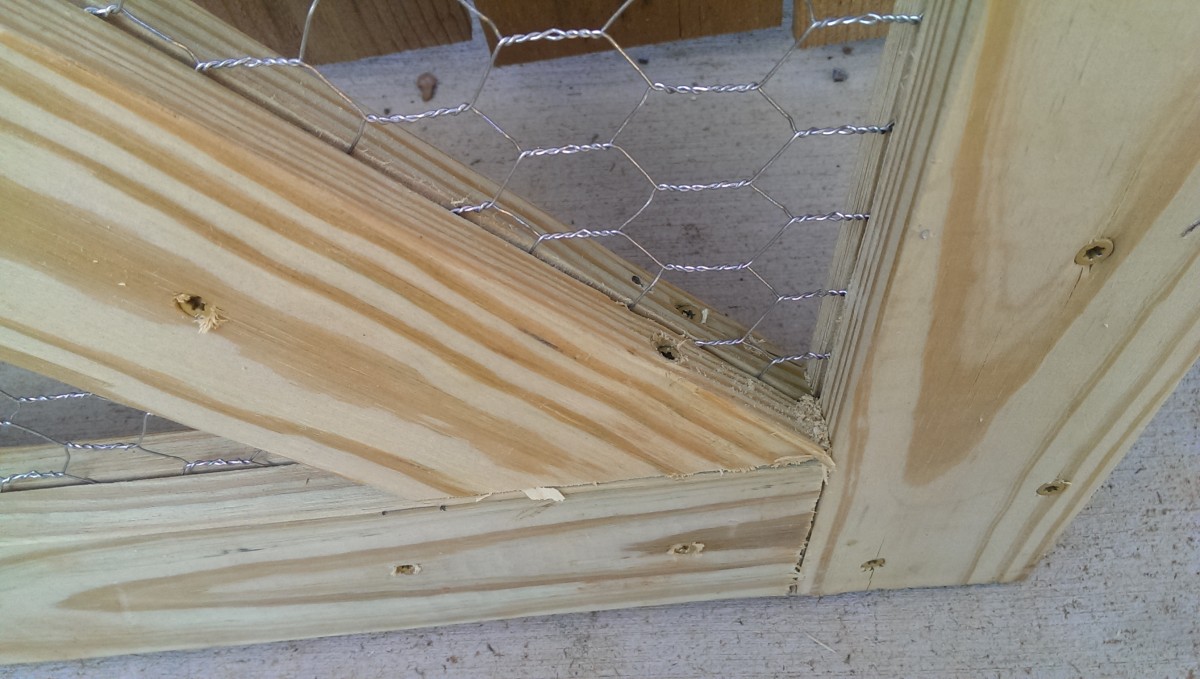
Diagonal test fit
The next step was to deal with the diagonal cross brace. I cut a diagonal on the miter saw to an angle I eyeballed, and then sat it under the gate as shown. I was then able to simply mark where it intersects the other end of the gate with a pencil and lop that off with the miter saw. Easy peasy.

This 90 angle extension on the drill helped enormously
I sunk screws in vertically through the diagonal after drilling pilot holes
I was able to use a couple of screws to hold the diagonal halves together while I screwed them against the gate. I used the right-angle extension pictured to help with this. The goal was to put screws straight down through the diagonal and into the bottom piece. I drilled pilot holes first, which I HIGHLY recommend, to make sure the screws went where I wanted, rather than splitting apart the wood.
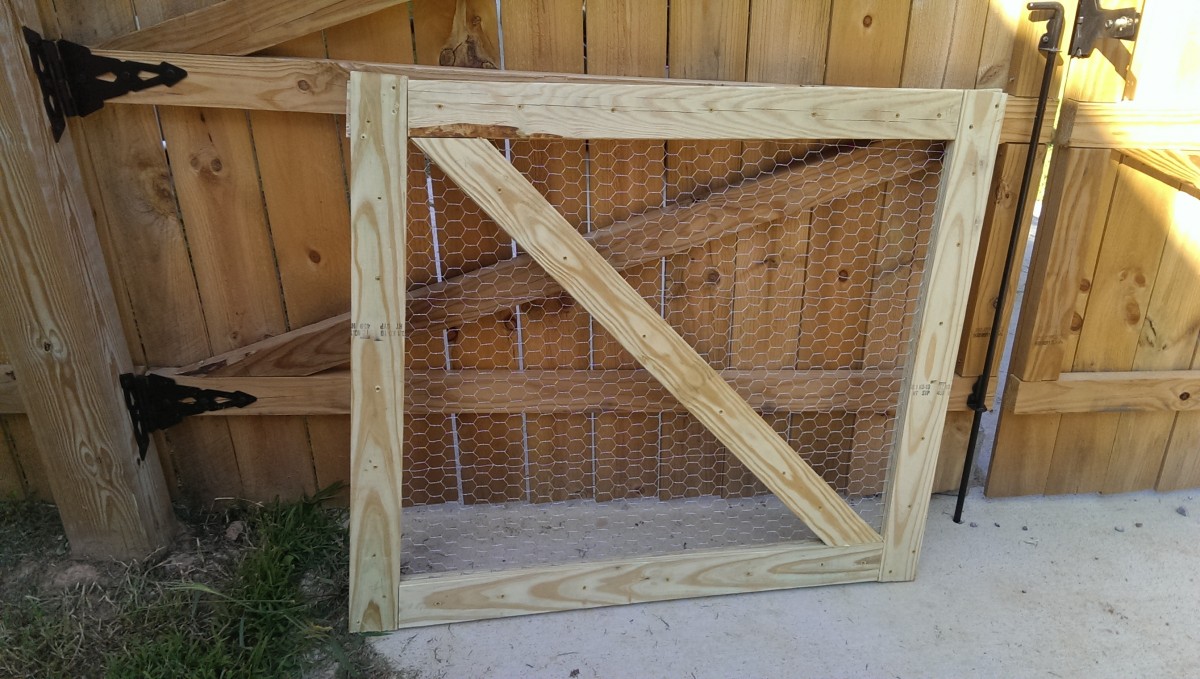
Gate ready for installation
Once this was all complete, the gate was ready to be installed on the fence. (After a little trimming of the halves, of course.)
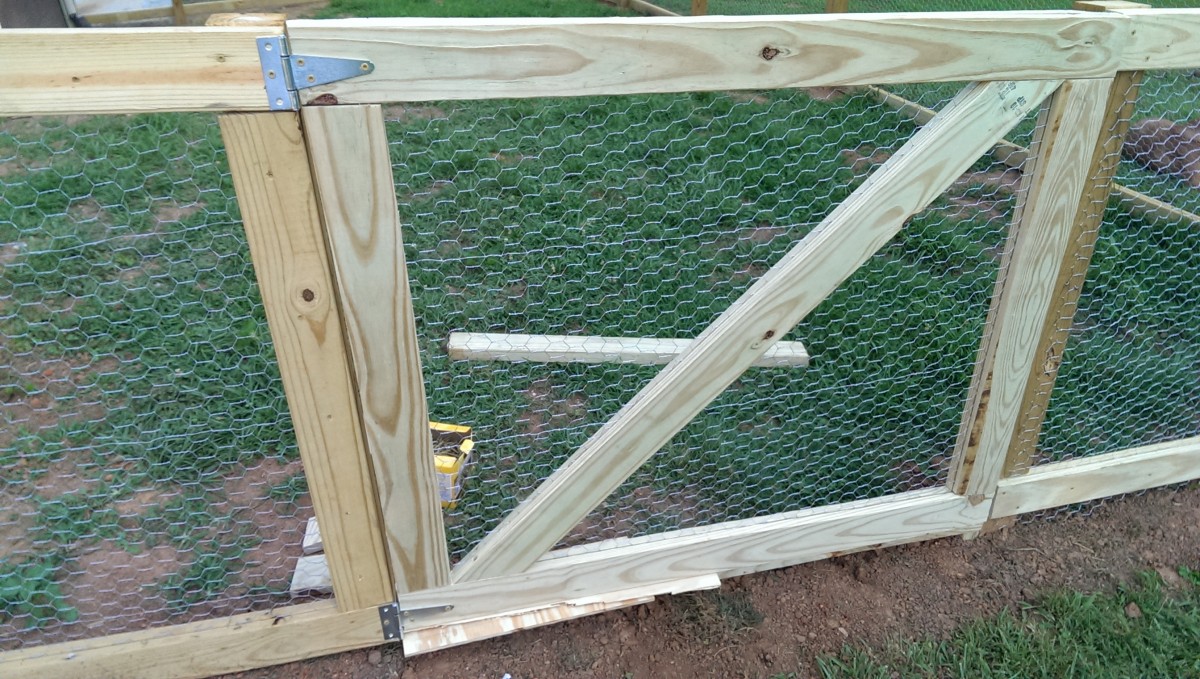
Hinges being installed

A piece of wood levels the gate and leaves an appropriate gap
Installing the gate is pretty straightforward. I used a thin piece of plywood I had laying around under the gate to hold it straight and give some clearance underneath. Then, I simply screwed in the pair of hinges I bought at the big box store. The gate is aligned and has plenty of clearance. Once it’s screwed in, you can chuck the temporary brace piece. I also installed a small gate latch to hold it closed.
Gate stop block
One issue I noticed was that since the latch is at the top of the gate, you can push on the bottom and have it bend in much further than I liked. I probably could have designed it to have a rabbet or something to handle this, but I added a stop block instead. Basically, I just cut a small piece of 2×4 and screwed it in where I wanted the bottom corner of the gate to stop. Between this and the latch, the gate does not push in very easily, so there’s no fear of a dog or accidental kick damaging anything.
The gate is finished
And with that, the gate is all wrapped up.
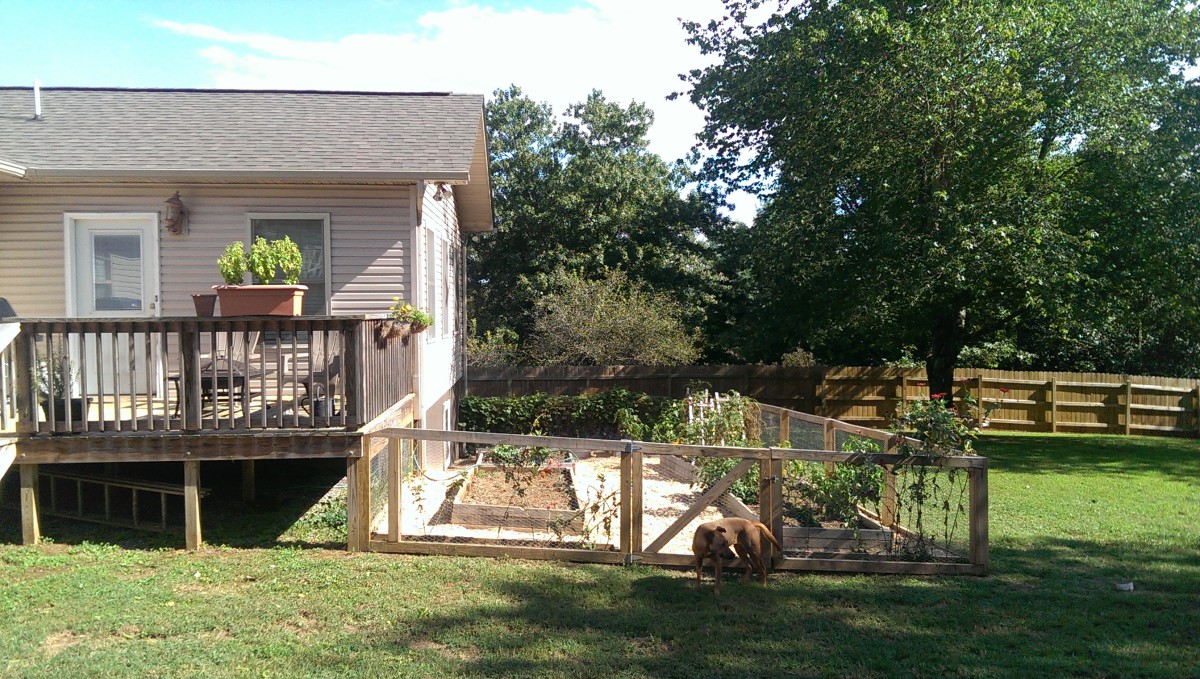
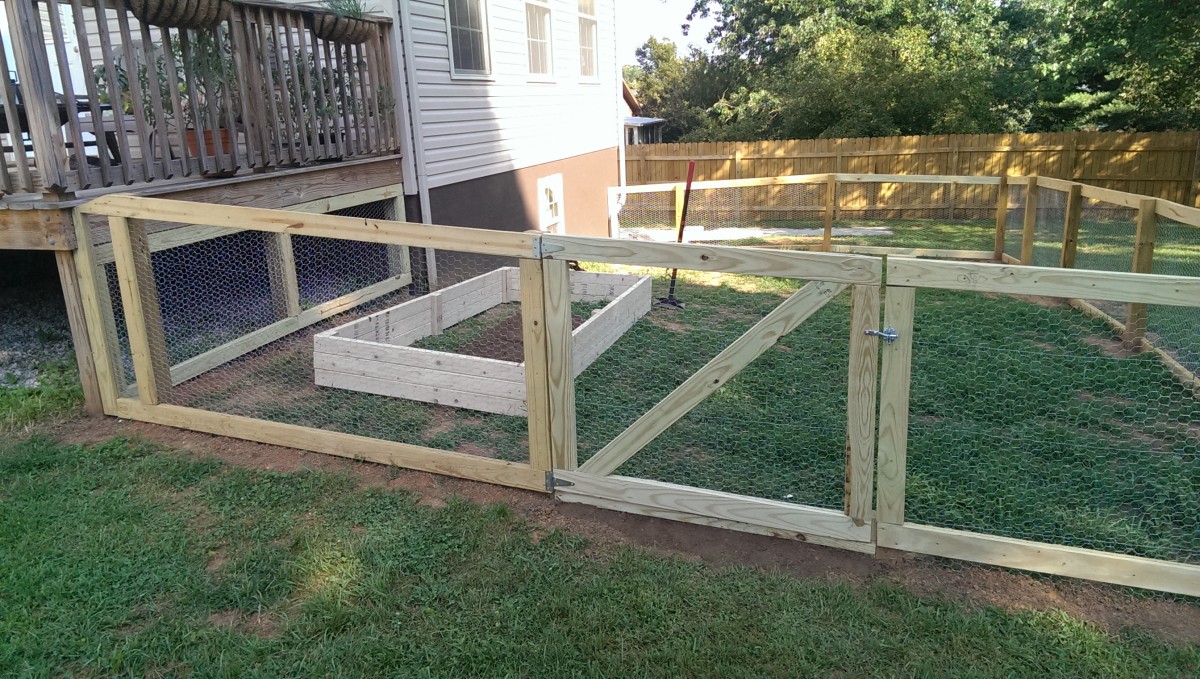
Garden fully completed
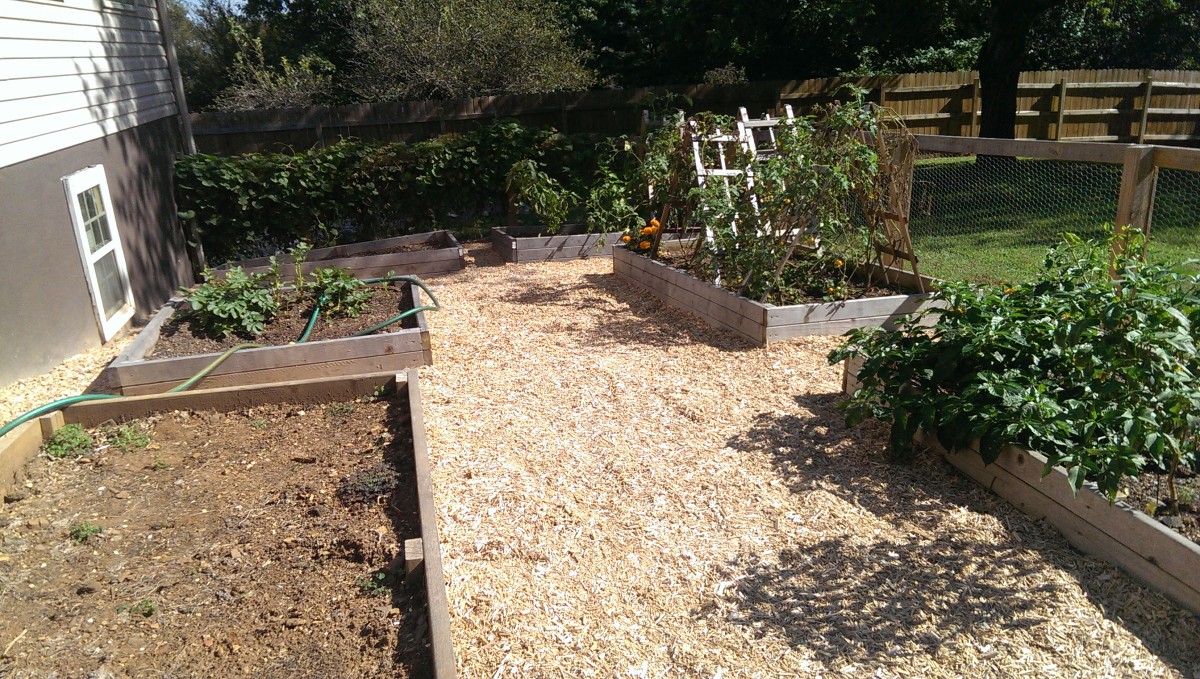
Inside of garden
Once you’re all done, you can add some raised beds and mulch to finish the look.
It turned out beautiful!
Thanks!