Thread Spool Holder
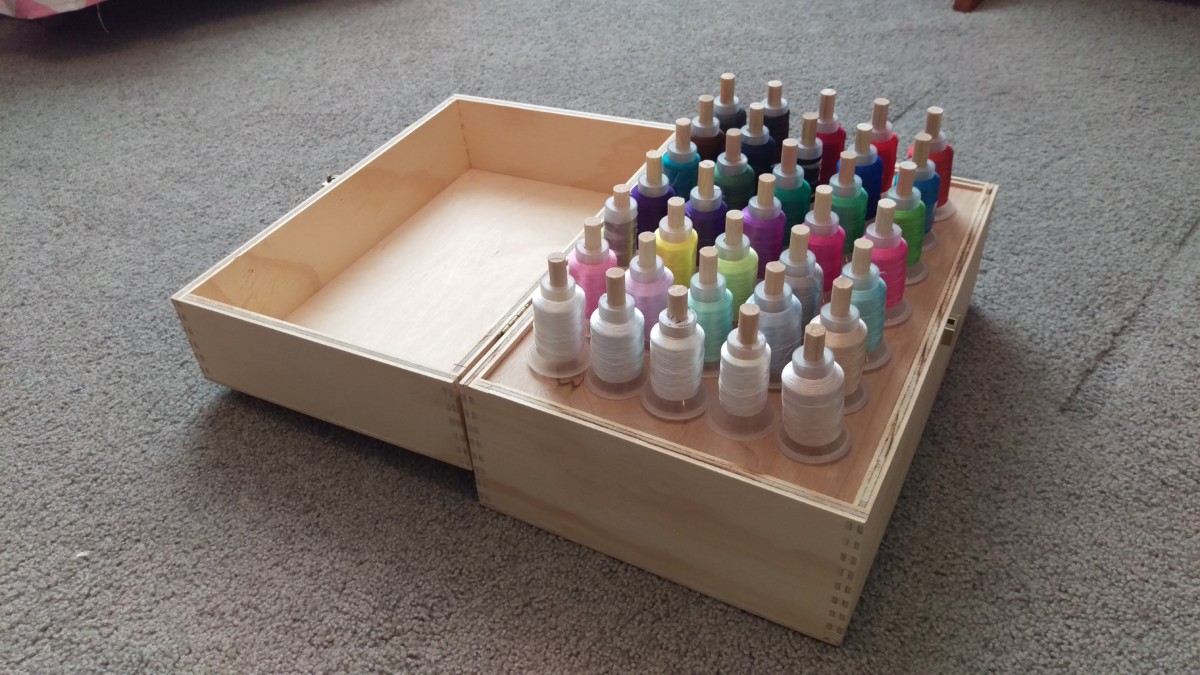
The end result
My wife needed a way to organize her thread spools, but the organizers available all looked to be cheap plastic and/or fairly expensive. I simply couldn’t bring myself to plunk down $45 for a plastic box. Instead of doing that, I made some quick modifications to a nice wooden box that some wine had shipped in. The result is a nice sturdy spool holder that cost less than $10.
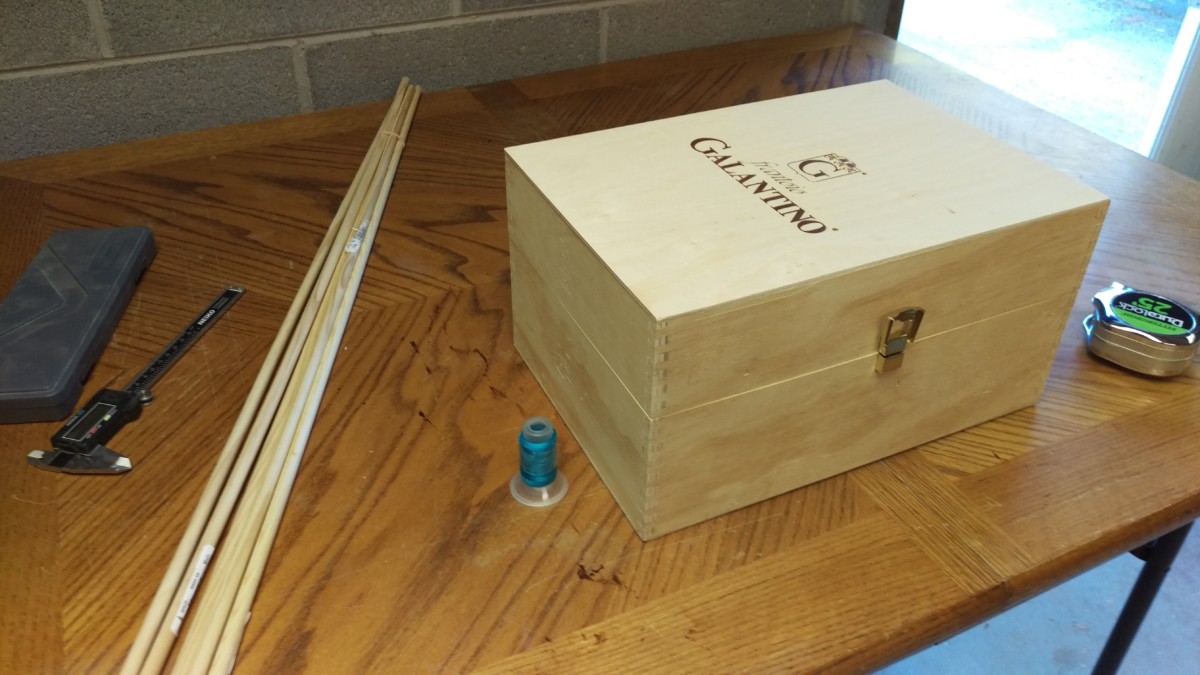
Wine box, test spool of thread, and dowel rod
If I hadn’t had the wine box handy, I could have simply made a box out of plywood. I had saved this box because I liked the box joints that were used to make it and figured it would be useful for something later.
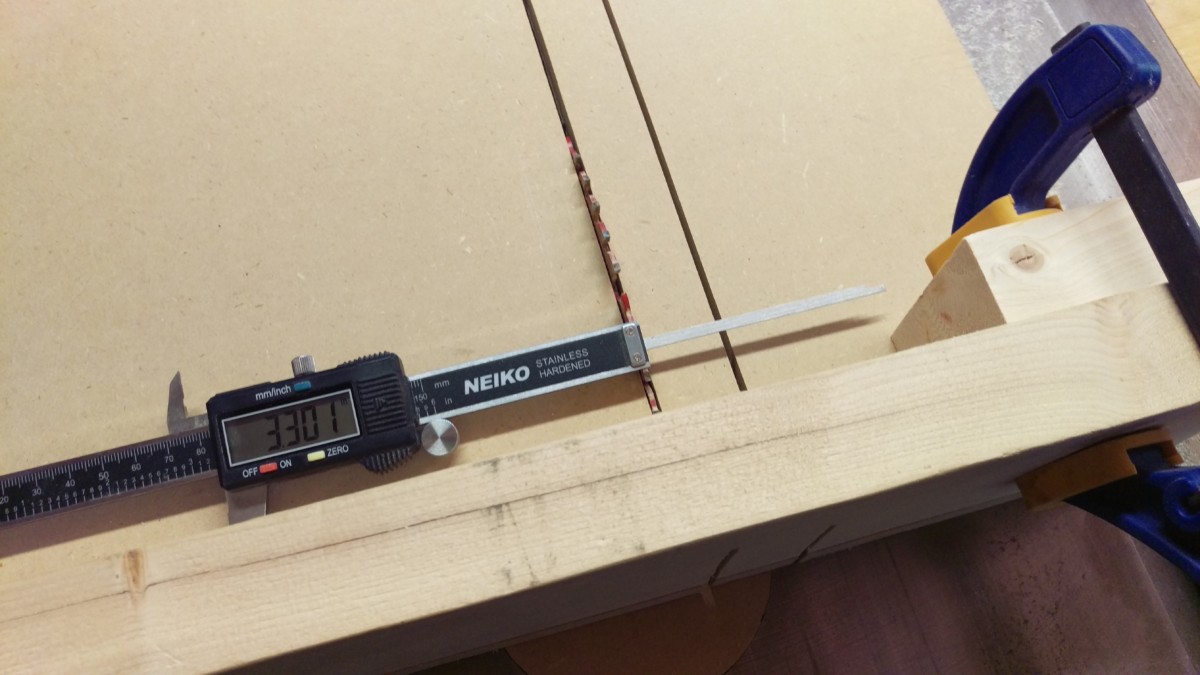
I grabbed one of my wife’s thread spools to use as reference for spacing and dowel rod diameter. My design is pretty simple: I just put holes in two boards, put lengths of dowel rods in them, and put the whole thing in the box. A 3/8″ rod fit well inside the thread spools with a bit of slack.
Now, dowel rods from home depot are generally horrible. They’re rarely round and rarely 3/8″. In the past, such as my crib build, I’ve had real issues with them. That said, in this instance, they’re close enough and very cheap. Since there was a bit of slack, it didn’t matter that they were out of round slightly.

Cheap underlayment
I needed some wood for the boards. Unfortunately, I had used up all my decent-looking plywood scrap. I ended up cheaping out and getting a $5 piece of underlayment from home depot. In retrospect, I should have paid a little more for better wood: the underlayment looked OK, but I had to be really careful about tearout when drilling holes.
Also, the underlayment is only 5mm thick, so I ended up gluing two pieces to get two 10mm thick boards. Shown are the 4 pieces I am going to glue together.
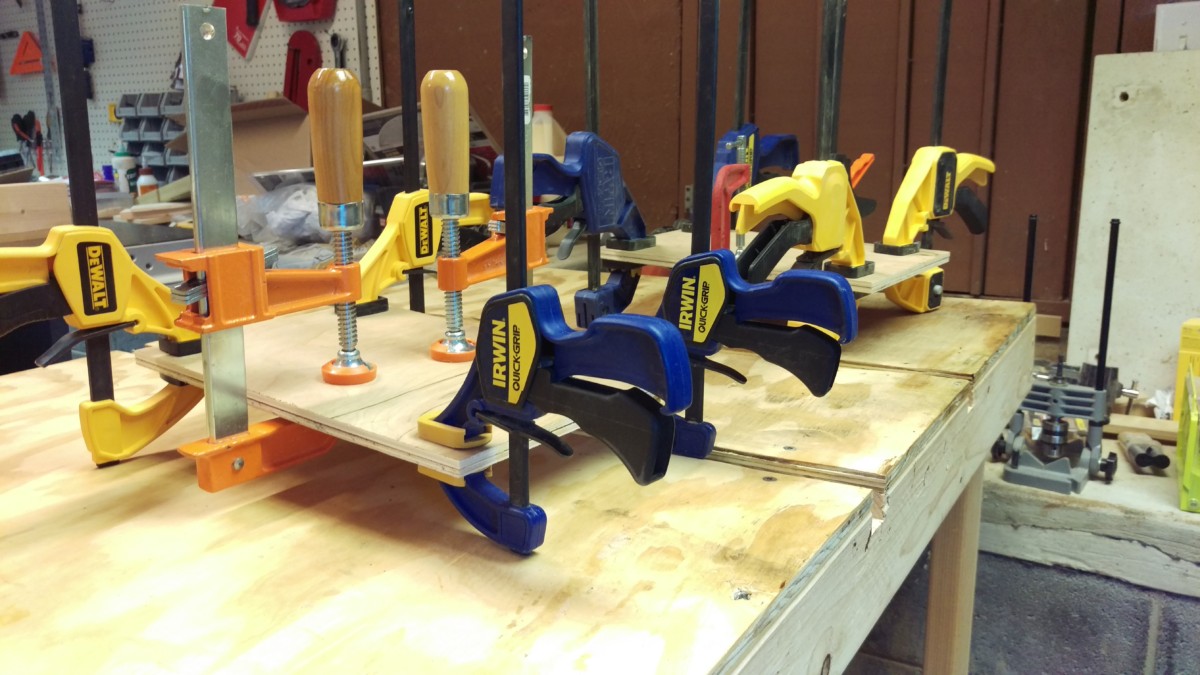
Gluing boards to make them double thick
They laminate together fairly easy. I was sure to glue them together before cutting them down to the actual size I needed, so that the edges would all be perfectly flush.
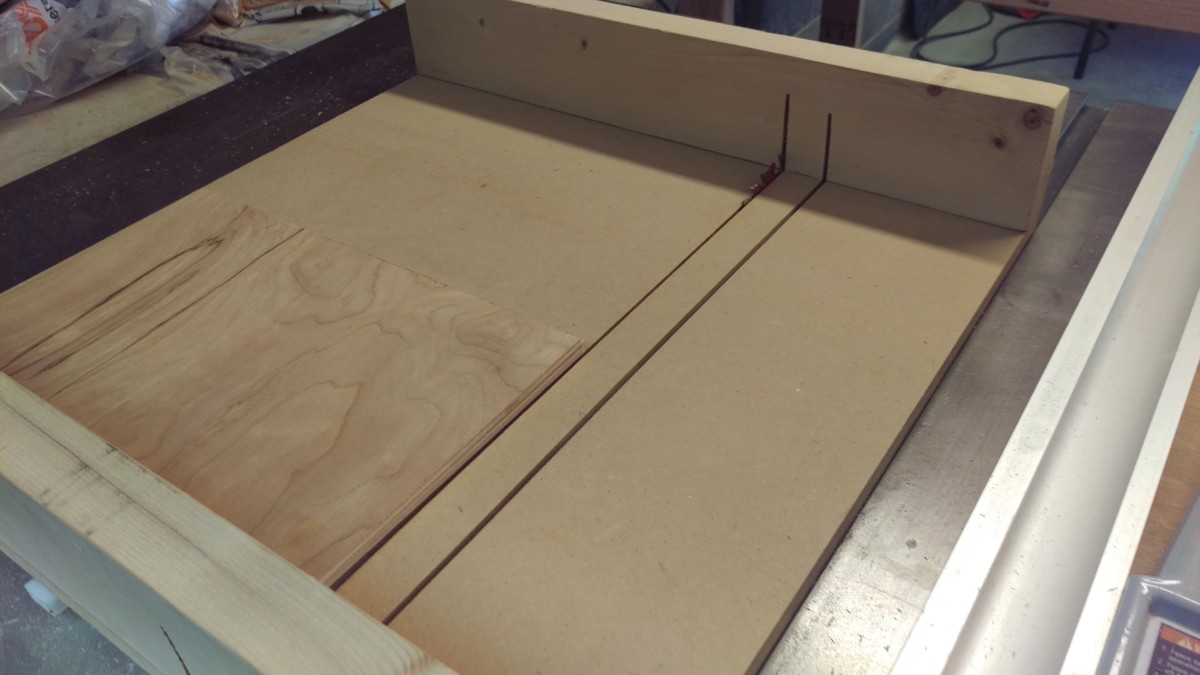
Small crosscut sled made short work of these panels
My small crosscut sled made short work of cutting the two final panels down to size. I would not recommend freehanding this cut. (Or freehanding any cut on the table saw, ever, for that matter.)

Test fit
After cutting each piece, I test fit it inside of the box. I wanted it to have a snug fit, but not be so tight that it stuck. Just a hair under the inside dimensions of the box.
Setting up the crosscut sled with a stop block

Cutting the dowel rod down to pieces
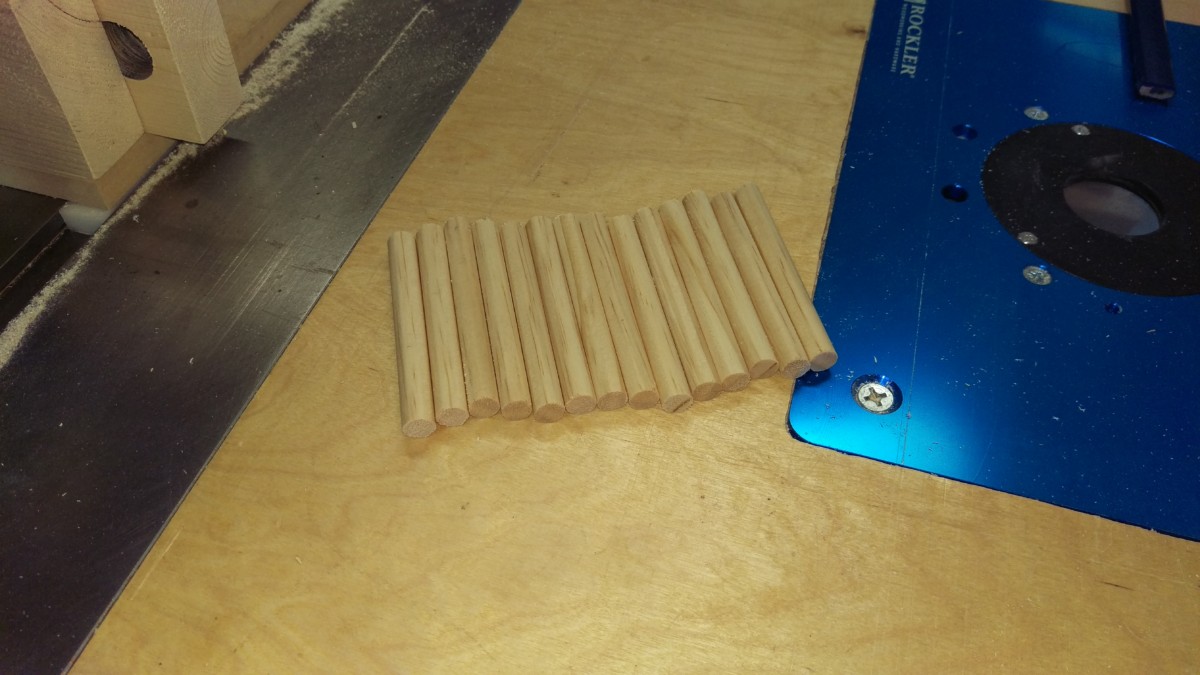
Some of the resulting dowels
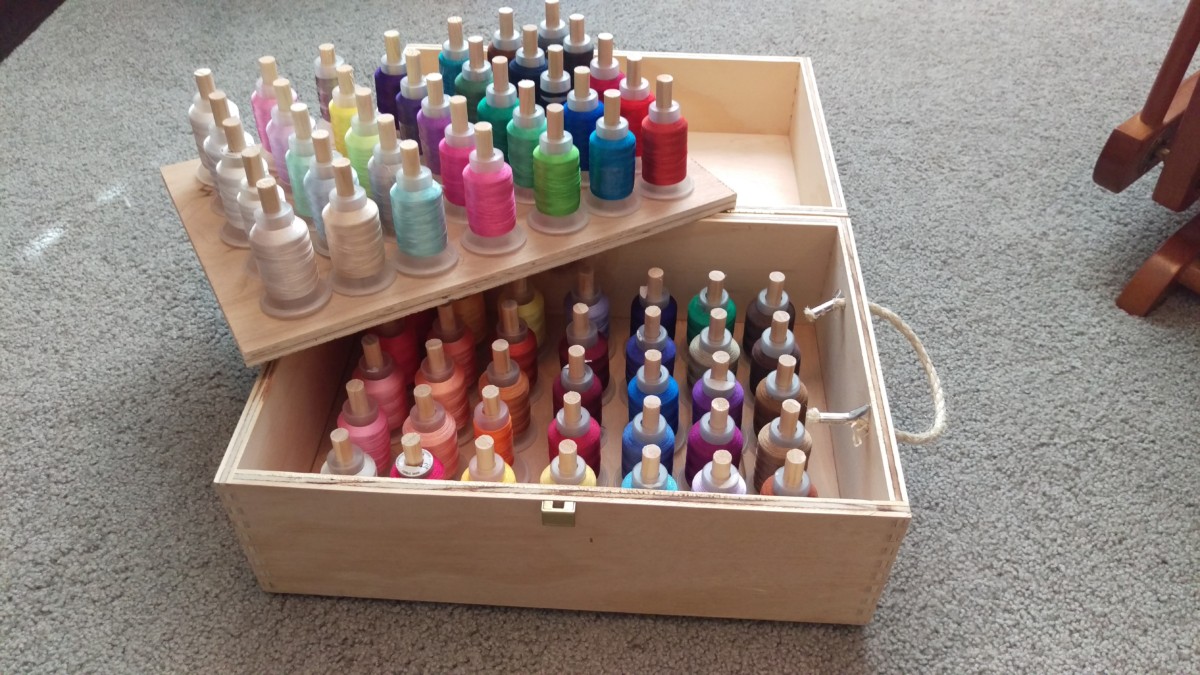
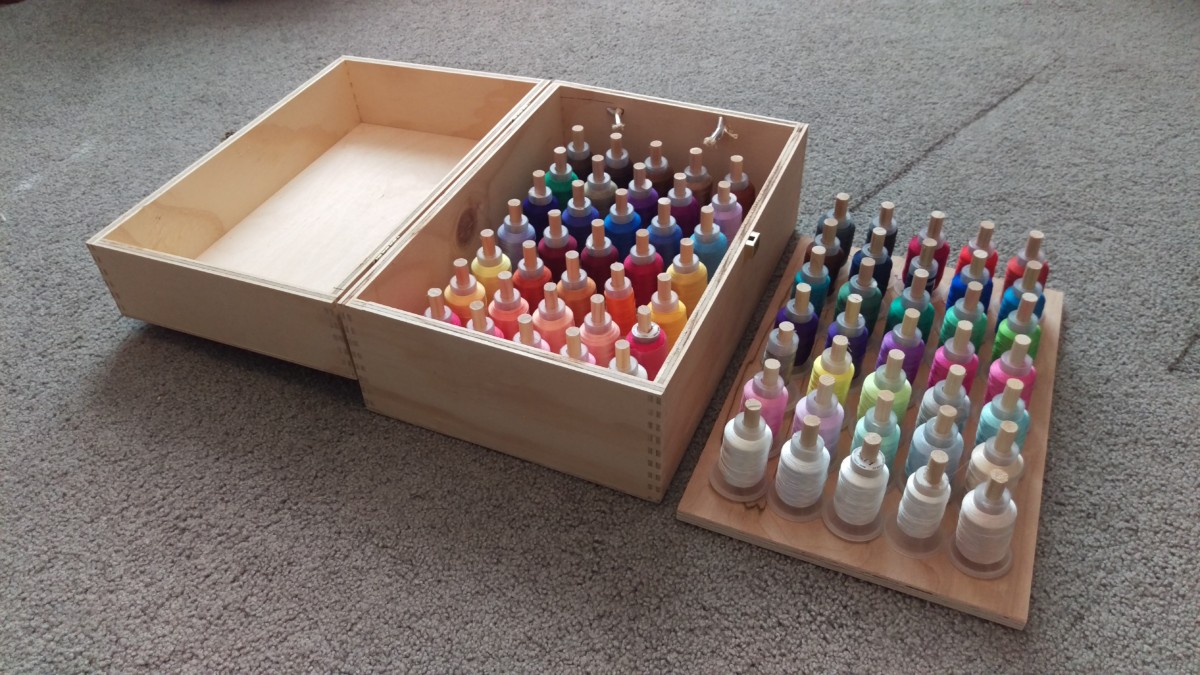
At this point, I need to do a little bit of thinking. Based on the dimensions of the spool of thread, I figured that I could fit 35 spools per panel, for 70 total. I also knew that the inside height of the box was more than twice the height of a spool. In other words, I could stack two panels in without a problem.
I decided to make each of the dowels just under half of the inside height of the box. Thus, the next step is to cut the dowel rod down into equal-length pieces. I set up a stop block on my crosscut sled and used the table saw to cut my dowel rod down to pieces. It’s important to use a pencil or something to hold the small piece of dowel rod in place, otherwise it can catch in the table saw and shoot off. I don’t consider this much risk if both pieces are securely held, but a good bandsaw could also perform this operation, with less fear of turning the dowels into projectiles.
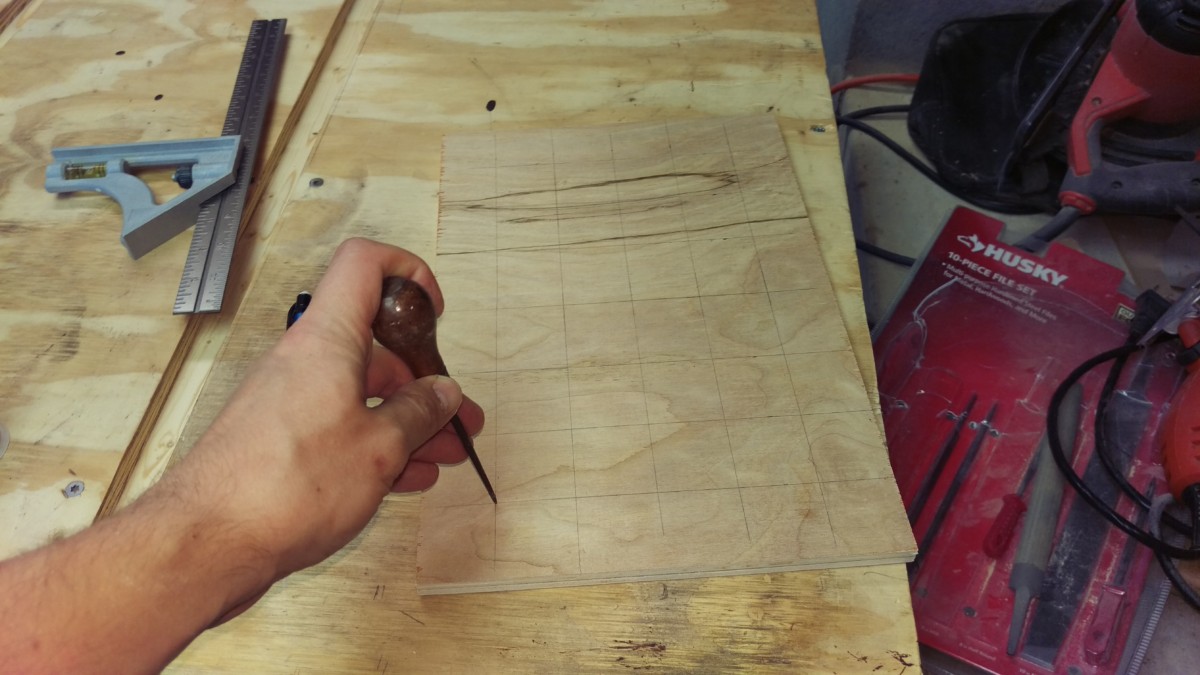
Grid for dowel holes
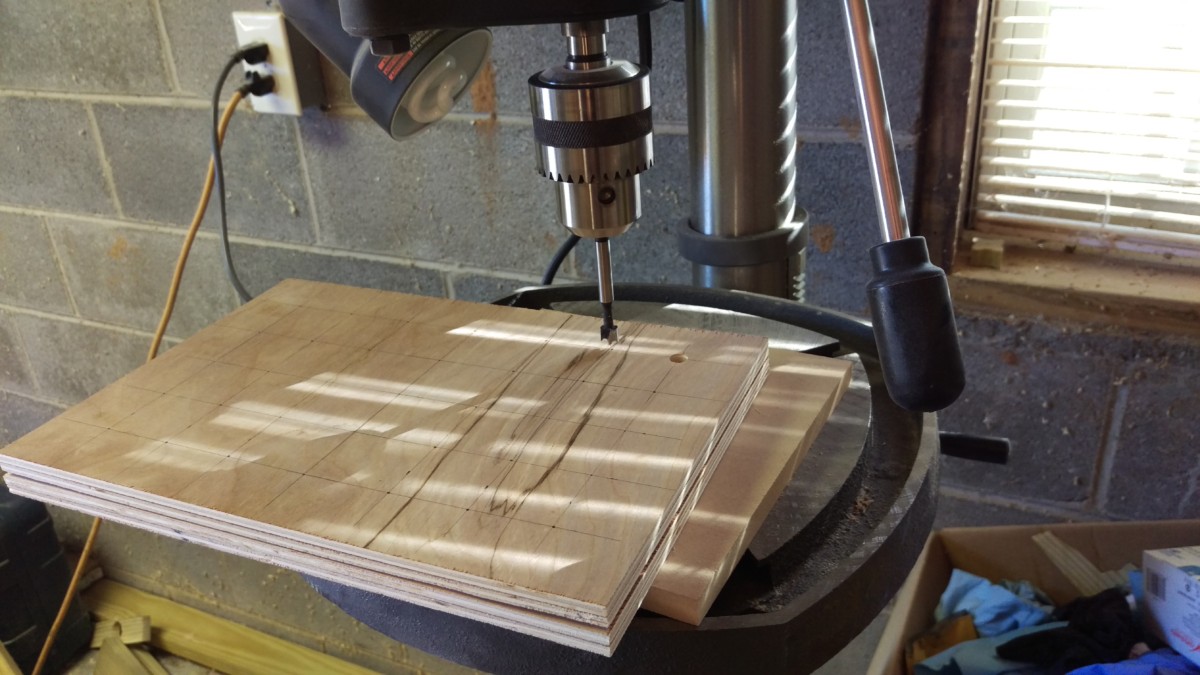
Now I needed to drill the 35 holes per panel for my dowels. I started by making an even grid, where each X will be a hole. I spaced them as evenly as possible. The size of the box didn’t quite divide evenly, but I did space them symmetrically, so it still looks nice.
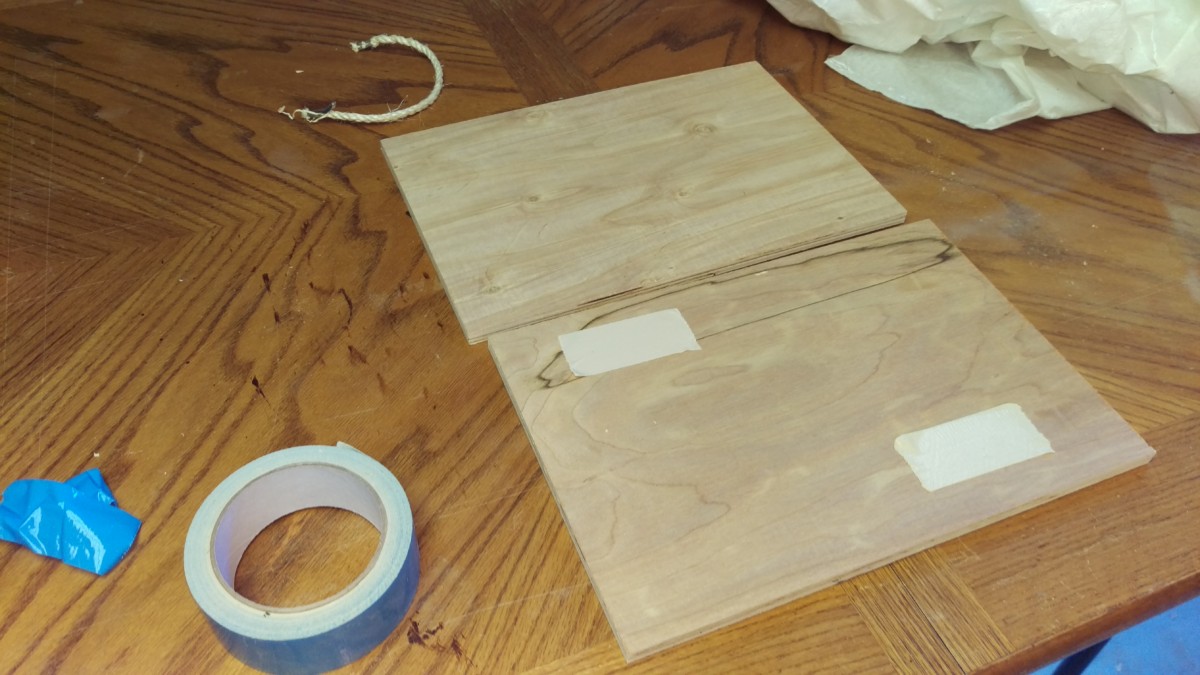
Double-stick tape the panels together
Drilling holes with backing board
Once I had my lines drawn on one panel, I simply used double-stick tape to tape the two panels together. This let me drill out both panels at once, and ensure the spacing would be identical between them.
I used my drill press to make the holes. This let me make sure I was drilling straight holes, and I found it to be faster. You could certainly do this job with a hand drill as well.
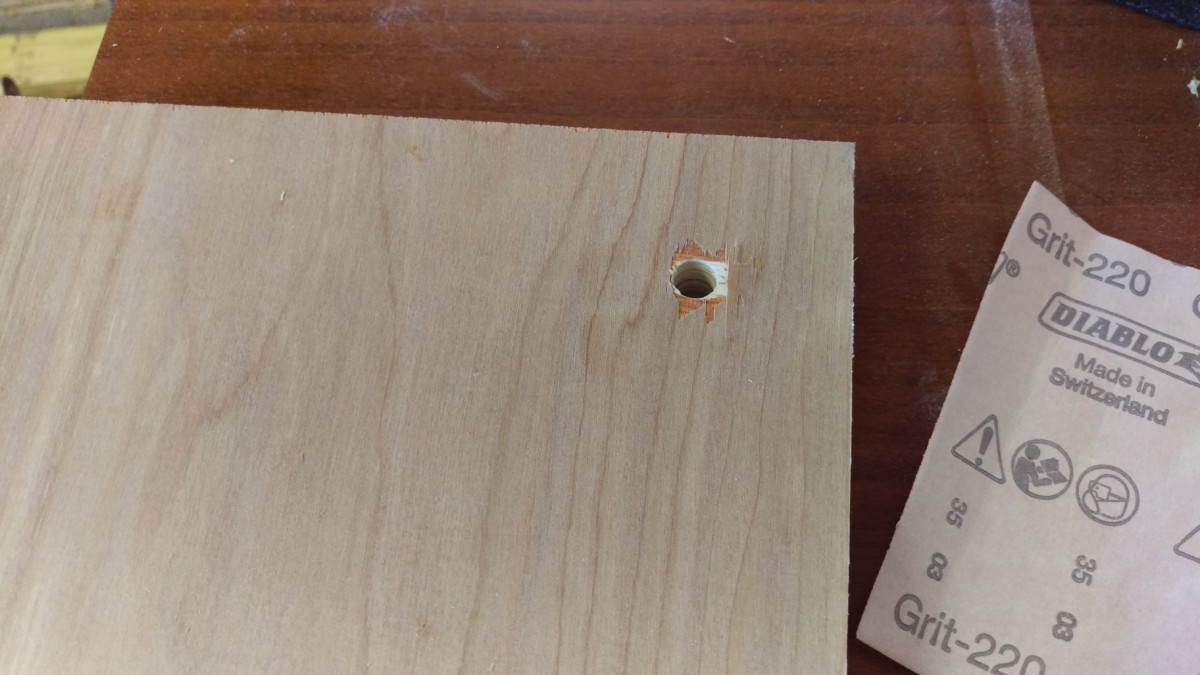
Drilling without a backing board resulted in tear-out
In retrospect, I said I shouldn’t have cheaped out and gone with cheap underlayment. It tears really easily and is awful stuff. I initially started drilling without a backer board, and the bottom tore out really severely, as shown. After that, I had a piece of scrap under the panels for the remaining holes, which helped considerably.
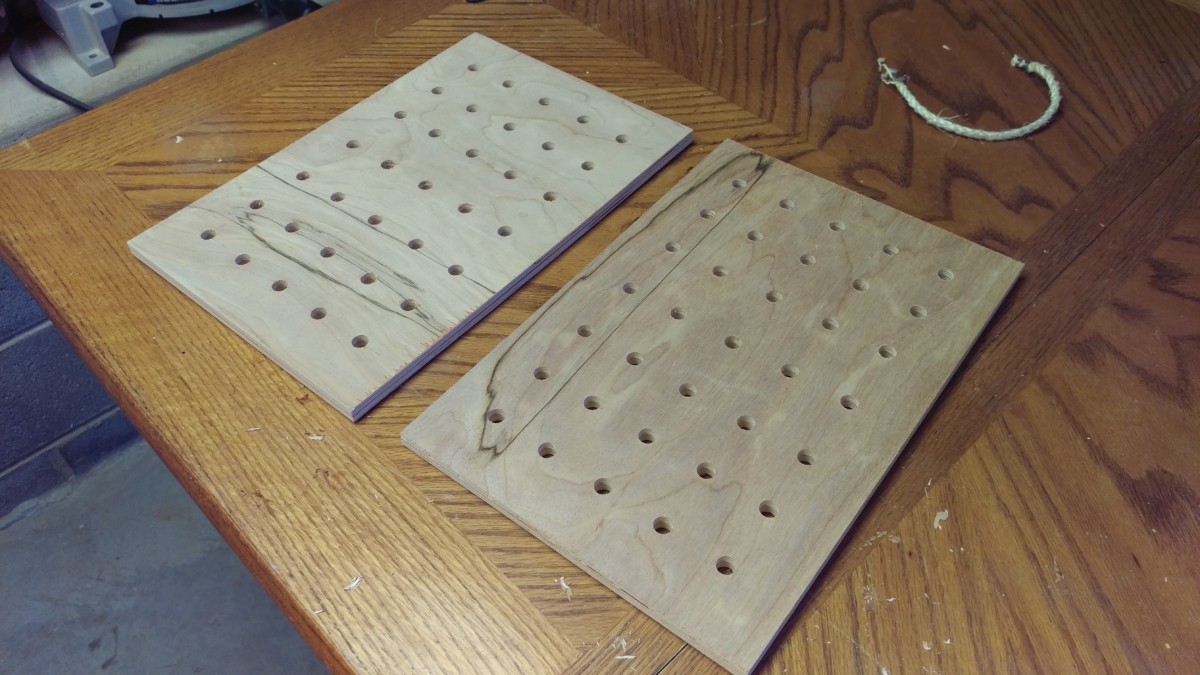
Holes are drilled
Fortunately, I was able to simply put any tearout on the bottom and hide it. The resulting panels came out fairly nice, I think.
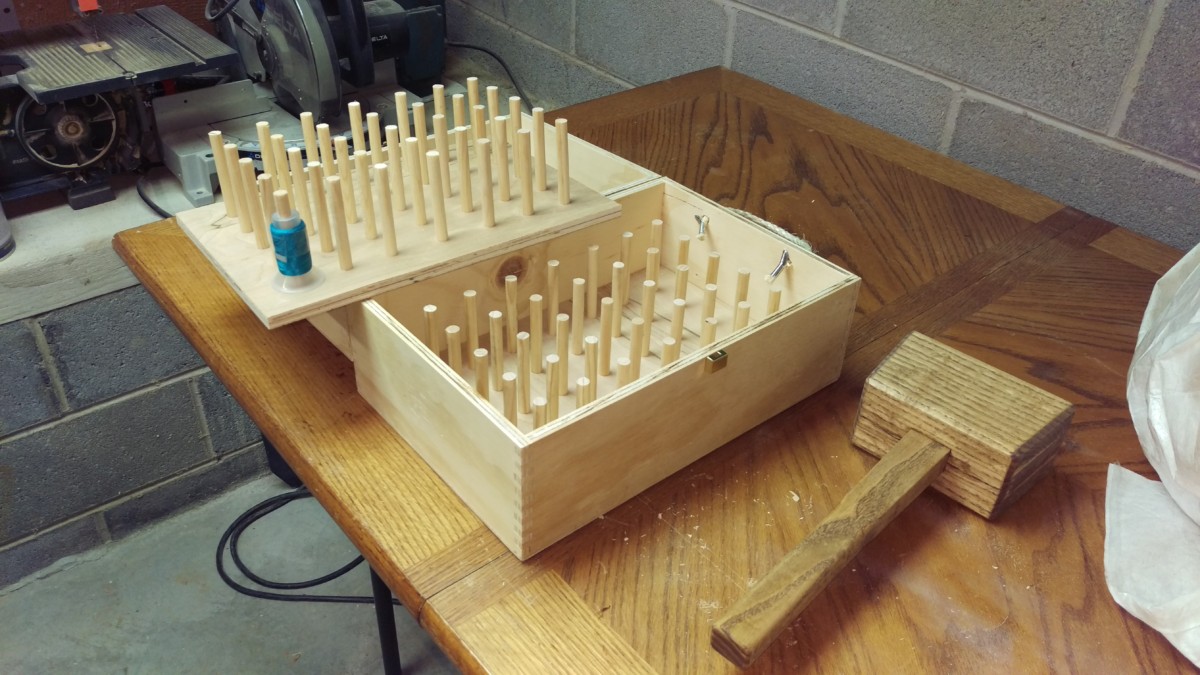
After installing the dowels
I was planning to glue the dowels in place, but I realized there’s not exactly a lot of load on them, and they were a fairly tight fit. I ended up just seating the dowels in the holes without any glue. If my wife has any problems with that, I can always glue them later.
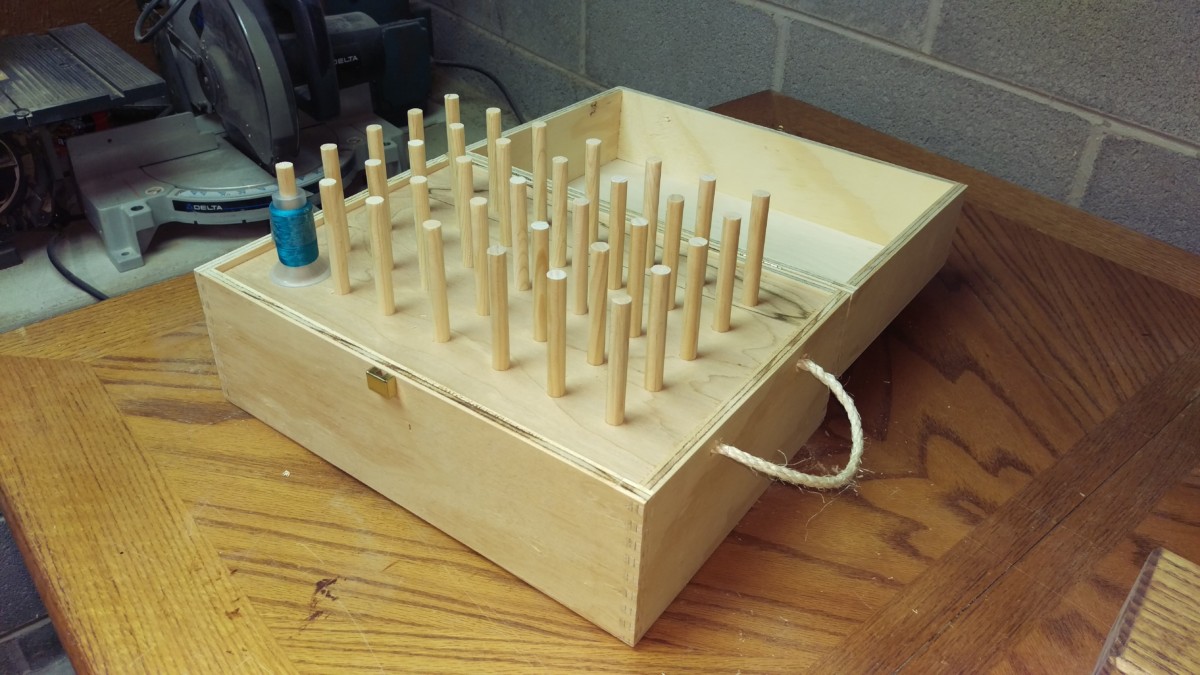
Top panel fits perfectly
One thing I was happy about that happened purely by luck is that the top panel nests right at the top of the box. It looks like I planned it that way, which I didn’t.
Finished
Panel out
The end result

Box closed
And finally, you can see the end result. This was an extremely short and simple project, but we were able to get a nice 70-spool thread holder for my wife for about $10, rather than shelling out $50+ for a smaller plastic one. All in all, I think it came together rather nicely.