DIY Miata Headrest Speakers
Miatas only have a speaker in each door in the standard configuration. However, some came with headrest speakers that act as rear speakers. My 97 didn’t come with them, but I was interested in making it work if I could do it cheaply and easily. All Miata seats have space in the headrest for the speakers, they just don’t necessarily come with a set. As such, it’s simply a matter of putting speakers in place and wiring them, and you have DIY Miata headrest speakers.
Speakers
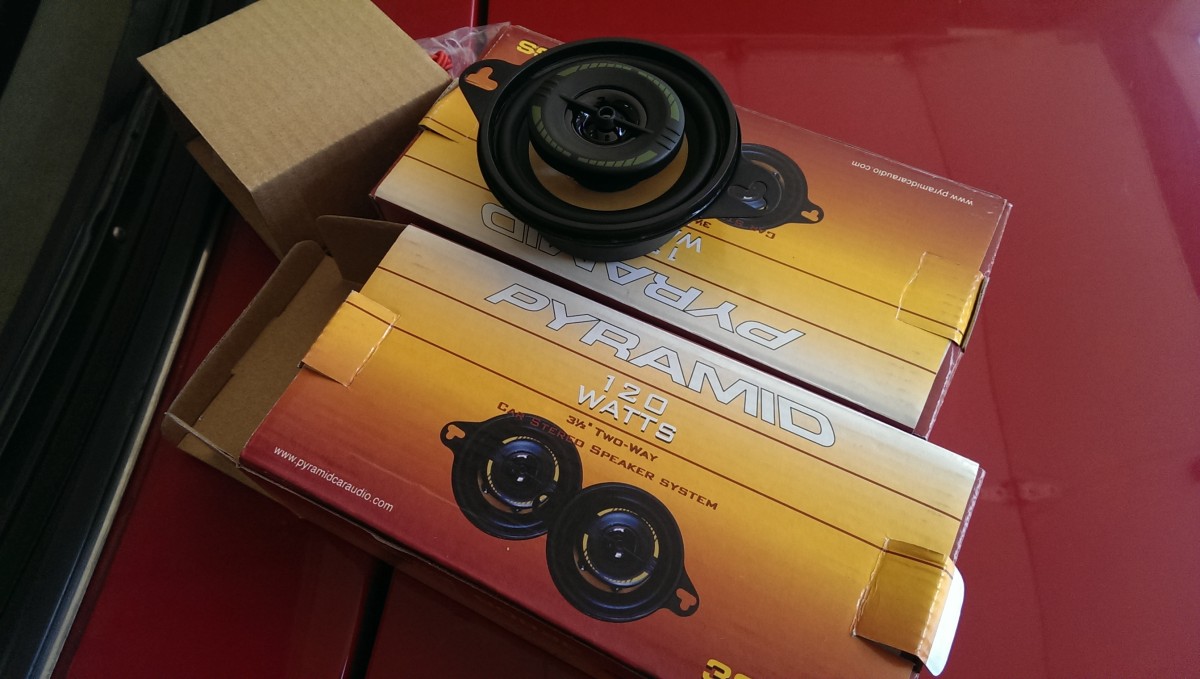
New speakers, about $20 total
From the factory, Mazda uses these 2″ speakers in a funky form factor. The factory headrest is designed to accept these. There’s also another company that makes an aftermarket set sized appropriate. In both cases, however, it’s $100+. I didn’t want to spend this much, but saw that others had talked about cramming a 3.5″ speaker in place after cutting away some foam, so that’s what I went with. The pyramid 3.5″ speakers pictured 
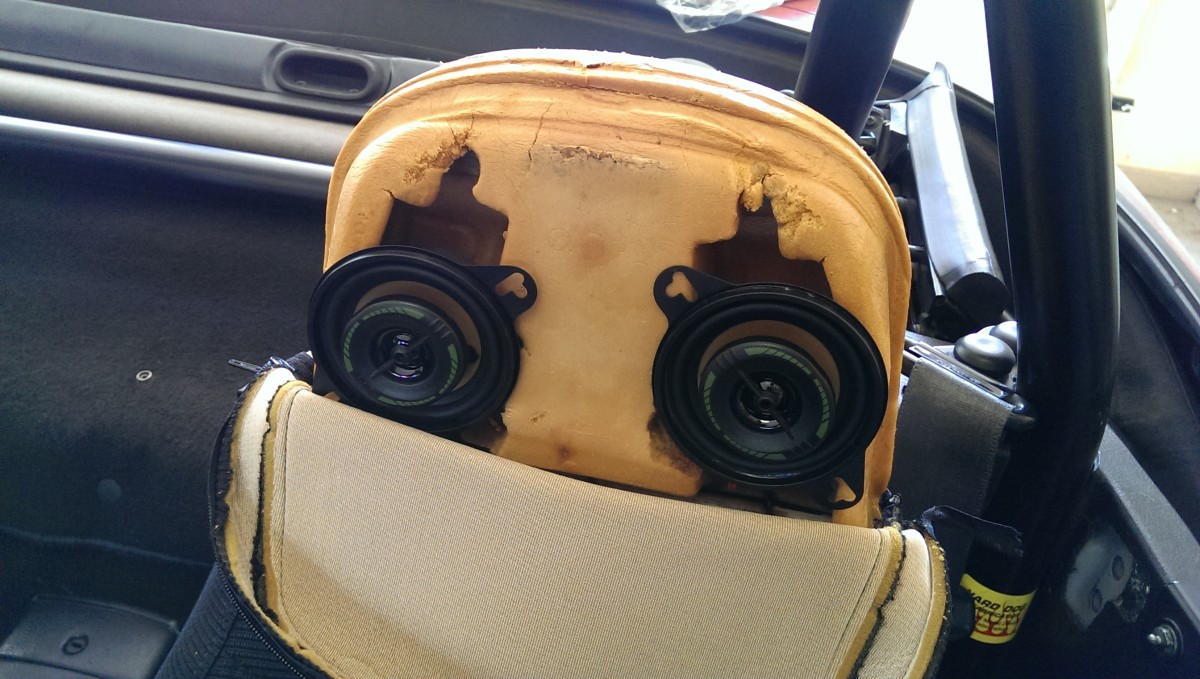
Opening the headrest
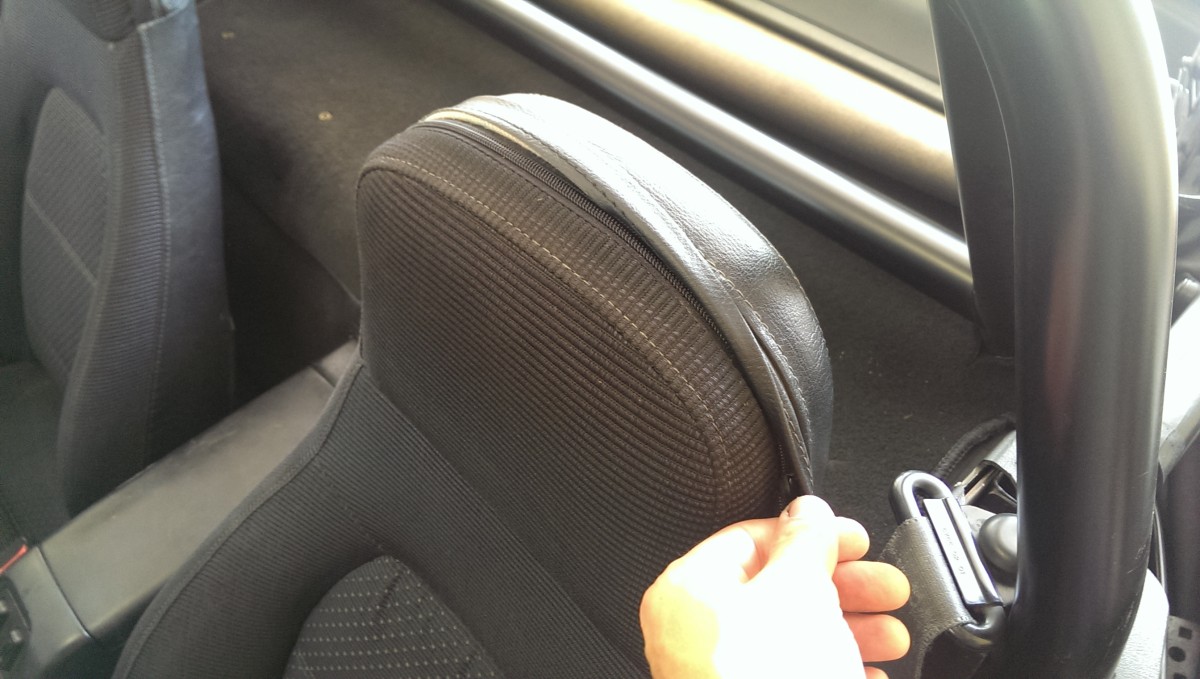
Headrest has a zipper
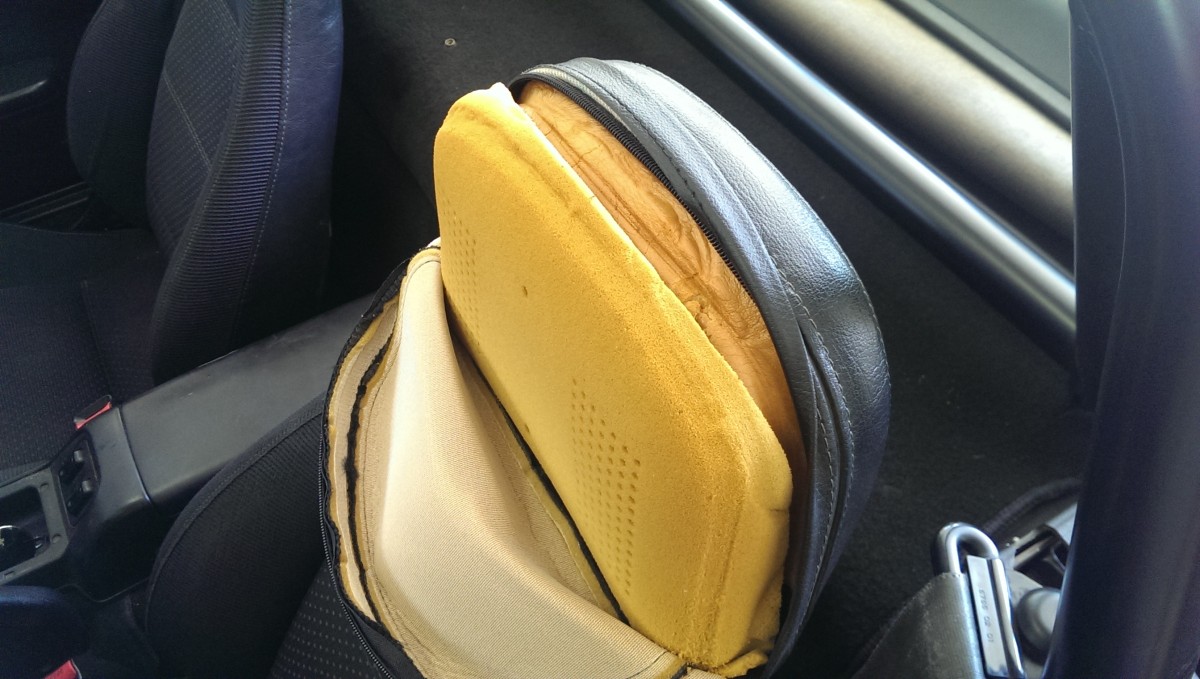
Front pulls down after unzipping
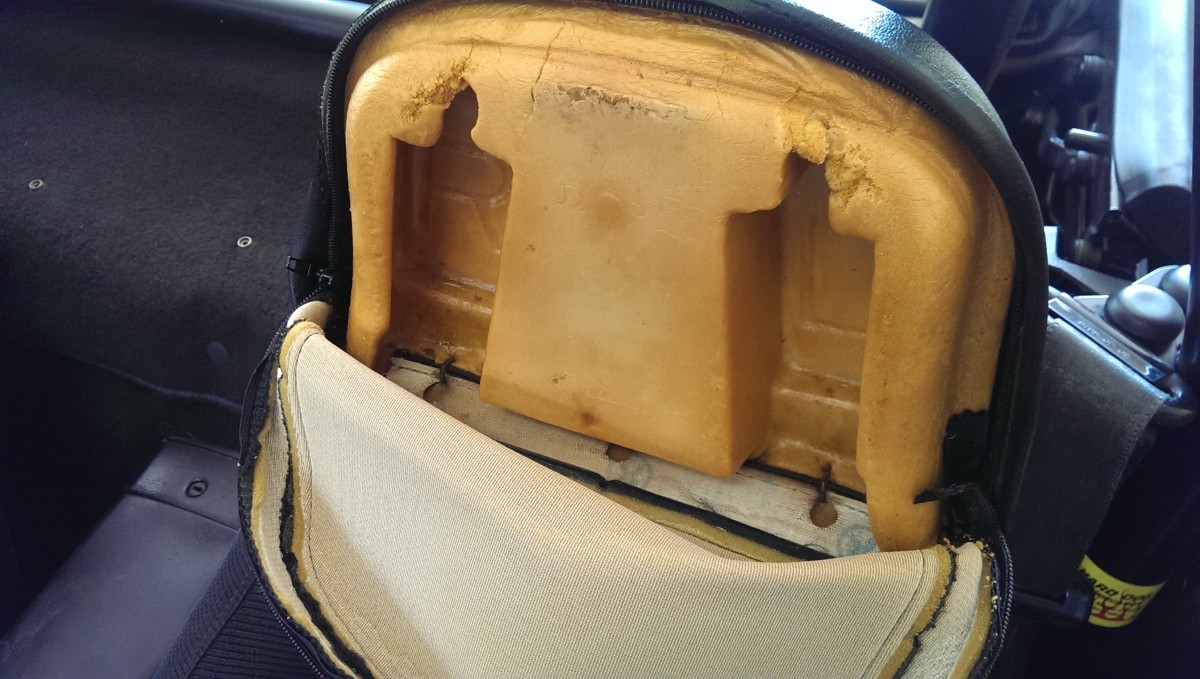
Plastic cover off
The headrest on the seat has a zipper as pictured. The first step is to simply unzip and pull down the fabric. Then, there is a foam-covered plastic cover that simply pulls off.
Wiring the speaker holes
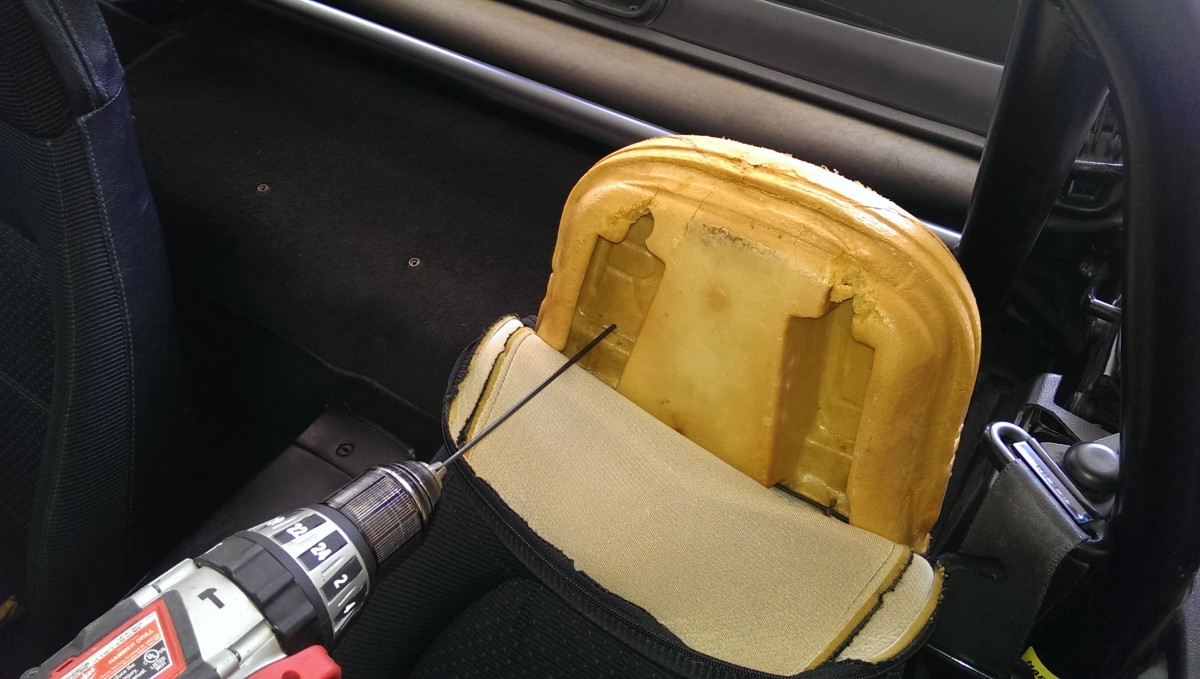
Drilling left speaker

Drilling right speaker
Some seats may have wiring already. If you do, great, you can skip this part. My seat did not, so I had to run 4 speaker wires, two per speaker. I had to run wire through the speaker housing areas to the back of the seat first.
I simply used an 1/8″ bit, although anything a little larger than the wire will do, to drill a hole through the headrest. It’s mostly just going through foam, so honestly you could probably almost use a coathanger. I used a very long bit I had handy, but a shorter one would probably be fine.
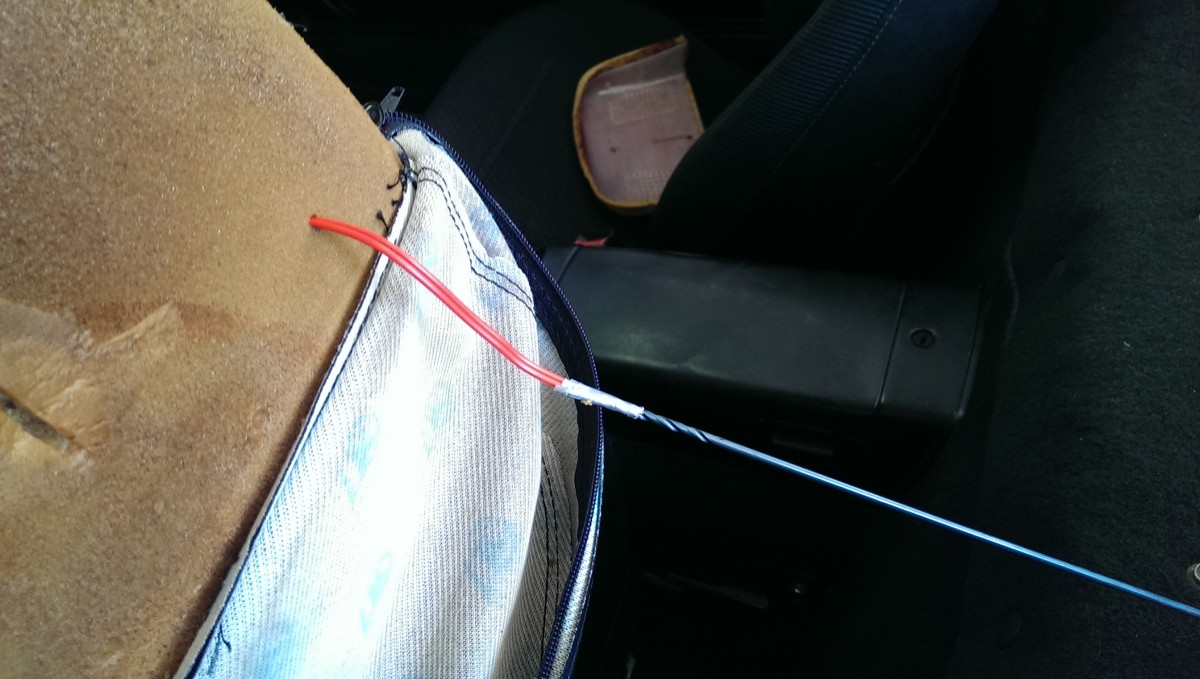
Feeding wire to the back of the seat
I then taped the wire to the drill bit and pushed the drill bit through the hole. This easily fed the wire through. If you drill a small hole, the foam will close back up around it, making it hard to feed the wire. Doing it this way makes it very easy. I did the same thing for both headrest ports in the seat.
Pushing wire down the seat
The next step was to push the wire down the back of the seat, inside the vinyl. I ended up just keeping it taped to the drill bit and pushing the entire thing down the seat back. There’s a good amount of room to work here, though, so it’s no big deal.
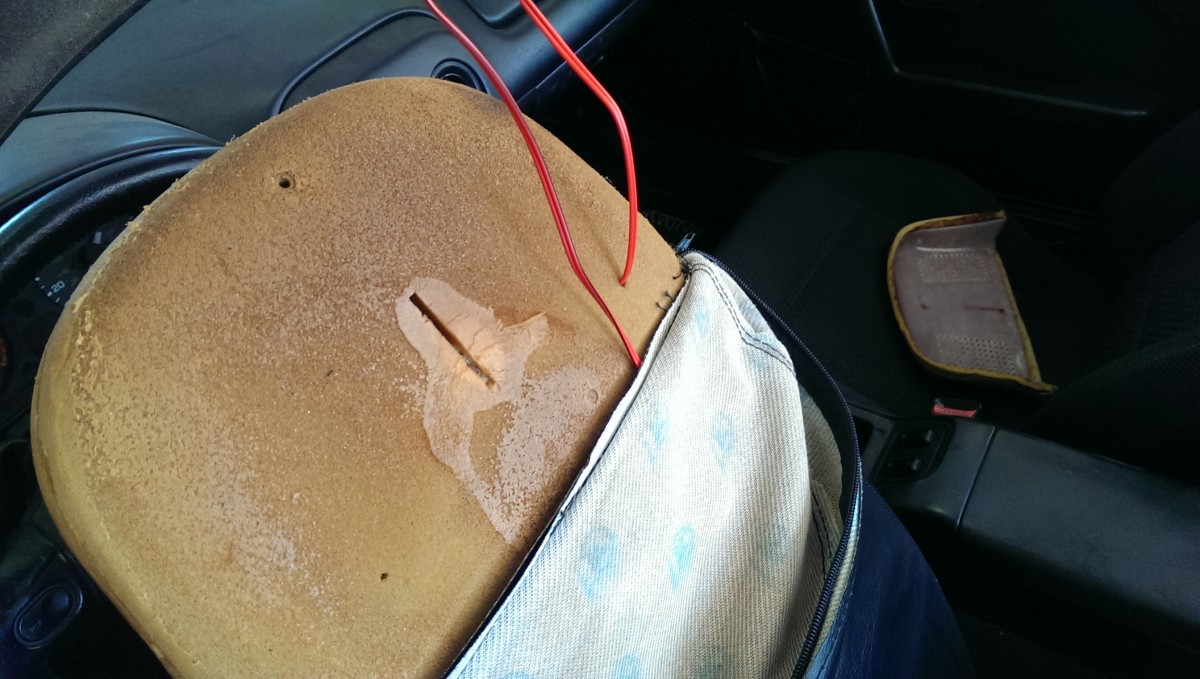
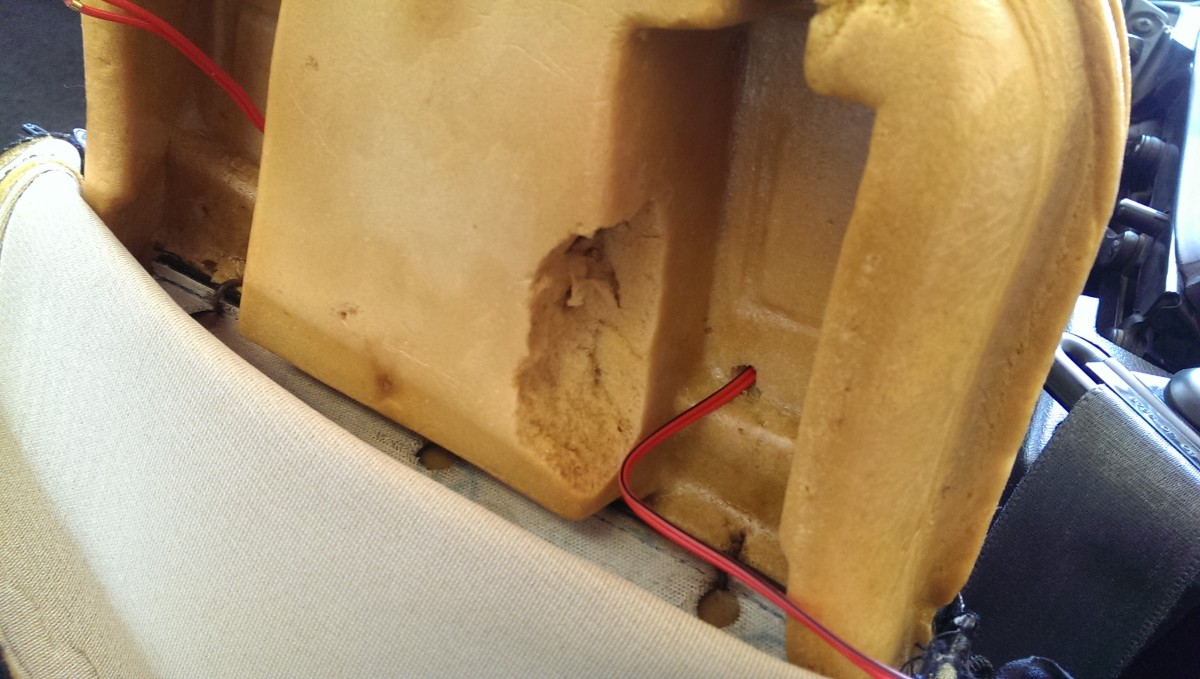
Wire exit
Done
Once it’s fed mostly through the seat, you should be able to see the coathanger, drill bit, whatever sticking out the bottom and can simply pull it through. Once you do that for each wire pair, that’s it for this step. I’ll also note here that I put a piece of tape around the left speaker wire so I would know which is which for the next step.
Install speakers
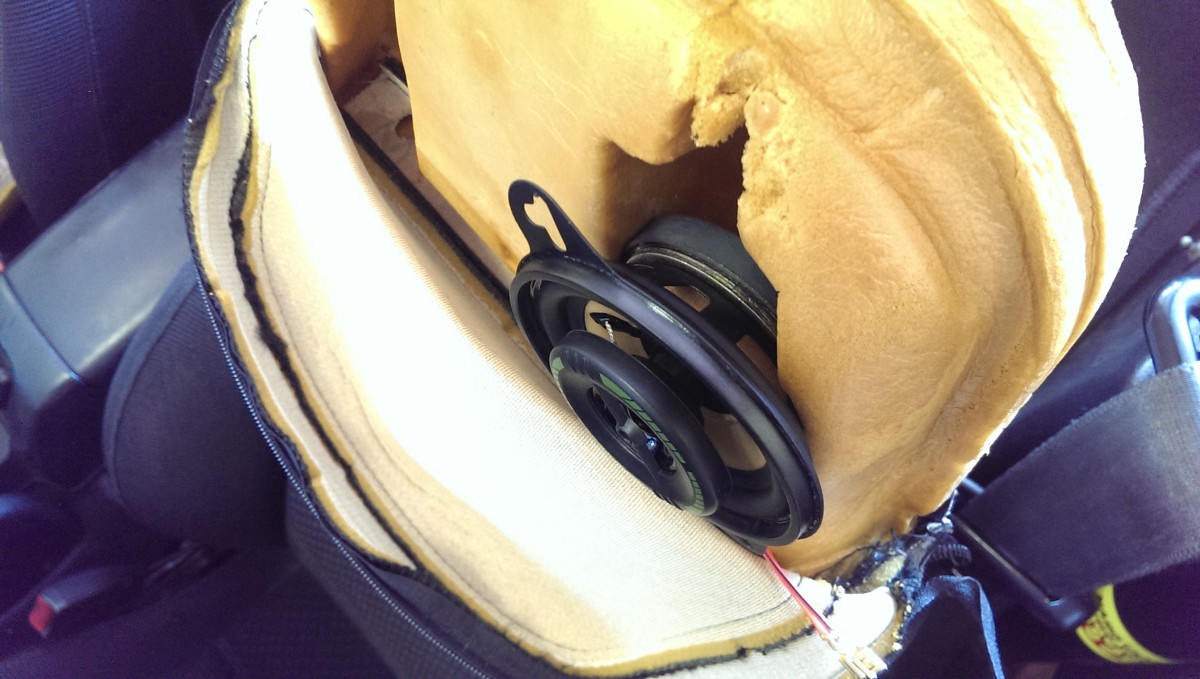
Doesn’t fit
So you’ll notice that the 3.5″ speakers are just a bit too wide for the enclosure. Fortunately, the enclosure is just foam, so this is easy to remedy.
Cutting foam
I just used a knife and hacked at the foam to carve out a shape that would hold the speaker. I didn’t care, personally, if it was pretty. It just has to be large enough to accomodate the speaker.
Done, ugly but functional
I just kept hacking on it until they both fit in there. Then, I connected the speaker wires to the speakers. They came with spade connectors already attached to the wires. If you don’t have this, you can simply solder here. Be sure to connect positive and negative to the correct terminals; in my case, the negative had black on the sheathing, and the positive did not. This part is now complete, and the headrest can be closed back up.
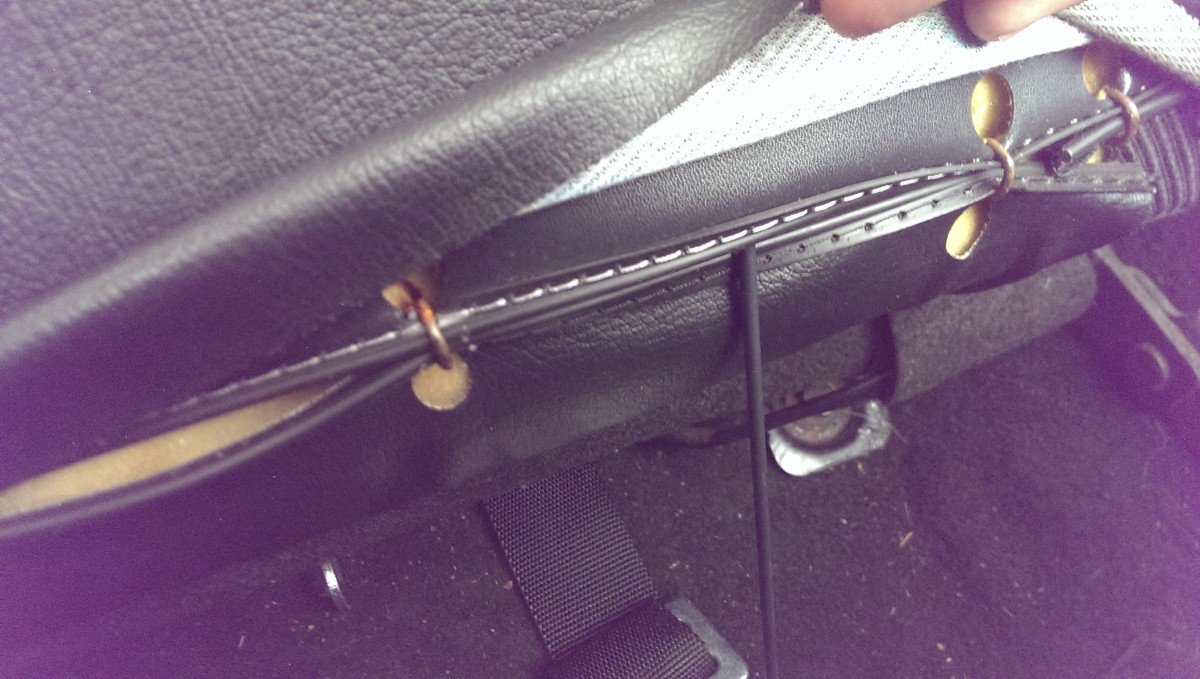
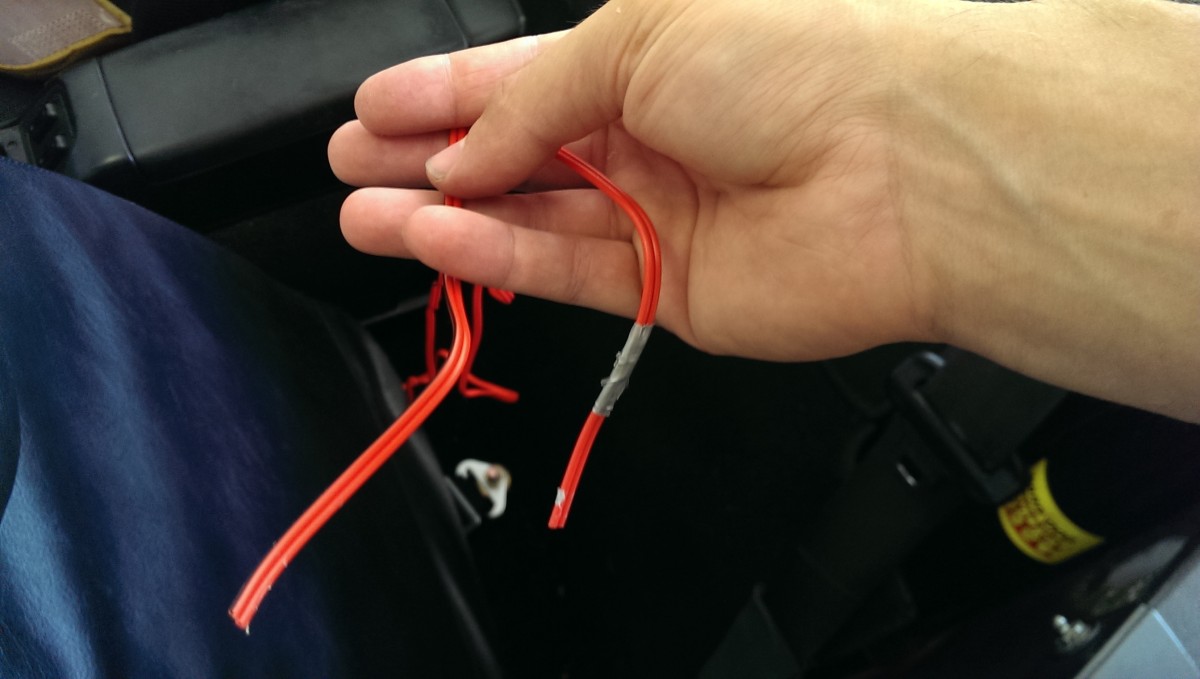
Wiring to the radio
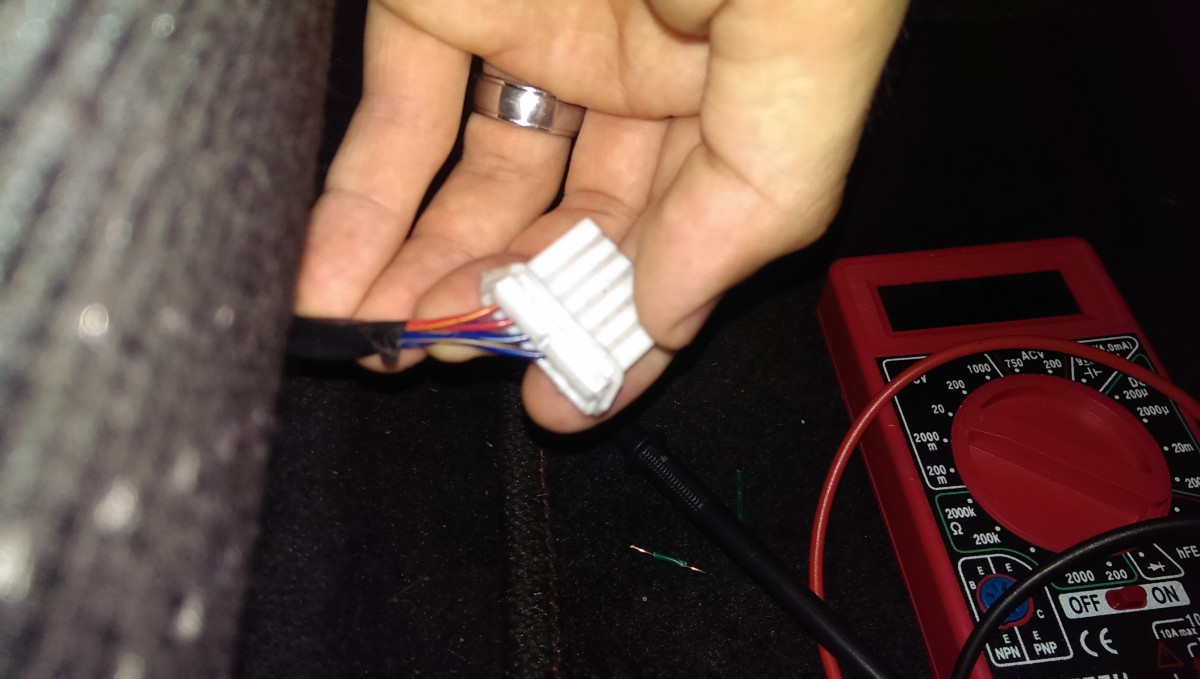
Factory connector
If you have the factory wiring in your seat, you can probably get away with plugging it in and being done. However, as I said, my seats didn’t have the wiring already, so I had to come up with a connector on my own to connect the speakers to the stereo. The factory connector is pictured. I’m sure you can order the matching connector to keep everything factory if you want to, but that sounded expensive, and this is a cheap DIY miata headrest speakers article, so that wasn’t going to happen. Instead, I simply hacked it off.

Testing speakers
Once I had cut and stripped that connector, I also stripped the ends of the 4 wires going to the headrest speakers. It turns out that a lot of the time, the factory wiring is done incorrectly for the headrest speakers. Fortunately in my case, that was not true, because I had installed the stereo and done the wire splicing myself only a year or so ago. Still, I wanted to double-check.
I simply figured out which wire goes to which by trial and error. There are only 2 pairs of wires on each end to connect up. I set the balance on the stereo all the way left, then tested twisting a pair onto the pair of wires that went to the left speaker. If music came out, I had gotten that part right.
The second question was which lead was positive and which was negative. If you reverse these, music will still play, but it will be out of sync with the other speakers. I tested that by turning the radio up with talk radio, which is very sensitive to being out of phase like that. When the wiring is reversed, it sounds sort of like an echo chamber.
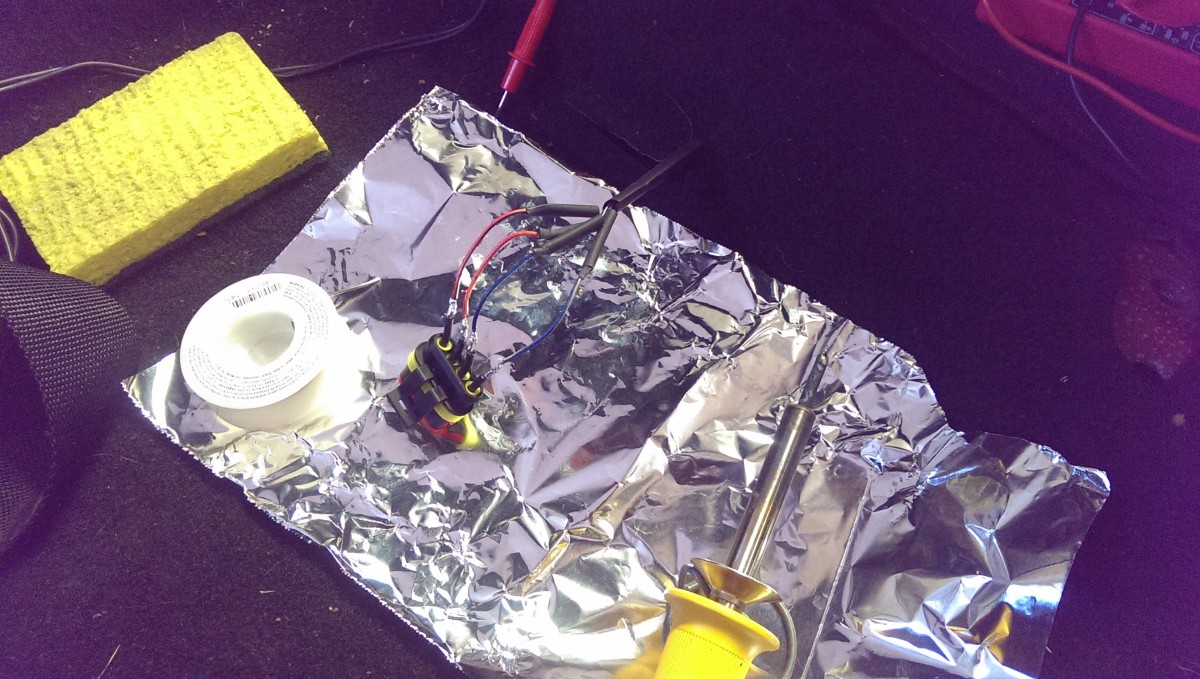
Soldering on foil
Once I had all 8 wires matched up to each other, 4 from the headrest speakers and 4 from the stereo, I proceeded to permanently connect them. I do want the seats to be removable, of course, so I got a pack of 5 waterproof 4-pin connectors on Amazon for around $15
The connectors were crimped onto the wire and then pushed into a plastic housing. I chose to crimp and then add solder to ensure it held. Before soldering, though, I slid on 5 pieces of heat shrink tubing – one small piece on each wire, and then a large piece to hold them all together. this is pictured in the subsequent steps. To solder in the car, I simply put a piece of foil down on the carpet to catch anything that dripped.
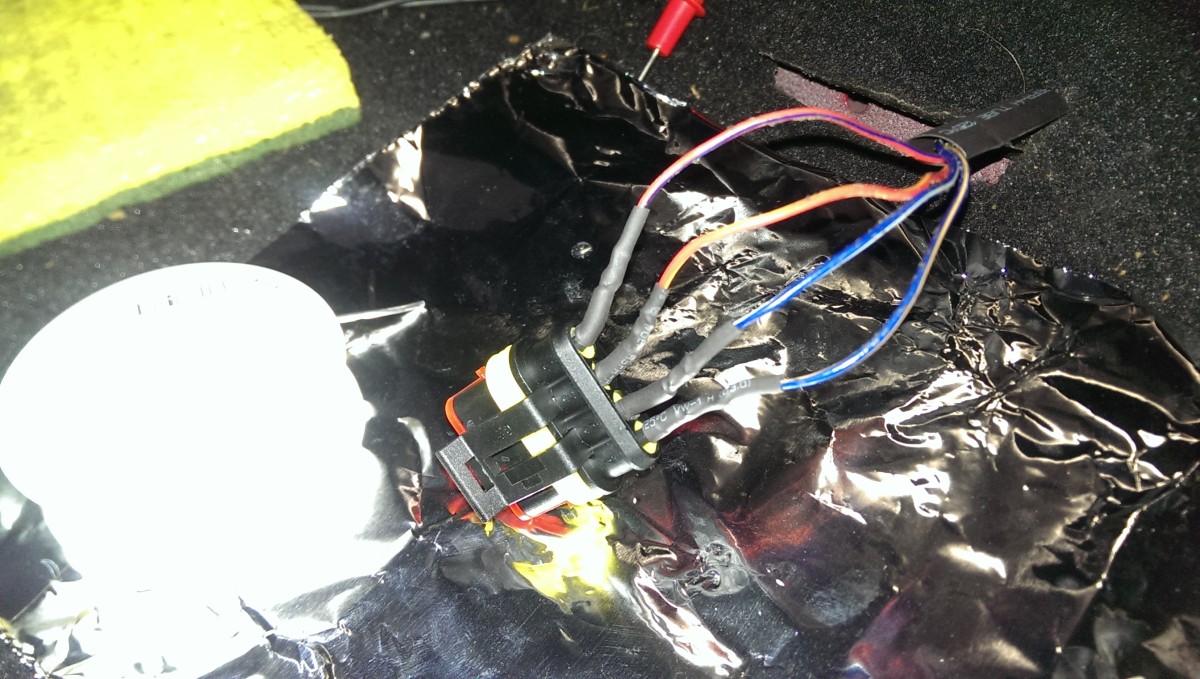
Heat shrink tubing on wires
As mentioned, before soldering, I put a small piece of heat shrink tubing on each wire. This will insulate the solder connection and support the wire around the connection. Any time you solder something like this, especially in a car, heat shrink tubing helps make sure the connection lasts reliably. You just have to remember to put it on before soldering, otherwise you have to start over again. You can use a lighter or a hair dryer to shrink the tubing around the joint, but a heat gun is the best option. Lighters can accidentally melt plastic too easily, and hair dryers don’t get quite hot enough.
Larger heat shrink tubing wrapping wires
I also put a large piece around all 4 wires. This is mainly just for convenience, as it holds them together and keeps a single wire from snagging on something as easily. I suppose a conduit sleeve or something would be even better, but this isn’t that important to me.

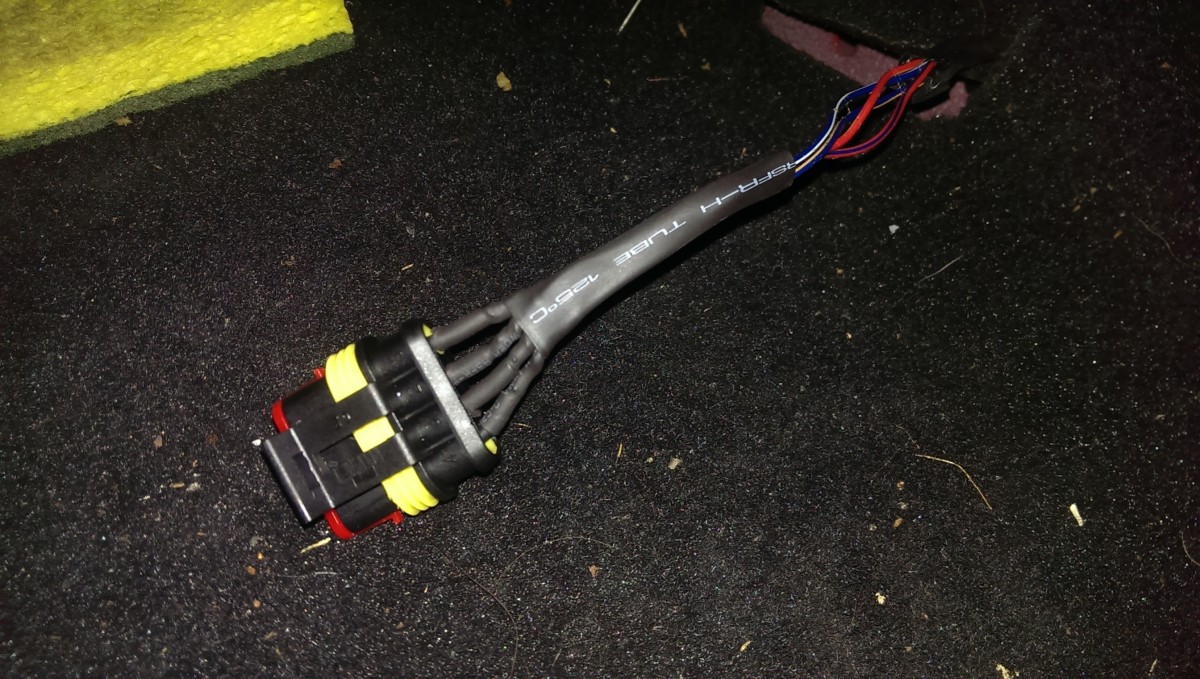
Matching connection from seat
I performed the same procedure on the seat’s connection, although I was able to solder on the garage floor with the seat out.
Wrap-up
This project was under $30 and I’m pretty happy with the results. I ended up setting the fade on my stereo to bump it just a few points to the rear, otherwise the headrest speakers were very quiet. Even speakers this small do really help bring out the stereo’s sound: what they don’t have in size, they make up for in proximity to your head.
They won’t be really good from an audiophile’s perspective, but neither will any audio system you’d put in a Miata. Truthfully, car acoustics are always horrible anyway. In all, this was a pretty straightforward and inexpensive upgrade, and as such, I’d do it again. I can’t say it’d have been worth spending $100-$200+ on Miata-sized speakers for the same results, though.