Replacing a 94-97 Miata Heater Core
My car had wispy white smoke coming out of the vents on my way to work. I had been wondering why the windshield was getting a film on the inside. Duh, turns out my heater core was leaking.
Your car’s engine gets hot during normal operation, of course. In a typical water-cooled engine, like most cars, the engine circulates coolant to a radiator on the front of the car. Hot water goes into the radiator, where air passing through it can cool it down, before it circulates back to the engine again to be re-heated.
Since this is otherwise wasted heat, your car also uses hot coolant to heat the inside of the car via the cabin vents. When you turn the heat on in your car, it switches airflow to blow over a small radiator located under the dash, called the heater core. This radiator has hot coolant flowing through it just like the larger one used to cool the car.
While this system is very efficient, there’s one issue: if the heater core leaks, you get coolant inside your car, typically soaking into the carpet. This is both gross and not terribly great for your interior. If the leak is bad enough, you can lose enough coolant to overheat your engine. If you see white smoke coming out of your vents, it usually means coolant is leaking out of the heater core and burning off. In my case, it meant I was in for replacing a 94-97 Miata heater core, mine being a 97.
Removing the old core
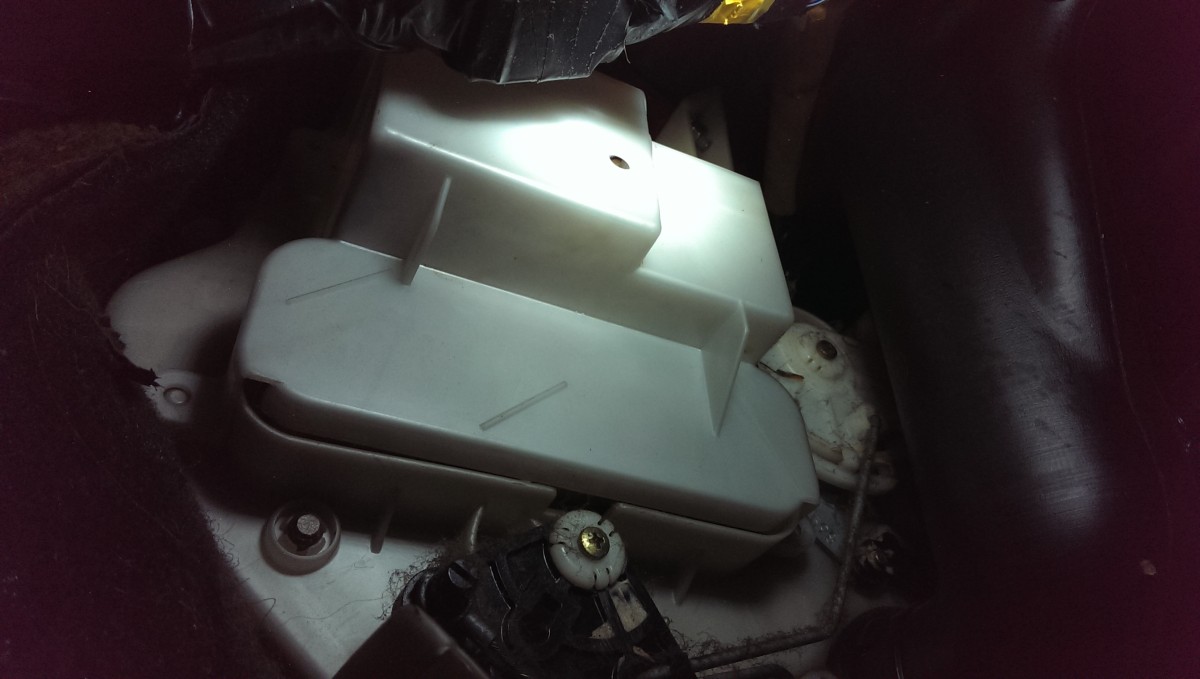
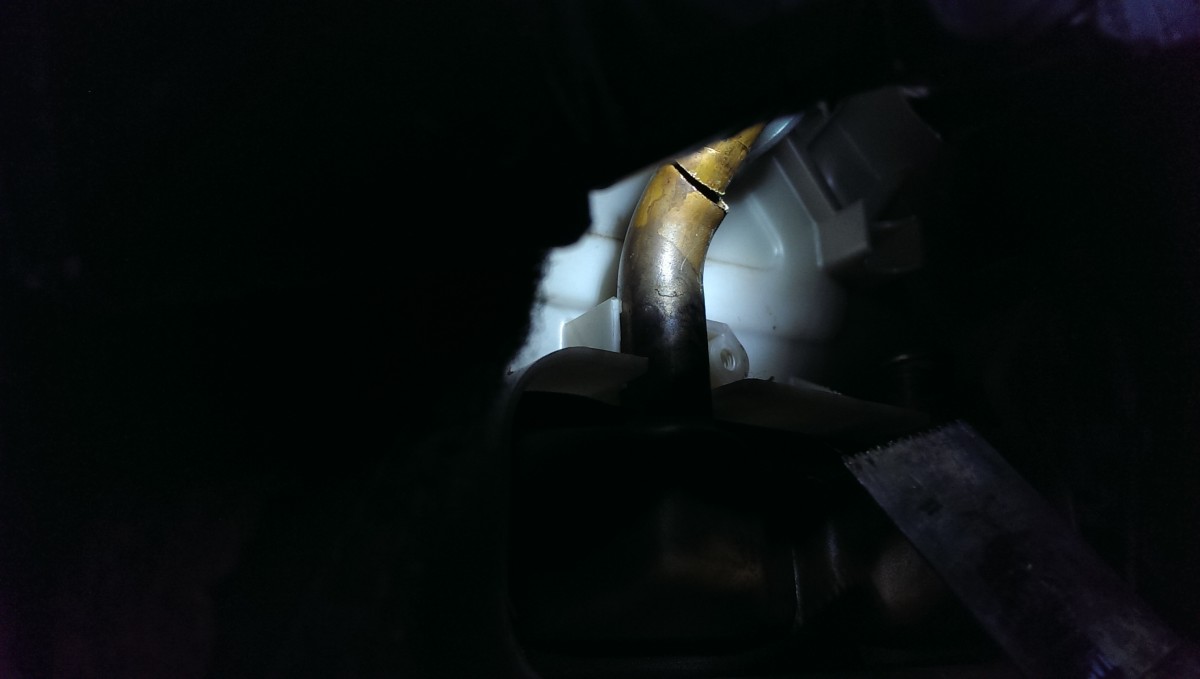
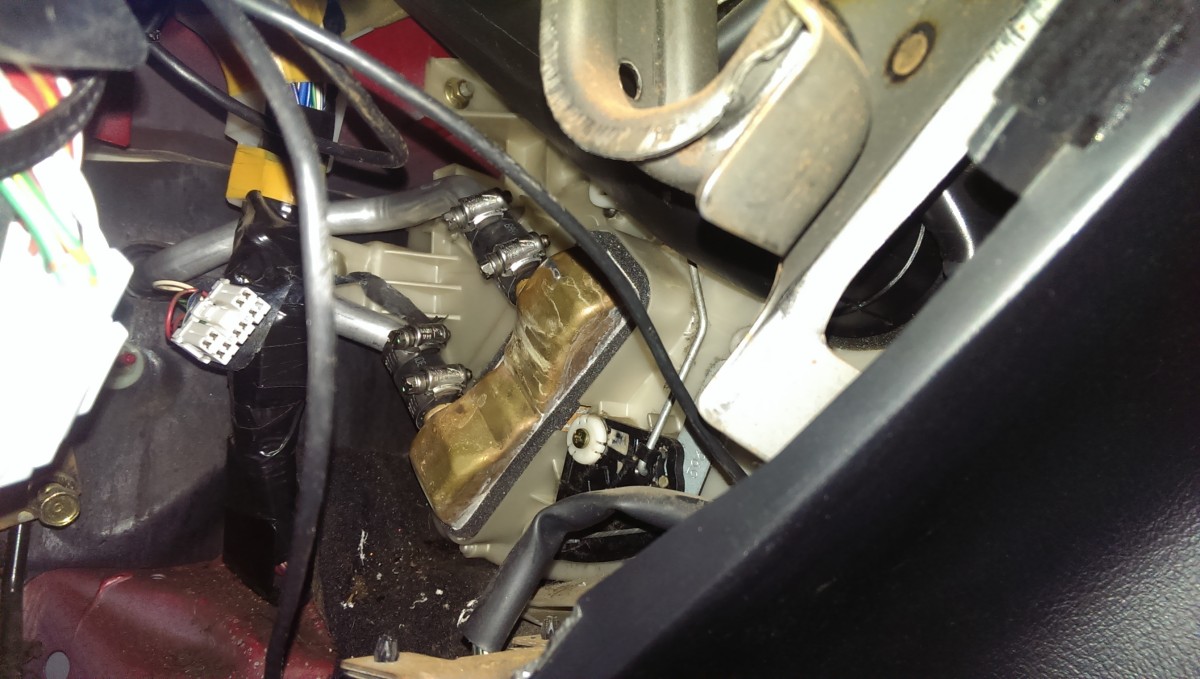
Heater core in driver’s footwell, right side near accelerator
In a lot of cars, this job is a massive pain, because getting to the heater core requires disassembling the dash. In the Miata, you can do that if you’d like to, but it isn’t necessary. In fact, this is probably one of the easiest cars to do this job on. To start, turn yourself into a human pretzel and put your head in the driver’s footwell. Just against the wall past the accelerator, you’ll see the heater core as pictured. It should have white plastic covering it.
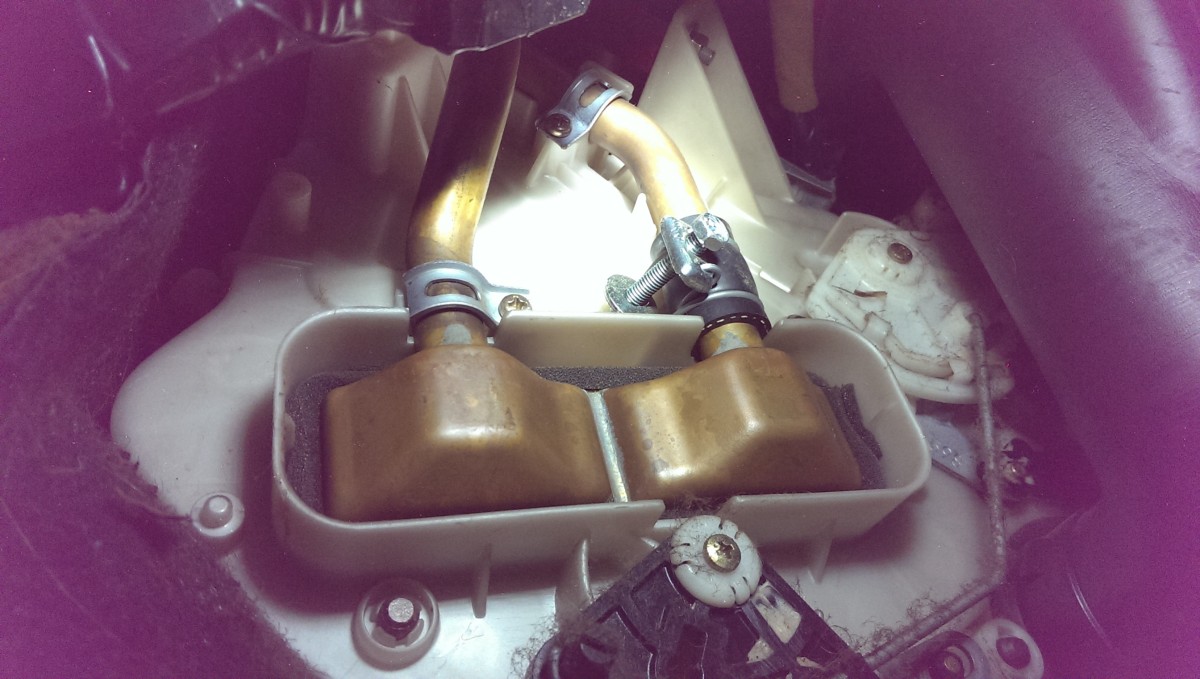
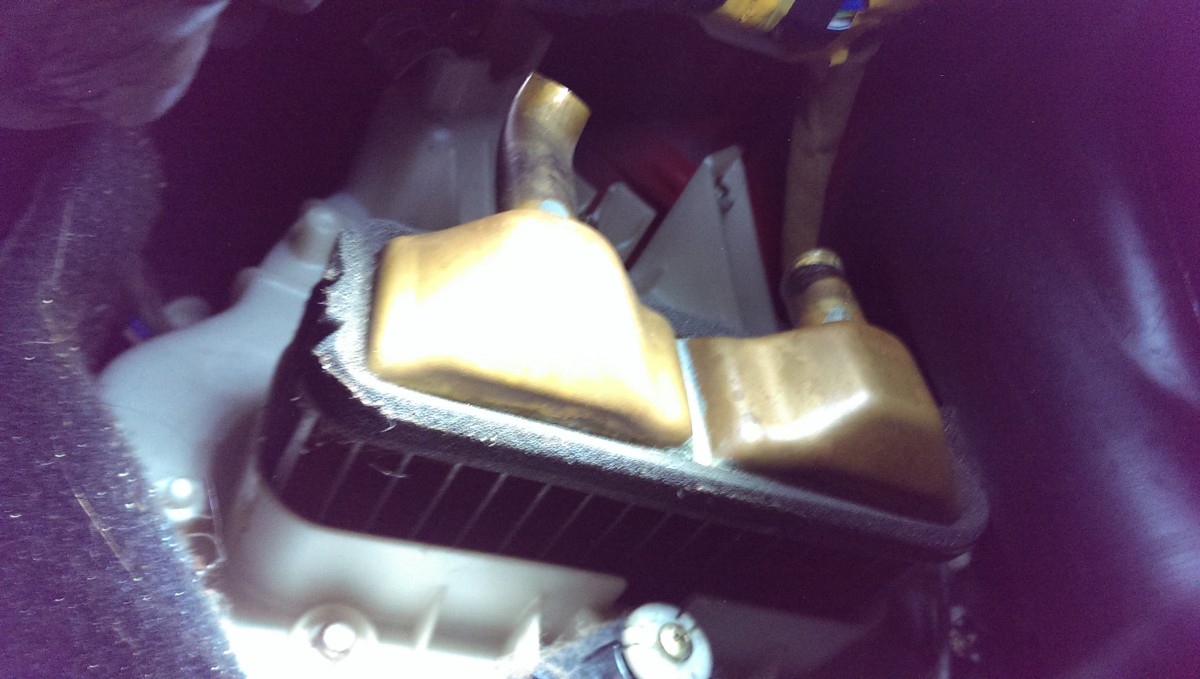
Heater core cover removed
The next step is to remove the plastic cover. There should be 4 phillips screws holding it in place. A stubby screw makes it a bit easier to get to, but isn’t necessary. In my case, someone had clearly done this job before, so there were only 2 screws. You also need to undo the little aluminum clips that hold the pipe to the white plastic, if they are installed in your car. They take the same phillips head as the plastic cover.
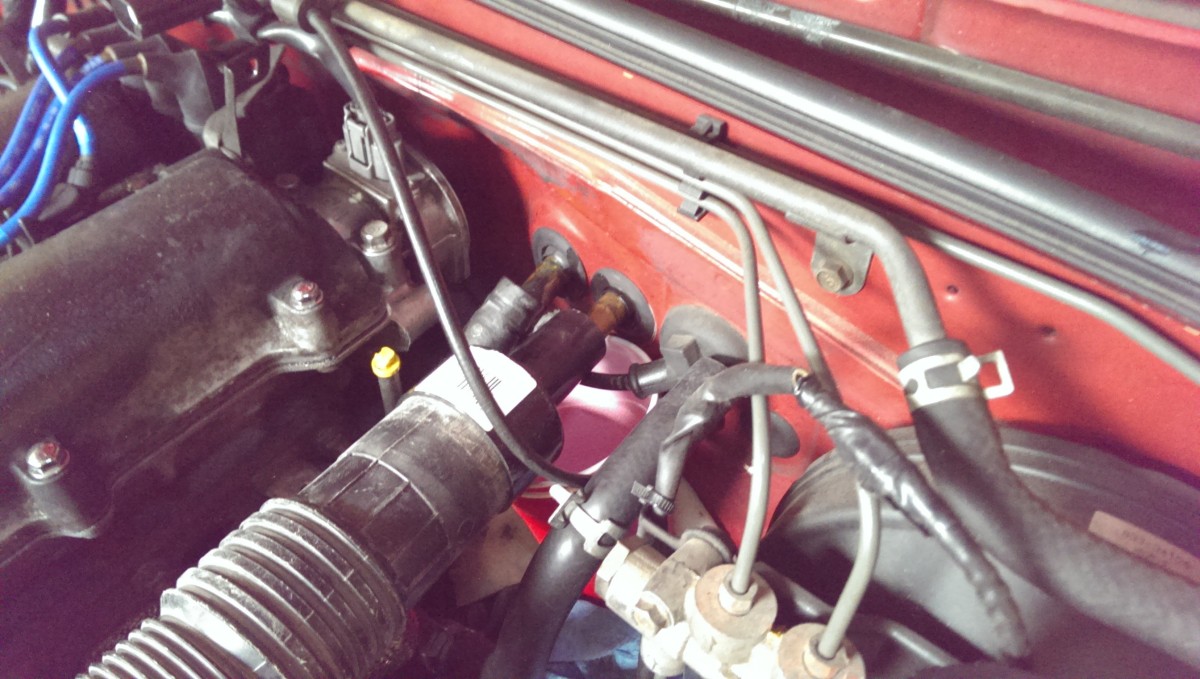
Undo the rubber lines to the core
The core has two lines that go through the firewall to connect to the engine. In a 94-97, they are fragile copper pipes. There are two rubber hoses connecting them to the engine. These can be extremely difficult to get off. I had already replaced mine as part of replacing my engine, so the rubber was fairly new.
The good news here is that the main danger in removing these when they’re old is crushing the copper pipes on the heater core. You’re replacing the heater core, so you are free to give this a shot, although you may want to reuse one of the pipes – read further below. The other option is to simply cut them off and replace. This works too. I would probably try to carefully undo them first and then cut them off if it took too long.
Using a shop vac to suck out coolant during removal
When you remove the rubber, the lines will probably leak a bit of coolant. This will just drip into the engine bay, so it isn’t a big deal. However, if you have a wet/dry shopvac handy, in wet mode, you can simply suck this up as it comes out. Once the lines were off, I used the smallest adapter I had, as pictured, and sucked as much coolant out of the heater core itself as I could.
A lot of people spill coolant inside their car when doing this job. By putting the shopvac on each line prior to pulling it, I had hardly anything left when the core came out. I highly recommend doing this step, it worked great.
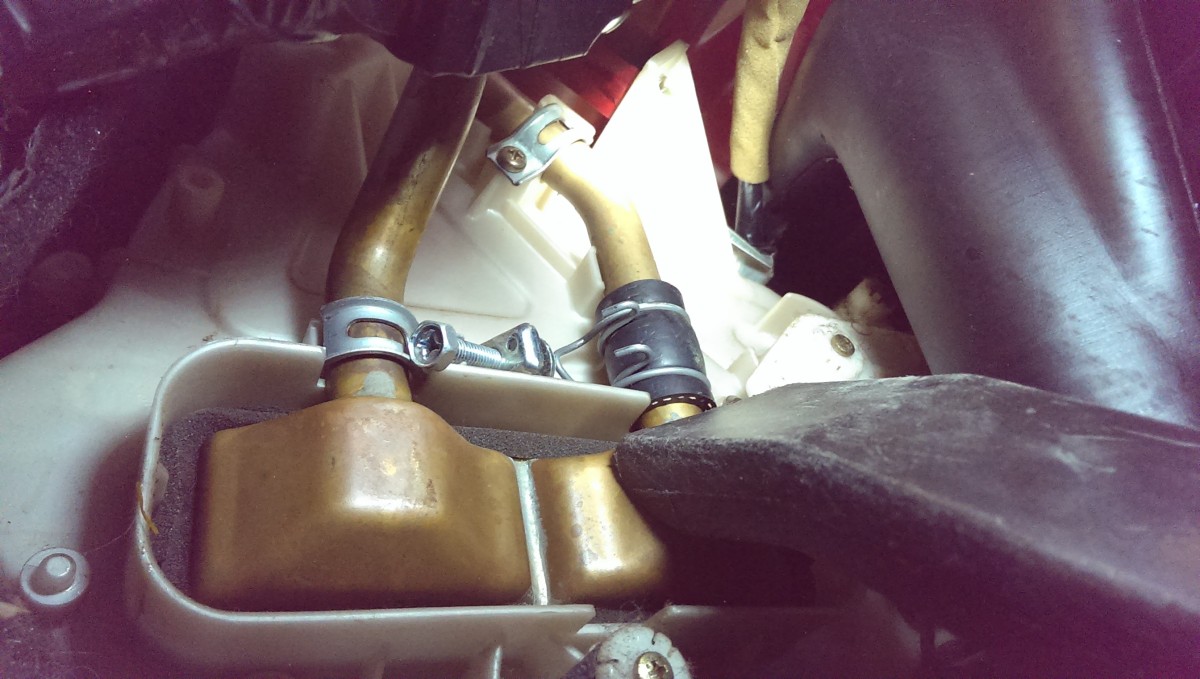
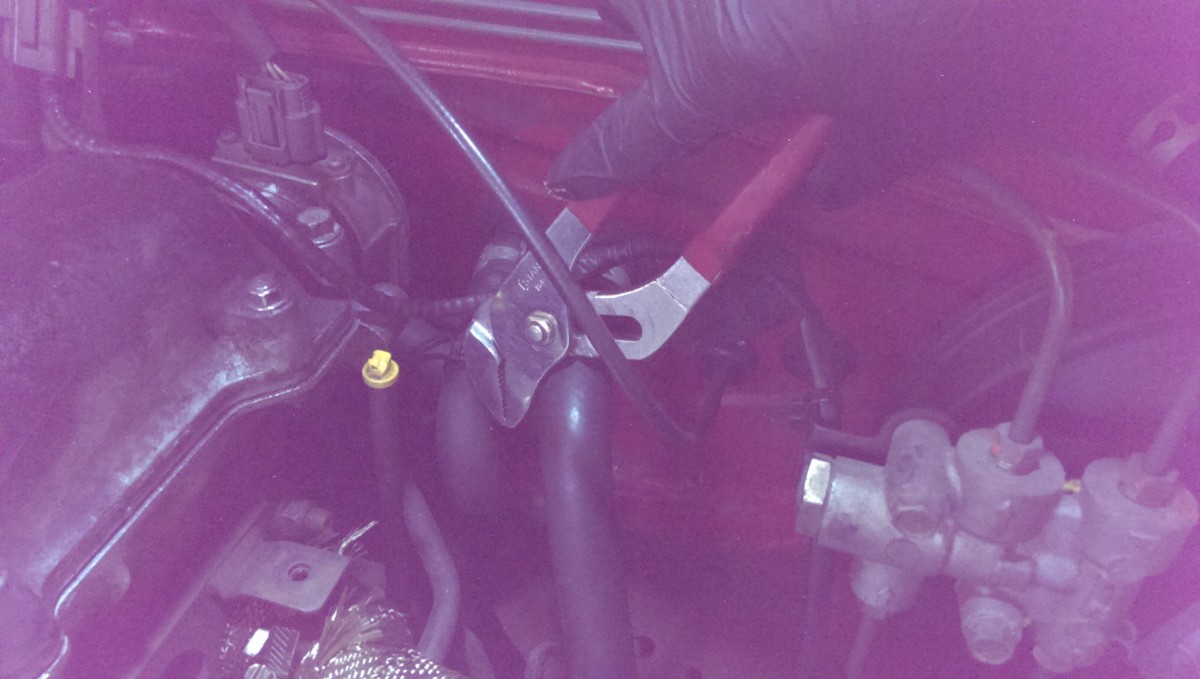
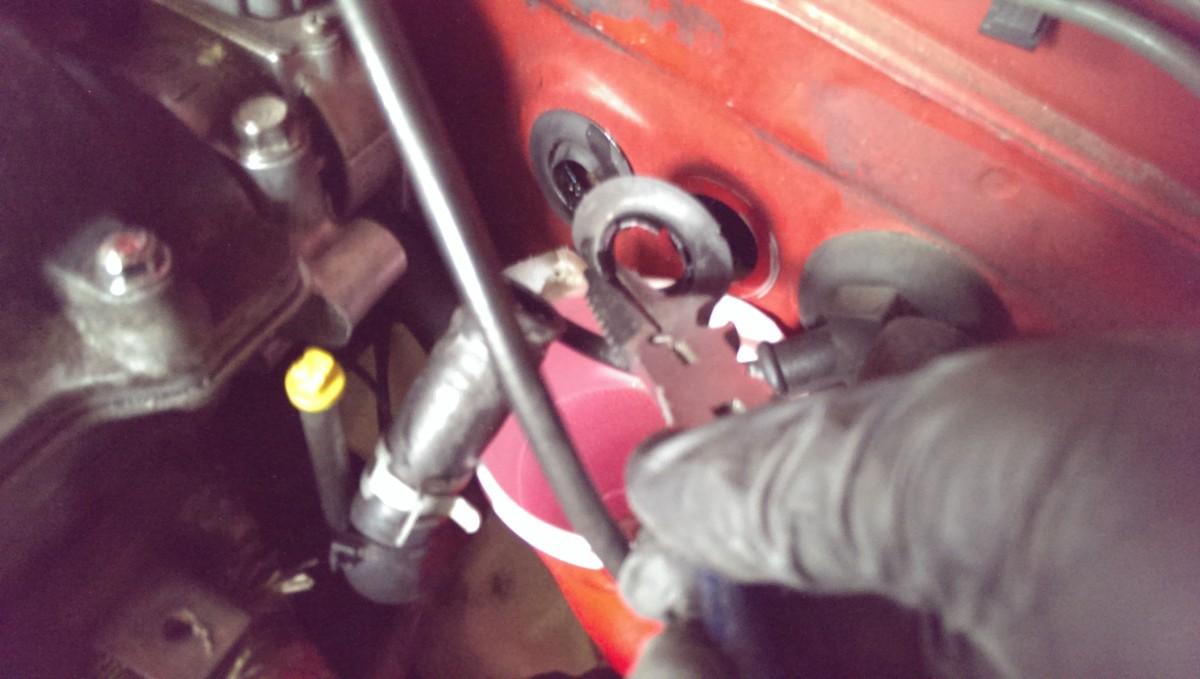
Undoing one line, shopvac ready
Undoing hose clamp
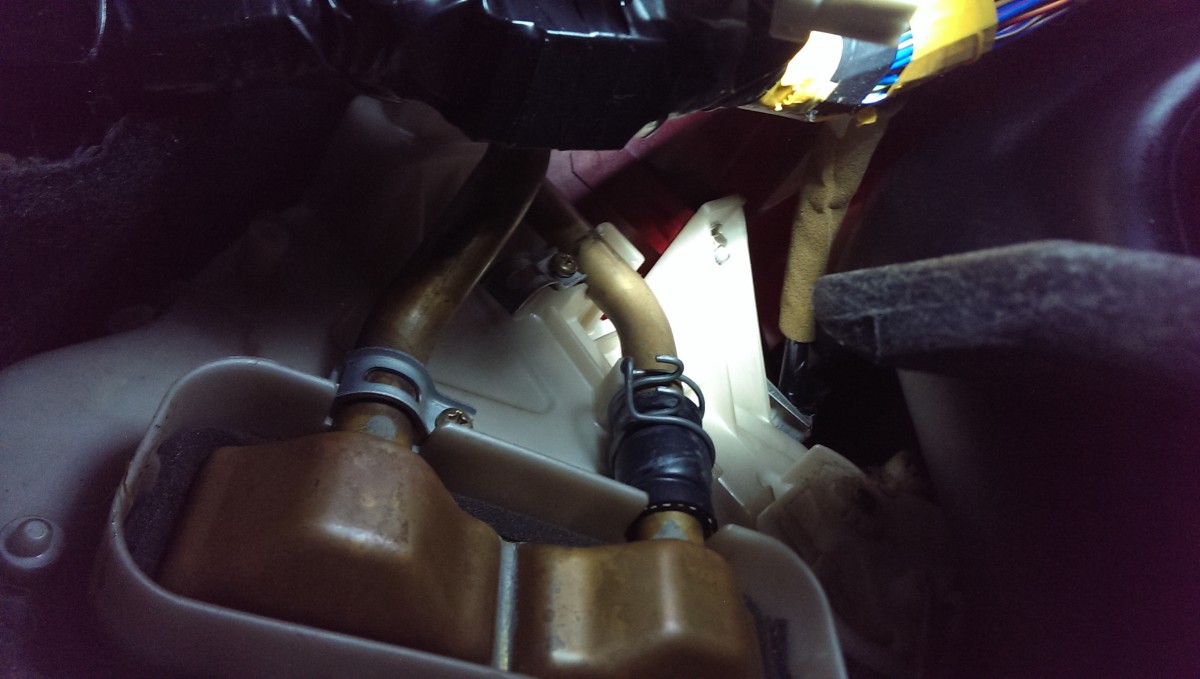
Line removed, can be pulled out of car now
Once the rubber lines in the engine bay are disconnected from the core, it’s back under the dashboard again. On a 90-97, one of the lines actually clamps on with a piece of rubber tube and a hose clamp. This is the easiest to remove. I had the shopvac handy in case any coolant spilled, but there wasn’t any. YMMV. Undo the clamp and remove the rubber. The rubber is probably old and hardened, so you may have to use pliers. If you’re reusing it, you need to be careful not to crush this pipe.
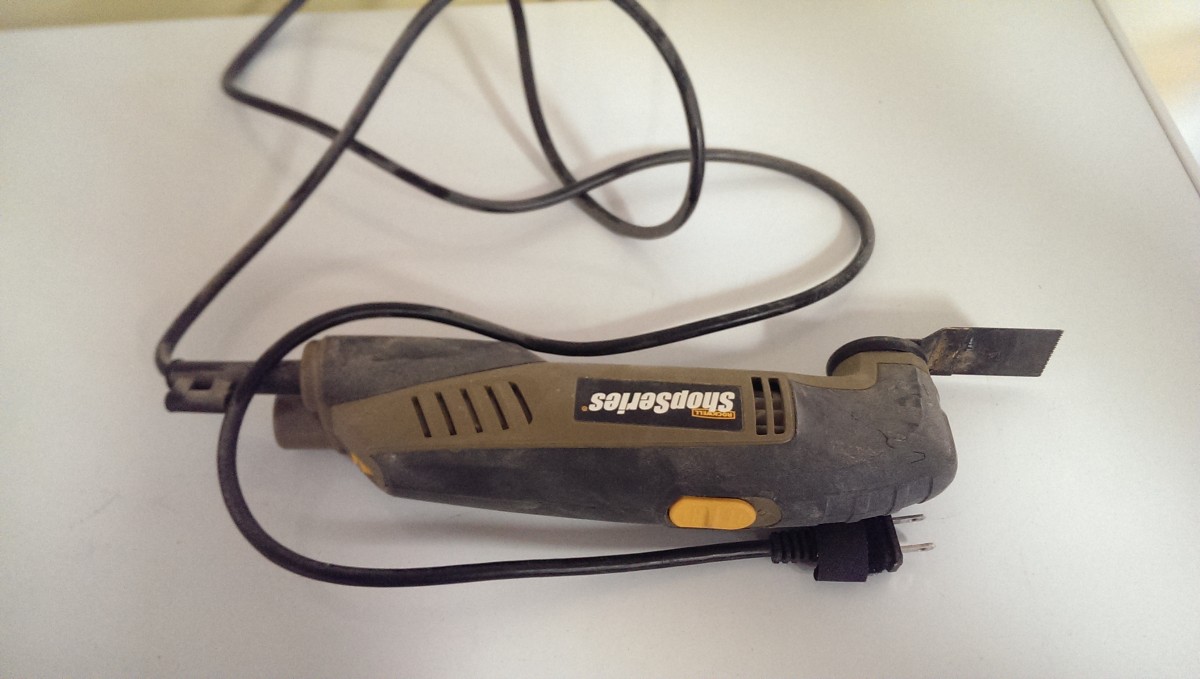
Oscillating multitool made this really simple
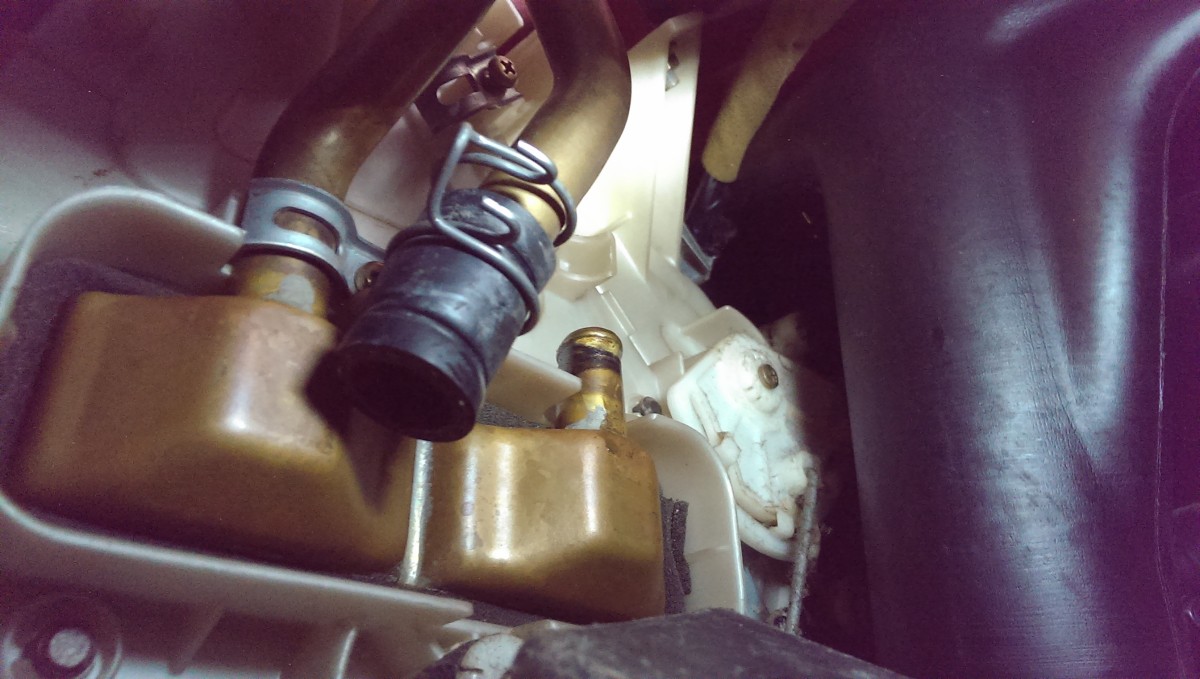
Line cut
The easiest way to get the rest of the core out is to cut the other pipe. If you want to leave it welded (or brazed?) together like it is now, the dash must come out. However, you can instead simply snip it off. I used an oscillating multitool, as pictured, with a narrow metal cutting blade. The copper is very soft, and it zipped right through. A dremel with a cutoff wheel, sawzall, even some stout tin snips should do the trick.
Coming out

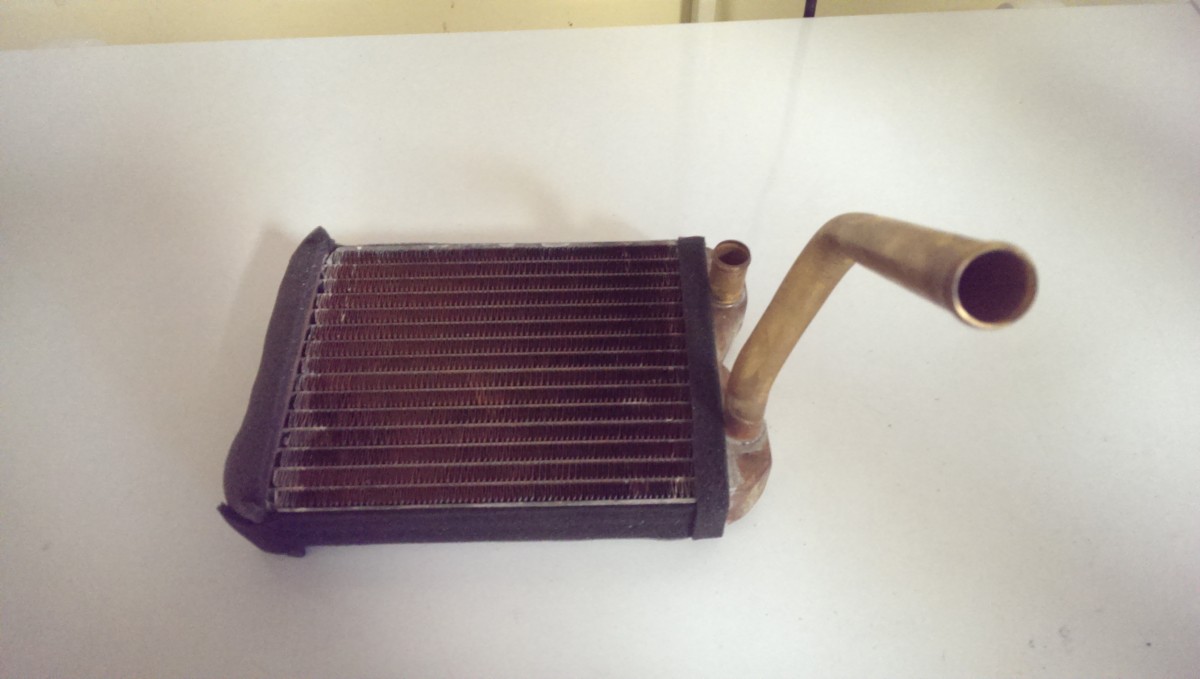
Removed pieces
Once that is done, you can simply slide the core out as pictured. And voila, your heater core is removed.
Choosing which new core to install
90-93 Core

99-00 Core
Now, you’ve got some options at this point. Unfortunately, there are no aftermarket replacement 94-97 heater cores for these cars, unless maybe you want to spend $350 on a Mazda OEM part. If you do, have fun with that, I’m not rolling in it. Fortunately, you can use either a 90-93 or a 99-00, both of which are cheaper options. I’ll tell you how to do both, but based on experience, I would spring for the 90-93.
Basically, you can either go back to a 90-93 core, cut off the copper pipe, put rubber on both pipes, and bolt it back in just like the old core. The main downside to this approach is that the cheapest OEM-style replacement cores from Rockauto, Partsgeek, etc, run $80-$105, depending, not including shipping and taxes. Even if you go with this approach, I would recommend considering getting aluminum pipes from a 99-00, because they’re a lot more durable than the older copper ones.
The other approach is to upgrade to a 99-00 core. The plus side is that they are only $50 on Amazon.
A note on pipes and grommets
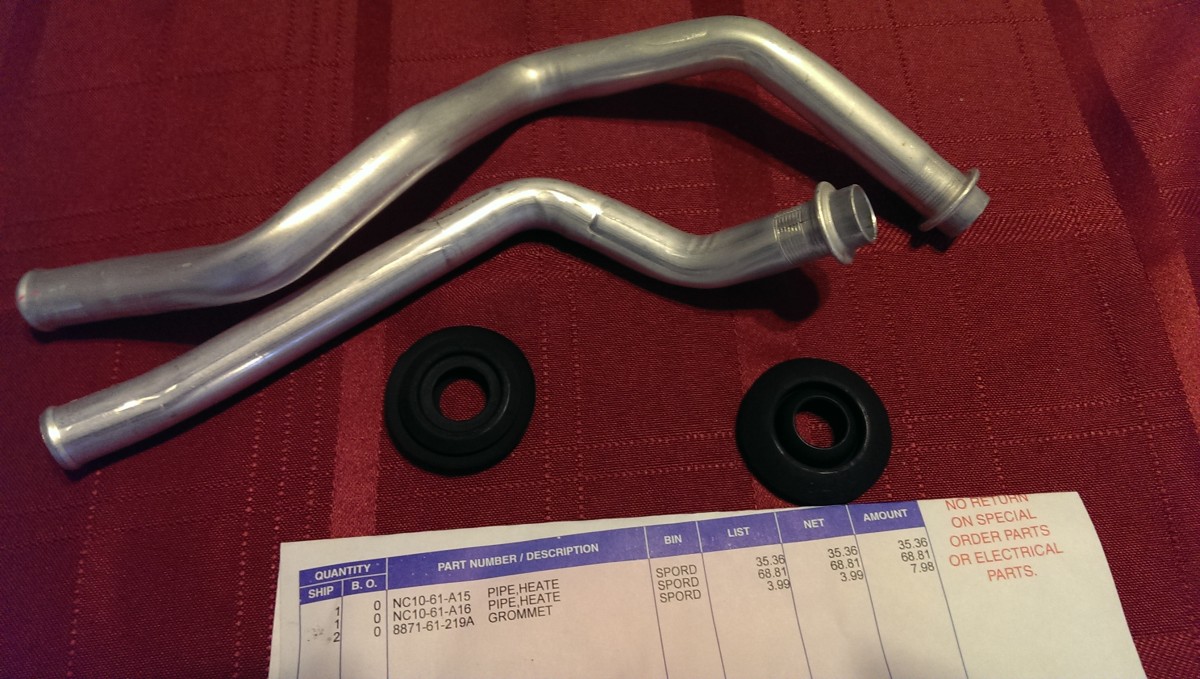
Pipes and Grommets
The pipes that go through the firewall on a 90-97 are very soft copper, as I said. They bend really easily, and if you find yourself having to disconnect them, you need to be really careful not to break them. I chose to upgrade to the less-fragile 99-00 aluminum pipes. Regardless of which core you’re using, the aluminum pipes will work with the methods described below. They are a bit pricey, though, so YMMV – might try a junk yard. Part numbers for the pipes are Mazda NC10-61-A15 and NC10-61-A16.
One thing that is cheap and definitely a good idea is getting replacement grommets. These keep the heater core pipes from banging on the firewall when the engine is running. The ones in your car are most likely 20 years old and worn out. Replacements from the dealer are only $3 or so. Part numbers for the grommets are Mazda 8871-61-219A.
Grommets need replacement
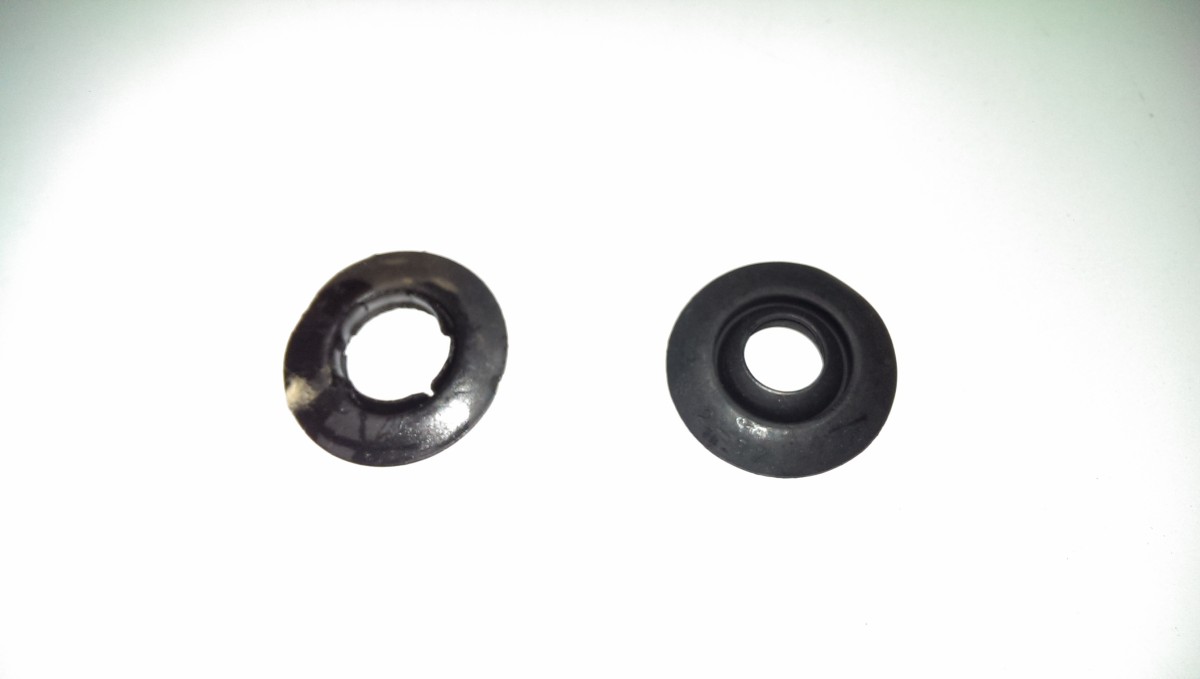
Old vs new grommets
At this stage, before reinstalling the new core, this is a good time to fix the grommets. Some needle nose pliers get them out easily. For reinstallation, they can simply be squished and pushed into place.
Installation Option #1: 90-93 Core
90-93 Core
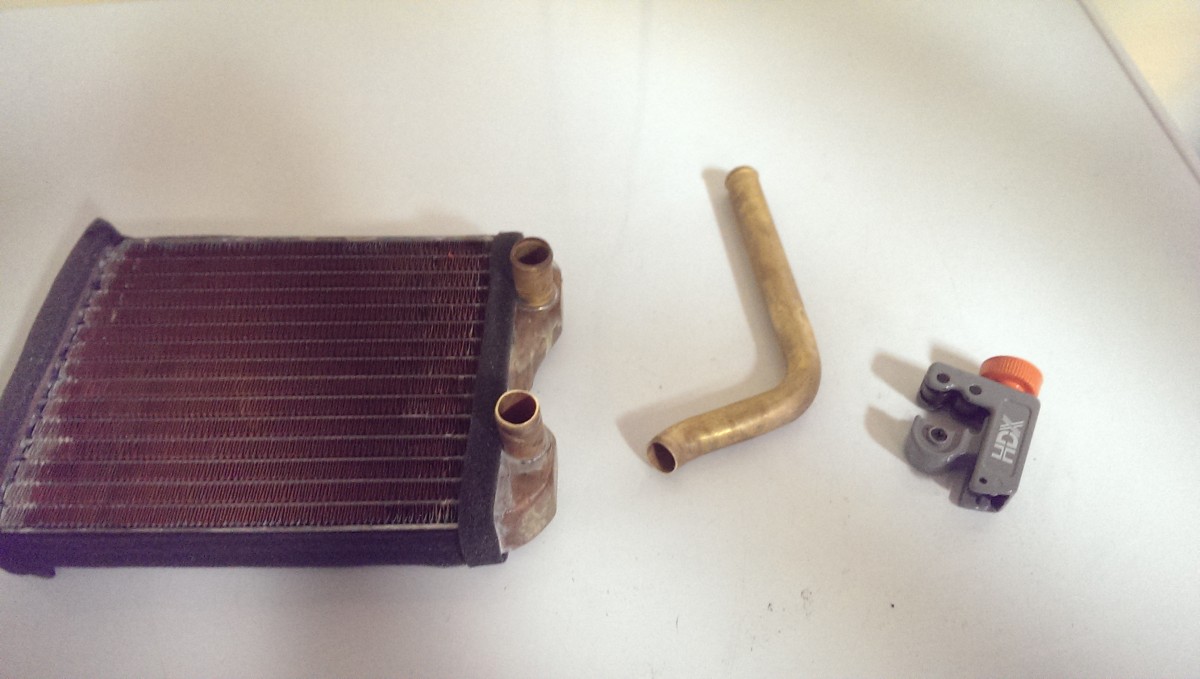
Cut pipe off to attach hose
This is my recommended route. It costs a little more, but it’s worth it. Step one is to take the core and lop off the welded-on pipe. I used a plumber’s pipe cutter I had handy, because it keeps the edge nice and smooth without noticeable burrs, but this isn’t strictly necessary. Just don’t bend the pipe when you cut it and remember to leave a couple of inches on the end. I also recommend using some fine-grit sandpaper to smooth the outside edge so it doesn’t cut the rubber hose; a fine file would also work for this purpose. I used some 800 grit wet/dry I had laying around. I found out afterwards on miata.net that it’s a good idea to file the inside edge of the pipe as well, as a burr can induce turbulence that can accelerate wear in the copper and cause a leak.
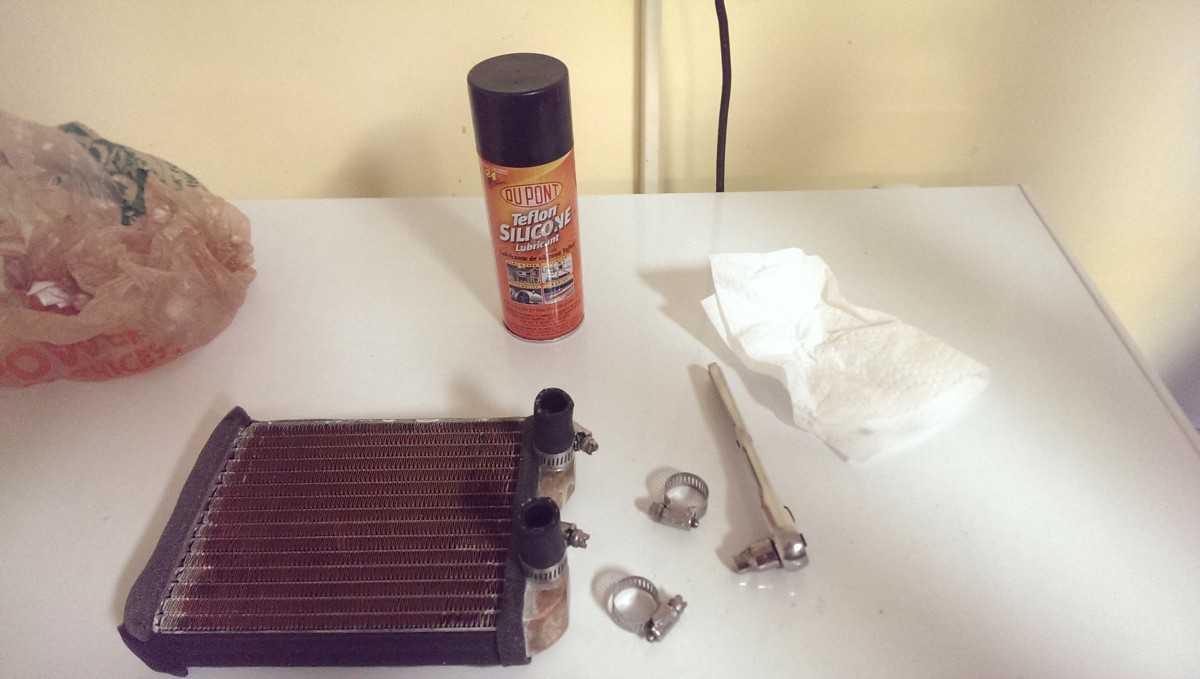
Attach 5/8″ hose
Then, you can attach some 5/8″ or 16mm rubber line, available for next to nothing at any Autozone or the like. I sprayed a little bit of silicone lubricant into the hoses to make them slide on more easily – it’s a very tight fit. Then, a small hose clamp fixes it in place. It is now ready to be installed. The extra two hose clamps will be used to secure the pipes to the core inside the car.
Done
Once the core is prepped as shone, slide back under the car. The core should slide easily into place. You can then plug the pipes into the core and secure with the two remaining hose clamps. Hook the hoses back up in the engine bay, reinstall the plastic cover, and you should be all set. If the hose clamps get in the way of the plastic cover, you can reinstall with slightly longer screws.
Installation Option #2: 99-00 Core
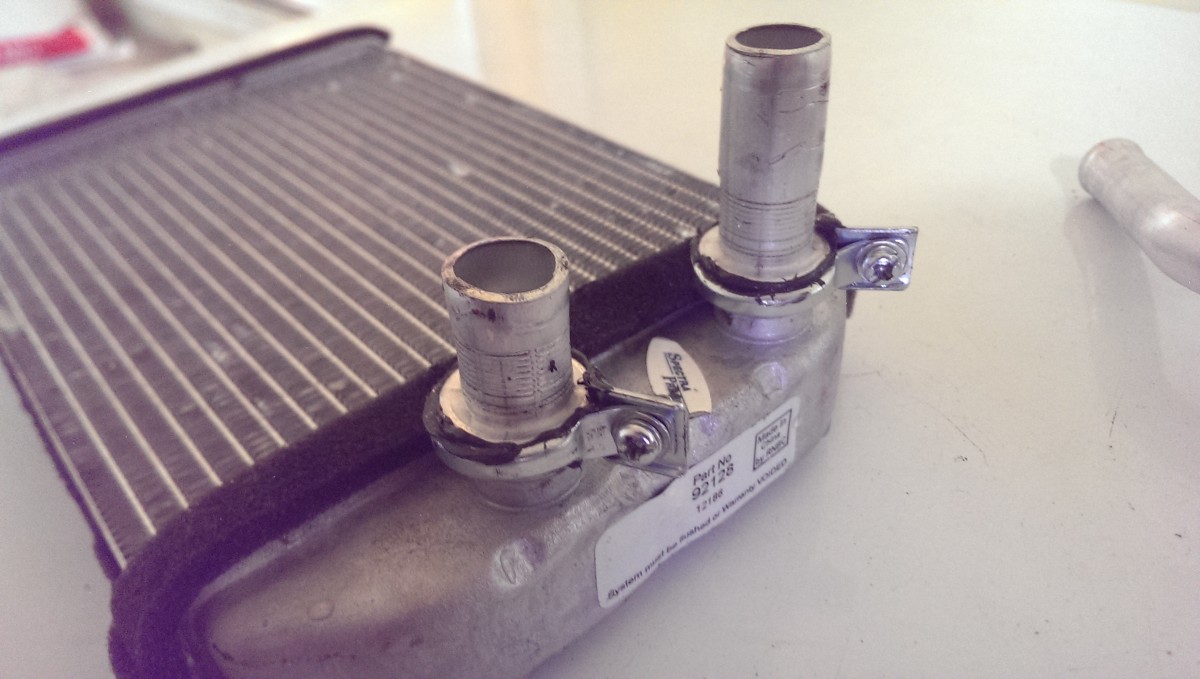
99-05 Core
This core is cheaper, but you must buy the aluminum pipes discussed above, which probably cancels out the cost savings. The new core should come with the v-band clamps and o-rings shown.
Pipes attached
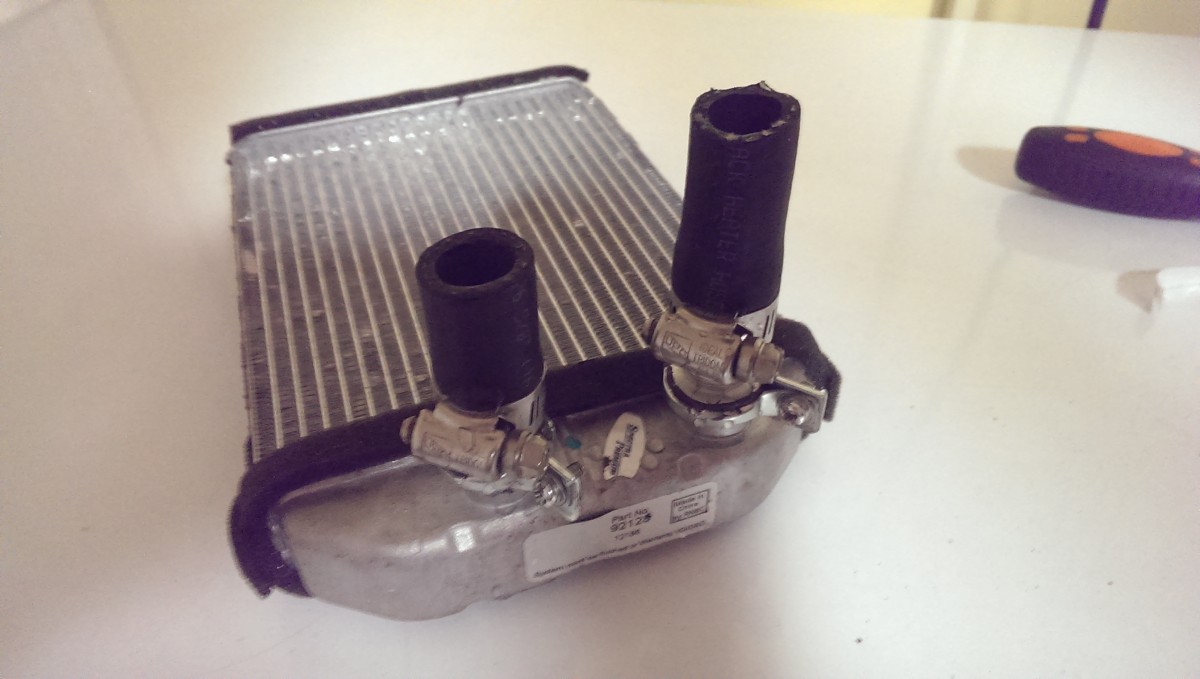
Hose attached
The v-band clamps are a major pain to work with. They’re very finicky, prone to bending if you aren’t careful, and don’t seal very easily. In a word, I hate them. Some plumber’s grease can help the o-rings seal better. I honestly have no idea how you’re supposed to install these things inside the car. As a result, a lot of people end up lopping off the aluminum pipe, installing the v-band clamp outside the car, and attaching it using 5/8″ or 16mm hose just like the 90-93 core. As with the 90-93 core, I recommend using some fine-grit sandpaper to smooth the edge so it doesn’t cut the rubber. The result is pictured above. I could not get these things to seal for the life of me, including RTV.
It’s possible that the aftermarket Spectra core I got had poorer-quality o-rings or v-band clamps than the Mazda OEM, but I have no Mazda OEM to compare it to, so I’m not sure. Once you install it as above, it’s ready to go in the car.
The remaining procedure is just like the 90-93 core. Slide under the driver’s footwell, push the core in its slot, and hose clamp the pipes to the rubber hoses inside the car. Then, attach the rubber hoses in the engine bay, and you’re good to go. Note that this core doesn’t quite fit, so you really need to cram it in. It might not be a bad idea to shave down the sides of the core or the plastic housing it mates to.
Wrap-up and other notes
Compared to cars requiring a full dash disassembly, doing this job on a Miata really isn’t that bad. It’s worth noting that if you go to aluminum pipes, the support clips likely won’t all fit. I just installed what I could and left it alone. Likewise, the plastic housing may need longer screws to get around the new hose clamps, which is also no big deal.
What a great article!
I have a 2000 and was about to take the dash apart. It sounds like maybe I should not replace the heater core with the 2000 replacement but rather go with a 90-93. I’m on my way back to the garage to reassess.
Thanks for taking the time to post this.
Hi, I appreciate the feedback. You definitely should not have to take the dash apart, as long as you can squeeze under the dash.
This was on a 1997 (NA). I’m not sure if a NB (2000) can accept the 90-93 heater core or not, to be honest. I wish I did, but I’d be carefuly about it, as you don’t want to buy one and cut it up only to have it not work.
Great Read! It’s amazing and well detailed, and super helpful because you basically covered every area I had to dabble into (like that $350 heater core). There’s a car community called Wheelwell for these type of posts where people post content like this. Check it out! I think if you post there, a lot of people would benefit from knowing everything you went through.
Good evening guys. Im in need for help at the moment. Long story short, I followed everything to install the 99-00 core but got stuck with the v-band clamps… I’m too deep into this and I’m trying to make it work without trying to cut anything more. Was wondering if anyone has tried buying a different set of v-band clamps that could seal better/easily. Really appreciate any words/help. Thanks much.
Sorry, I don’t know of any tricks for those vband clamps. I gave up on that idea on my 97. :-\
ive been busting my ass trying to figure out how to change my heater core. this article tells you everything you need to know, thanks for the help man