French Cleat Garage Storage
We have a bunch of garden tools, ladders, and other items that were taking up floor space in the garage and shop. Of course, floor space is at a premium, so I wanted to do something about it. I could have put up some shelves, but they’re not very good at holding shovels, axes, and the like, and they take up far too much floor space.
There are also plenty of commercial wall storage solutions, but they’re all fairly expensive. I instead went with french cleats. A french cleat is simply a 2×4 with a 45 degree angle serving as a hook, screwed to the wall. You can easily make small shelves and tool holders that hang on the french cleat. French cleat garage storage can hold a lot of weight and can be easily rearranged. I even figured that if we move, I can take the tool holders with me, put new cleats on the new garage, and hang everything again.
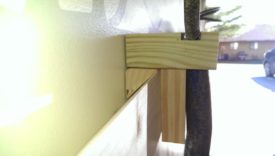
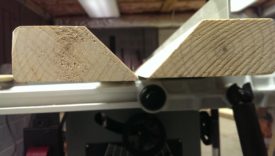
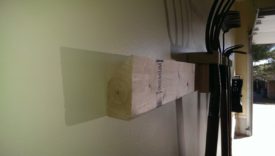
Here is a profile view of a french cleat. As you can see, the bevelled 2×4 is screwed into the wall. As we’ll get to later, the garden tool holders have a matching bevel, so they hook on the cleat. They hold a good amount of weight, but easily lift up to come off and move.
Hanging ladders
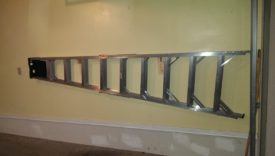
Before doing the french cleats, though, I wanted to simply get my ladders off the ground. I could have made french cleat hangers for these as well, but they’re so long that this would have been a waste of a french cleat. Instead, I just used some scrap 2×4 to make these simple little holders.
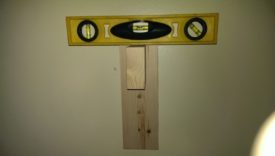
They simply screw into studs in the wall and serve as a platform to rest the inside of the ladder on. This has worked out very nicely. I repeated the process with the 6′ ladder later on.
Making French Cleats
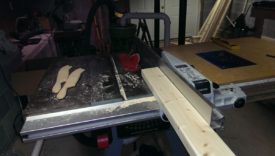
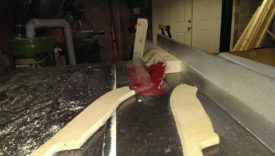
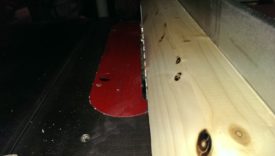
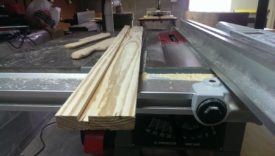
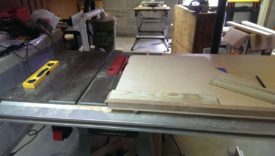
Actually making the french cleat is very straightforward, provided you have access to a table saw. It’s simply a matter of tilting the blade to 45 degrees and running the piece through. Always use push sticks or something similar when working with the table saw.
This step is optional, but I didn’t really want a sharp edge on my french cleat. I simply ran it through the table saw again, just trimming the very tip of the edge off, to make it blunt.
Once cut, these cleats are ready to be screwed into the wall. If you want to support a lot of weight, you could use lag bolts. For my purposes, I went with 3″ deck screws. I made sure the cleats were at least about 4′ long, so that I could easily screw into at least 3 studs (spaced 16″ apart). I used two deck screws per stud. This process is almost identical to when I built a garage shelf, so I won’t repeat it here.
I ended up putting 3 4′ cleats on the wall, which turned out to be enough to hold the tools I had. Once the cleats are up, it’s time to make the tool holders, which is the more time-consuming part of the project.
Making light rake/broom/etc holders
The first holders I made were for my lighter tools: rakes, brooms, and so forth. As such, I could get away with some relatively flimsy designs. I made this all out of scrap I had available.
I cut up some scrap 2×4, bits from a shipping container, and cutoff from making the french cleats into usable sizes. I was planning to make five of these at once, to save time.
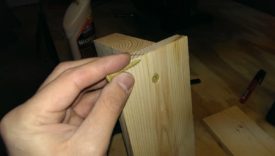
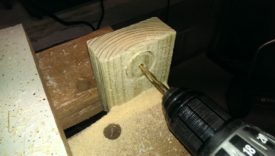
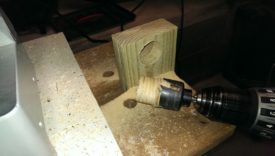
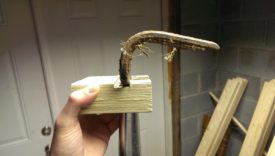
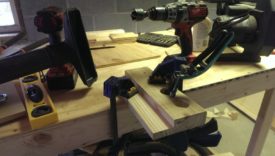
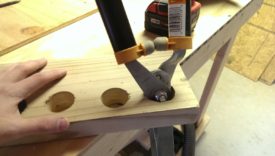
The bits of 2×4 need a hole in them to hold the actual tool. I used a hole saw bit I had laying around. Because it wasn’t deep enough to go all the way through, as shown in the first picture, I simply drilled as far as I could. Then, I used a bit whose sized matched the pilot bit in the hole saw, and ran the hole completely through. Finally, I flipped the piece around and finished the hole from the other side.
Since I did this project, I have since acquired a drill press and set of forstner bits. If I did this again, I would simply mount this piece in a drill press vise and go through it in one shot.
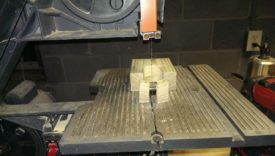
Once the hole is cut, I used my little 10″ bandsaw to cut out a chunk of the side. This gives me a slot to slide my tool in with. Any number of saws could be used to do this, including a jigsaw, multitool, hacksaw, etc.
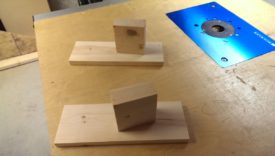
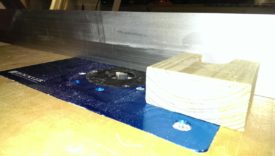
Finally, I set up the router table to cut a dado to serve as a tool rest. This is to keep the tool from sliding off on its own. I have since acquired a dado stack for my table saw and would more than likely use that if I did this again.
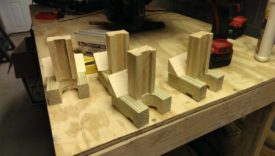
The second picture shows one of the small rakes resting in the newly-created tool slot.
The last step is gluing and screwing the pieces together. The cut up chunk of 2×4 serves to hold the tool. The glued and screwed 45-degree angled piece hooks into the french cleat. And lastly, the big of pallet scrap holds against the front of the french cleat, keeping the holder in place.
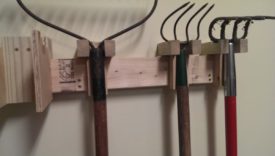
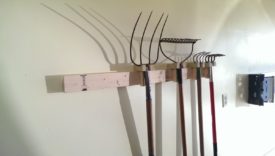
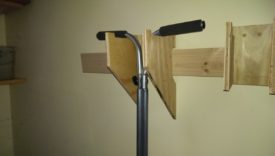
Here are some photos of this style of tool holder in action. Hopefully this clarifies how the french cleat works. These holders aren’t the strongest, but let me recycle a lot of scrap into something more useful that would otherwise be trash.
Making medium duty tool holders
I had some heavier tools that needed more substantial support. I wanted to have a more substantial bracing for these, so that they rested further down against the wall to take the load.
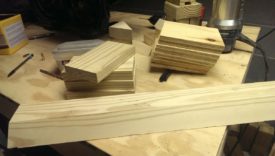
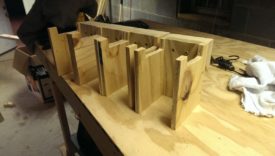
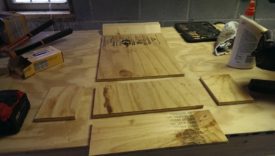
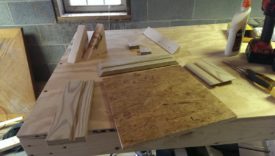
I started by cutting up more 45-degree bevelled 2x4s, essentially more french cleats, to use as the hooks for the heavy-duty holders. I also cut some pieces of scrap OSB to use for sides, two per holder. Lastly, some thinner strips of wood served as the back for the holder.
I cut the strip of french cleat, shown in the foreground of the last picture, into sections, one for each tool holder. Then, I glued and screwed the backs onto the cleats as shown.
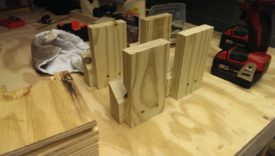
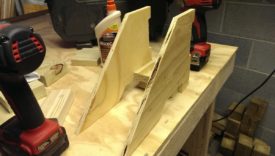
I then used my bandsaw to notch all of the sides. This notch is intended to keep the tool from sliding off of the holder. You could use a number of tools to make this, including a jigsaw, a table saw with a dado blade, a router, a multitool, and so on.
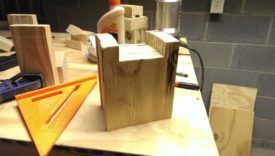
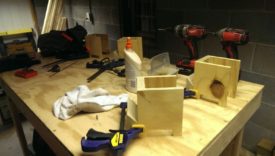
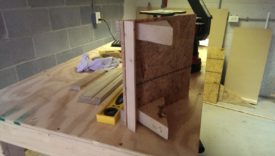
Note that the tool holder is upside-down in this picture. The sides are glued on and clamped in place. I’m about to add screws to hold the sides in place.
Once that’s done, these tool holders are now ready. I used these for shovels and things that are a bit more substantial. The longer sides and continuous french cleat piece help support a bit more load.
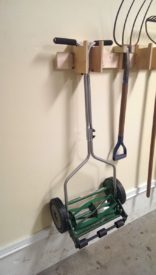
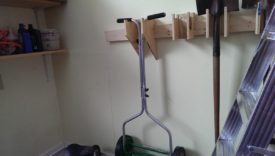
Here they are in test. They held up just fine, although I ended up switching the heavy reel mower in the picture over to one of my heavy duty holders, below.
Heavy tool holder
When I tested my medium-duty holder with the heavy reel mower, it became evident that it was heavy enough to make the french cleat want to twist. I ended up making these heavy tool holders to compensate. They are a nearly-identical design to the medium duty, except that the side pieces of OSB go all the way against the wall, with a notch cut out, as shown, for the french cleat itself.
Once I did this, the brace against the wall helps keep the holder from twisting in place. This lets the cleat take the weight downward, rather than potentially being twisted forward. I will note that the sharp points on the bottom of this holder put little dents in the wall – I ended up going back and cutting those to a more blunt profile.
Small tool holder with storage tray
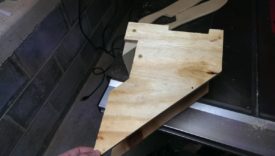
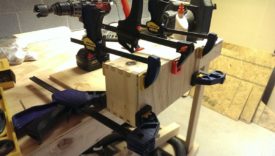
We also had some little garden shears and things that needed a place to be stored. Additionally, I wanted somewhere for the gloves we use for yardwork. I ended up with this tool rack with a box underneath it. I started by cutting out the pieces as shown, from some french cleat 2×4 and some scrap plywood.
I had some scrap 2×6 or 2×8, I forget which. I put a small rabbet in it to match the back and cleat areas.
I put some holes in this piece to put small tools in. Here’s a test fit with the garden shears.
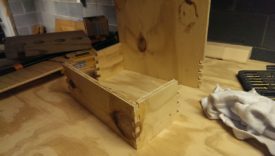
I also used a simple jig to make box joints for the box on the bottom. This wasn’t really necessary, I just wanted to try out making box joints with my then-newly-acquired dado stack.
Here is the lower half of this holder with the box joints completed.
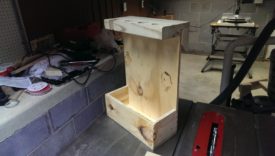
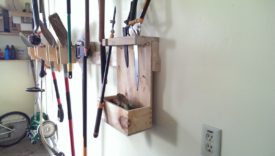
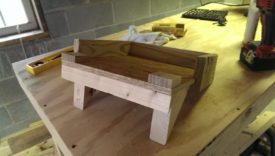
The bottom was simply glued on, if I recall. Not the strongest, but gloves aren’t really very heavy. I glued up the box joints, and glued and screwed the top, back, and french cleat engagement piece. Here is the final result. I did end up cutting a notch in one of the holes similar to how I did before, to accomodate a larger pair of shears.
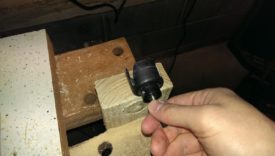
In all, this turned out pretty handy. The shears and gloves are conveniently right next to each other, and we were able to store other miscellaneous small garden items in the box under the gloves, such as a plug auger drill bit.
Small shelves
The final items to be built were two small shelves. One is for the chainsaw, and the other is for gas cans, oil, and fuel stabilizer.
For the chainsaw shelf to take up as little room on the french cleat as possible, I ended up making it able to seat the body of the chainsaw and let the blade stick out the side. I wanted nice tall edges on the shelf to keep it from falling or being pulled off of the shelf. I picked out a piece of scrap for the sides and cut a long dado to house the shelf surface.
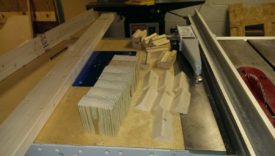
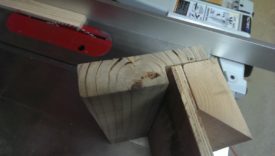
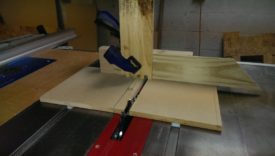
I then used a crosscut sled to cut the one long piece into multiple sections for the sides. By doing it this way, it’s easy to make sure that the dado is placed exactly the same on all sides. I tilted the table saw at this point to make mitered corners.
Here are the sides laid out next to the OSB piece that will serve as the shelf surface. You can see that one side is shorter than the other; this is the space to let the chainsaw blade stick out.
To have the shelf attach to the french cleats, I used some cutoff, similar to how I did with the light duty tool holders. I had to put some thicker blocks on the top of the shelf just to give the screws something substantial to bite into. The triangle braces are the back support.
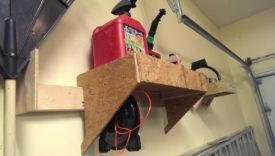
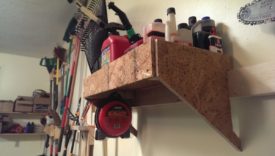
I wanted the second shelf to support a bit more weight, since it was for random items. A full 5-gallon gas can is also surprisingly heavy, at about 30 pounds. I built it almost identically to the heavy tool holders, except with a large shelf surface. I didn’t take pictures of the build process.
Wrap-up
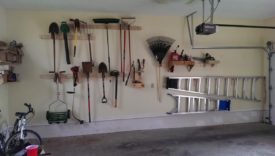
And that is that. I got all of the garden tools and ladders up off the ground, and saved a ton of space in the process. Additionally, doing it this way rather than with shelves means that there is still room to open a car door on that side of the garage.


I do something similar. Being that I don’t have an extensive array of woodworking tools (no table or miter saw) I mount 2x4s to the studs along the wall and use inexpensive screw-in hooks and mounts from big-box stores to hang items. I also once had a random, odd-shaped piece of scrap plywood that I mounted to the studs to tack small items onto.