Installing Coilovers in a Miata
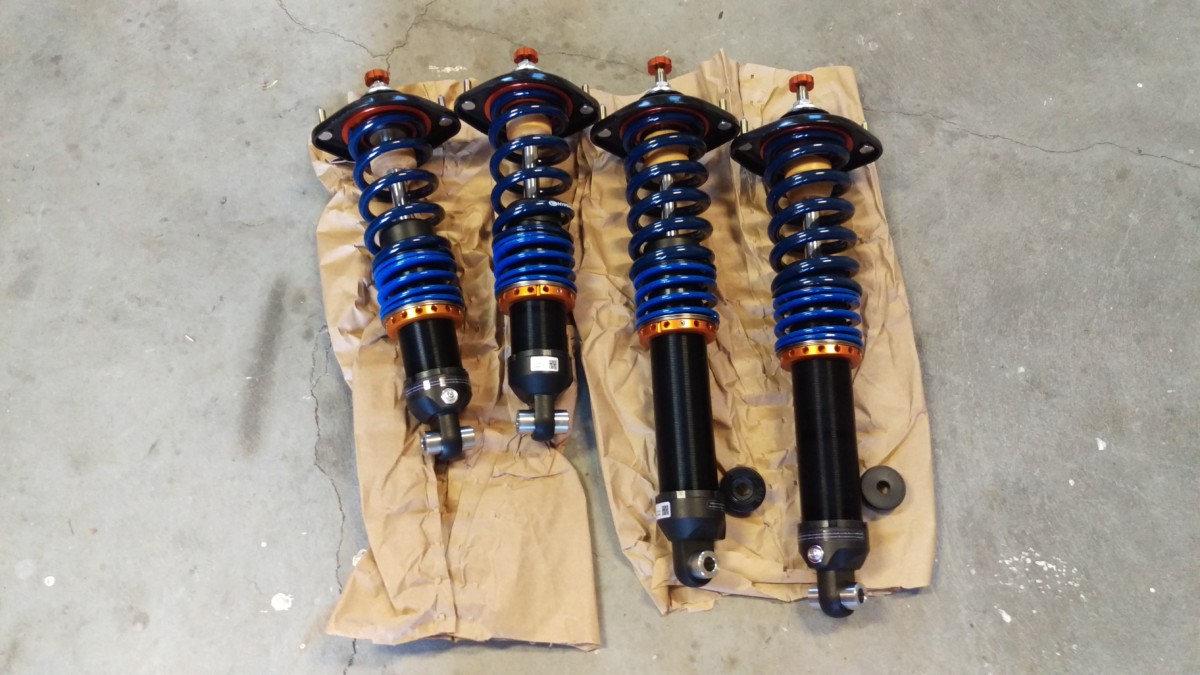
My new Xidas
I recently pulled the trigger on a set of 949Racing Xidas, so I figured I would document how to put them in the car. Installing coilovers in a Miata is the same procedure regardless of which brand is being installed. If you’re instead only changing the shocks, springs, or bump stops, rather than the entire coilover, you can still follow this guide. The only additional step is that after the coilovers are removed, you will use a spring compressor to disassemble the coilover and replace the stock components with whatever upgrades you have.
Things to buy
- New coilovers, of course
- A basic set of metric socket wrenches, breaker bars, etc
- A 21mm socket
and a 21mm combination wrench
if you’re using the “long bolt” method
- A floor jack and jack stands

Removing the Front Coilovers
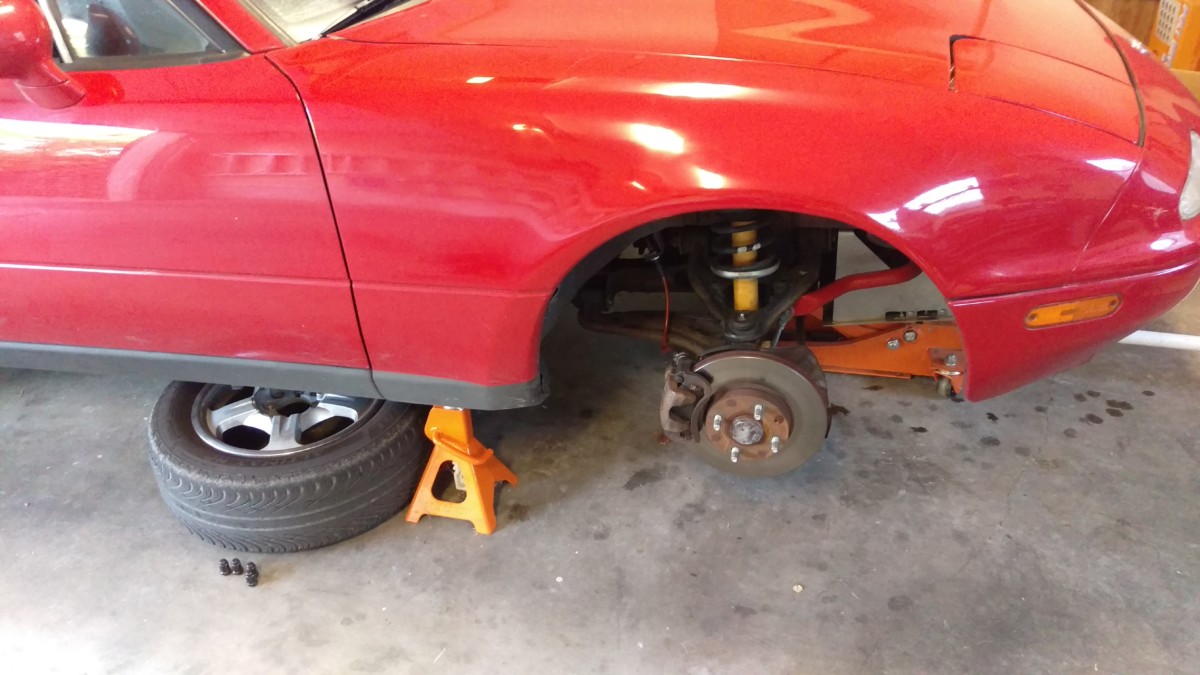
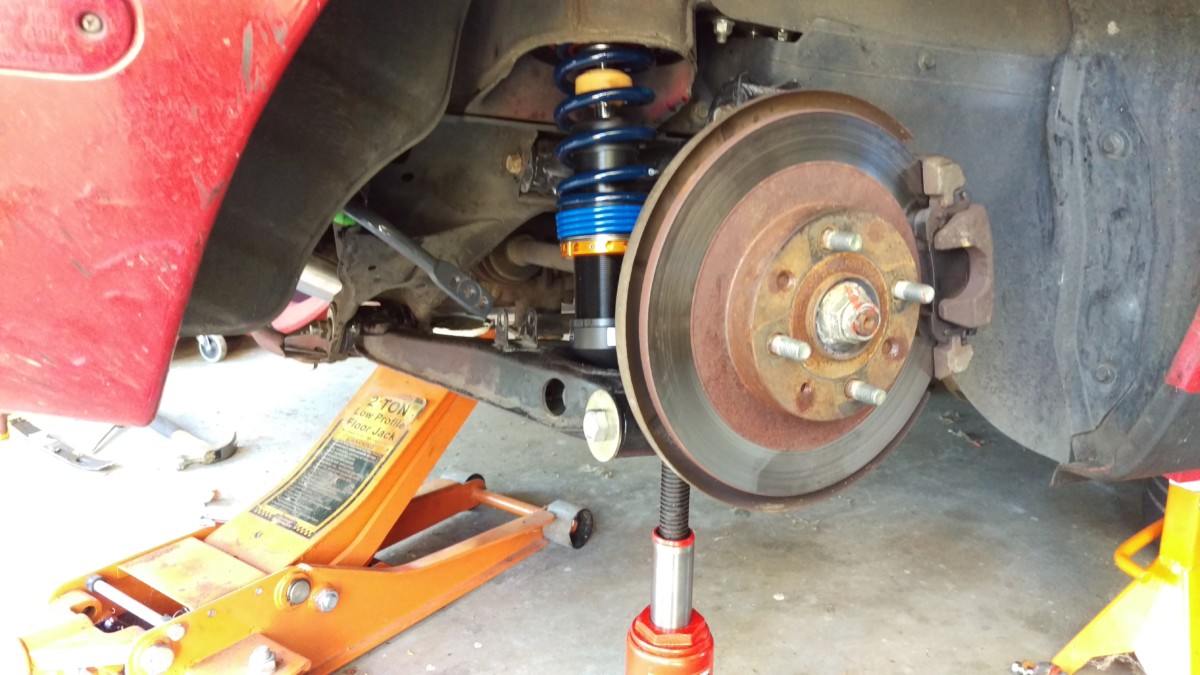
Get the car on jack stands, wheels off
There are at least three or four ways to remove the front coilovers that I know of. Here, I’ll discuss two of them. Regardless of which method you choose, the first step is to get the front of the car on jack stands. Also, remove the wheels as pictured.
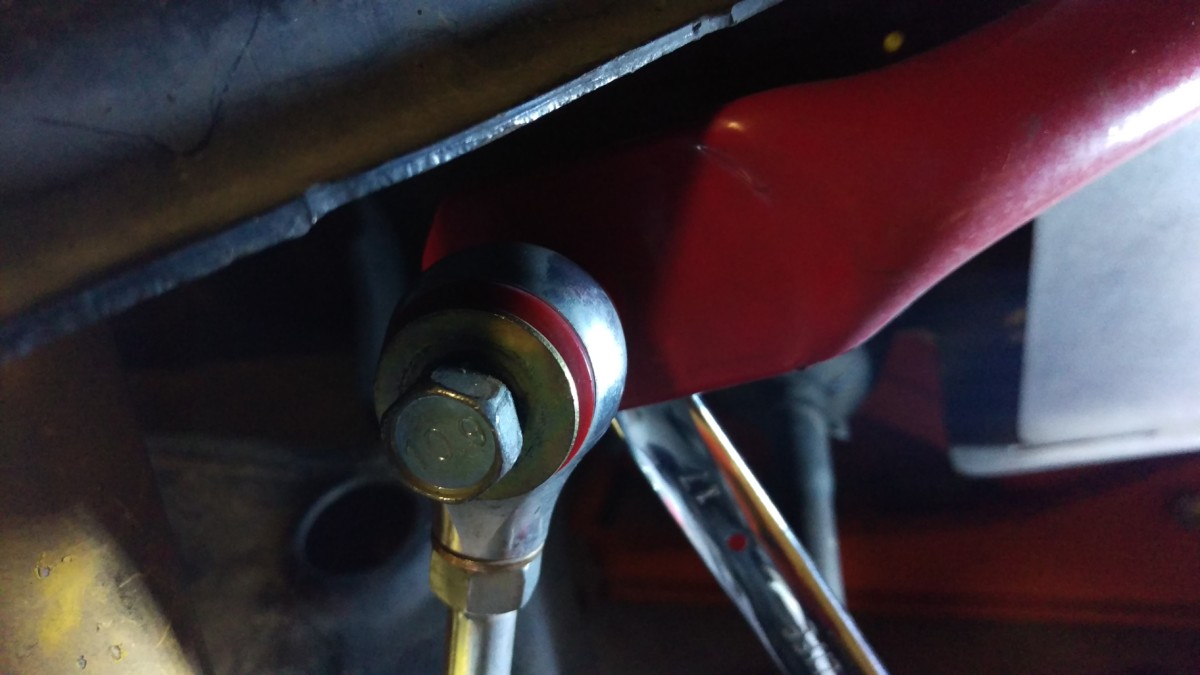
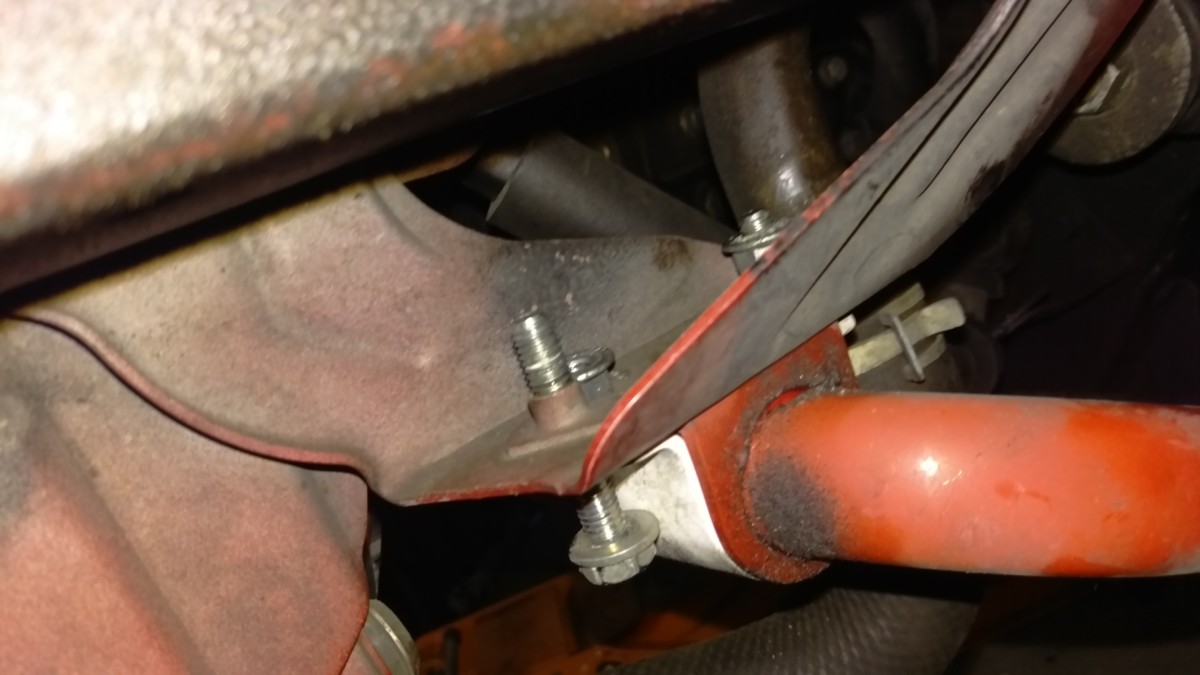
Undo the sway bar end links
The lower bolt for the end link
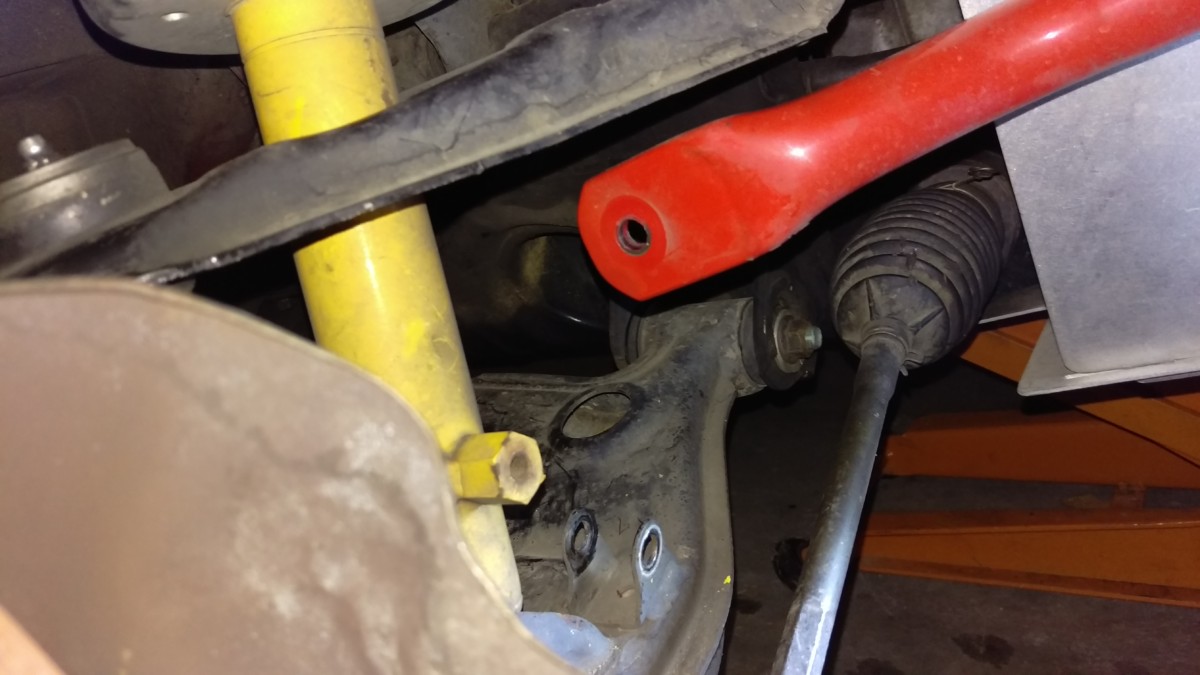
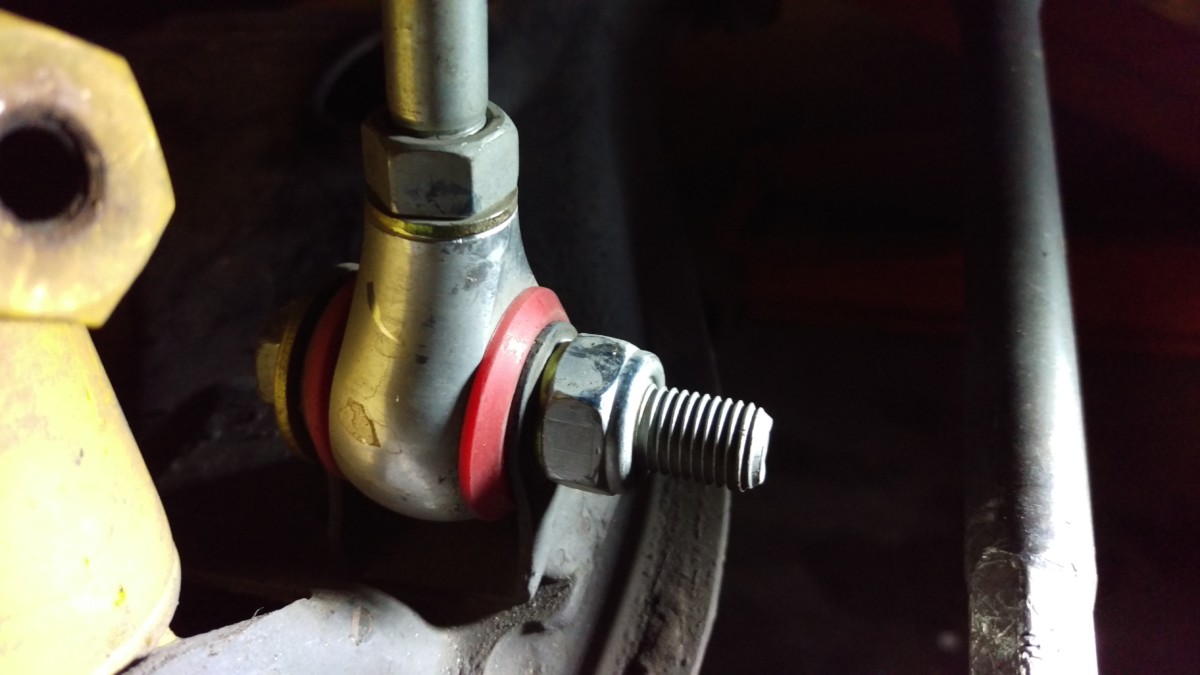
With the end links removed, the sway bar can be rotated out of the way
Additionally, the sway bar end links need to be removed regardless of which method is chosen. Each link has two bolts. One bolt goes to the control arm, and the other goes to the sway bar. The sway bar must be detached like this, or it will prevent the control arms from drooping low enough to remove the coilovers. My car has racing beat end links, but the same basic procedure applies for the stock ones.
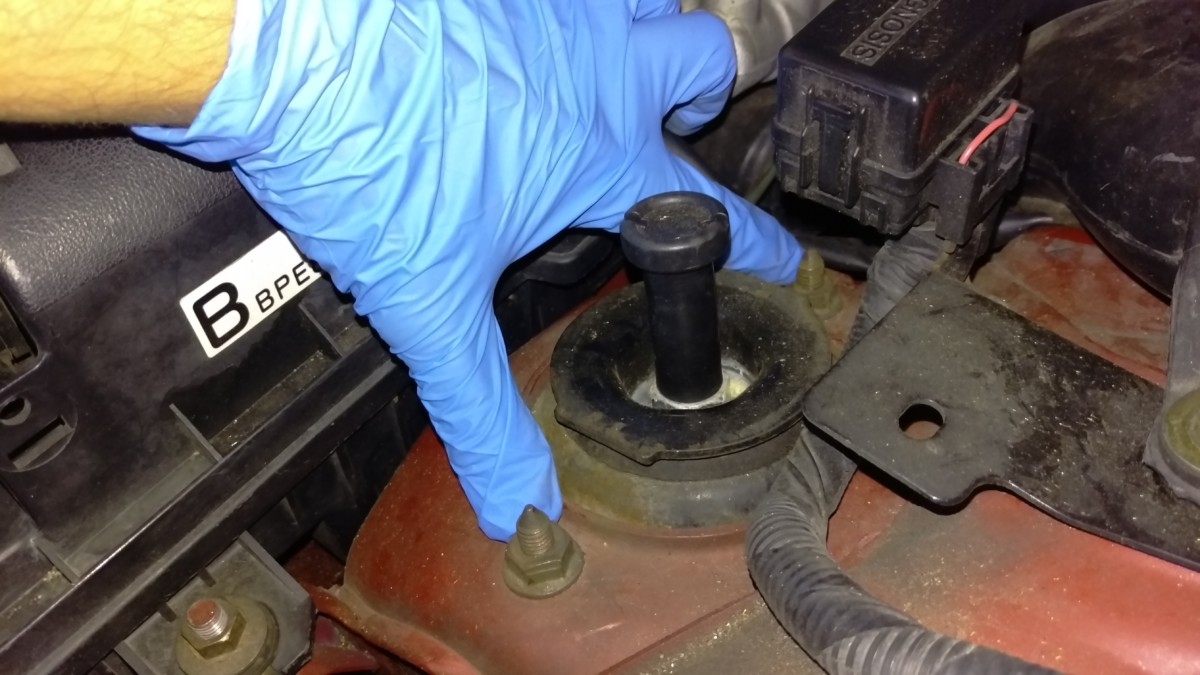
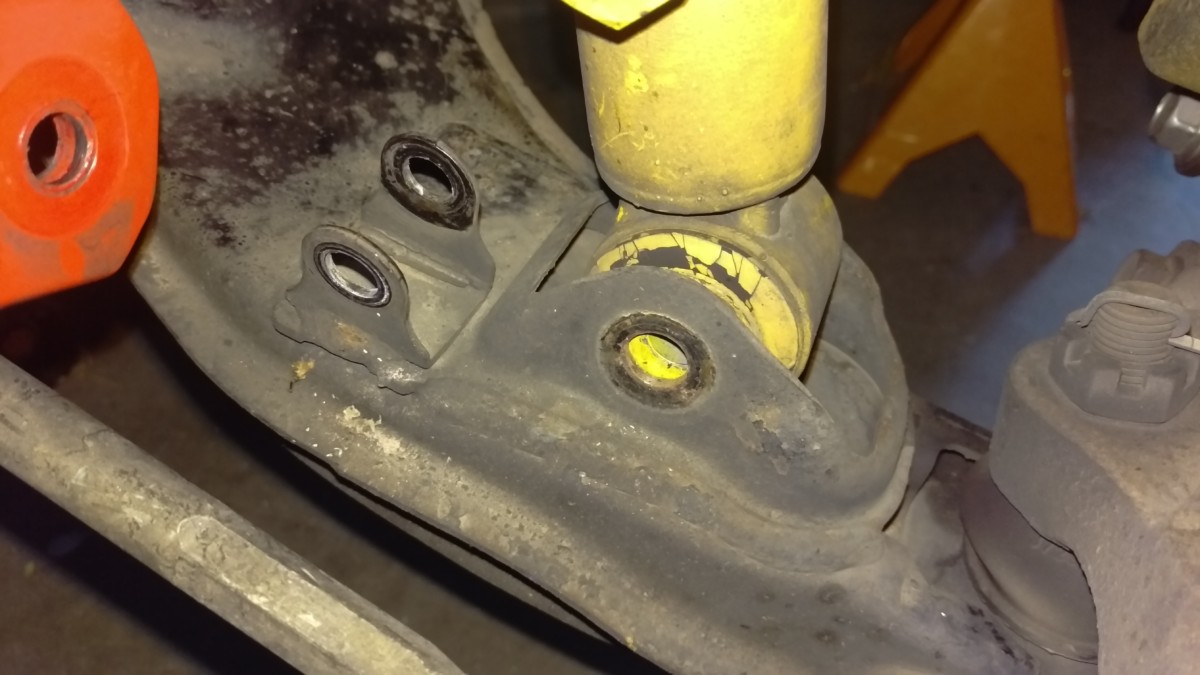
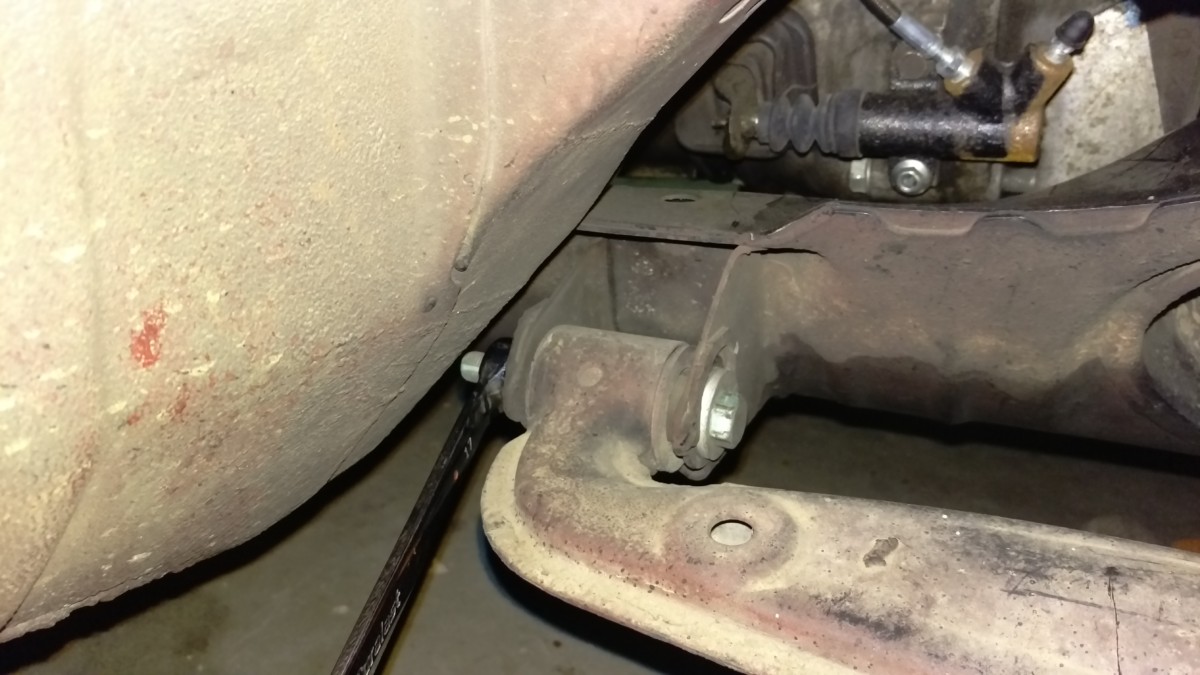
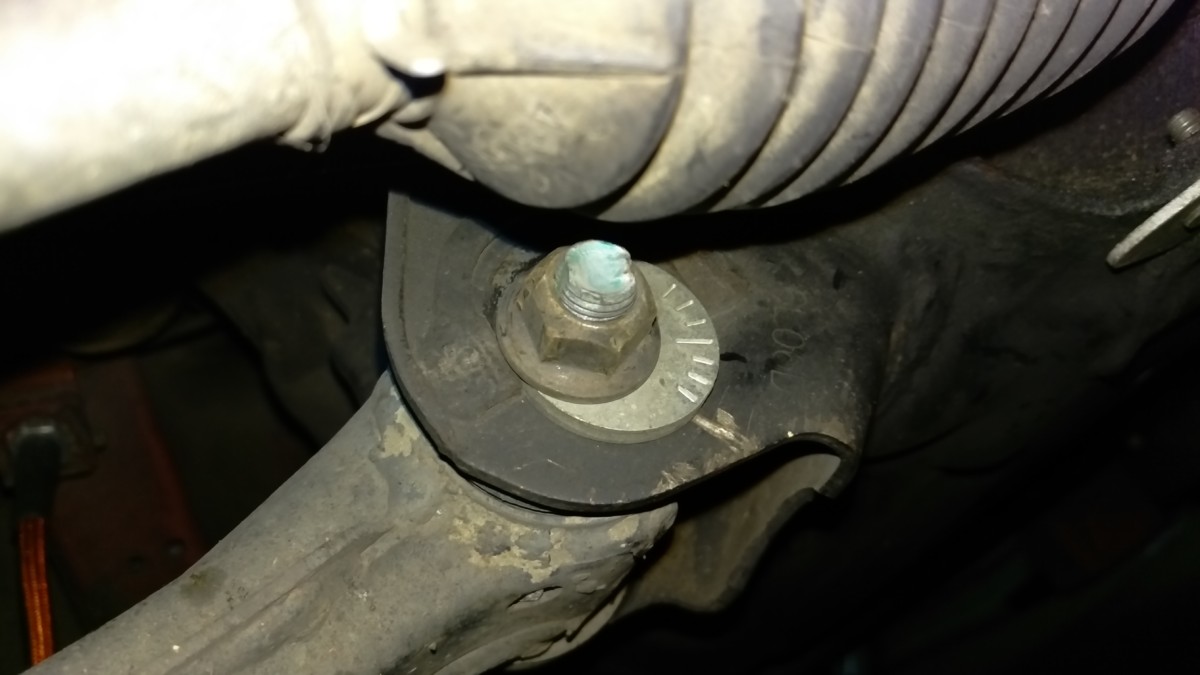
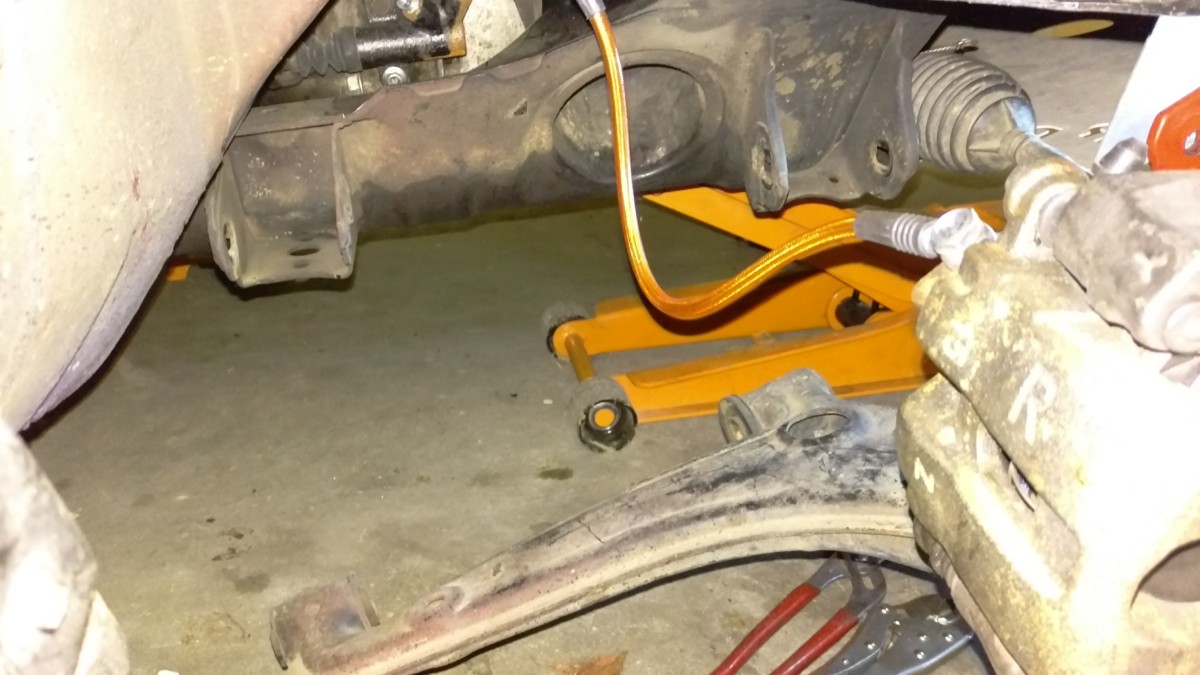
Break these loose before starting to work
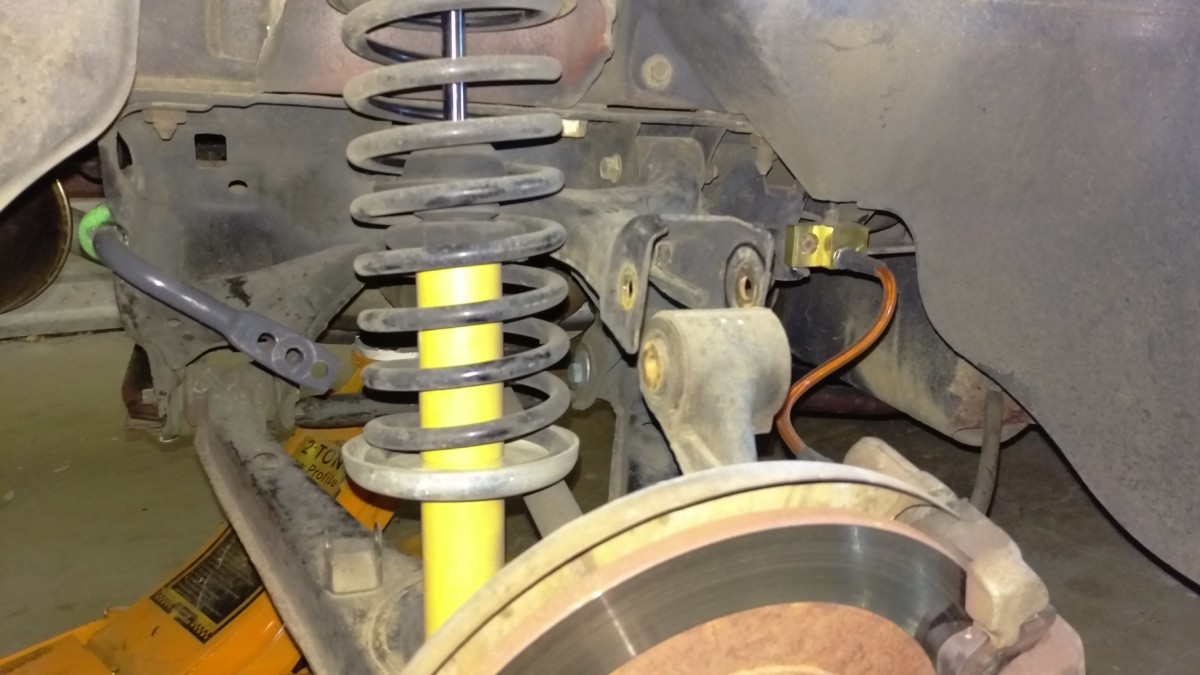
You should also break these two bolts loose before proceeding, especially if they haven’t been removed in 20 years. Don’t remove them entirely at this time. They hold the coilover top hat to the car. If you’re planning to disassemble your coilovers after removal, you should also LOOSEN the nut under the black plastic cap in the center in the picture. (You will not have the cap unless you also have Koni shocks.) This nut holds the coilover together, and it’s easier to loosen up inside the car. You do NOT want to remove it entirely at this point, because the tension on the spring will be released, and it can end badly.
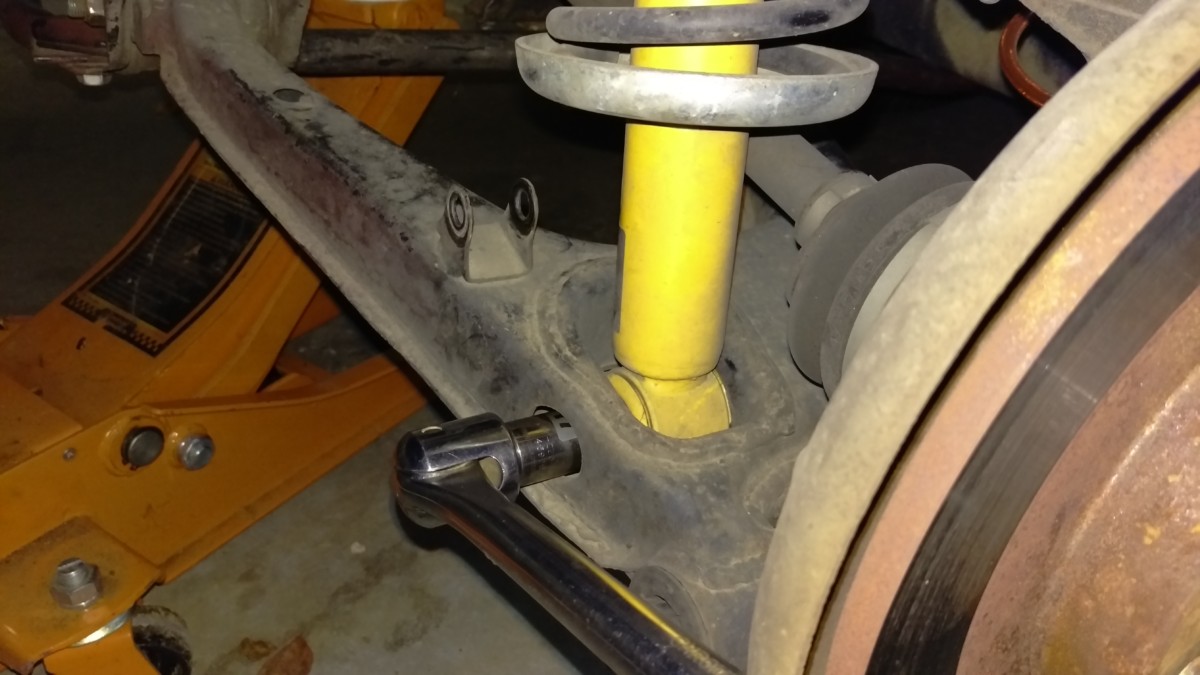
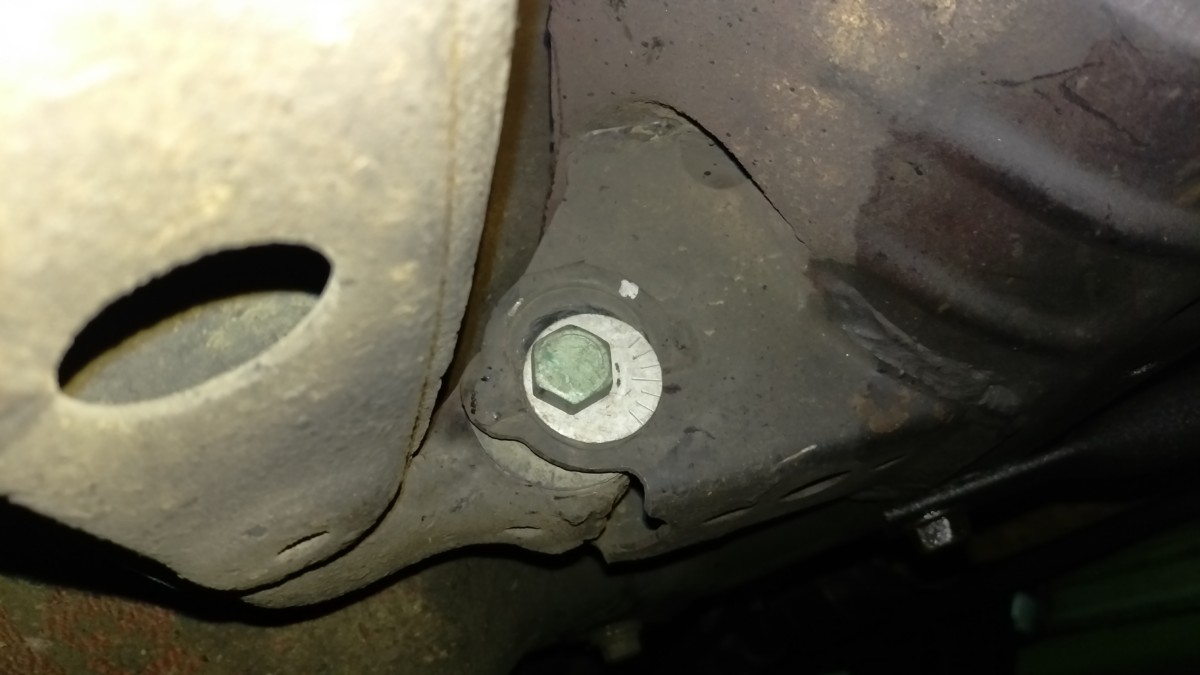
Break the lower shock bolts loose
You should also go ahead and break these lower shock bolts loose. Depending on which removal method you choose, the control arms won’t be as rigidly in place later on.
The “Long Bolt” Method – Recommended (Front Coilovers)
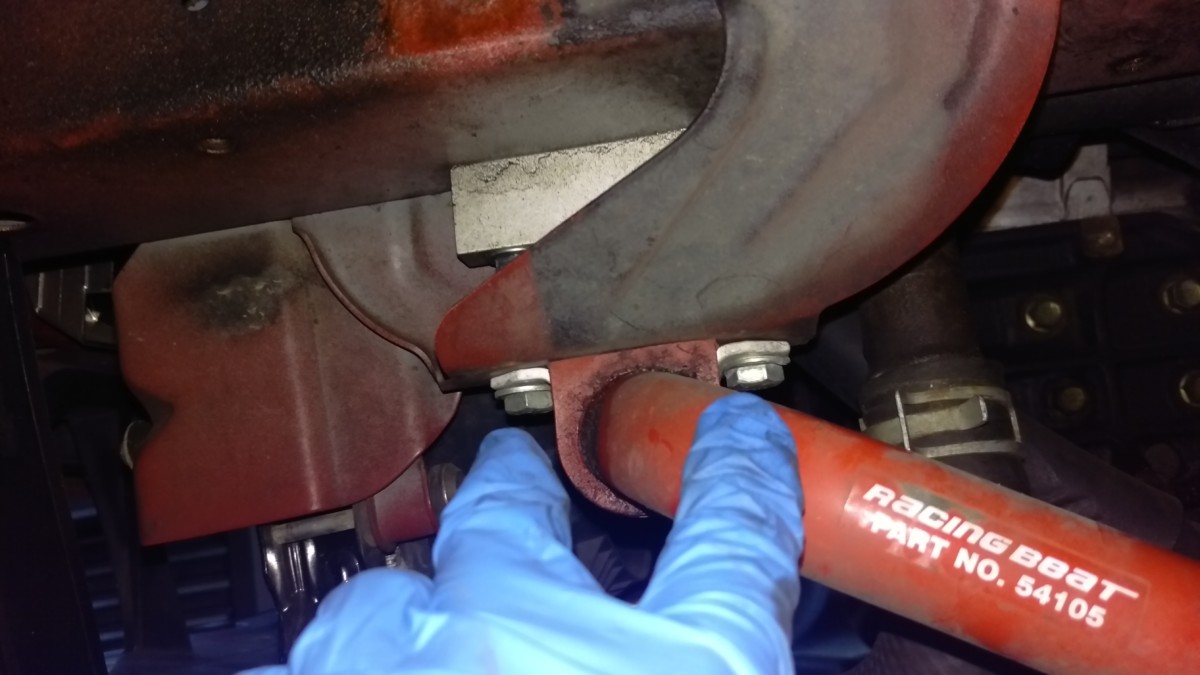
The sway bar bracket bolts may need to be removed for the long bolt method
Removal gives clearance for long bolt
This is probably the most popular method, and for good reason. When it works, it gets the coilovers out with minimum effort. I’ve been told that sometimes the UCA bolt is slightly bent, preventing this method from working. If that’s the case, you’ll have to try a different way.
For this method, the sway bar bracket bolts may have to come out. If you have a racing beat end link brace like I do, it’ll get in the way when you try to slide the UCA bolt out.
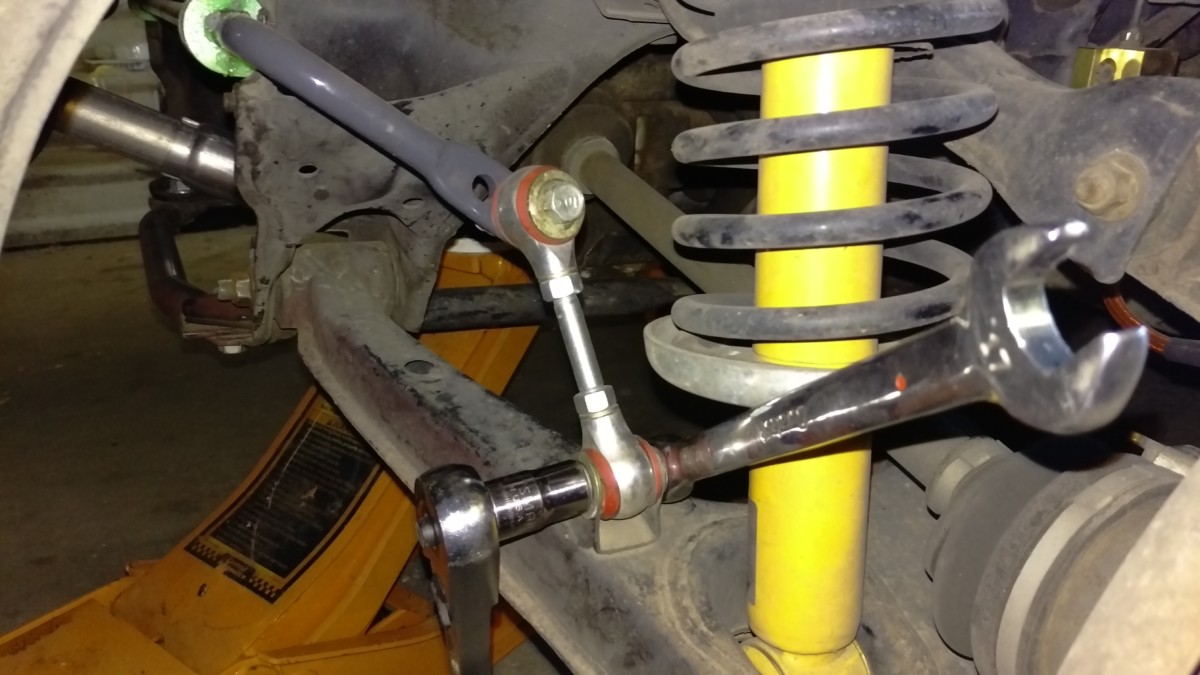
Unbolting the UCA bolt
Once that is sorted out, you can undo the UCA long bolt. It gets a lot of torque from the factory, so you may want to use a breaker bar. The nut and bolt are also 21mm, so make sure you have large enough sockets and wrenches. I used the adjustable crescent wrench pictured to hold the bolt still while undoing the nut, but a 21mm box wrench would have been better.
Bolt removed
Once the bolt is removed, the UCA will kind of flop down. You’ll have to feed the UCA bolt through the sway bar bracket to remove it.
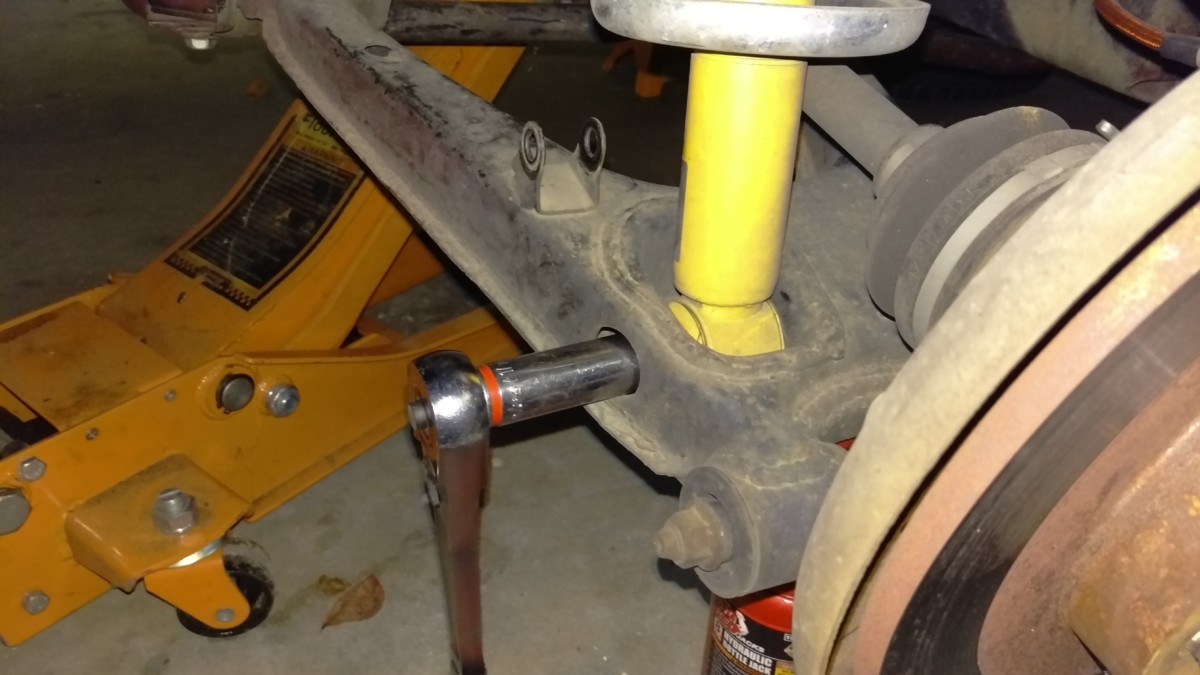
Remove the lower shock bolt
Lower shock bolt removed
Now you can fully remove the lower shock bolt. If you already broke it loose as suggested earlier, it should come out fairly easily.
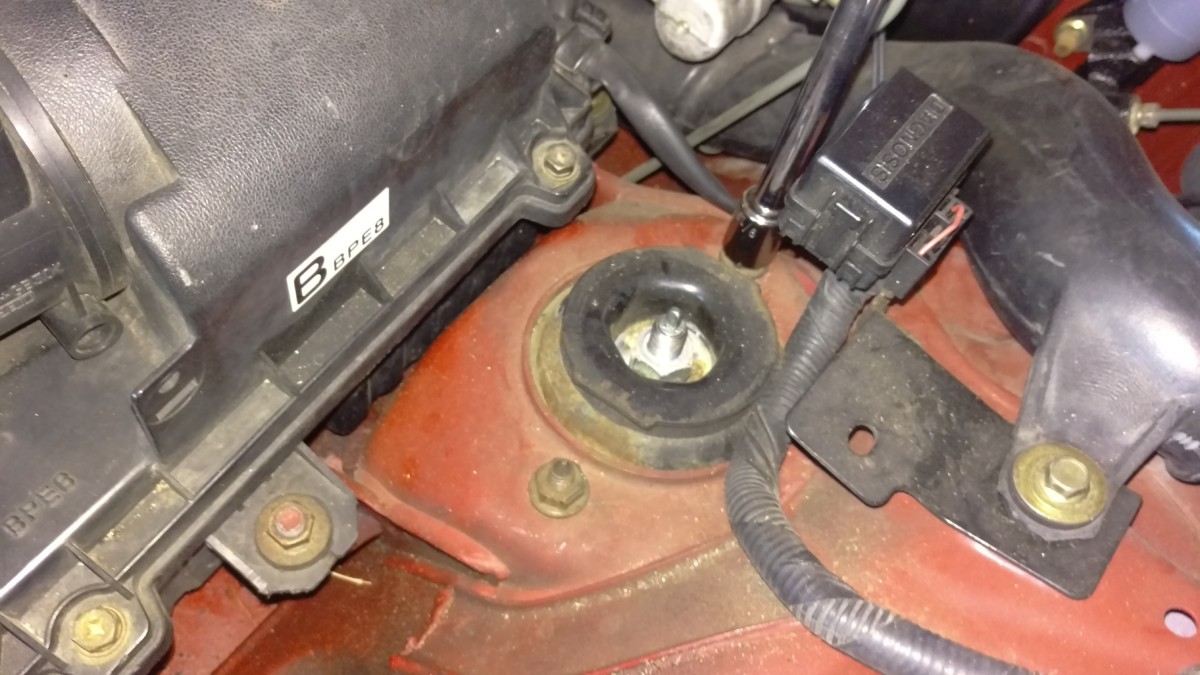
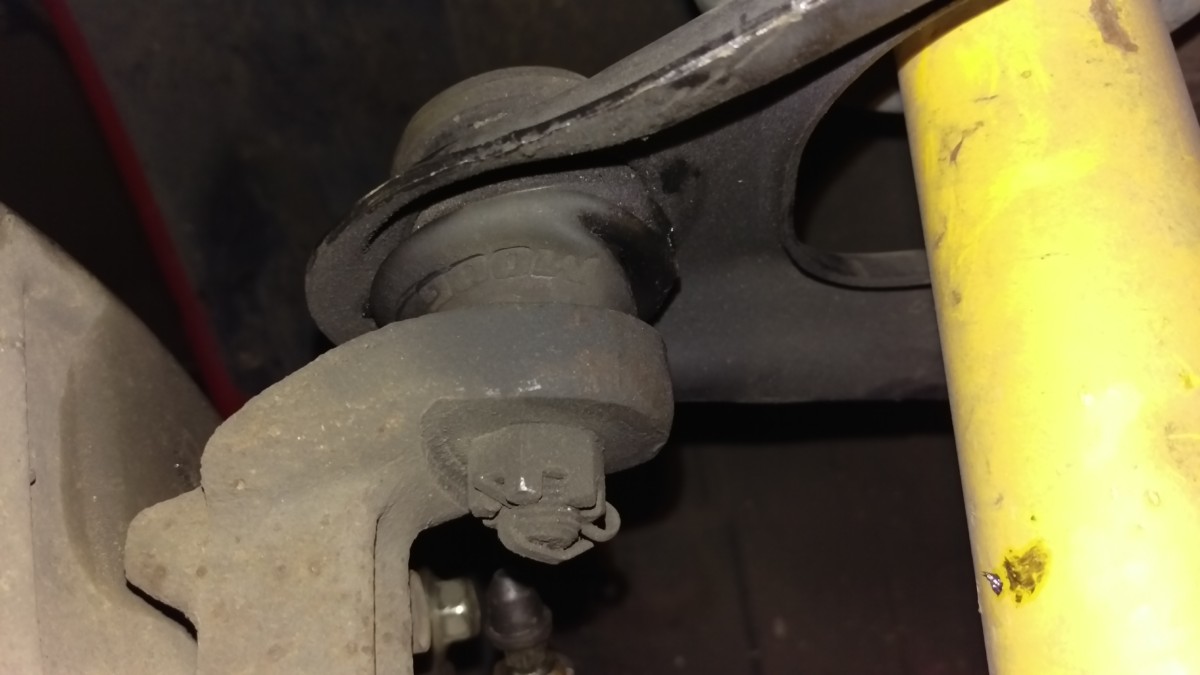
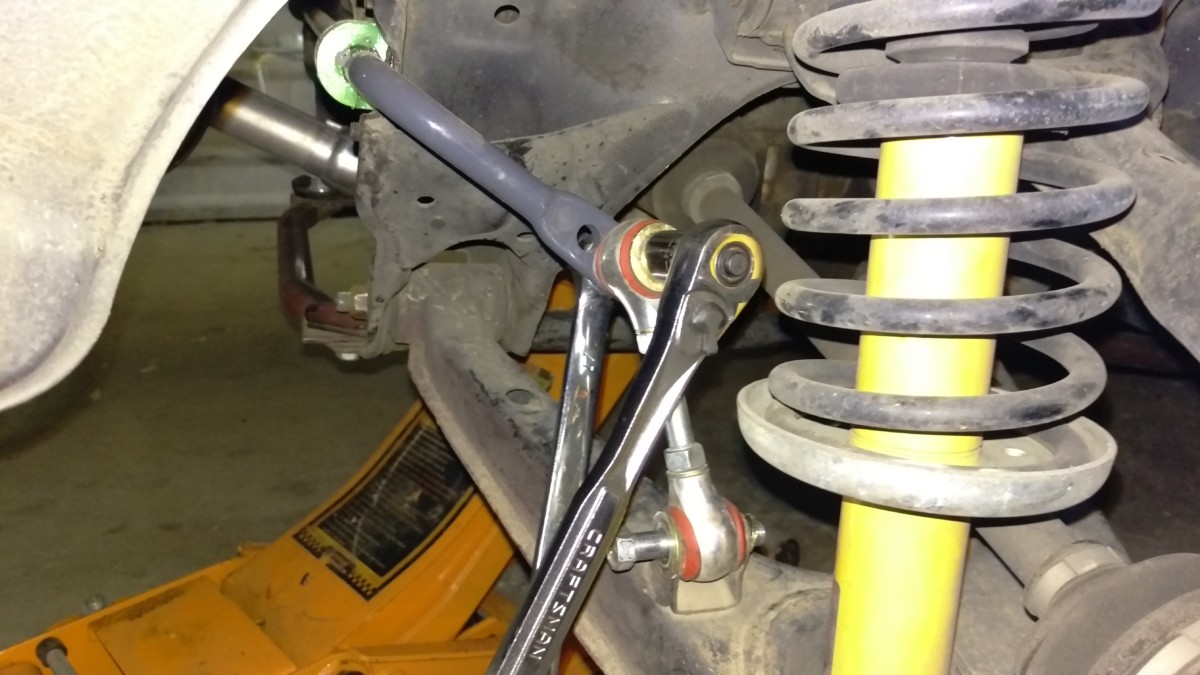
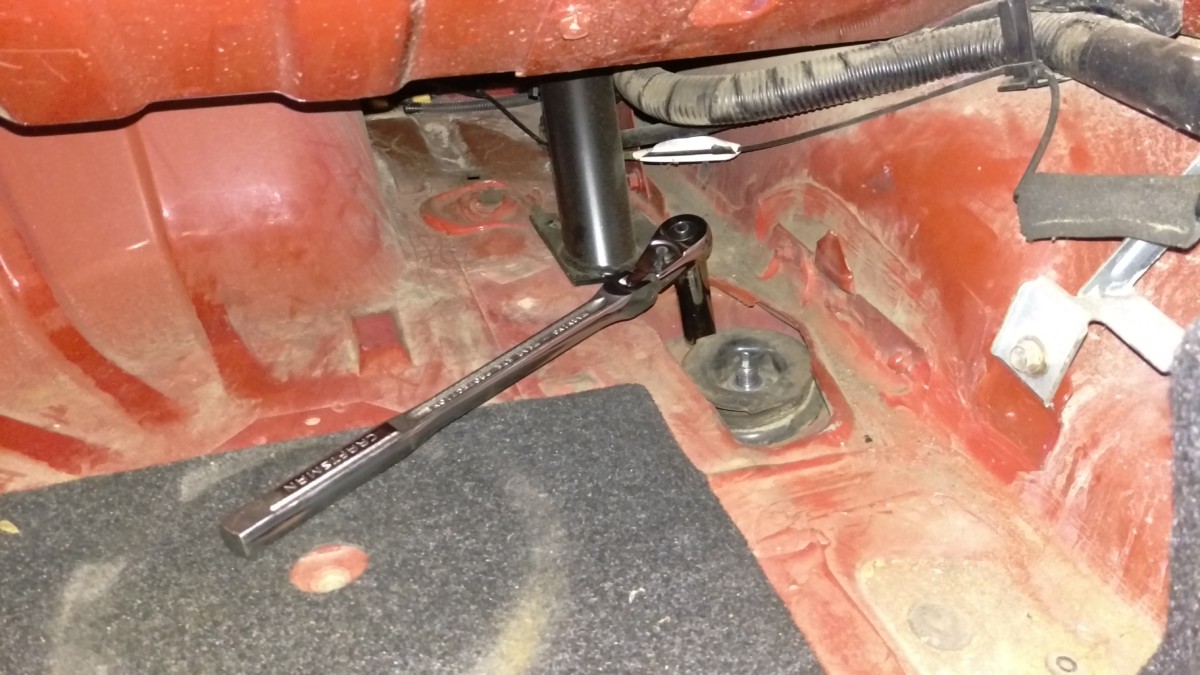
Removing the first upper shock nut
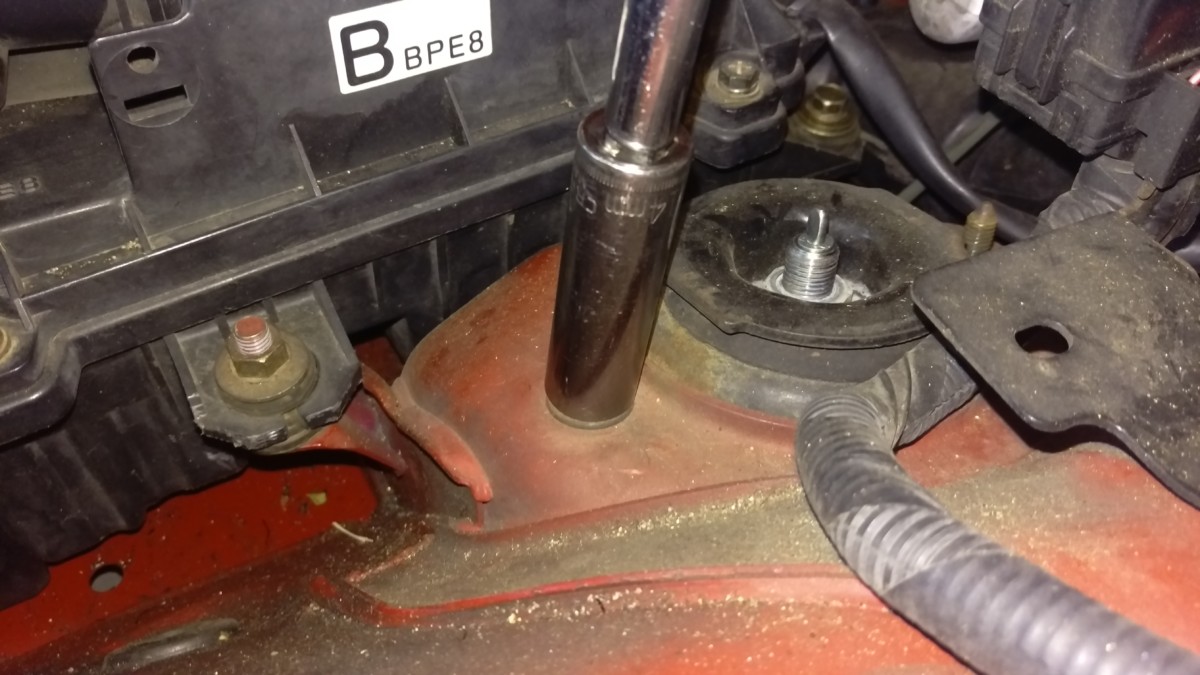
Removing the second upper shock nut
Then, remove the nuts on the upper shock mount as pictured. DO NOT REMOVE THE NUT IN THE MIDDLE, as it holds the coilover together.
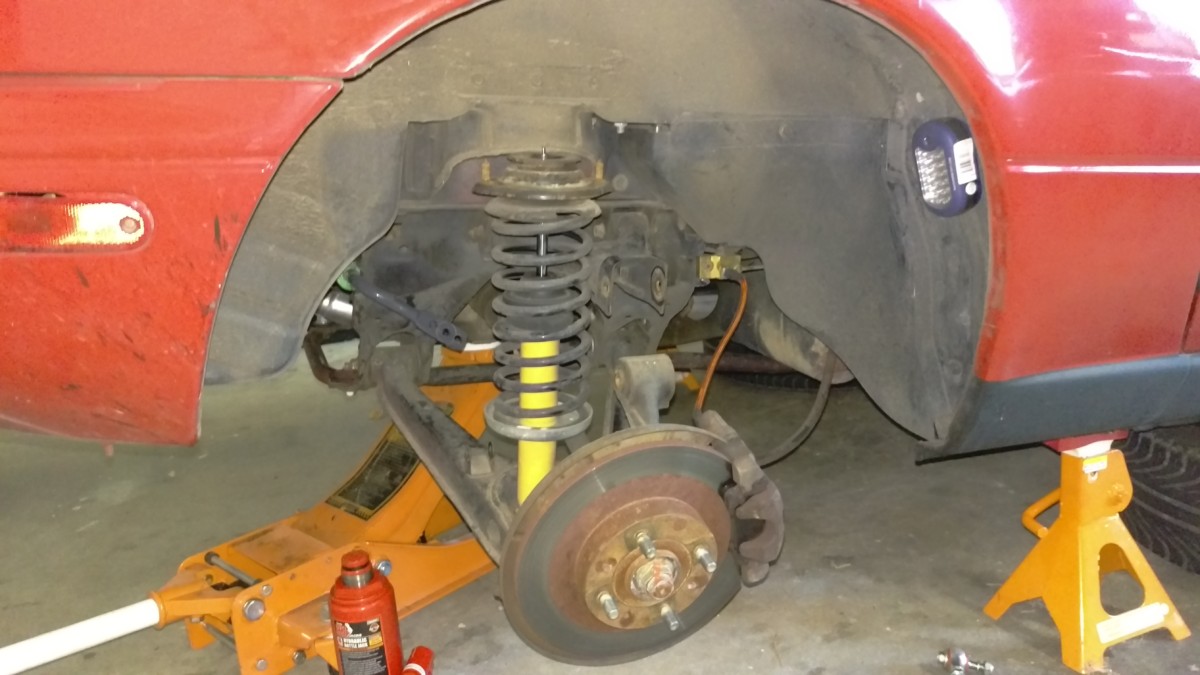
Done
Once that’s finished, the lower control arm will be able to droop down when you push on it. The control arm will kind of fall out towards you. Couldn’t be easier.
The Haynes Manual Method (Front Coilovers)
Removing the first upper shock nut
Removing the second upper shock nut
The Haynes manual procedure is a little annoying, but it works even with bent UCA bolts. First, go ahead and fully remove the two upper shock nuts. Note, NOT the center nut, just the two side nuts pictured.
Remove the lower shock bolt
Lower shock bolt removed
Then, go ahead and remove the lower shock bolt as well.
Loosen the LCA Bolts

Loosen the LCA Bolts
Now, go ahead and loosen the LCA bolts. You just need to break them loose, plus maybe a turn or two. Don’t loosen them too much, or your alignment will go out of whack. The goal is simply to allow the LCA to pivot further than it otherwise can, not to wreck your alignment. Once it’s loose, you can use a pry bar to pry down on the LCA and pull out the coilover. It’s helpful to have a second person to grab out the coilover while you pry down on the LCA.
Other tips for the Haynes method (Front Coilovers)
If you can’t get the LCA to drop far enough to remove the coilovers, you have a couple of additional options.
Option 1: Separating the upper ball joint
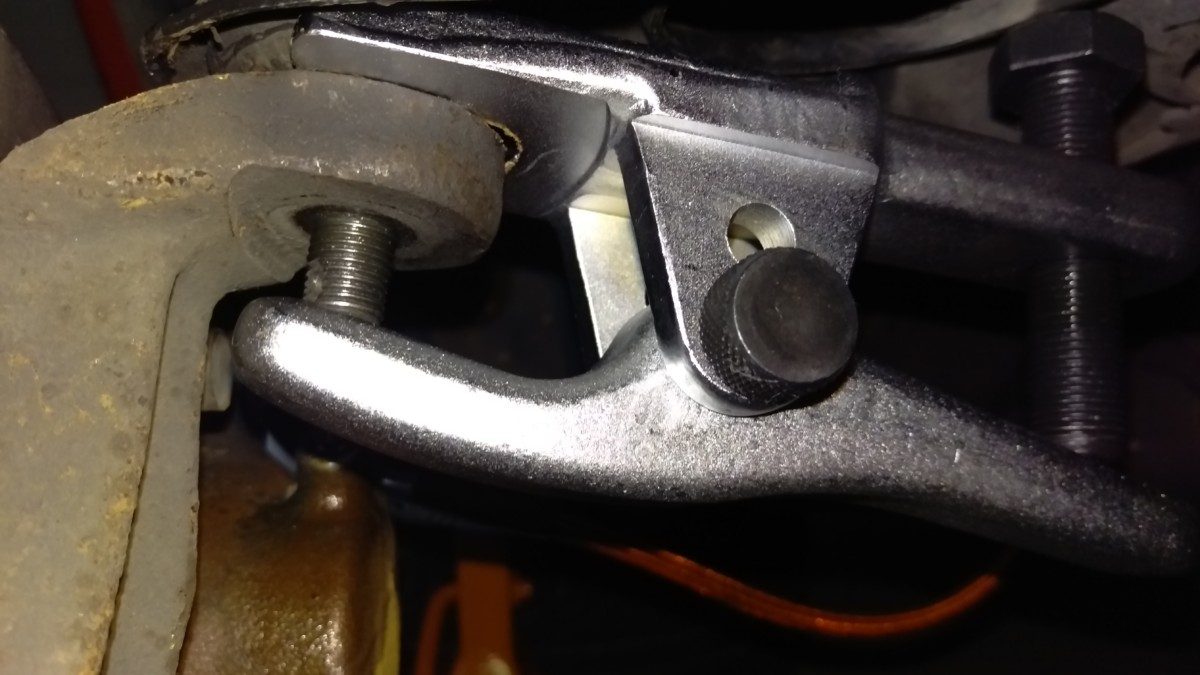
Undo the cotter pin and unbolt the upper ball joint

The Upper Ball Joint is free to be pried apart now
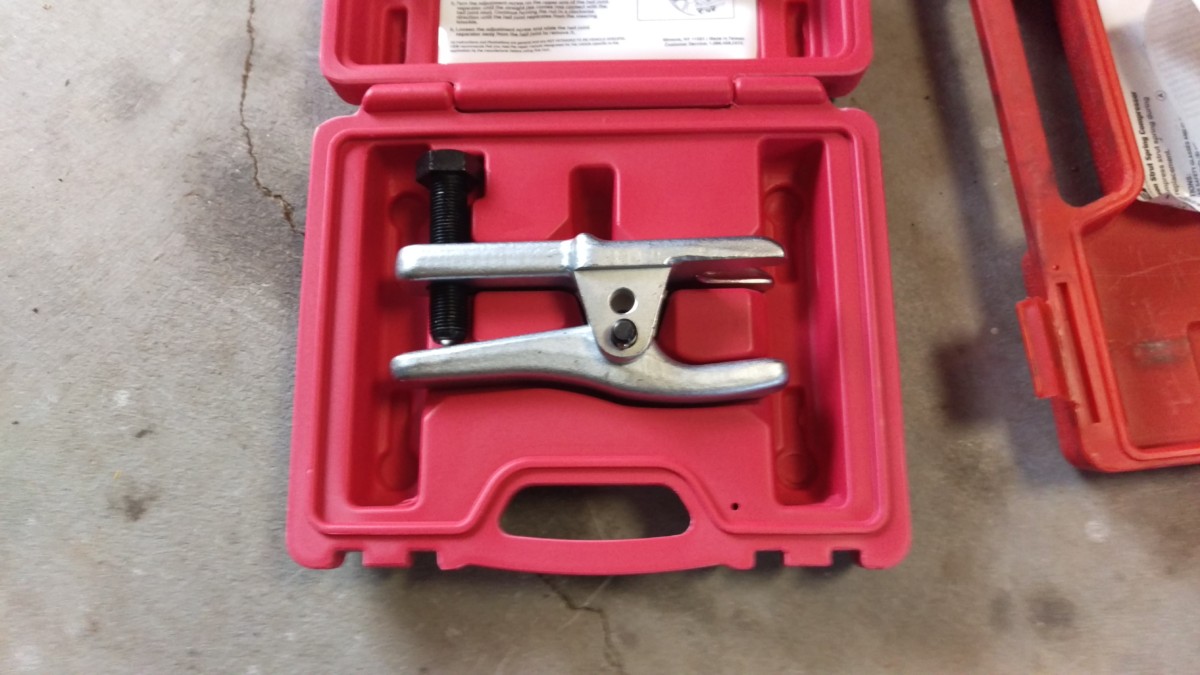
Free autozone ball joint separator rental
Separating the upper ball joint
One option is to separate the upper ball joint. This provides the same effect as the long bolt method but will work even if the long bolt is bent. You may want to use a ball joint separator to do this. The one pictured can be rented for free at Autozone.
Option 2: Spring Compressor
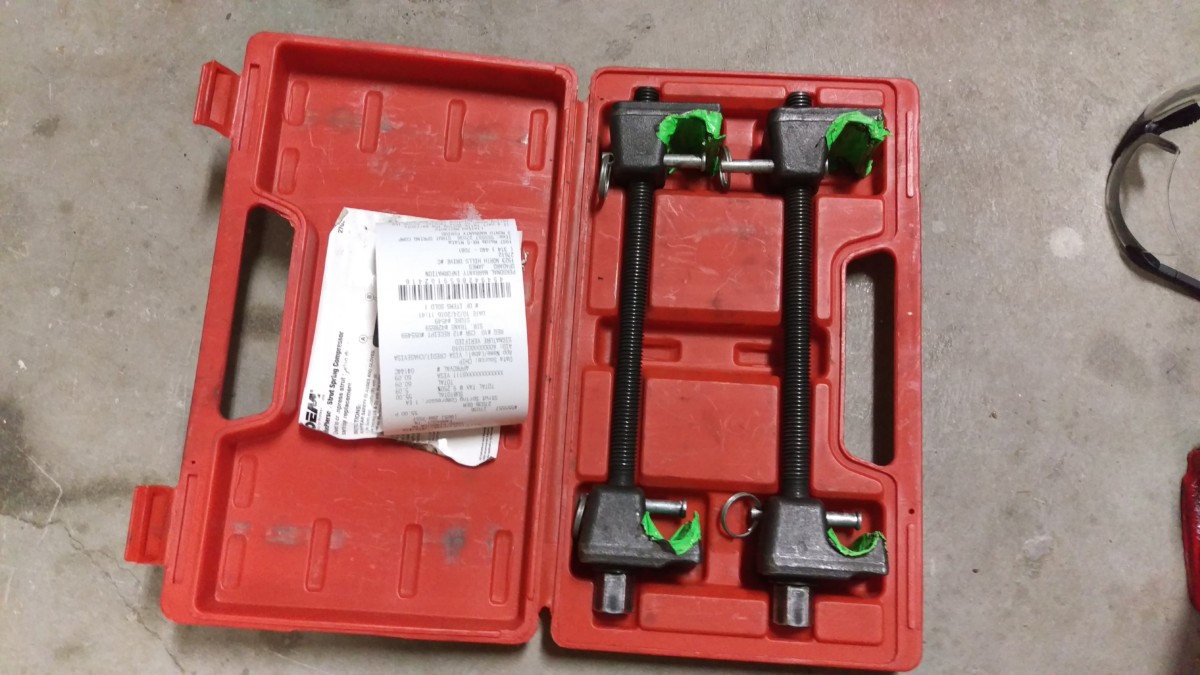
Autozone free rental spring compressor
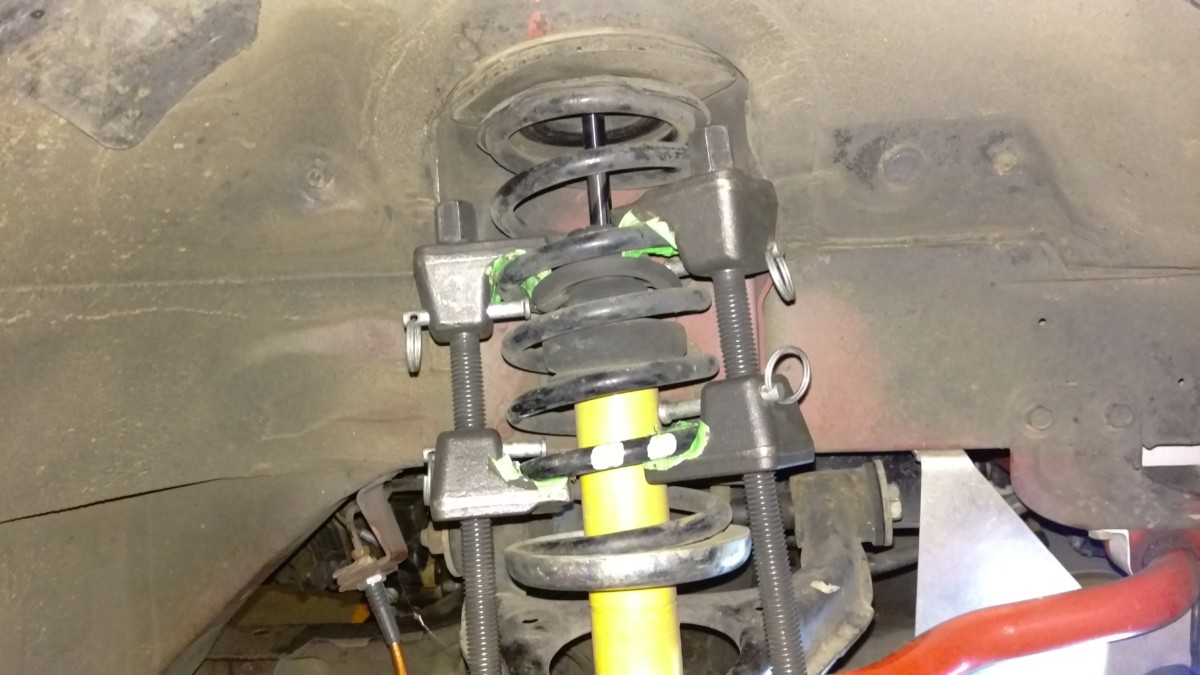
Spring compressed to shorten the coilover for removal
Another option is to put a spring compressor on the springs. The spring compressor pictured can be rented for free at Autozone. Note that you should be very careful when using spring compressors. Fortunately, in this case, the top hat is staying on. Thus, if the compressor fails, the spring should still be held in place.
Compressing the spring should shorten the coilover enough to pull it out.
Option 3: Undo the LCA eccentric bolts
Marking alignment
Marking alignment
Another option is to completely remove the bolts holding the LCA to the subframe. You’ll need an alignment after getting new coilovers anyway, but this will really and truly wreck things. First, go ahead and use a paint pen or sharpie to mark where your eccentric bolts are currently set. This will help you get somewhat close to your original alignment afterwards so that you can still drive the car to the shop.
Removing the LCA eccentric bolts
Then, go ahead and remove both bolts. The LCA will flop down, and the coilover will come out very easily. Make sure to support the wheel hub. Don’t let the weight of the wheel hub put strain on the brake line.
Removing the Rear Coilovers
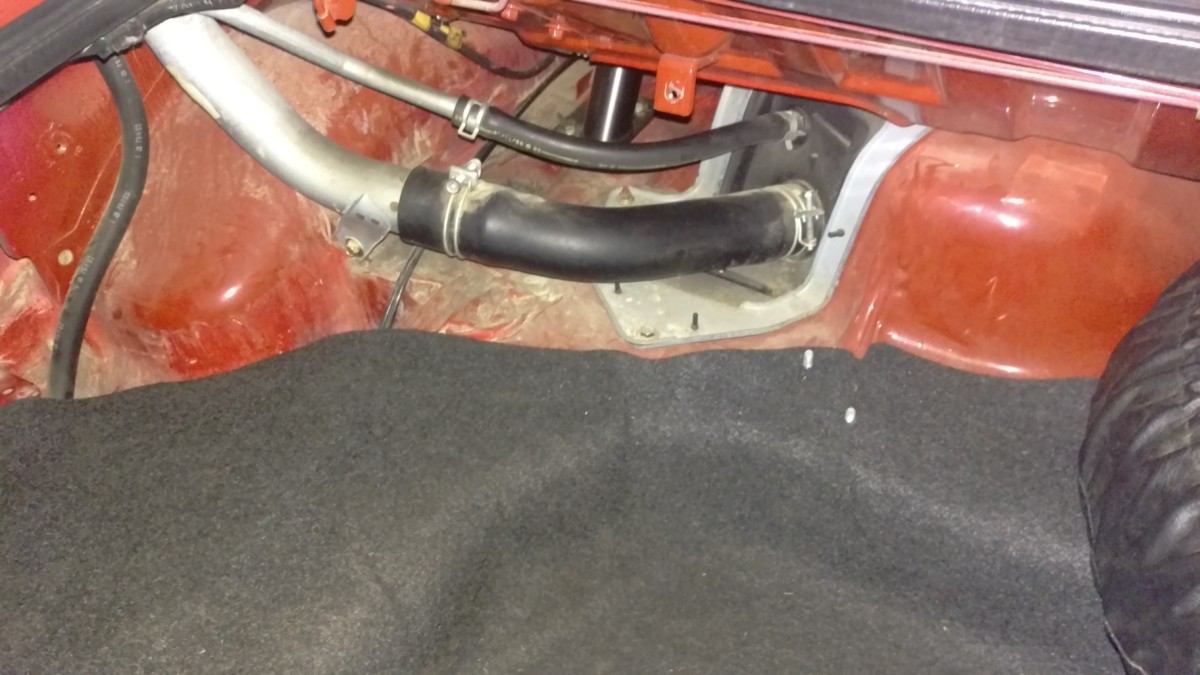
There’s a panel in the trunk to remove, which no longer existed in my car
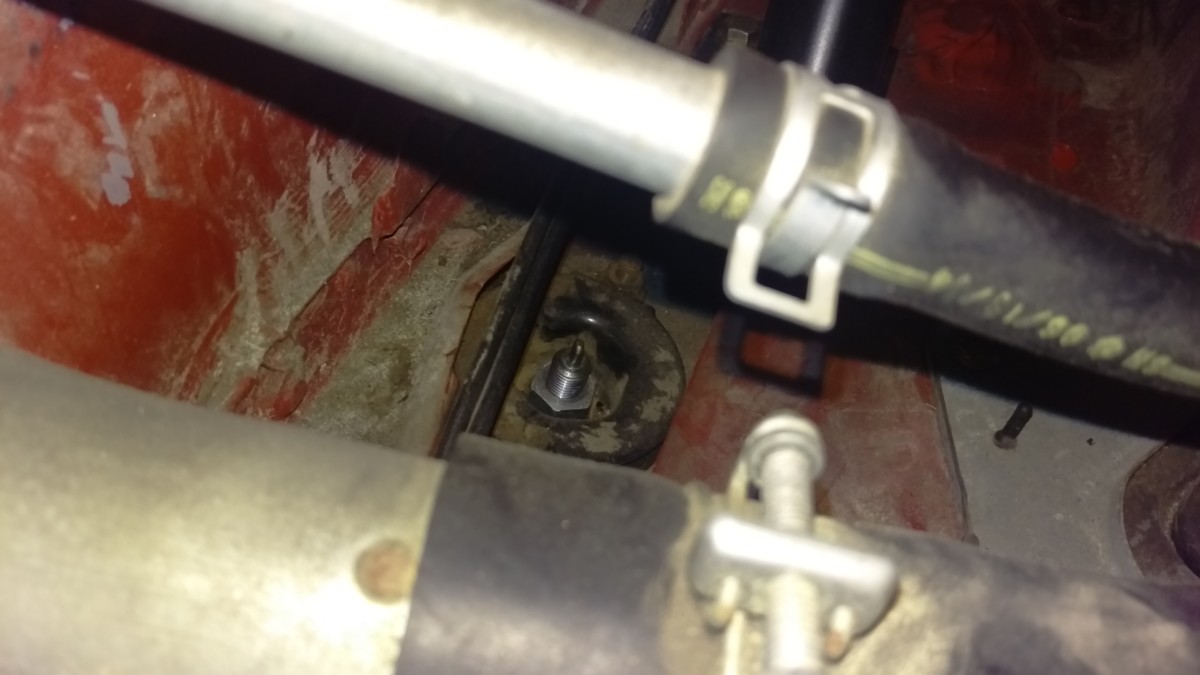
The rear driver coilover upper mount is behind the fuel filler line
There’s really only one way I ever remove rear coilovers, and it’s extremely easy. First, getting to the upper shock mounts can be annoying. There’s a panel in the trunk on the driver’s side covering the fuel filler lines. I don’t have it anymore in my car, but the picture shows where it would be. There are 3 or 4 bolts to remove it. Once you do that, the upper shock mount is behind the filler lines.

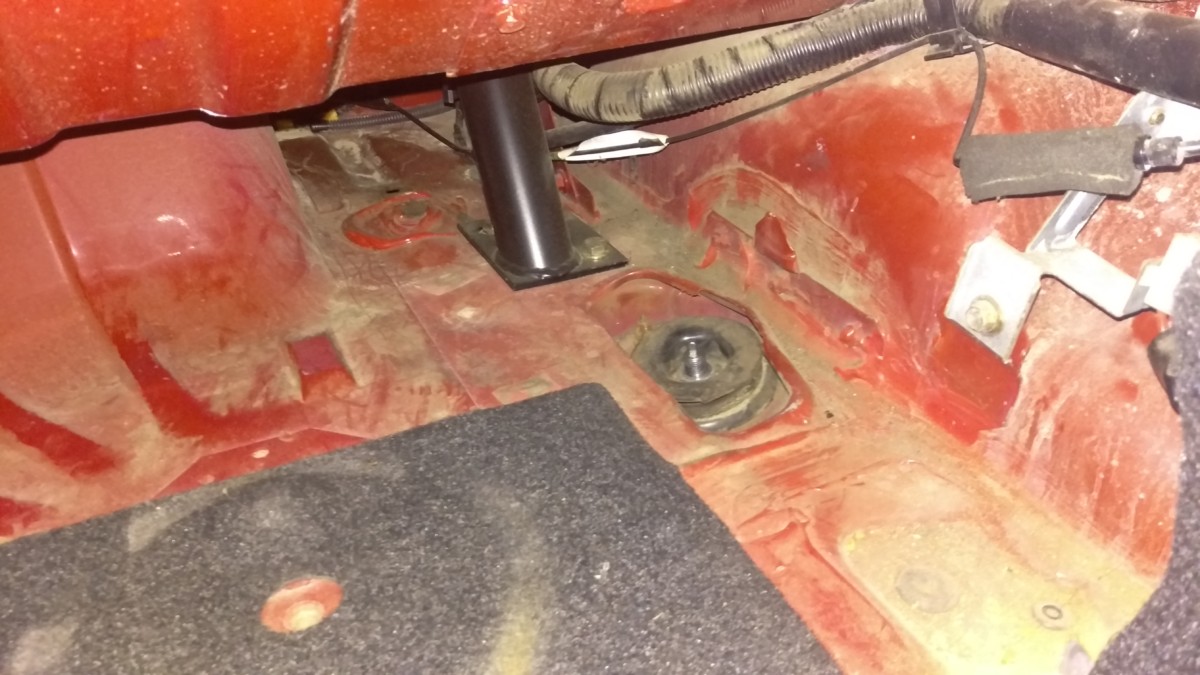
Remove the spare tire to get to the passenger side shock mount
Easily accessible
The passenger side upper shock mount is sitting behind the spare tire. Once you remove the spare, it’s easily accessible.
Sway bar end link removal as before
Sway bar end link removal as before
Just like on the front, go ahead and loosen the upper and lower shock mount bolts. Then, detach the sway bar end links again as well.
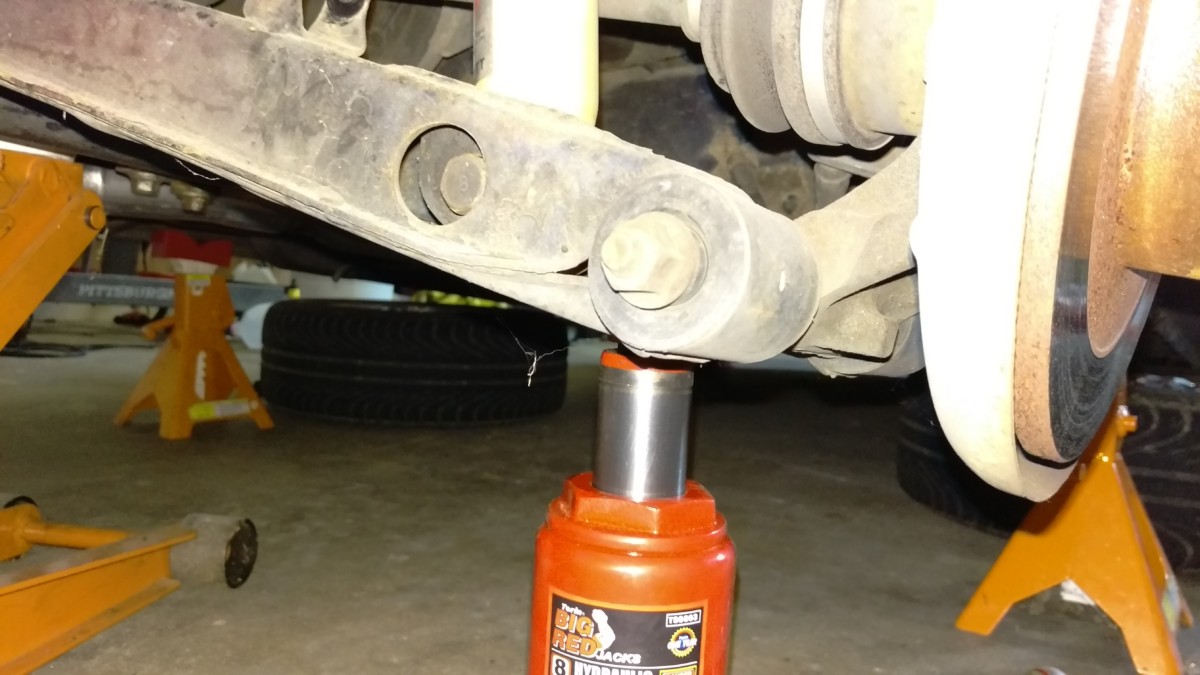
Put something under the hub so it doesn’t flop down too far
You’ll want to put something under the wheel hub before the next step. I used a bottle jack


Undo the knuckle/spindle/whatever bolt
Bolt removed, hub can droop very low now
Once the hub/LCA are supported, go ahead and remove this bolt.
Remove upper shock mount nuts
Remove lower shock bolt
Then, go ahead and fully remove the coilover mount bolts. Again, on the upper, do NOT remove the center nut. Just the nut on each side that holds the coilover to the car.
Coilover ready to be removed
At this point, you can lower your bottle jack or whatever is supporting the hub. The LCA will droop quite a bit, and the coilover should pop out pretty easily. While lowering, make sure you’re not putting any strain on the brake line.
Changing Shocks and Springs
Autozone free rental spring compressor
Once you have a coilover out, you may be replacing just the shocks, the springs, or the bump stops. You can do that two ways. The first way is the safest way: take the complete set of coilovers over to a mechanic, along with your new parts, and let them change them out. The second way is to use a spring compressor and do it yourself.
The spring compressor will put pressure on the spring so that you can remove the top nut and top hat. The style pictured, from Autozone, is the easiest to obtain, since you can rent it for free. It’s also the most dangerous. On the plus side, factory Miata springs are extremely weak, at about 150#/90# front/rear. Additionally, most aftermarket Miata springs are shorter. In either case, there isn’t as much force from the spring as other cars. Do this operation at your own risk, and make sure you understand what you’re doing.
Replacing the Control Arm Bushings
Removing the coilovers is the first step to removing the control arms to change bushings. If you’re doing that job at the same time, now would be a good time to go read the control arm bushing article.
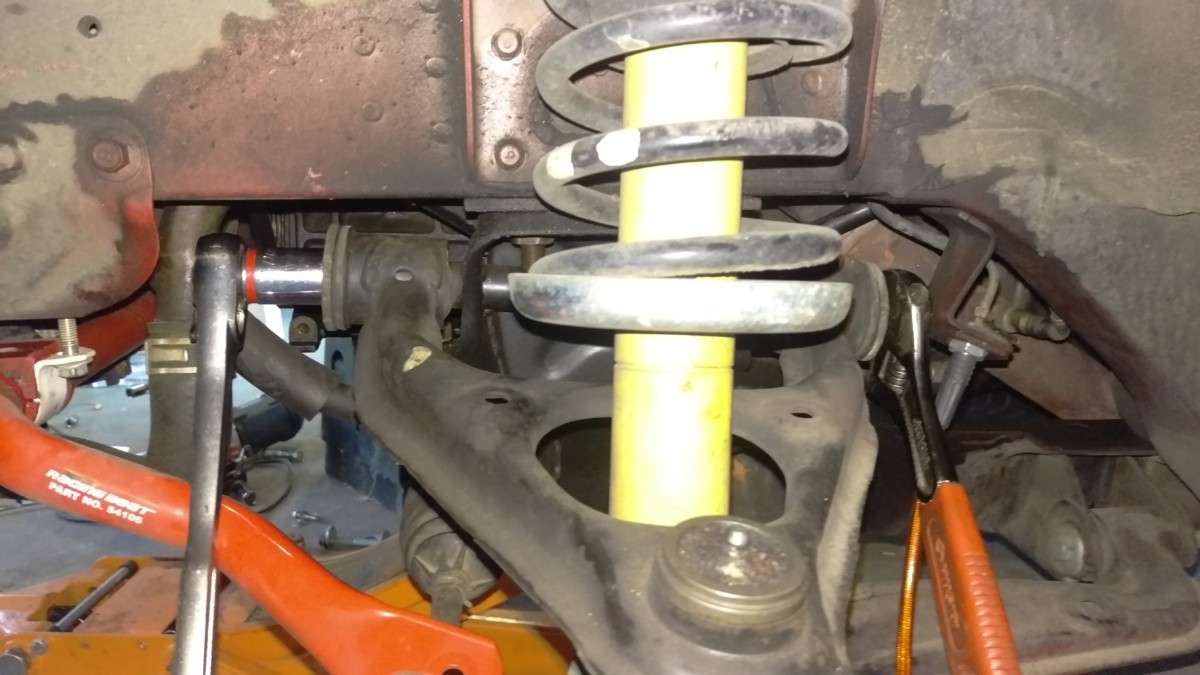
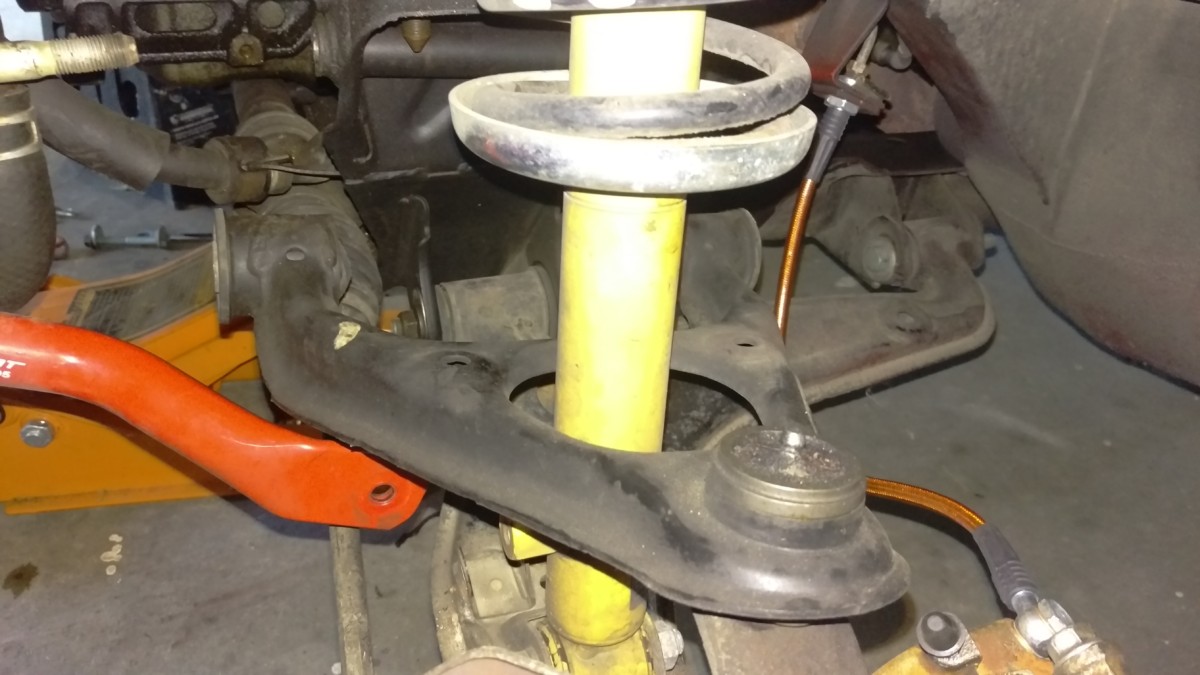
Torquing After Reinstallation
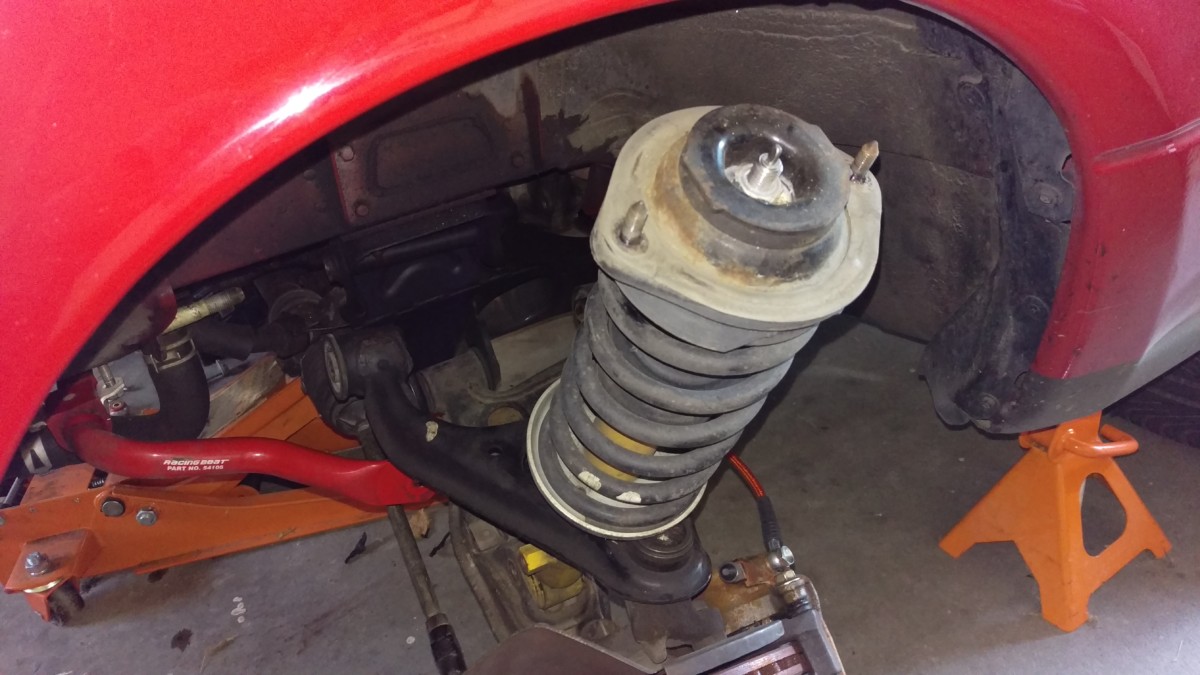
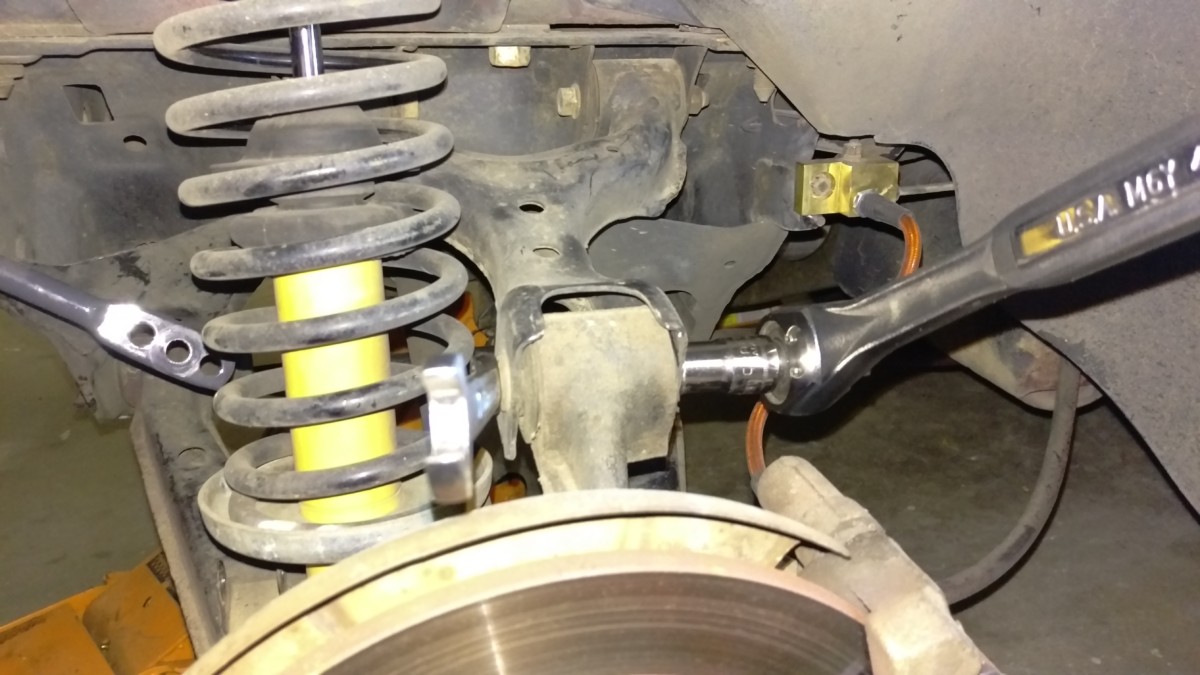
Jack up the corner to ride height to torque properly
Once you have your new coilovers installed, you’ll want to torque down any bolts you loosened. One thing to note here is that you want to do this with the suspension loaded. Put a jack under the control arm and lift it until just before that corner of the car raises off of the jack stands. Note that in the picture, the bottle jack is doing this. The floor jack is sitting under the differential as a backup to the jack stands.
With the corner in the air like this, go ahead and torque to factory specifications with a good torque wrench
Adjusting the Sway Bars
If you lowered the car, you likely want to use adjustable sway bar end links. After everything else is torqued down, you can begin adjusting the sway bars. Click here for details on this procedure.
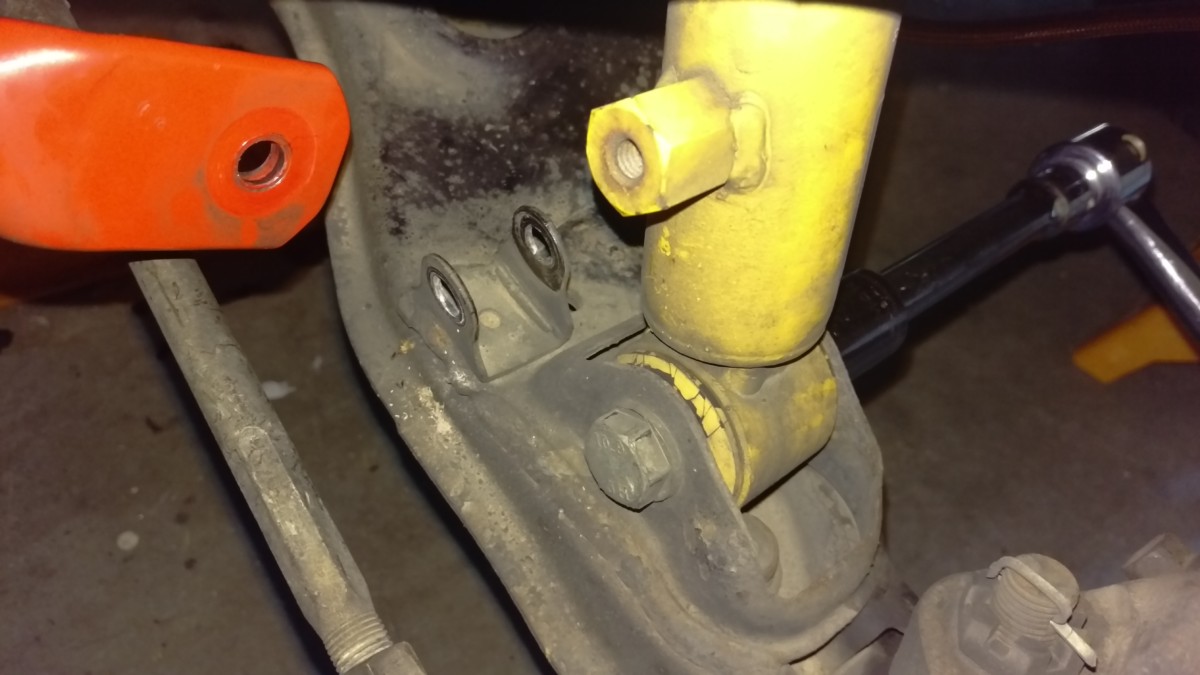
Adjusting the Ride Height
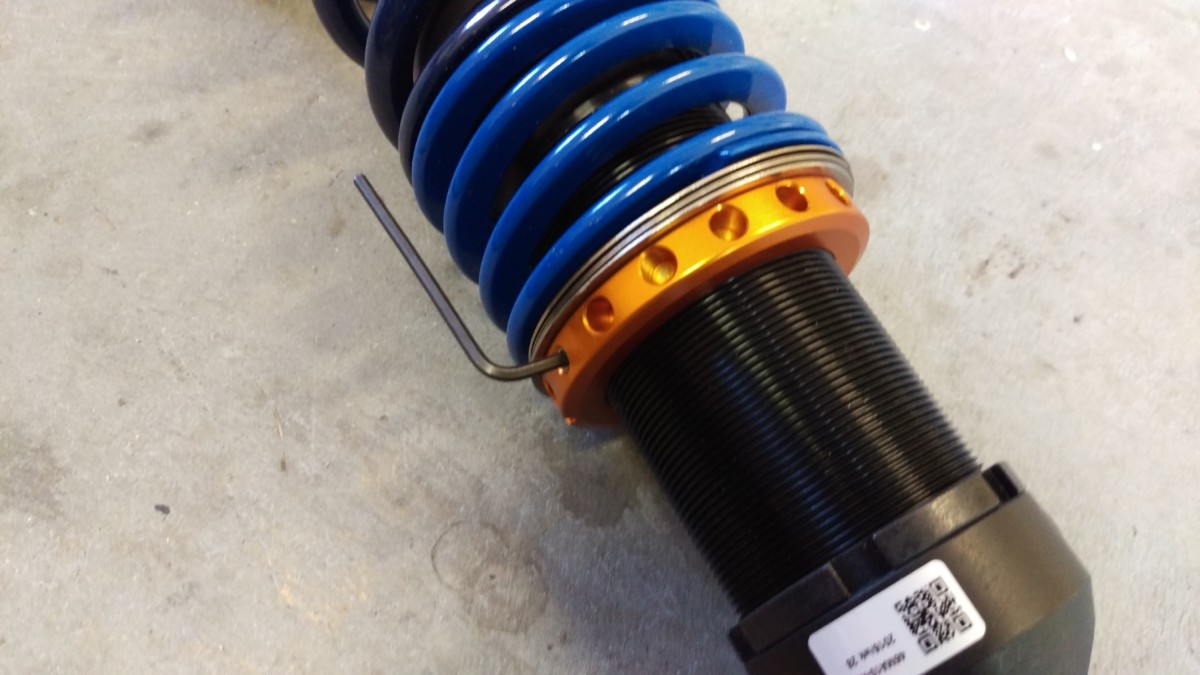
These xidas use an allen wrench to loosen the set screw, like most adjustable coilovers
If you have a set of adjustable coilovers, you’ll want to dial in the ride height once everything is back together. Most of them have a set screw that is loosened with an allen wrench for adjustment. The set of Xidas that I just installed are no exception.

Checking the ride height at the pinch weld
With the car on the ground, roll the car back and forth a few feet to settle the suspension, especially if you just installed new control arm bushings. This can make it drop a half inch or an inch, especially right after torquing everything down. Then, go ahead and check the current pinch weld height at every corner. You can also use the hub-to-fender height, but the pinch weld height is easier to measure.

Adjusting ride height
With Xidas, 3 turns is roughly 1/4″ of ride height. You’ll have to look up the adjustment ratio for other coilovers or simply figure it out through trial and error. In any case, do your best to adjust each corner of the suspension. You’ll find that changing one corner has an effect on the others, so the process is a bit of trial and error.
I personally end up doing major adjustments to all 4 corners at once until I’m in the ballpark, and then take each corner at a time. On this car, which is for dual duty street and track use, I set the ride height with 1/4″ rake (1/4″ higher in the rear) with 1/4 tank of gas and no driver, per 949Racing’s recommendations. I went with 5.25″ pinch weld height in the front, and 5.5″ in the rear.
Conclusion
Once you have your coilovers reinstalled, sway bar end links adjusted, bolts all torqued, and ride height set, the job is done. Don’t forget to go take it for an alignment right away.
[…] installing my new Xida coilovers, I decided to change the bushings in all 8 of my car’s control arms at the same time. In my […]
[…] bushing is fixed, you can put the bar in the car. For details on removing the old bar, you can see the coilover installation writeup. The block kit will be installed into the car as shown. You don’t need to assemble it like […]
I found removing stock front coilover shocks was easy with the long pivot bolt removed from upper control arm… much easier! Haynes method requires 1 strong guy or 2 strong folks… removing the bolt is not hard, and the shock falls out even without spring compression… saves time.
Thanks for the note! Totally agree, if the long bolt method works, it is definitely the easiest.