Installing Miata Stainless Steel Brake Lines
Most cars, including Miatas, come from the factory with rubber brake lines. A popular upgrade is to install stainless steel sheathed PTFE lines in their place. It is commonly believed that the steel lines flex less than their rubber counterparts, leading to a firmer brake pedal. Personally, I believe this to be greatly exaggerated. Rubber brake lines still have a core made of some kind of stiff plastic or sometimes are even a rubber jacket over braided steel, although not on a Miata.
In my opinion, people notice a dramatic difference after installing stainless steel brake lines primarily because they bleed their brakes for the first time in years during installation. Fresh brake fluid makes a drastic difference in firming up the pedal, and it’s a fairly easy job. However, it is true that rubber lines will eventually begin to wear out, and when they do, they will begin to swell under the pressure of braking, which will contribute to a softer pedal as well. In these cases, new brake lines are needed.
In my case, my car still had the factory original lines from 1997, meaning they were close to 20 years old. The older they get, the higher the risk of a catastrophic failure. I decided it was time to go ahead and replace them as a preventative measure, especially since I put the car on a race track.
Rubber vs Stainless
This is a much debated topic, with a lot of hearsay and myth surrounding it. I’m going to go ahead and add some more. You can certainly go out and buy replacement rubber lines. If you do, I would probably go with OEM Mazda, as I don’t know enough about the $8 lines sold on Rockauto to trust them for such a safety-critical function. They’re a bit cheaper.
This is where, in my opinion, buying stainless makes sense. I bought a set from 949Racing. These lines are run on tons of cars in extreme track conditions without issue, and there’s enough people out there using them that I trust them to do the job. They also cost less than the going rate for OEM Mazda lines. Other vendors, such as Trackspeed Engineering and Flyin’ Miata, also sell their version of these same lines.
I think it really comes down to preference, as both lines will do the same thing. As I said earlier, the steel lines are widely believed to flex less, but I have serious doubts about whether anyone would notice the difference between fresh rubber lines and fresh steel lines, and I’m not alone in that. When I had a lifted truck, stainless lines made sense because they’re easy to custom order in extended lengths. The biggest reason in favor of stainless that I have seen recently came from miataturbo, where the owner of Trackspeed Engineering commented that rubber lines can swell with the heat of track use and pull out of the crimp on the end fitting. It seems plausible enough to me.
In either case, either rubber or stainless will work. Once you get your fresh set of lines, it’s time to go ahead and replace them.
Shopping List
Replacement brake lines
The main items for this job are a fresh set of lines, as pictured, plus a 10mm flare wrench

You also want to have some gloves (I use disposable nitrile
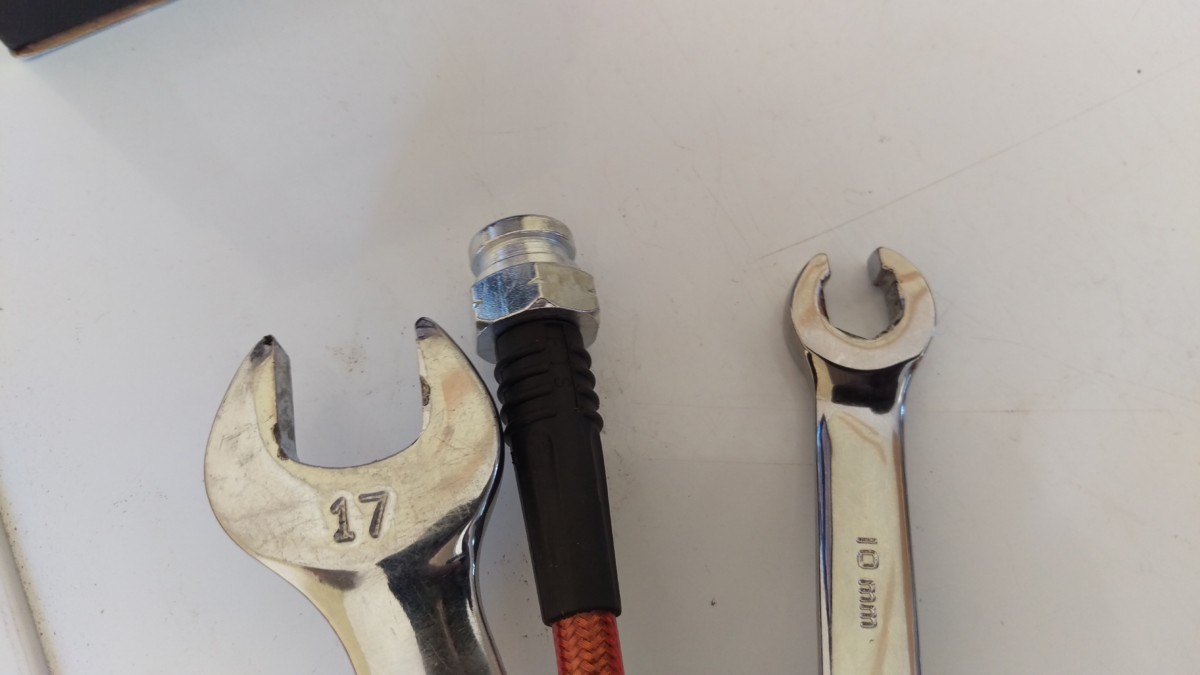
17mm wrench, line fitting, and 10mm flare wrench
You really want a flare or line wrench, such as the wrench in the right side of the picture. You can’t get a box wrench on the brake line, as the line itself is in the way. You could use an open wrench, but you only grip the nut on 3 sides and so run the risk of stripping it. The flare wrench or line wrench is able to get the most grip on a line fitting to prevent this from happening.
You also want the items necessary to bleed your brakes, such as some DOT4 brake fluid


Which line goes where

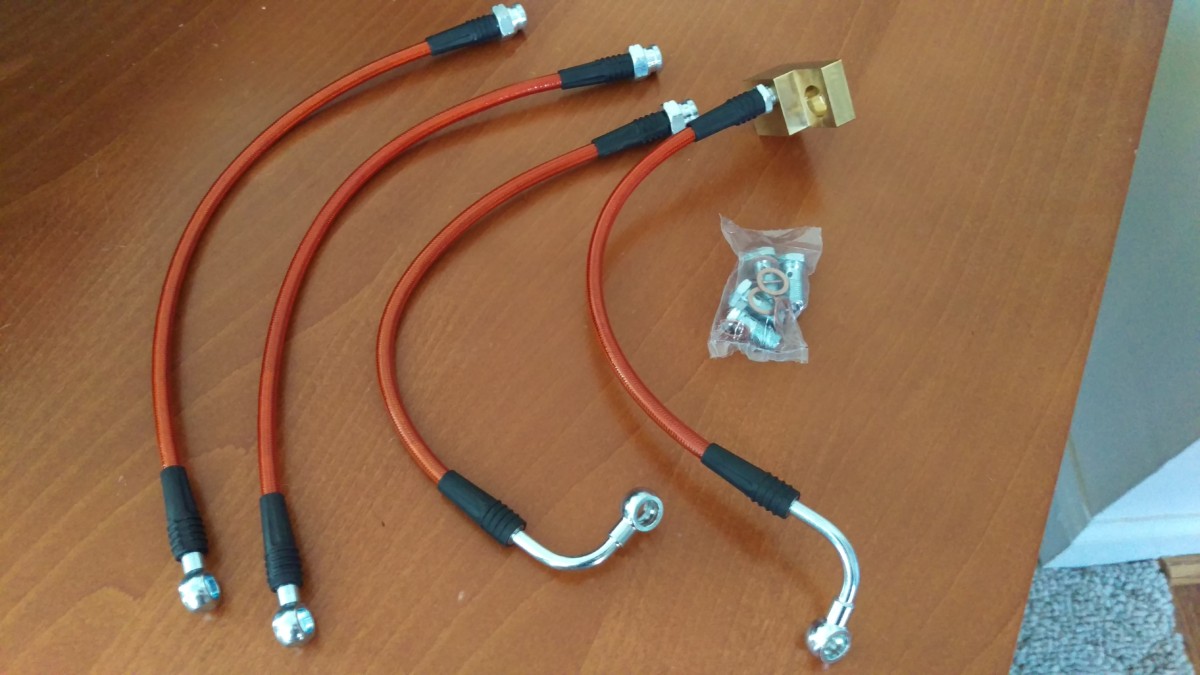
Pretend the front of the car is towards the right
The lines in a good kit like the one linked above will be sized specifically to each corner of the car. You don’t want to swap them around. I laid them out in the order they should go on the car, pretending the flashlight is the front. The two equal length, longer lines are the front driver and passenger brake lines. They should be identical to each other, so it shouldn’t matter which goes on which side.
The shorter lines with the goofy bends on them are the rear. The driver side rear line has a normal fitting like the fronts. The passenger side rear has the brass block thing. This will connect into two hardlines on the car later, which is why it is made this way.
A note on speed
On all of the lines, you can try to minimize the time you have to spend bleeding the brakes afterwards by trying to swap the lines fast to lose less fluid. This is what I did when I replaced my front calipers. However, I find that brake line replacements are finicky enough for this to not really be an option, so I just let them mostly drain to make less mess, and assuming I’m going to basically do a full brake flush afterwards. Fortunately, bleeding miata brakes is pretty fast compared to other cars.
Replacing the front lines
Holding up the line to where it goes
The procedure for both front lines is identical, so I’ll only describe it once. You can hold the line up alongside the old one to verify where it will go and that it is the correct length, as shown.
Crack the line loose, but don’t remove it
This is a final reminder to wear gloves and eye protection while removing the brake lines. Brake fluid will come out, and it is very bad for your skin and eyes.
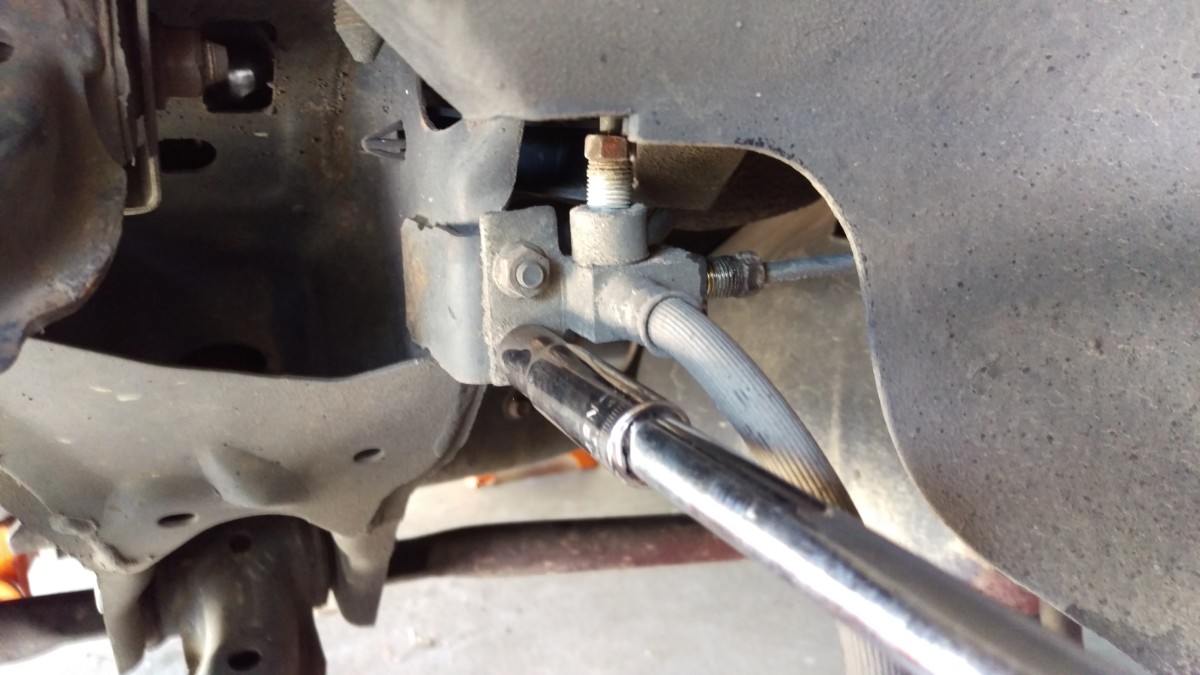
Next, you can use your 10mm flare wrench (aka line wrench) to crack the nut on the hardline loose. Don’t actually open it yet – leave it closed / tight, just loosened enough that you can easily undo it later. It’s easiest to break it loose now, while everything is still hooked up.
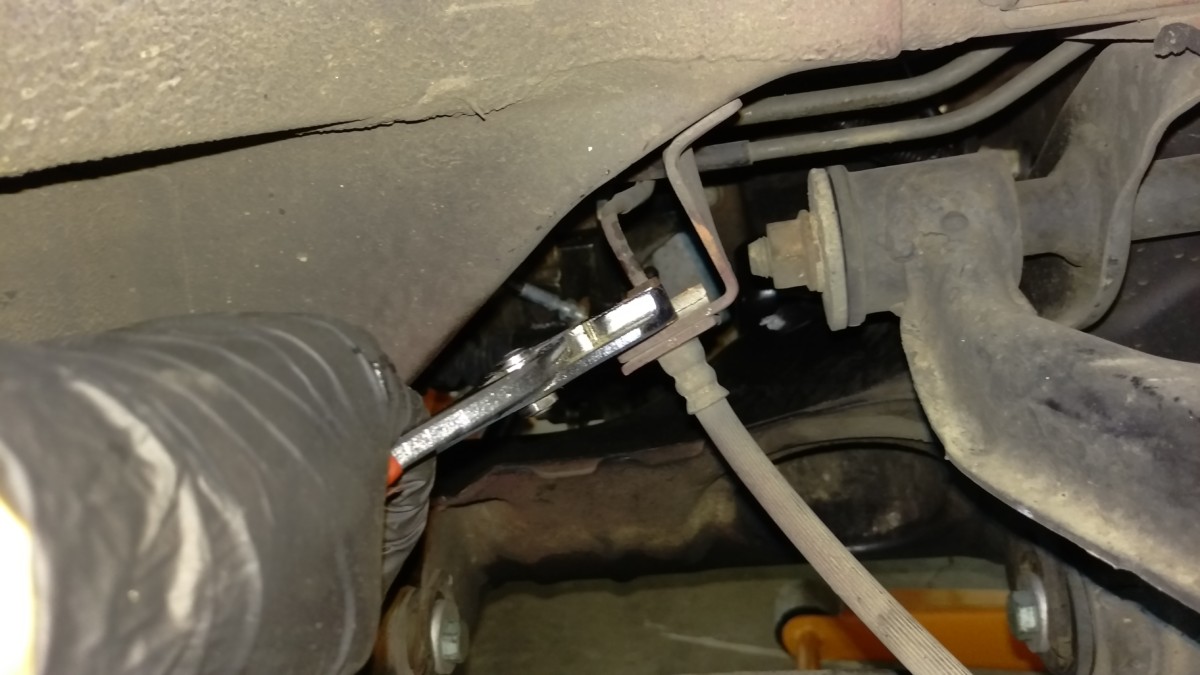
Remove this tab thing with pliers or a screwdriver
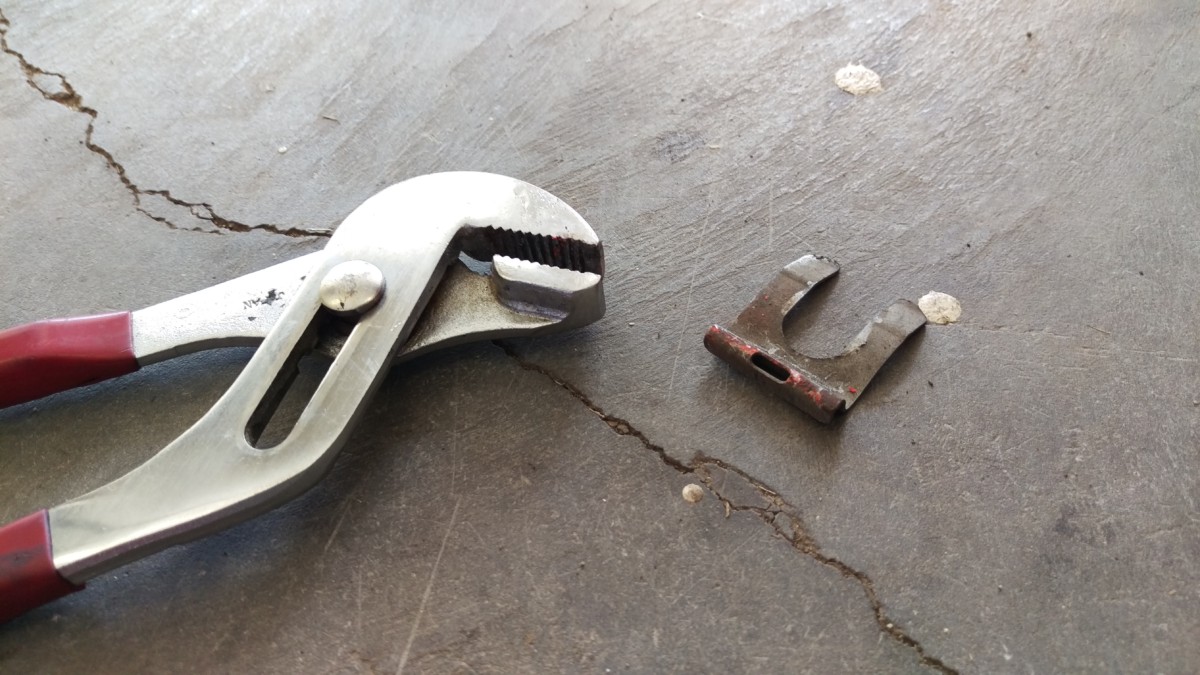
Tab after removal
Next, there is this tab thing sitting in the bracket holding the line in place. You need to pull this out. You can either use some pliers to pull and wiggle it out, or you can try to wedge a flathead screwdriver in the slot on it and pry it out. I found some channel locks work pretty well. If it’s really stuck, you can try gently tapping it out with a hammer and screwdriver or something similar. Try not to bend it; it will be reused later.
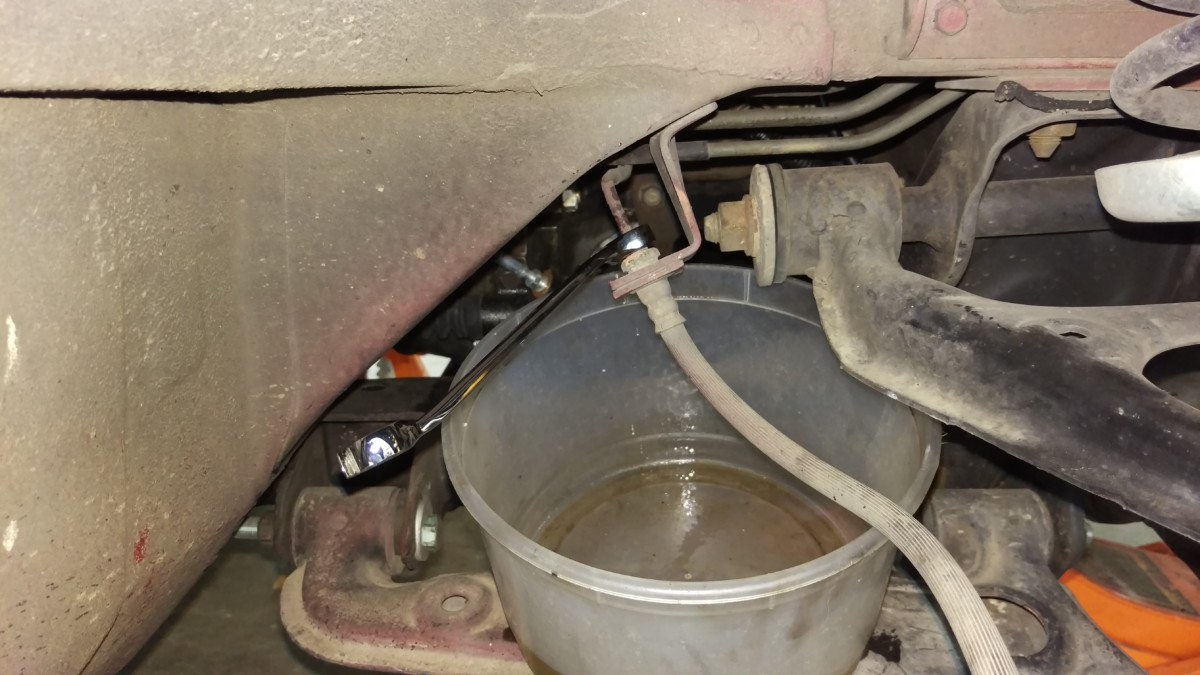
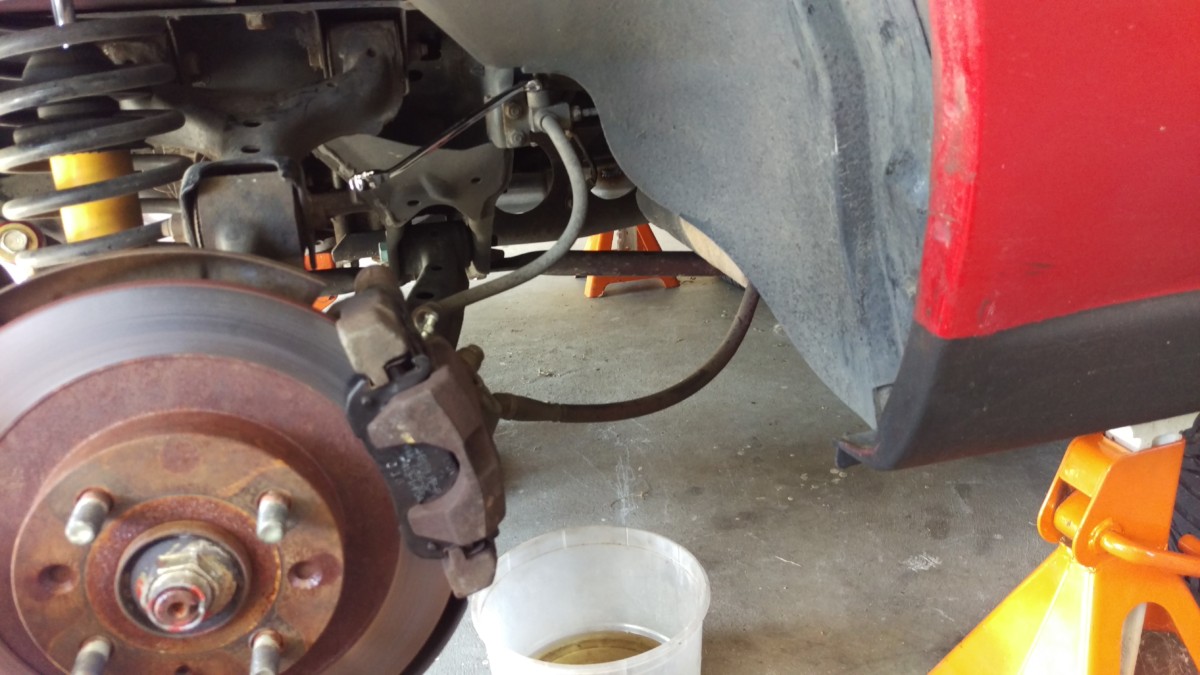
Get a bucket under the line
Now, get a bucket under this connection to collect the inevitable drips. With the bucket in place, you can go ahead and loosen the connection all the way with the 10mm flare wrench.
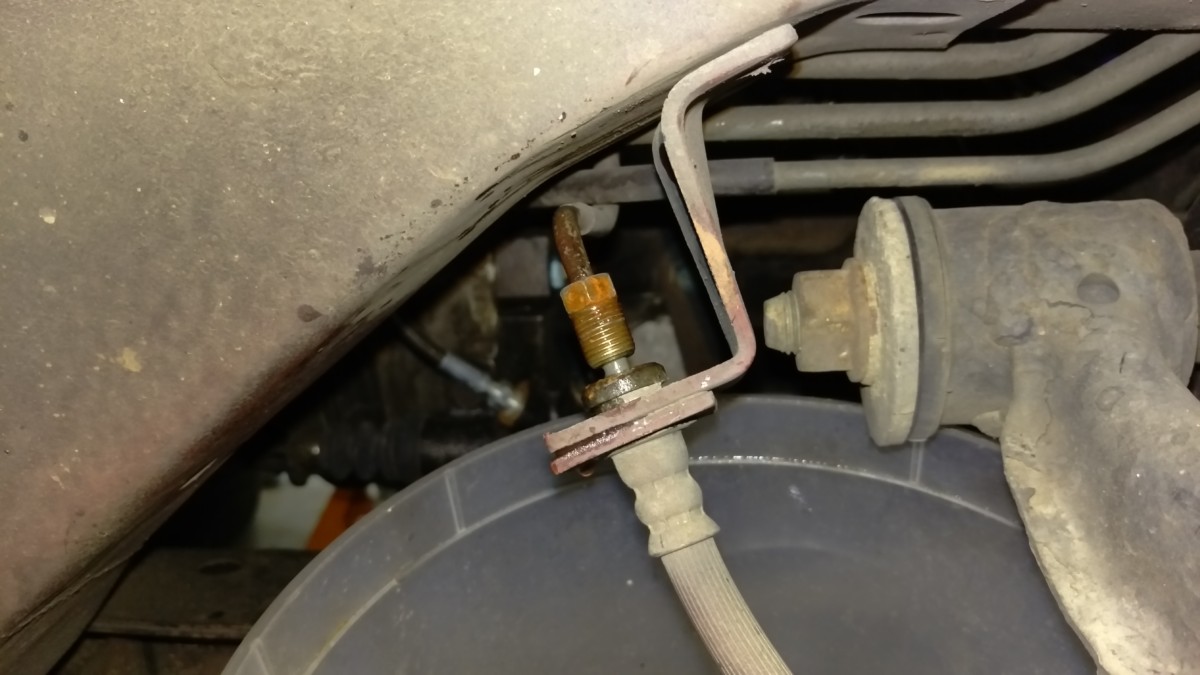
The line is undone and ready to pull out
Fluid will come out as you do this, but you should be able to catch it in your bucket. Your hands should be safe, because you’re wearing gloves.
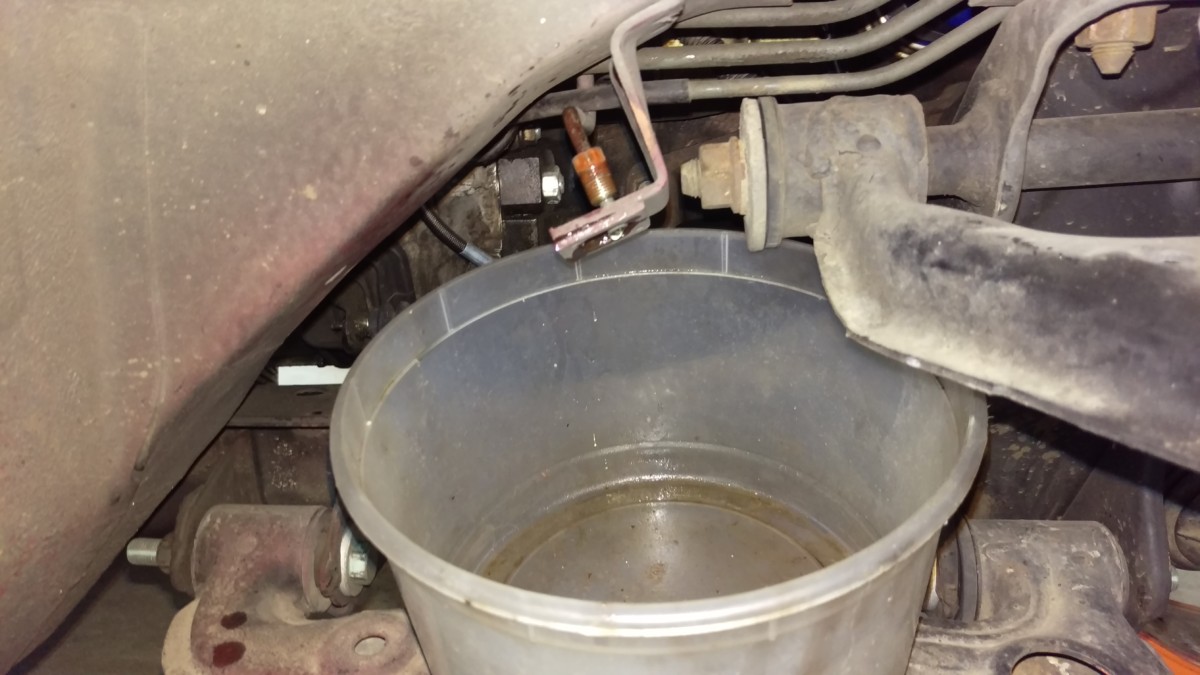
Soft line removed, hard line draining into bucket
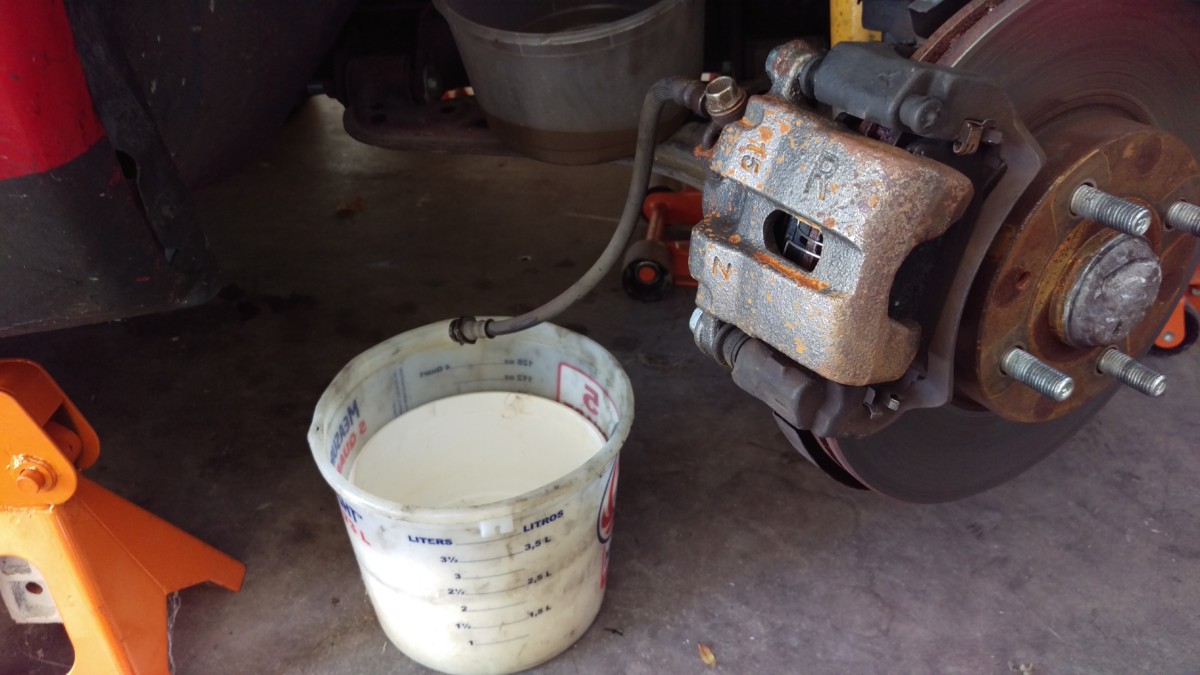
Soft line draining into second bucket
At this point, you can simply pull the soft line off. It should slip easily out of the bracket. You’ll have the hardline draining into your first bucket, as shown. I found it easiest to simply point the now-detached softline at a second bucket, pictured. It won’t take long to drain the soft line, as it only has as much brake fluid as was in the caliper.
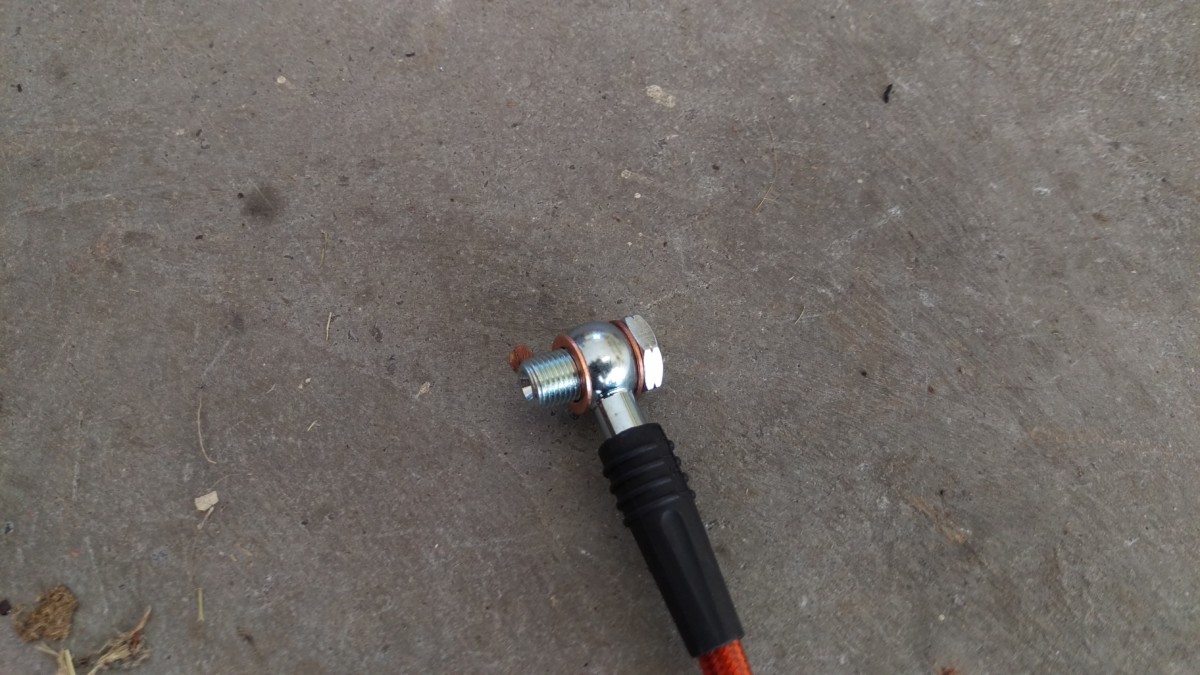
New banjo bolt and crush washers
The new lines should come with new banjo bolts and crush washers. You should use new crush washers in the arrangement shown. You want to have the bolt, a washer, the fitting, a second washer, and then put the whole thing into the caliper. The crush washers help ensure you have a good seal.
Removing the old line, paying attention to orientation
Old line removed
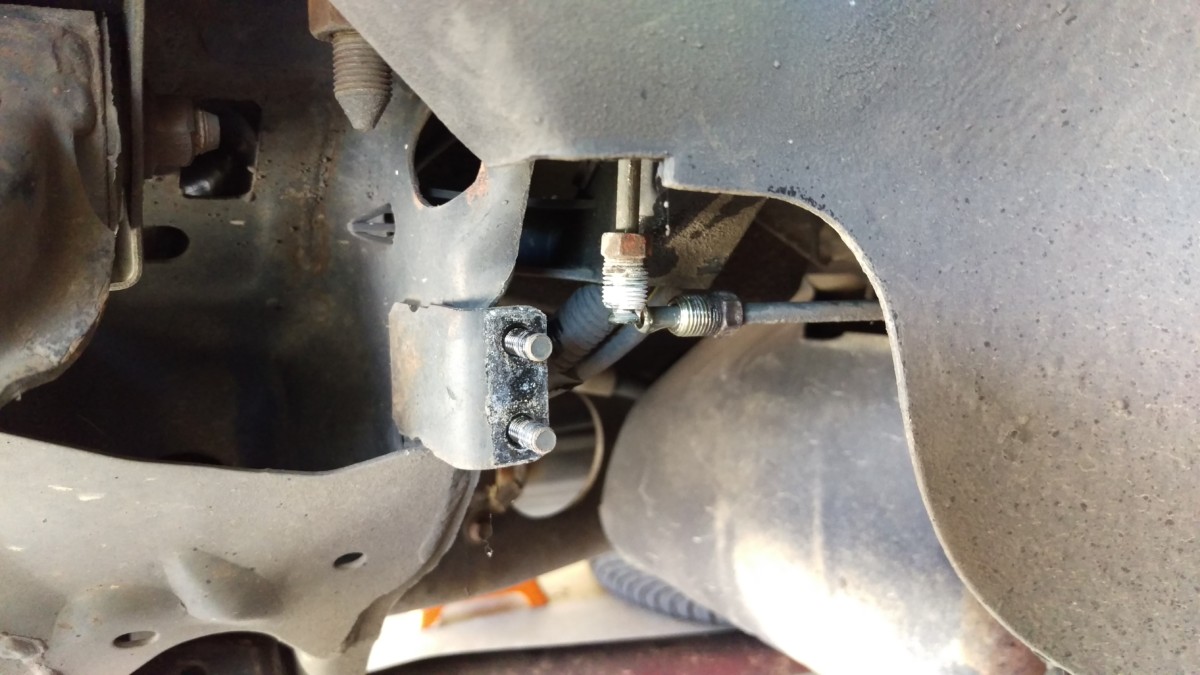
Next, go ahead and remove the old line altogether and put it aside. It will still have some brake fluid in it, so be sure not to spill everywhere. As you’re removing the old line, pay attention to the line orientation on the caliper. The factory lines have a tab making sure they point a specific way on the caliper. We want to point the new lines in the same orientation when we install them.

New fitting loosely installed
At this point, you can bolt the new line to the caliper, but don’t tighten it yet. We’ll orient and tighten it after installing the other end, to make sure the line doesn’t twist or kink.
New line being installed
A 17mm Open Wrench helps with tightening it
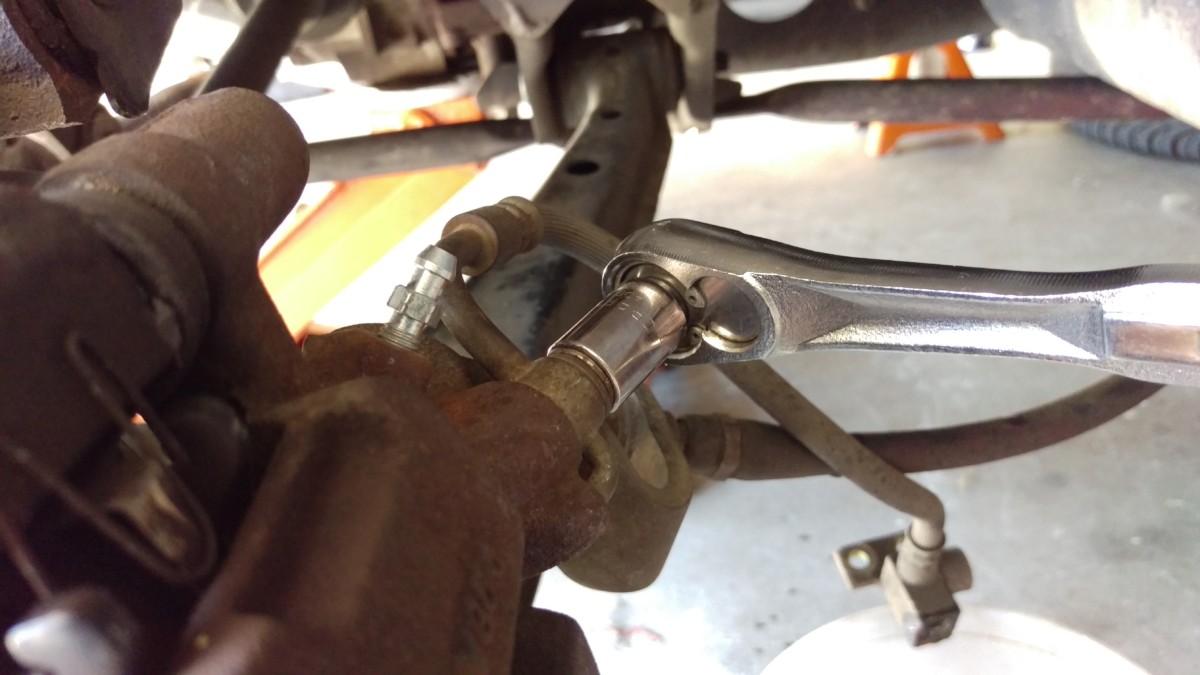
With the end connecting to the caliper loosely attached, we can install the other side. You should be able to easily hook it in. You can hand tighten to get it seated. Then, re-install the tab we pulled out earlier. I usually put it in place, and then tap it in gently with the side of a wrench.
Once that’s seated, use the 10mm flare wrench to tighten it down. You may need a 17mm wrench on the line fitting to keep it from turning, as the new lines may not seat as snugly in the brackets as the original lines did. I don’t own a 17mm flare wrench, so I just used an open wrench for this purpose.

Snug down the banjo bolt to the caliper to finish the install
With the fitting to the hardline installed, it’s time to revisit the caliper end. In the picture on the right, you can see the hole where the original hose’s tab went. Using the old line as a guide, tighten down the banjo bolt so that the new line is in the same orientation. This should prevent the line from rubbing on suspension components. If this were to happen the line could wear through, and you could have brake failure.
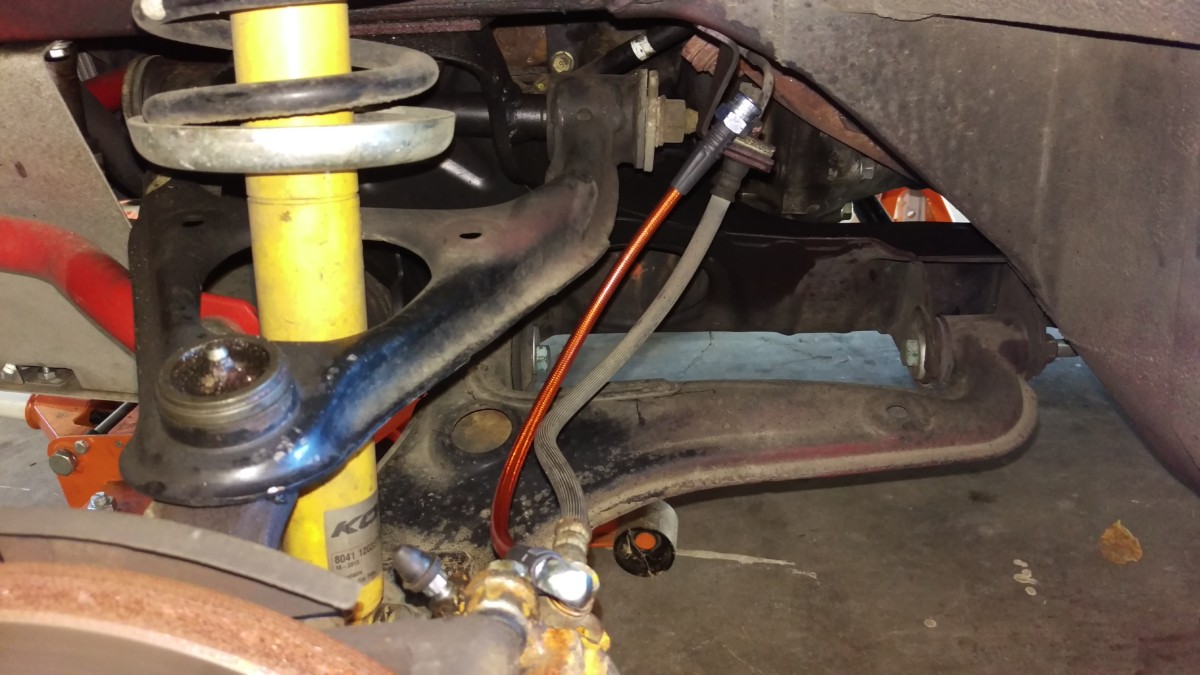
Driver Rear Line
Slightly different fitting on the caliper
The line on the driver side rear is almost identical to the front two. There are only two major differences. The first is that the fitting going to the caliper is slightly different. The procedure is the same though, simply re-orient the line the same way the factory one was on installation.
The fitting is horizontal behind this bracket
The second difference is that the fitting is sitting horizontally behind this bracket. The line itself comes in on the left. Aside from these minor differences, the procedure for this line is identical to the ones above.
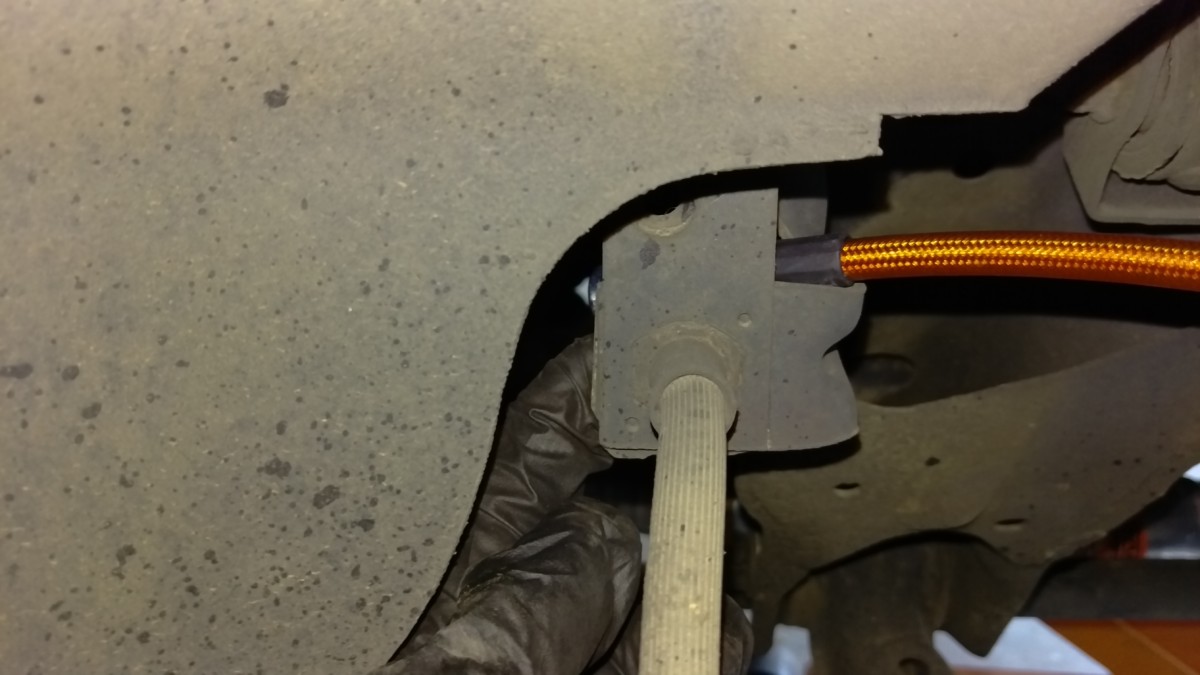
Passenger Rear Line
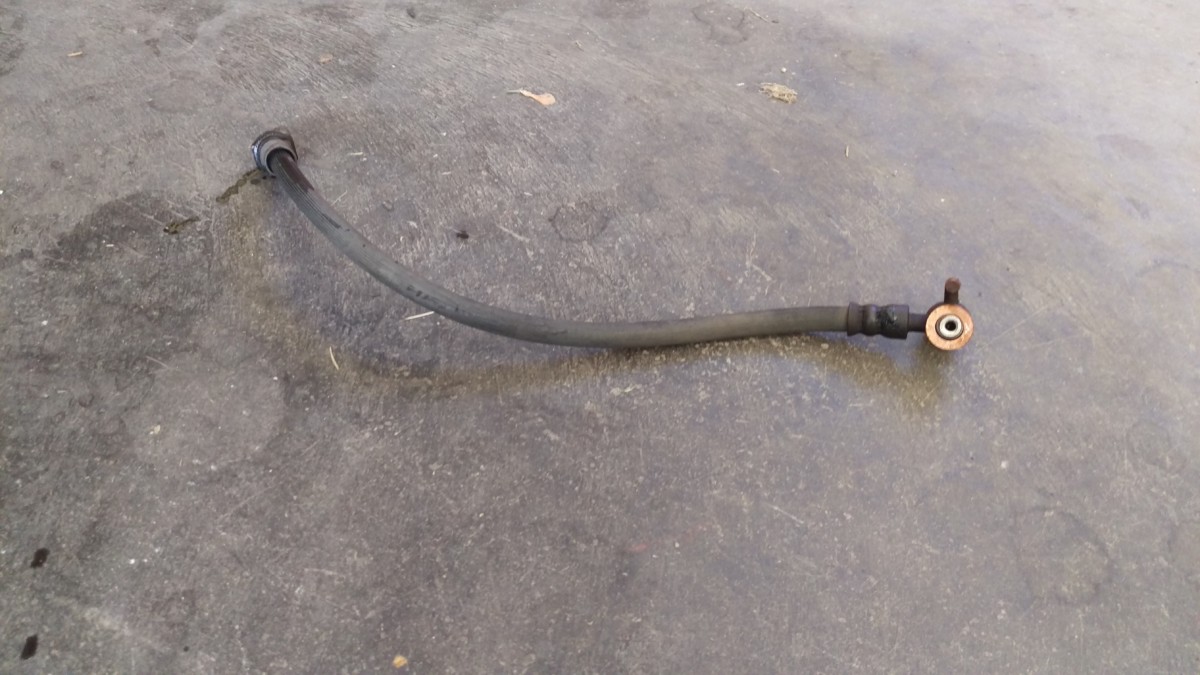
This 949 line comes with a new distribution block
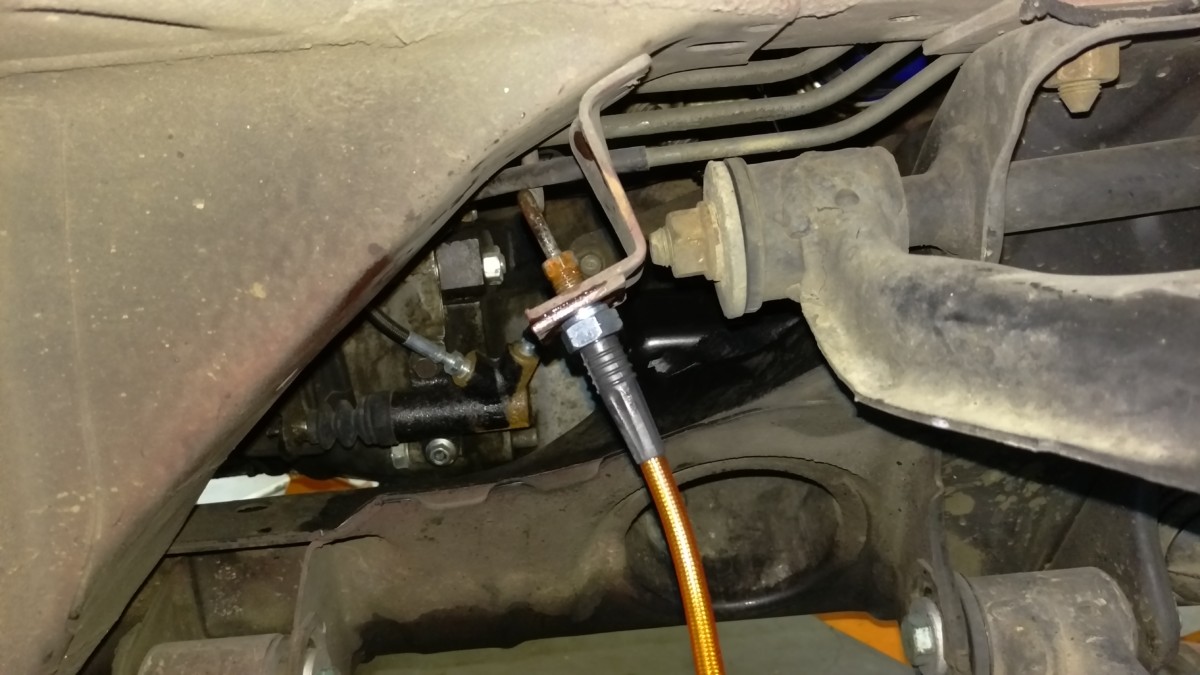
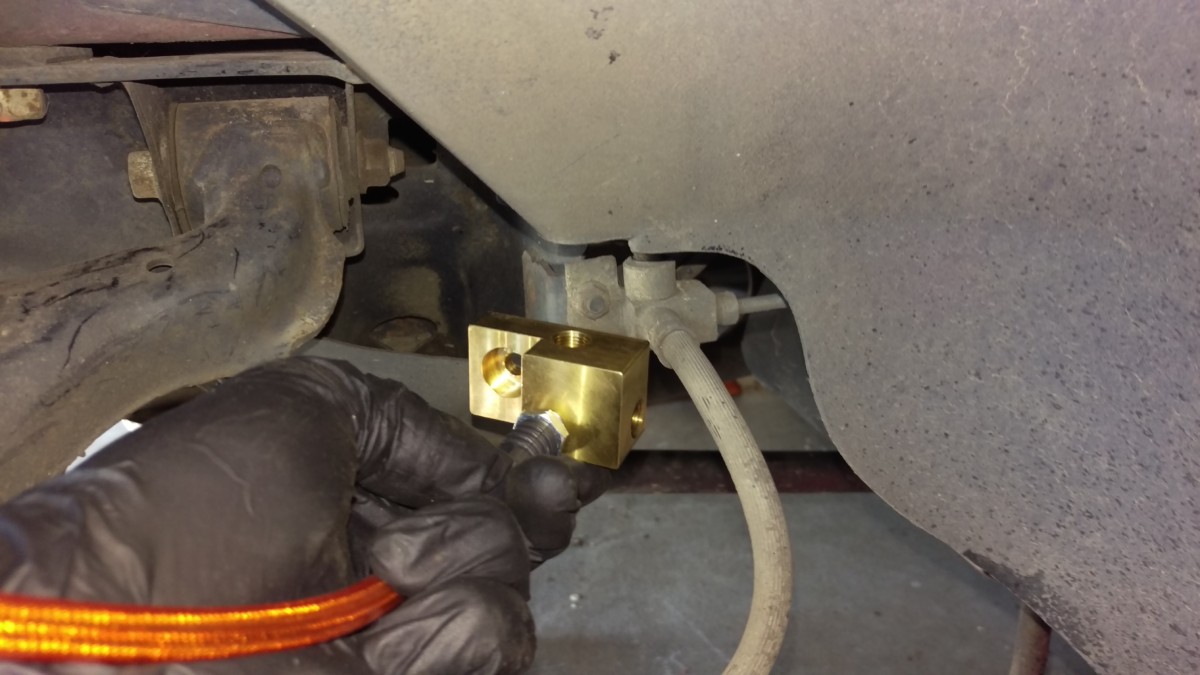
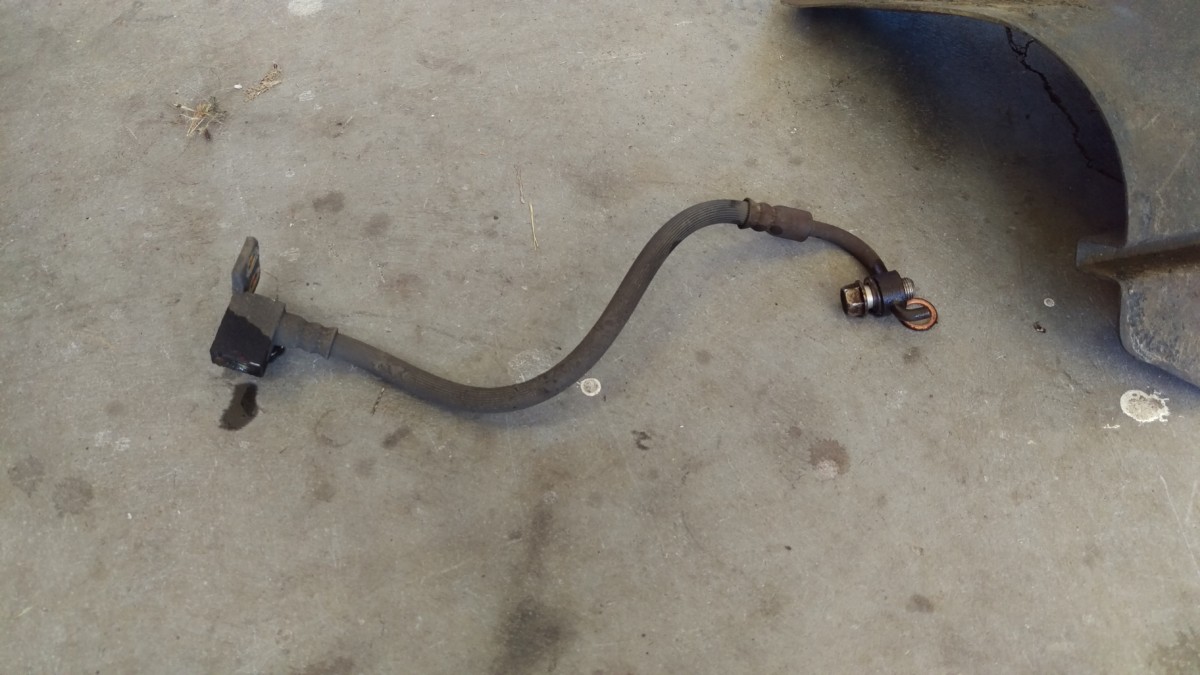
This one is different from all the others, primarily because it has this extra distribution block thing. Most of the reputable kits come with a new one. The 949 line I bought, pictured, has a new brass block. What’s going on here is that the main line for the rear two calipers comes back to this block. The passenger side brake line taps directly into it. There’s an additional hardline going from here to the driver’s side for the other line, which we already replaced. This brake line routing should make it clear why you bleed the miata’s driver side rear first, unlike most cars.
If you bought a cheaper set of lines that doesn’t include this block, I assume you would attach the new line to the OEM block in a procedure similar to the other 3 corners. I didn’t do this, though, so I can’t help much.
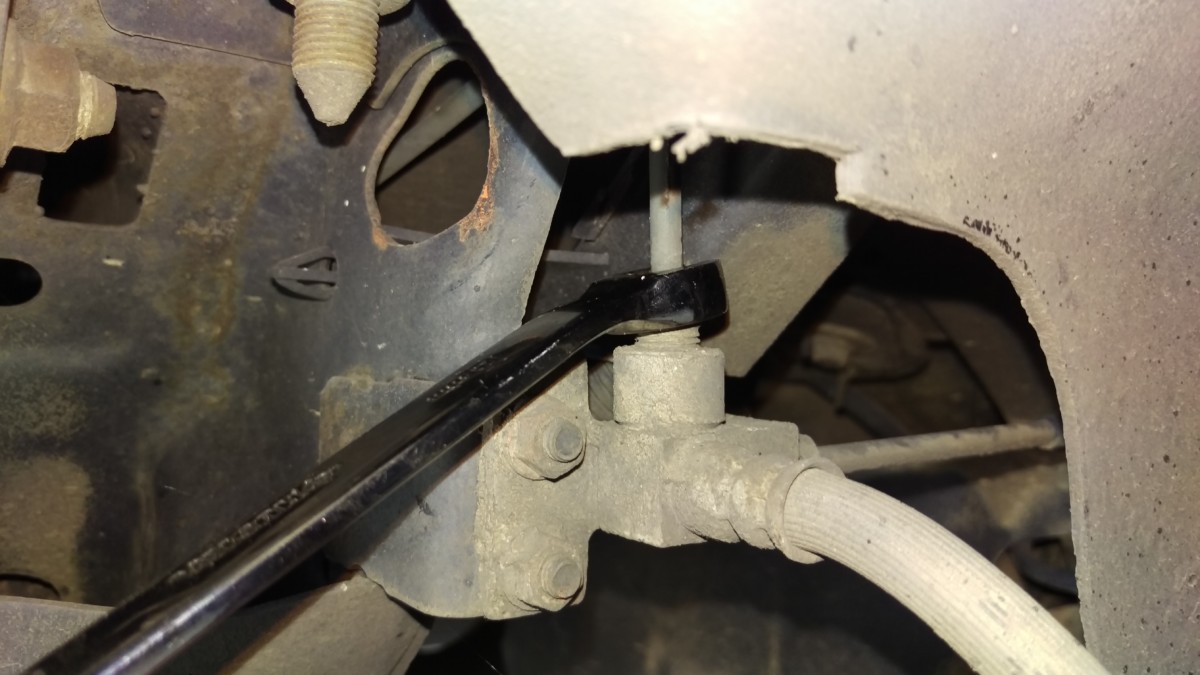
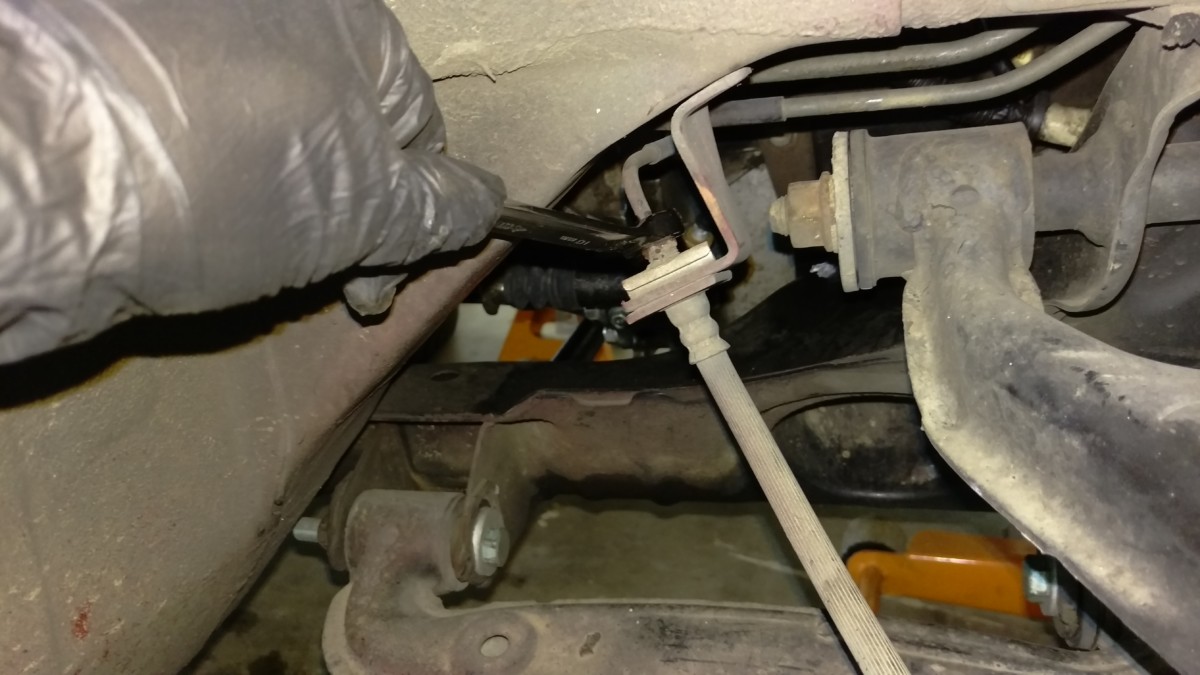
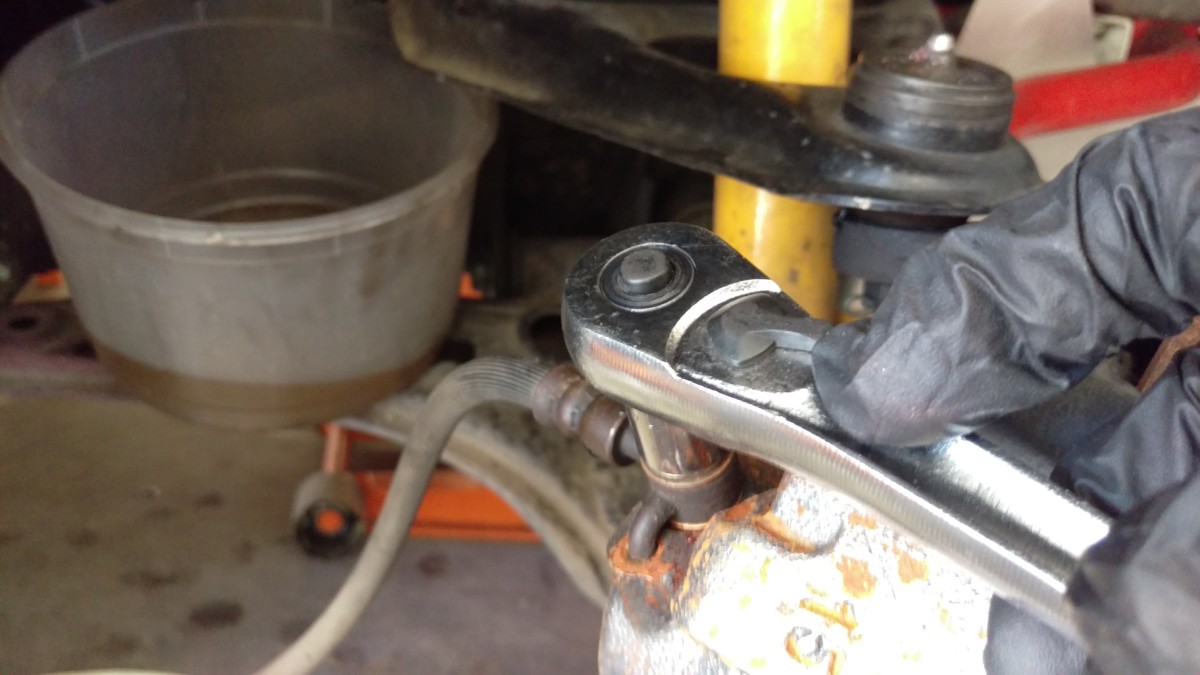
Crack the line loose
Crack the other line loose as well
Just like on the other sides, go ahead and crack the lines loose before removal. Again, don’t open them, just break them free so they can turn easily in the next step, and then gently close them again.
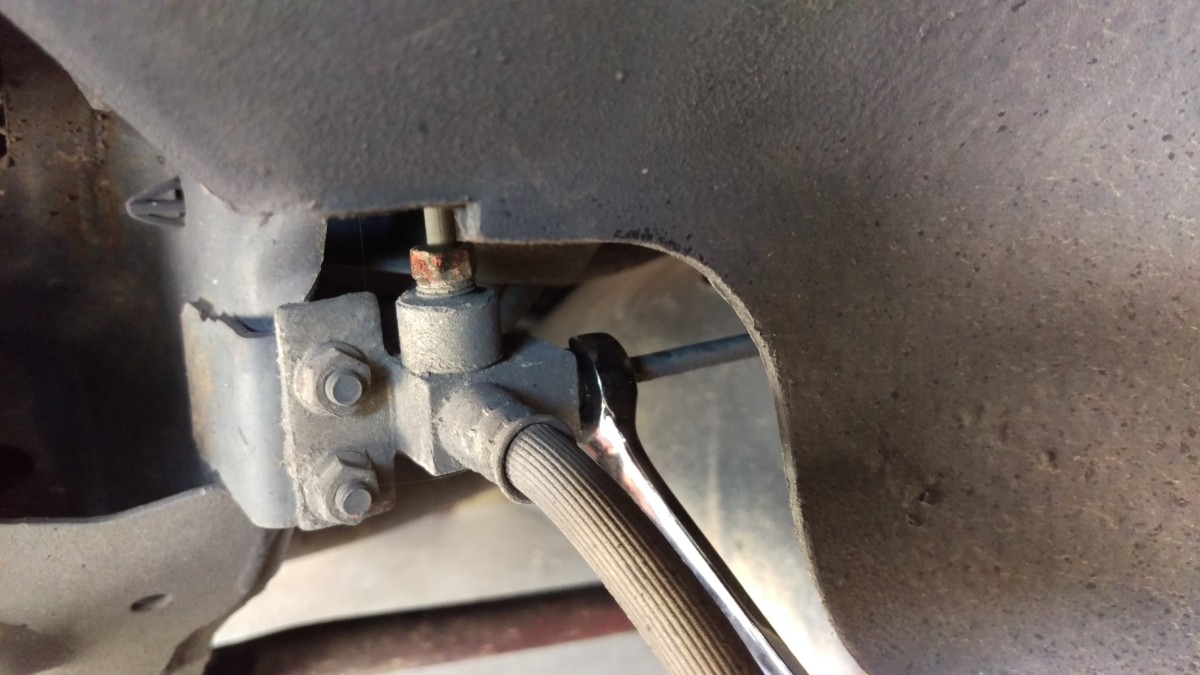
Grab a bucket, and open them all the way
You now have two ways to go here. You can unbolt the distribution block next, or you can just go ahead and fully loosen the lines. I don’t see what difference it makes, but I did the latter. Grab a bucket, put it in the line of fire as shown, and completely unscrew both hardlines. Some fluid will of course come out. By this point you should know to wear gloves and eye protection while doing this.
Undo the mounting bolts
With the lines undone, you can break loose and remove these nuts holding the distribution block on. They’re threaded onto studs welded onto the bracket. I believe they’re 10mm.
Both nuts removed, line should come out now
With those nuts removed and the hardlines loosened, you should be able to gently pull the hardlines out of the block and pull the block off.

Let it hang over the bucket to drain
You can let the block hang over the bucket to drain.
Undo the banjo bolt to the caliper as before
Line is removed
Then, you can undo the banjo bolt, just like the other corners, and the line is removed.
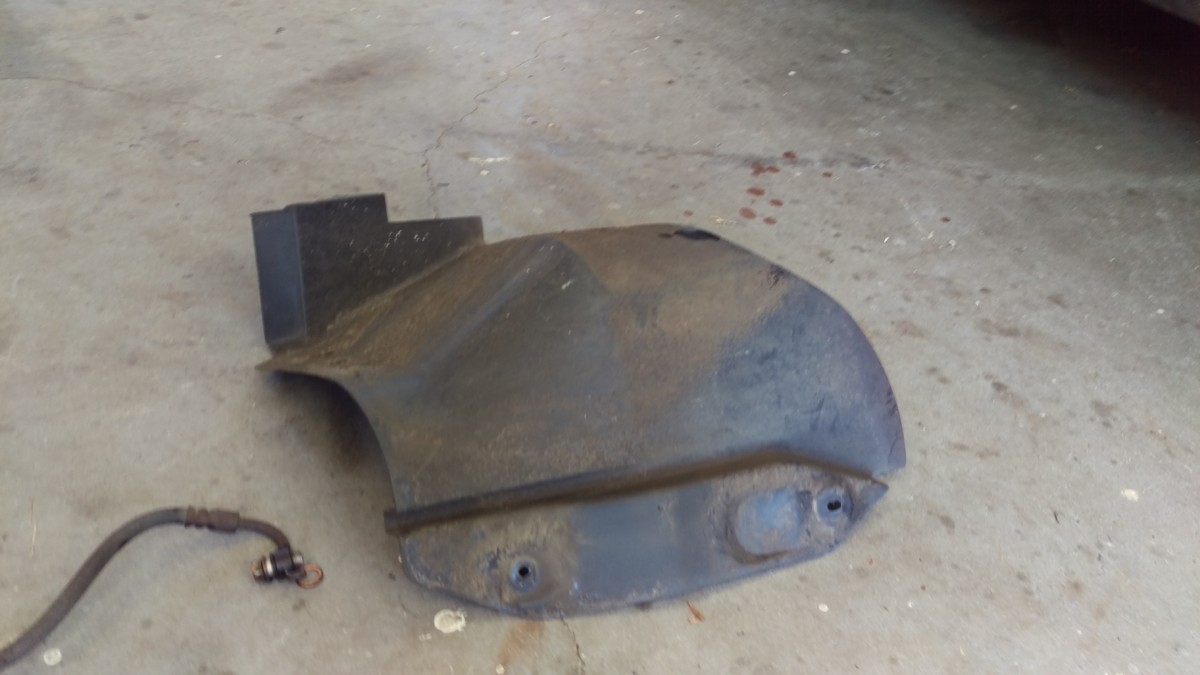
Removing this splash guard helps with access and takes only 4 bolts
Before installing the new line, I’ll point out that you may find it easier to work if you remove this splash guard. I probably should have done this at the get go. There are only 4 10mm bolts holding it on. Undo those, pull it off, and it really opens up the area around the distribution block as shown below. It’s sitting right in the front of the wheel well, behind the passenger door.

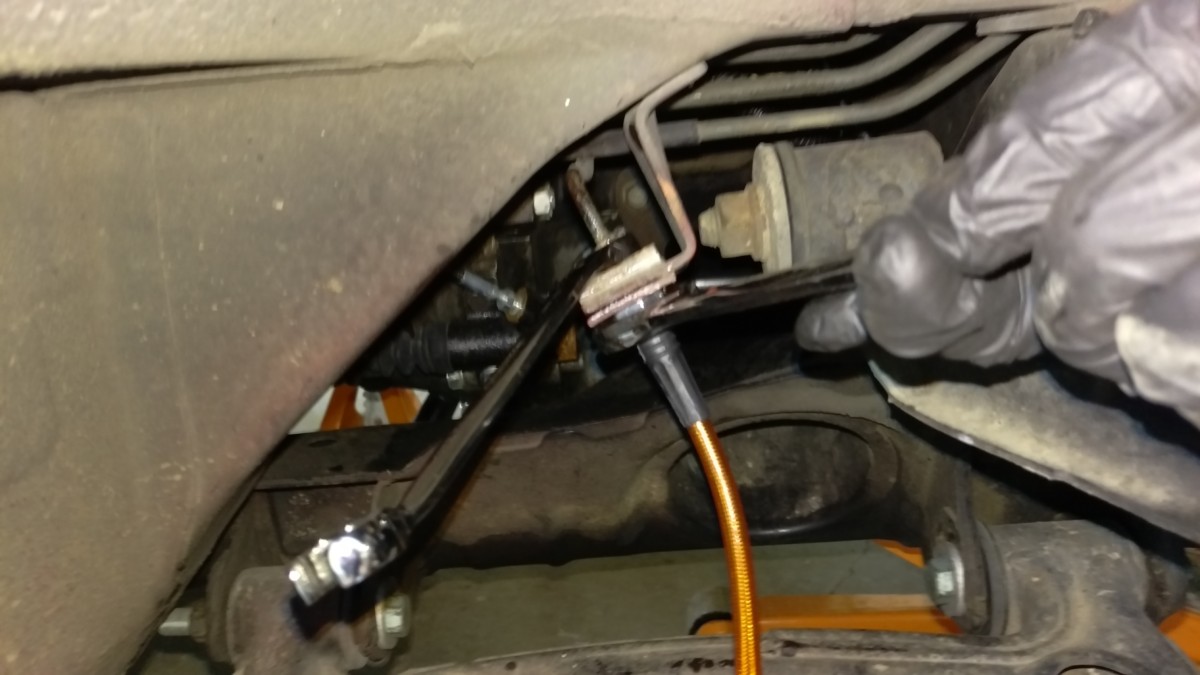
With the splash guard removed, there’s more room to work
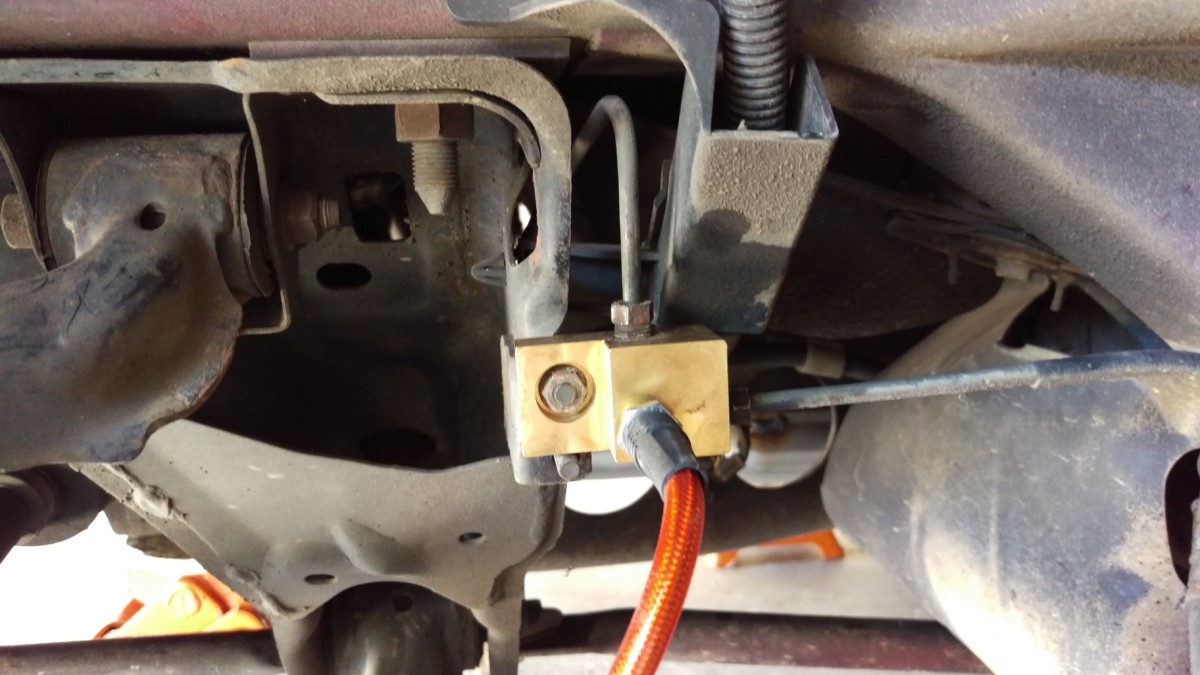
Here’s a shot with the splash guard removed. I’m putting the new distribution block in, but you can see how the work area has opened up significantly. Getting the new block in can be a bit fiddly, so the room helped me out.
This end is done
I ended up sliding the block on the upper stud, but not bolting it in. Then, I started both hardlines threading in. Next, I put the nut on the stud and tightened it down. Lastly, I tightened up the hardlines with everything in place. It’s not too bad, just be careful to get the hardlines threaded in properly without crossthreading it or bending the lines.
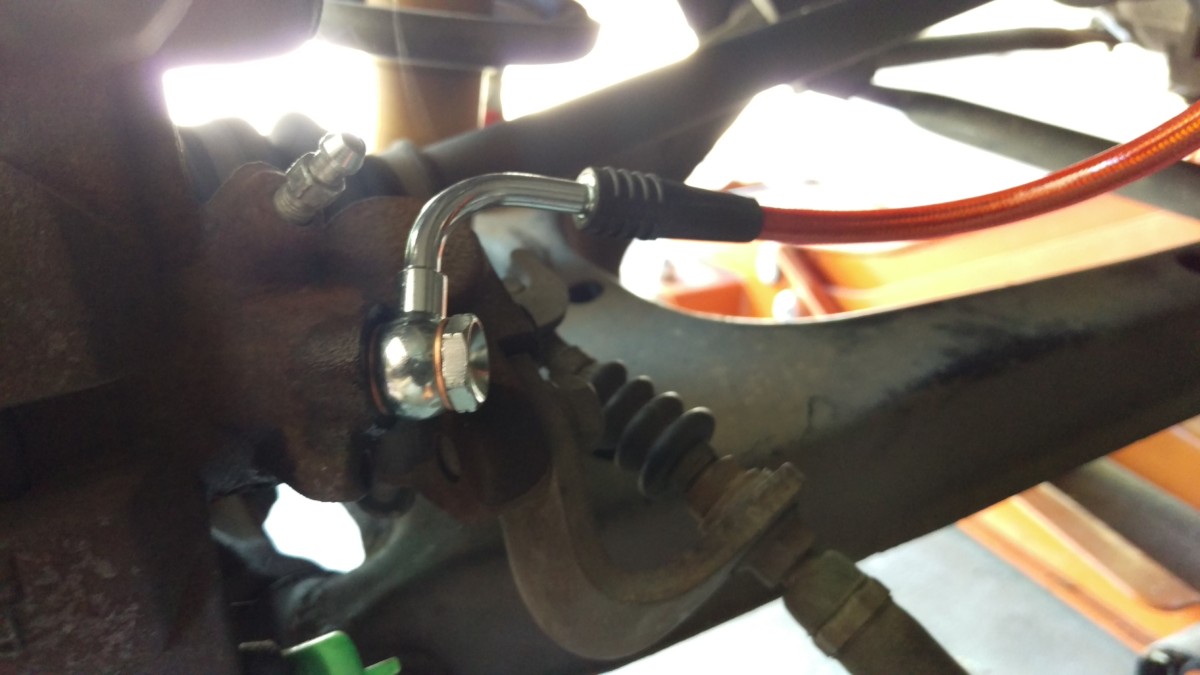
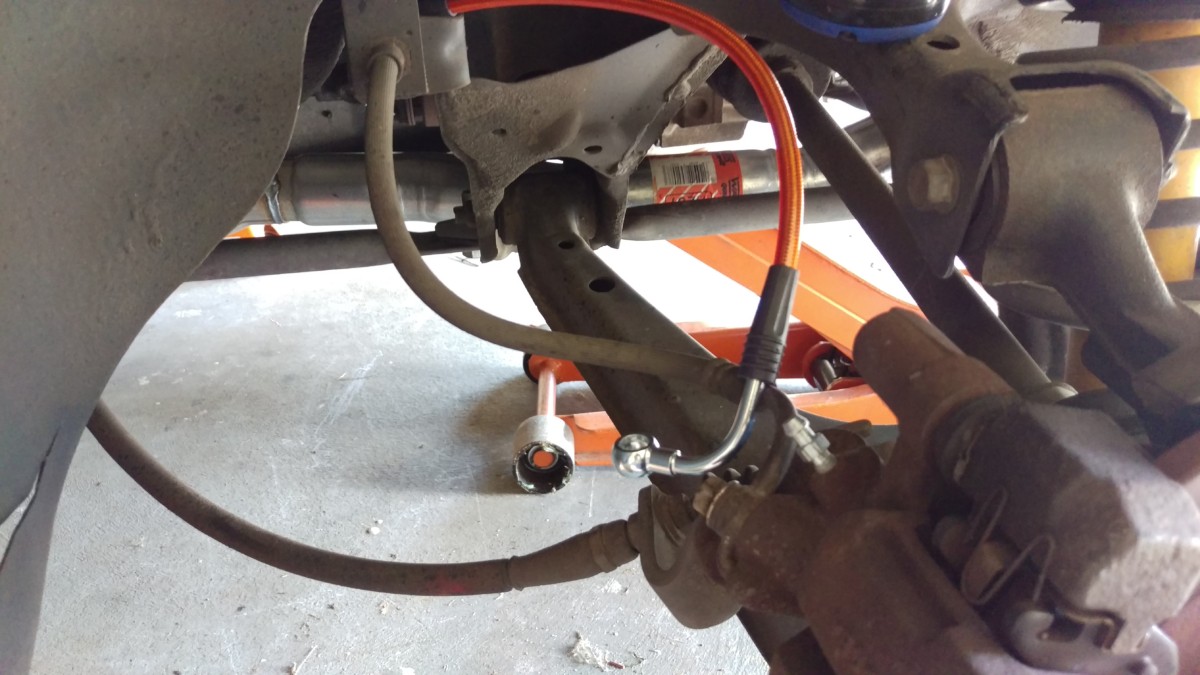
Banjo bolt installed as before
As a last step, install the banjo bolt as you did with the others, again paying attention to orient it the same as the factory brake line. And with that, you’re just a brake bleed away from being done with this job. Don’t forget to reinstall that splash guard if you removed it, of course.
Conclusion
I didn’t notice any difference in pedal feel from fresh brake fluid on my OEM brake lines to these. As I said, I think a lot of the difference people feel is either because their OEM lines have worn out and started to bulge under braking or they simply needed fresh brake fluid. However, I’m convinced that these lines should be less susceptible to heat damage with track use, and they also cost less than factory Mazda brake lines. I don’t trust the no-name rubber lines enough to try them out on my car.
As stated before, you must bleed your brakes after doing this procedure. I have a writeup on doing that, too, so definitely check it out. I have had zero problems with the 949 kit since installing, and I’m really glad with the results knowing that I’m no longer on 20-year-old lines.