Miata Torsen Differential Swap
Aside from using Tochigi-Fuji in 2003, Miatas had robust Torsen limited slip differentials available from 1994 to 2005. This makes parts readily available, making a Miata torsen differential swap the quickest way to upgrade your open differential car to two-wheel burnouts. I decided to install one while I was doing my K24 swap. Note that these instructions are for a 1997, although NB Miatas should be similar.
1.6 vs 1.8
1990-1993 cars came with a smaller differential that is known to be very fragile. Plenty of these have been shattered under stock power. A Miata torsen differential swap with a 1994+ Torsen rear end is a great upgrade for these cars, and follows the same general outline as below.
One Piece vs Two Piece
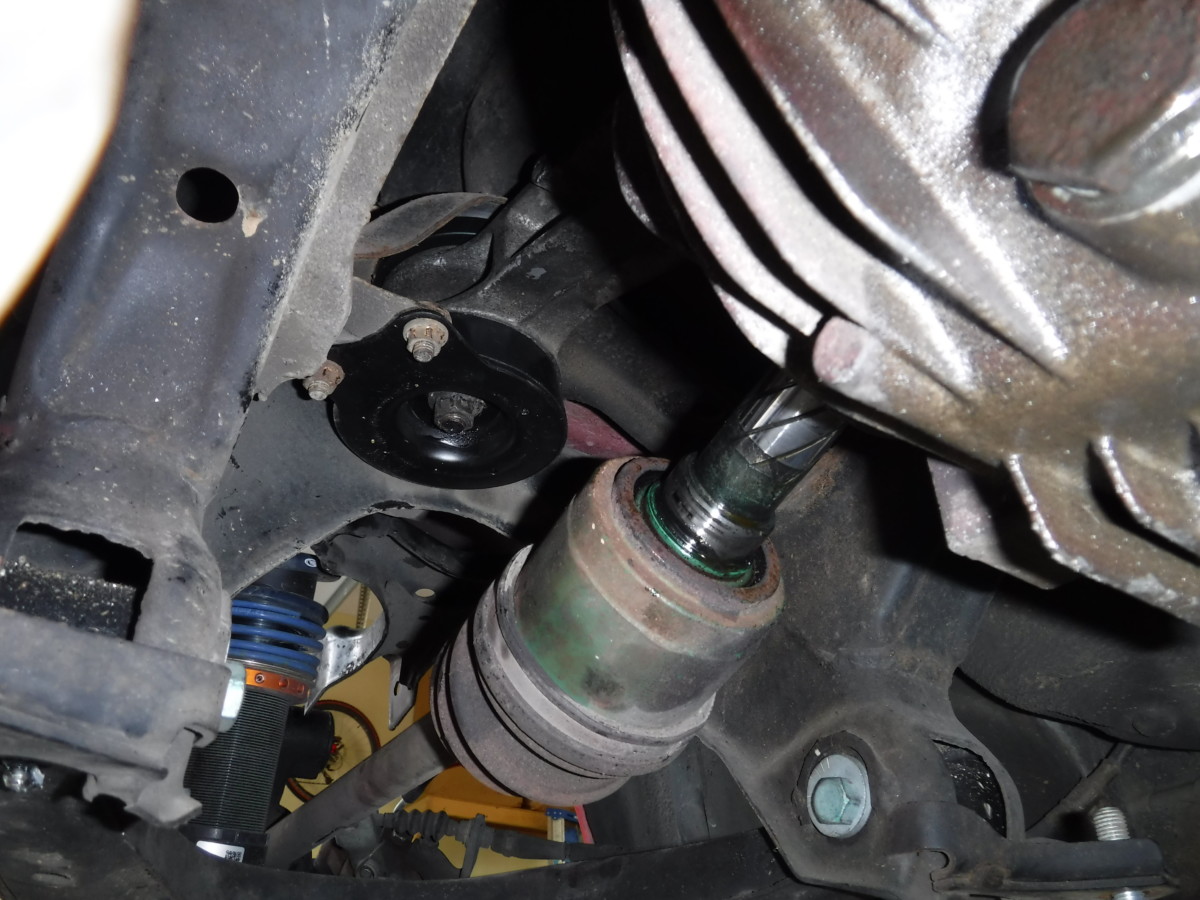
One piece axles
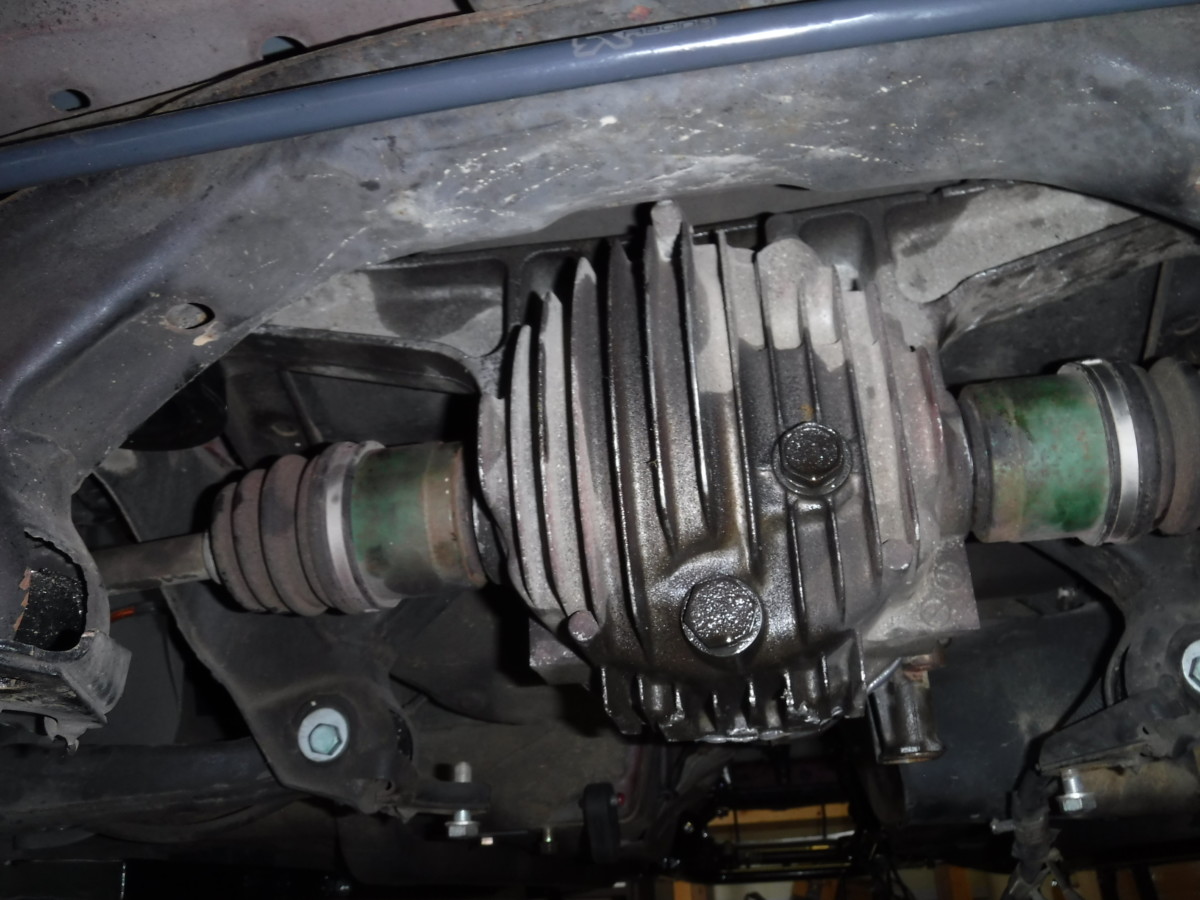
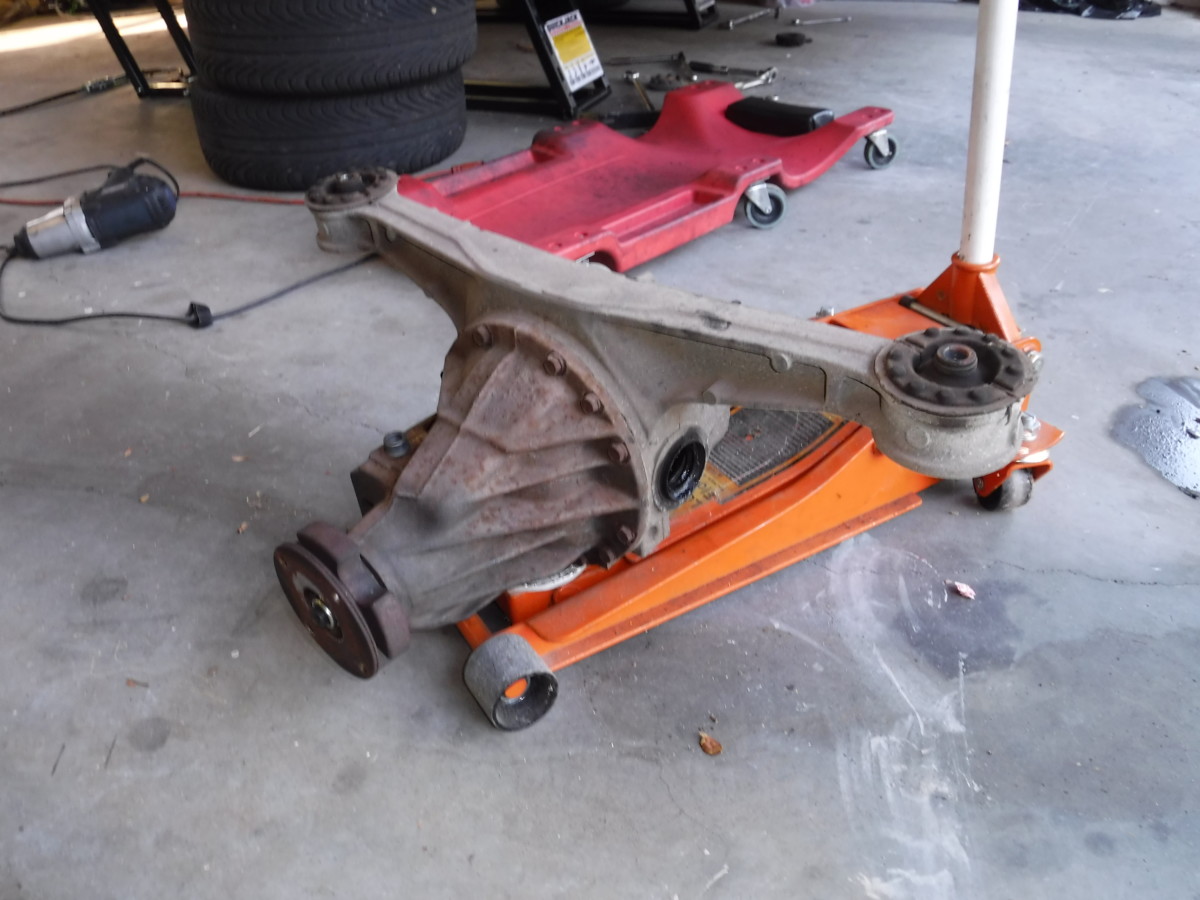
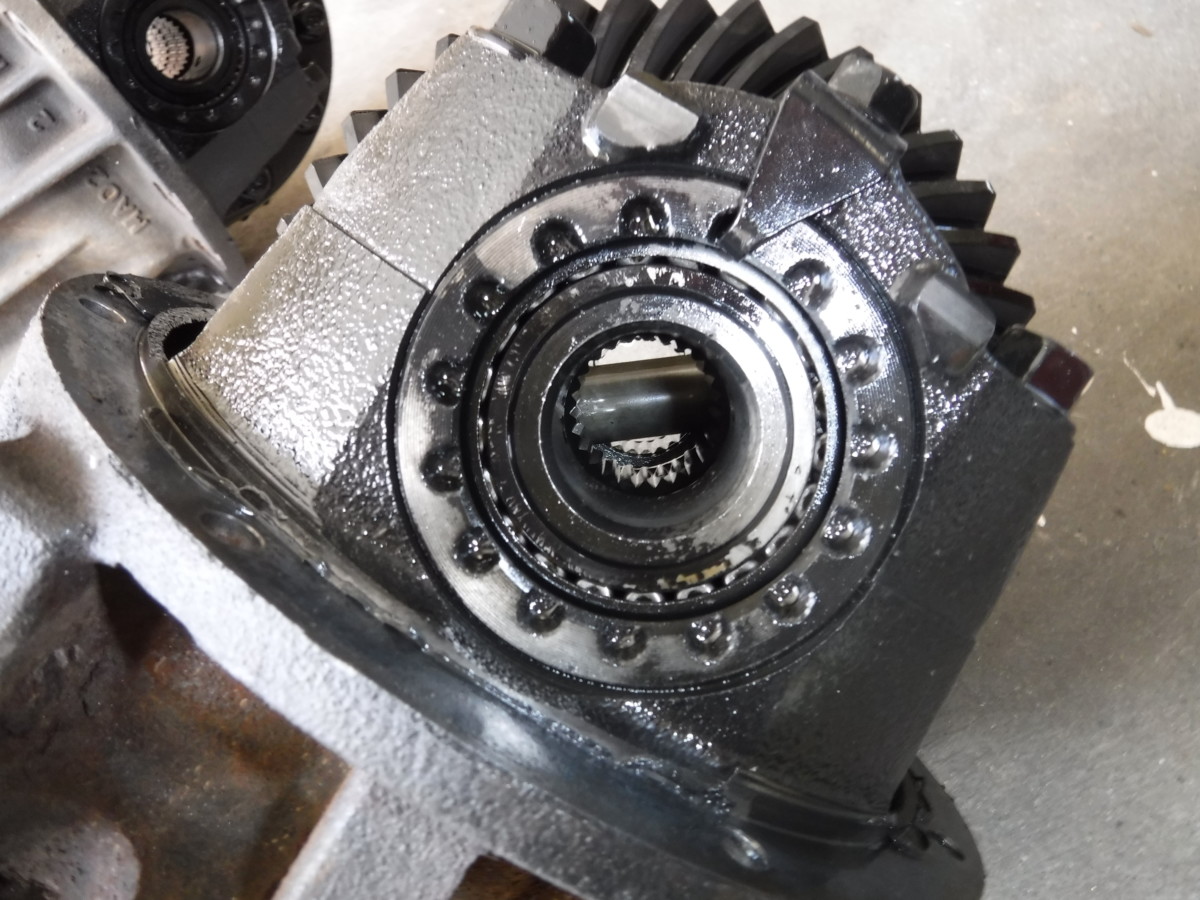
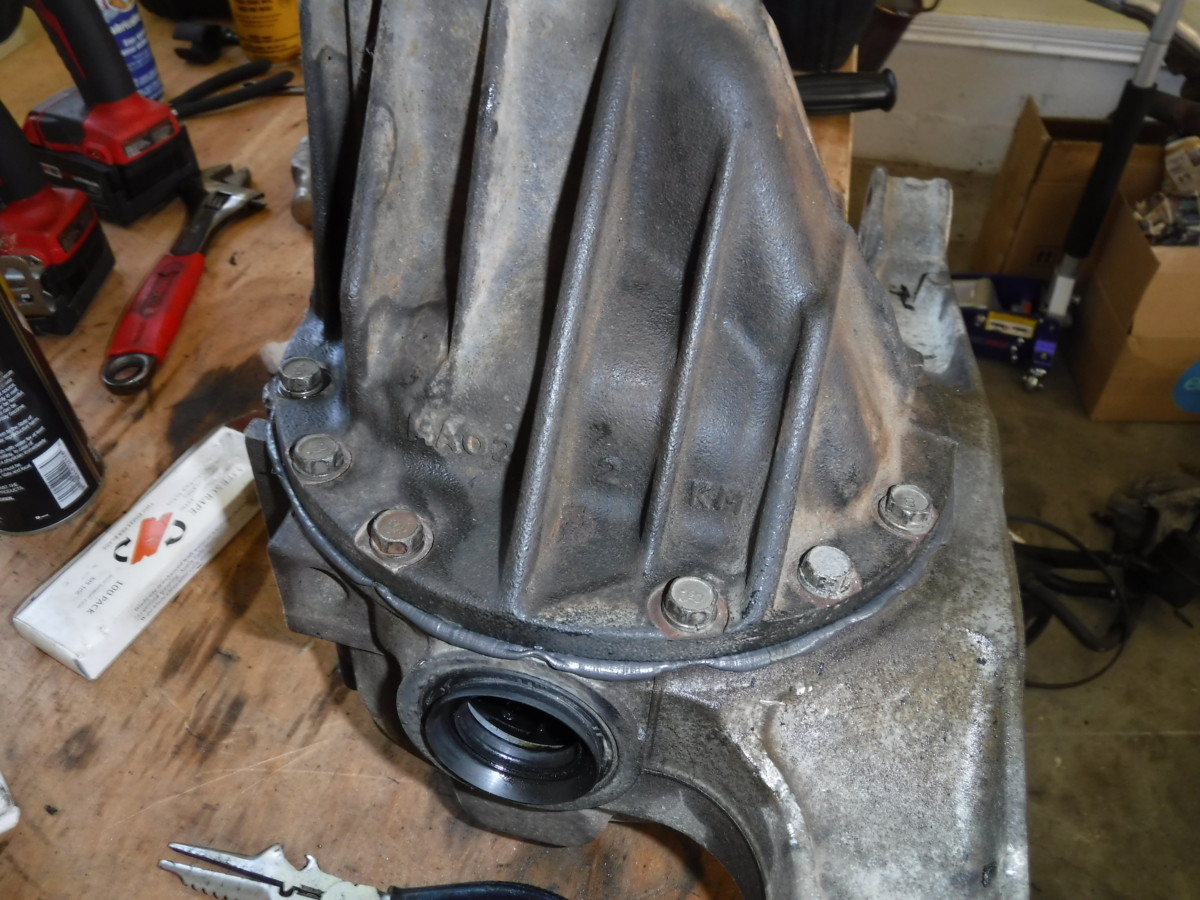
Miata Torsens are sometimes called either “one piece” or “two piece”, referring to how the axles connect to the differential. The differential in the picture has “one piece” axles, because the whole axle slides into the differential. With two piece axles, the axles bolt into flanges on the differential, much like a driveshaft.
Two piece axles are easiest to work with, but if your car already has one piece, you’ll have to buy the entire rear end to switch over. I didn’t want to go through all that hassle.
Additionally, one piece axles give more clearance for exhaust. Specifically, the KMiata 3″ exhaust won’t clear two piece axles.
Gearing
If you’re putting a Torsen in, you can also change gearing at this time. For my K24 swap, a 4.10 final drive and 6-speed transmission is reported to work well, so that’s what I went with. Most 5-speed cars came with a 4.30 final drive, while the NB 6-speed cars came with 3.9, except for MazdaSpeed Miatas, which had 4.10. In general, naturally aspirated cars do better with 4.30 gearing. Turbo cars have more mid-range torque and are better suited to 3.9 or even 3.6 gears.
If you do change gearing, you’ll also probably want to swap your speed sender in the transmission to correct the speedometer reading.
Parts Required
- Torsen differential – Obviously required for a Miata torsen differential swap
- Differential bushings
(optional, but this is a great time to replace them)
- Differential seals (two for the axles, one for the driveshaft side) – I chose not to replace these as mine looked fine
- 7/8″ or 22mm O2 sensor socket
– To remove the rear O2 sensor
Diff out of housing
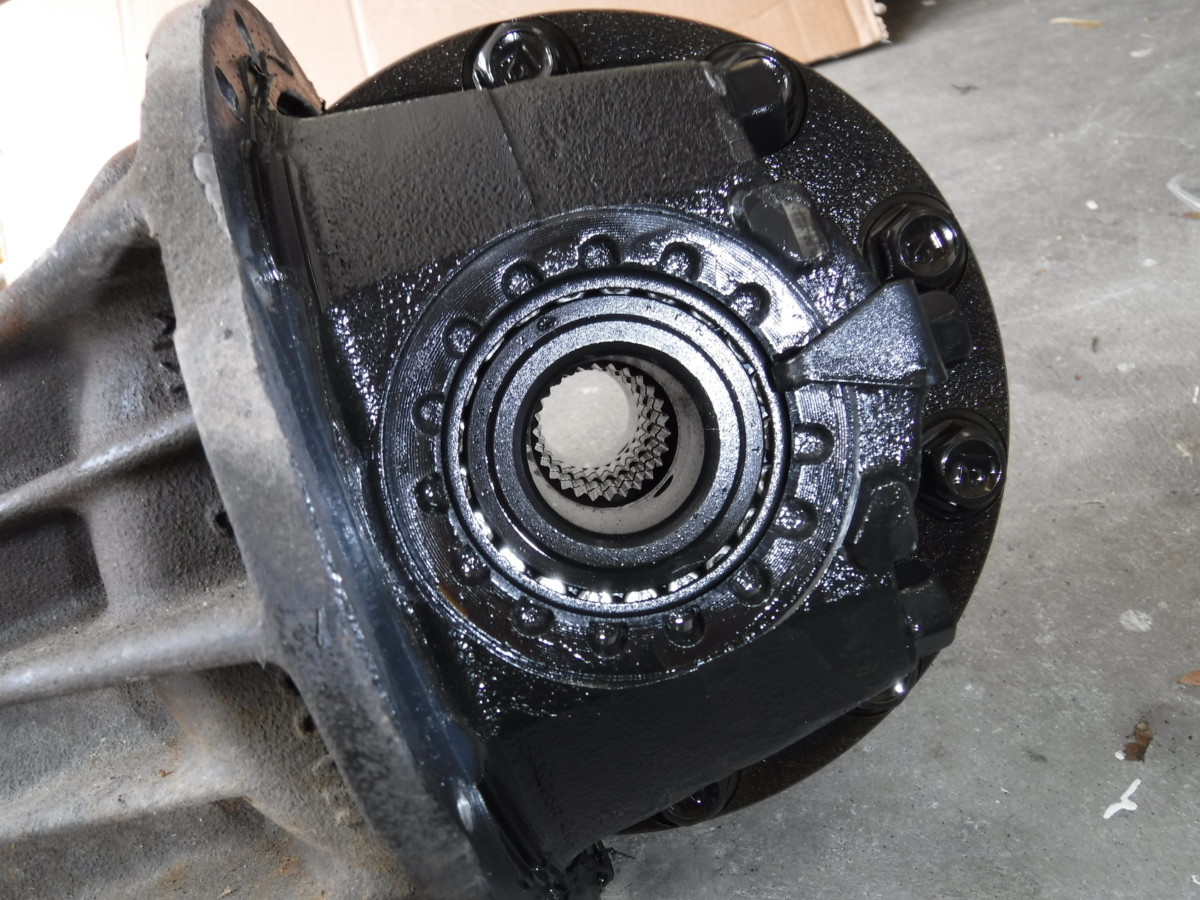
I’ll note that you don’t need an entire housing and rear end necessarily. I bought a Torsen out of another 97 Miata that also used one piece axles. This meant I could use my existing housing and axles, saving some money. The picture shows the bare minimum. (Setting up a new ring and pinion is outside the scope of this article.) Buying a differential in a housing will save you a little bit of time. If you want to go from one piece to two piece axles or vice-versa, you’ll need the entire rear end.
Rear Brace Removal (If necessary)
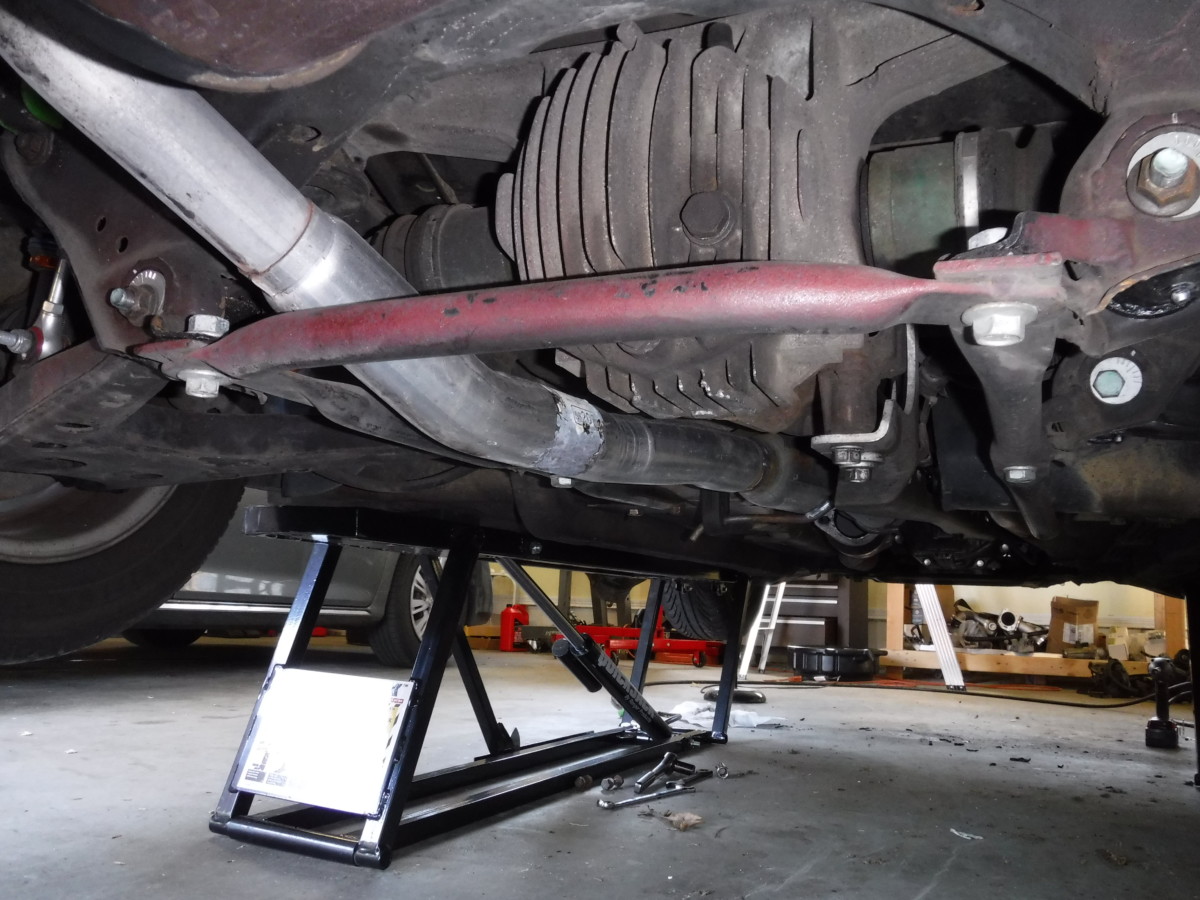
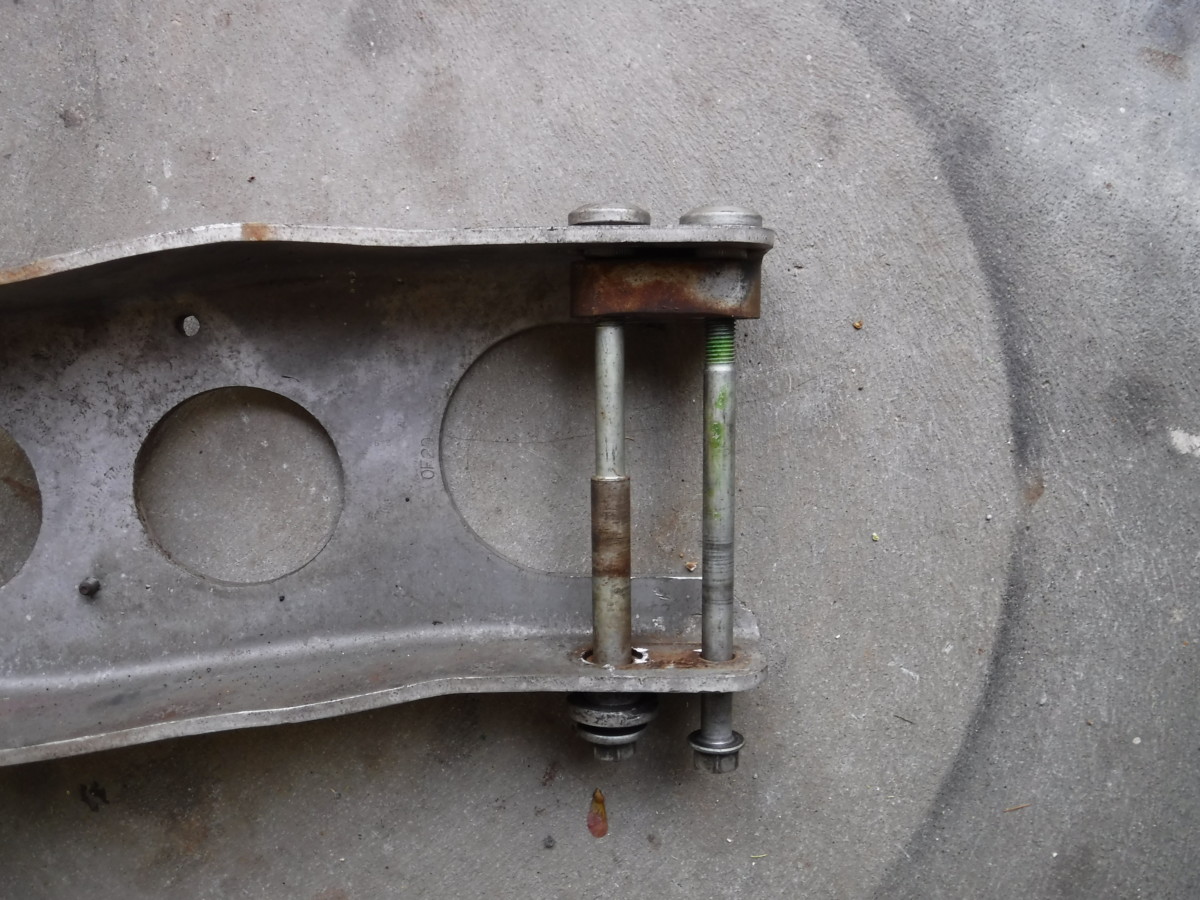
Rear brace
This rear chassis brace is present in certain model years, including my 1997. If your car has one, it needs to be removed before the exhaust can come out easily. There are six bolts, three on each side.
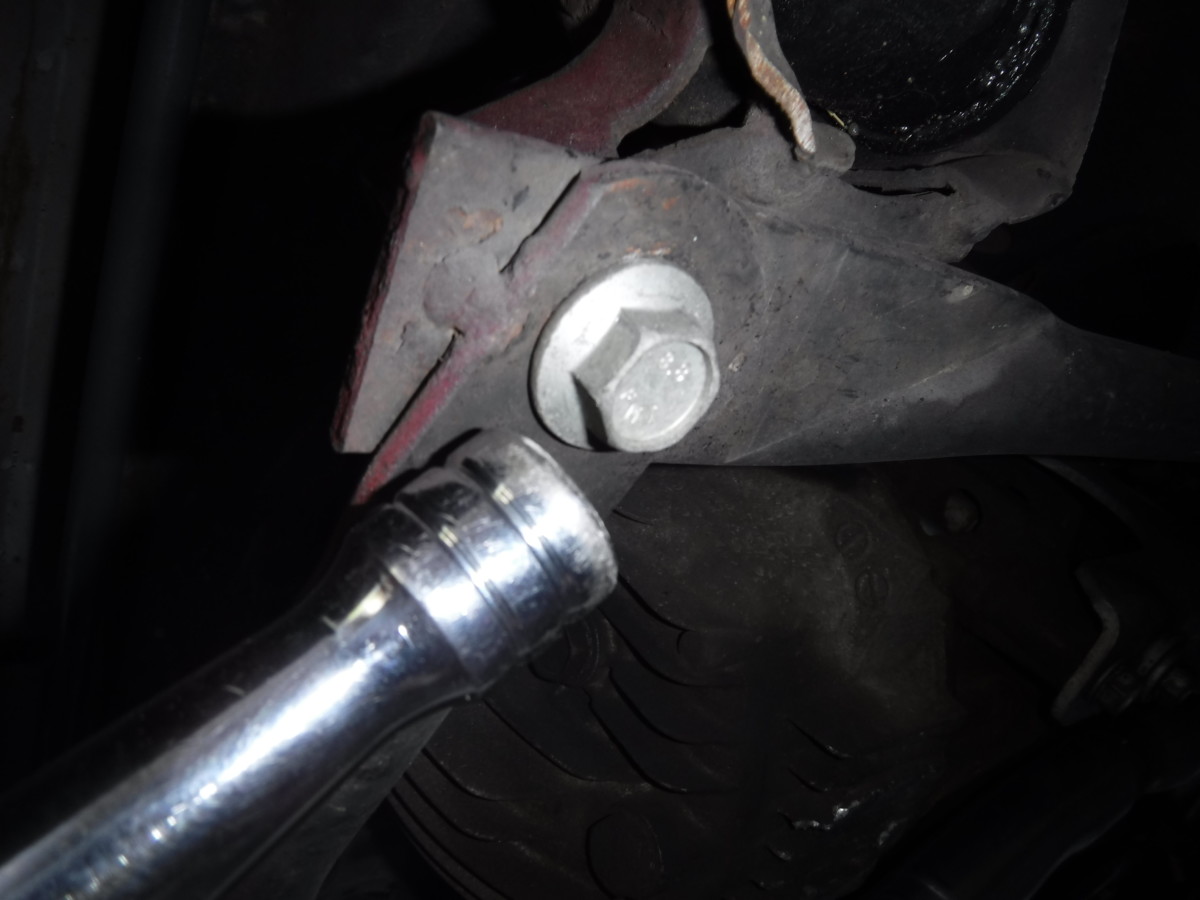
First bolt

Second bolt

Third bolt
Working your way along each side of the brace, you can see the bolts. Two of them toward the rear have loose nuts on top, while the other four thread into captive nuts.
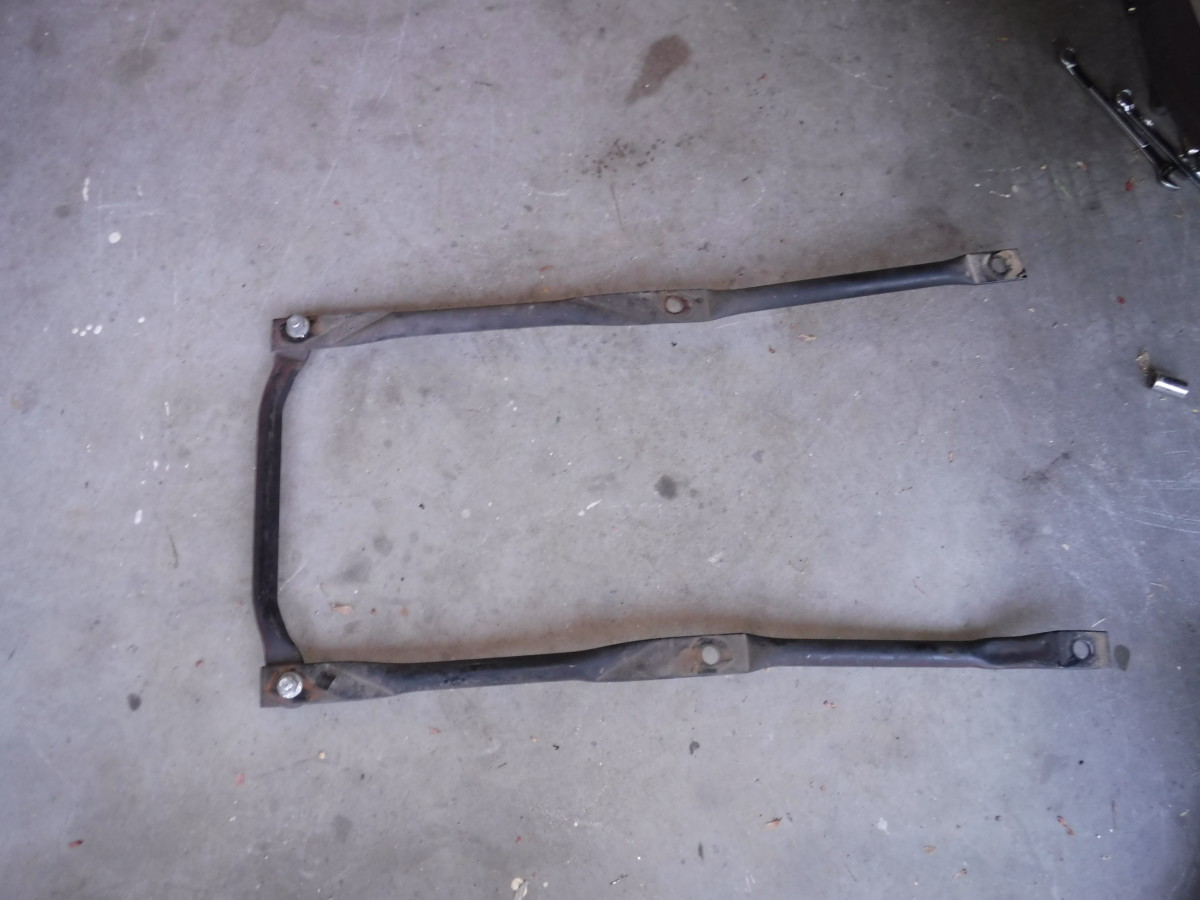
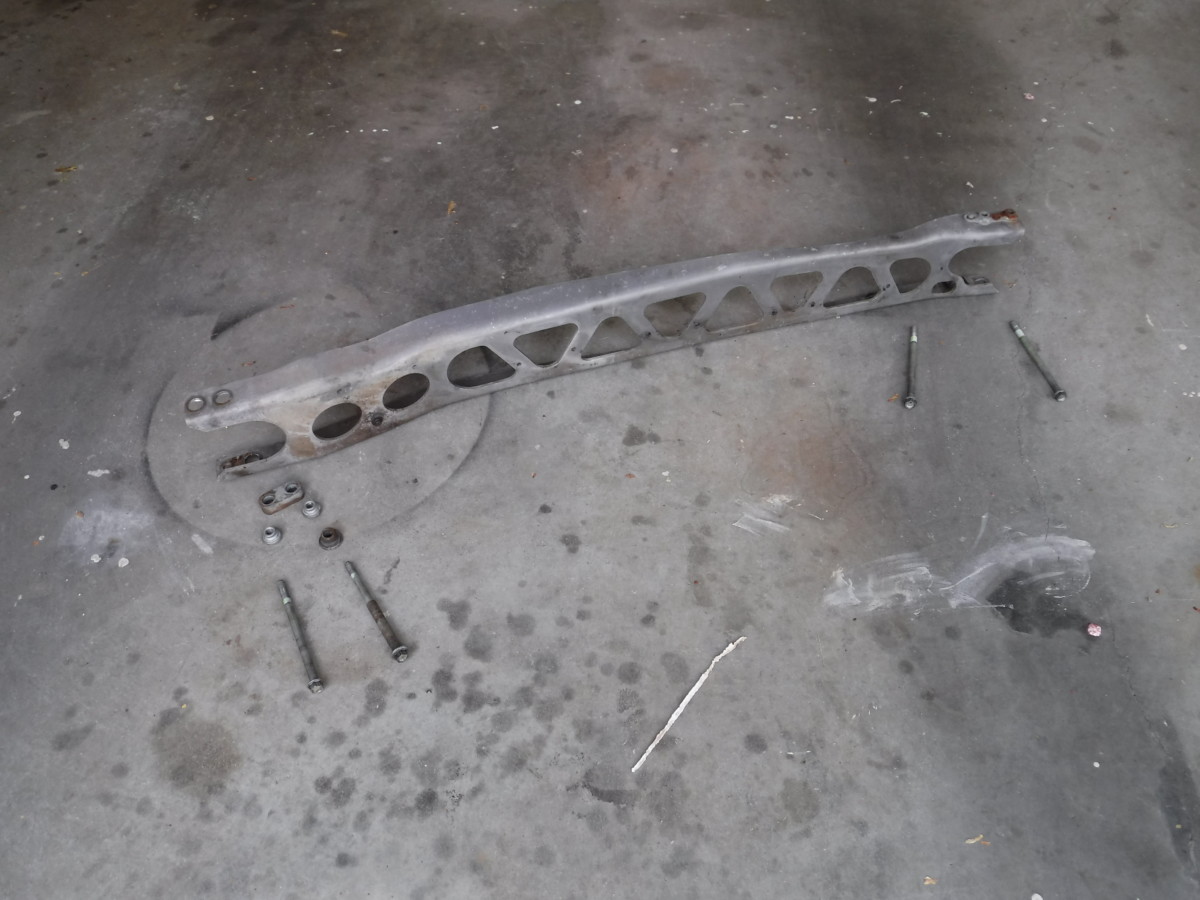
Brace after removal
And here is the brace after removal. Again, not all cars will have this.
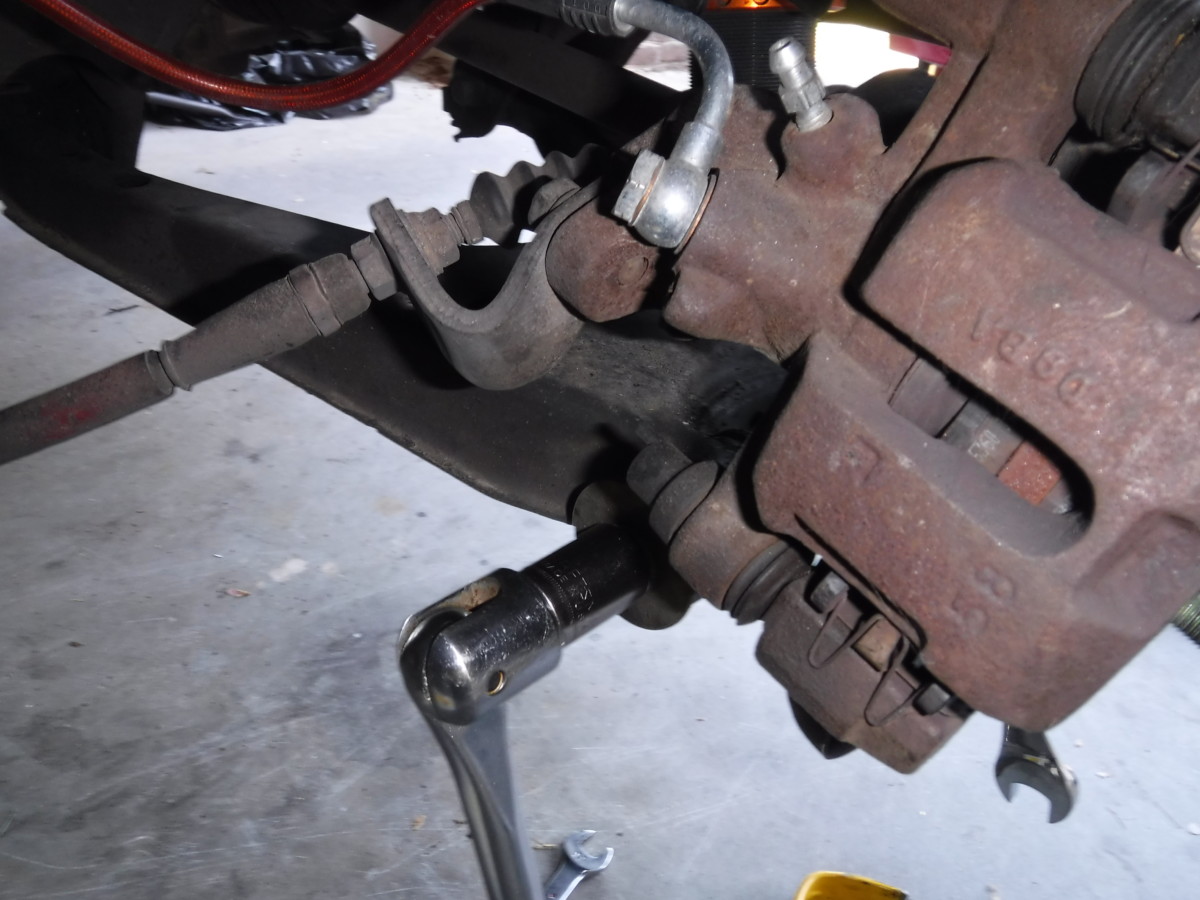
Rear O2 Sensor Removal

O2 sensor socket in use
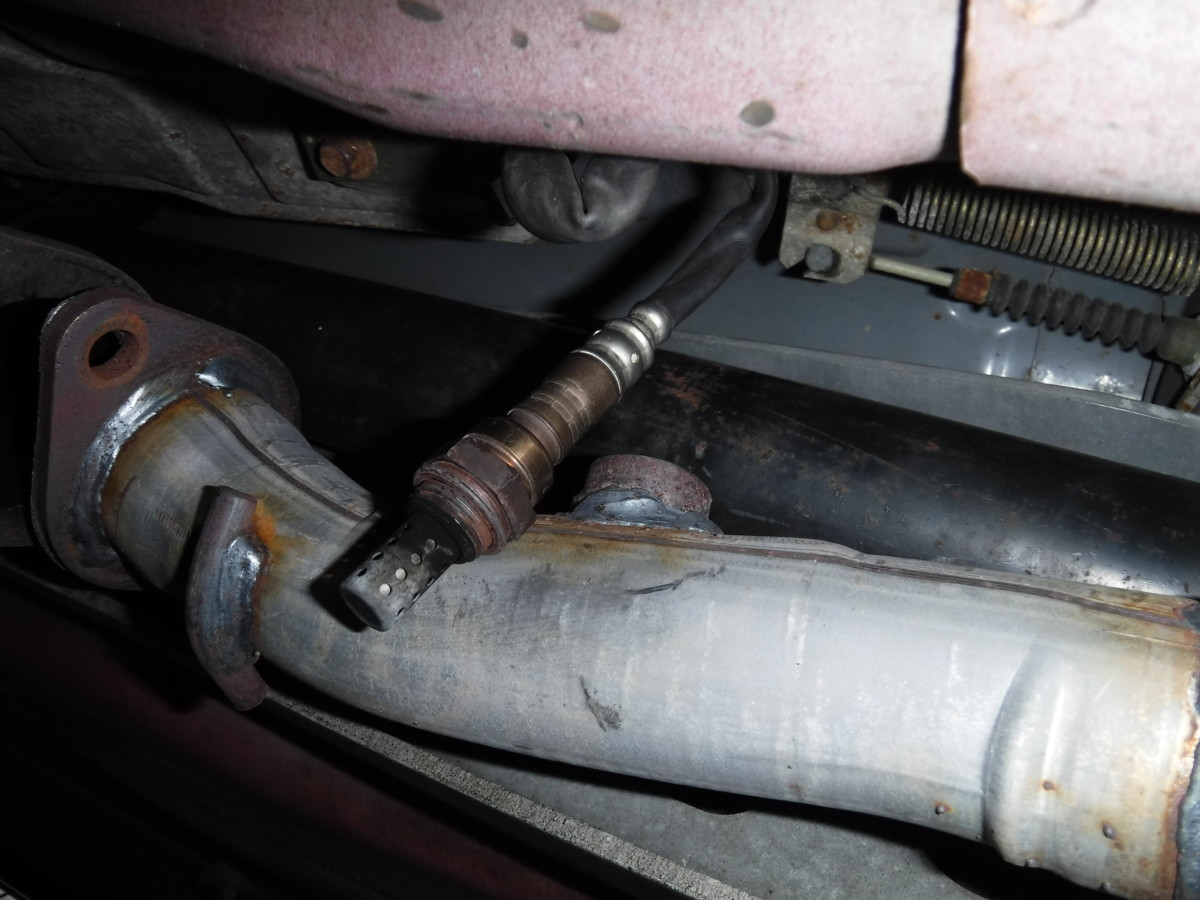
Removed
Your O2 sensor socket
Exhaust Removal
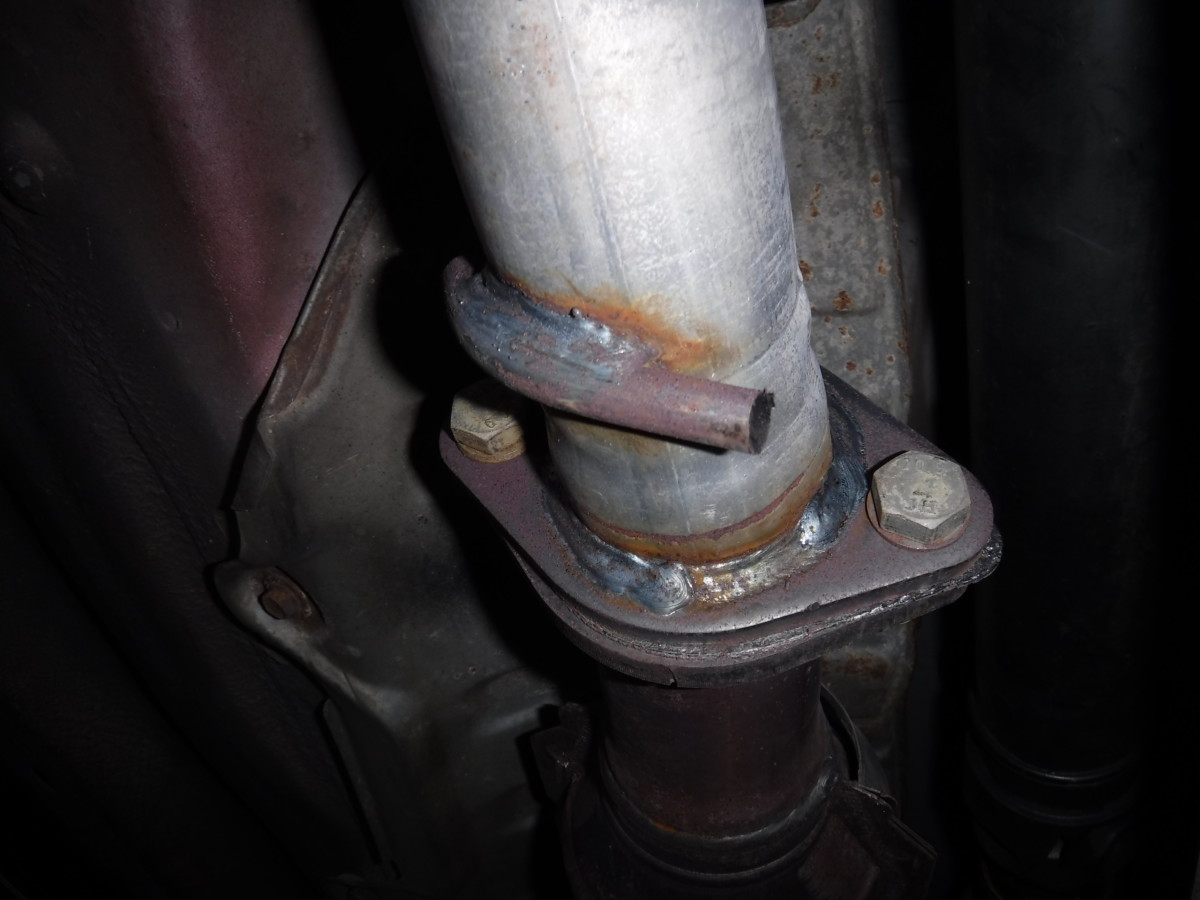
Bolts from cat to catback exhaust
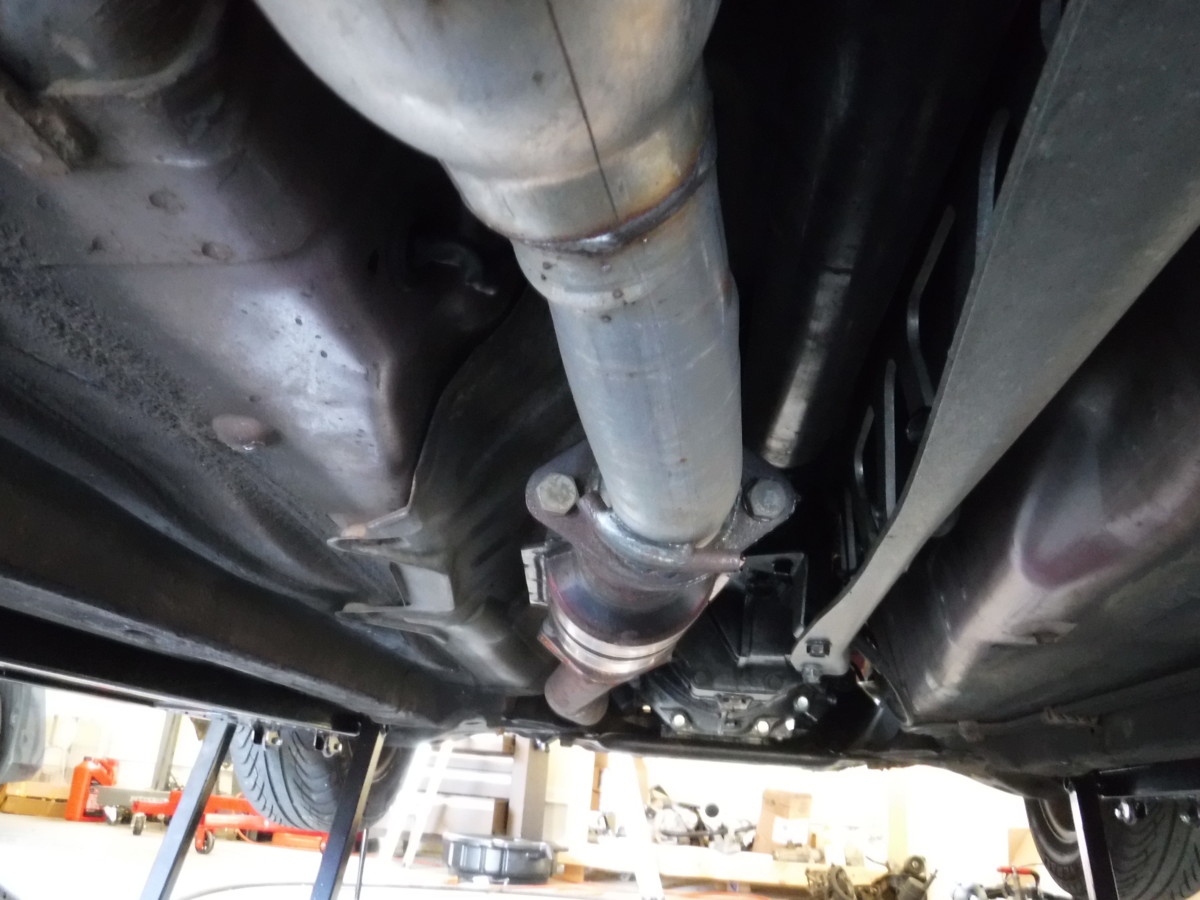
Zoomed out view
The exhaust will interfere with removing the diff, so it must be removed from the catalytic converter on back. The two bolts should be undone first, as they will hold the rear of the exhaust to the cat. They may be pretty rusty if they have never been removed. NB Miatas may be able to get away with separating the muffler only, further back in the exhaust.
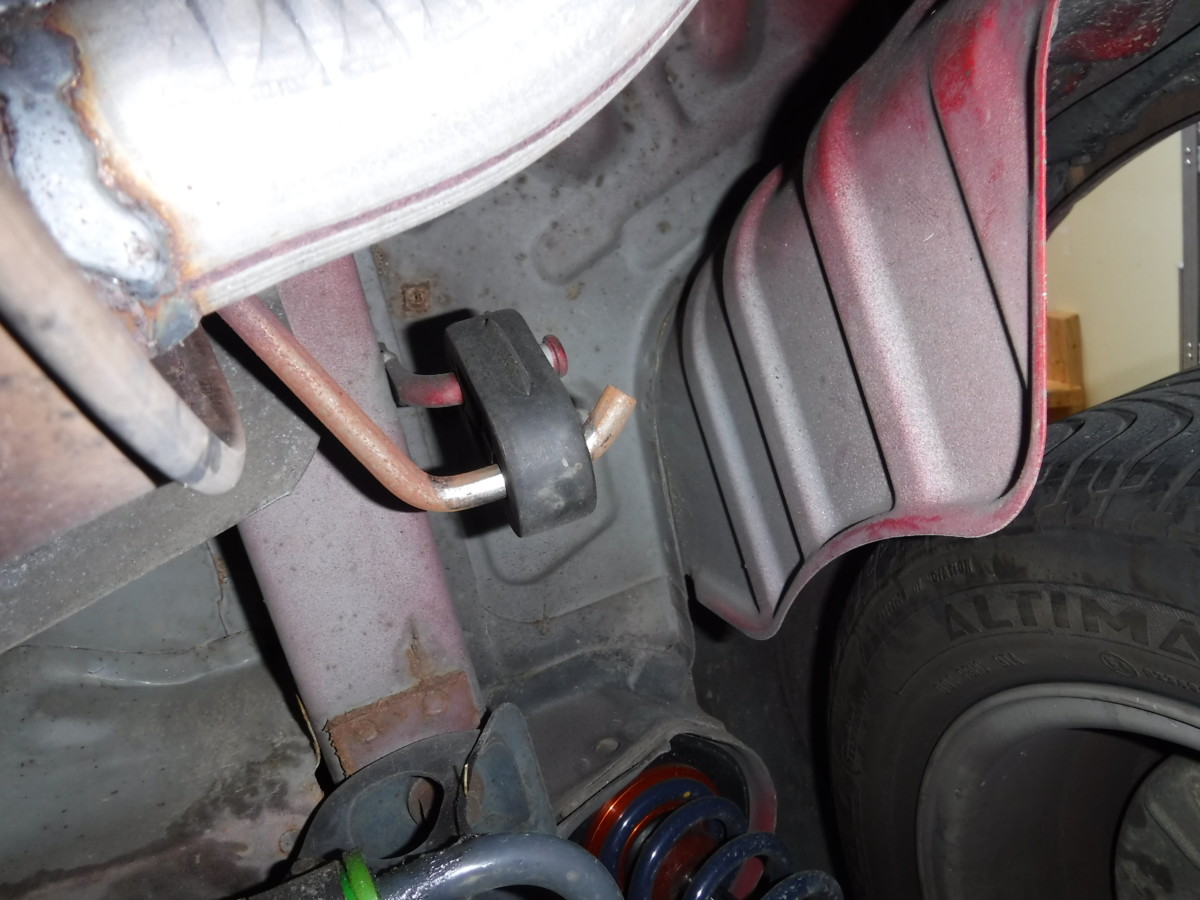
First exhaust hanger
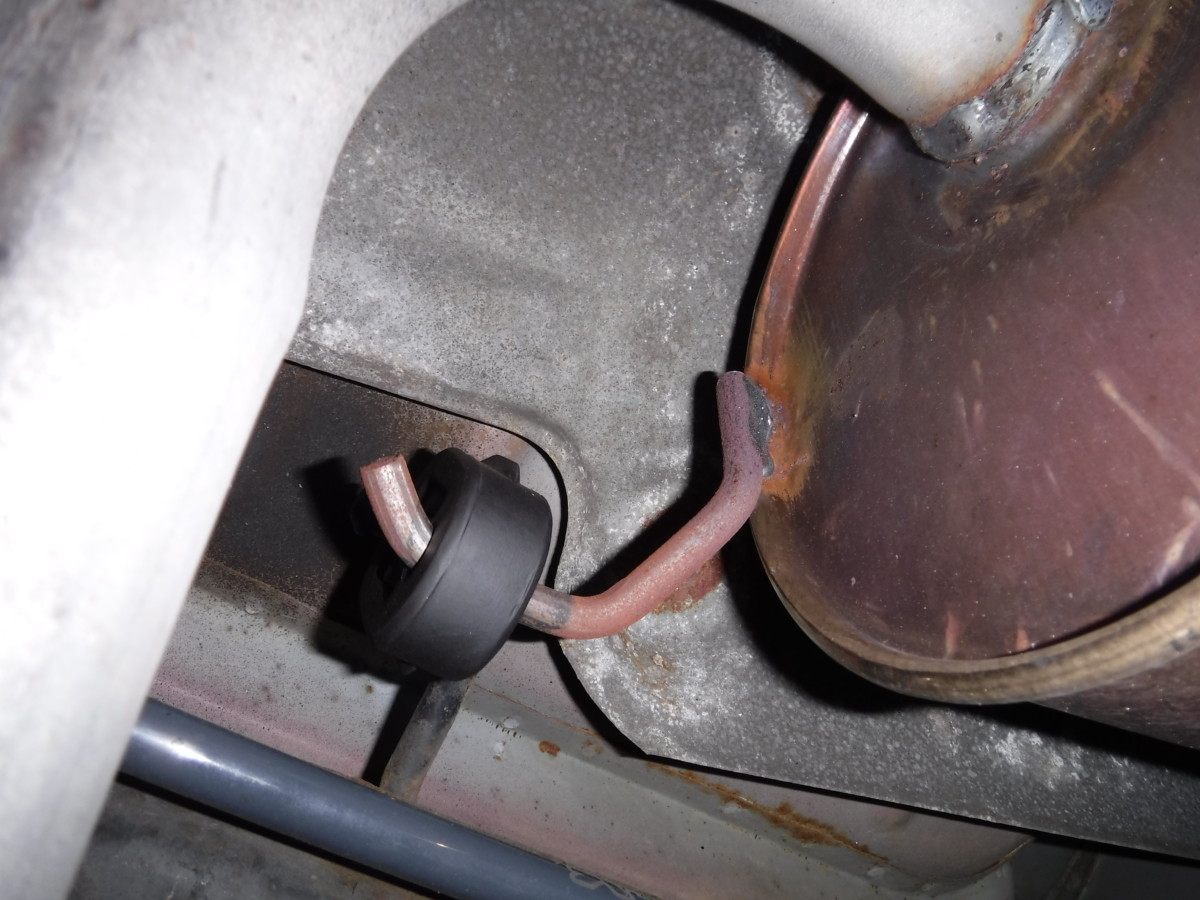
Second exhaust hanger
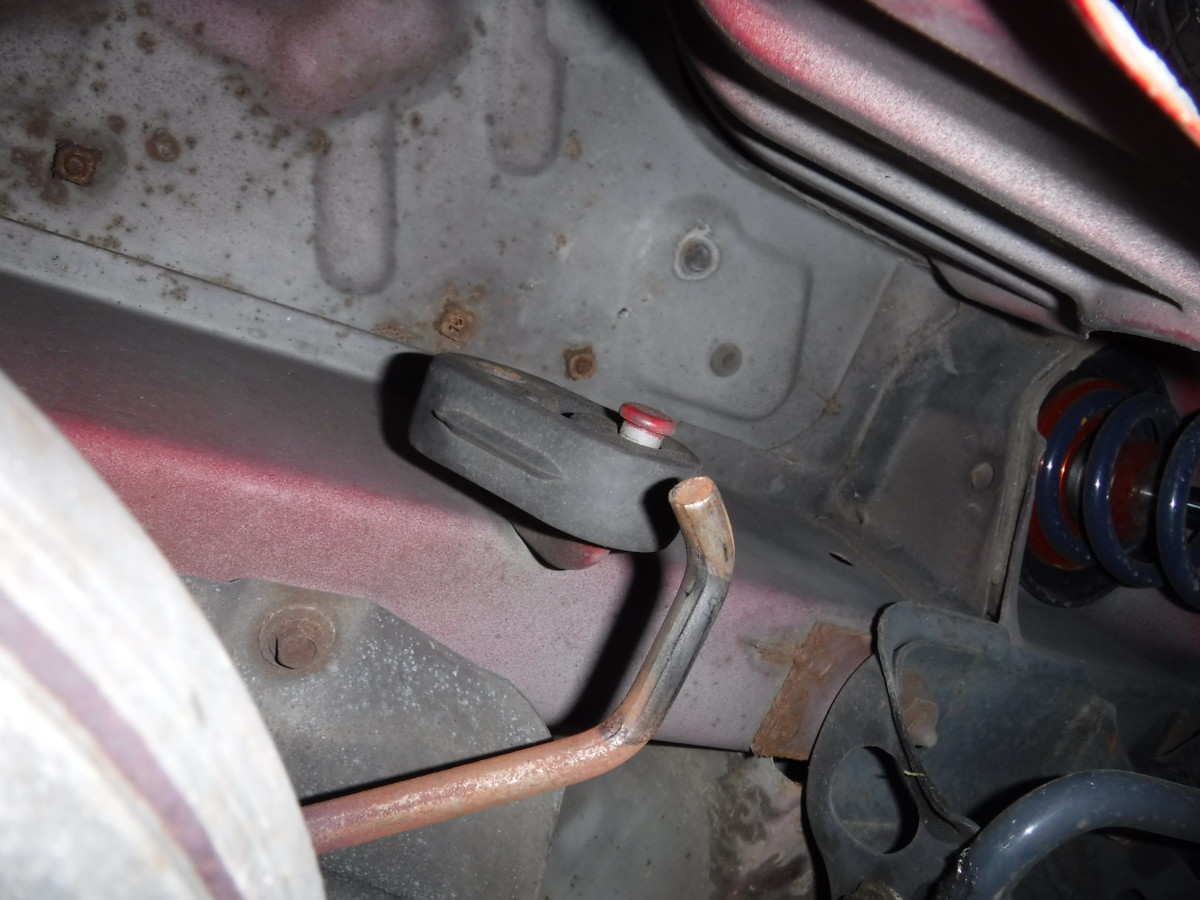
Third exhaust hanger
My 1997’s exhaust was held on with these three exhaust hangers. They can be rather difficult to remove; I’ve found some silicone grease and pliers go a long way towards sliding them off. If yours are in bad shape, you can also simply cut them off and replace with new ones. Replacements are cheap

Exhaust removed
Once that’s all done, the exhaust comes right out as pictured.
Drain the Differential Oil
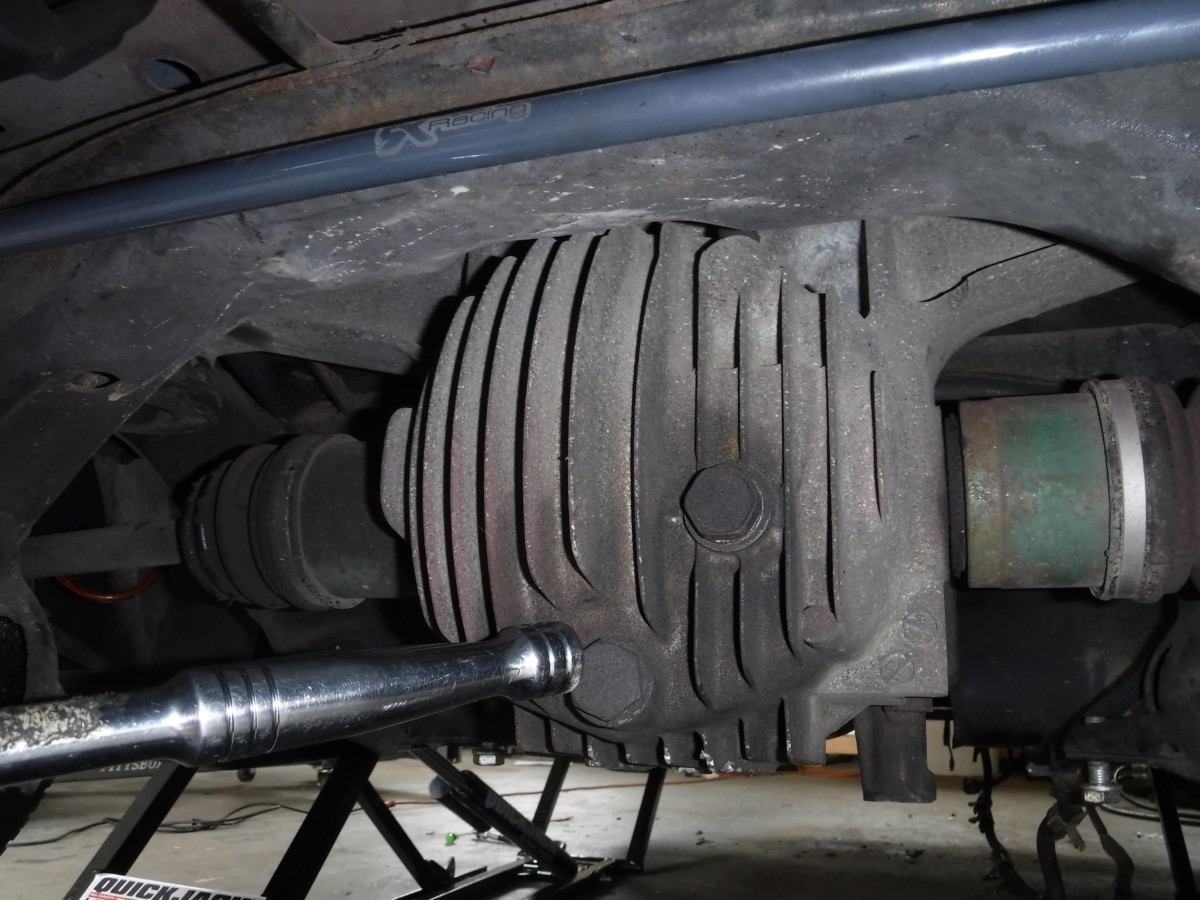
These are the drain and fill bolts for the differential

Remove the fill (top) bolt first, then the drain (bottom) bolt to drain the differential
Before proceeding, you should drain the differential. Remove the fill bolt (top) first, to make sure you can refill it afterwards. Then, remove the bottom bolt (drain). Be sure to have a pan ready underneath the differential to catch the fluid.
Driveshaft Removal
Four bolts and nuts
The driveshaft connects to the differential with four bolts. You can spin the driveshaft by hand in neutral to access each of these and put it in gear with the parking brake to help hold it while you break them loose.

Driveshaft undone
Once all four bolts are out, the driveshaft will drop down from the diff. You can pull it out of the transmission if you want it entirely out of the way, just be aware that it may leak transmission fluid. Drain the transmission if you want to avoid this, especially if you’re planning to change the transmission fluid anyway.
PPF Removal
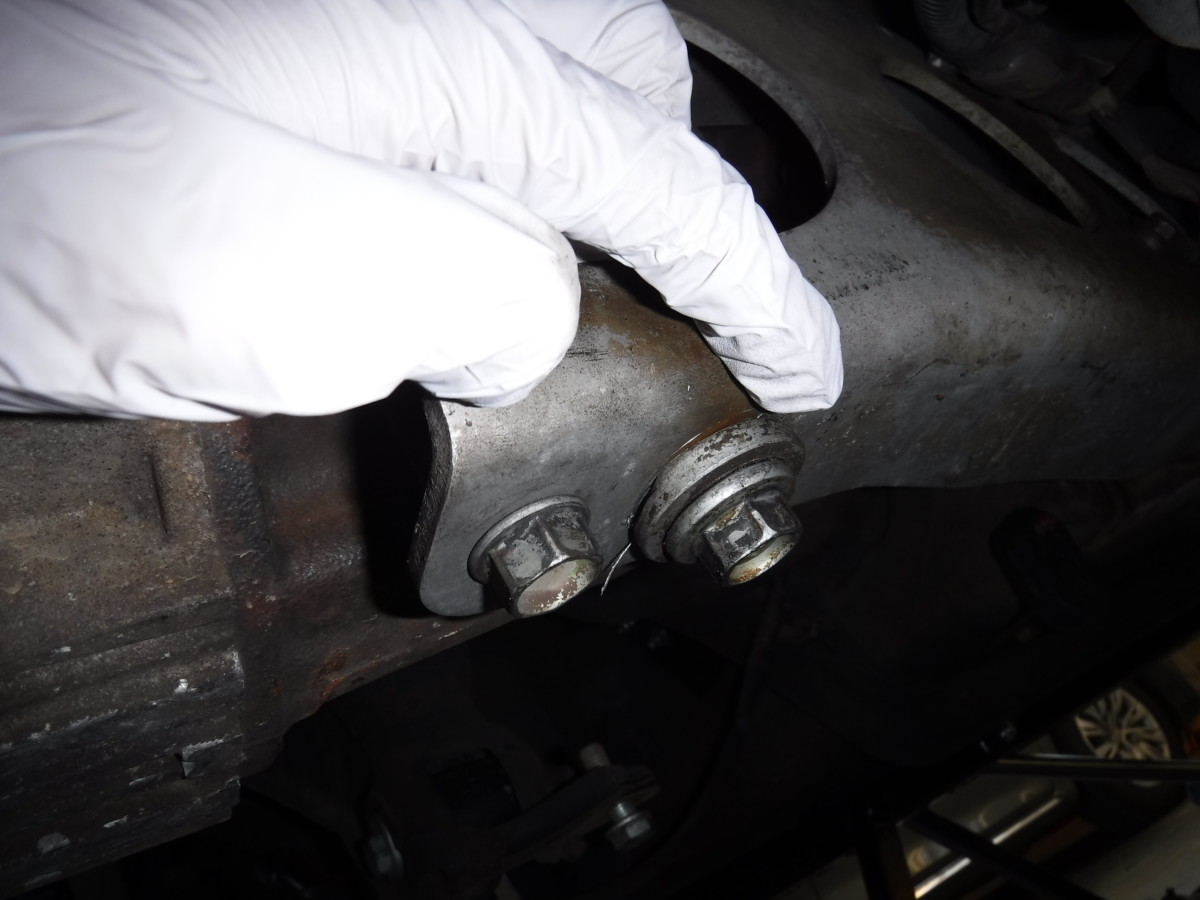
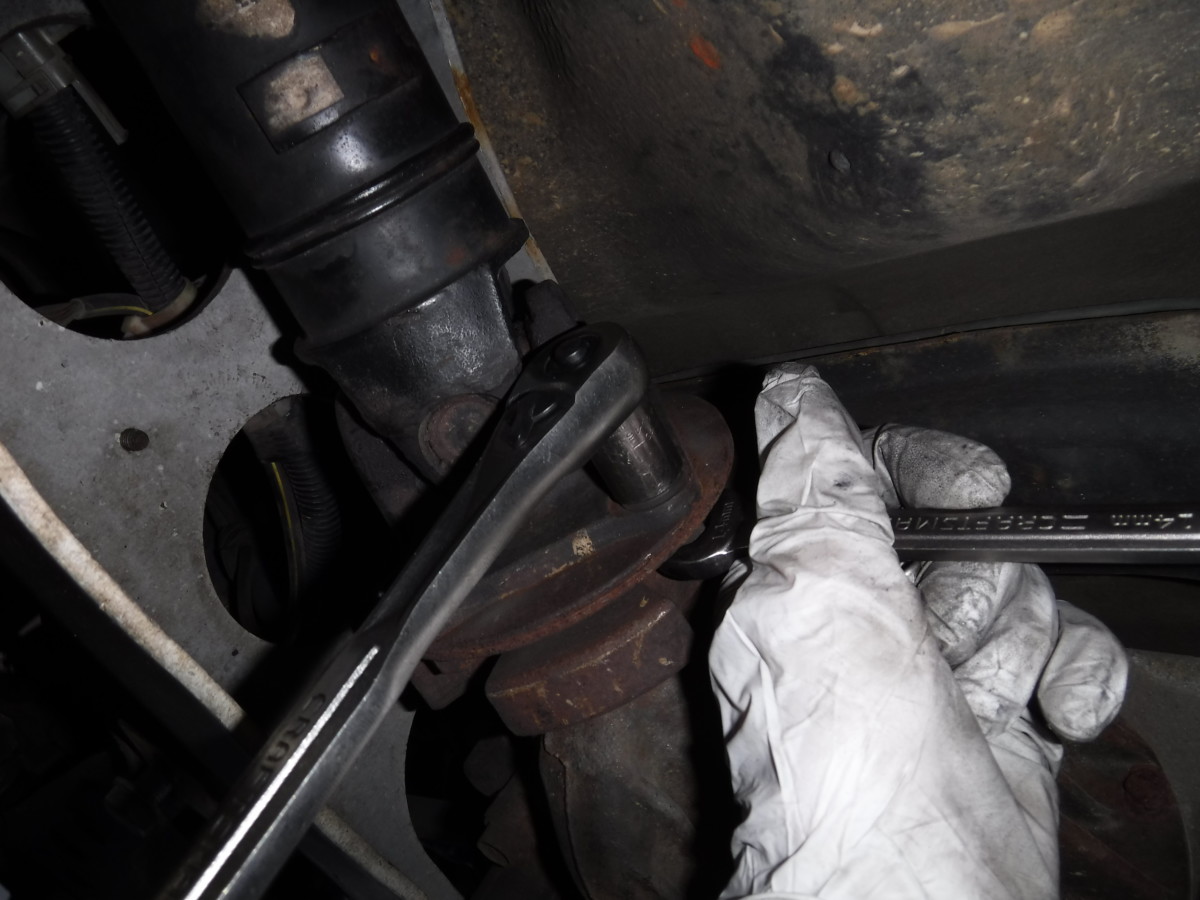
These two bolts come out
This part can be pretty tough. Remove these rear two bolts connecting the Power Plant Frame (PPF) to the differential. The one to the right, in particular, is prone to getting stuck. If you can’t remove these two bolts, you can instead disconnect the front half of the PPF from the transmission, and deal with these two bolts with the differential out of the car.
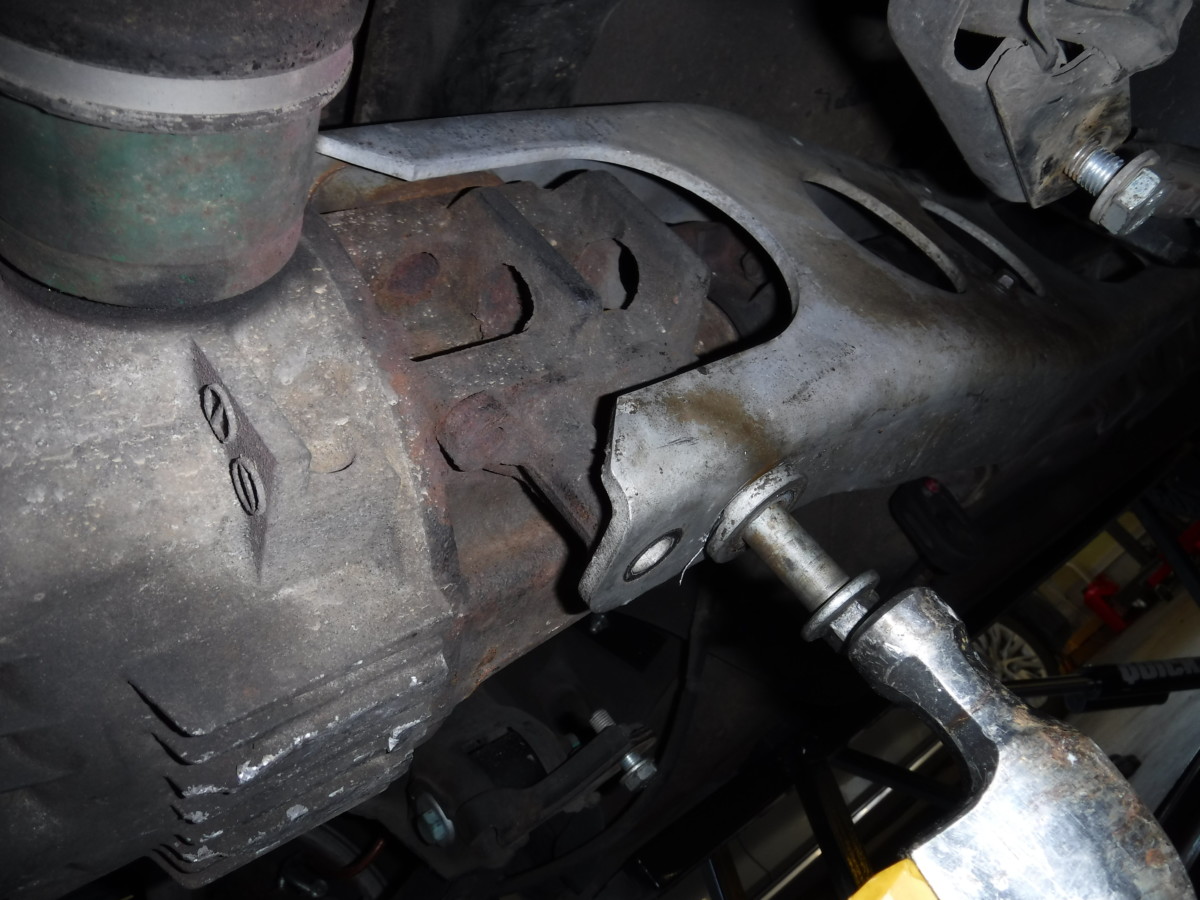
Remove the spline nut at the top of each bolt
The top of each bolt has a spline nut or nut-sert or whatever you want to call it that needs to be removed. Thread the bolt in a few turns and tap it out with a hammer.
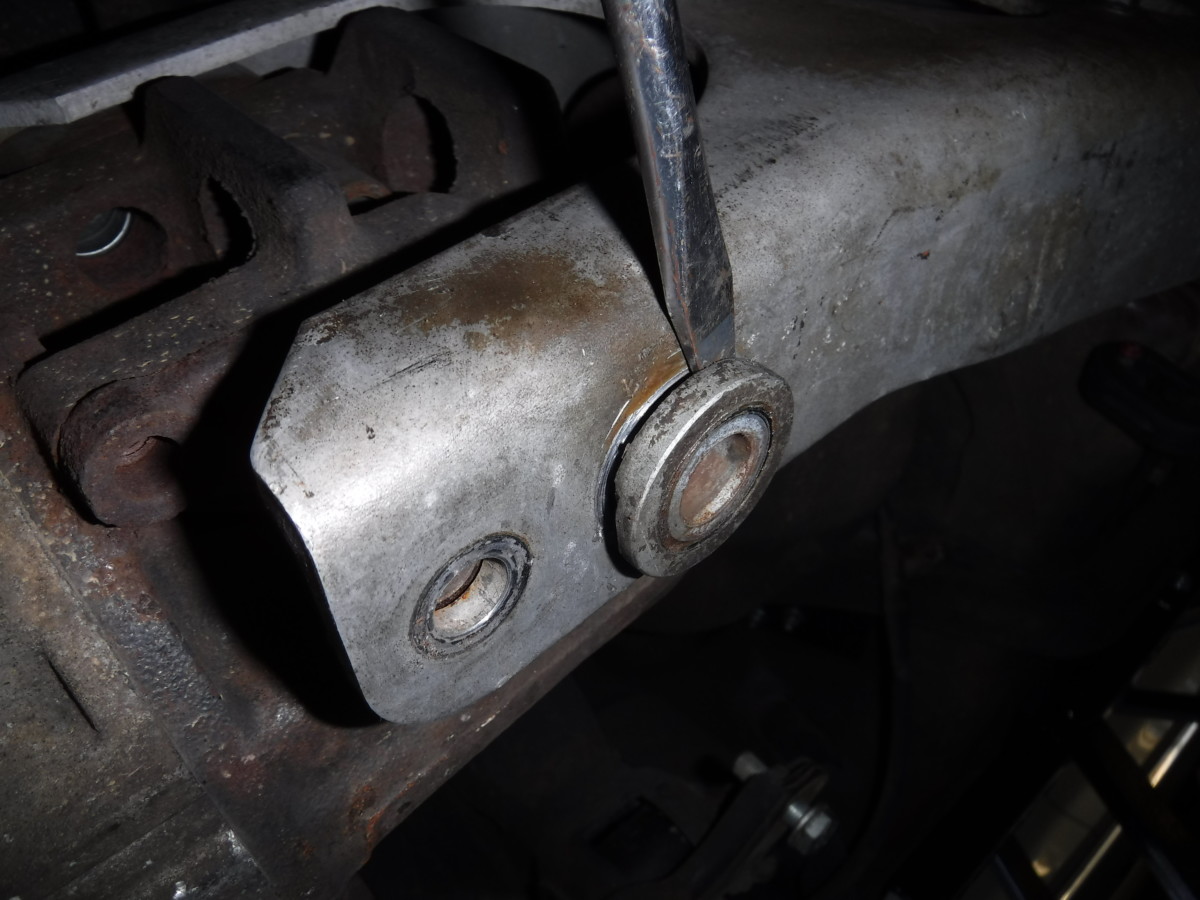
Pry out this insert as well
This insert should be pried out as well. Once its removed, the ppf can be pulled off of the differential.

*Front* PPF bolts, to transmission
*Rear* PPF bolts, to differential
All parts of the PPF
Here is a view of how the PPF bolts fit together inside the car, for illustrative purposes. You do not have to remove the entire PPF to do a Miata Torsen differential swap.
Loosen the Control Arms

Remove the UCA Bolt
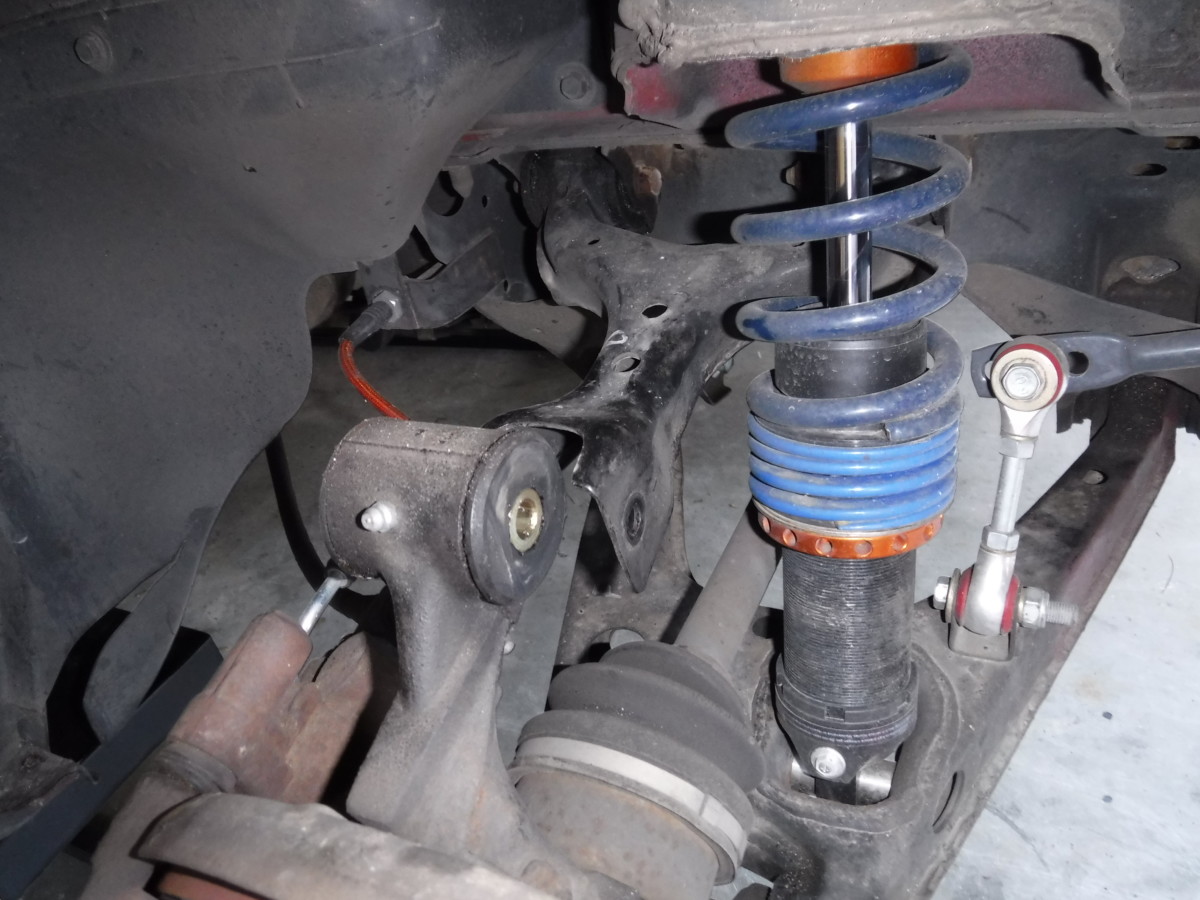
Detached
Undo the bolt holding the upper control arm to the wheel spindle on each side. You can use a pry bar to pull them apart.
The LCA bolt should be loosened but not removed
Then, loosen the long bolt through the outer part of the lower control arm. Don’t remove it all the way. The wheel hub will droop further when this is done.
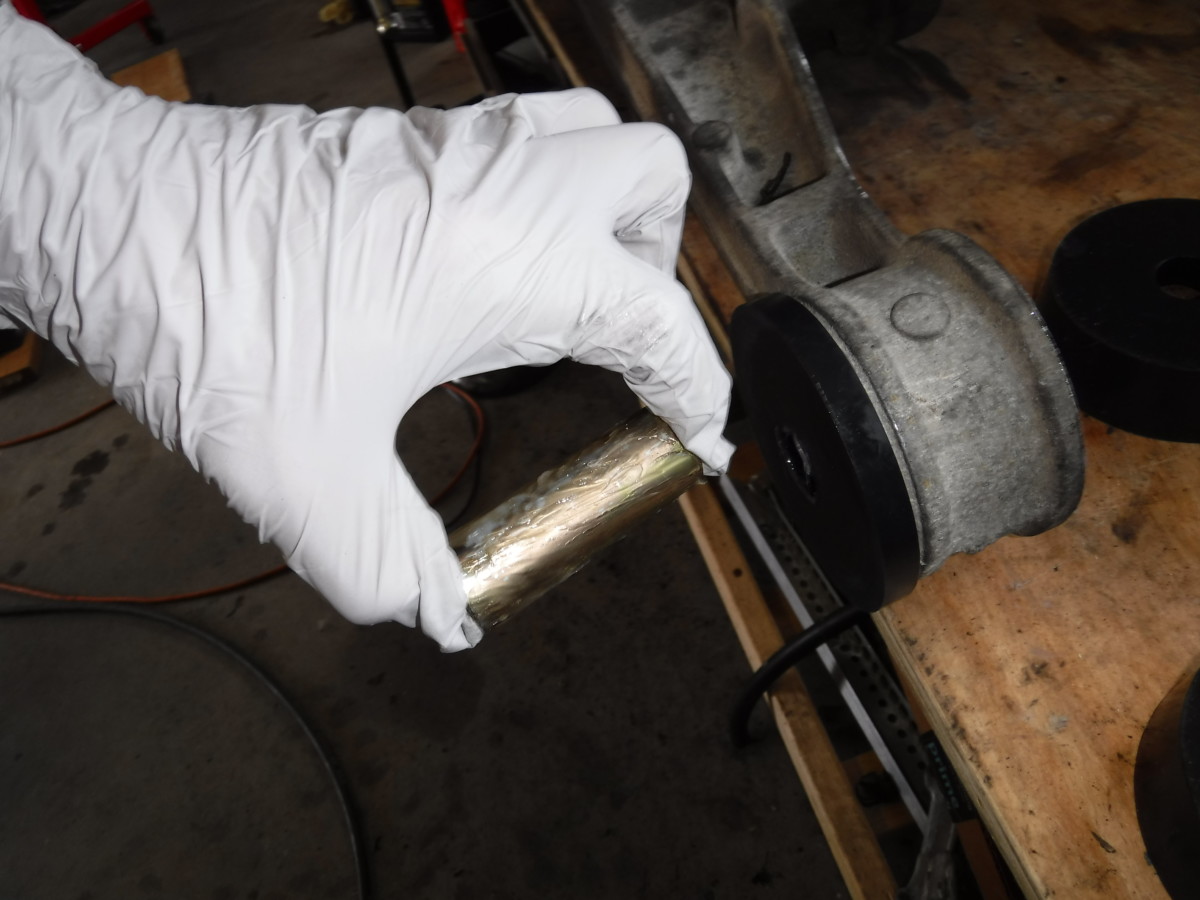
Detach the Axles
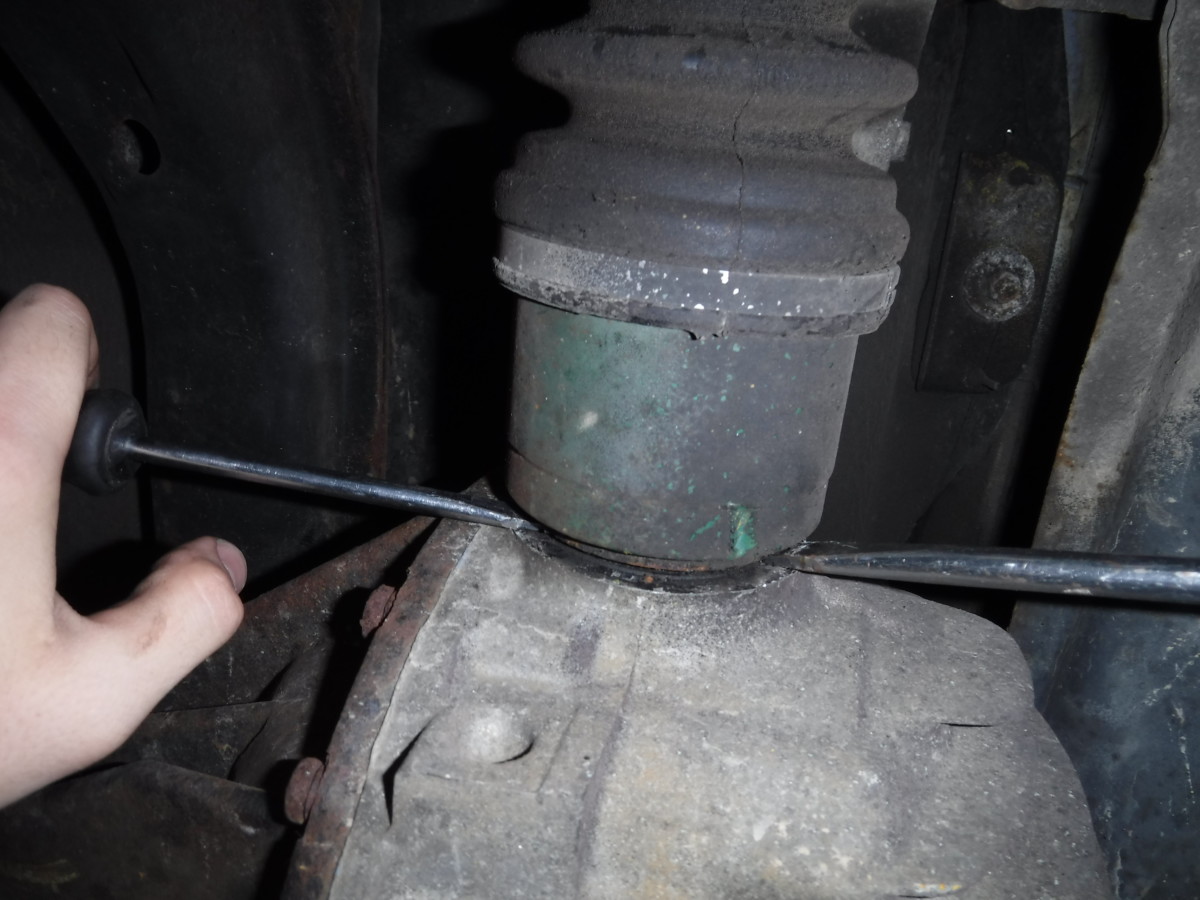
Use big flathead screwdrivers to pry these apart
Since these are one piece axles, you have to use a couple of screw drivers to pop them out. With sufficient force, the axles will suddenly pop out of the diff. If you have two piece axles, you can simply unbolt them. The flathead from Milwaukee’s demolition screwdriver set

The axles are now popped out and loose
When the axles are popped out, they’ll look like this. They sit in the diff loosely.
Undoing the Differential Mounts

Remove both 14mm nuts on both sides
The differential is about ready to come out. Remove both of these 14mm retaining nuts on each side.
Support the diff with a floor jack
Ensure the differential has a floor jack under it.

Remove the larger 17mm nut
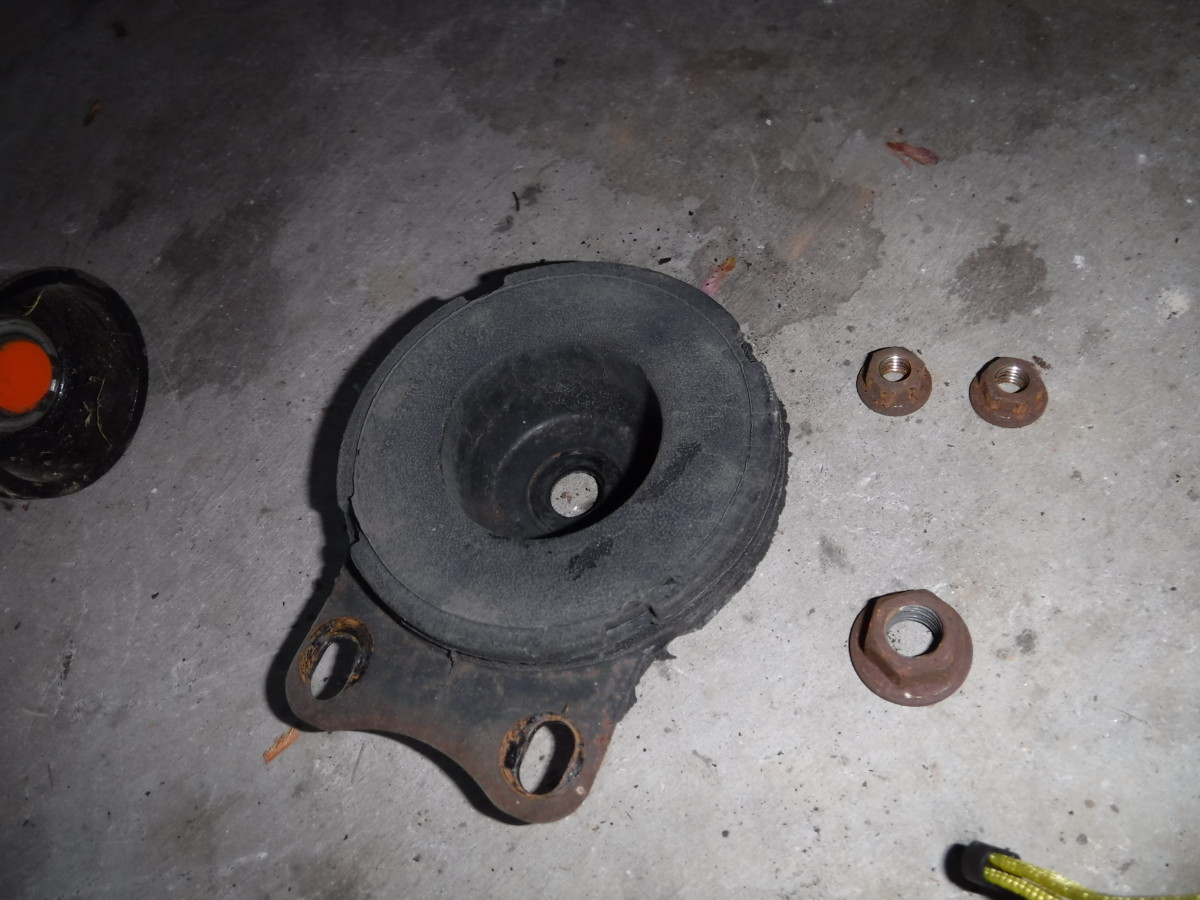
Retaining plate and three nuts from one side
Finally, remove the larger 17mm nut from each side. An impact wrench is helpful.
Removing the Differential

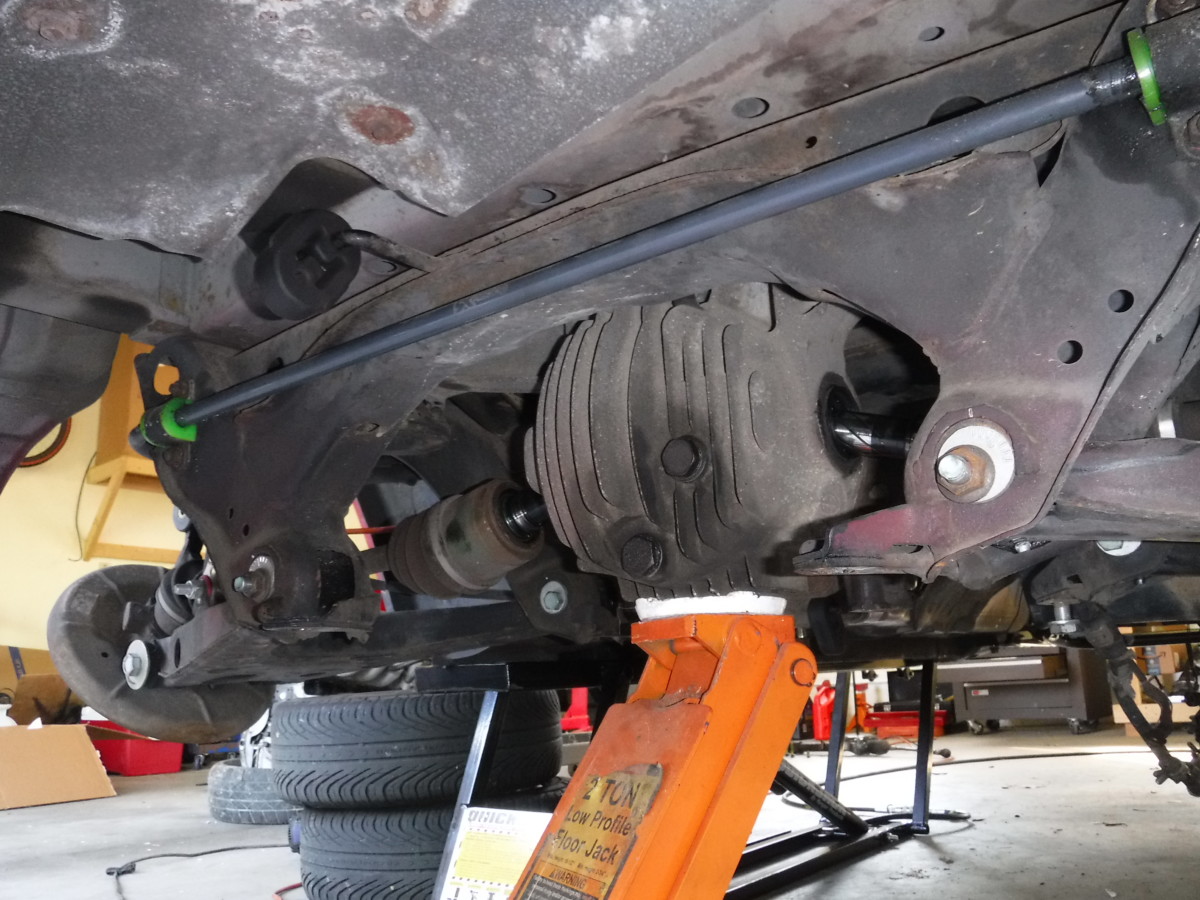
Shift it to one side to remove the other axle, then switch
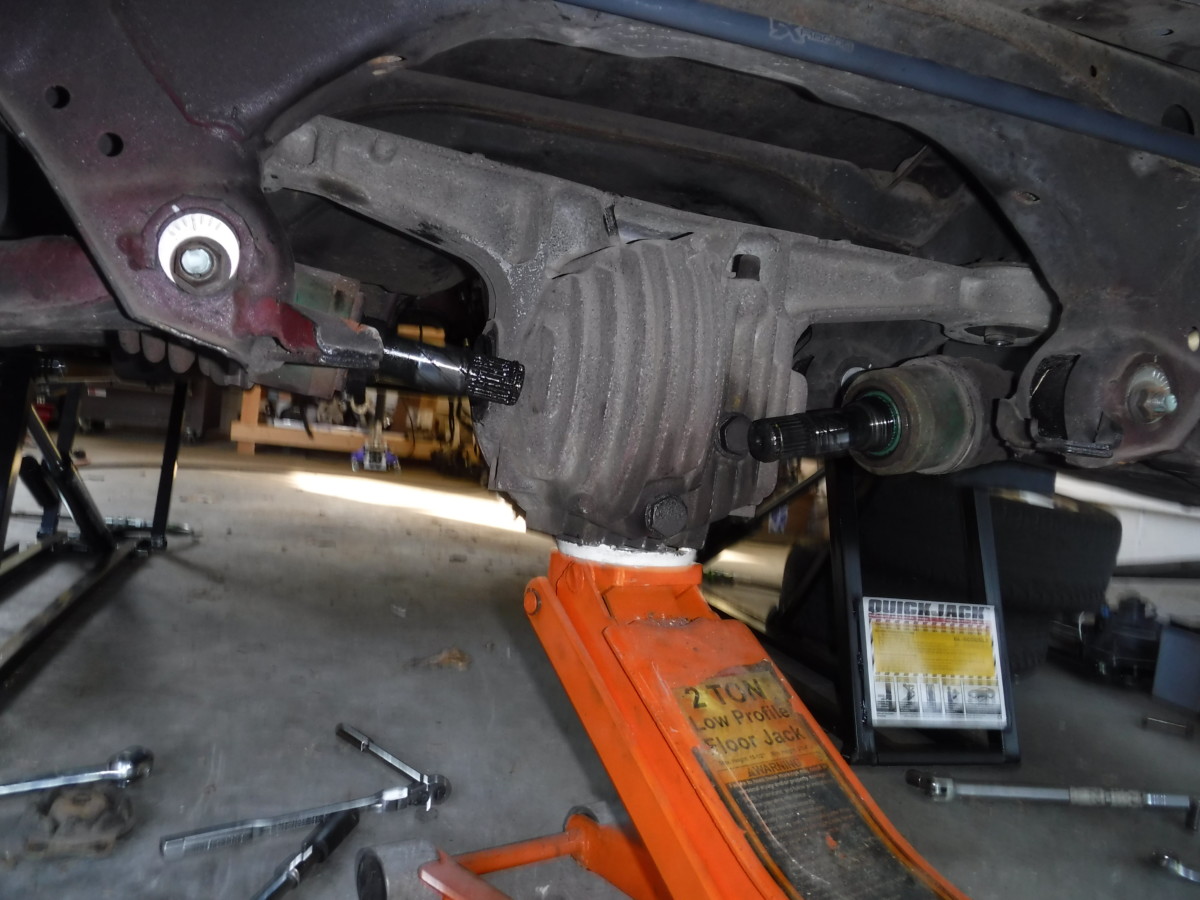
Both axles out of the way, ready to come out
The one piece axles interfere with removal of the diff. I had to shift the diff one way fairly far, as shown, to have enough clearance to pull the other axle out. Then I was able to move it back the other way and repeat.
Done
After a bit of finagling, the differential housing is out.
Removing Differential from Housing (If Necessary)
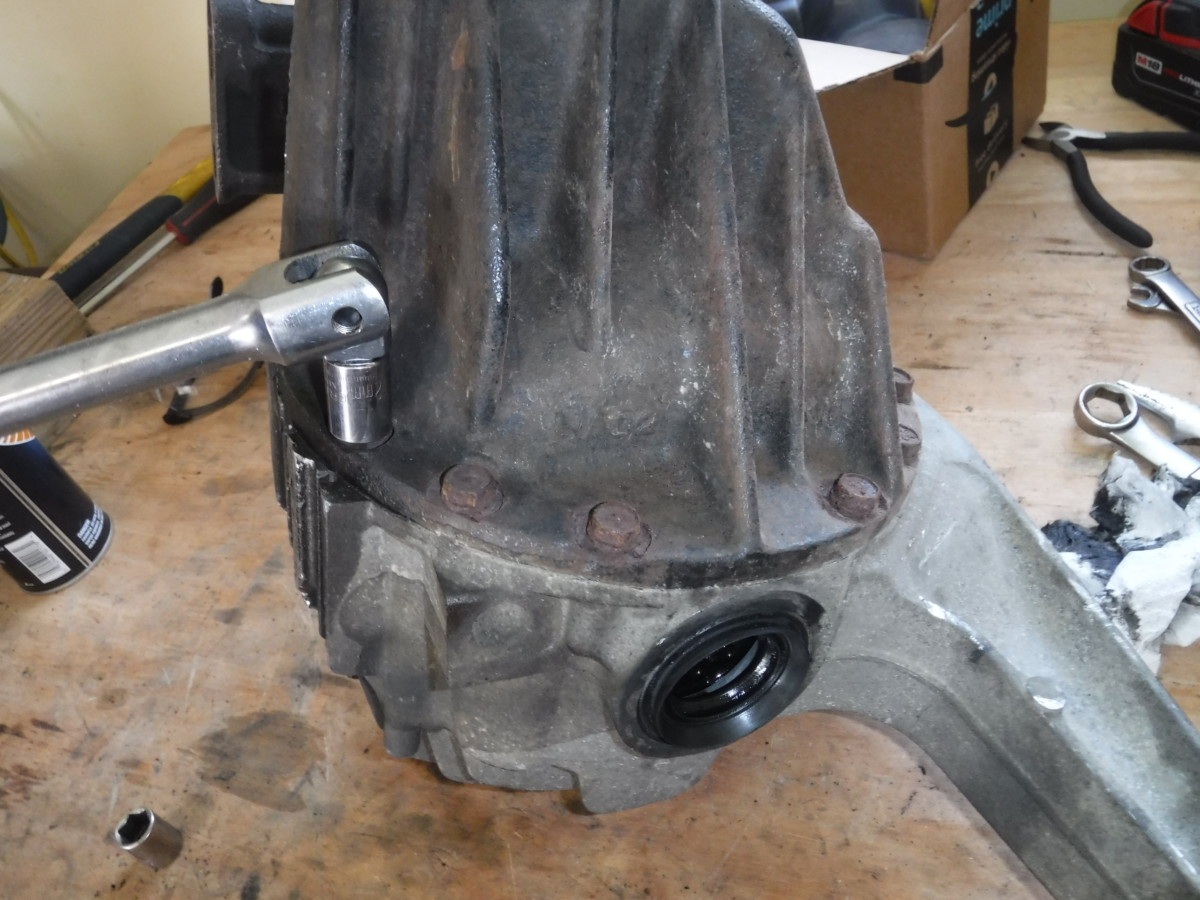
Undo all bolts holding the differential
As stated, I bought a differential without a housing because it was cheaper. This means I had to swap the new diff into my old housing, however. To remove the differential from the housing, undo all of the bolts on the cover as pictured.
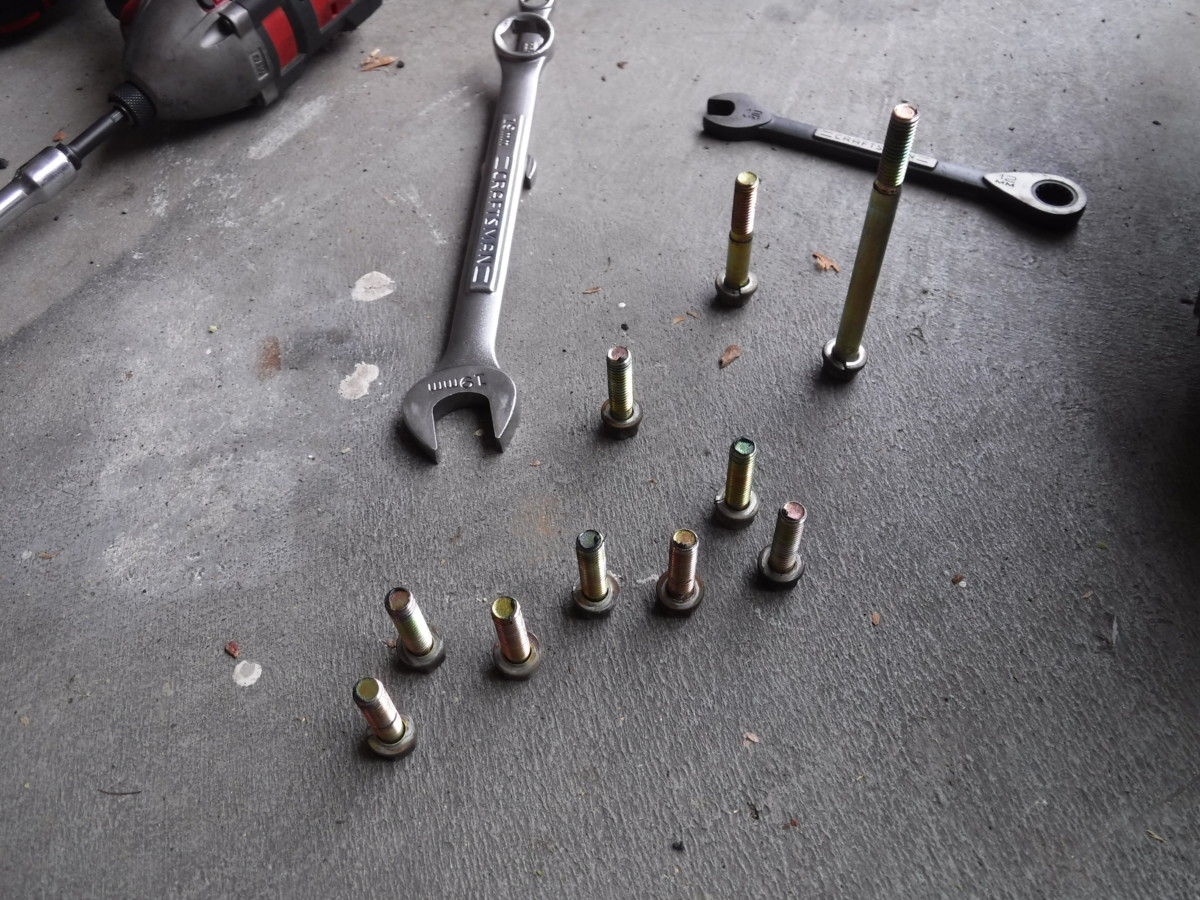
All the bolts after removal
Here are the myriad bolts you’ll have afterwards. It is fairly obvious where the longer bolts go from looking at the housing.
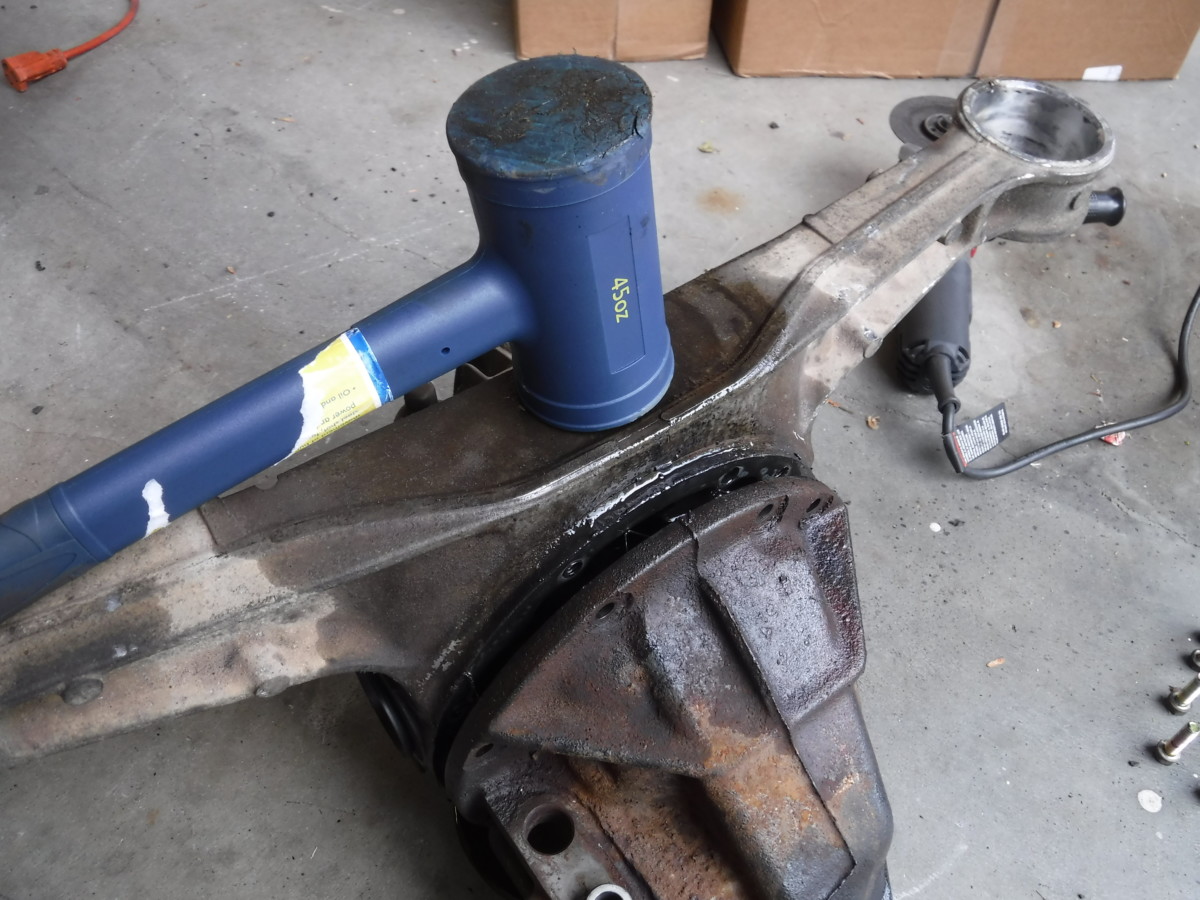
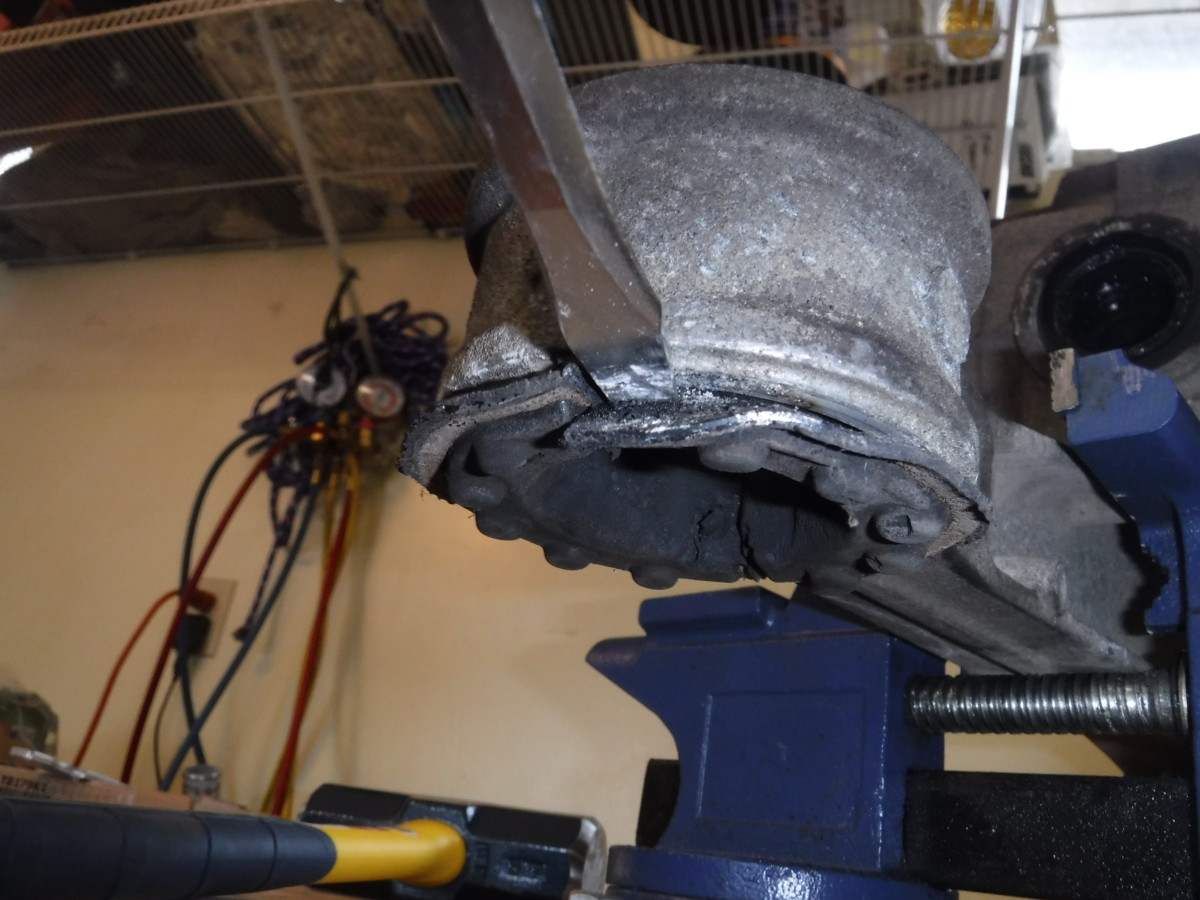
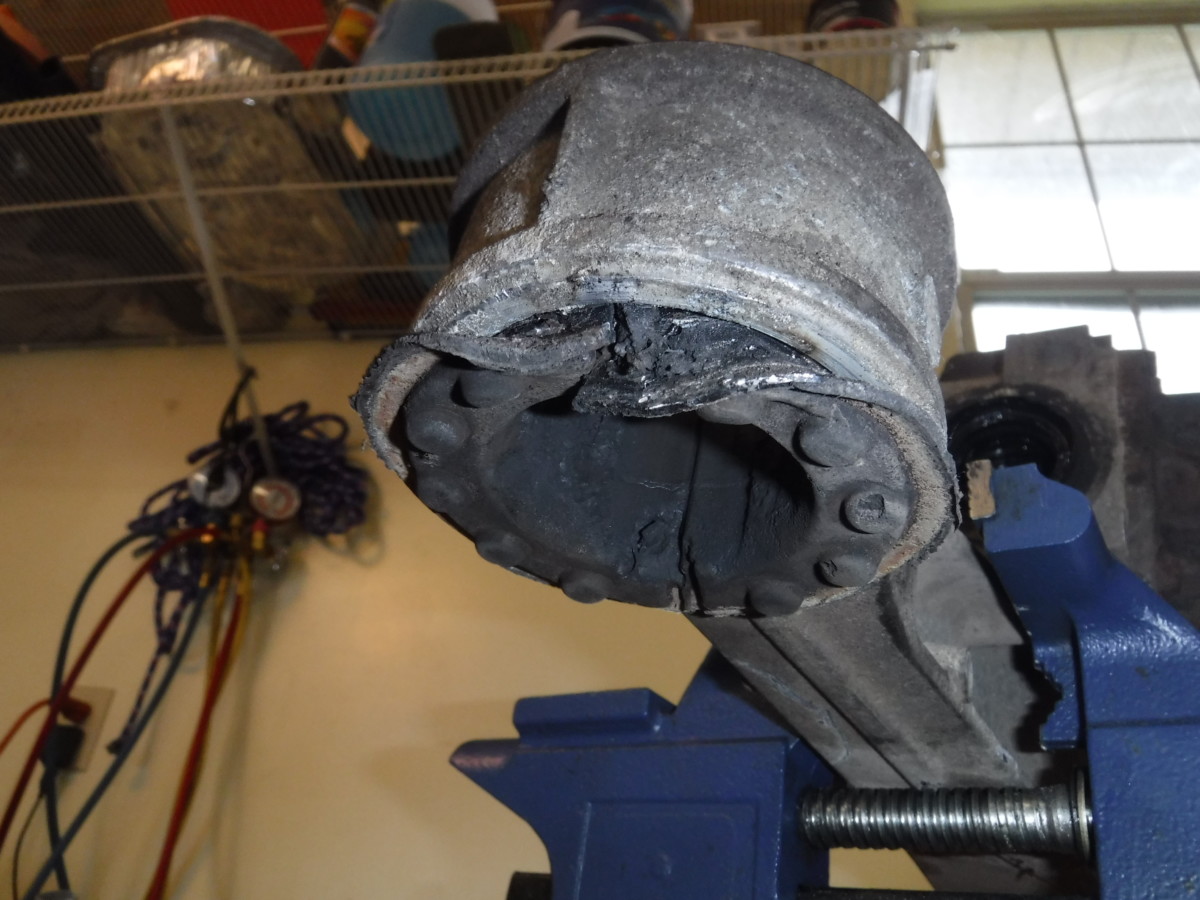
Give it a good smack to separate
With all the bolts out, a firm smack on the top of the housing with a dead blow hammer should be enough to separate the differential.
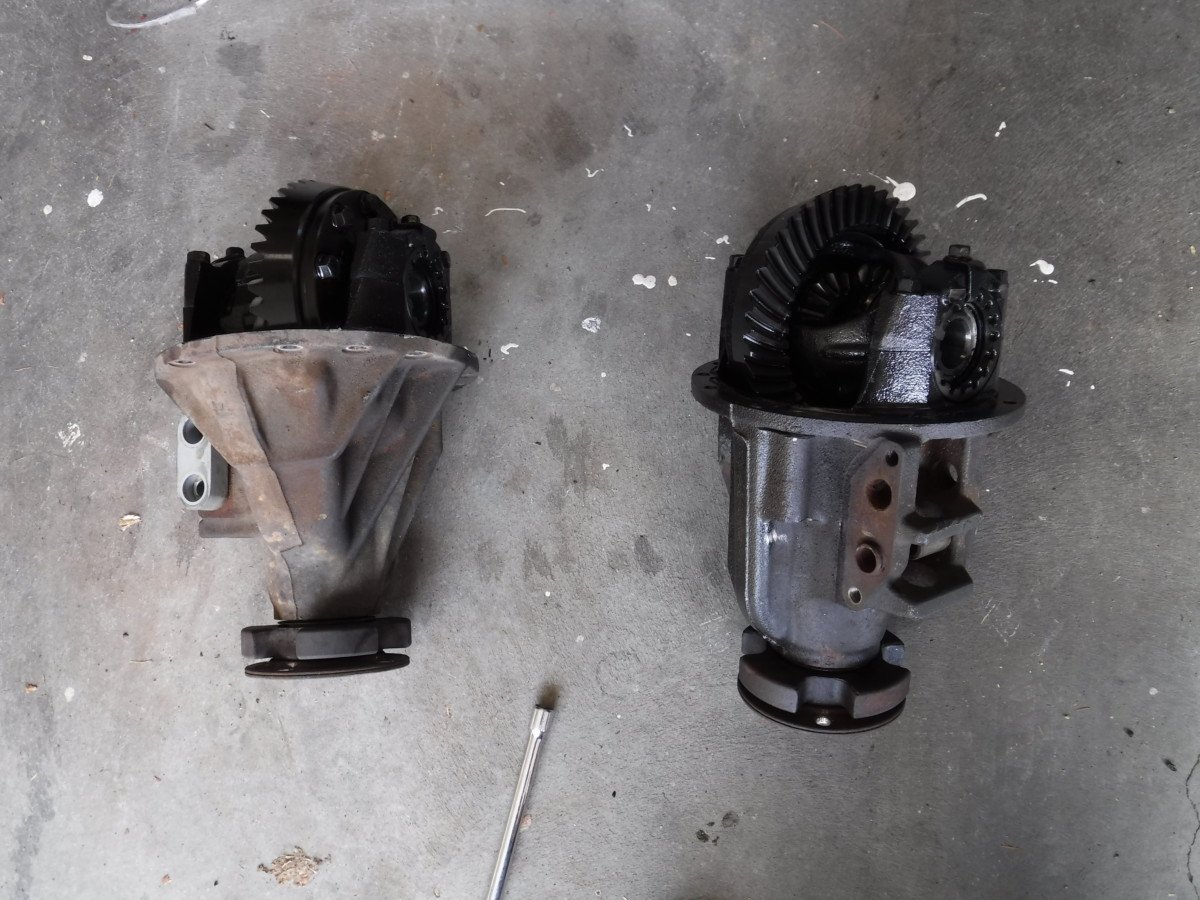
Old vs new
Here are the two differentials side by side.
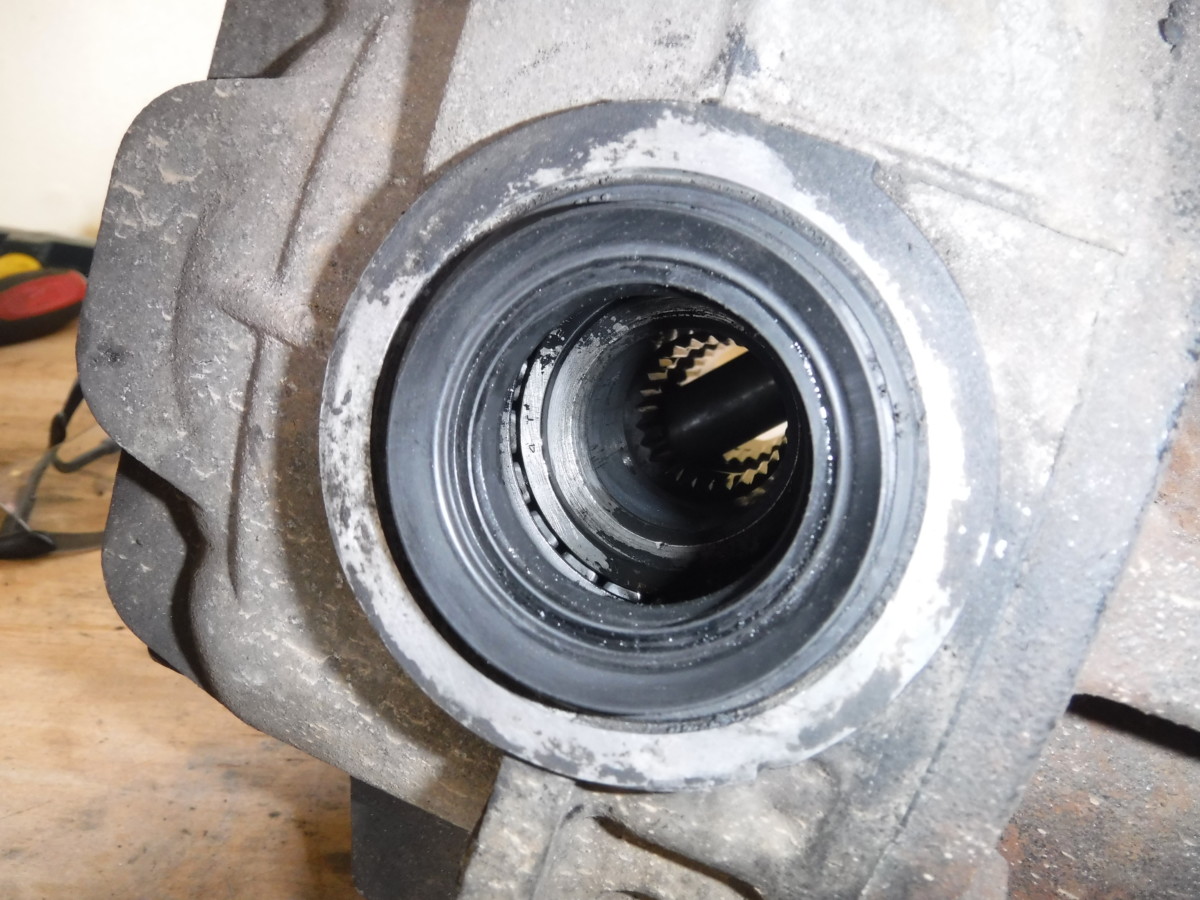
Open diff has this visible bar in it
You can see straight through the Torsen
Here’s a shot showing how to easily distinguish an open differential from a torsen. The open differential has this bar visible, while you can see straight through the Torsen.
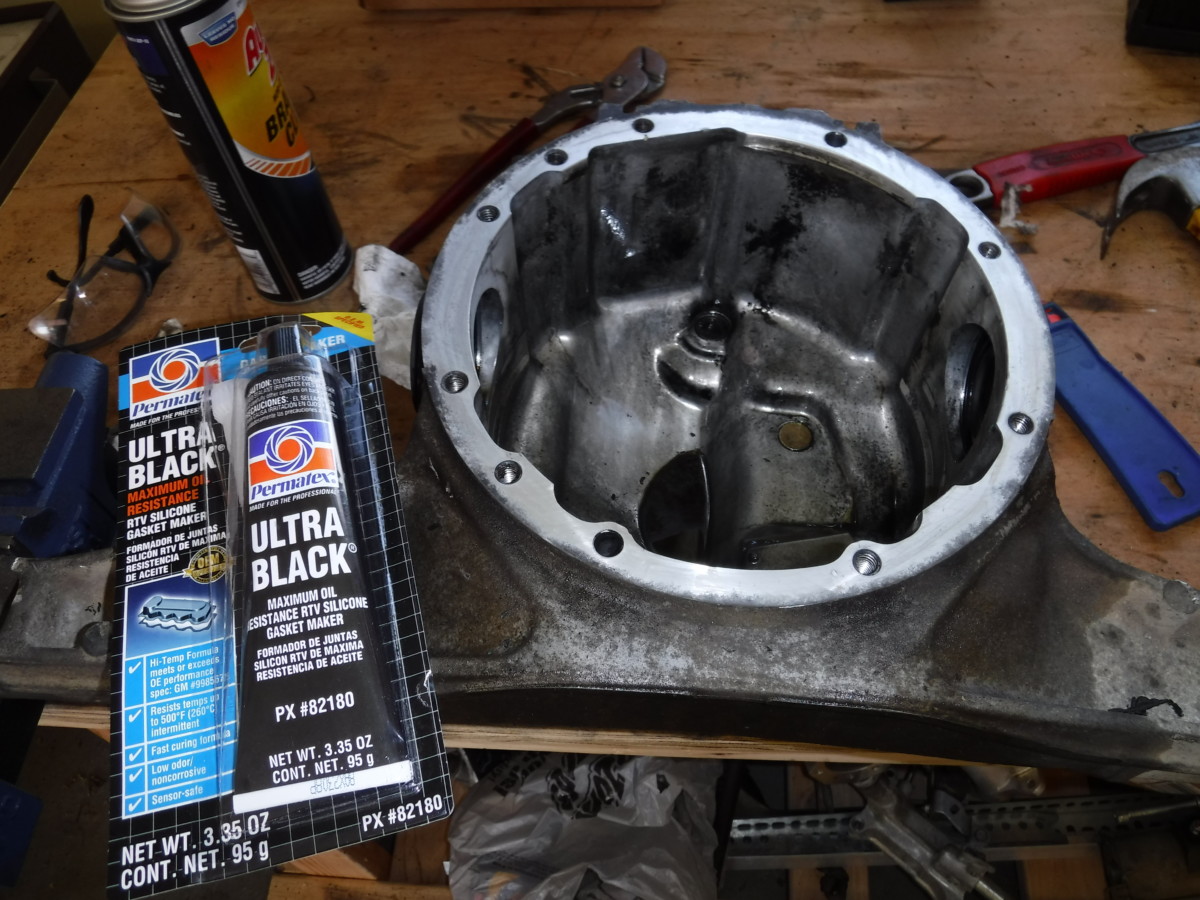
Ultra Black RTV is my favorite
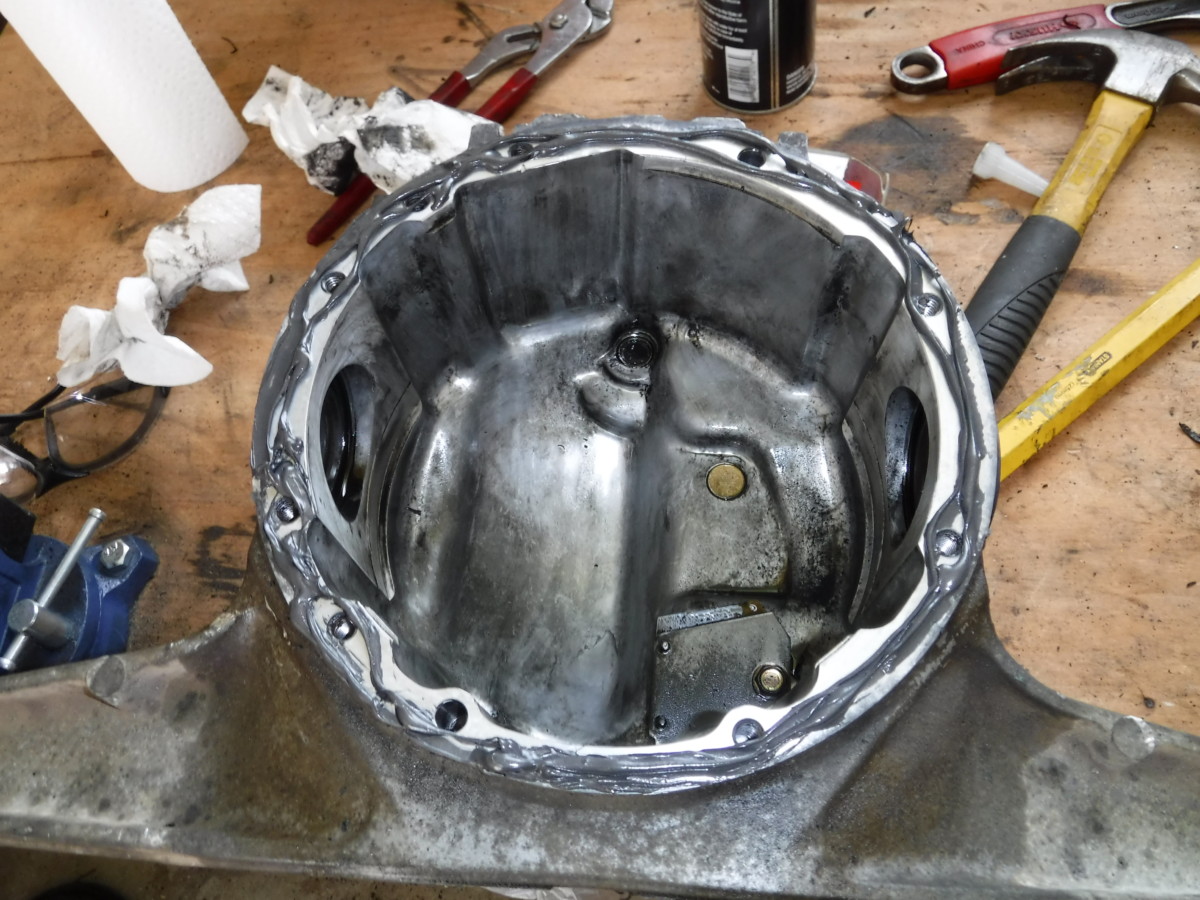
Not my best RTV job, but got full coverage around the bolt holes
You can clean the housing with some brake cleaner

Torque the bolts to 19 lb-ft
Finally, torque the differential bolts back down incrementally in a star pattern. They torque to 19 lb-ft. So torque them all to 5, 10, and then 19 or similar.
Removing the Old Differential Bushings (Optional)

Drilled out the old bushings

Center removed
If you’re installing new differential bushings like me, you have to remove the old ones. I started by drilling a bunch of holes until the center fell out.
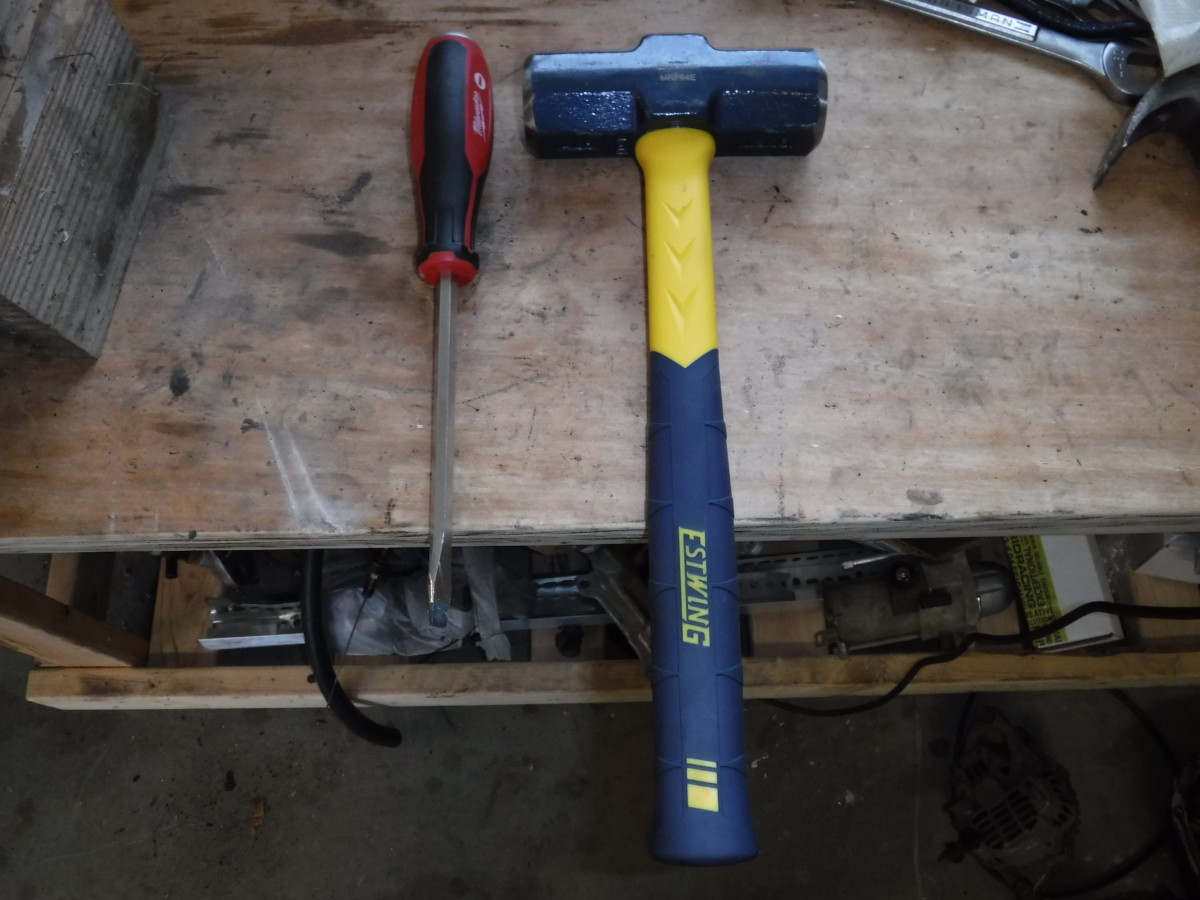
Mini sledge and a demolition screwdriver
Caving in the bottom edge
Once that was done, I used my Milwaukee demolition screwdriver

Bent in and ready for removal
I did that until it looked like this. Then, I began hammering the screwdriver into the bushing from the top, to force it out.

Old bushings are out
Mounting bore is clean
This procedure mangled the old bushings but left the bores in good shape.

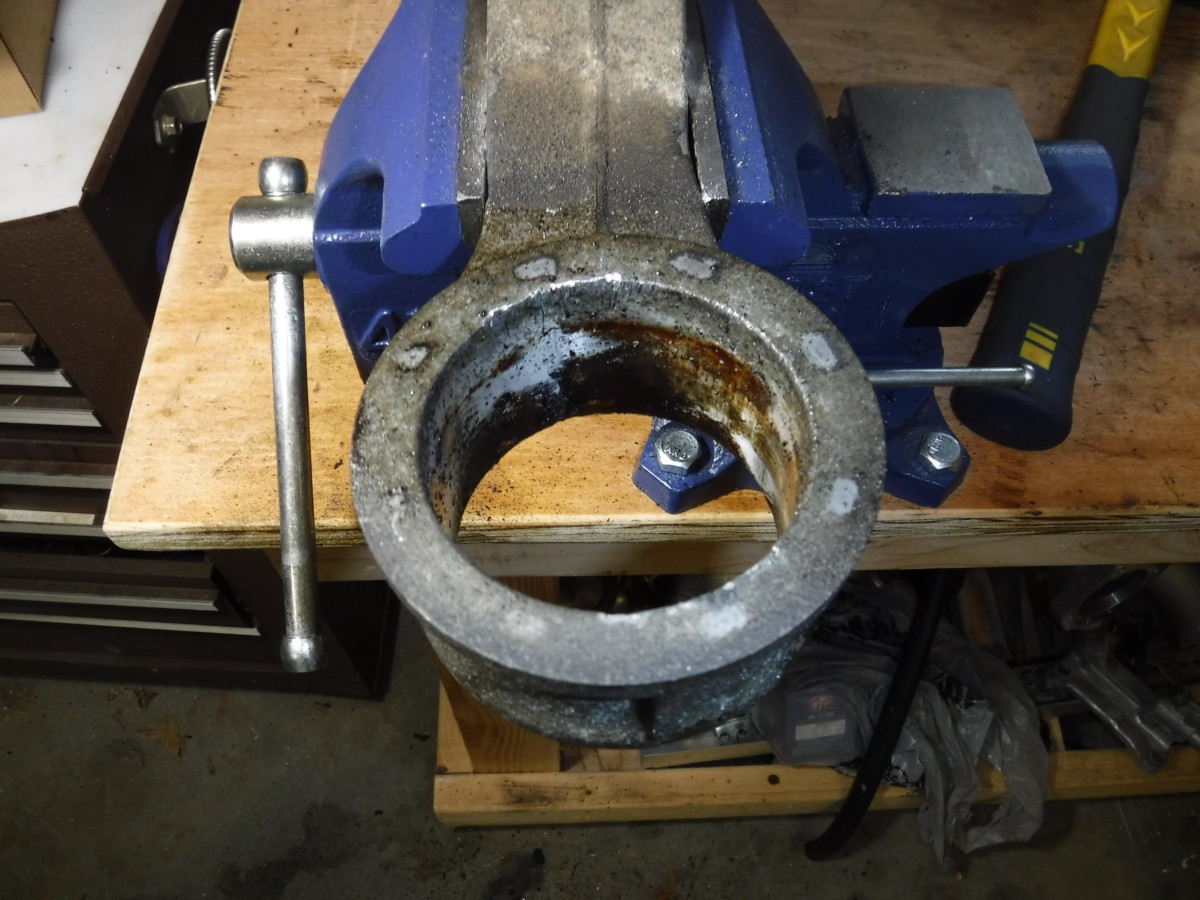
Using a wire brush to clean the bores
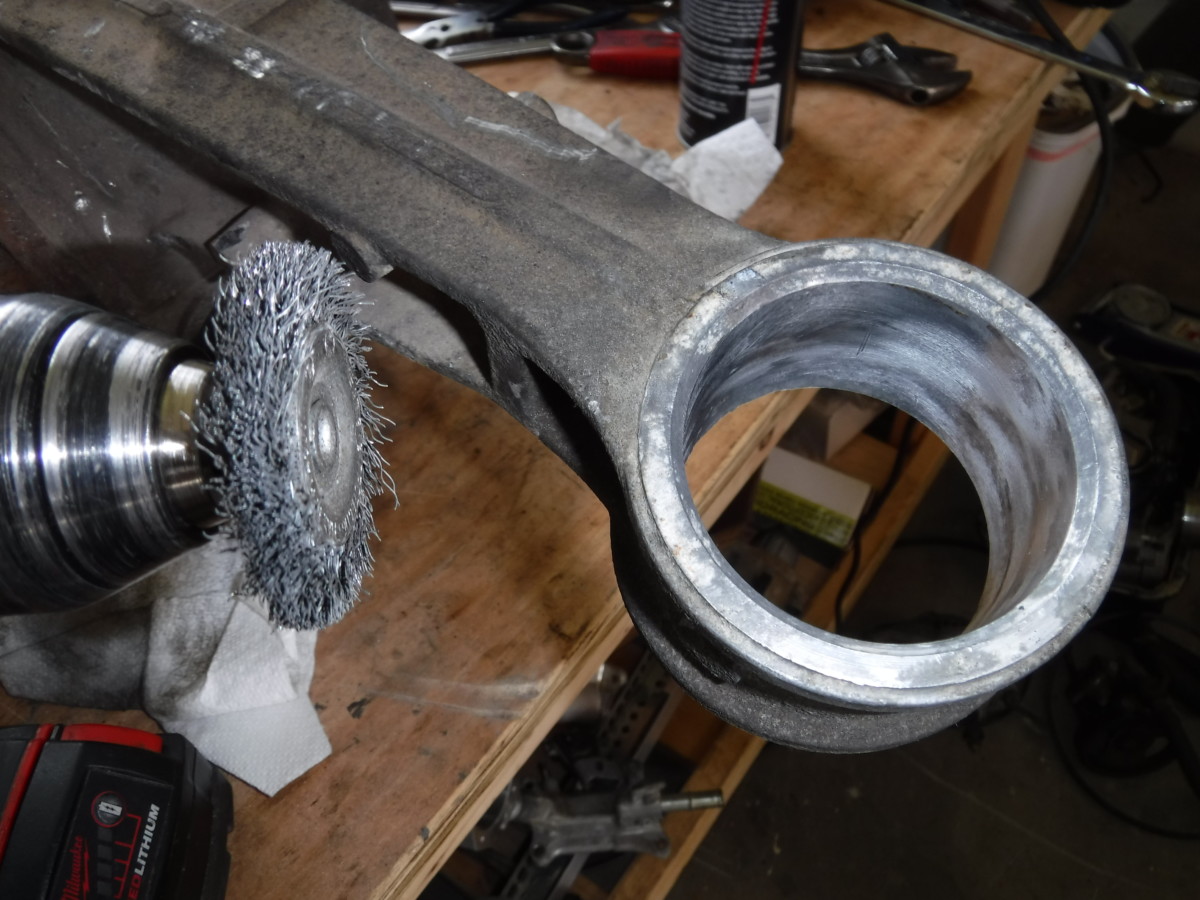
Clean and ready for new bushings
You should clean out the bores before installing new bushings. A wire wheel
Installing the New Bushings (Optional)
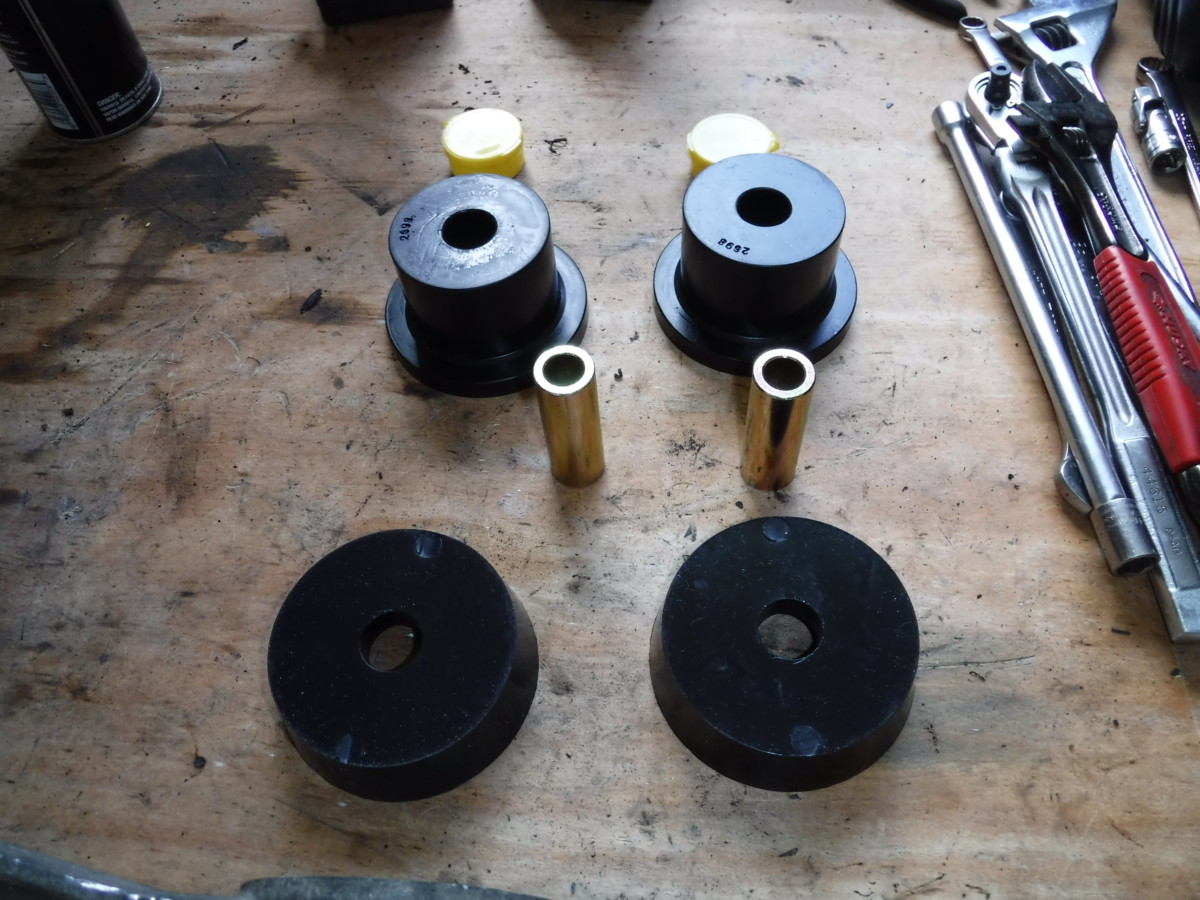
New bushings from Energy Suspension
I went with Energy Suspension polyurethane bushings
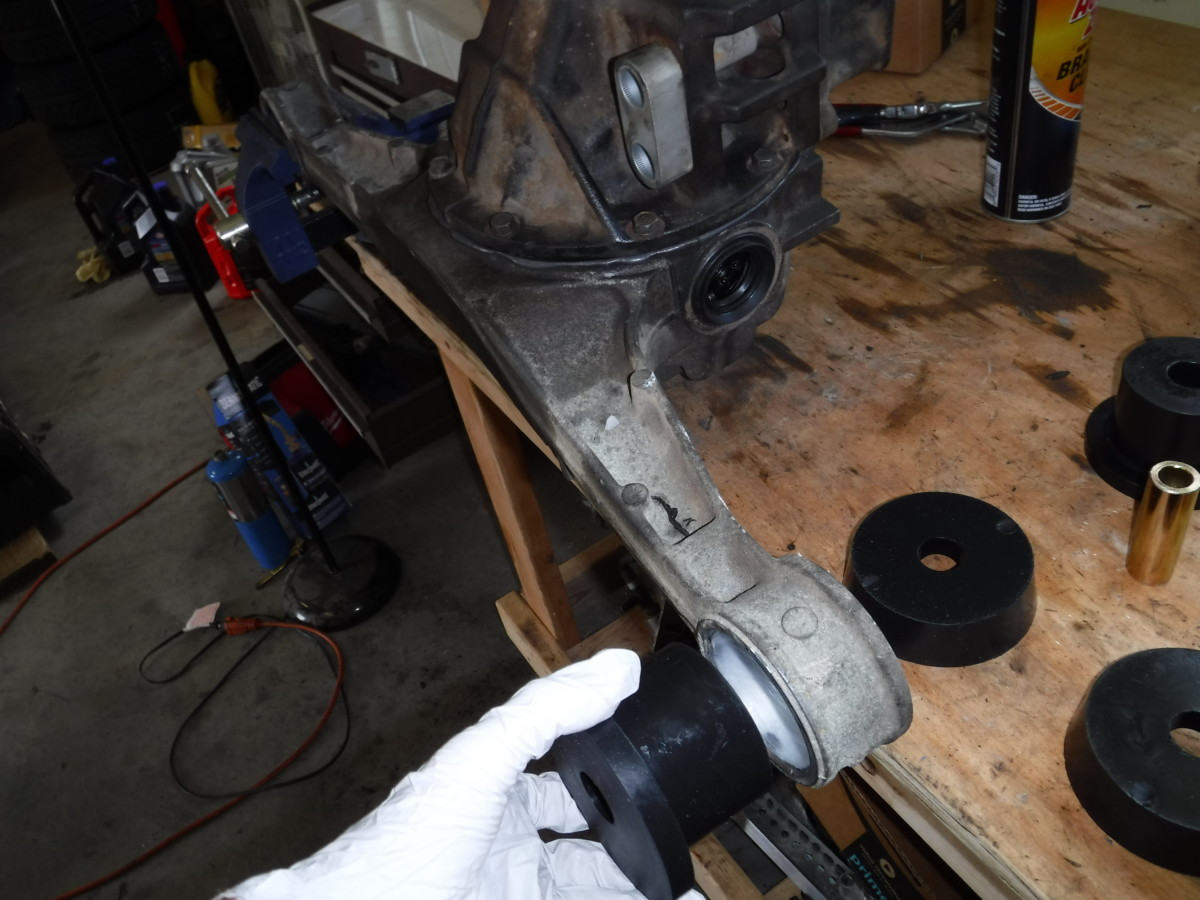
Large part of bushing pushes in from the top
Grease up the bushing thoroughly with the included grease. It should slide right in with hand pressure. You can use a clamp or vise if necessary.
Lube the inner bearing and push in
The inner bearing goes next, again lubricating it before installation.

A larger socket and a clamp easily got one side flush

The bottom should stick out for the other half of the bushing, pictured

Sleeve is flush with top of bushing
Some 6″ C-clamps and a larger socket made short work of pushing the sleeves flush into the bushing. The top should be flush, while the bottom protudes a bit. This portion on the bottom fits into the bottom half of the bushing later on.
Preparing the Retainer Plates (Optional)

A propane torch separates the rubber from steel
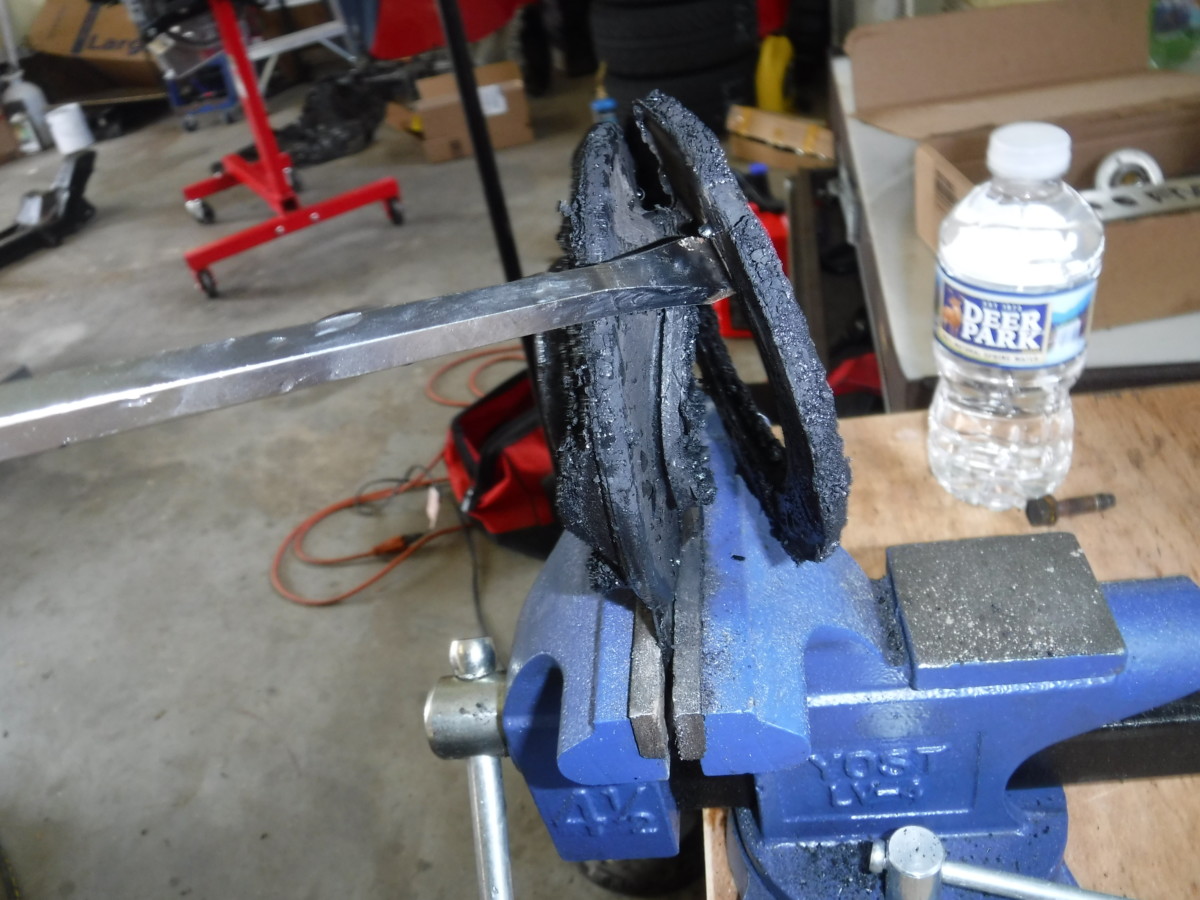
Once burned, the rubber pulls off
If you’re using Energy Suspension differential bushings
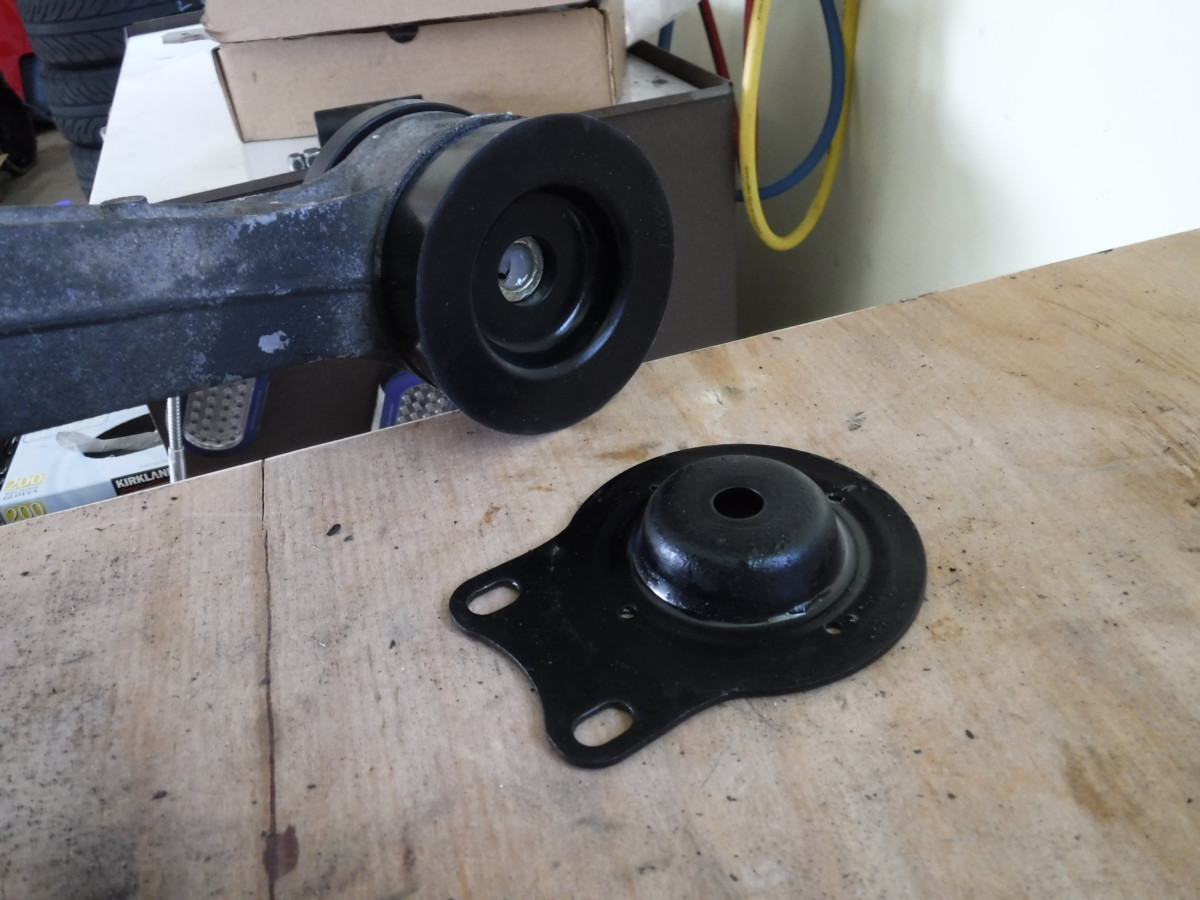
Retainer plate after cleaning and painting
Once all the rubber is off, you can clean off any remaining residue with a wire wheel
Axle Seals (Optional)
My axle seals were still in good shape
You may choose to replace your seals at this time. There are three, one for each axle and one on the front behind the driveshaft flange. My axle seals were in good shape, as pictured, so I elected to leave them alone.
Reinstallation
Retainer plate after cleaning and painting
Retainer plate reinstalled
As the Haynes manual says, reinstallation is the reverse of removal. I used a floor jack to lift the differential back into place, again using the left-right shimmy to coerce the axles back into the diff. Then, I jacked the differential completely into place and installed the bottom half of the bushing and retainer plates as shown. The large diff bushing nuts torque to about 70 lb-ft, and the smaller 14mm nuts are 14-20 lb-ft.

There will be a gap between the axles and the diff
You’ll probably notice a gap between the diff and the axles at this point, if you have one piece axles. They need to be seated in the diff.
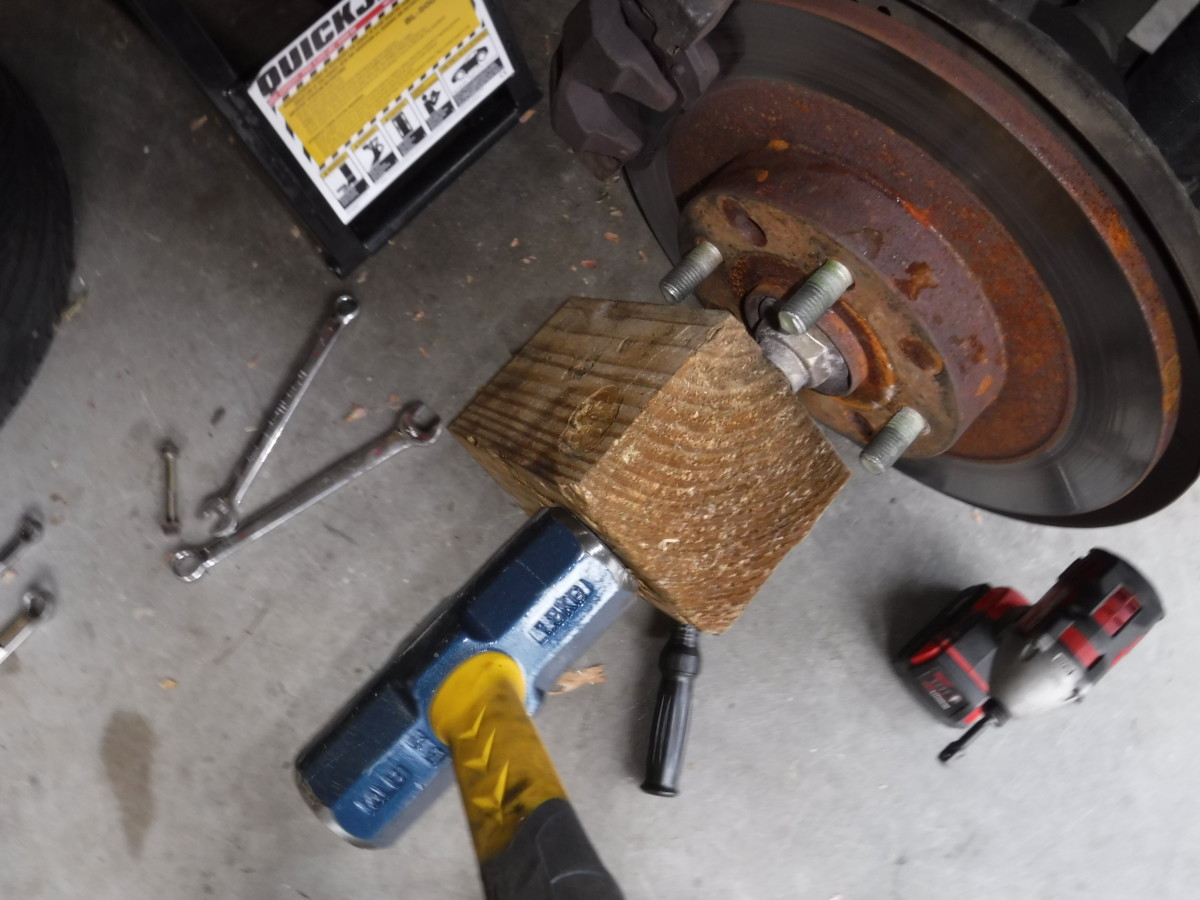
A good tap should seat the axles
Push the axles in as far as you can by hand. When you’re reasonably sure they’re centered, a firm tap on the axle nut with a block of wood should seat them. They will pop when they’ve gone back in place.

The axle will be much closer to the diff when seated
After seating, the axle will be much closer to the diff. And that about wraps it up, Miata Torsen differential swap complete. Reinstall the driveshaft and power plant frame and don’t forget to add lubricant. Depending on how fresh the Torsen is, you may want to do a short interval oil change.
Why didn’t you also reinforce the differential arms (welding a plate to it) while it’s out? I’ve heard the arm can break off.
Wasn’t sure if it was necessary, but I’m considering going back and doing it.
Were you able to bolt the old driveshaft to the torsen diff? I’ve seen people say you need a driveshaft from a newer model since the differential is longer than the original.
you do need a new driveshaft. he has a 1997 miata, so his driveshaft is compatible.